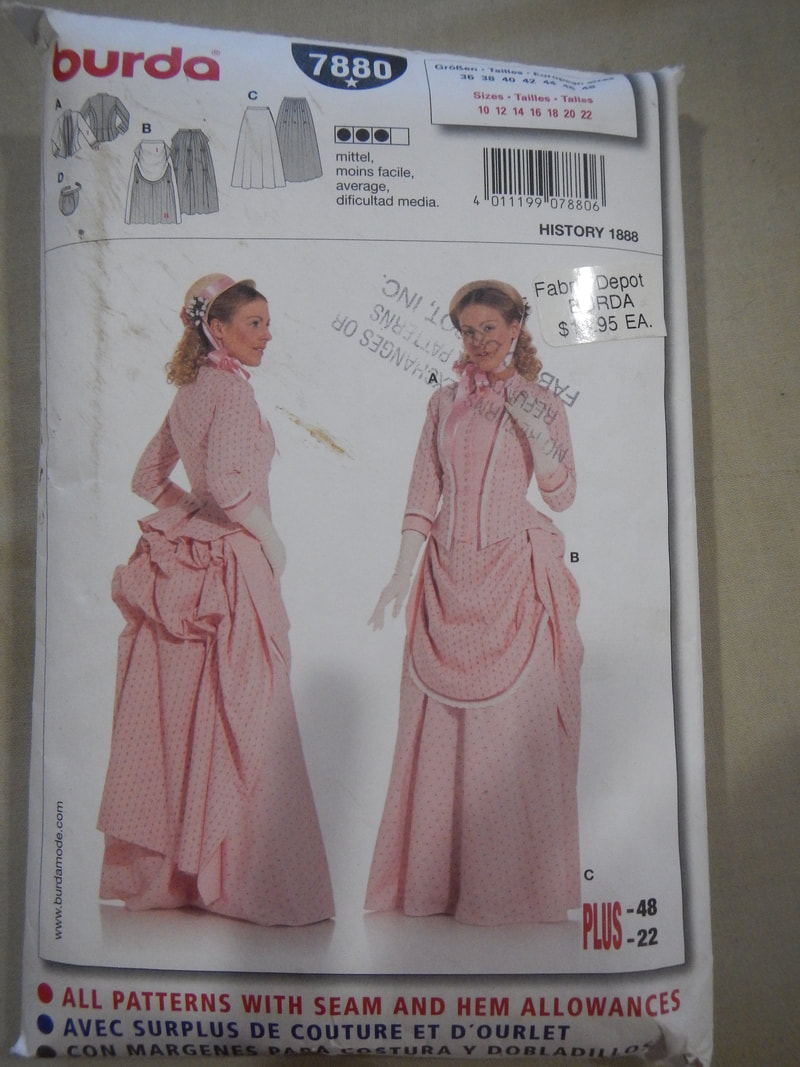
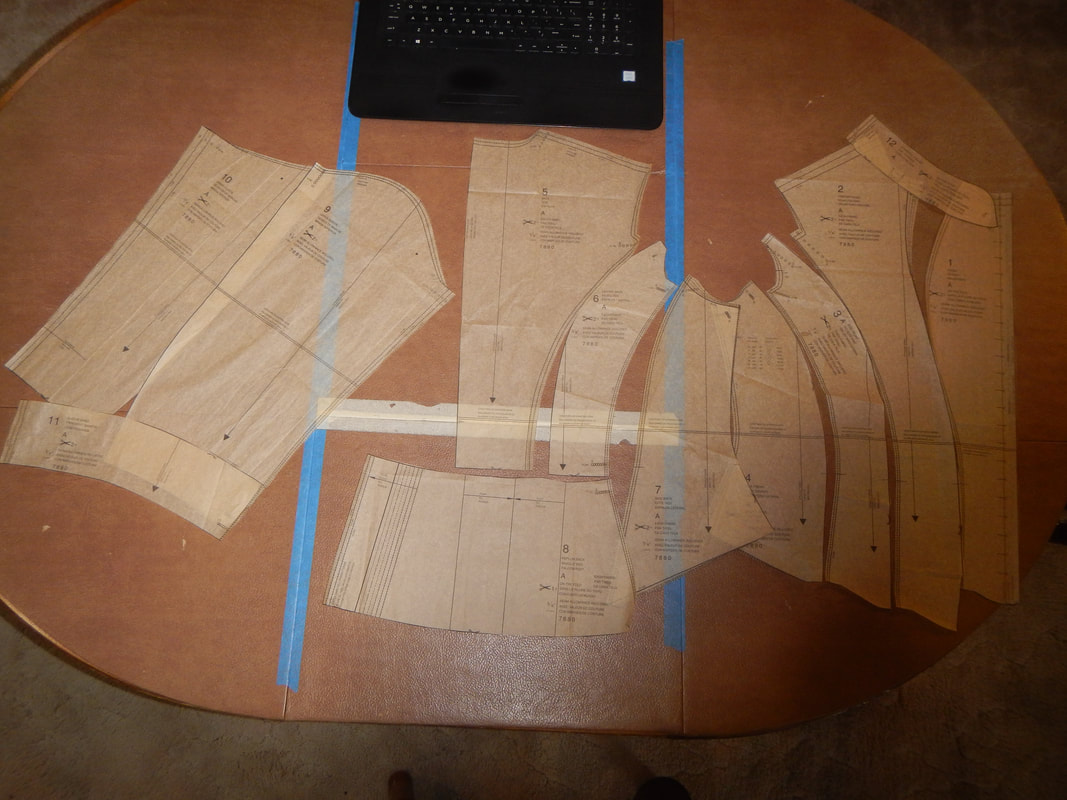
BURDA 7880 My first thought is to see if an existing pattern might work to replicate this jacket. I have Burda 7880, which is very similar in its style lines, and better adapted to fit an uncorseted body. So I cut out the pattern in my size and lay it out. I'm focusing on the bodice, since I already know the sleeves will need major alterations.
The pattern's markings are... arcane to say the least. For instance, in most patterns there are little triangles along the edges that tell you 1) which edges to sew to which and 2) where to match the edges at curves. Burda gives us three symbols that are not in the same place: tiny Arabic numerals near the top of each edge tell you which edges to match to which; little circles next to the numerals seem to show how deep the seam allowance is (?) but might mean the intersection of two seams; and unmarked lines, drawn perpendicular to the edges, help you match the edges on curves. Another problem is that the pattern doesn't mark the bodice's waistline. Mind you, the waistline is not the same as a waist seam; this pattern doesn't have a waist seam. No, I mean the waistline: the place in the pattern whence curves and flares project, where the body of the wearer bends, and which determines the grainline of pattern pieces in most garments. Since people's waistlines vary, the pattern should mark the waistline so that alterations can be done. I am short-waisted and slightly swaybacked; I need to know where the waistline is! Burda must not agree, since they didn't mark it. They did put doubled lines for "lengthen or shorten here" where the waist most likely is, perhaps they meant that to stand in for both meanings? But the more I compare the Burda pattern to the 1880's basque, the more I realize that I can't use Burda's pattern anyway. There are three major problems:
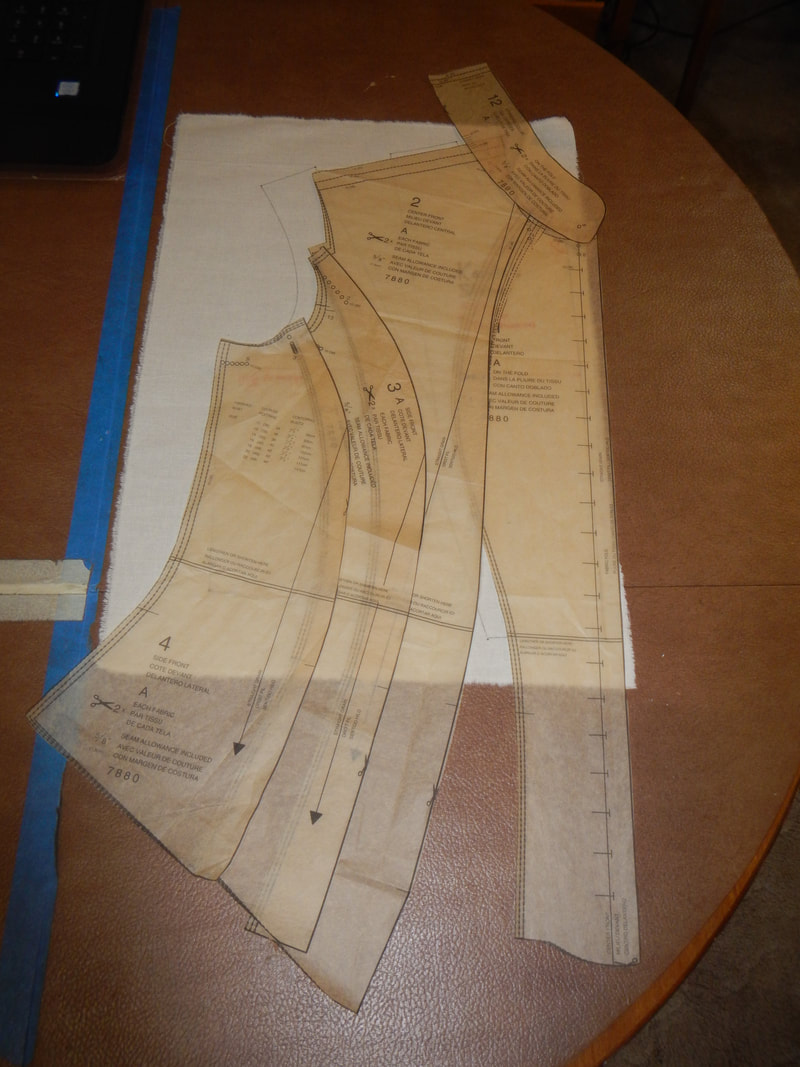
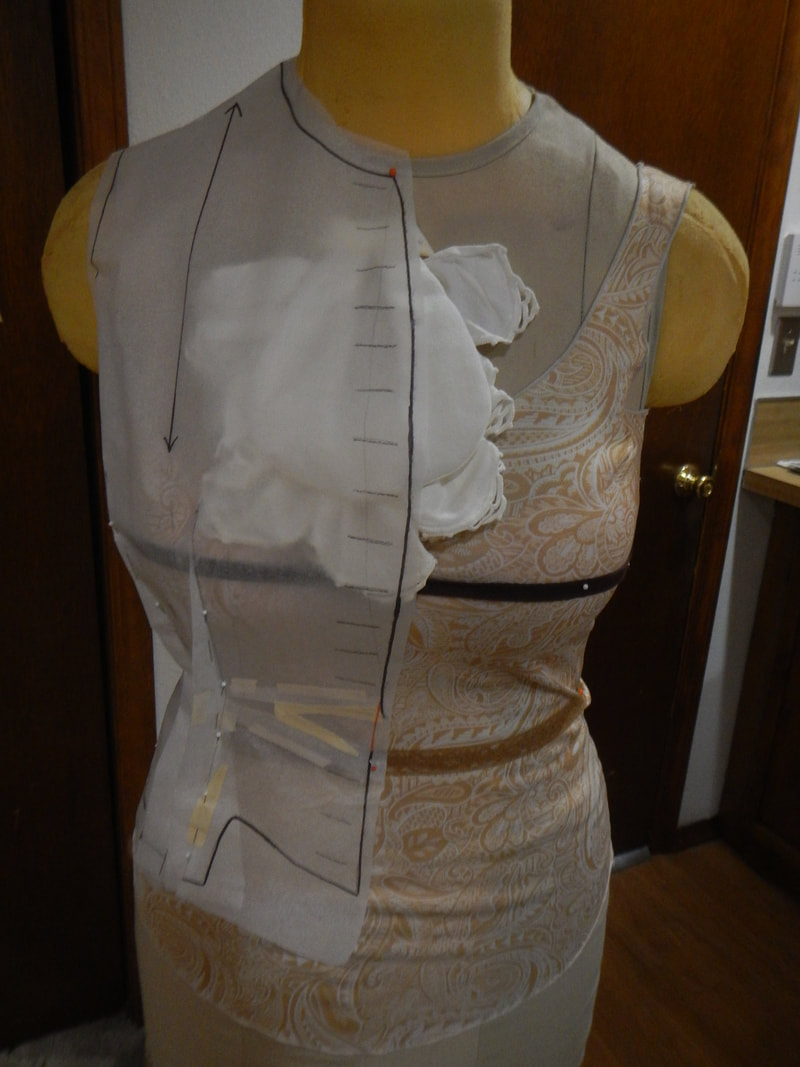
There's also the question whether Burda's pattern will fit me, I lay the pieces on my sloper to see if they correspond or not:
Mostly, yes, but with lots of little things wrong in little ways... Working with the Burda pattern would mean first making the pattern fit me, then making the pattern more accurate to the historical bodice. That's two jobs. So I decide to not to use Burda 7880, though I'll keep the pattern on hand since the skirt pattern will be useful in future! CAPTURING THE ORIGINAL BODICE Capturing the bodice pattern goes like this:
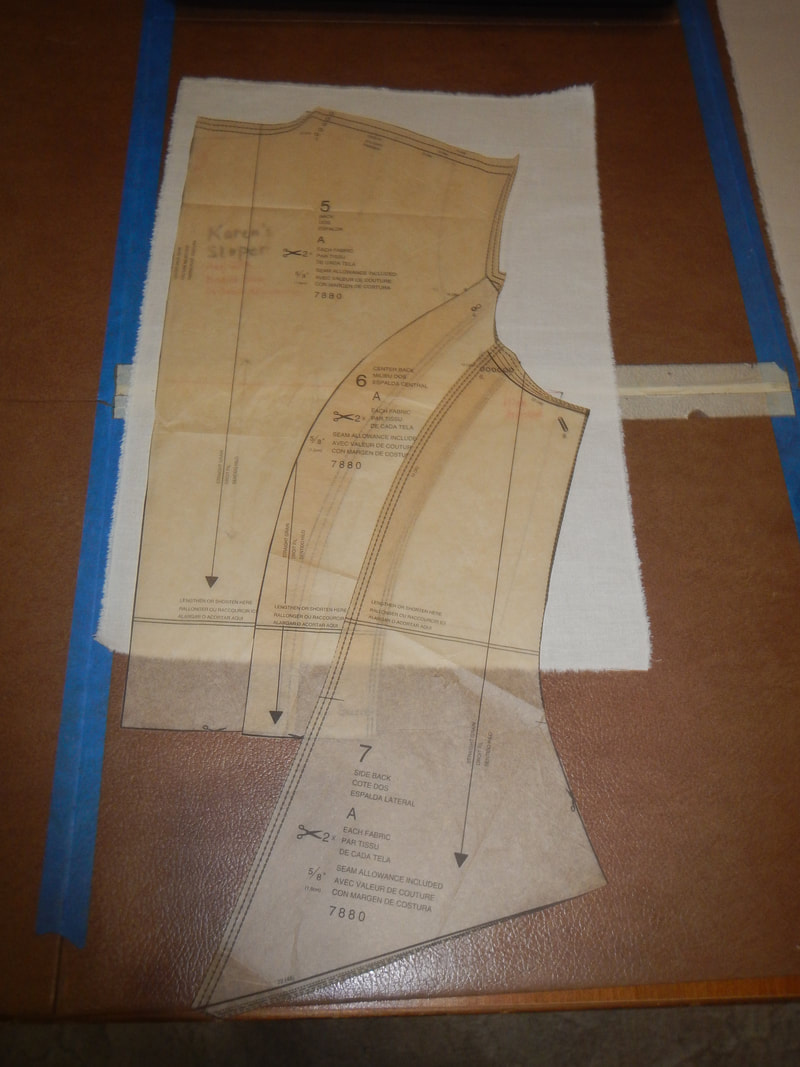
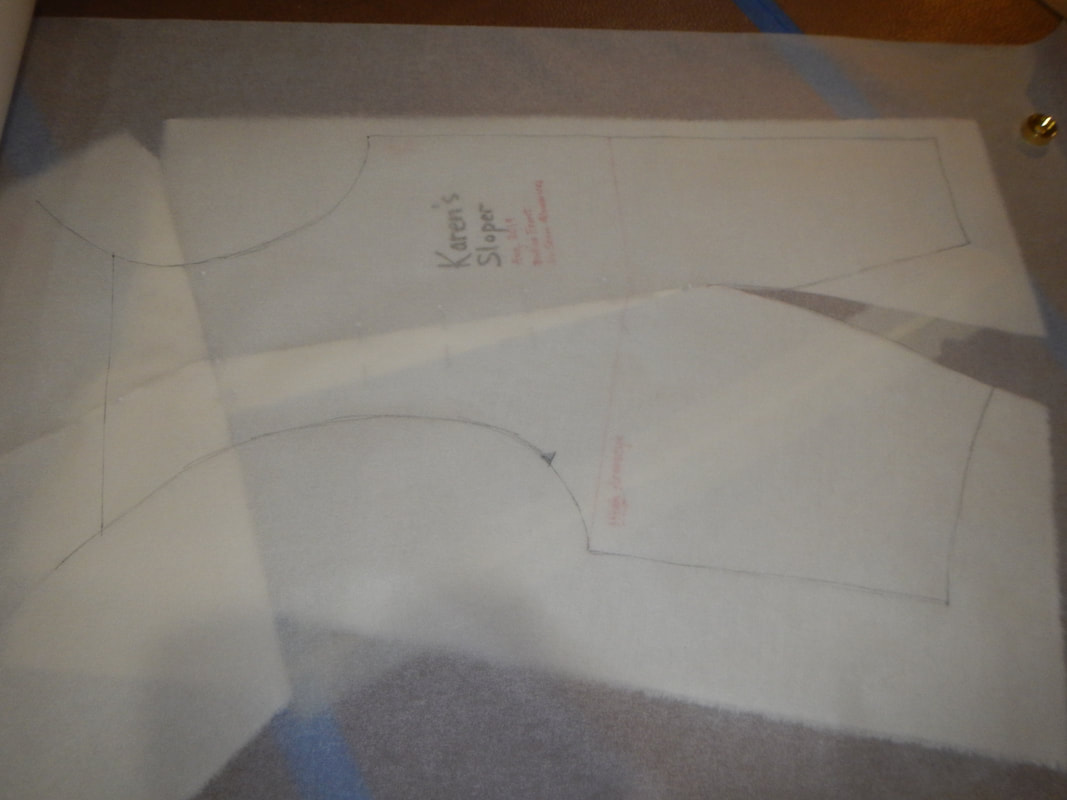
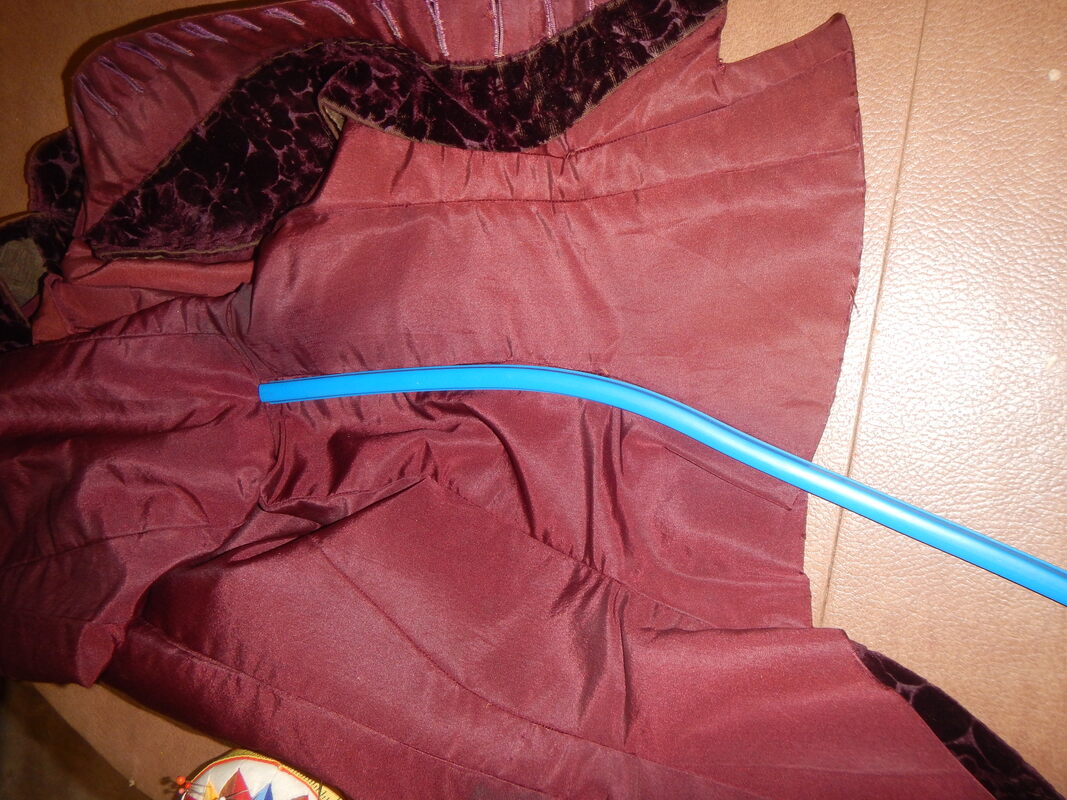
Here are a few examples and the vocab I'll use for clarity while explaining. My sloper is drawn on muslin with Sharpie; its lines are its seam lines, no seam allowances added. There's also some pattern paper, lying on top of the muslin so I can trace new pattern pieces. As with the sloper, the lines are draw are seamlines, no seam allowances added. The bodice, dark burgundy, is my reference piece. CF stands for Center Front and CB for Center Back. (The difference between "lie" and "lay" is that you lie down, but you lay the baby down. "Lay" always needs an object.) SHOULDER SEAM The first major difference between the modern pattern and the historical one is the shoulder seam.
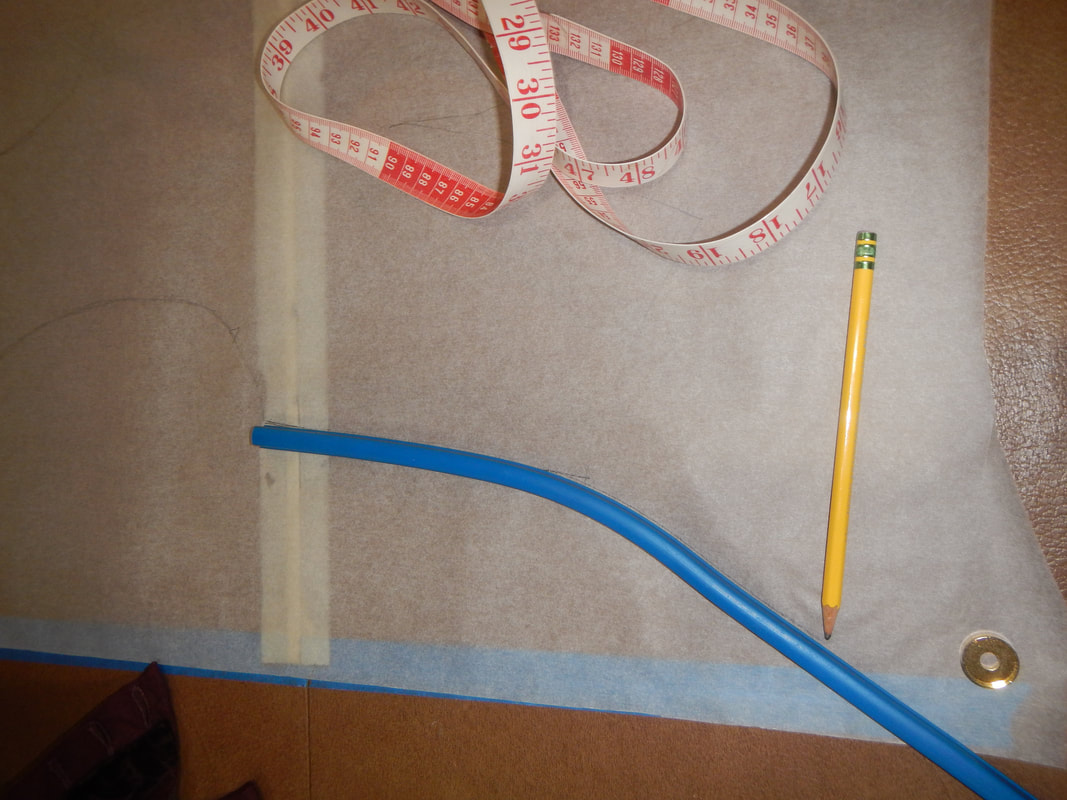
SIDE SEAM The next thing is to make my pattern's side seam match the reference's side seam. The reference garment has flare below the waist, since it was worn over big skirts. I use a bendy ruler to copy the shape of the reference's side seam. When I trace it on my new pattern, I position it so the waistline is the same, and trace from there. The sloper stops at my natural waist, so the new line extends the bottom.
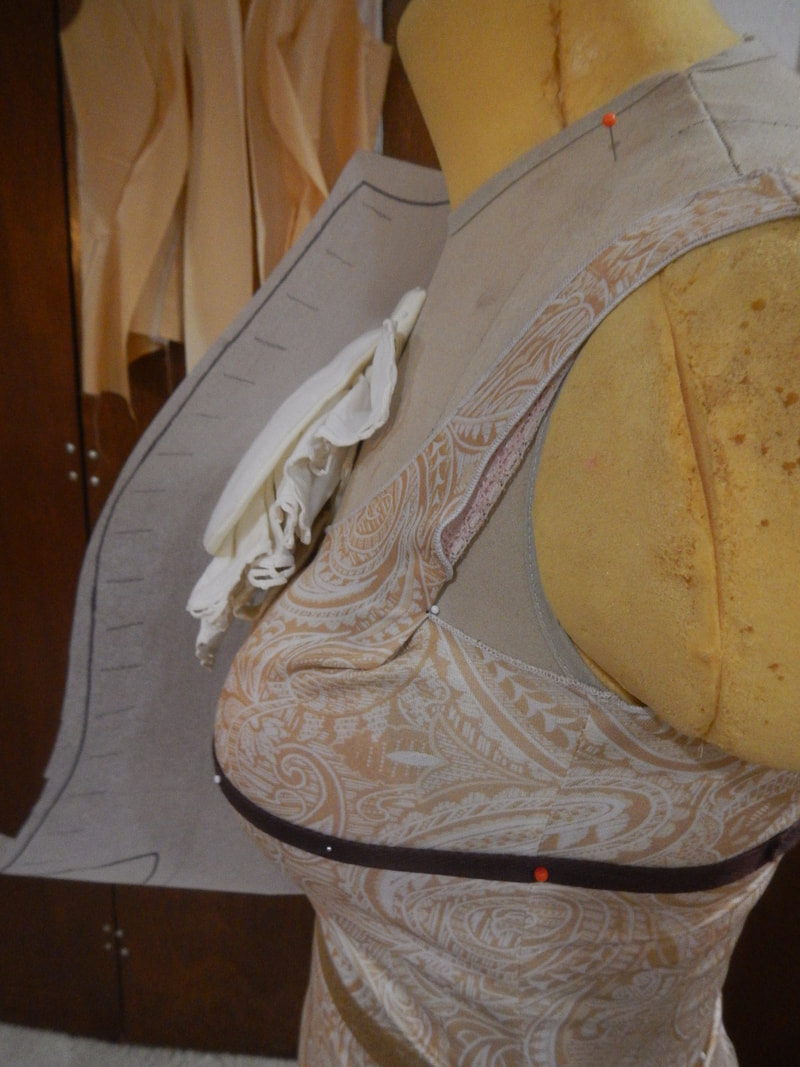
Okay, let's take stock. I'm working on the front piece. I have an accurate shoulder seam; I'm not changing my armscye; the side seam is correct. What's left? The two darts under the bust, and the CF line. The darts may be tricky, but I know that there's enough fabric there because I'm working from my sloper. Remember the first step, where I pinned my sloper's upper dart closed and cut the line of the bottom dart so it would flare out and lie flat? Well, that flaring out is adding extra fabric below where I took it from the top. That's how I know that I have enough fabric below for two darts. CENTER FRONT - MONOBOOB! I decide to trace the CF line next. And here's where we see the next big difference between the modern pattern and the historical one: the CF line is straight on the modern pattern (on most modern patterns!), but curved on the historical one! I ponder this... is it just because the bodice is so tightly fitted? Or is is because the original body would've been padded so that the bosom looked rounded? I know from photographs and drawings from that time that the Victorians didn't think about cleavage the way we do nowadays. Nowadays, we like to see the slit between the breasts, the "cleaving" part of cleavage. That's why push-up bras have padding on the bottom and outside of each cup, pushing the flesh of the breast inward and making that enticing slit. This cleavage ideal has never been universal, though. The Victorians didn't talk about cleavage; they talked about décolletage, meaning the revealing of the neck and shoulders. A dress was décolleté if it showed neck, shoulders, maybe a bit of the back. Evening ball gowns were décolleté. But even then, the neckline would trace around each breast, so the revealed skin was smooth, no crease. They wanted to show off the high, rounded curves of the bosom, but not the line between the breasts. Busty women would fill their cleavage with frills or bows or flowers, so that no gentleman could look down their dress. In the daytime, when the dress covered the body up to the neck, women plumped up the front of their chest with "bust enhancers" and frilly corset covers, so that the two breast merged visually into one bosom. Costumers call it "monoboob"! Very strange to modern eyes.
This different breast ideal explains one of the biggest differences between true Victorian corsets and modern ones... many modern corsets have the cups at the top built like a pushup bra, to create cleavage by closing in the sides. Victorian corsets had the cups at the top open, like a shelf for the breasts to sit on. Thus the bosom was able to "heave" as in those heated bodice-ripper stories. Victorian corsets didn't encase breasts like modern fetish wear, they presented them on a platter. So I look at the reference CF and think, how do I put this on me? I know the neck and the waist must be snug, so I'll match the neck and waist of the reference bodice to my sloper. Then I'll trace the line and see what I get.
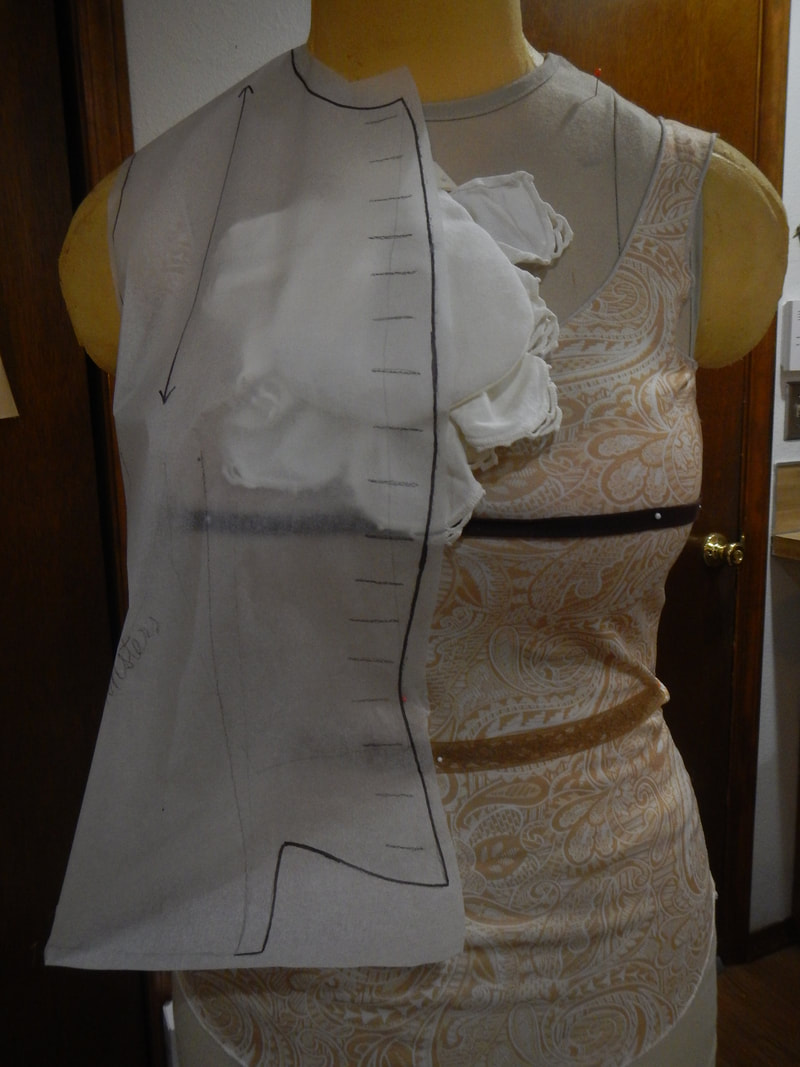
Okay. Now let's think about overlap... my sloper is designed without seam allowances, and the CF of the sloper is the CF of my body. If the new pattern needs a little overlap so it can button, I need to move it over a bit, right? But I look closer at the reference, and the answer is no. Though the reference bodice does button closed, there's nearly no overlap! The mandarin collar meets neatly over the throat, and the first button just below that is sewn on the edge of the fabric--not near the edge, on the edge. Likewise, the buttonholes are nearly on the edge of the fabric. Is this something I should correct? Or is it a feature, not a bug? I've never made a bodice with a curved front before; I think I'd better do as was once done. If it doesn't work, I can innovate next time! DARTS Now time for the darts. My new pattern's darts will have different intake (how much fabric is caught in in the fold) than the reference bodice's darts, but that's okay, because I'm a different size and shape. The important thing is to get the style lines, the visible seams, to match. I use my ruler for this, measuring the reference and transferring marks to the pattern. How far is the first dart from the CF bottom? Make a mark. How tall is the dart? And how far is the top of the dart from the CF? Make a mark. Draw a vertical line between the two marks. Then I do the same to the second dart, but measuring from the side seam. What I've got now are two vertical seam lines, like pillars. And in between them? Mystery.
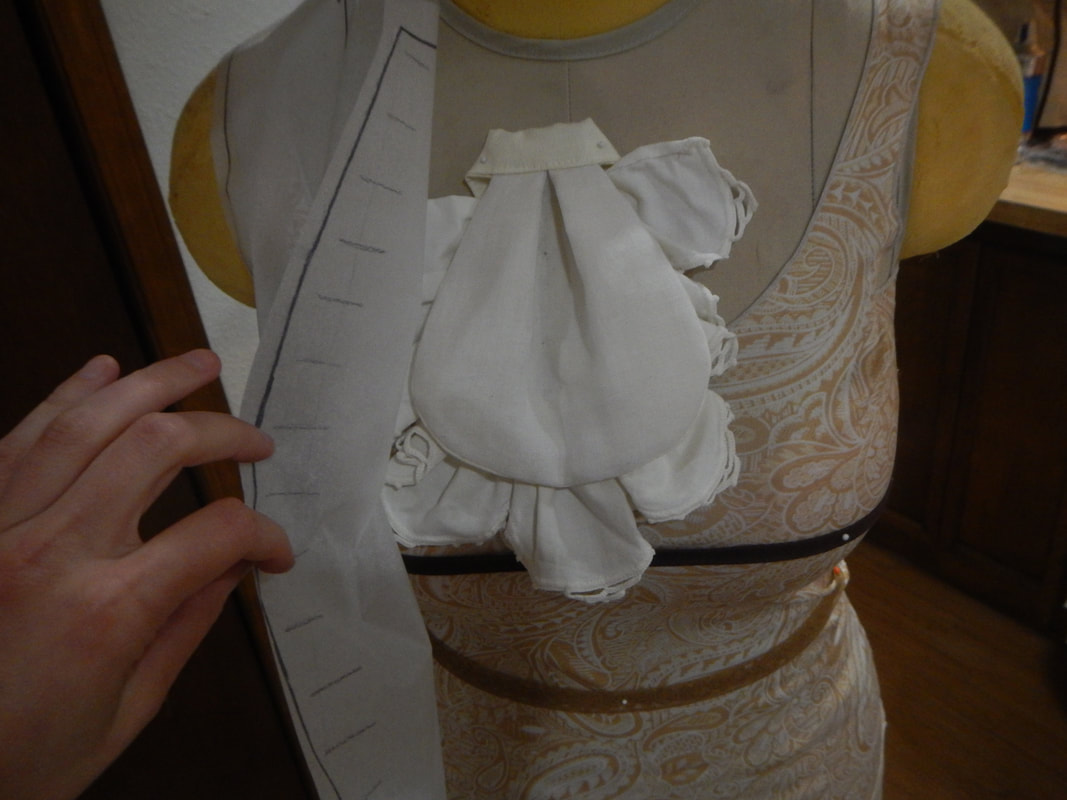
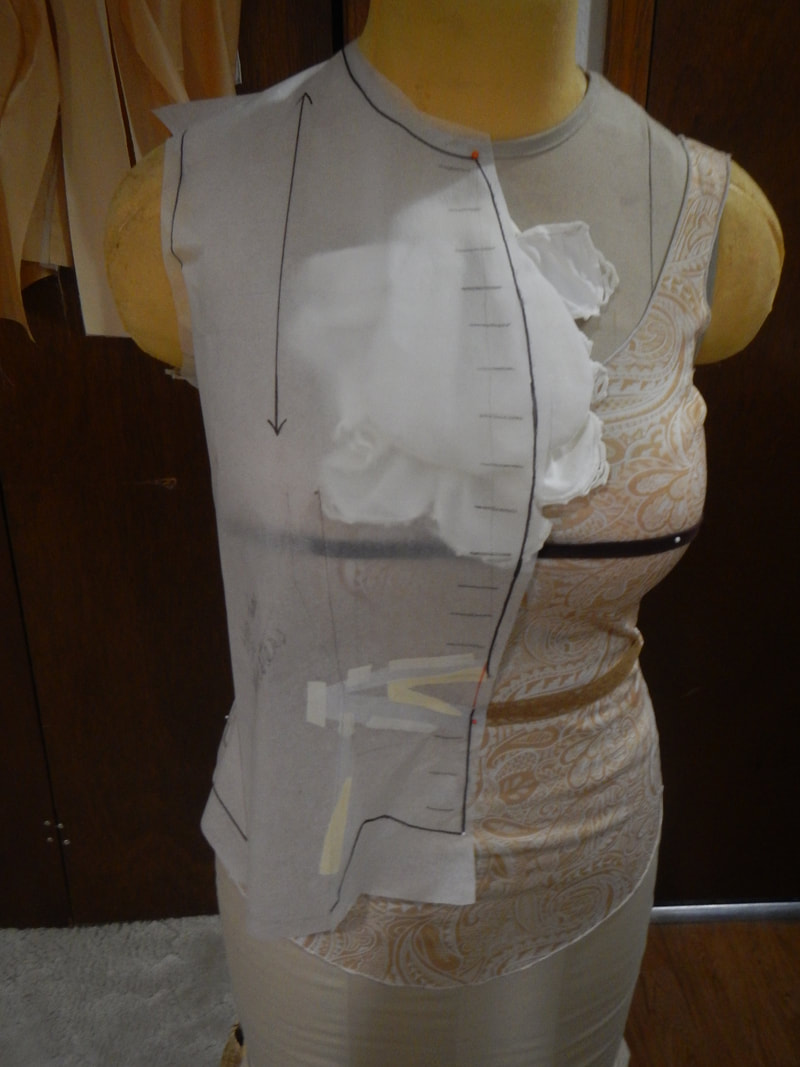
Pin fitting the paper pattern quickly reveals that the CF is not long enough for my torso. There's an inch and a half difference between the pattern's waistline and my own. I fix it by cutting horizonally in from the CF to the vertical line of the first dart, then pivoting the whole front corner down an inch and a half from that point. This changes two things. First, the dart line gets a little squiggly (the fabric that's lost when I pivot is fabric that would otherwise be caught in the dart). I notice this and don't worry about it. Second, the angle of the CF below the waist is now vertical instead of flared. I fail to notice this at this point, but I remember it later, while sewing, so you'll see what I do about it then!
Okay! Now about those darts... I pin them, using the vertical lines I've already drawn as one side, and pinning to find the other side.
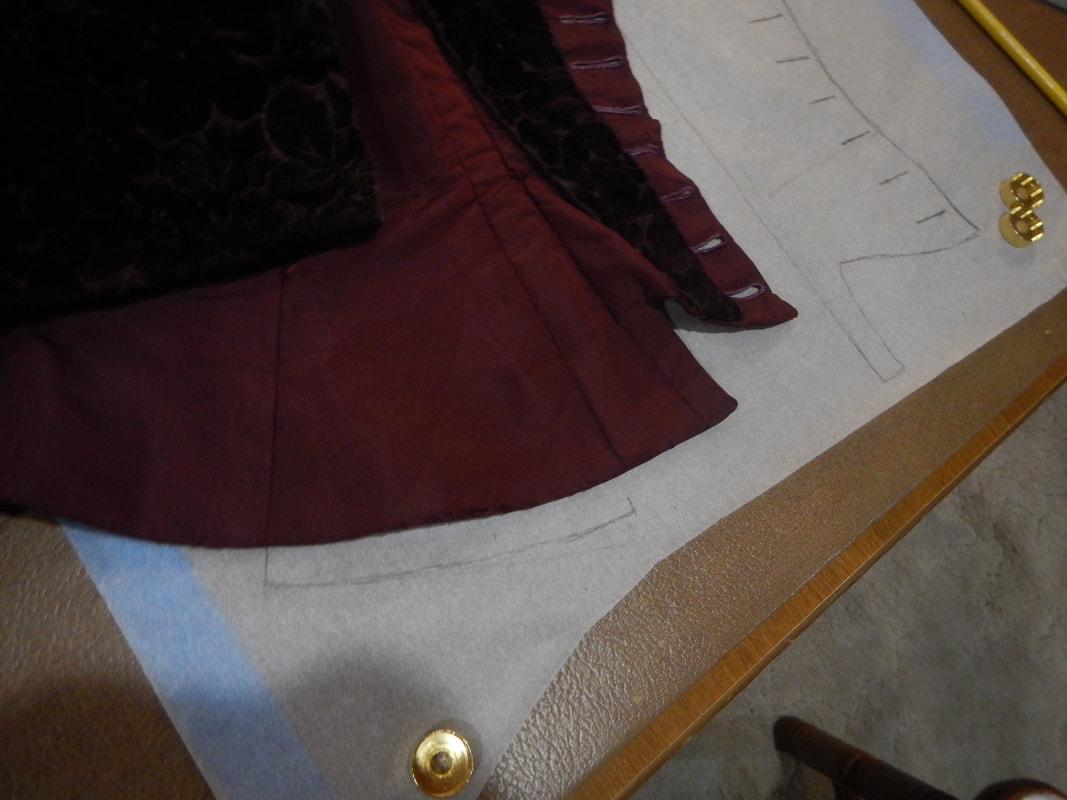
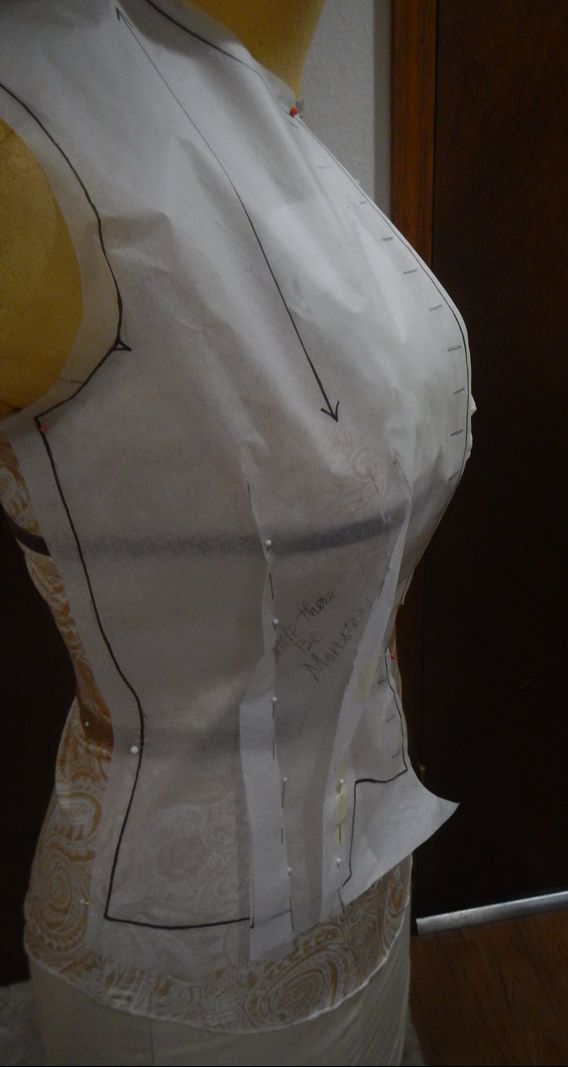
I take the paper off of Mimi, leaving the darts pinned, so I can transfer their lines to the pattern. This next picture is particularly clear about the CF alteration. You can see how I cut and pivoted the corner down to add an inch and a half of length. You can see how pivoting from the line of the dart made the first dart bend. You can see how it straitened the previously flared CF line, below the waist. And you can see that I have to add another buttonhole. 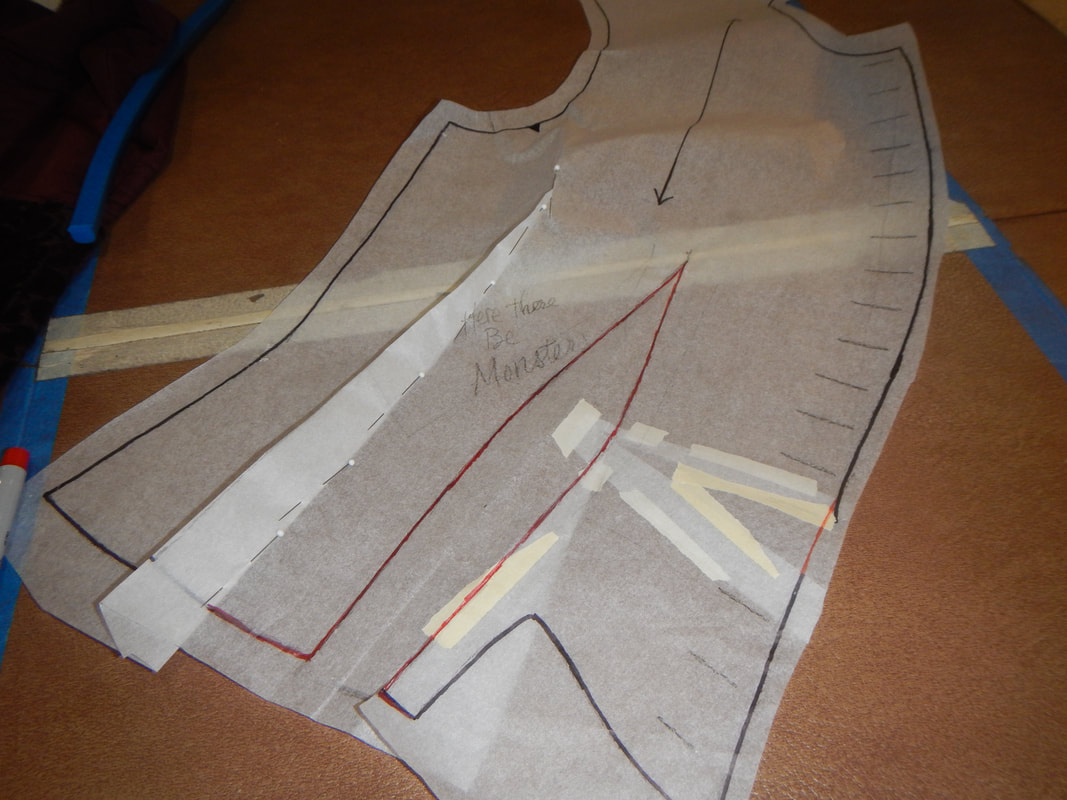 BACK BODICE (Incredibly, I seem to have done the back bodice without taking any pictures of the process! It was pretty much the same method as the front bodice, but more fun because I found it easier and it fit perfectly on the first try.) TRIM PLACEMENT The simplest part! I just rub off the front "lapels" and back "capelet" from the reference garment, and place them on the pattern. 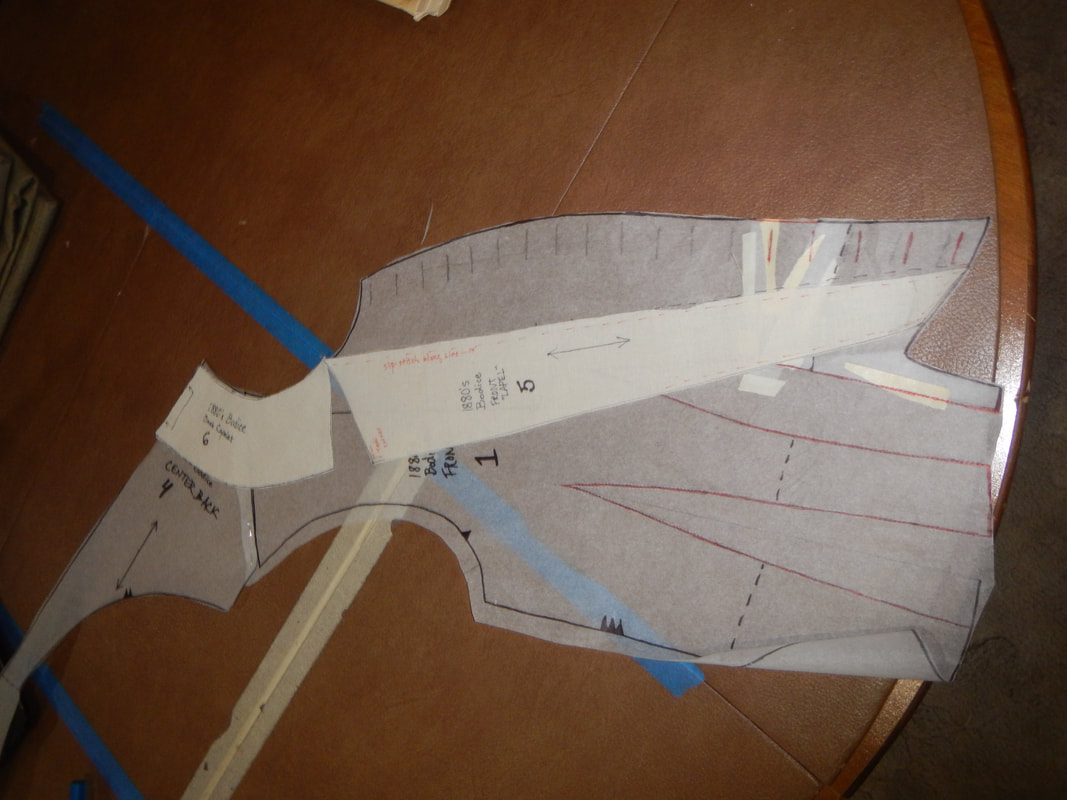 MUSLIN I make and model the muslin. I'm still unsure how the CF curved line will work in reality, but I'm going to try it! So no more alterations to the bodice! Next up, draping the sleeves. 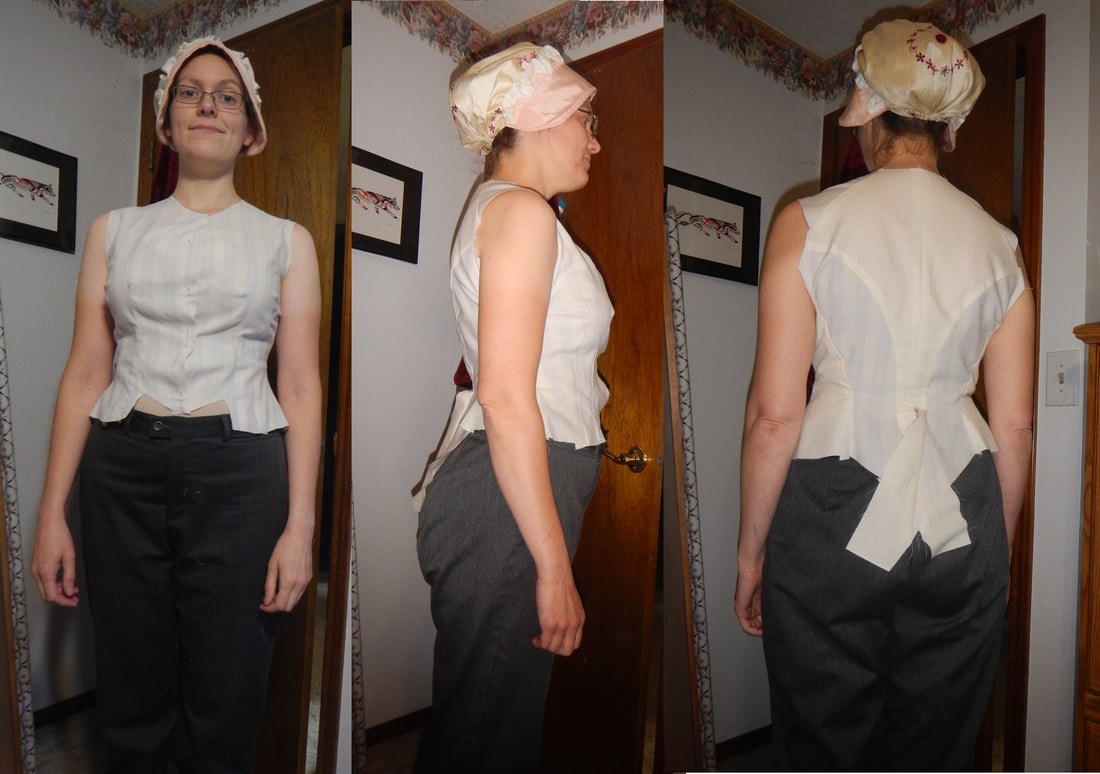
0 Comments
Leave a Reply. |
Karen Roy
Quilting, dressmaking, and history plied with the needle... Sites I EnjoyThe Quilt Index Categories
All
Archives
March 2024
|


 RSS Feed