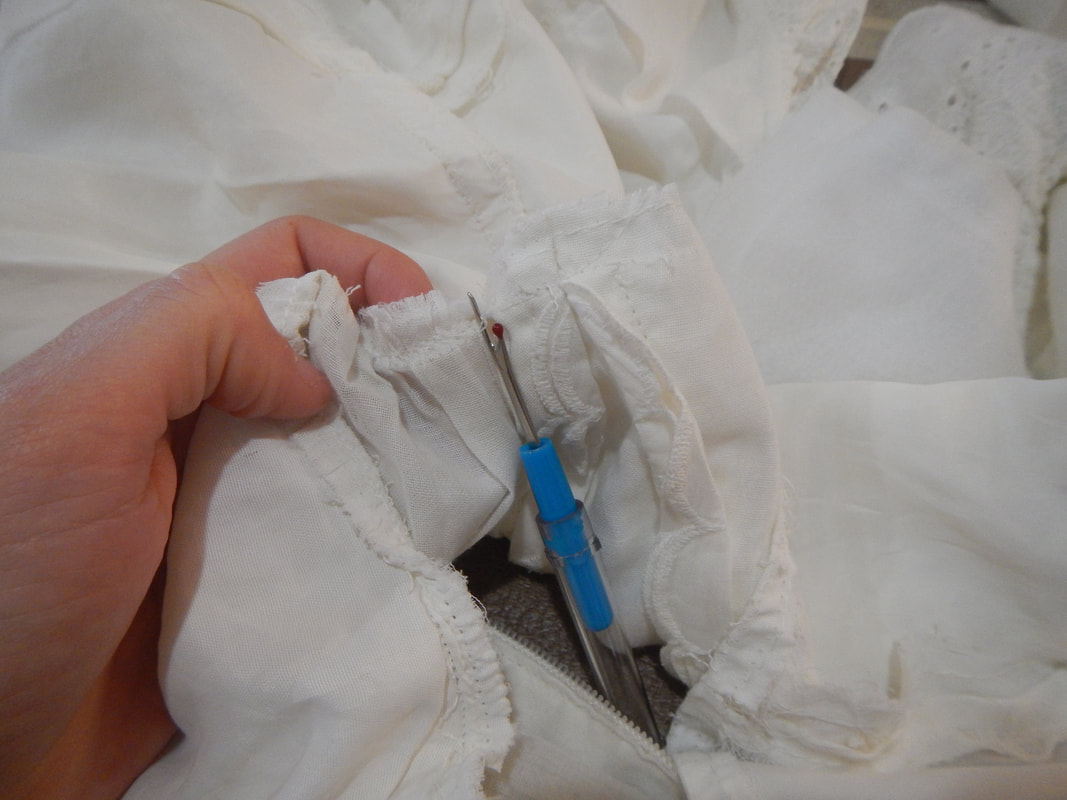
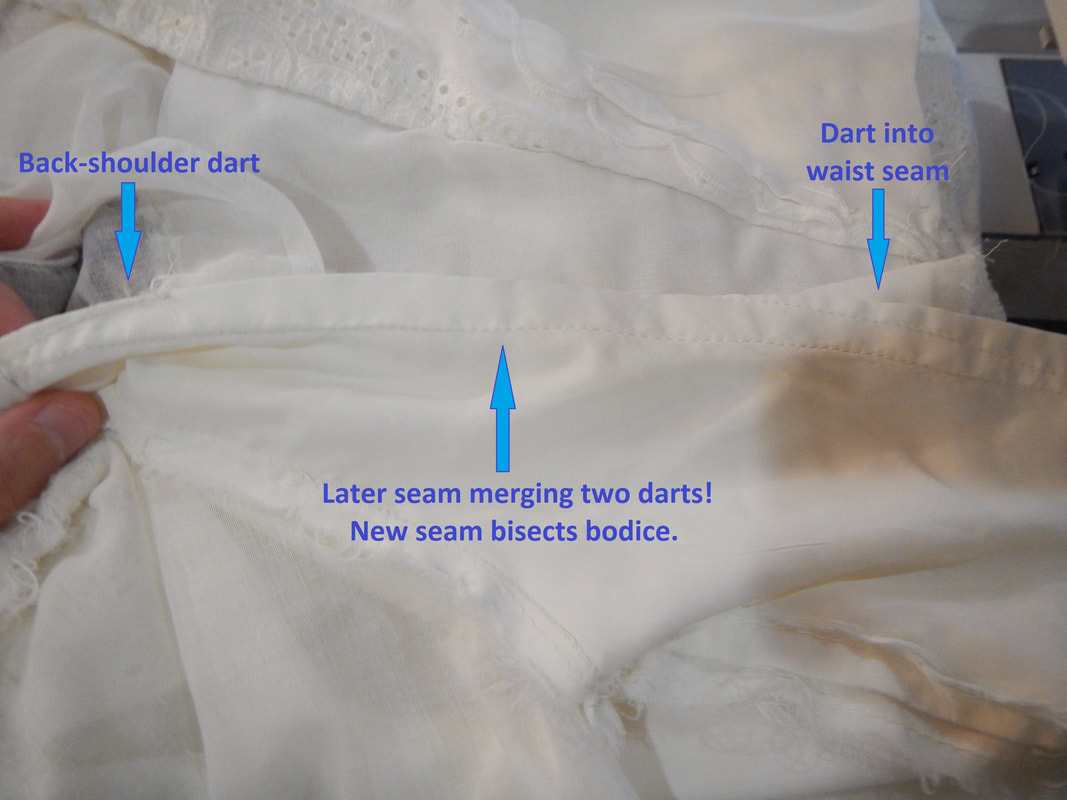
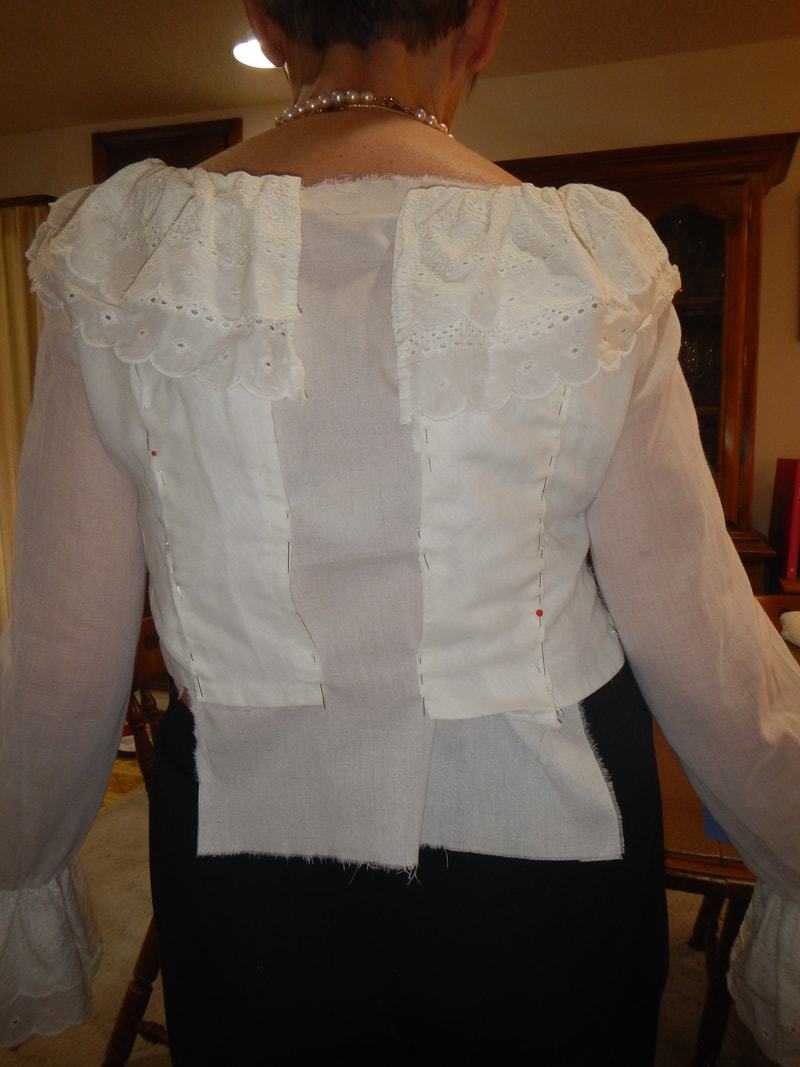
OUR PLAN OF ATTACK The dress was purchased from a department store, several weeks before her wedding. The label is "Young Edwardian by Arpeja". It's a summer dress made of sheer cotton (handkerchief weight? gauze?), lined with polyester and trimmed with ruffles of broderie Anglais (eyelet lace). It has long sleeves and a short skirt. The dress is in good condition as far as seams go, but very dingy looking. My client shows me a picture of her trying it on, and there are many inches in the back that won't close (the waist is only 27" around, and is set higher than her natural waist!), as well as stressing in the seams of the lining around her bottom. I look at the dress, and her picture, and do a quick assessment of problems and solutions. PROBLEM: The dress is yellowed with age, the ruffles especially. SOLUTION: OxiClean! She washes it before we go fabric shopping, and the next time I see it, I could swear it's a new dress! It goes from yellow and mottled to white and fresh! Amazing! MATERIALS: I don't know, since she did it at home. But some kind of OxiClean; I'll have to remember that next time I have to wash something I think is past hope. PROBLEM: The polyester underskirt is too tight (though the cotton skirt is fine) SOLUTION: Remove the skirt entirely and make a wider underskirt that shares the skirt's dimensions. MATERIALS: 1 yard Ambiance lining fabric (Bemberg rayon) PROBLEM: The bodice doesn't fit her torso. SOLUTION: Un-sew the back darts to add ease, then put in a modesty panel and corset-back lacing. MATERIALS: 1 yard of cotton flat-lined with salvaged lining from the dress' underskirt, 4 yards of satin ribbon, and 4 yards of lacing cord. FINAL RE-CONSTRUCTION: Re-sew the old skirt and new lining to the now-enlarged bodice, distributing gathers evenly. That's the plan, anyway. Once I get into the seams of the garment and do a fitting, my plan changes a little. FIRST FITTING I start by pre-washing and drying the new-bought fabric. I want the cotton to shrink before I sew with it! As for the Bemberg rayon, after washing it, I iron it dry to get it smooth. Starting on the dress, I un-pick the waist seam to remove the skirt, and examine the back darts. Interestingly, though my client doesn't recall ever having it altered, it looks like it has been. Originally, there were two darts in the back: a rear-shoulder dart and a vertical dart into the waist. They are still there, but there's also a line of stitching connecting them, merging them into a seam that bisects the bodice's back panel. I leave the back shoulder dart in place and unpick the other two lines of stitching to give more room in the torso.
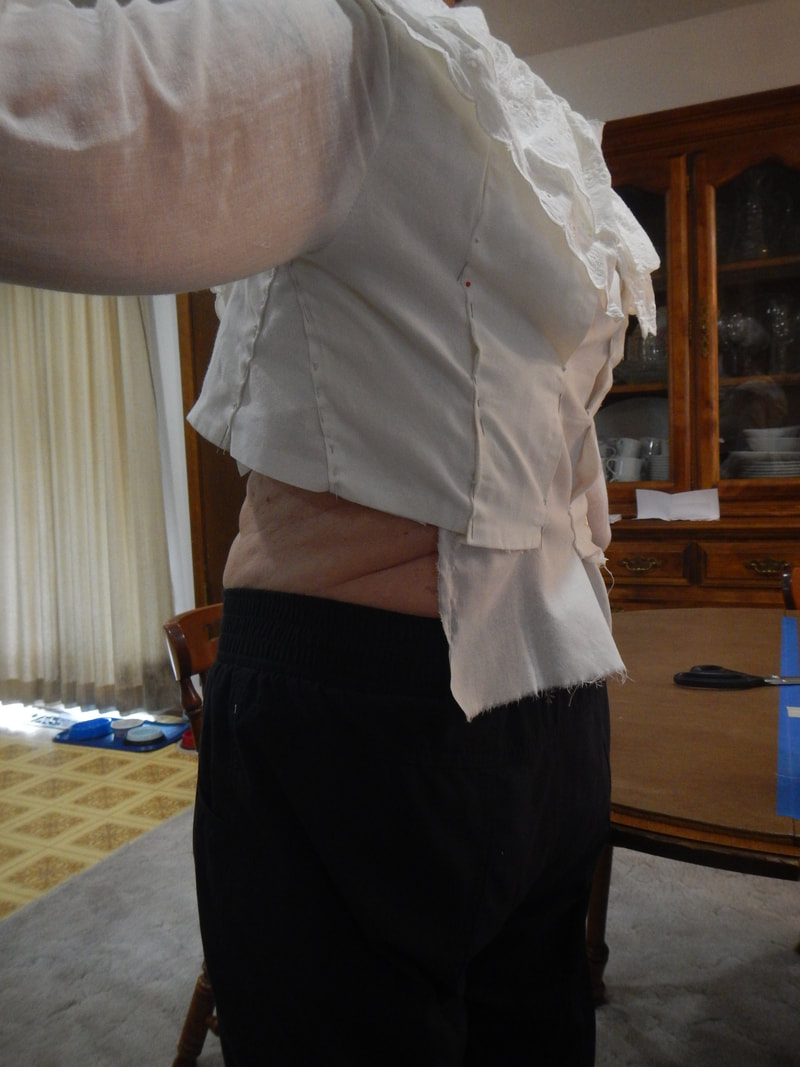
But when she tries the bodice on, I see that un-picking those seams is giving me ease in the wrong place... the back closes only at the top, and still gapes open below, while the front looks strained and weird. I ask her to take the bodice off again, and this time I re-pin the back seam/darts, and un-pick the side seams instead. I insert muslin triangles in there and she tries the bodice on again. That's better! There is still gaping at the back, but now it's shaped more like an inverted triangle, which matches the design of the front.
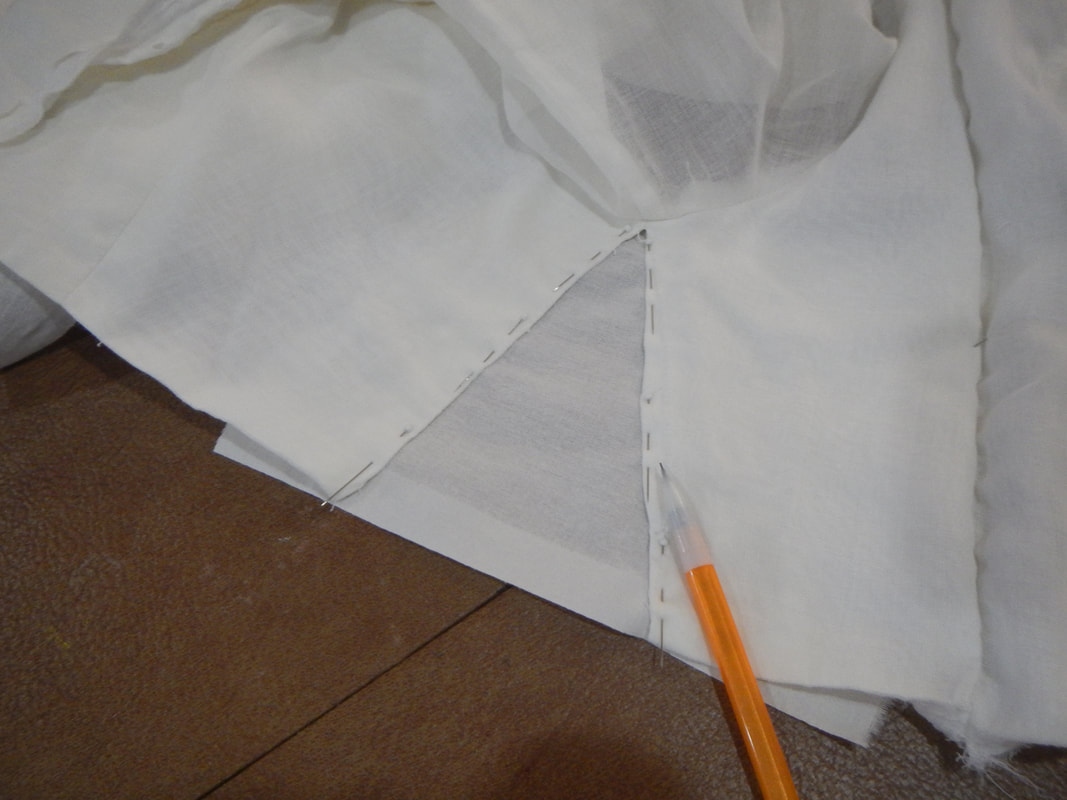
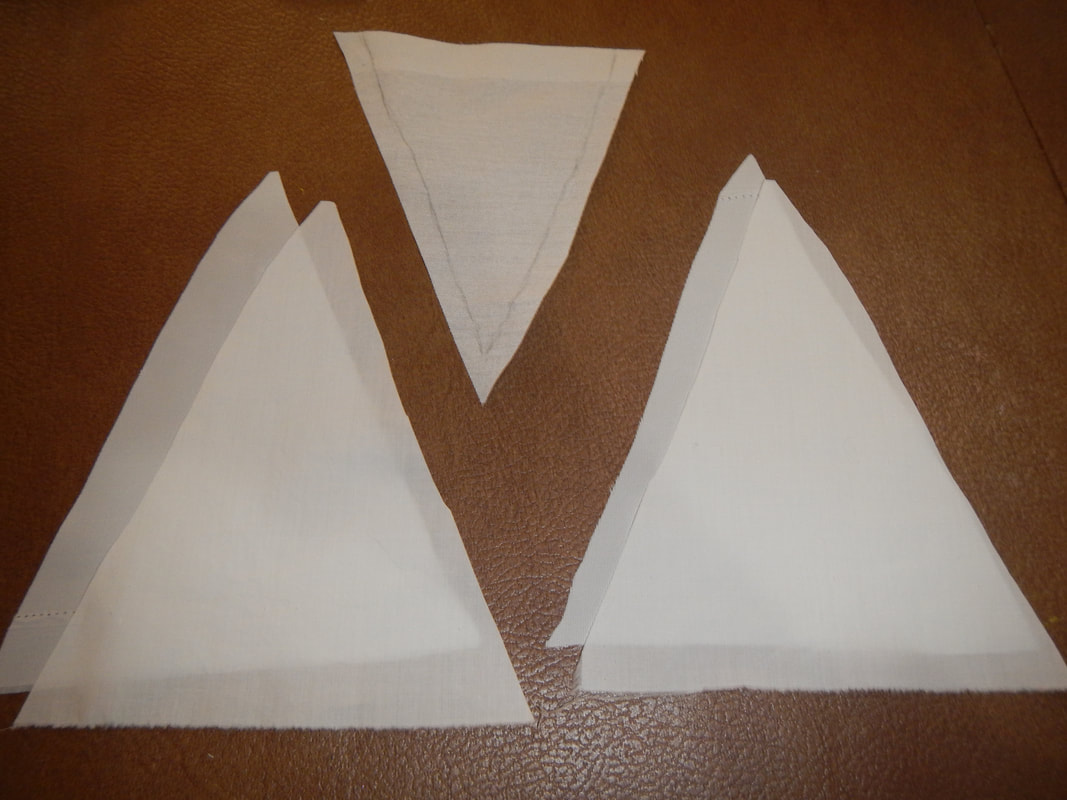
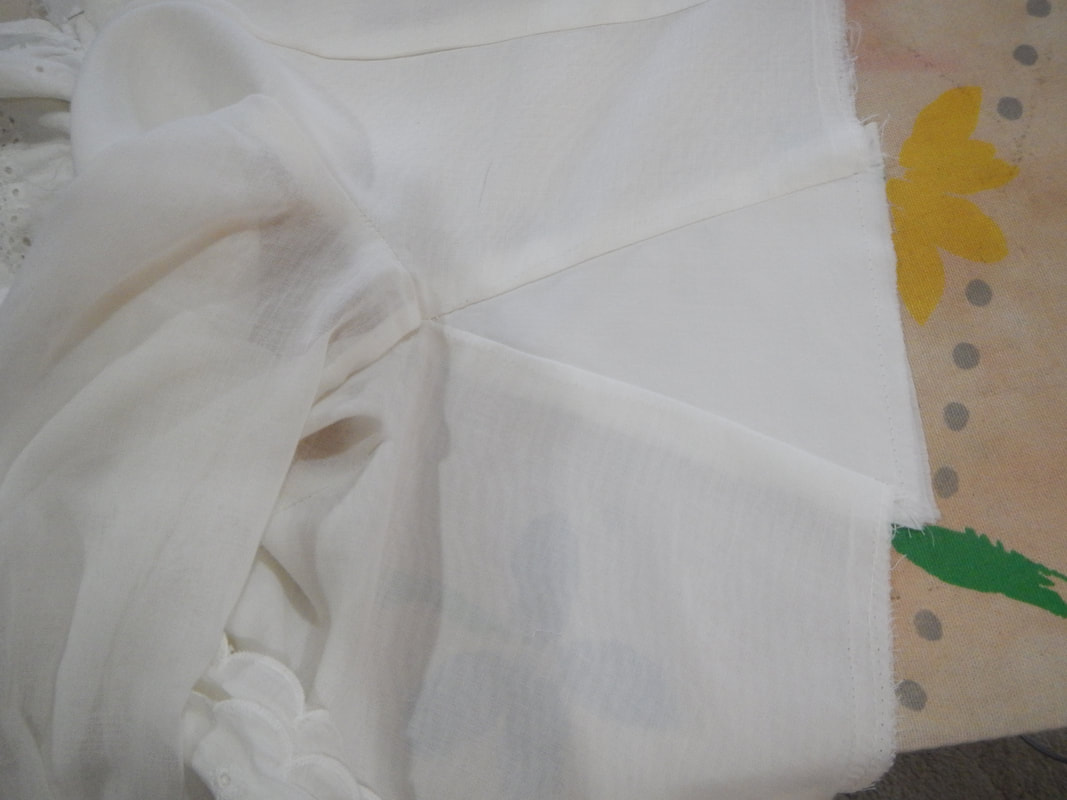
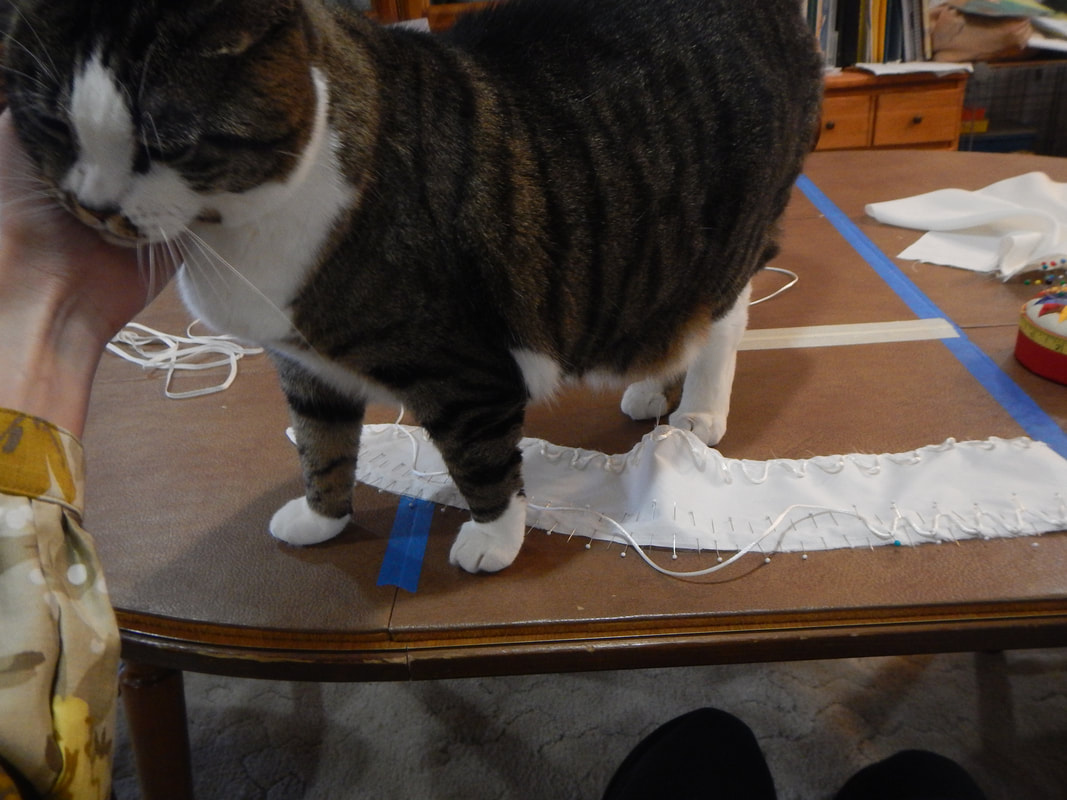
I smooth more muslin over her back and pin the bodice closed over it, tracing the edges of the exposed muslin with pencil to make my pattern for the modesty panel. Soon, the back is fitting right. However, she still has reservations about the front, and there's not a lot I can do, there. The front darts under the bust were cut at some point, so I can't un-pick them because doing so would leave me with cut-out Vs instead of more fabric. The problem isn't so much her size as the location of her bosom's fullness: breasts sag as we age, and hers are now located around where the waist of the dress is. So when she raises her arms--"to dance", she says--the bodice rides up over her bustline, and when she puts her arms down, the bodice catches there and looks tres dorky. "Can you make it longer," she asks, and I say I can add a waistband before re-attaching the skirt. We'll see how that works! Before she leaves, we talk briefly about why she's re-making her dress instead of buying a new one: she wants to express her values: that she appreciates her history and takes care of her things. Groovy! ALTERATIONSHere are the materials:  I intend to use the original skirt lining as the lining for the new bodice pieces. The bowl holds the belt-loops, zipper, and hook-and-eye salvaged from the original while un-picking. Next to the bowl are the ribbons bought for the faux corset back. First I re-sew the back darts I'd previously un-sewed. Then I take my muslin pieces and use them as patterns to make the side seam gussets (the little triangles) from the cotton, lined with salvaged polyester from the original skirt lining.
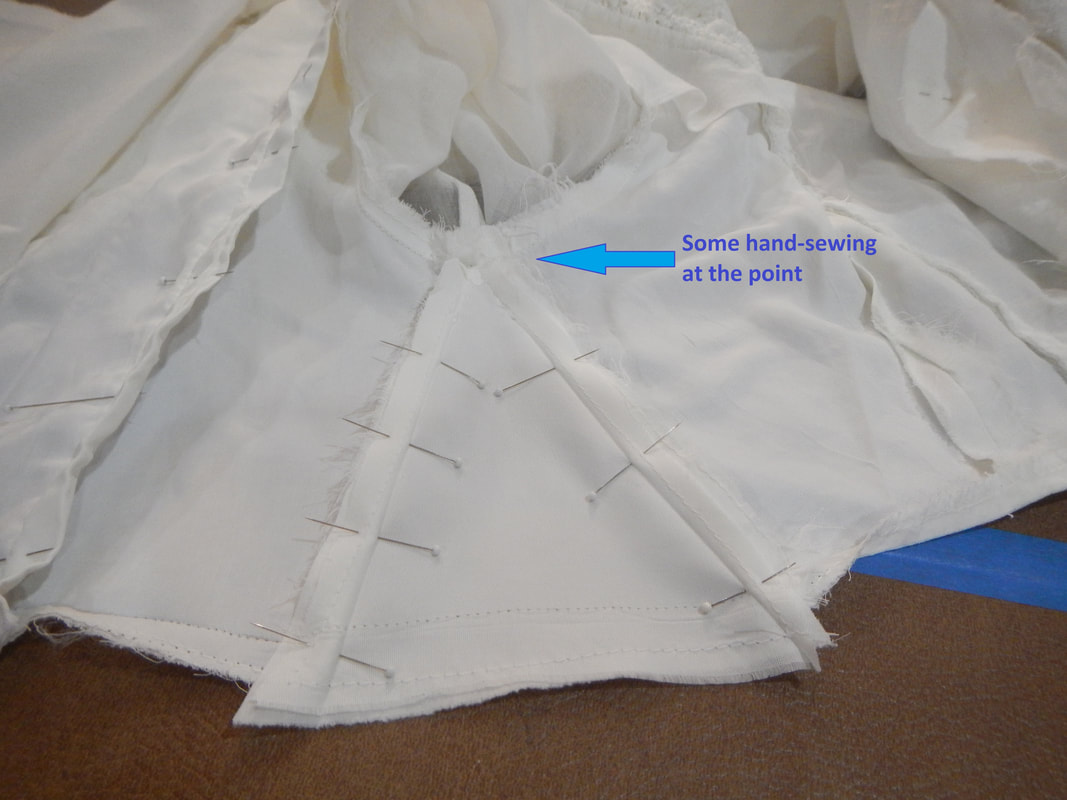
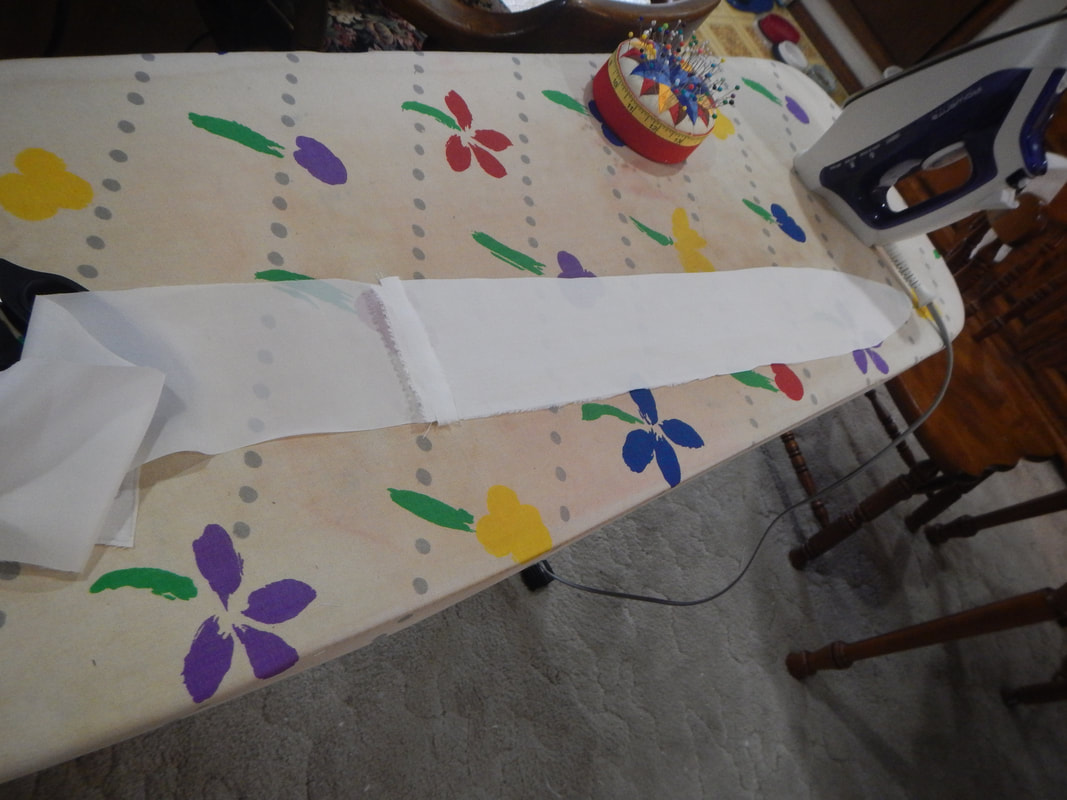
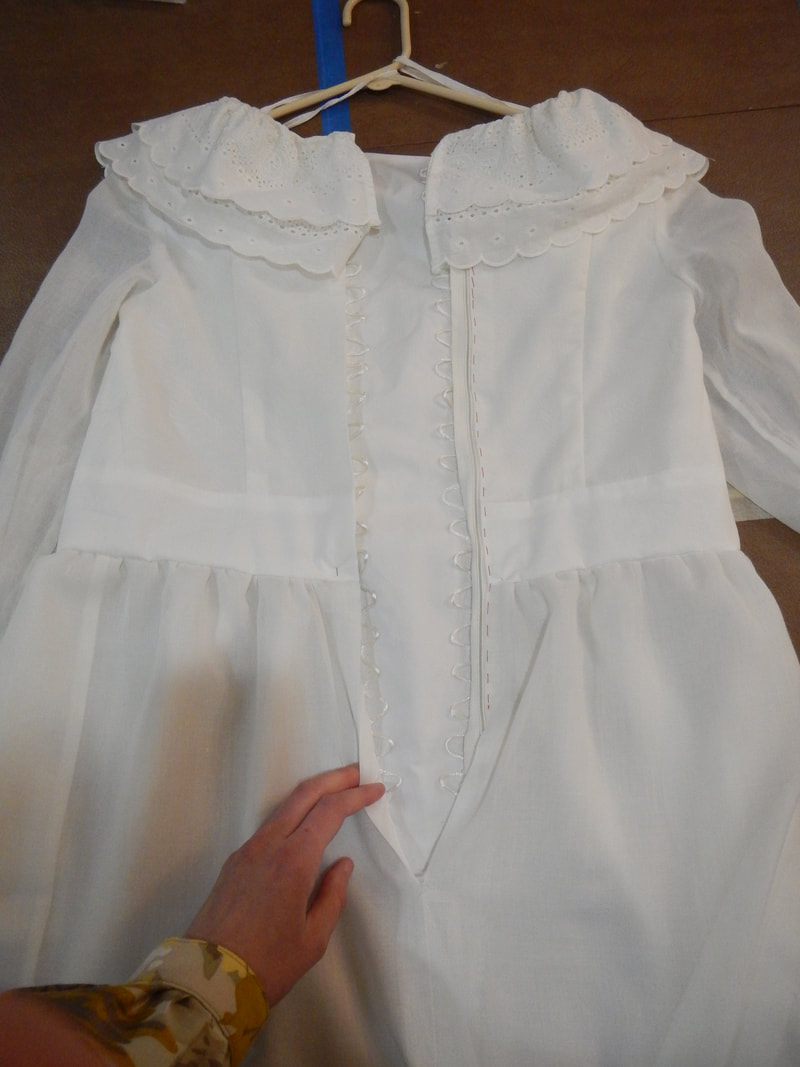
If I wanted to avoid hand-sewing, I would have to un-sew the sleeve-to-bodice seam at the underarm. Then I could machine-sew the two straight lines of the triangle all the way to the point, then re-sew the sleeve to the bodice. But hand-sewing is quicker! Then I make a waistband at the bottom of the bodice, using cotton for the outside and the Bemberg rayon for the lining. 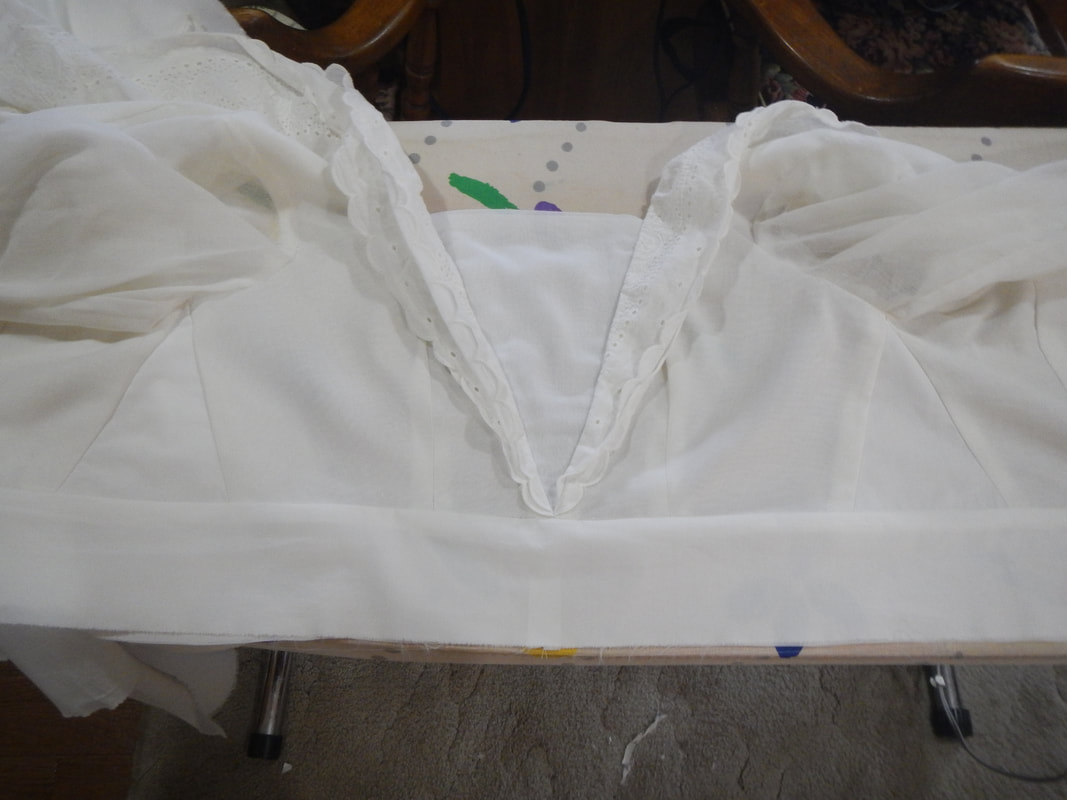 I gather the old skirt and new lining, now made to the same roomy dimensions, to the new waistband. The next step is to make the faux corset back. Originally, my plan is to have that be the new closure: the back would lace closed over a modesty panel. However, I begin to think it might be easier for my client to get dressed if there's a zipper. Lacing requires help; back zippers also require help (if you don't have flexible shoulder joints), but they're a lot easier for the helper to do. So I sketch a new idea for assembly:  The faux corset will still be adjustable, to make the bodice a little tighter, if needed, but the zipper will be the true closure for the dress.
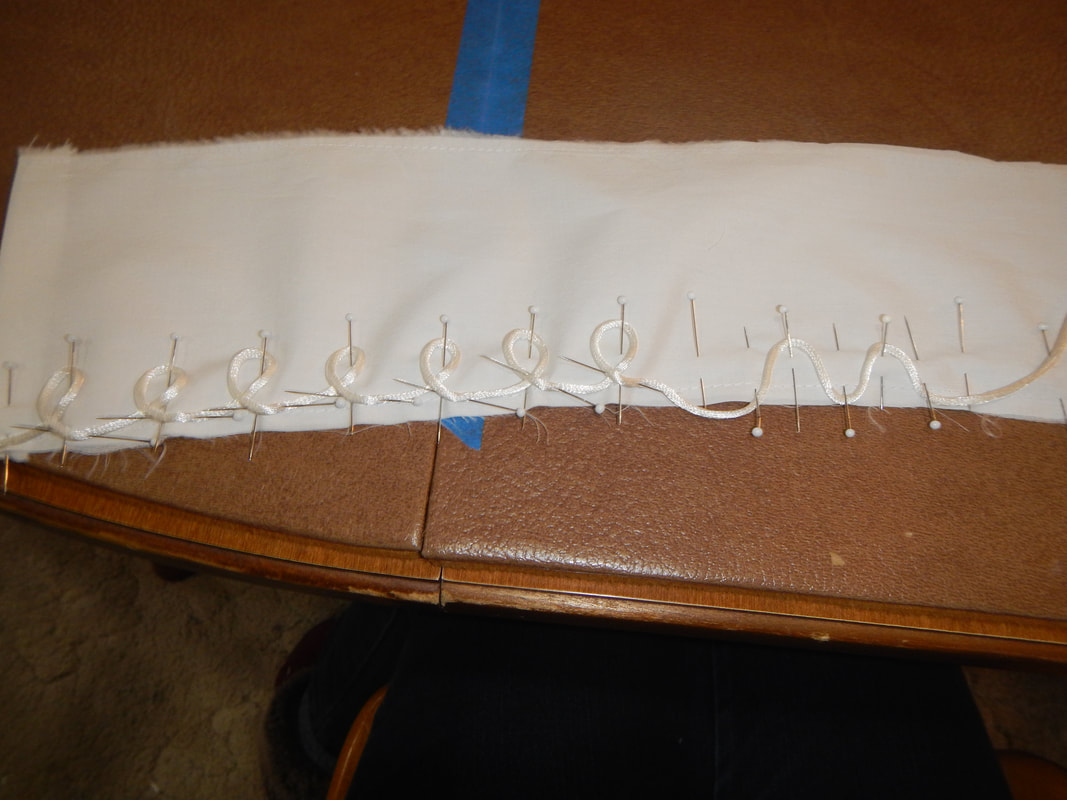
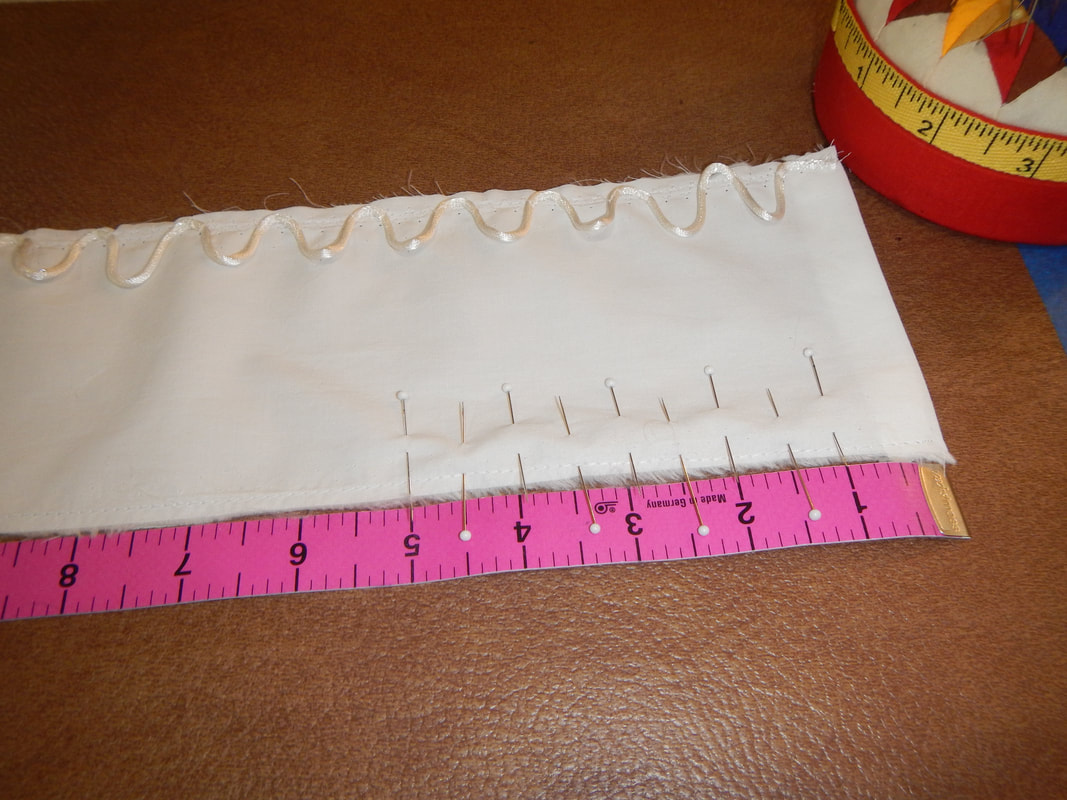
After a few experiments (above right), I figure out how to pin the loops for lacing. In the end, the least bulky method is to space my pins apart first, then loop the cord back and forth between them. I use a three-step zig-zag stitch to hold the edges in place. 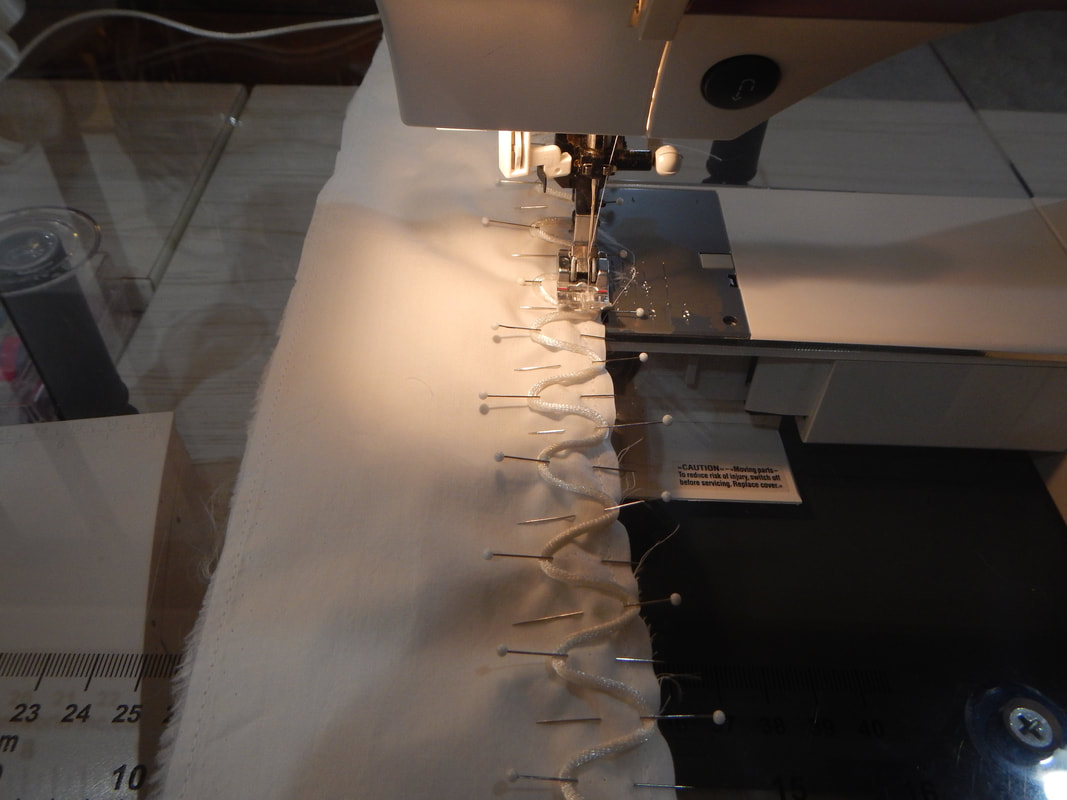
Noticing that either the cotton or label has shrunk, and they are now puckering, I take the label off, iron the two layers separately, and sew it back on. I think it's the label that shrank, actually, since the holes of the original stitching in the cotton are now larger in diameter than the label! Anyway, the two layers are definitely smoother when I'm done! 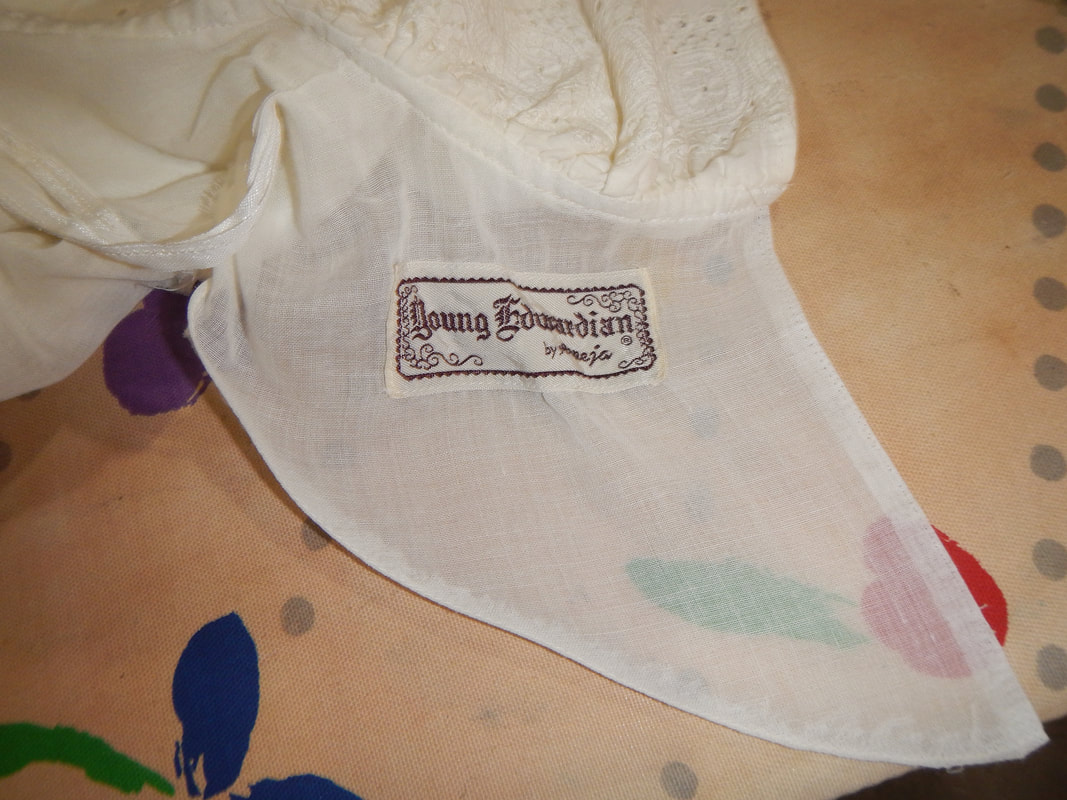 wrinkles, soon to be corrected
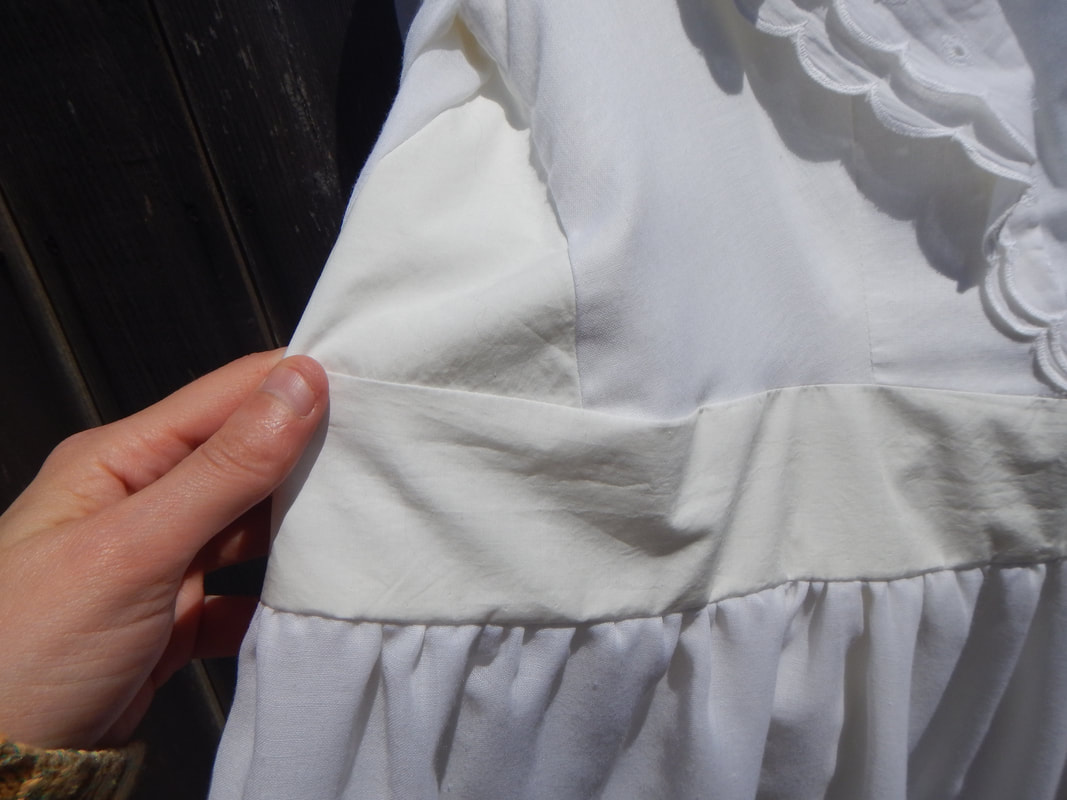
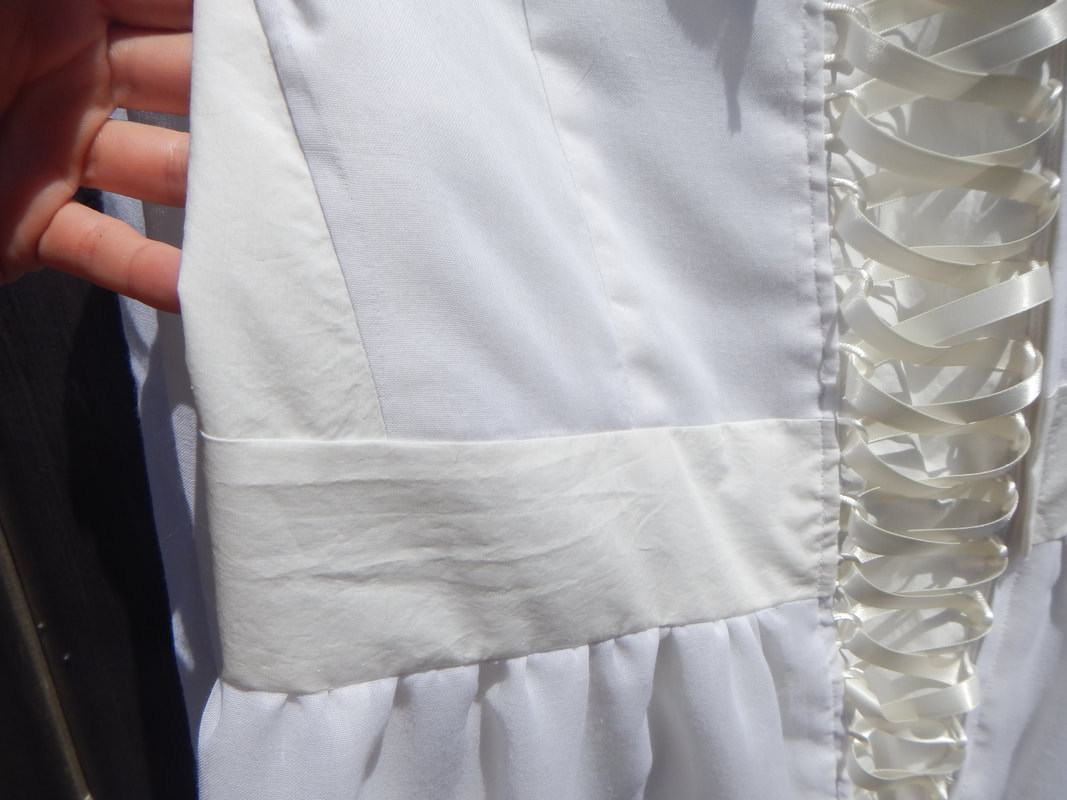
Below: the way I finally finish the back panel! 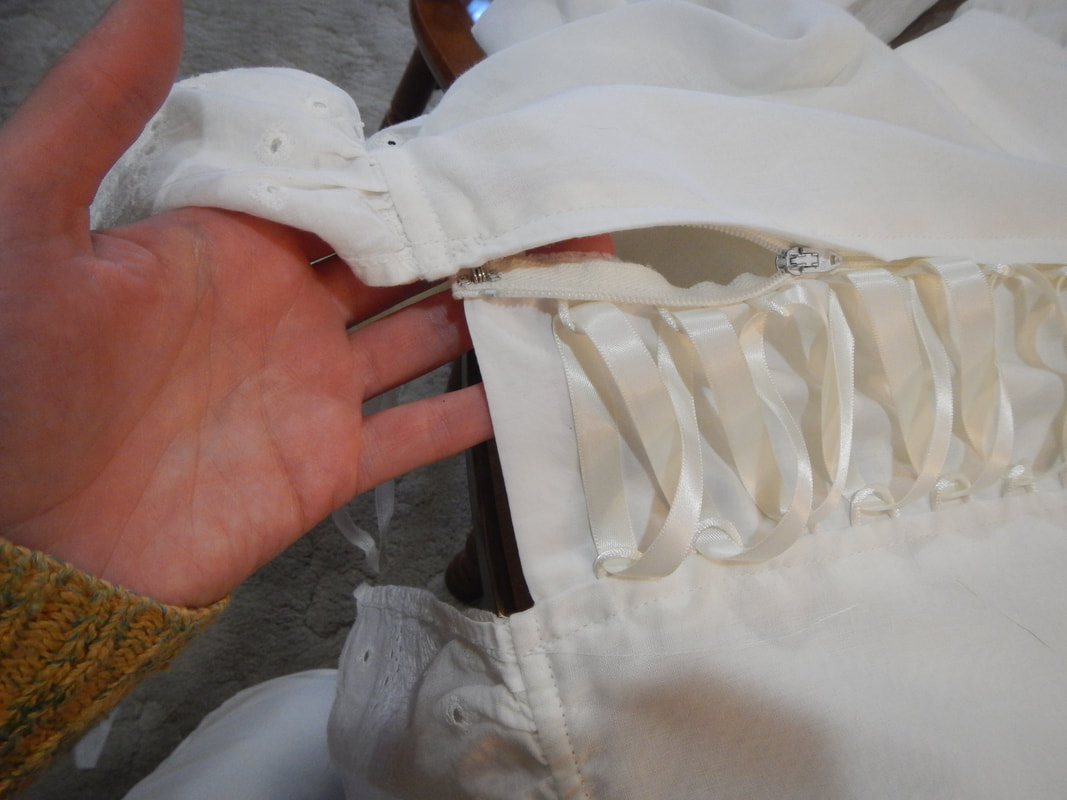 Back Panel zippers shut and hooks at the top. And here are some close-ups of the new waistband and underarm gussets, on the finished dress. In the sunlight, you can see a very slight difference in color with the new cotton, but it was still a pretty close match.
Here's the dress after the alterations... now I just need to have my client try it on once more! 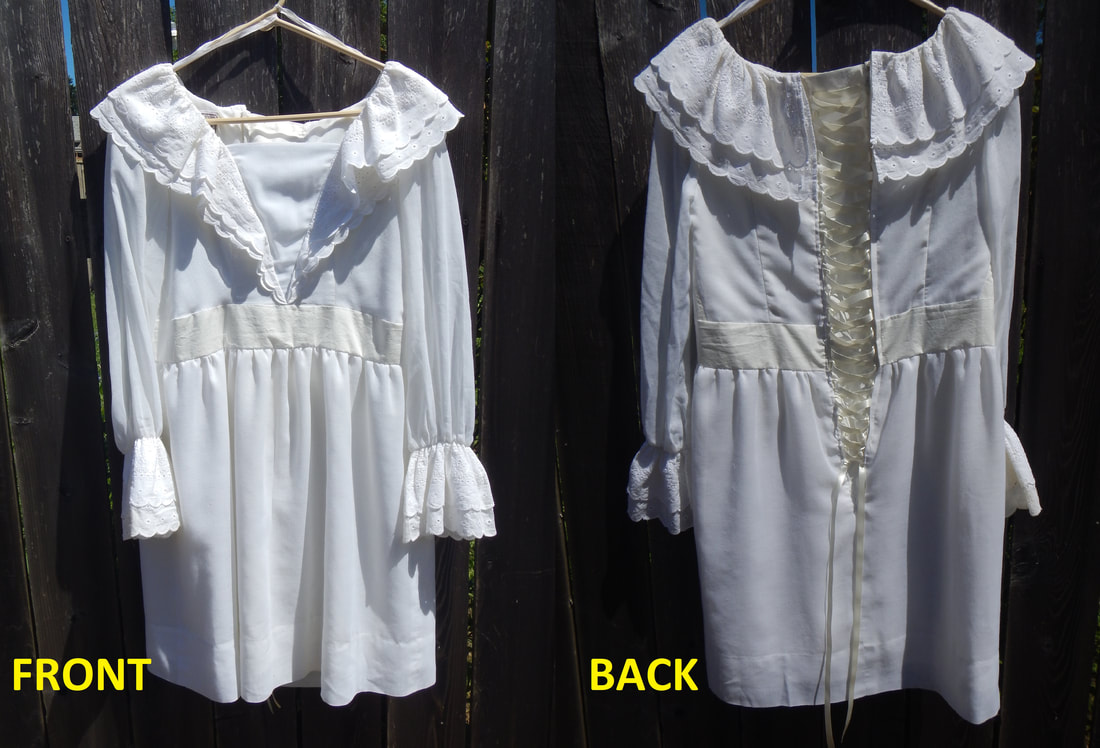 SECOND FITTING The second fitting goes well. My client fits into the dress no problem, and I even have to lace the back panel tighter to cinch in the waist area.
She isn't a fan of the new waistband (where it sits or how wide it is), so I fold it in half the long way and take a long narrow fish-eye dart out of it, folding the excess down on the inside. At its deepest, this horizontal dart is a half-inch, and it tapers to nothing at the Center Back and doesn't interfere with the zipper, so it's a small change. The modified waistband looks like two skinny strips instead of one wide one. Then I add some belt loops (made from "serger worms", the thread chains you get when you run your serger without any fabric in it) to the sides, and she buys a semi-sheer ribbon with gold edges, which is quite pretty!
3 Comments
The Sister
6/30/2018 11:55:13 am
What? No final picture of the blushing bride? I want to see her in her 50-year old wedding dress! I'll get misty, I promise. What a sweet story! I'm so glad you could help this sweet lady pay tribute to 50 years of love and commitment.
The Sister
7/2/2018 11:37:05 am
Yes please! Leave a Reply. |
Karen Roy
Quilting, dressmaking, and history plied with the needle... Sites I EnjoyThe Quilt Index Categories
All
Archives
March 2024
|

 RSS Feed