Robes de Coeur
  • Blog
  • Quilting
  • Clothing
    • Menswear
    • Womenswear >
      • Self-Made Patterns
      • Commercial Patterns
    • Hats
    • Miscellany
  • About
  • Blog
  • Quilting
  • Clothing
    • Menswear
    • Womenswear >
      • Self-Made Patterns
      • Commercial Patterns
    • Hats
    • Miscellany
  • About

A Good Night's Work! (A-line skirt)

11/16/2017

2 Comments

 
Picture
I recently acquired a bunch of new fabric to play with.  While sorting it, I discovered some patterns already cut out but un-sewn.  One was a simple A-line skirt (McCall's 9398, from 1968).  The original seamstress had cut out the front and back panels (no facings, zippers, lining fabric, or waistband) in two different fabrics: dark gray and light gray.  At first I thought the fiber was an acrylic masquerading as wool, but since it bears a hot iron so well, I now think it's actually wool. 

I make the light gray skirt in one evening, using my serger and sewing machine, and some easy hand-sewing.  I don't have the McCall's directions, so I just put things together my own way.  I'm tagging this "stash busting" even though it's not my stash...! 
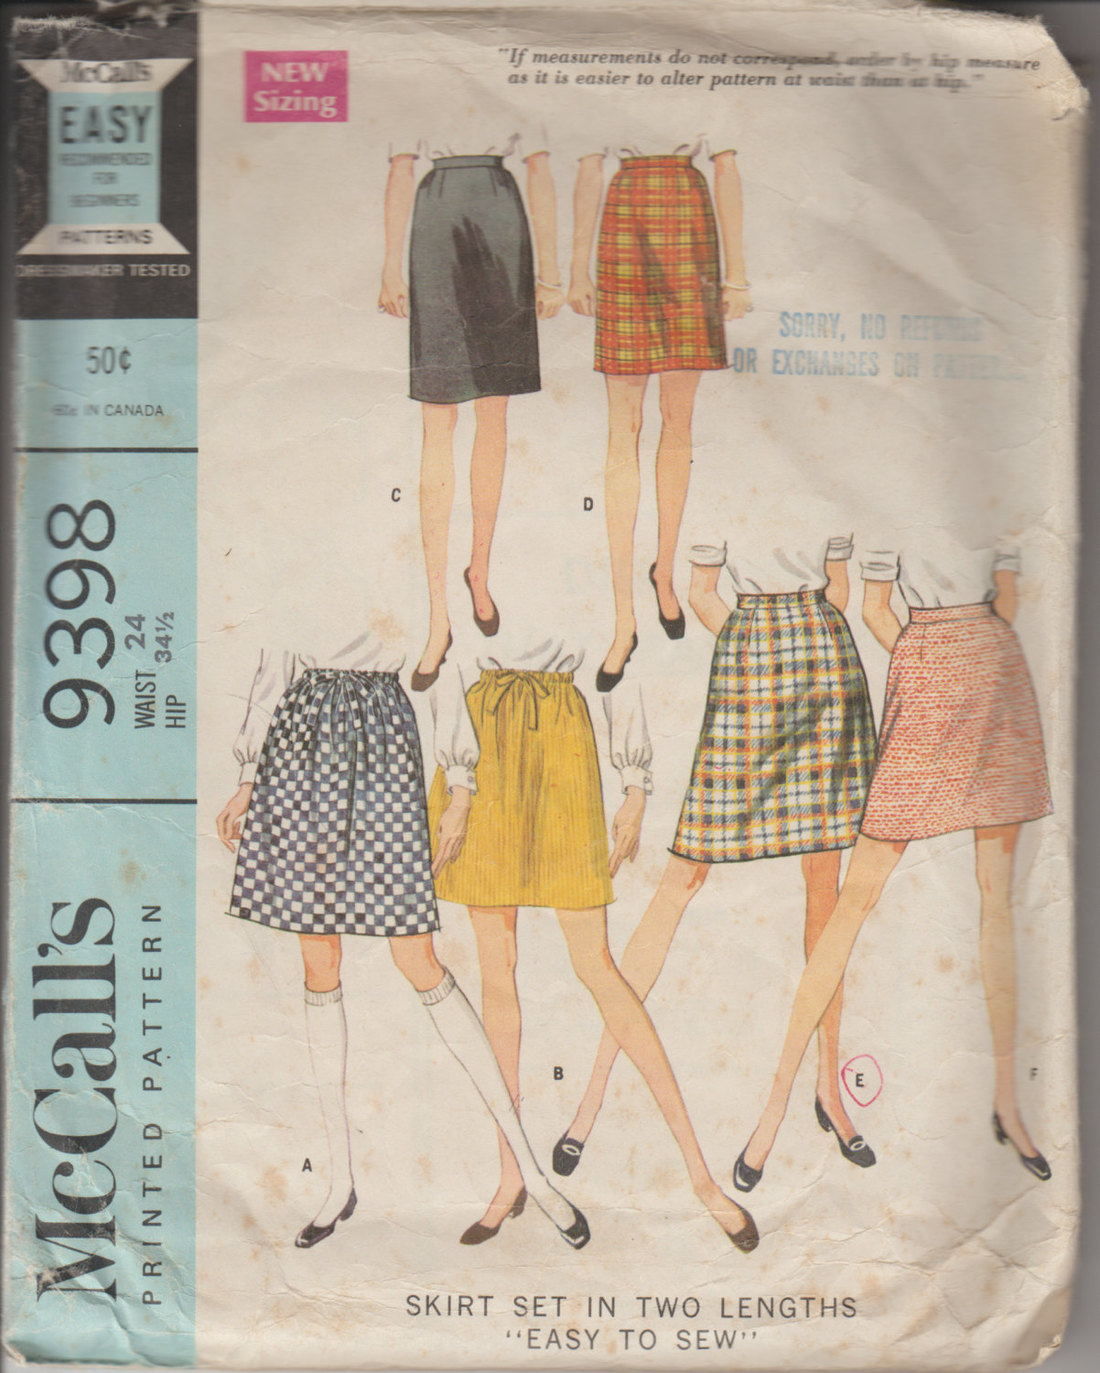
The pattern pieces say they're meant for a 25.5 inch waist.  My waist is more like 27" or 28", so I decide to sew with only 1/4" seam allowances and then adjust the darts to fit me.  This works fine. 

STEP BY STEP

  1. Sew right side seam with serger, with narrow 1/4" seam allowance. 
  2. Sew left side with sewing machine, inserting zipper at top.  Serge the seam allowances below the zipper. 
  3. Press the seams. 
  4. Press the folds over the zipper with white vinegar and the steam iron to really set them in their folded position. 
  5. Serge the bottom of the skirt to prevent fraying.  Turn up the hem and press. 
  6. Hand-stitch the hem in place.  The wool is nice and thick, so it's easy to take large, closely spaced stitches that go only part-way through the exterior wool.  From the outside, the stitches are invisible, but they're pretty sturdy. 
  7. Try on skirt inside-out.  Pin the darts in the front and back. 
  8. Take skirt off and re-pin the darts more symmetrically. 
  9. Sew the darts, beginning the dart at the waistline, not the top of the fabric!  The reason for that is that I need to fold the top down later (step 13), and when I do that, it'll need to spread open.  So the darts start at the waistline, but above it they are un-sewn, just folds. 
  10. Press the darts as sewn, then to the sides. 
  11. Take a nylon half-slip (from the same stash as the wool) and pin it in place inside the skirt, making sure it's shorter than the wool skirt, and that its extra width at the top is carefully tucked into the darts to keep a smooth line.  I cut away the half-slip's worn out elastic waistband to make it fit the skirt lengthwise. 
  12. Snip the half-slip open at the zipper, turn the edges under, and pick-stitch it in place. 
  13. Since I have no waistband fabric, I fold the top of the skirt down to make a fold-over facing, spreading the folds at the top of the darts so they mirror the darts.  Tack the folds in that open position with a few machine stitches. 
  14. Serge the edge of the fold-over facing, going over the stitches from the previous step.  This prevents fraying and holds the fold-over facing in its spread apart shape. 
  15. Take a bit of twill tape (from my stash) and pin it into the waist area, folding the facing down over it, then pinning the tape to the fold-over facing but not the rest of the skirt. (There are pictures below showing this process.)
  16. Use my machine to sew the twill tape in place.  This stabilizes the waist, preventing it from stretching out with wear.  The stitches are all in the folded-over area, so not seen on the outside of the skirt. 
  17. Fold the facing back down, concealing the ribbon and the top of the nylon slip.  Hand-sew the facing down, going through 2.5 layers: the facing, the nylon, and half of the exterior wool (but not enough to show stitches on the outside. 
  18. Run off some serger "chain" (I have a friend who calls them "serger worms"!) and use it to tack the slip to the skirt at the bottom of the two side seams.  This is a French Tack, which keeps the lining from riding up. 

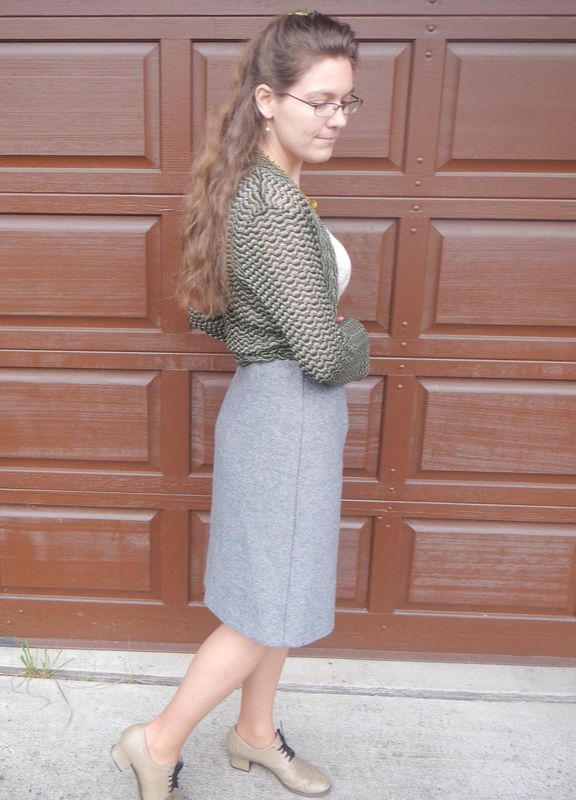
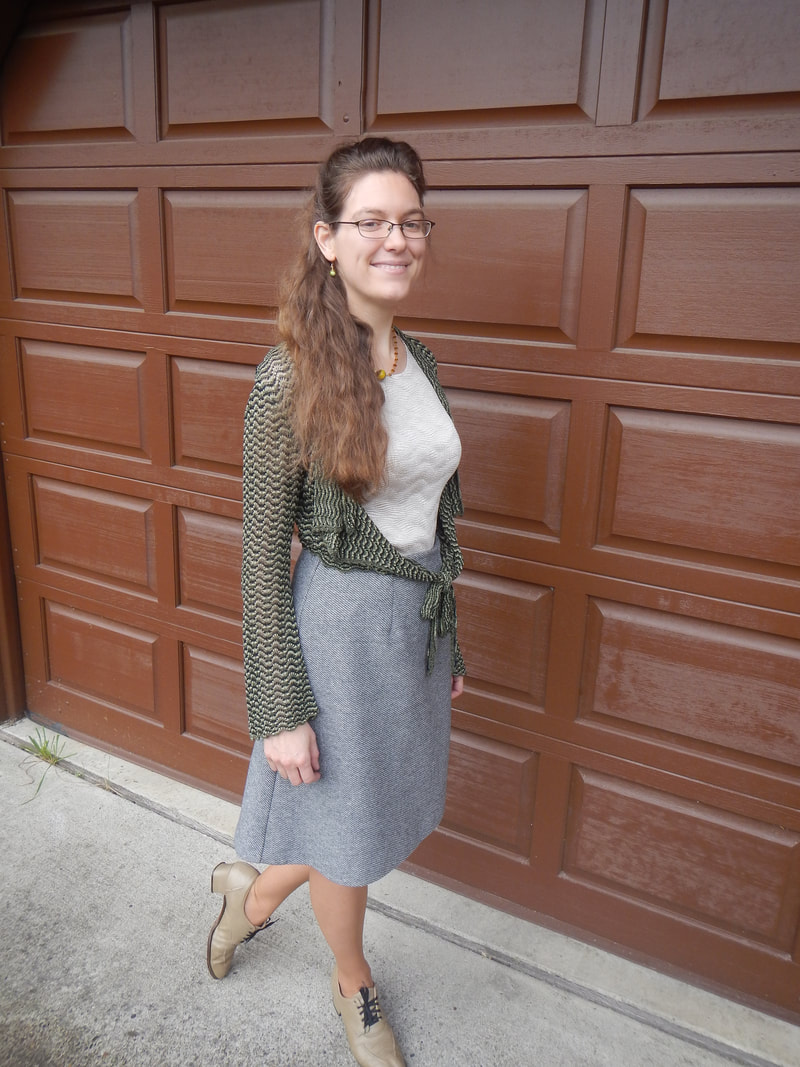
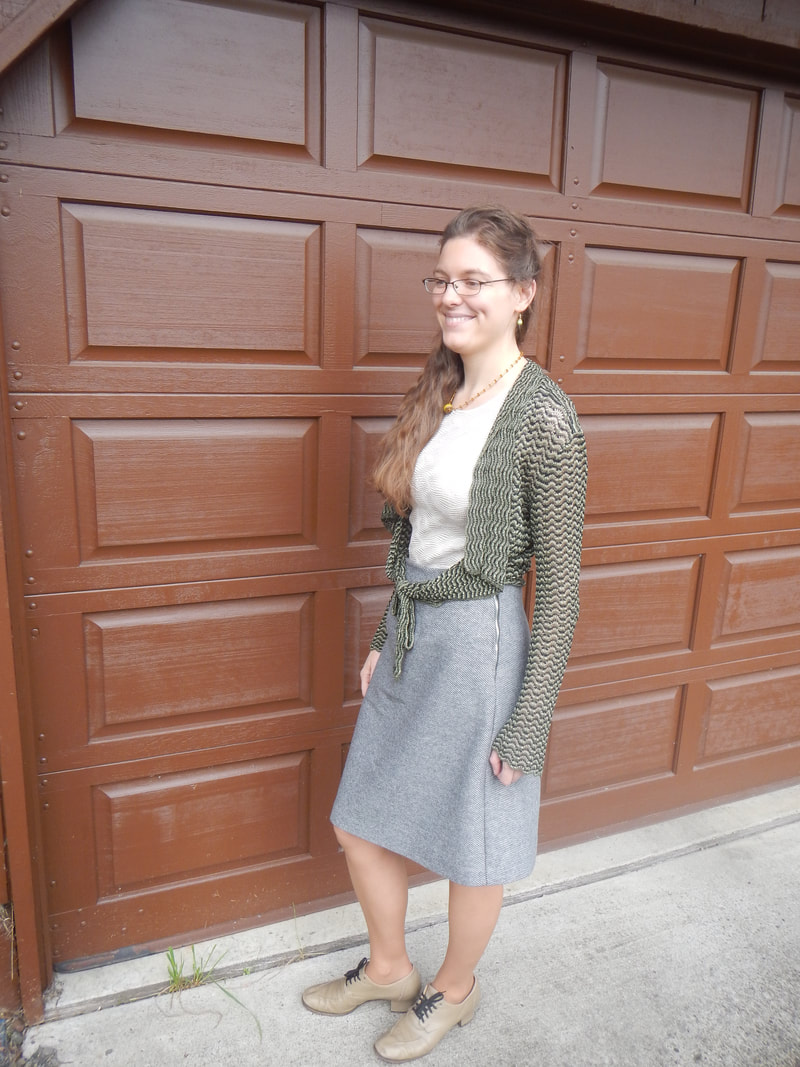
PROGRESS PICS

I put them all in a slideshow, so click Play and read captions if you want. 

FINISHED PICS

Picture
As you can see, the front darts end a little abruptly, making a pouchy belly.  But it's so minor I won't bother to correct it... perhaps someday I'll have more of a belly and it'll be perfect!  And for the next skirt (the dark gray one), I'll make the front darts a little longer. 

The back darts are perfect, the side seam straight, and the hem parallel to the ground.  The side zipper gapes a little despite my best efforts (next time a back zip will be better!). 

What I love best is what you can't see: the nylon half-slip lining, with it's pretty lace.  It does its job (the skirt doesn't stick to my nylons) and looks darling! As for styling the skirt, you can see I'm wearing green/gold/gray again.  I like this color combo. 
Picture
Picture
2 Comments
The Sister
11/17/2017 05:50:52 am

This is quite a nice skirt for you! Good job using what someone else had started! Also, you hair is growing so long! It's beautiful!

Reply
Karen Roy link
11/18/2017 10:47:04 am

Thanks, sister mine! My hair is longer, but no thicker, alas. I'm still pulling it out, and there's always a new spot to cover.

There are at least two more versions of this A-line skirt to come: she cut it out in three fabrics! The next one (dark gray) will post on Monday, but the third (a white one) is yet unsewn. (I have more pressing things to work on before I can play with that, but I do have a splendid idea for embellishing it when I have time!)

Reply


Leave a Reply.

    Karen Roy

    Quilting, dressmaking, and history plied with the needle...

    Categories

    All
    1910's
    Alteration
    Antique
    Dyeing
    Embroidery
    General
    Hand Sewing
    History
    Lacemaking
    Mending
    Menswear
    Millinery
    Modern Elizabethan
    Musing
    Other Sewing
    Philippians 4:8
    Project Diary
    Quilting
    Regency
    Retro
    Self Made Pattern
    Self-made Pattern
    Terminology
    Victorian
    Vintage

    Blogs I Read

    The Dreamstress
    Male Pattern Boldness
    ​
    Lilacs & Lace
    Tom of Holland
    Fit for a Queen
    Line of Selvage
    Mainely Menswear
    Bernadette Banner

    Archives

    January 2023
    December 2022
    November 2022
    October 2022
    September 2022
    August 2022
    October 2021
    September 2021
    August 2021
    July 2021
    June 2021
    May 2021
    April 2021
    August 2020
    June 2020
    May 2020
    April 2020
    March 2020
    January 2020
    December 2019
    November 2019
    September 2019
    August 2019
    July 2019
    May 2019
    April 2019
    March 2019
    January 2019
    December 2018
    November 2018
    October 2018
    September 2018
    August 2018
    July 2018
    June 2018
    May 2018
    April 2018
    March 2018
    February 2018
    January 2018
    December 2017
    November 2017
    October 2017
    September 2017
    August 2017
    July 2017
    June 2017
    May 2017
    April 2017
    March 2017
    February 2017
    January 2017

    RSS Feed

Blog

Quilting

Clothing

About

Copyright Karen Roy
​© 2017-2022