Robes de Coeur
  • Blog
  • Quilting
  • Clothing
    • Menswear
    • Womenswear >
      • Self-Made Patterns
      • Commercial Patterns
    • Hats
    • Miscellany
  • About
  • Blog
  • Quilting
  • Clothing
    • Menswear
    • Womenswear >
      • Self-Made Patterns
      • Commercial Patterns
    • Hats
    • Miscellany
  • About

A Muff for My Niece

11/26/2018

4 Comments

 
Picture
materials for the muff
My niece has requested a muff for Christmas.  (I'm guessing this has something to do with her long-standing love of Frozen.)  For color, she wants pink.  Then--because her mom doesn't like velvet--she requests velvet.  I consider it my bounden duty to help her tease her mother, so I consent to the velvet!  But I don't have pink velvet in my stash, so coral-red is what she'll get.  ;)  I also have some pink charmeuse for the lining, and brown faux fur (a knit) from an old hat that I disassembled. 

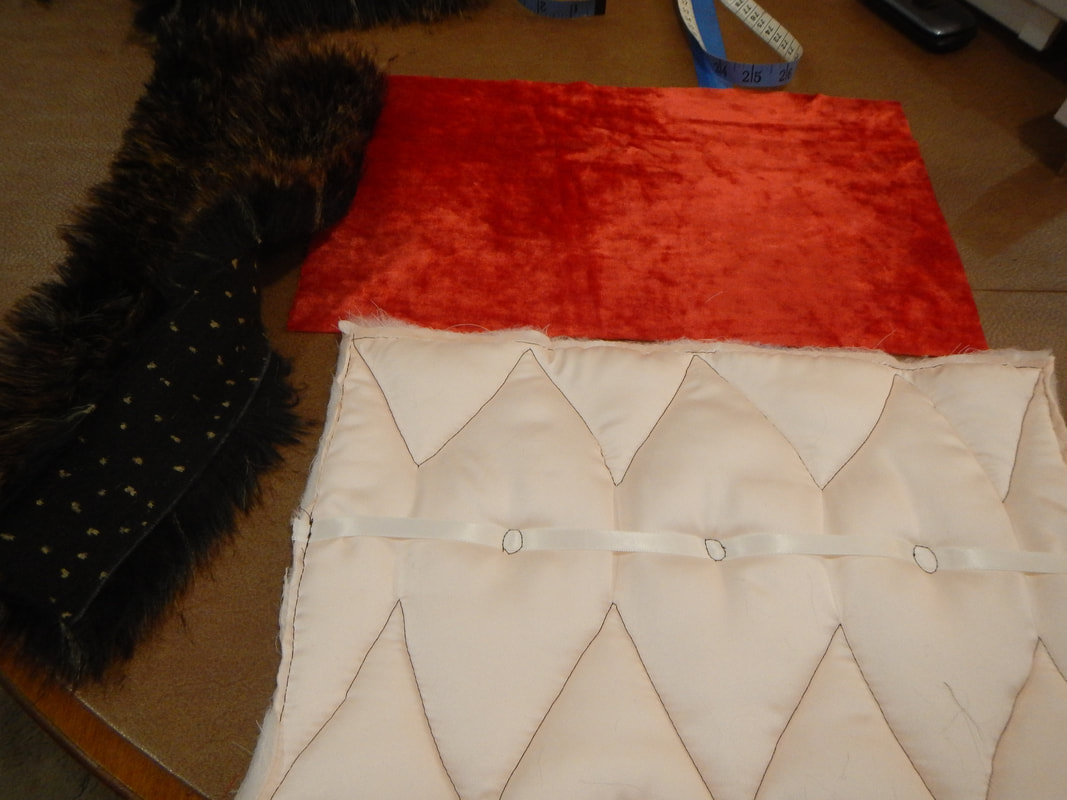
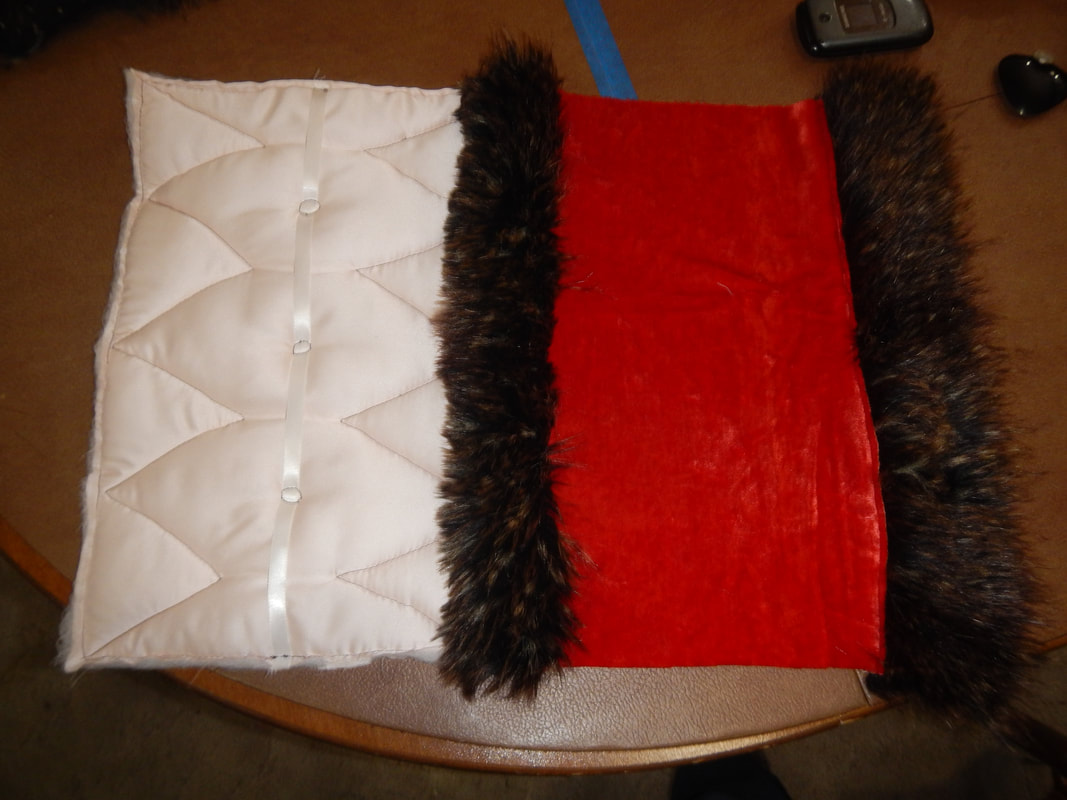
THE PATTERN

To start, I look online for the ideal dimensions for a child's muff.  The Wear Our Heritage site, a Canadian fur company, has muff instructions and useful info on dimensions:
The rectangle from this raccoon pelt is only 9 inches wide. This is about the minimum width one would want for a muff. It would be a very appropriate size for a child's muff, but 12 inches is more typical for a ladies muff. The length was 15 inches. Many muffs are 19-23 inches long.
So:
9" x 15" -- minimum for a child's muff
12" x 15" -- adult's muff
19" x 23" -- larger muff

In the end, I cut a velvet rectangle 9" x 15", intending to widen it still further by adding strips of the faux fur, for the exterior.  I cut two layers of the charmeuse and put batting between them, for the interior.  I make the interior dimension larger than the velvet, because I know it'll be compressed a bit when I quilt it.  (Ultimately, the goal is for the exterior piece to be bigger than the interior, because that's what makes the outside wrap around the inside, so the lining doesn't show.  I'll get to that in a bit, when I sew the faux fur on.) 
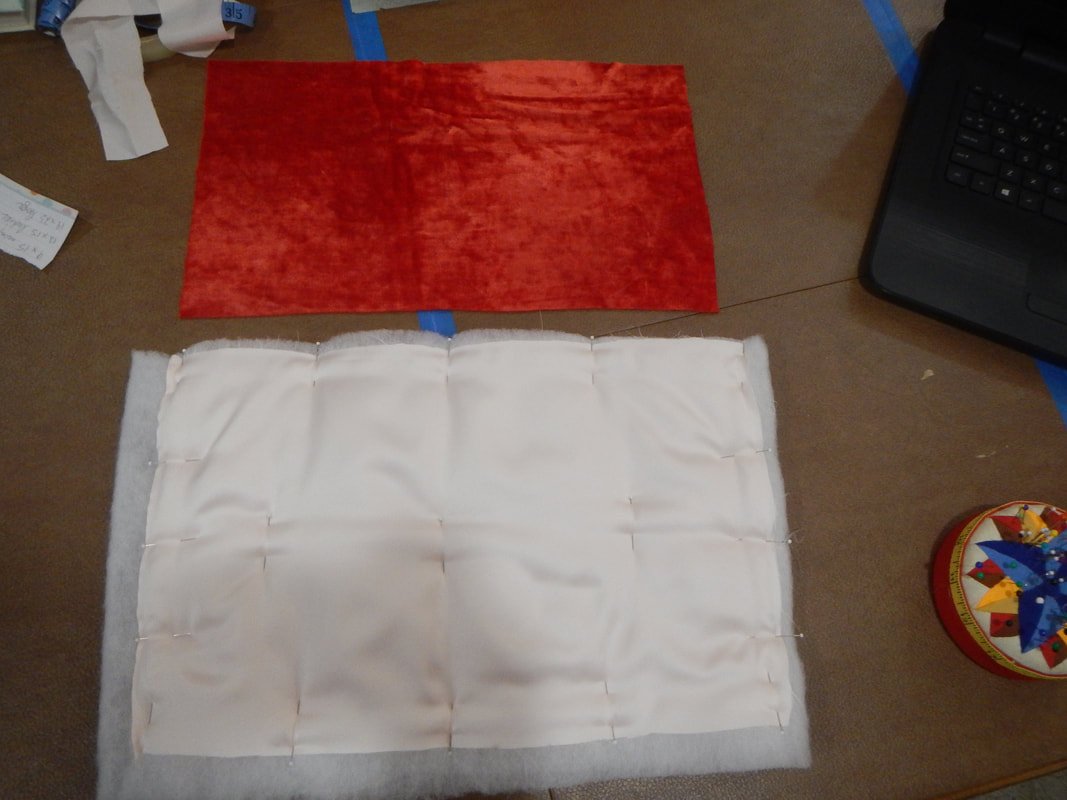
Picture

ASSEMBLY

I start by quilting the interior.  In the picture below, of the quilted layer, the short edges of the rectangle will eventually be sewn together to make a tube, and the long edges will make the opening for my niece's hands.  I quilt the interior very minimally--too much quilting and it won't be puffy inside the muff; I just do two layers of zig-zags on the sides.  I lay a ribbon down the center, and tack it down at intervals.  The ribbon is there so that when my niece takes one hand out of the muff, she has something to hold onto with the other hand so the muff doesn't slide off. 
Picture
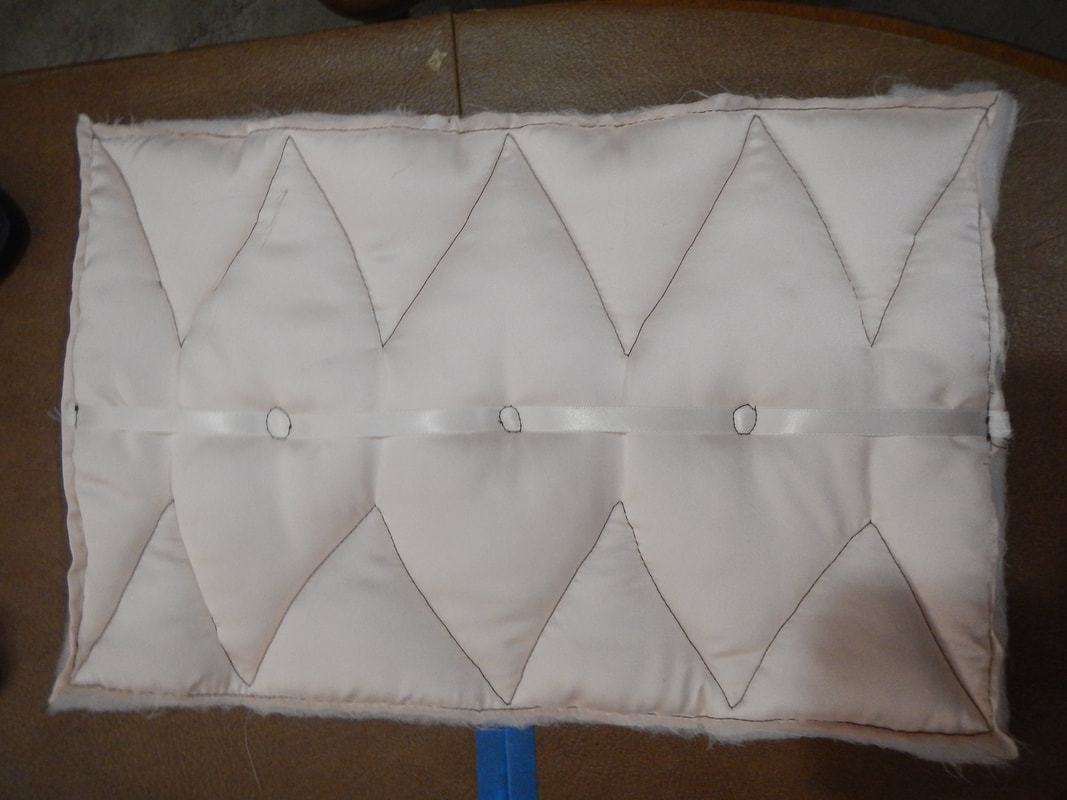
Now I want to make the velvet exterior larger than the interior, and I'm gonna use the fur for that:
Picture
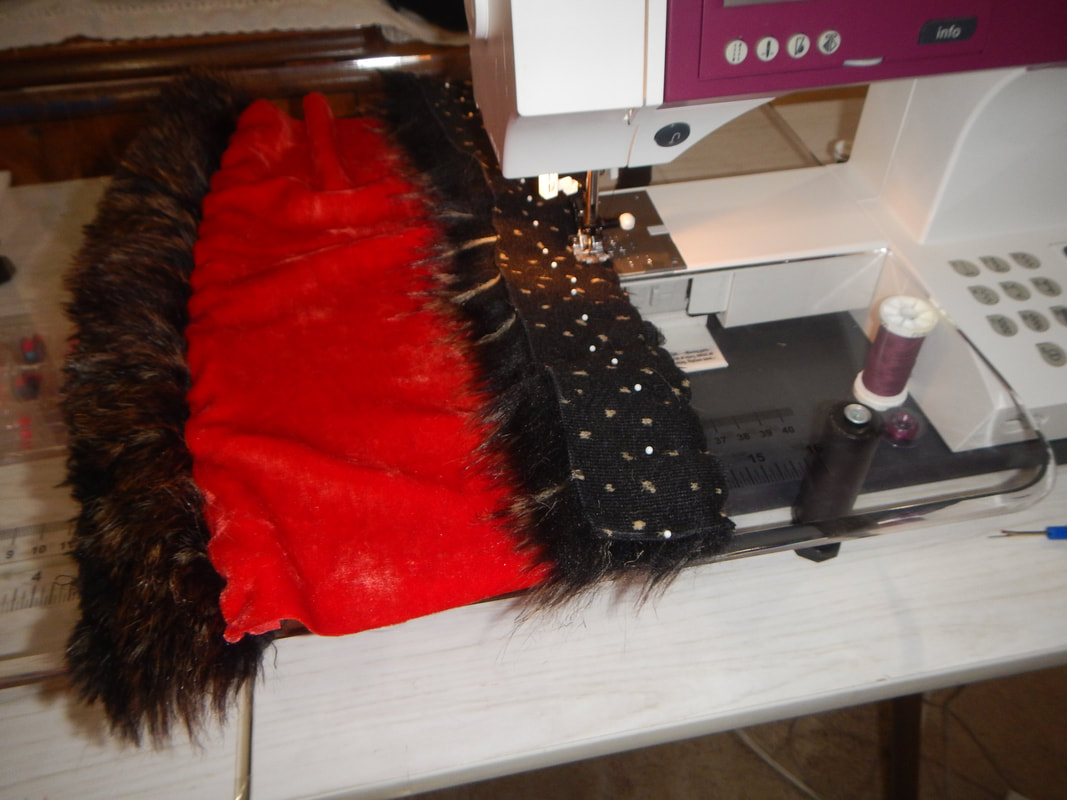
I sew the interior and exterior together, making a tube. 
Picture
The exterior is now larger, as you see!
Picture
Finished tube.
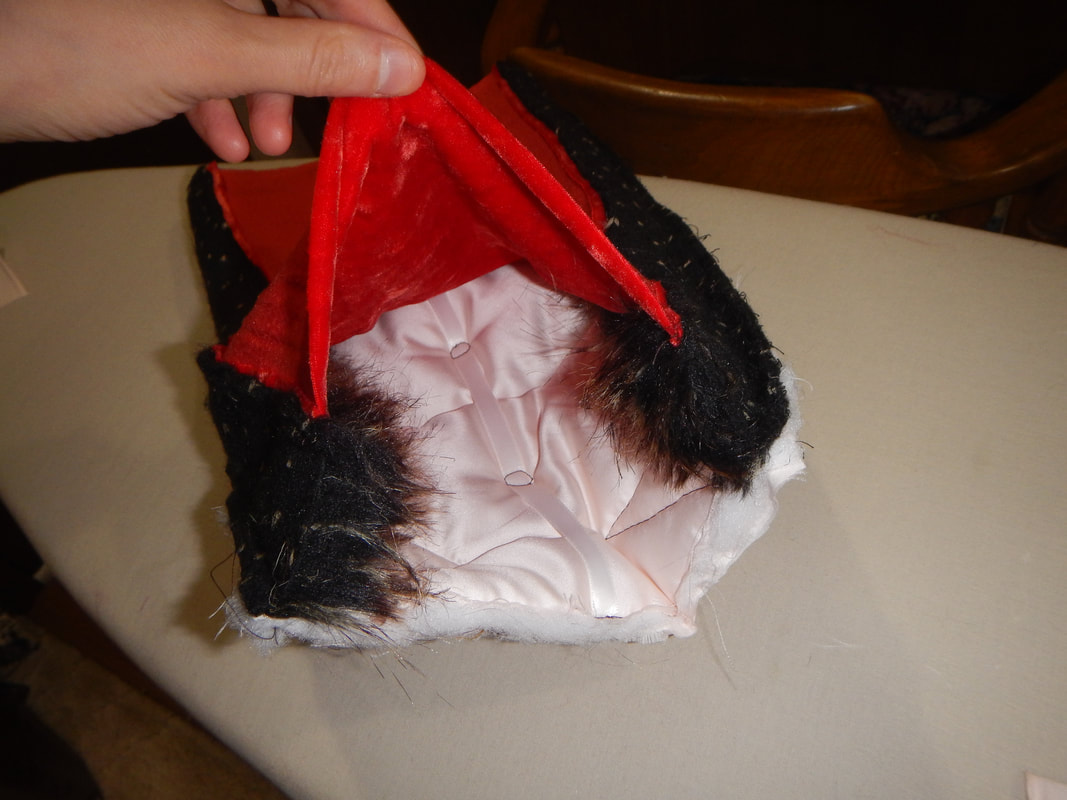
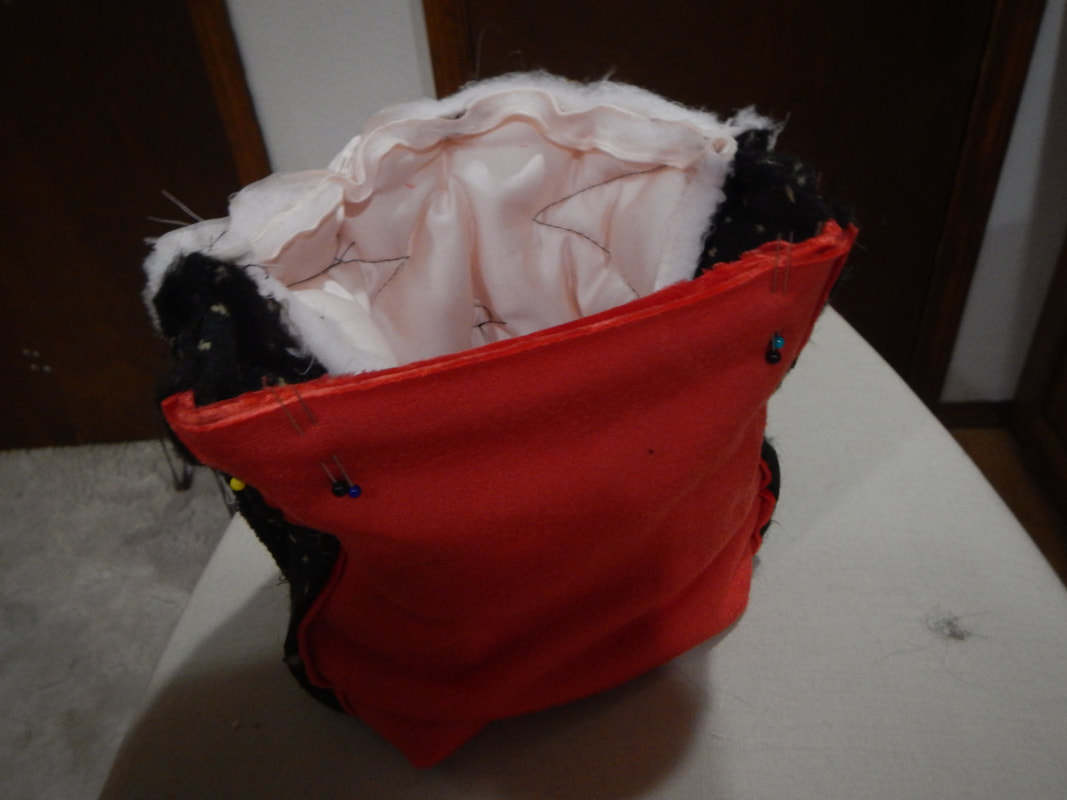
Now the long edges are sewn and the seams enclosed.  The short edges are still raw.  And the inside view shows how the fur wraps around to the inside, which should provide a fuzzy seal around the hands when the muff is used. 
Picture
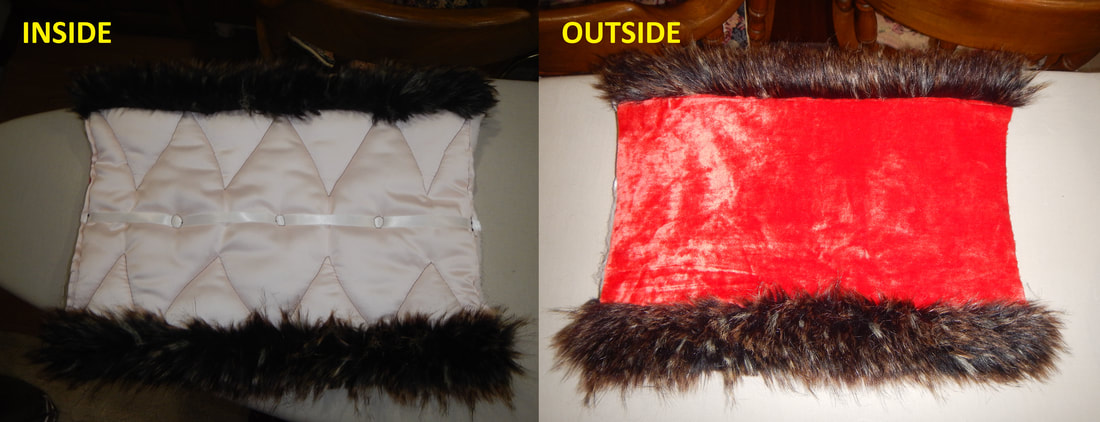
This next bit is tricky to explain... I start by folding short edge to short edge, and pinning the lining pieces together.  Then, as I label in the picture below, I take the exterior velvet and pull it around the bundle of muff to match the exterior piece on the other side.  In the picture, I take point A and pull it under and around to point B.  Here's a before and after picture:
Picture

Once the exterior pieces are together, I use doubled pins to mark the start and stop points of my sewing.  I sew this chunky seam, going over the fur and the quilted layers but leaving the velvet un-sewn between the doubled pins.  Then I flip the velvet back under and around the muff, putting the thing right-side-out again. 
Picture
Picture


Now there's nothing left but to slip-stitch the opening closed!  While I do that, I catch the interior seam allowances occasionally in my stitches, so the tube doesn't invert itself when tugged at.
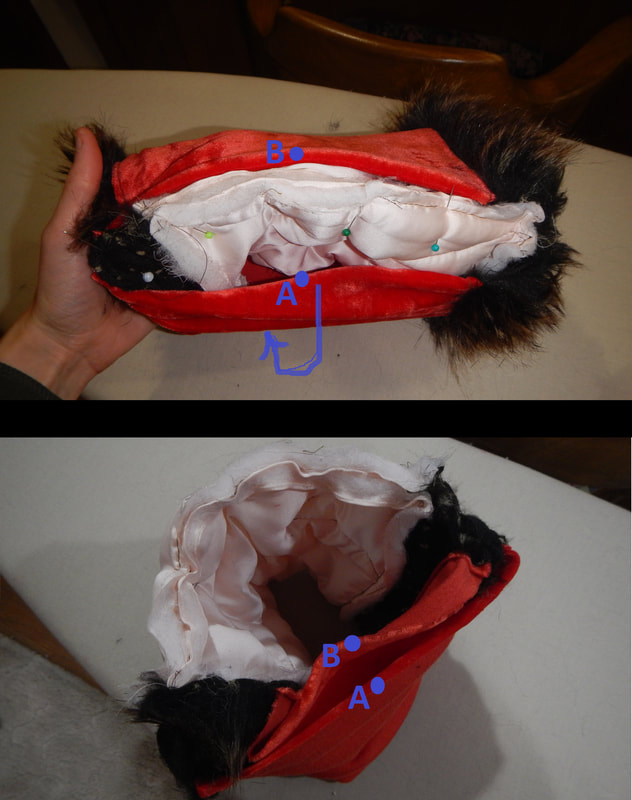
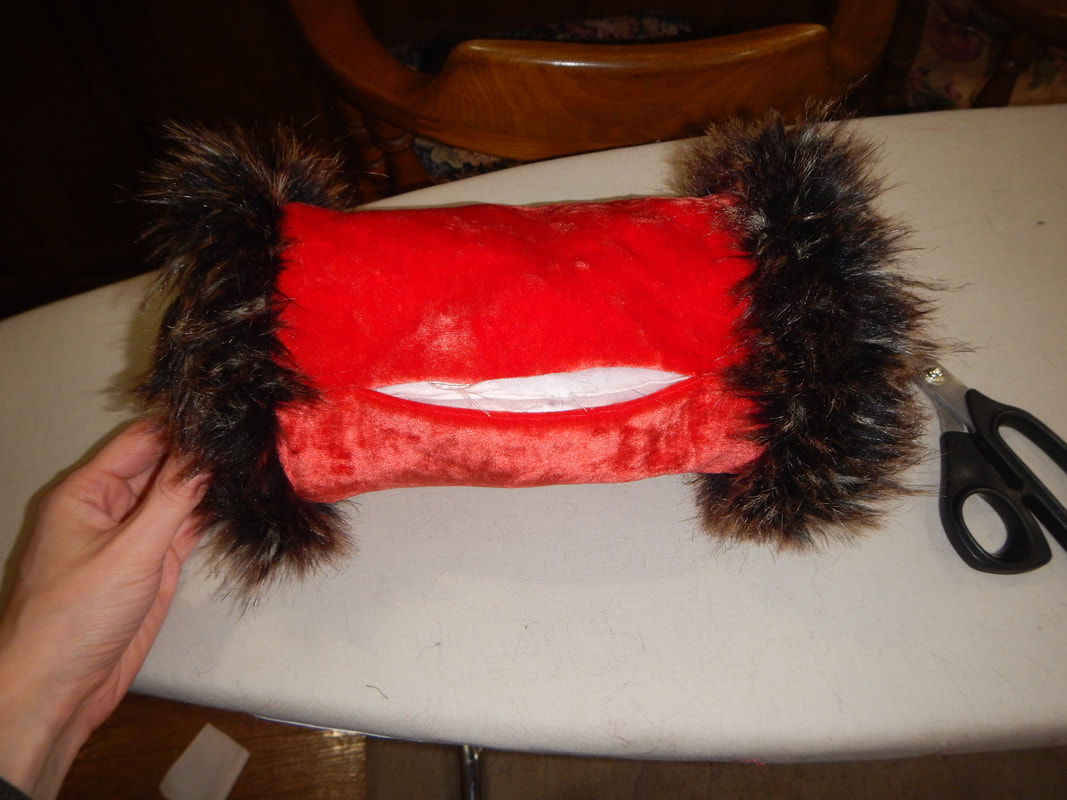
The finished muff is large enough for an adult, but not enormous for a child.  My niece'll get many winters' use out of it! 
Picture

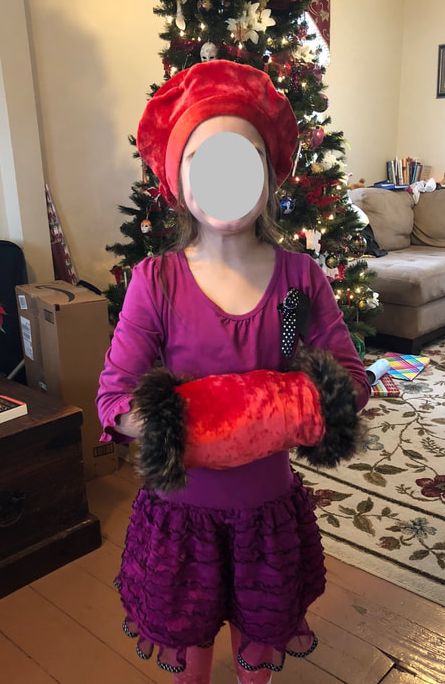
1/21/2019 - Added photo of my niece in the muff and hat! 
4 Comments
momsydoodle
12/2/2018 10:55:44 am

That's adorable! I know she'll love it.

Reply
Karen Roy link
12/5/2018 08:41:58 pm

And I made a cute hat to go with it, but no pics because it's just the same as the other two hats I made her, only done in velvet with a furry pom pom. So cute!

Reply
The Sister
12/11/2018 11:09:46 am

You're right that she picked velvet because she's a stinker who knows I dislike velvet! Once she gets it she'll try to trick me into feeling it. Haha!

She'll love it and feel just like a queen; thank you! It's very well thought-out!

Reply
Karen Roy link
12/14/2018 10:02:08 pm

I just shipped it to you, but I had no wrapping paper, so you have to handle the velvet to get it wrapped up! (I'm so mean... I don't know WHY you hang out with me!) ;)

Reply


Leave a Reply.

    Karen Roy

    Quilting, dressmaking, and history plied with the needle...

    Categories

    All
    1910's
    Alteration
    Antique
    Dyeing
    Embroidery
    General
    Hand Sewing
    History
    Lacemaking
    Mending
    Menswear
    Millinery
    Modern Elizabethan
    Musing
    Other Sewing
    Philippians 4:8
    Project Diary
    Quilting
    Regency
    Retro
    Self Made Pattern
    Self-made Pattern
    Terminology
    Victorian
    Vintage

    Blogs I Read

    The Dreamstress
    Male Pattern Boldness
    ​
    Lilacs & Lace
    Tom of Holland
    Fit for a Queen
    Line of Selvage
    Mainely Menswear
    Bernadette Banner

    Archives

    January 2023
    December 2022
    November 2022
    October 2022
    September 2022
    August 2022
    October 2021
    September 2021
    August 2021
    July 2021
    June 2021
    May 2021
    April 2021
    August 2020
    June 2020
    May 2020
    April 2020
    March 2020
    January 2020
    December 2019
    November 2019
    September 2019
    August 2019
    July 2019
    May 2019
    April 2019
    March 2019
    January 2019
    December 2018
    November 2018
    October 2018
    September 2018
    August 2018
    July 2018
    June 2018
    May 2018
    April 2018
    March 2018
    February 2018
    January 2018
    December 2017
    November 2017
    October 2017
    September 2017
    August 2017
    July 2017
    June 2017
    May 2017
    April 2017
    March 2017
    February 2017
    January 2017

    RSS Feed

Blog

Quilting

Clothing

About

Copyright Karen Roy
​© 2017-2022