Robes de Coeur
  • Blog
  • Quilting
  • Clothing
    • Menswear
    • Womenswear >
      • Self-Made Patterns
      • Commercial Patterns
    • Hats
    • Miscellany
  • About
  • Blog
  • Quilting
  • Clothing
    • Menswear
    • Womenswear >
      • Self-Made Patterns
      • Commercial Patterns
    • Hats
    • Miscellany
  • About

A Red Tam!

2/20/2017

3 Comments

 
Picture
During construction, the segments at the front of the hat got bisected, which looks quite neat from above.
As my sister has expressed the wish to wear more hats, and I am happy to oblige her, I sat down recently with some curtain remnants.  I decided to make a tam, though she fretted that it would be too "fussy".  The pattern was easy: 
  1. Decide how many panels or segment you want (I decided on six)
  2. Measure head circumference at the place you want the hat to sit (22.5").
  3. Divide head circumference by number of panels (22.5" / 6) and that gives you the size of the bottom of each panel (3.75")
  4. Draw a shape like the dome of the Taj Mahal, with the base being the above calculated length.  
  5. Make a long rectangle (about 24") for the band.
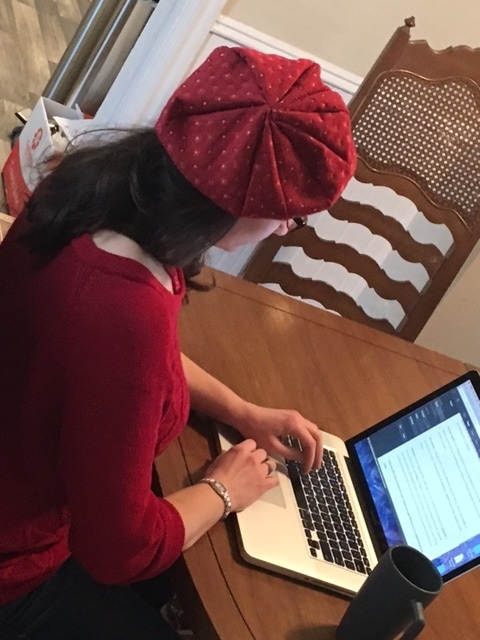
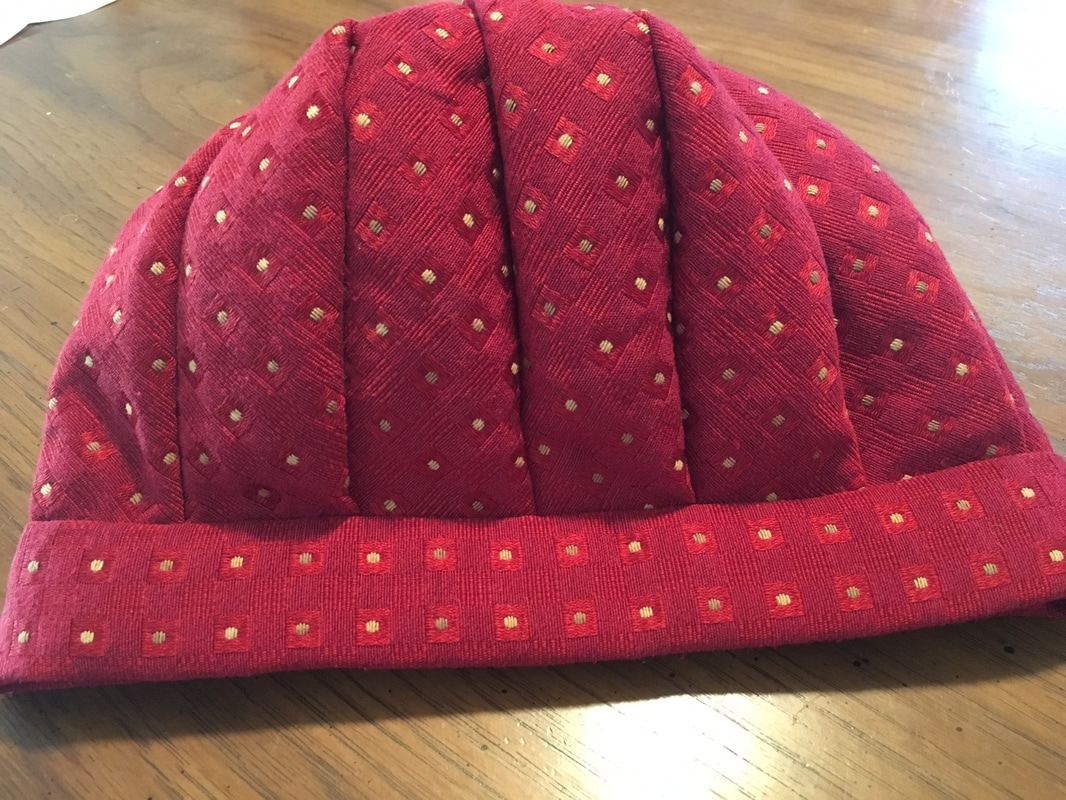
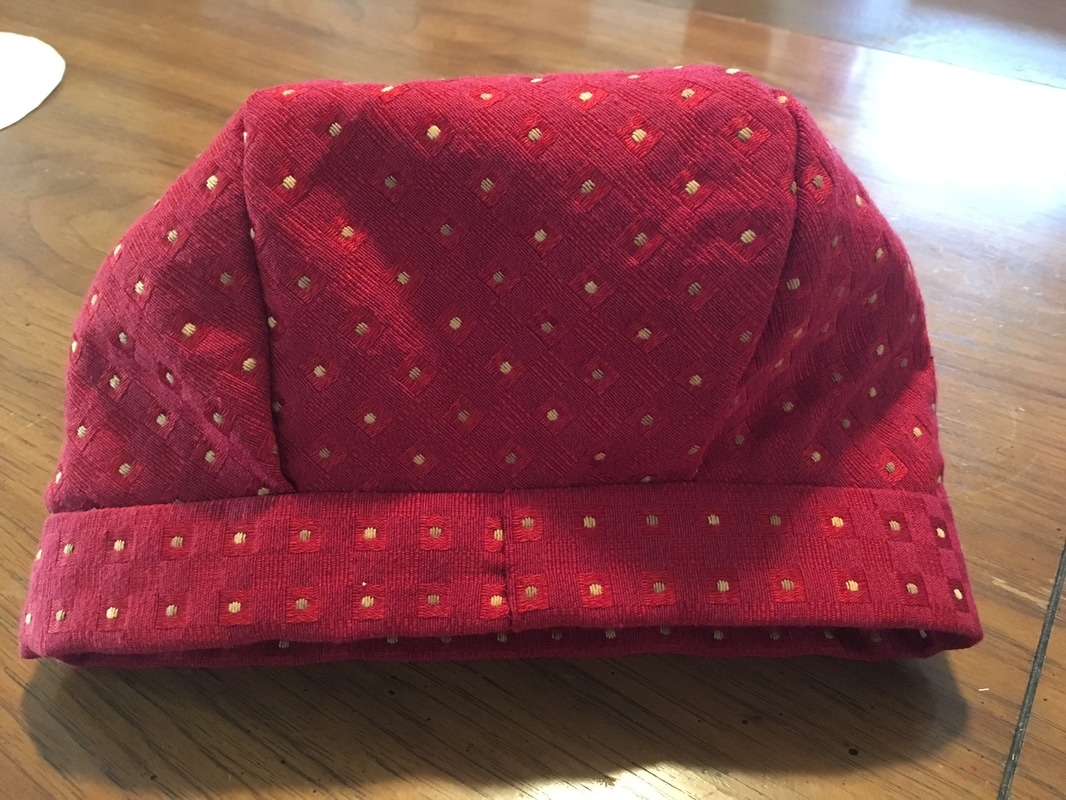
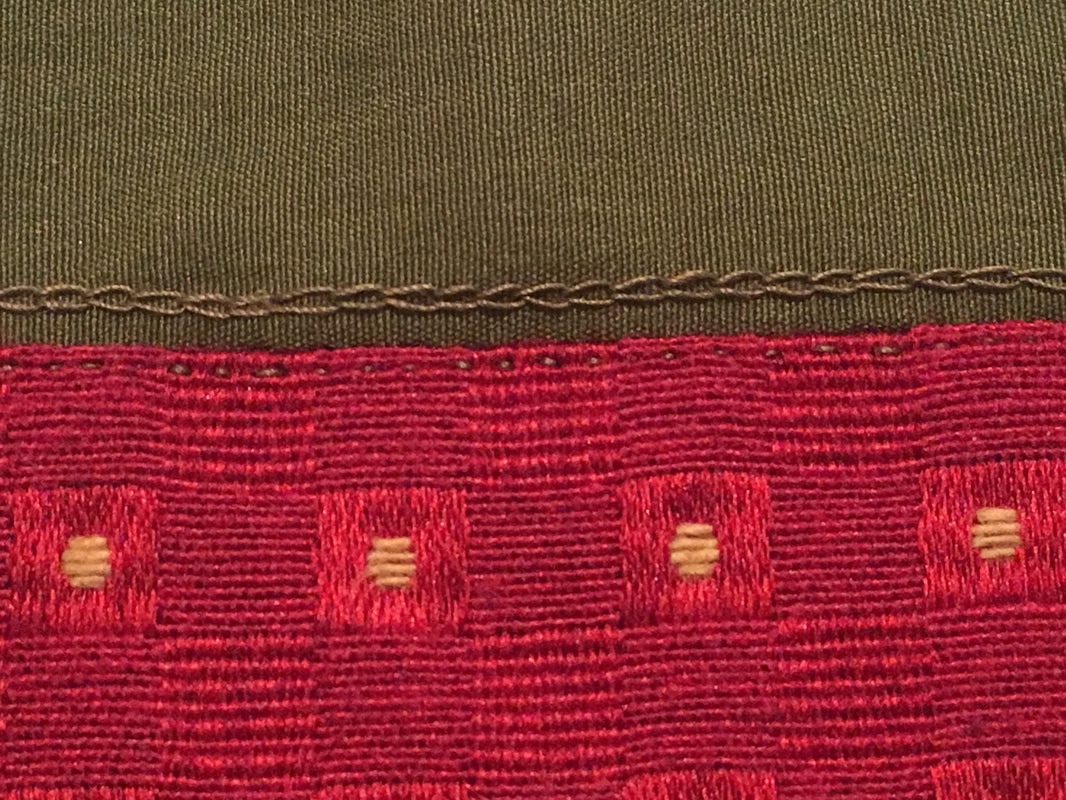
It was a quick project.  I cut the segments on the bias and the band on the straight, mainly so I could see the contrast.  I used the sewing machine for most of it, all of an evening, and hand-finished the band the next morning.  

The most fun came when I had my sister try on the hat during its construction.  At first, the curves of the Taj Mahal shape were too sharp, and she dubbed it the hat a "starfish" and said she'd never wear it!  So I shaved off the edges--twice--until she liked the curves.  But then she thought it was still too floppy and required too much adjusting, so I bisected some of the segments with faux seams, and this met with her approval.  (By "faux seams" I mean that I simply folded the segment down and sewed a teeny pin tuck on the inside: barely any width is lost, but from the outside it looks like two skinny segments instead of one big one.)  But then she decided she like it only half halved... if that makes sense.  She likes the bisected panels on the front of the hat, for shape and detail, and not on the back of the hat.  The pic at the top of this post shows the difference between front and back with a top view.  

To protect seam allowances from fraying with wear, I lined the hat with a bit of green cotton broadcloth from an old nightgown of mine.  Here are some completed hat pictures, with comments.  
Picture
The front of the hat, with segments bisected, giving the illusion of more. See how the extra seams make the hat stand up more?
Picture
The back of the hat, with the original, larger segments. I put the seam of the band at center back so she'd always know how to put it on.
Picture
These are the two fabrics used in the hat. This picture is actually of a quilt square I made from the scraps.
Picture
The hat inside out. The green fabric is tacked to the crown at the top and gathered into the band at bottom. The white stripe is the selvedge of the band fabric.

FINISHED HAT A HIT!

Picture
3 Comments
The Sister
2/20/2017 02:50:27 pm

The Starfish Hat is a very cheery addition to my collection and enablement of one of my 2017 goals to "wear more hats". Thanks, Karen!

Reply
Karen Roy link
2/21/2017 11:29:09 am

Oh, it is NOT a starfish! ;)

You should see what I'm making you now... It's a cross between an envelope hat and a Glengarry cap, in brocade. You have been warned!

Reply
The Sister
3/3/2017 09:38:18 am

I'll do myself the favor of not looking up "envelope hat" or "Glengarry cap", so as to save myself from undue fretting. I'm sure it'll be lovely!


Your comment will be posted after it is approved.


Leave a Reply.

    Karen Roy

    Quilting, dressmaking, and history plied with the needle...

    Categories

    All
    1910's
    Alteration
    Antique
    Dyeing
    Embroidery
    General
    Hand Sewing
    History
    Lacemaking
    Mending
    Menswear
    Millinery
    Modern Elizabethan
    Musing
    Other Sewing
    Philippians 4:8
    Project Diary
    Quilting
    Regency
    Retro
    Self Made Pattern
    Self-made Pattern
    Terminology
    Victorian
    Vintage

    Blogs I Read

    The Dreamstress
    Male Pattern Boldness
    ​
    Lilacs & Lace
    Tom of Holland
    Fit for a Queen
    Line of Selvage
    Mainely Menswear
    Bernadette Banner

    Archives

    January 2023
    December 2022
    November 2022
    October 2022
    September 2022
    August 2022
    October 2021
    September 2021
    August 2021
    July 2021
    June 2021
    May 2021
    April 2021
    August 2020
    June 2020
    May 2020
    April 2020
    March 2020
    January 2020
    December 2019
    November 2019
    September 2019
    August 2019
    July 2019
    May 2019
    April 2019
    March 2019
    January 2019
    December 2018
    November 2018
    October 2018
    September 2018
    August 2018
    July 2018
    June 2018
    May 2018
    April 2018
    March 2018
    February 2018
    January 2018
    December 2017
    November 2017
    October 2017
    September 2017
    August 2017
    July 2017
    June 2017
    May 2017
    April 2017
    March 2017
    February 2017
    January 2017

    RSS Feed

Blog

Quilting

Clothing

About

Copyright Karen Roy
​© 2017-2022