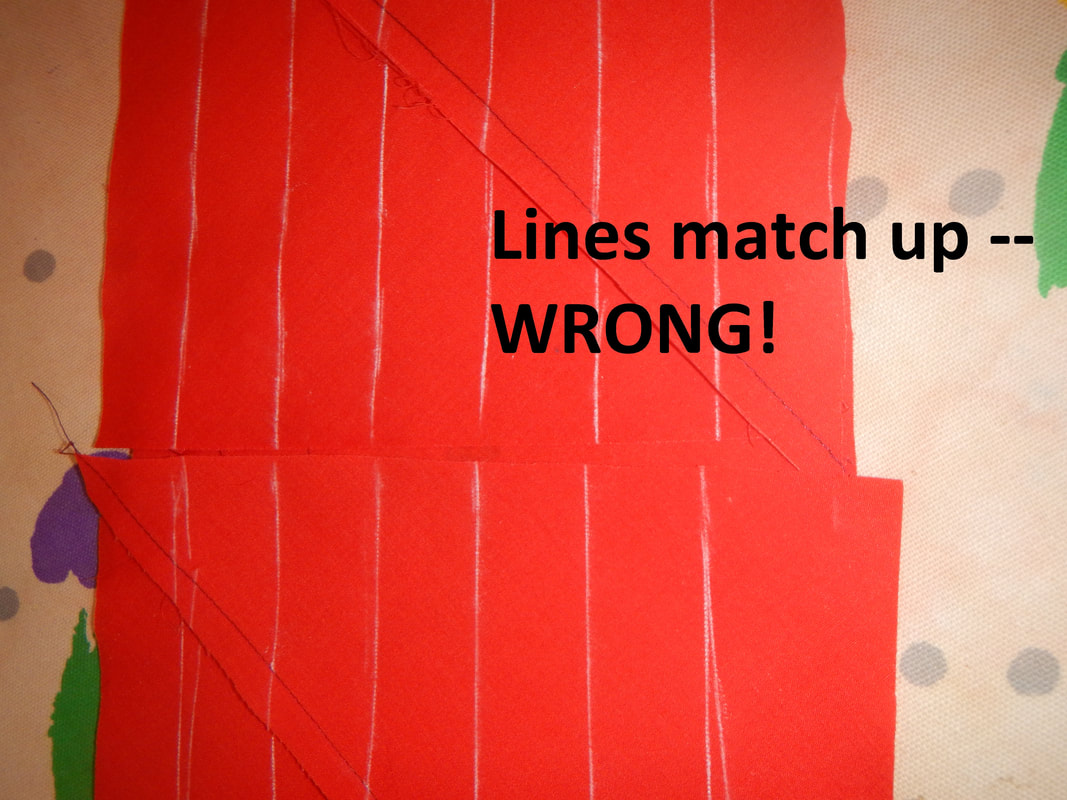
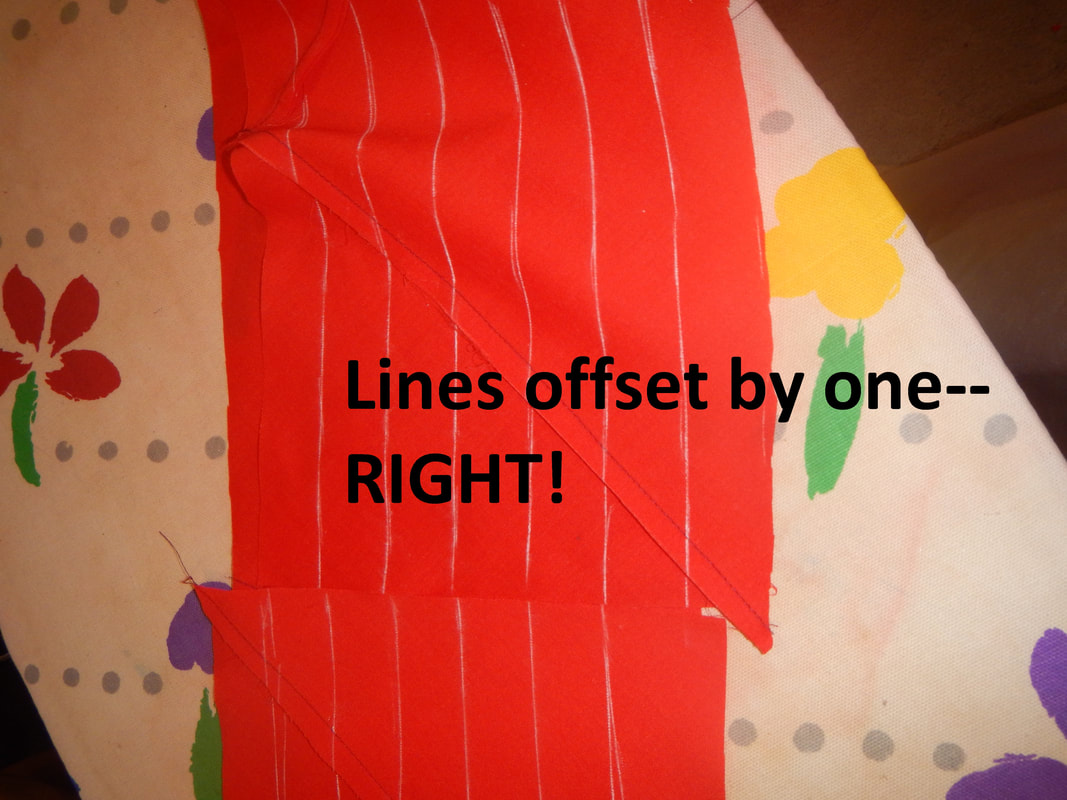
HOW TO MAKE BIAS TAPE First I cut two squares of fabric and slice them diagonally to make right triangles. The two sides that form the right angle are on grain or on cross grain, and the longer, diagonal side, is on the bias. Then I sew the triangles together along their right sides to make a long parallelogram. Then to square off the edges, I take one last triangle, cut that in half, and put it on the ends. I iron all the seam allowances in the same direction. If you look at the length of this rectangle, it's all on the bias: 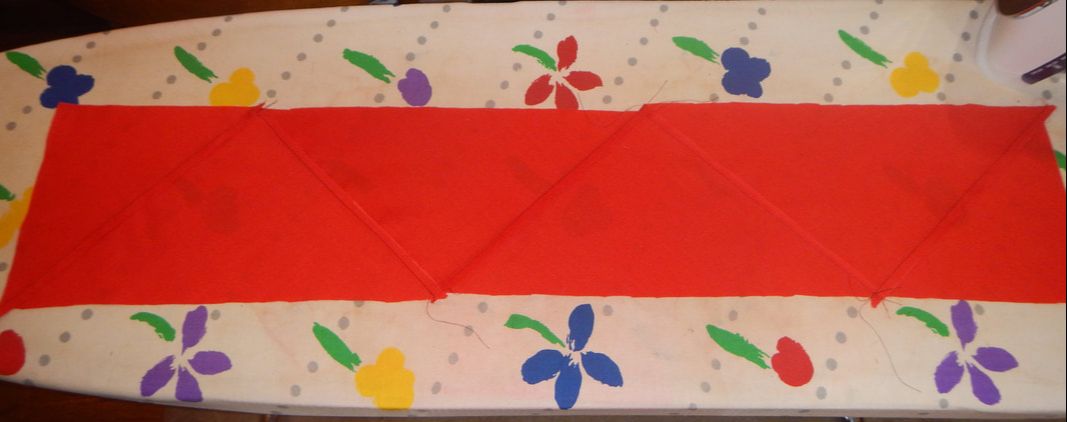 Next, I draw parallel lines one inch apart down the parallelogram. That's because I want my bias tape one inch wide; you can of course make it wider or narrower depending on your needs. You may want to fold or double fold your bias tape to make bias binding. In that case, you'll need to decide how wide you want it when it's folded, then add a quarter inch or so to each side to get your measurement for this step. You can use a bias folding doohickey (it's a technical term!) or just follow the clever instructions from By Hand London to iron your folds in. As it happens, I didn't fold my bias tape for this project, so I just marked one inch strips and kept it simple:  Now, I fold the rectangle in half so the lines come together at their ends. This'll be my last seam before I cut along the lines. It's important to get one thing right: if I line the lines up perfectly, that is wrong, because then when I cut I'll get multiple little rings of bias tape. I want one long strip, so I have to offset the lines by one. I sew the rectangle together like that (offset), and press the seam to the same direction as the others.
Finally, I start cutting the lines in the direction that allows me to go easily over the ironed-down seam allowances. Sort of like petting a cat: go in the direction the fur grows! :D 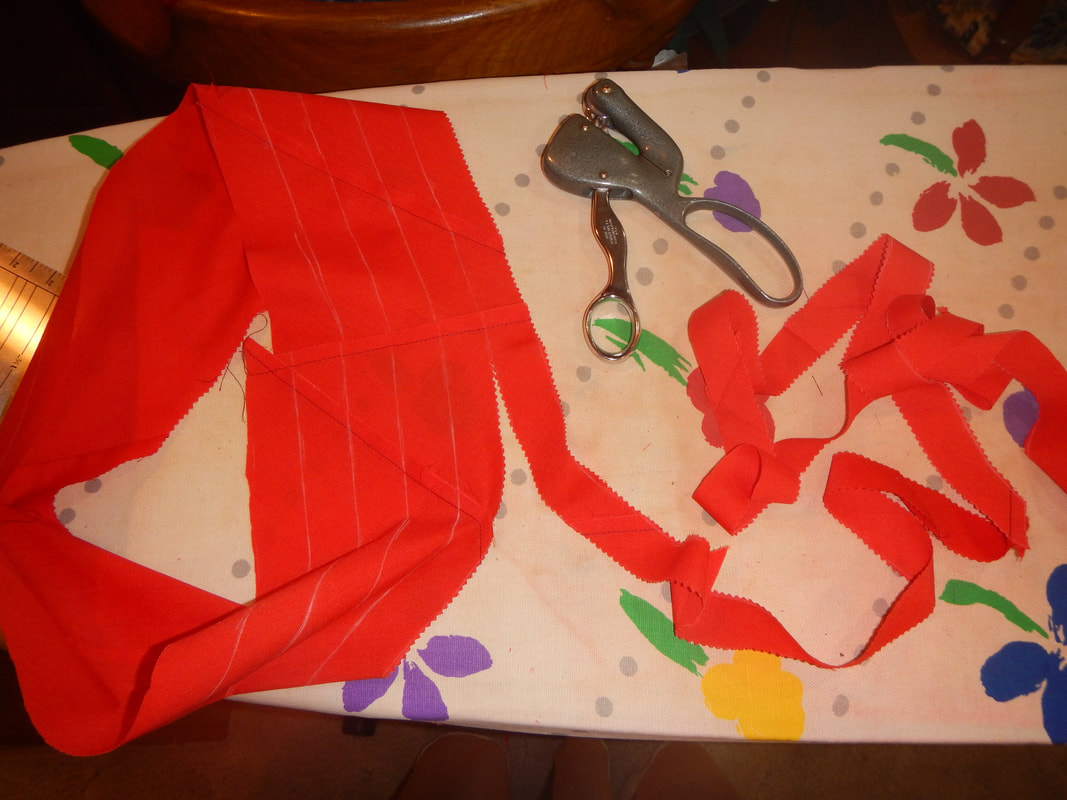 I use my pinking roller for this, which makes a pretty zig-zag edge, but isn't actually necessary. Pinking is a means of keeping fabric from unraveling, but fabric cut on the bias isn't going to unravel much anyway, so I could use regular scissors. A THOUGHT ON REPETITIVE STRAIN INJURIES AND ERGONOMICS Whether using pinking shears or regular scissors, cutting long strips or heavy fabric can be hard on the hands. In my case, I have a previous soft-tissue injury which I need to be careful of. See, I have many years of typing jobs behind me, and I'm afraid I haven't ever typed properly... I default to the claw position for my wrists. A couple years ago I had to leave a job because the repetitive strain of this was causing burning in my forearms that kept me up at night and made typing impossible. When I left the job (and quit some volunteering I was doing, too), it took many months for my hands to recover enough that I could hand-sew or hand write! It was scary, because I love to work with my hands! So take this warning: whatever you do with your body, do it sensibly and ergonomically! You only get one body, and it breaks easily. And ironically, the smallest and softest tissue takes the longest to mend. Fine motor skills are a gift worthy of protection.
1 Comment
The Sister
9/25/2017 01:52:32 pm
My oh my... where did you get such cool, old-fashioned pinking shears? Leave a Reply. |
Karen Roy
Quilting, dressmaking, and history plied with the needle... Sites I EnjoyThe Quilt Index Categories
All
Archives
March 2024
|

 RSS Feed