|
A repeat client of mine always surprises me with interesting challenges. When he told me he wanted high-waisted jeans, the request plunged me into a world of patterns, construction methods, rivets, and body-types that were all new to me. Here is the tale of the first pair I've made him, which I call the charcoal jeans because of their color. SHOPPINGThe first step was to research jeans patterns for men, with an eye to the classic look of Levis before the low-rise became so prevalent. Male Pattern Boldness has a Jeans Sew-Along with plenty of useful information. I decided to buy KwikSew 3504, a basic five-pocket jean pattern with a medium rise and two leg options (straight cut or boot-leg). Then I emailed the McCall's company (the parent company for KwikSew) to make sure that my intended use didn't constitute commercial production or manufacturing (which is prohibited according to the pattern envelope). They assured me that it was fine to charge him for my experience to alter the pattern and make the pants, as long as I wasn't mass producing things for ready-to-wear sales. So I bought the pattern. (I also printed out their email and put it in the pattern envelope, because I'm a dot-every-i kind of gal!) When I went shopping with my client, we picked out:
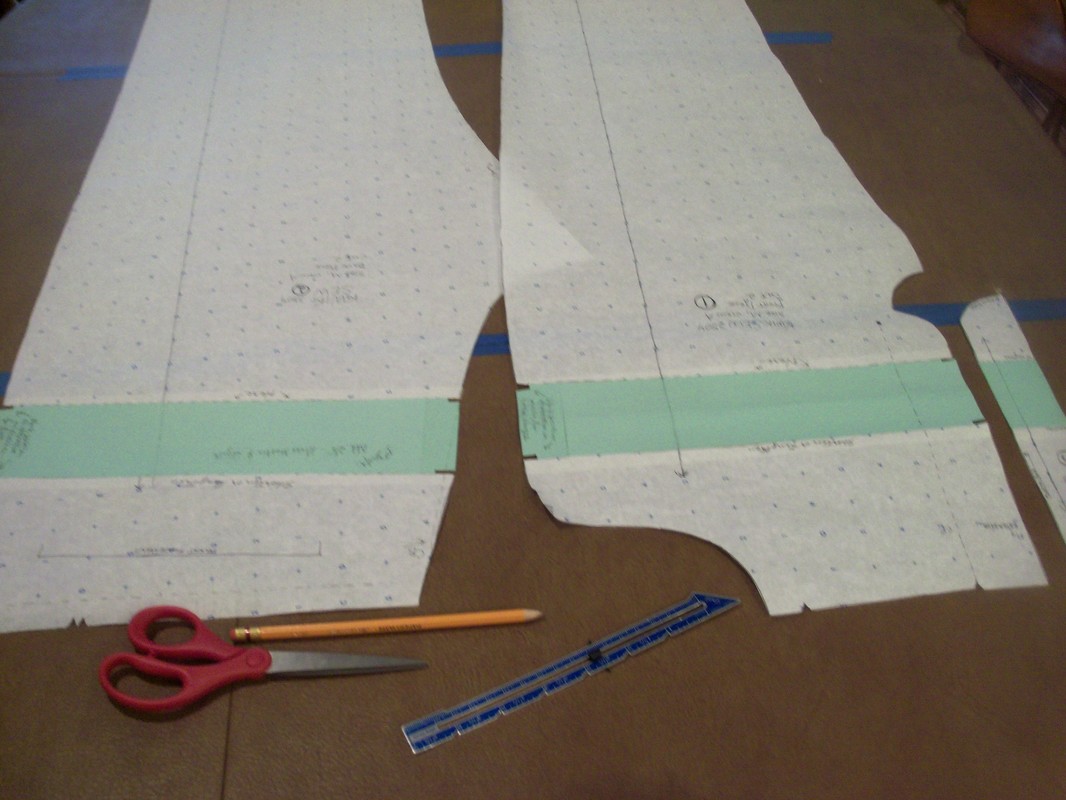
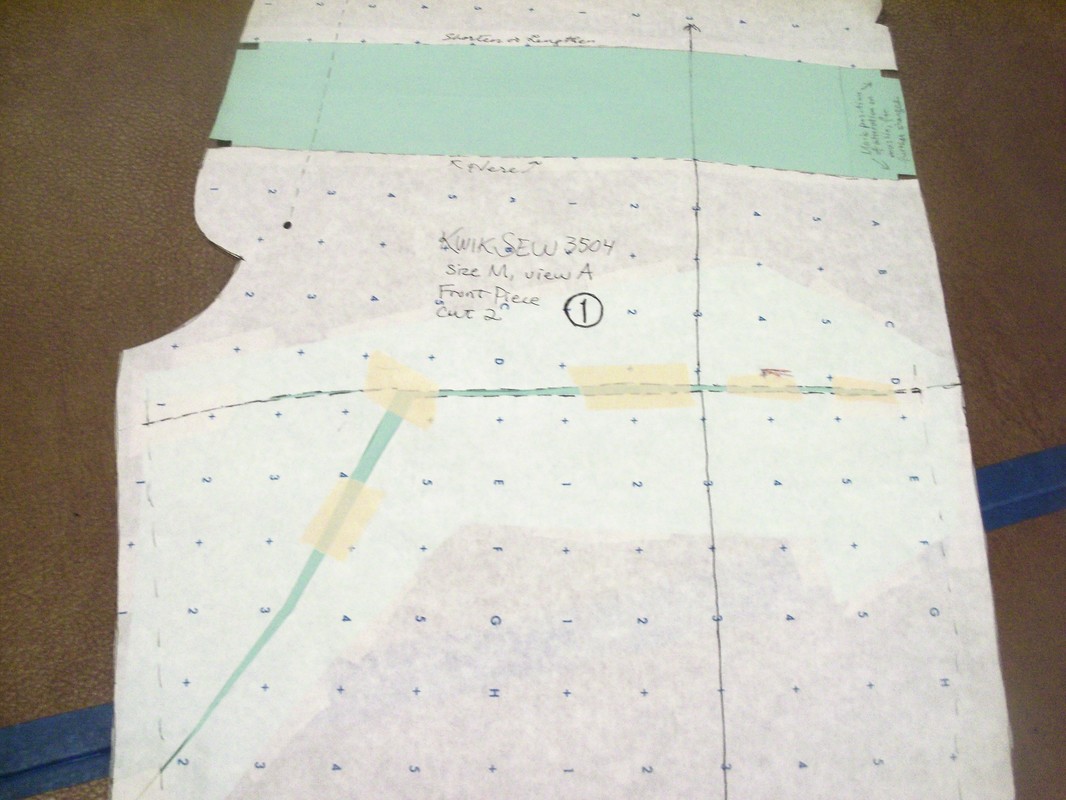
PATTERN WORKMy client is tall, but not long-legged; his height comes from a long torso. So I needed to shorten the leg and lengthen the rise. Happily, KwikSew included the shorten/lengthen lines on the pattern. So I traced the pattern in medium to a new piece of paper, cut the rise, and added about 2 inches:
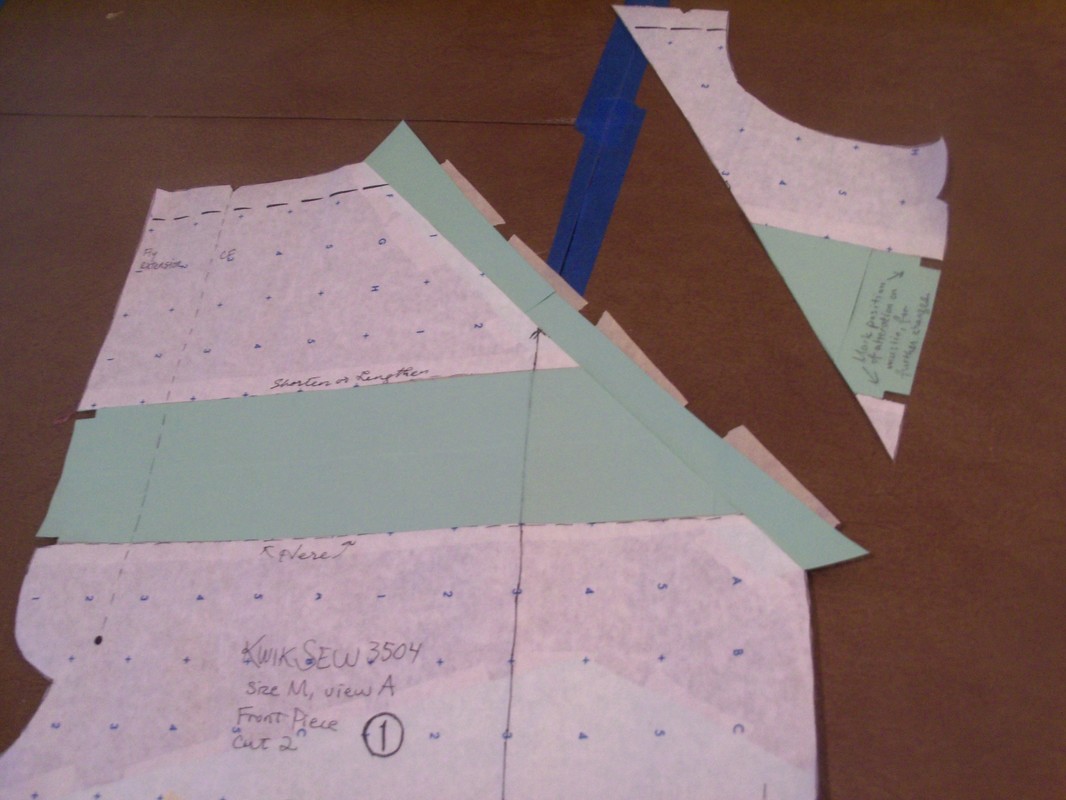
Then I made a quick muslin version, sans working pockets. He tried it on. On the up side, it fit well in the mid-section! I pinned out some gaping at the small of his back (which was to be expected given how I'd lengthened the rise). The front was tight when he sat down, but perfect when he was standing. However, the legs were peculiarly voluminous! I don't know if this is the nature of KwikSew's jeans or just a quirk of fitting it to my client. However, I needed to take out a huge horizontal fold around the upper thigh, and taper the legs several times to get things right. Then I still wasn't entirely sure about the butt (ahem, "derriere", or "rear", or "seat"! Because custom sewing professionals don't say "butt"!)... I didn't want him to have mono-butt, but there were so many pins and seam allowance changes in that area that I couldn't figure out what I was looking at. I had him sit, and there was enough ease in the back. Once he'd gone, I used pen to mark my pinned changes before the pins could fall out. Then I disassembled the muslin and tried to figure out how to apply the pinned changes to the paper pattern. In this endeavor, I was assisted by other bloggers who have over the years recorded their experiences in the same. In particular, Cation Designs' page about That Diagonal Pants Dart showed me one method of altering the flat pattern. I tried it, but found it confusing (I probably did it wrong). Then I tried a slightly different method. Below are my two attempts:
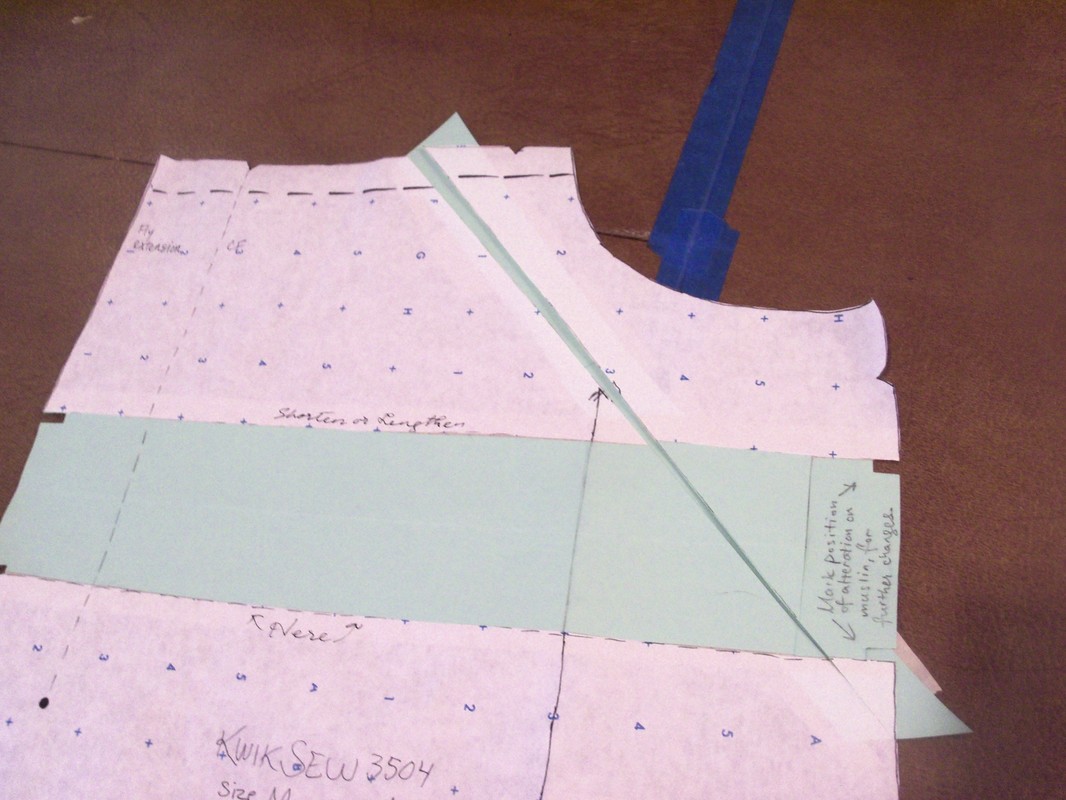
And here's how I added a teensy bit to the front:
FRUSTRATION WITH DENIM'S CROSS-GRAIN!In the course of making the charcoal jeans, I had several teeth gnashing moments. For instance, I pre-shrunk the denim, as you do, and lo, after that, it wouldn't true! I shredded both cut ends to get them down to exact cross grain, and laid them selvedge to selvedge, thinking that it would have to come right (it always has with other fabrics!), and found huge ripples in the folded edge! So I pulled it on the bias to try to rectify this, and that made it saggy, but didn't make it true! Aargh! My nose started to itch and I stormed about the house telling my woes to the cats, demanding to know what kind of wacky loom configuration could make this happen, and then washed the denim again to shrink out all the warping I'd introduced with my bias pulling. (If my housemate is reading this, aren't you glad we have a high-efficiency washer?) Then I went online and searched for "how to true denim", which yielded mostly useless results (lots of sites that weren't using "true" as a verb), but did lead me to this discussion about truing fabric. In the comments lower down, Speech girl says " Fabrics with a diagonal weave like denim and twill will generally not square up so I just make sure that the lengthwise ends are parallel so that the lengthwise grain will be correct and try not to worry about the crosswise grain," and Nancy K agrees: "Some fabrics will not square up and can't be, like twill weaves and then when you fold them and line up the selvedges, you would lay it so that there are no wrinkles on the folded edge." I can't understand how a "diagonal weave" works... when you set up the loom, the shuttle is still shooting back and forth perpendicular to the grain, right? So why would it end up diagonal? I know the surface pattern is diagonal, but surely the weave can't be...? My befuddlement notwithstanding, I bowed to the collective wisdom and cut on the grain even though the cross-grain was slanting all cattywampus. I hate doing things like that when I'm working for other people... if it were just for me, I'd feel better about being unsure of my actions. On the up side, at least I washed the denim first! When I bought it off the roll, it was crisp and perfect, folded selvedge to selvedge with no skew. But when I washed it, it skewed about three inches diagonally and wouldn't be corrected. Imagine if I'd made the jeans first and then washed them! SOME CONSTRUCTION PICS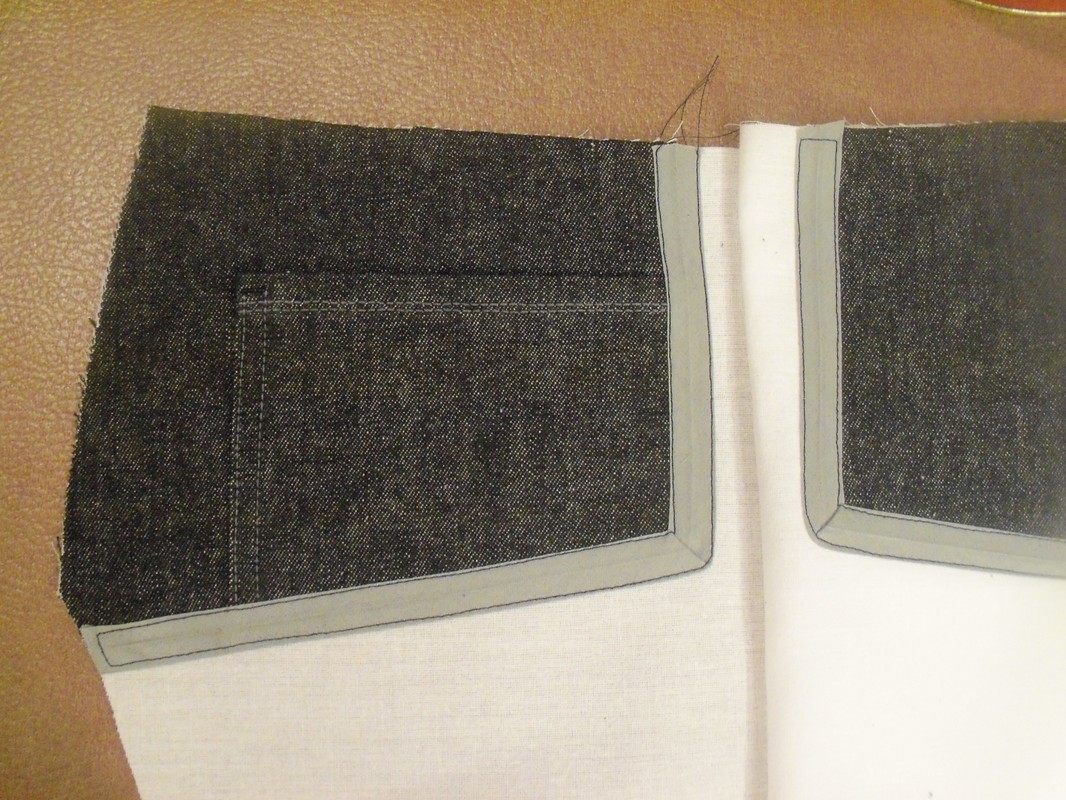 front pocket facings -- I used bias tape to cover the raw edges so it won't fray when he puts his hands in his pockets. 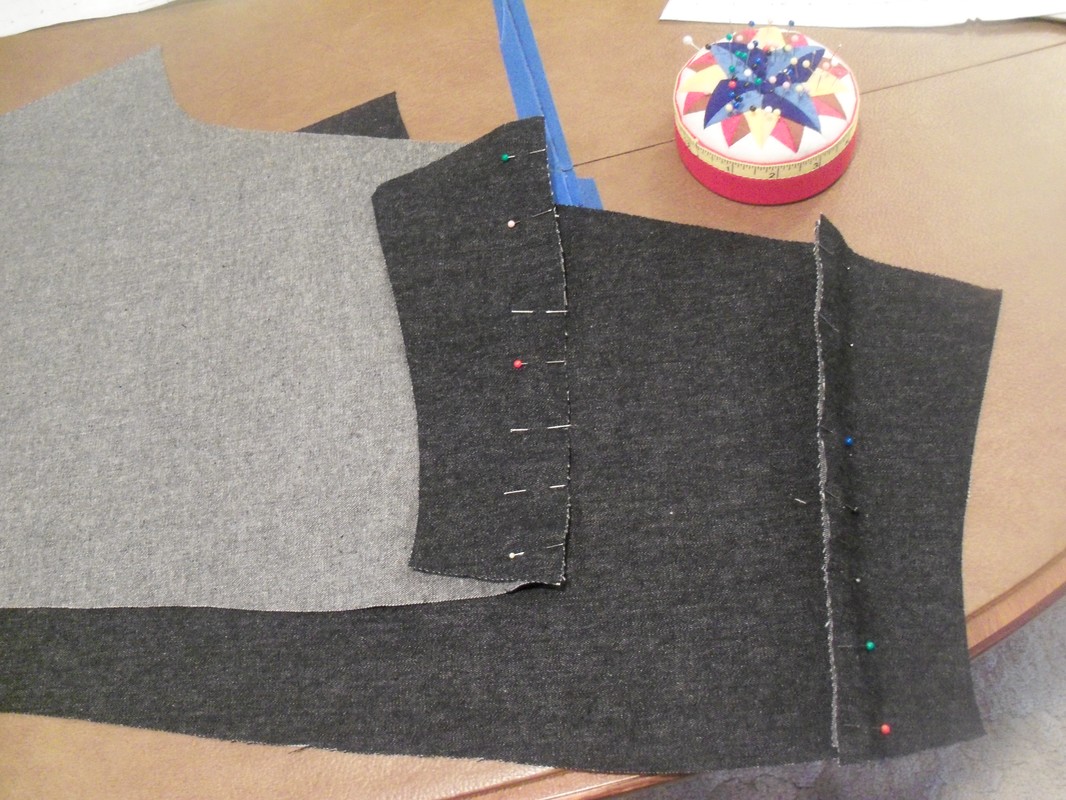 attaching yokes to back legs, wrong sides together 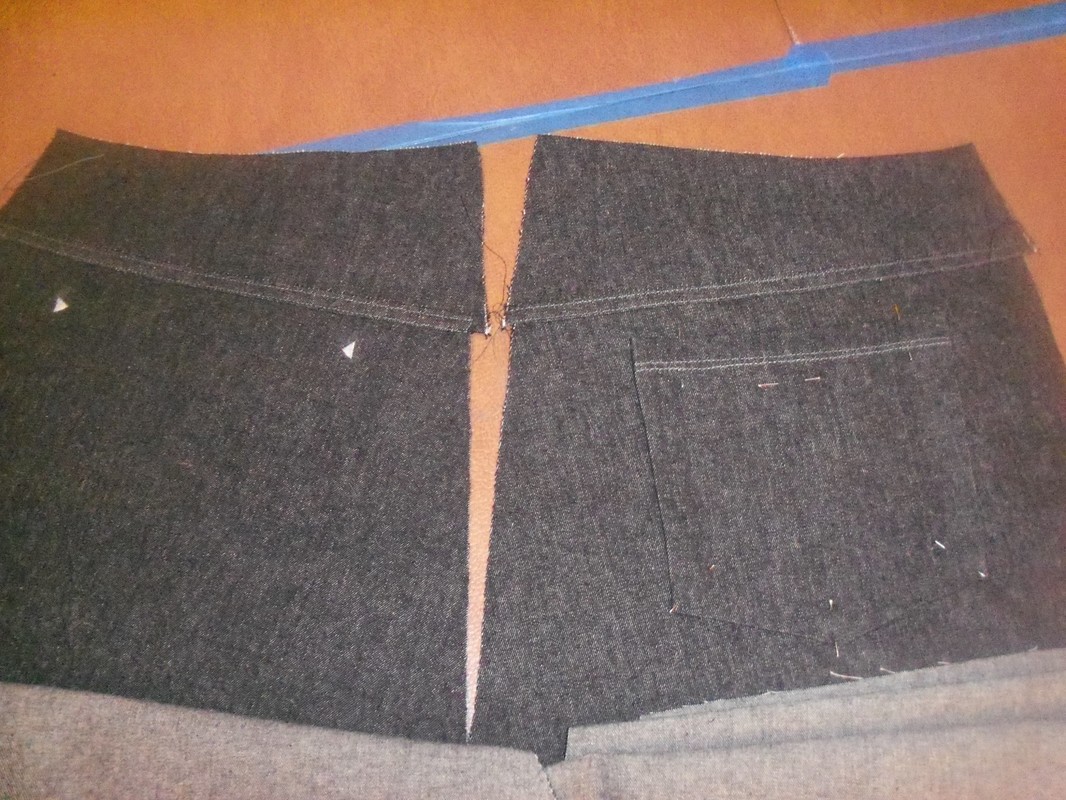 Yoke seams felled down. Pocket placement chalked on left, pinned on right. FINISHED PANTS
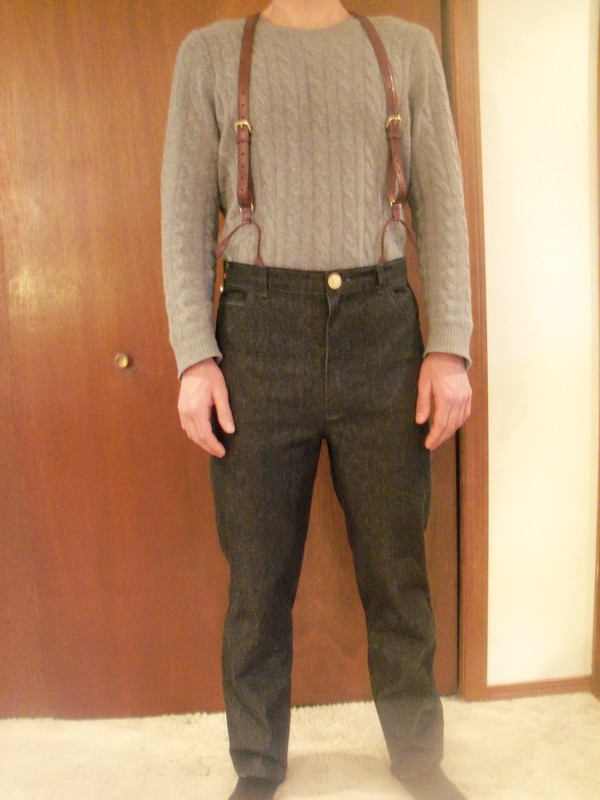
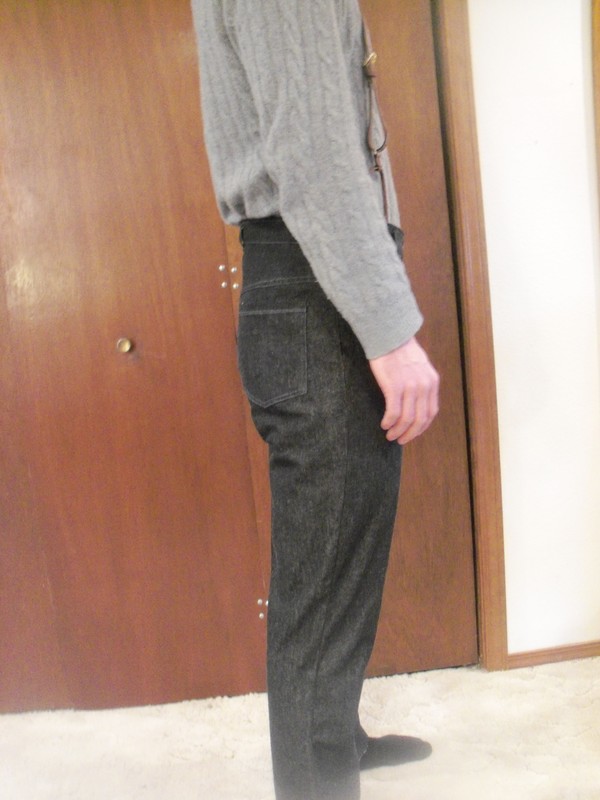
My client's instincts regarding rise were spot on: though these jeans go all the way up to his navel, they do not look disproportionate. They shorten the appearance of his long torso. The low-rise jeans which are all the rage right now in RTW give him an unbalanced appearance. CORRECTING THE MONO-BUTT?The one thing I'm not happy with is the final rear view. It's not bad (in fact, it's similar to the look of the commercially made jeans he walked in wearing that day), but I'd rather see more definition of the two cheeks. 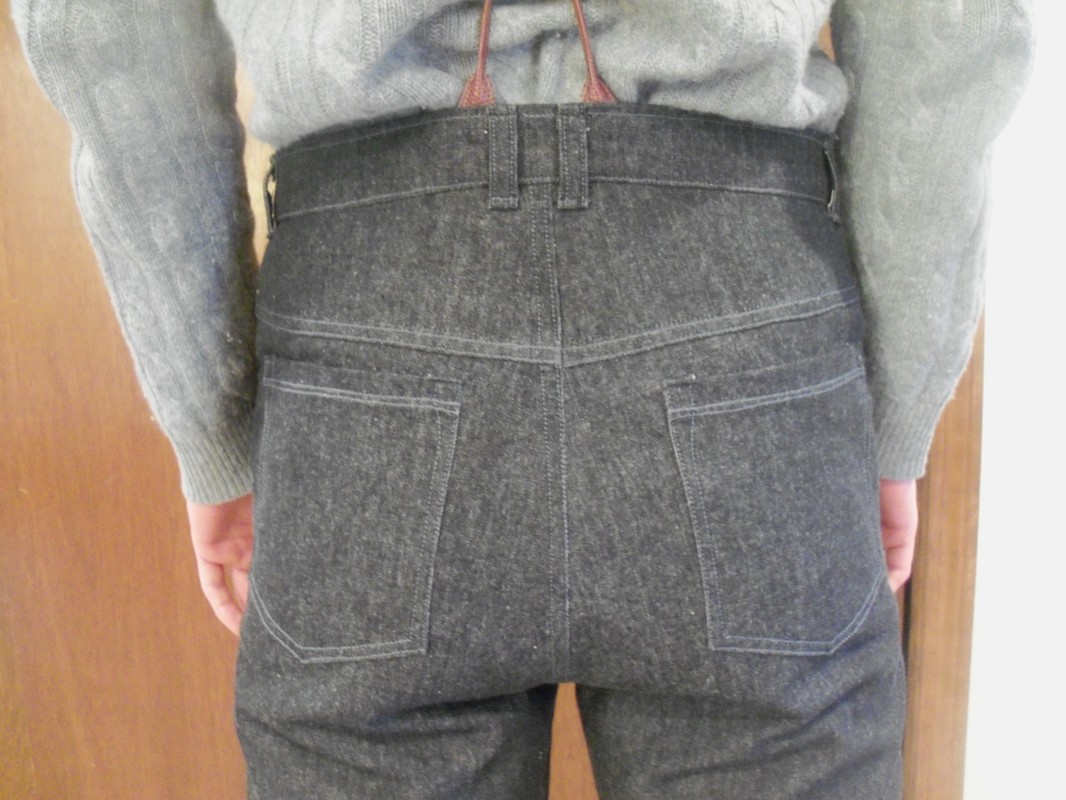 For my client's sake, and for my own future sewing endeavors (I now want to make myself jeans that actually work for my body!), I must figure out the mono-butt problem! But more on that later.
1 Comment
The Sister
3/24/2017 11:46:39 am
You really did a nice job with these jeans! I agree about the rise: it looks totally proportionate and balanced. And although your client's rear is not defined, at least we onlookers know that he HAS one, as opposed to the current trend of men walking about with their jeans clinging perilously below their butts, hanging onto Lord knows what. ;-) Leave a Reply. |
Karen Roy
Quilting, dressmaking, and history plied with the needle... Sites I EnjoyThe Quilt Index Categories
All
Archives
March 2024
|


 RSS Feed