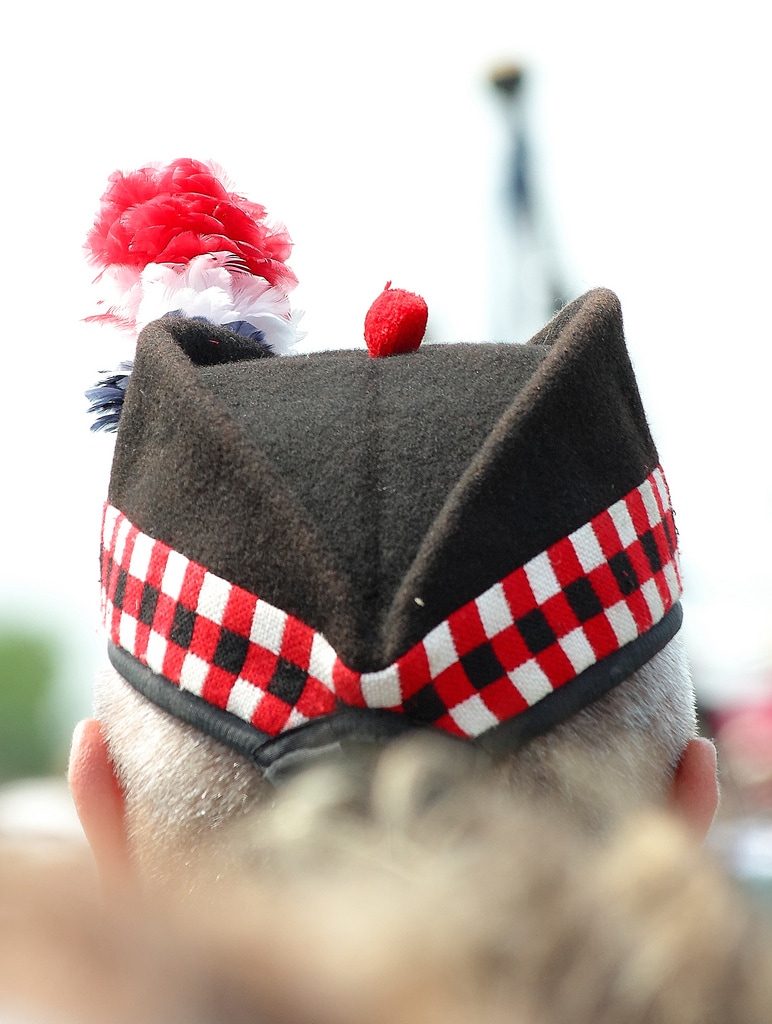
[Picture by ludovic (Ludo29880) on Flickr. Creative Commons license here.] So I resort to the looking-really-closely tactic. Many Glengarry caps are of blocked felt, but some are fabric. The overall shape is similar to an envelope cap and has the same property of being easily flattened. They seem to be composed of two shapes: the vertical sides are shaped a bit like Ayers Rock (as it's seen from the ground), and the top is like an almond, creased lengthwise. So two Ayers Rocks and one almond. Other details include ribbons dangling from the back, cockades or insignia perhaps, sometimes feathers, and a bobble on the top Historical pictures often show the cap at a forward tilt and over one ear, and in some pictures it looks like the front of the "Ayers Rock" may be a bit taller than the back. Modern pictures generally show a more straight method of wearing and a more symmetrical front and back view, which I think lacks the style of the tilt. Anyway, I decide to play with these shapes. FABRIC
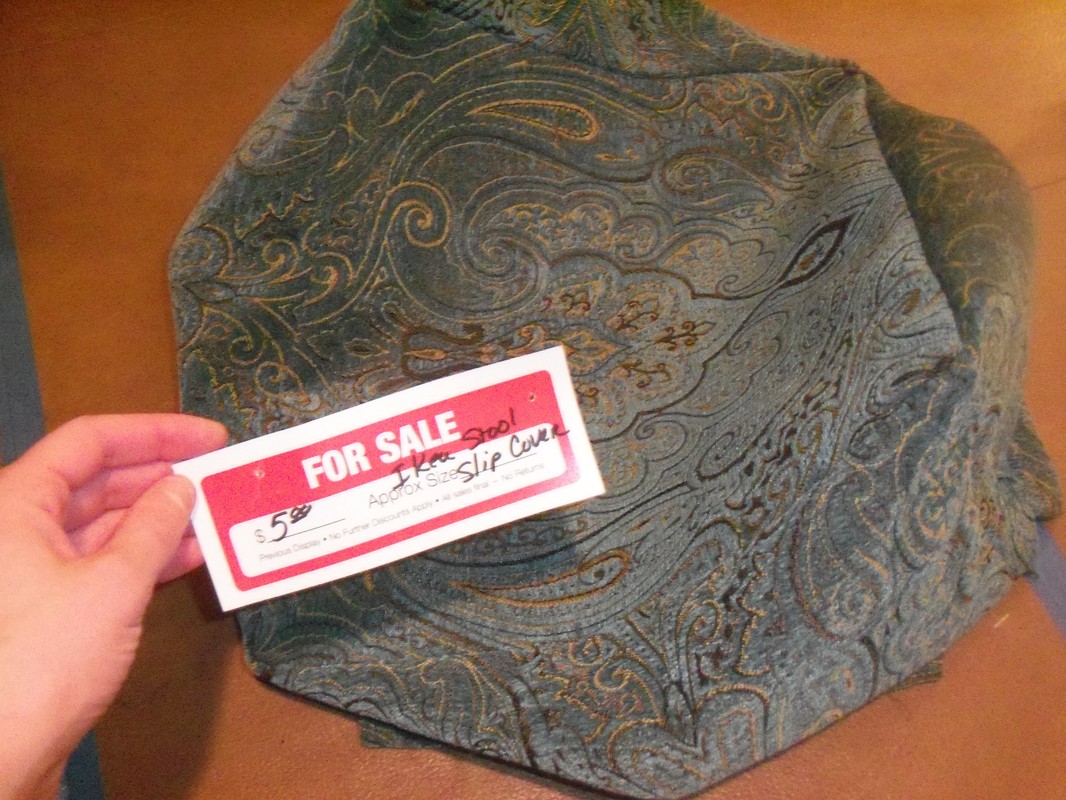
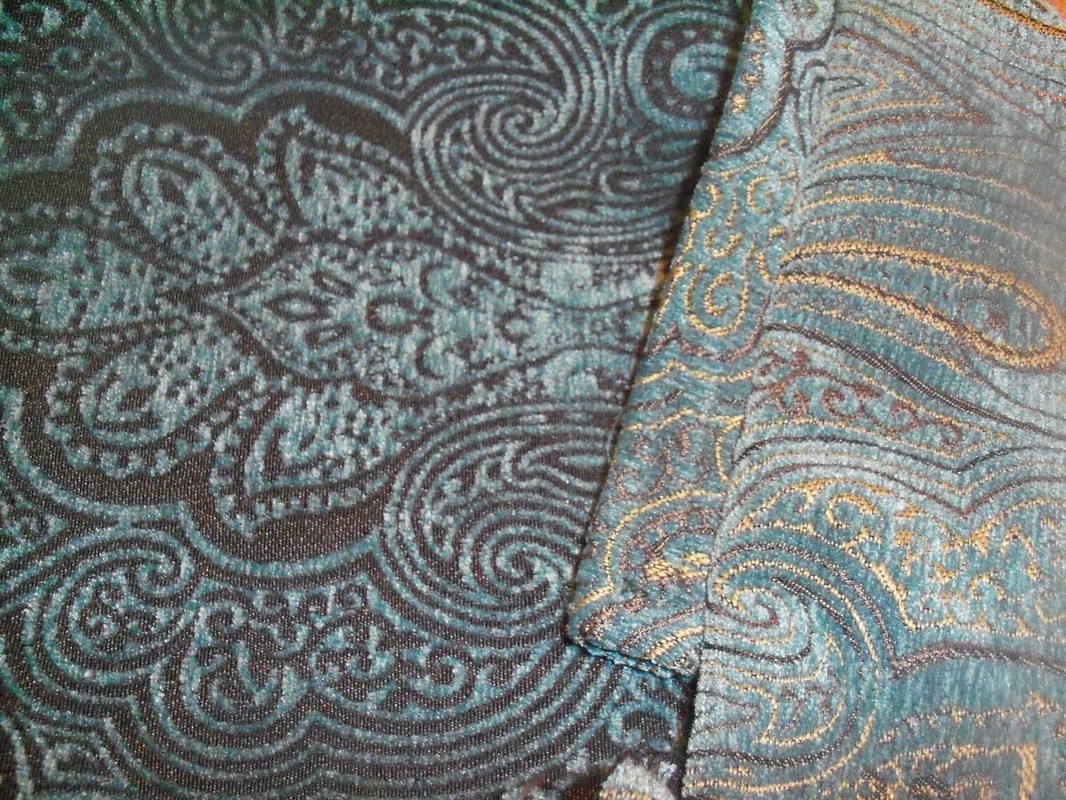
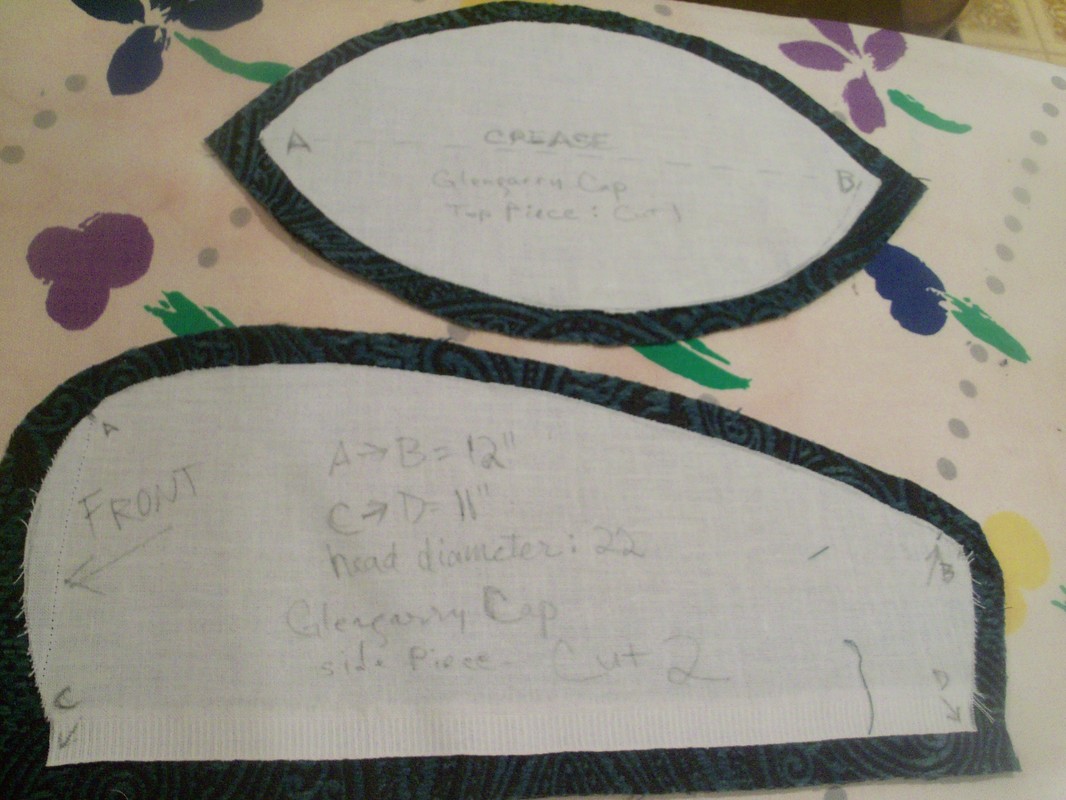
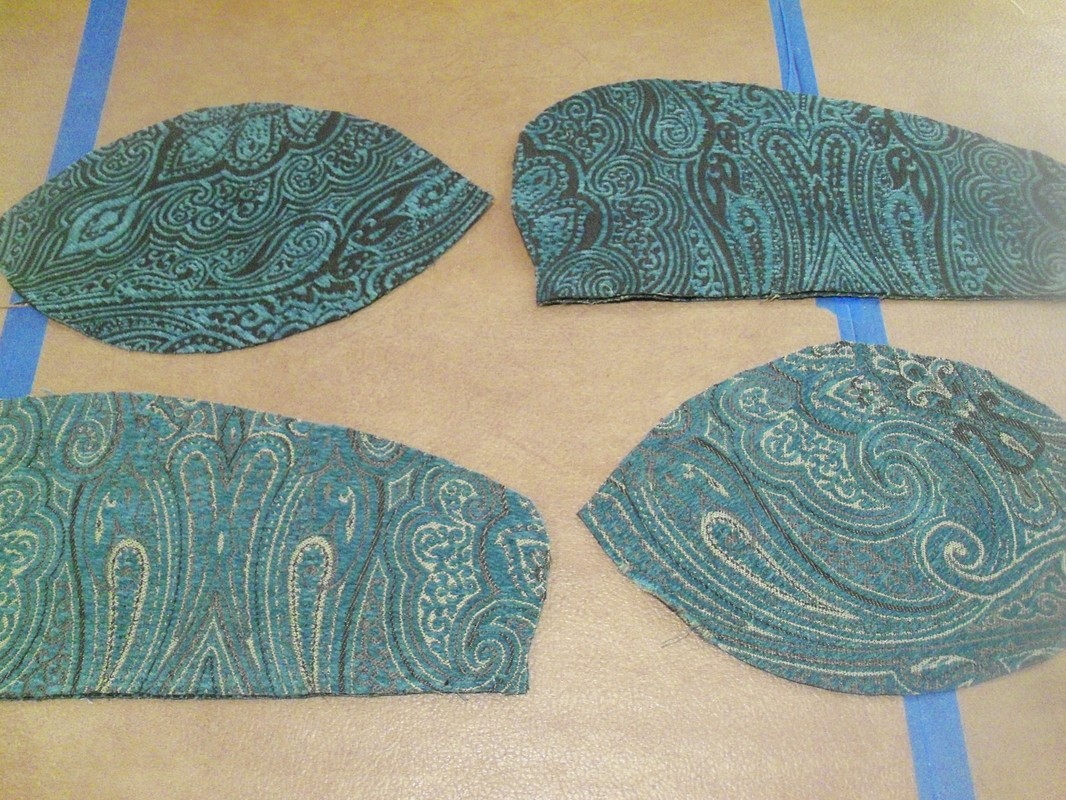
The fabric comes from the discount section of the fabric store. It had been sewn into a slipcover for a little stool and used for display. I picked it up for five dollars. I love both sides of the fabric: the outside has a bit of gold in it, which shifts the blue background into looking more green; the inside is blue and charcoal. I like the outside for myself and the inside for my sister. So I wash it, then take it apart to see what I've got:  Just enough for two hats, if the tops of the hats come from the big rectangle and the sides from the two long rectangles. THE PATTERNI measure around my head about where I want the cap to sit, and get 22 inches. So I draw a line 11 inches long and call it the bottom of Ayers Rock (C to D on the diagram). I draw by eye... what seems like a good height and size. Then I pick two points (A and B) on the top of the shape, where I guess I'll attach the almond shape, and measure between them. I draw an almond shape with sides that fit into that space.  At this point I really should make a muslin... but do I? No. I've made hats before, and I want to get working on the pretty fabric! (Famous last words...) I cut the pieces for two hats... so four Ayers Rock pieces and two almonds. Since my pattern has no seam allowances, I add them as I cut.
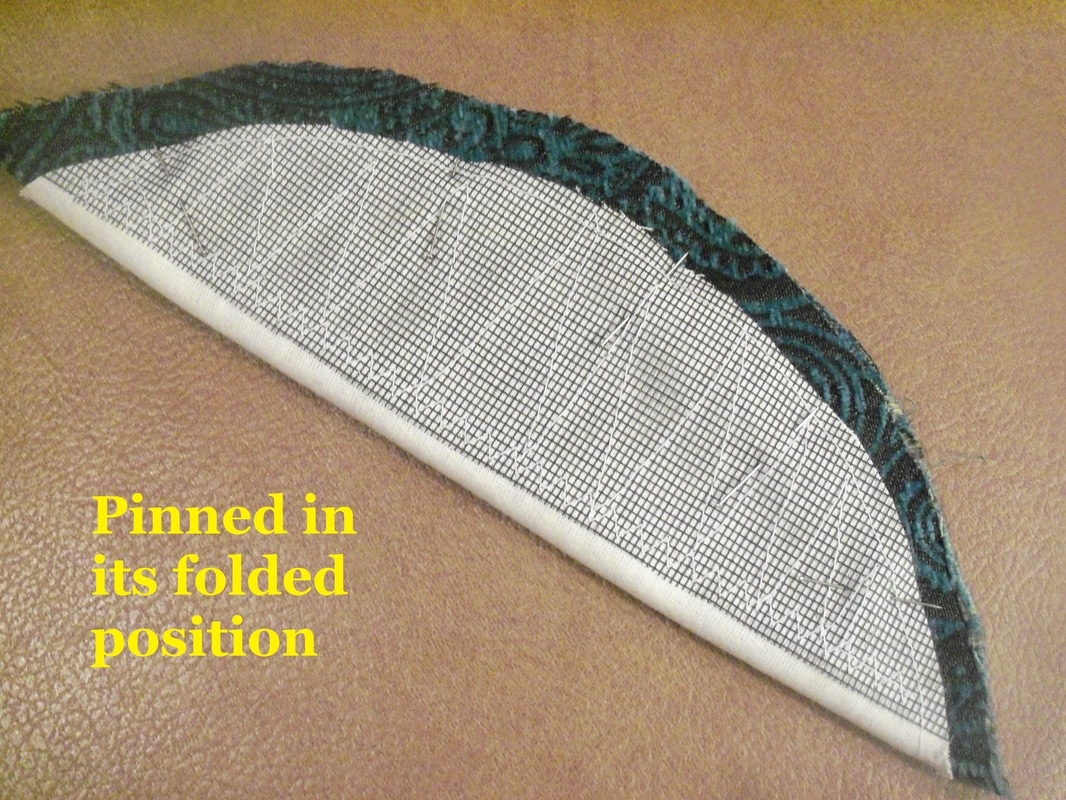
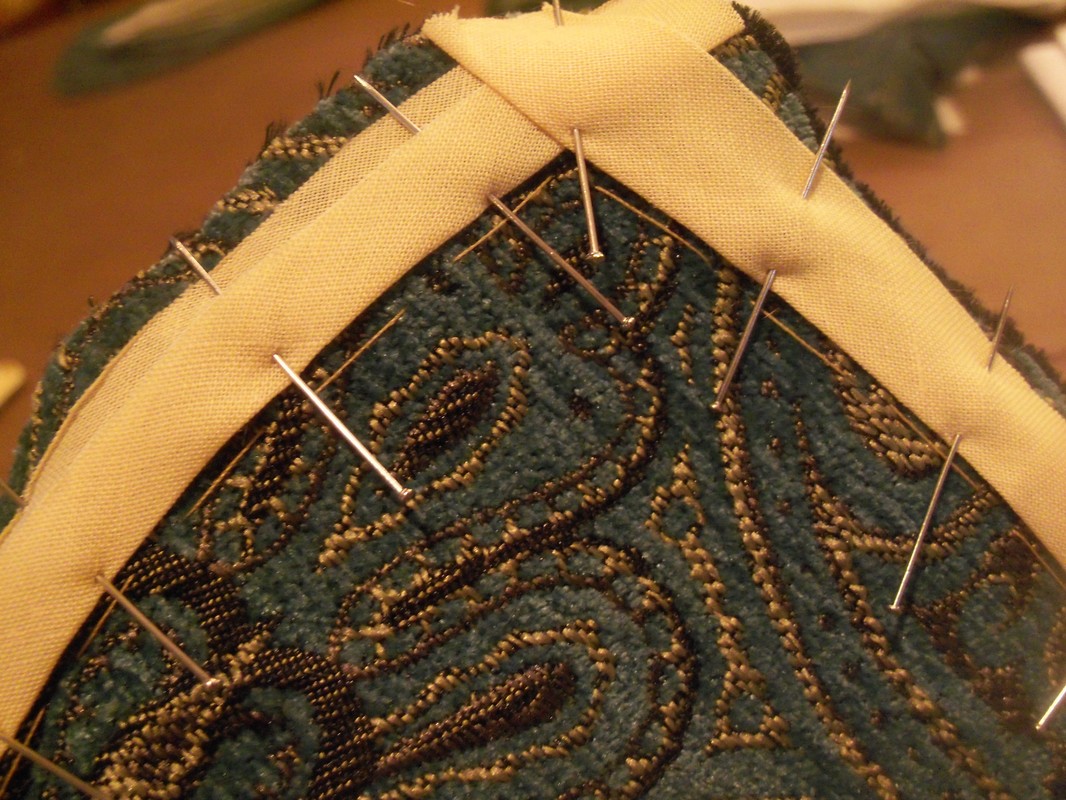
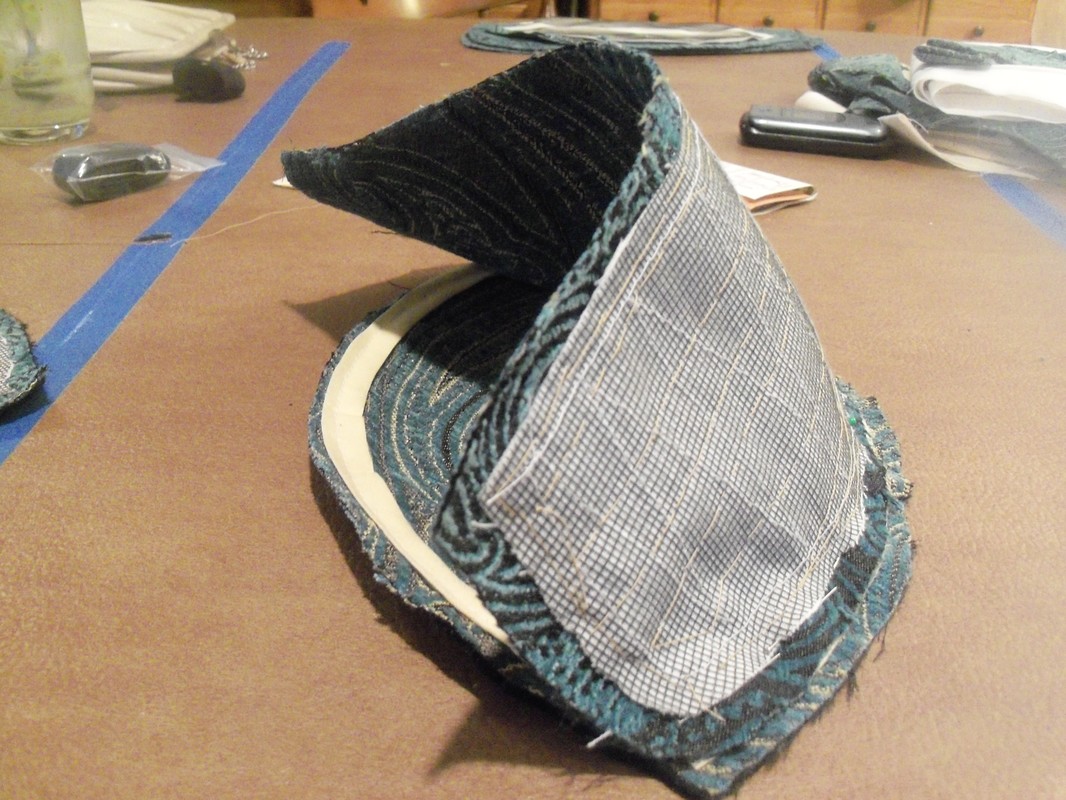
SHAPING AND STRUCTUREI decide to start by making my own hat, since I like to test things before making something for someone else. Since I don't want this hat to be too soft or dentable, I need to interface and shape it. I use old muslin for the interfacing and old screen door mesh (vinyl-coated fiberglass, not metal) for the structure. I cut the screen with crappy scissors, not my nice sewing scissors! This picture shows the three layers:  The white zig-zags are from where I used my sewing machine to put the muslin and the screen together to make one stiffer piece. I aligned the vertical stitch lines with the places where I didn't want the hat to bend. On the almond-shaped top piece, there's a gap in the screen... that's because I do want it to bend in the middle, to get the crisp crease down the center of the hat. But obviously, I can't machine-stitch the inner stuff to the brocade fabric of the hat--I don't want the stitches to show! So I have to hand-sew the next step: 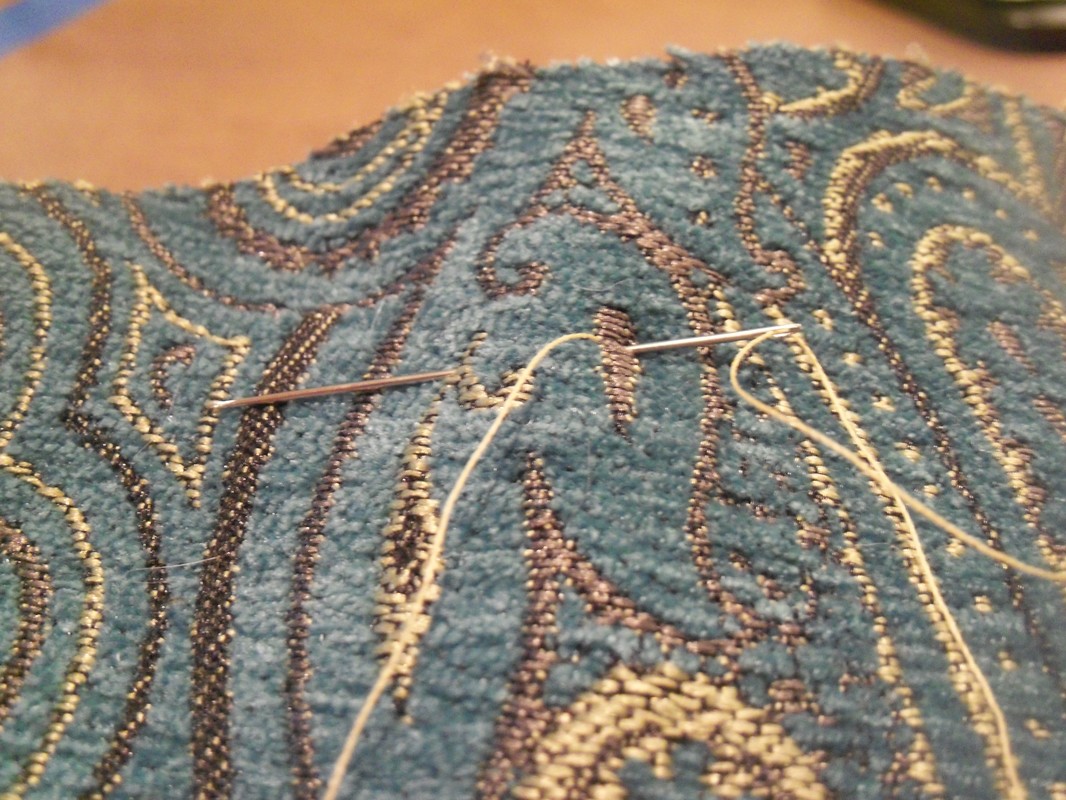 Notice I use a gold thread to blend with the gold of the pattern? I decide to use a back-stitch so that the tension would be locked in place after each stitch. And I position each back-stitch in line with the warp-threads that are already floating on the top of the fabric, so once I pull the thread taut,, you can't see it in the pattern. 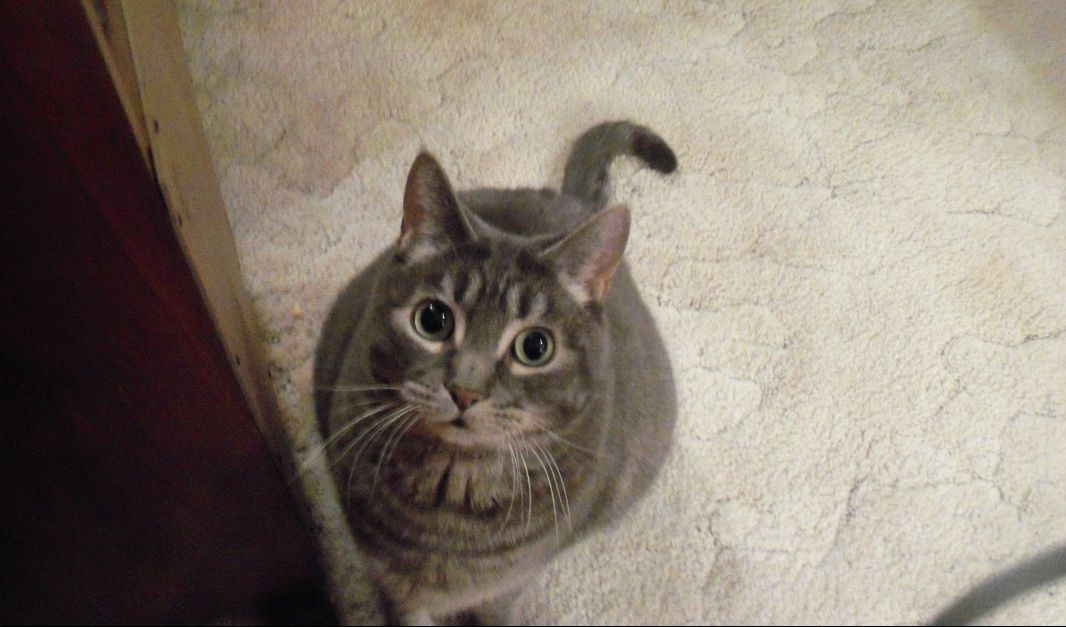 Cutie-Pie materializes from another room when he senses a long string in use, and watches me the whole time I sew, batting at my thread when it comes his way! While working on the top piece, I make sure to pin it in the folded position before sewing. The result of all this careful interfacing is that my top is permanently creased where I want it:
CONSTRUCTION First, I wanted to accentuate the top seam with piping, so I pinned and then sewed some bias tape to the edge of the almond-shaped top. When I sewed the side to the crown the bias tape peeked out at the seam:
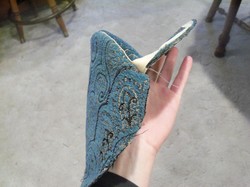 Here's the hat half-finished, showing the peek of bias tape on the left side and the tendency to fold in the middle. Once I got the sides on, I quickly saw that I'd gone wrong somewhere in my pattern drafting... the hat curved too much in the vertical seams (Center front and Center Back), and wouldn't fold flat. 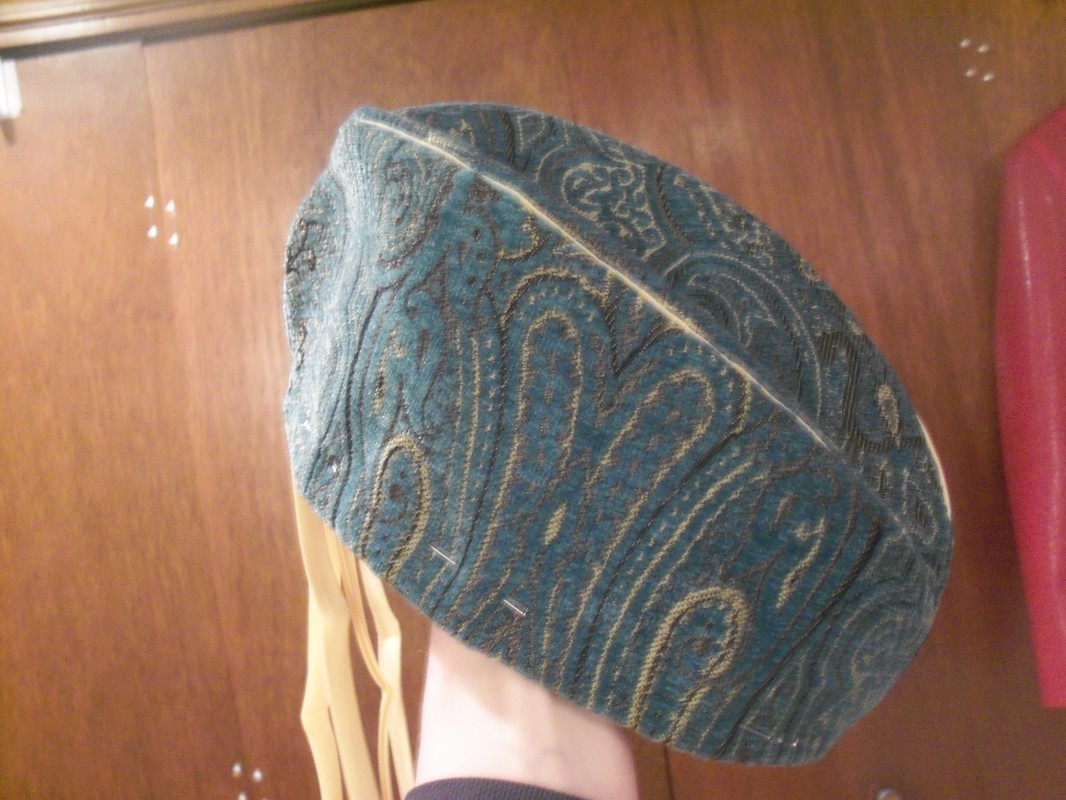 FIRST HAT FINISHEDAfter a bit of play, trying it on in different directions, I determined that the larger, rounded end (the one labeled "front" on the pattern) looks better at the back, and the narrow end at front. Obviously, that's the opposite of the way a proper Glengarry would be worn! Here's me trying it on, with the brim pinned under, in that direction: 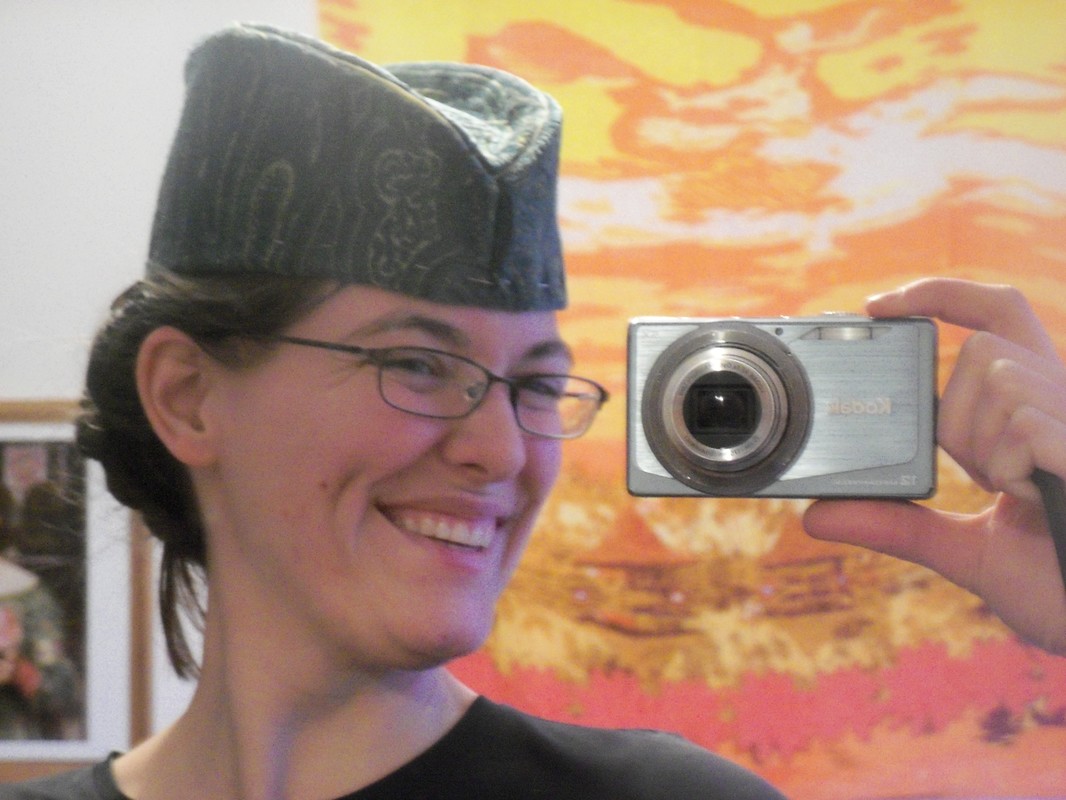 And the finished hat has yellow trim and a lining. While I am pleased with the way this hat turned out, it's not exactly right: for one thing, it doesn't fold flat. A Glengarry cap, like an envelope cap or garrison cap, should telescope closed neatly. For another, it's taller in back than in front, which looks okay for this cap but is tricky to wear unless I dress my hair high in the back, and anyway, it's wrong for a Glengarry cap. So I need to do further research before making my sister's.
5 Comments
The Sister
9/5/2017 10:59:48 am
I like this on you! It's quite fetching... makes we wanna try out mine again! Have you worn it out of the house?
Haha! I knew you were too timid to wear it. I can see you now, admiring the work I put into it, putting it in your closet, and never touching it again. You have no faith in me... none!
The Sister
9/6/2017 11:33:09 am
Hey! No hating! I love what you make for me and all the time and love you put into it. But it's not always easy to find outfits that work together, ya know! :-P
Robbie Craig
7/24/2023 06:19:04 pm
I have my grandfathers glengarry bonnet when he played the bagpipes for the troops Second World War. I can send you pictures or films of the hat to where should it be sent. Thanking you for your blog information. Leave a Reply. |
Karen Roy
Quilting, dressmaking, and history plied with the needle... Sites I EnjoyThe Quilt Index Categories
All
Archives
March 2024
|

 RSS Feed