|
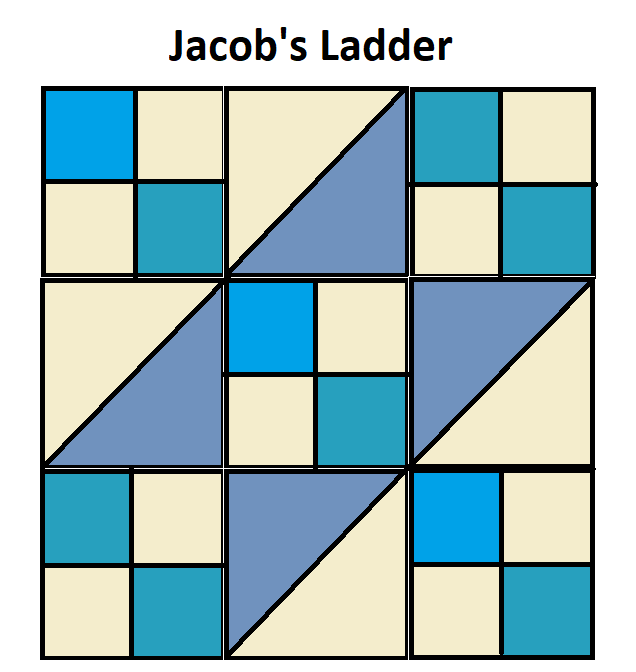
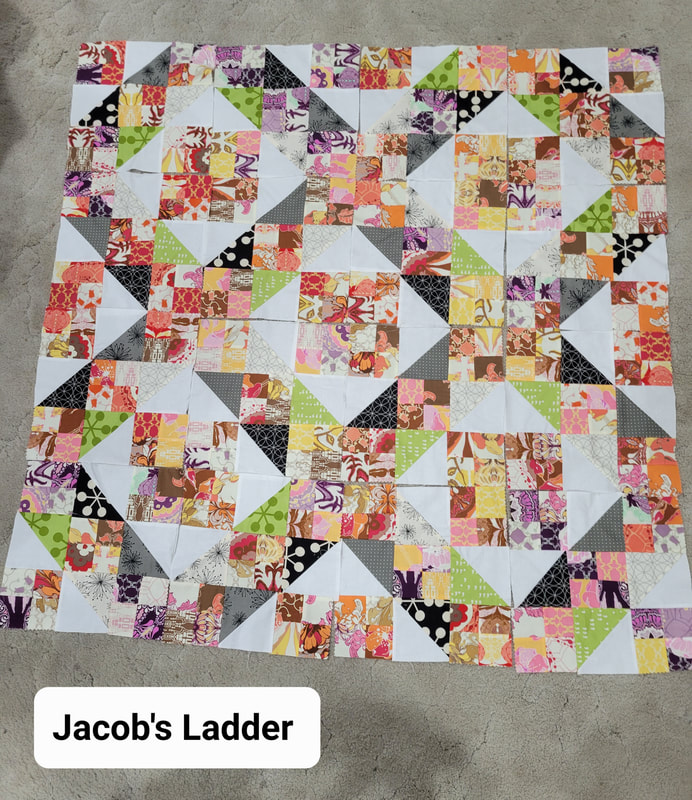
The story of Jacob's Ladder is written in the book of Genesis. Jacob, a grasping sort of character who conned his brother into giving him his inheritance, is fleeing his brother's rage and going to a far-off land to live with his uncle. One night while he's on the run, Jacob puts his head on a rock for a pillow and tries to sleep. In a dream, he looks up and sees "a ladder set up on the earth, and the top of it reached to heaven. And behold, the angels of God were ascending and descending on it!" From the top of the ladder, God tells him that He will keep the promises He's already made to Jacob's father, and will fulfill them through Jacob and his sons. (Not that Jacob deserves this grace, the cad! It's more about God's character than Jacob's.) When Jacob wakes up, he's stirred to make a monument to this special place where Heaven touched Earth, and he promises to serve God as long as God keeps His promise (and, oh--lets him return home safely without getting murdered). Jacob's path back home isn't an easy one, but that's another day's story. For today, we have the story of Jacob's ladder, a symbol of God's choice to make connections with creation, and to reach down into our reality and effect it. Jacob's Ladder is also the name of a string game, a wooden toy, and a quilt block. Guess which one this post is about?
O NECESSARY MATH Math is not my favorite thing, but it does underlie my favorite results. For, you see, math is the language of the universe. Math answers the question of why some notes harmonize and others don't, why some shapes please and others don't, why some buildings stand for centuries and others fall down after a decade. Math is behind ferns and shells and great works of architecture having the same proportions. Mathematical failures are why ugly things are ugly, bridges fail, and quilts are crooked. So, much as I hate fiddling with numbers, I continue to do so because I love beauty. When piecing a quilt top, every seam has the potential to skew the size of your block a little. Ideally, you should measure and trim as you go, making uniformity your goal, if you want the whole thing to fit together neatly. Below, see a picture of what can happen if you are not precise. The green circles show successful points and intersections, with seams nesting as they should, but the red circles show the mismatches that occur when pieces and blocks are slightly different sizes, getting sewn together. Had I taken the time to trim the blocks to uniform size before assembling the top, my finished top would have had more uniform dimensions, even if some corners were mismatched within. But I didn't. I was impatient. 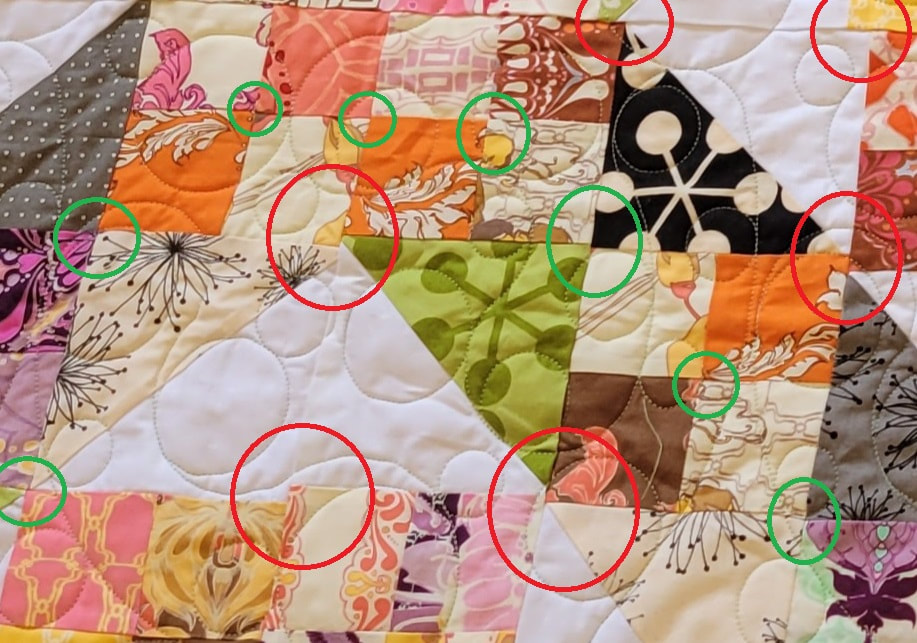 Once my quilt top was assembled, I measured and found it uneven. So here's how to use math (math, yay!) to apply a border or two to fix the problem. First, measure the width at the top, middle, and bottom, add those measurements together, and divide the sum by three. This is your average width. Cut two border pieces of exactly that measurement and sew them on. Because your quilt top is uneven, you may have to scrunch the border a little on one side or scrunch the quilt a little on the other, or stretch the fabric as you sew, to make it fit. But once the top and bottom borders are on, you've evened the wobbly measurements up. Now do the same with the vertical dimensions, but these measurements will include the borders you've just sewn on. See my diagram below. 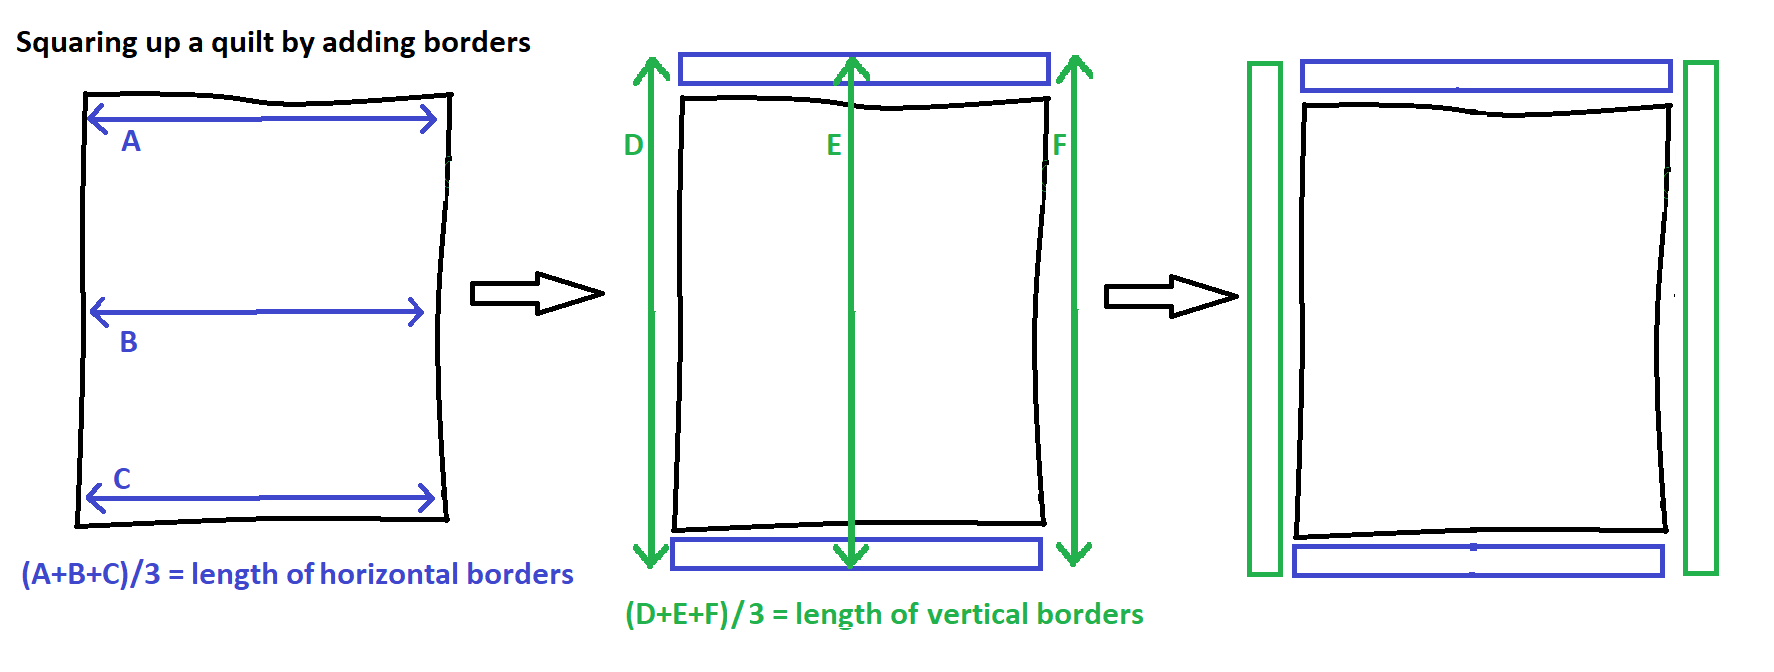 For this Jacob's Ladder quilt top, the disparity between measurements was so great that I couldn't have made it up with a little stretching or scrunching, so I did two layers of borders... the inner layer was approaching the average, but still the border pieces were unequal to each other, and the outer layer was the new average, evening up the dimensions. (I hope that makes sense!) I don't remember my exact dimensions, but let's say the math looked like this: (A + B + C) / 3 = (50 + 55 + 53.5) / 3 = (158.5) / 3 = 52.8333 If I cut my two borders to 52.84", and tried to sew those lengths to a 50" top and a 53.5" bottom, there would have been no scrunching or stretching it to fit! I would've had to fold something! So the solution would be to pick a number like 51" for the top and 53" for the bottom, and keep adding borders that got closer and closer to the average until the top and bottom matched! Thankfully, for this quilt the math wasn't so bad. It was more like this: (A + B + C) / 3 = (54 + 55 + 53.5) / 3 = (162.5) / 3 = 54.1666 I was able to square things up in only two layers of border, and that enabled me to put little 4-patches in the corners, which looked very intentional. 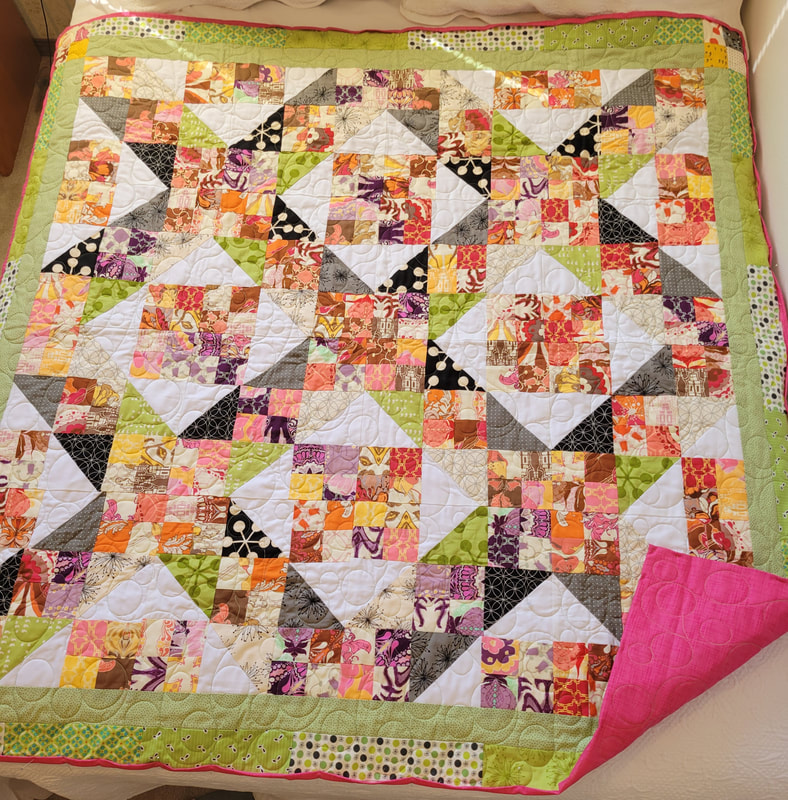 In this picture, I haven't yet finished the binding. It's pinned in place. What if you don't have a measuring tape or math skills? How can you square up a quilt, then? I've done this by eye... I simply fold the quilt accordion-style so top, bottom, and middle are aligned, and then eyeball and cut a border that seems to "split the difference". Sew it on. Do the same vertically, sew it on. Then fold the quilt one way and then the other: if you match up the top corners and the bottom skews, you still need to fix it. If you match up the top corners and the bottom corners also match, success! FINISHING I chose a bright white, thin cotton batting for this quilt. Bright white because I didn't want unbleached batting to show through and dull the effect of the white background. I picked pink backing because every other color I tried made the quilt seem muted, but the pink color made it come alive. Finally, I entrusted this project to Coco's Quilts in Milwaukie OR. Coleen of Coco's quilts used her long-arm machine to quilt it with an all-over swirly pantograph. I asked her how she handled the inevitable ripples that are found on a quilt with uneven dimensions (think about it; even if I evened up the edges, the middle would still be warped); she responded that she always uses a spoon-shaped foot on her machine, to avoid catching folds, and that long-armers have a trick called "soup canning" when there's a big ripple or belly in a quilt. Soup canning is literally putting soup cans on top of the quilt while quilting it, so their weight can stretch and pull the fabric of the ripple with a gentle tension, to prevent folds. Clever! Finally, I finished the edges by hand with a foldover binding.
I am very happy with this quilt. It's a cheerful throw-sized blanket.
2 Comments
The Sister
10/4/2022 10:11:32 am
So far I like this quilt the best; I love the pink & green color scheme with the brightness of white behind it, all with a touch of gray to ground it.
Ms Julia L Fursdon
7/16/2024 11:13:13 am
Thank you for your interesting thoughts about Jacob's ladder and the quilt. I want to make this for my grandson who is being brought up in a secular home. It combines beauty with grace. It will remind me that it is God alone who calls people to him. Leave a Reply. |
Karen Roy
Quilting, dressmaking, and history plied with the needle... Sites I EnjoyThe Quilt Index Categories
All
Archives
March 2024
|


 RSS Feed