|
Remember I mentioned that I was making Butterick 6190? Time for the details of this lovely project! My client this time is my friend Rosanne, who shall be attending an autumn ball with me this year! She picked the pattern and bought it, selecting the top from view D, but the skirt from the other views, since she didn't want a train. As for the fabric, she requested a dark purple or blue-violet, preferably satin, with silver contrast. She trusted me to pick the material as she wasn't around when I went shopping. I've dubbed it the Lady Aubergine gown, because of the eggplant color. THE MATERIALS For the fabrics, for budget reasons, I went to Fabrics For Less. (It was on NE Sandy at the time, but has since moved to 12115 SE Powell Blvd.) It's an interesting place... usually at fabric stores, the employees are fellow sewists, quilters, and knitters, who are interested in every aspect of sewing, and are helpful and enthusiastic with the customer. But at Fabrics for Less, the employees are quiet. Sometimes there's a radio or TV in a back room, and occasionally men come out and look around, but they don't seem interested in selling fabric! I speculate that the bulk of their business must be in the oriental rugs (different section of the store), and the fabric store is an afterthought. Certainly, the fabric section is usually a ghost town, and I can roam the bolts unhindered. But I don't mind the odd atmosphere: the selection is interesting and fun, with lots of sheers, embroidered sheers, shiny stuff, Middle Eastern and Indian dance costumes, et cetera. The quality is less than elsewhere, but that's okay for costumes; in this case, the gown will be worn once for sure, perhaps once or twice a year if there is occasion. The fabric doesn't need to be super durable, but there needs to be a lots!
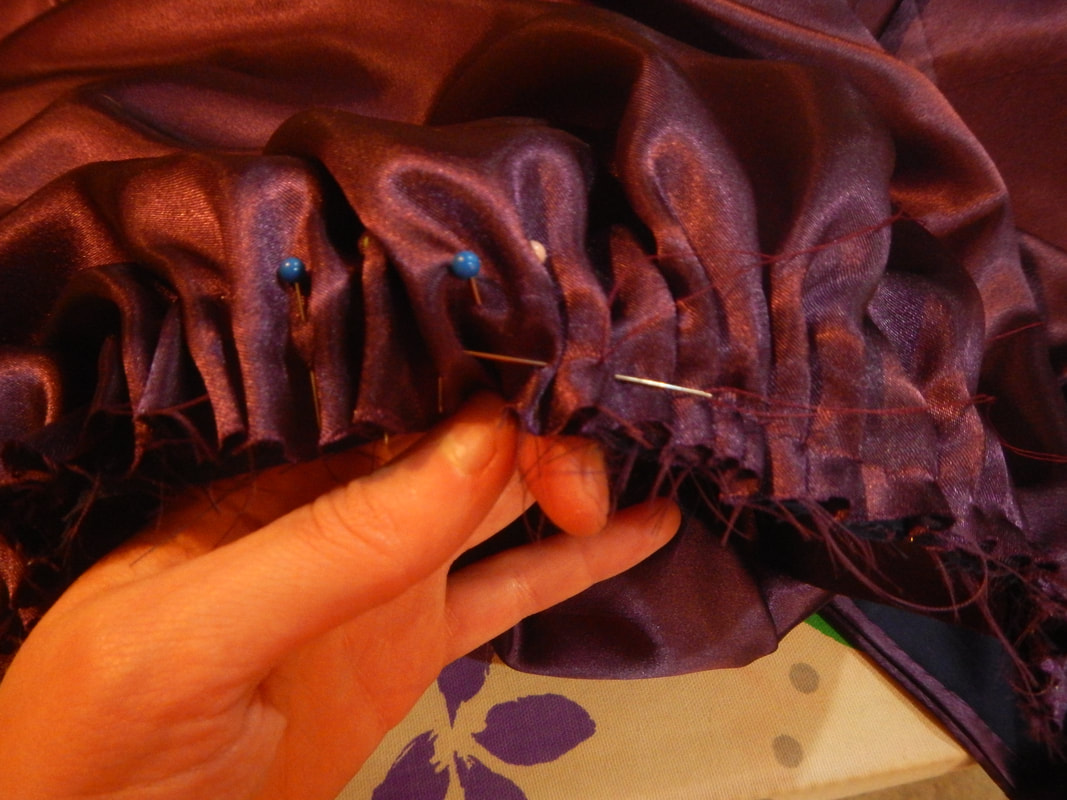
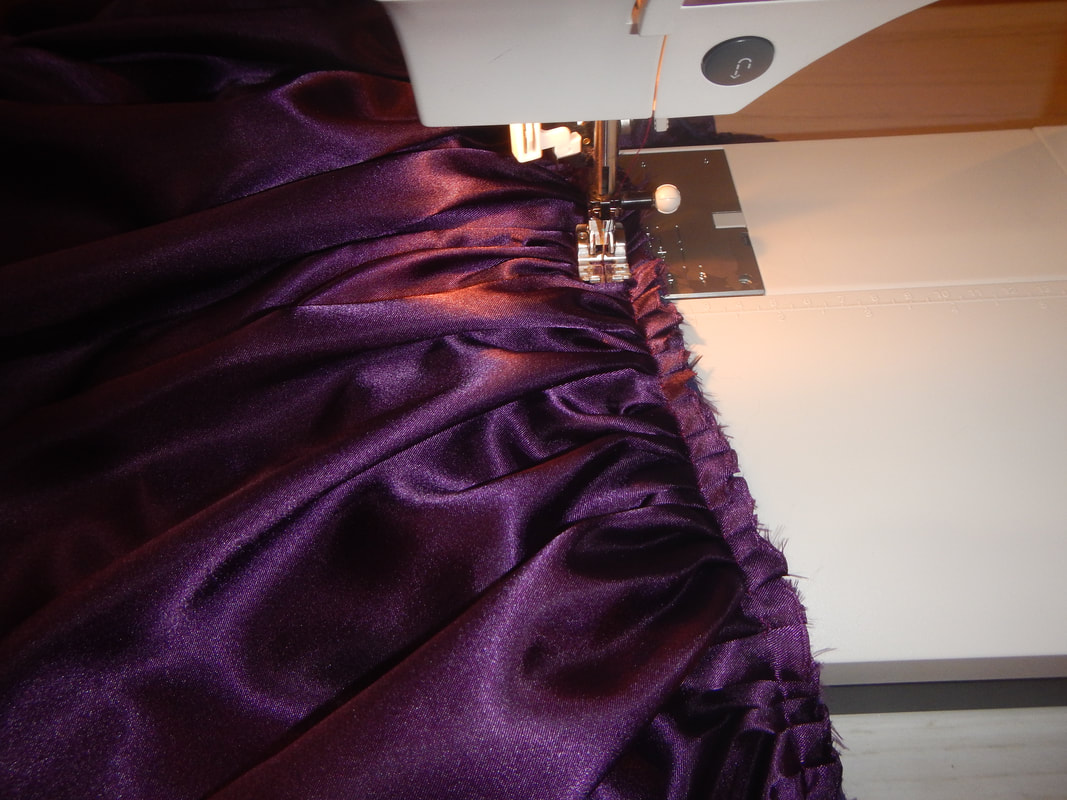
BODICE ALTERATIONS The first alteration was in the shape of the bodice. I measured Rosanne, then measured my pattern pieces to make sure there would be enough. Then I cut the pieces out of satin (fashion fabric) and blue cotton (interior). I flat-lined the pieces and sewed them together, sans darts, and had Rosanne try the bodice on inside out. Then I pinned darts which suited her shape: the front darts ended up being the same as on the pattern, but the back darts needed to be deeper and taller. In fact, the back darts were nearly tall enough to cut into the neckline, so I could have changed the pattern to either have separate panels or one curving one with the dart pinned out in the paper and the fabric cut as though it were not there. (Does that make sense? I'm musing now... if the dart had entirely bisected the bodice, I could have pinned or taped it in its folded position in the paper pattern, and it would still lie flat. Then I could have cut the fabric that way... As it happens, though, the dart didn't bisect the bodice; it was just tall. So I could have turned it into a princess seam and there would have been two panels instead of one.) THE TILTING WAIST While patterns are commonly sized up and down for different sized people, I have never seen one that was "aged" for different body ages. There are some predictable and common ways our bodies change as we age. For instance, when we're young, women usually (not always) have waistlines which are parallel to the floor (perpendicular to the spine), but as we age, our waists tilt forward or back. Sometimes the belly gets full or rises a bit, and the bottom is less full, so the waistline sits high in the front and low in the back. Other times the bosom pulls the front of the body forward and the bottom gets fuller and rises, so the waistline sits low in the front and high in the back. How much it tilts and in which direction is determined by genetics, lifestyle, and weight, but it does tend to tilt. Seamstresses address this by altering patterns or making fit corrections as we sew. In Rosanne's case, her waistline tilts forward at the front and sits high in the back over her bottom. The Butterick pattern simply cuts straight across, as though the waist is parallel to the floor. The effect when worn is that the back bunches up and looks baggy. So I had her try it on, and then I used chalk to mark her actual waistline. Here's a picture of the assembled bodice, with chalk lines showing the actual waist as opposed to the waist allowed by the pattern: 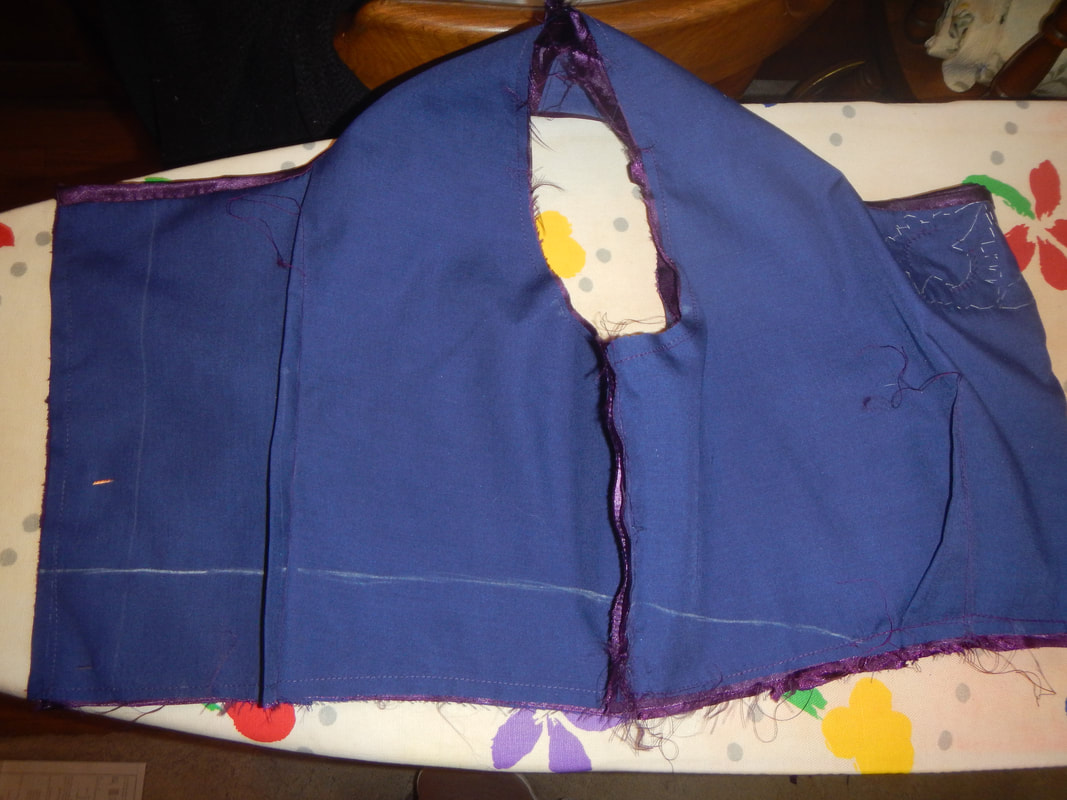 CB, to the left side of the picture, is several inches higher than CF, the right side of the picture, which needed no alterations. This picture also shows the tall back dart (left side). FULL ARM ADJUSTMENT The biggest alteration was for full upper arms. I asked my friend if she commonly found sleeves binding, and she said yes, so I did a full arm adjustment on the tissue pattern before cutting any fabric. I had never done this before, but it wasn't too hard once I sat down with Fit for Real People (by Pati Palmer and Marta Alto) and worked carefully through the directions, adding an inch of ease. The only thing I did wrong was that I didn't trace the original sleeve cap before slashing and spreading. So when I got to the direction to "true the sleeve cap", I had to do it by eye. As a result, when I tried to set the sleeve in to the bodice, there was extra fabric and it was annoying. I ended up with very slight puckers, which I tried to steam out, but couldn't because the blue lining fabric is stiff and unforgiving. Rosanne says to "call it a design feature", and I remind myself that "done is beautiful" and I'll do better next time now that I know my mistake. 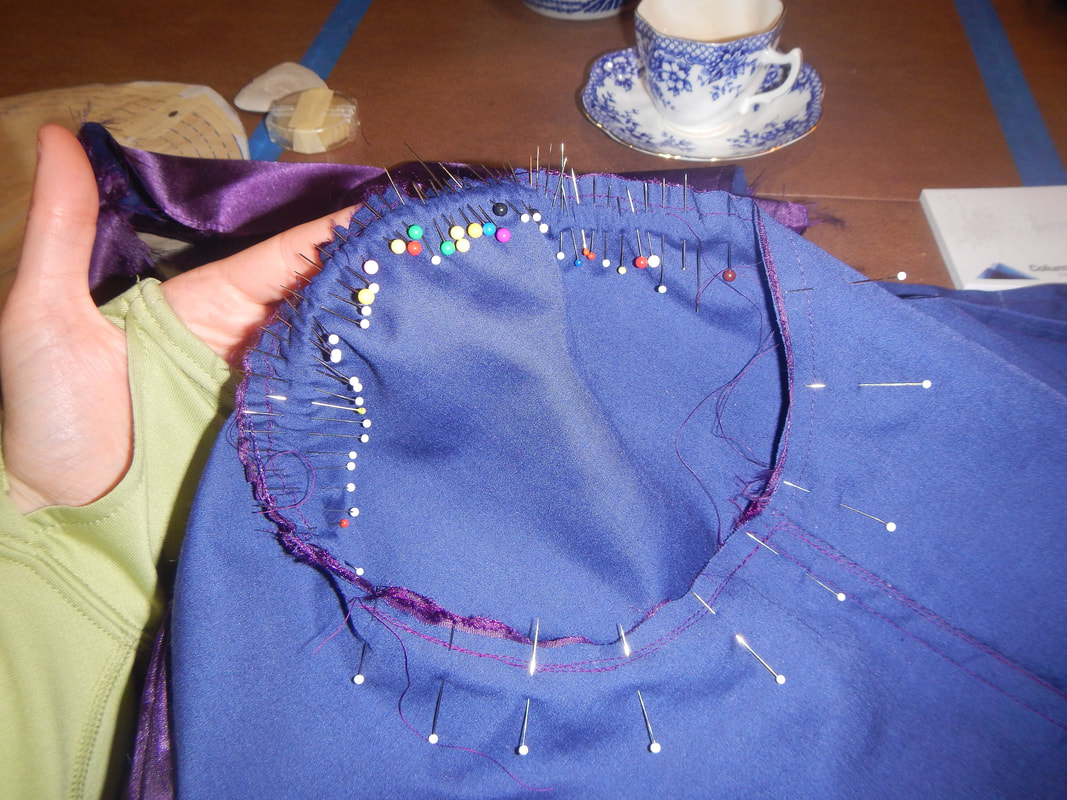 How I hate setting in sleeves! A VICTORIAN HEMMING METHOD In old sewing books, you sometimes see the instruction to "regulate [the hem] from the waist". In the Victorian era, the hem of a skirt was an area that received lots of wear (floor length gowns!) and therefore needed lots of attention to make it sturdy and have it hang right. Hems were usually finished with deep facings, which might come all the way up to the knees! Obviously, that amount of fabric and work is easier to handle before the skirt is sewn to the bodice, even before the waistline is pleated or gathered, while the skirt is still just a big flat tube of fabric. Another benefit of hemming first and then attaching the skirt to the bodice is that if you have a border print, a decorative finish, or a fabric with obvious nap or cross-grain, hemming it first ensures that the bottom looks right, and then you "regulate" the length from the waist by pinning it in place so the hem hangs to the right length. (At the Fit For a Queen blog recently, Mrs. Mole shortened a ruffly-hemmed skirt using this method.) And of course, if you're working with the shaping undergarments of the past (bustles, hoops, crinolines), you are better off putting all that kit on and then "regulating" the skirt's length over-top! Nowadays, hems don't usually drag on the floor, and so they're often sewn by hand or with a machine as the last step of the garment construction. But that doesn't work for me, because I hate hemming stuff, and will allow a nearly finished garment to sit in my UFO pile for ages if all it needs is a hem! So I have gotten into the habit of hemming skirts before attaching them, and then when I'm done, I'm done! For Rosanne's Lady Aubergine gown, since the bodice's new waistline tilts up in the back, I knew the skirt would need a variable hem: the skirt would need to be longer in the back to cover those extra inches and travel over the bottom. Here's how I did it:
Further notes:
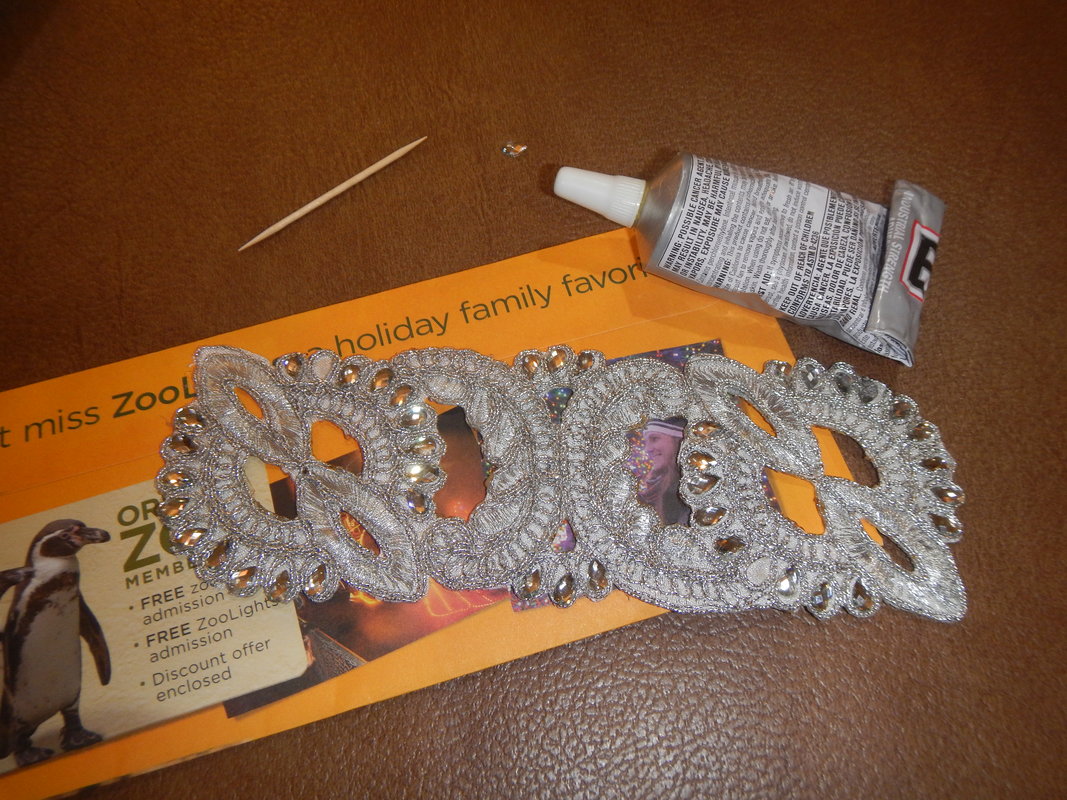
SOME PRETTY DETAILS I am really pleased with the details on this gown! The criss-cross on the bodice and the piping at the end of the sleeves is a slightly more red-violet satin than the rest of the dress. There are hand-sewn purple beads on the silver trim on the front. There is silver trim on the back at the waist closure. The back closes with a combination of hook and eye at the top and snap tape for the rest. There are strap catchers in the shoulder seams. FINISHED! Isn't the fit perfect? I love the color on her, and she looks so shiny and nice!
2 Comments
Rosanne
11/10/2017 07:57:28 am
Who's the pretty girl in the mirror there? Karen, you did an amazing job! I was proud to me a walking advertisement for your work!
The Sister
11/14/2017 06:49:09 am
Who IS that pretty girl in that mirror there? Why, it's the lovely Rosanne! What a pretty gown you made, sister mine! Rosanne looks beautiful; I hope you both had a great time at the dance! Leave a Reply. |
Karen Roy
Quilting, dressmaking, and history plied with the needle... Sites I EnjoyThe Quilt Index Categories
All
Archives
March 2024
|
 RSS Feed