Robes de Coeur
  • Blog
  • Quilting
  • Clothing
    • Menswear
    • Womenswear >
      • Self-Made Patterns
      • Commercial Patterns
    • Hats
    • Miscellany
  • About
  • Blog
  • Quilting
  • Clothing
    • Menswear
    • Womenswear >
      • Self-Made Patterns
      • Commercial Patterns
    • Hats
    • Miscellany
  • About

Making a Flower from... a Flower.

1/1/2018

0 Comments

 
Happy New Year to everyone using the Gregorian calendar! 

Have you ever looked at a fake flower--you know the type: plastic stem and fabric leaves and petals--and thought "too bad that's a big bulky fake flower; I wish it were softer and more sew-able so I could stick it on my dress"?  If that's the sort of thing you think, you're reading the right blog! 
Picture
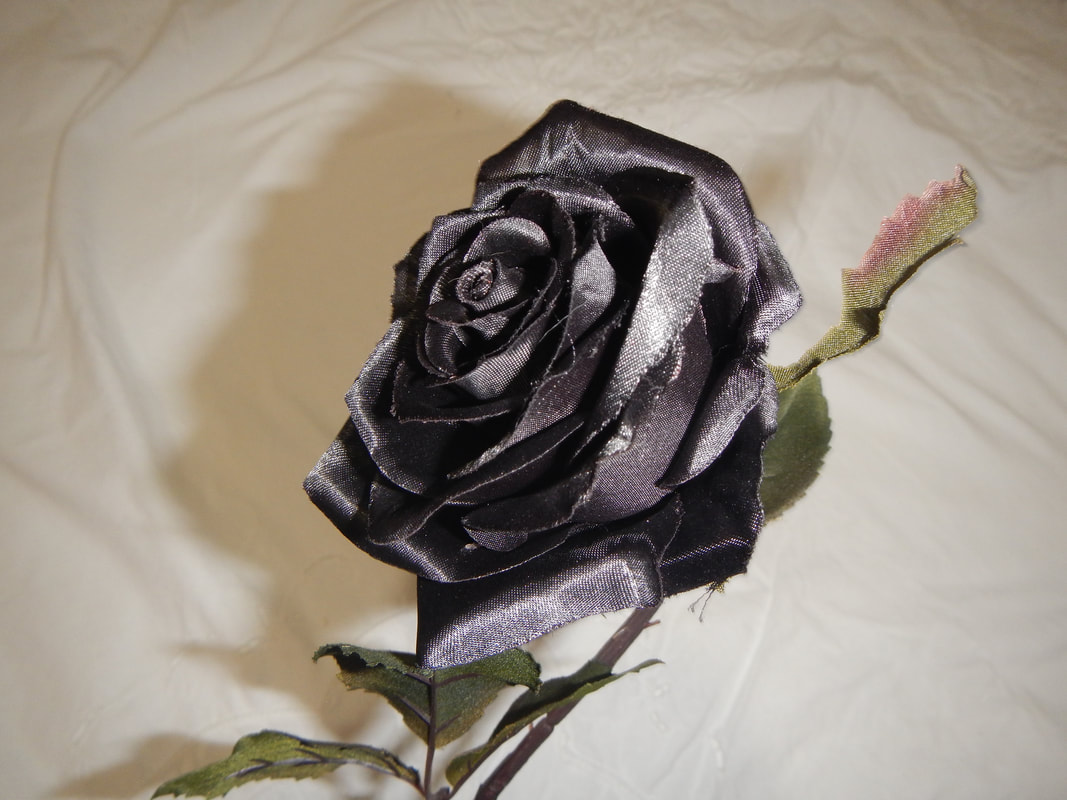
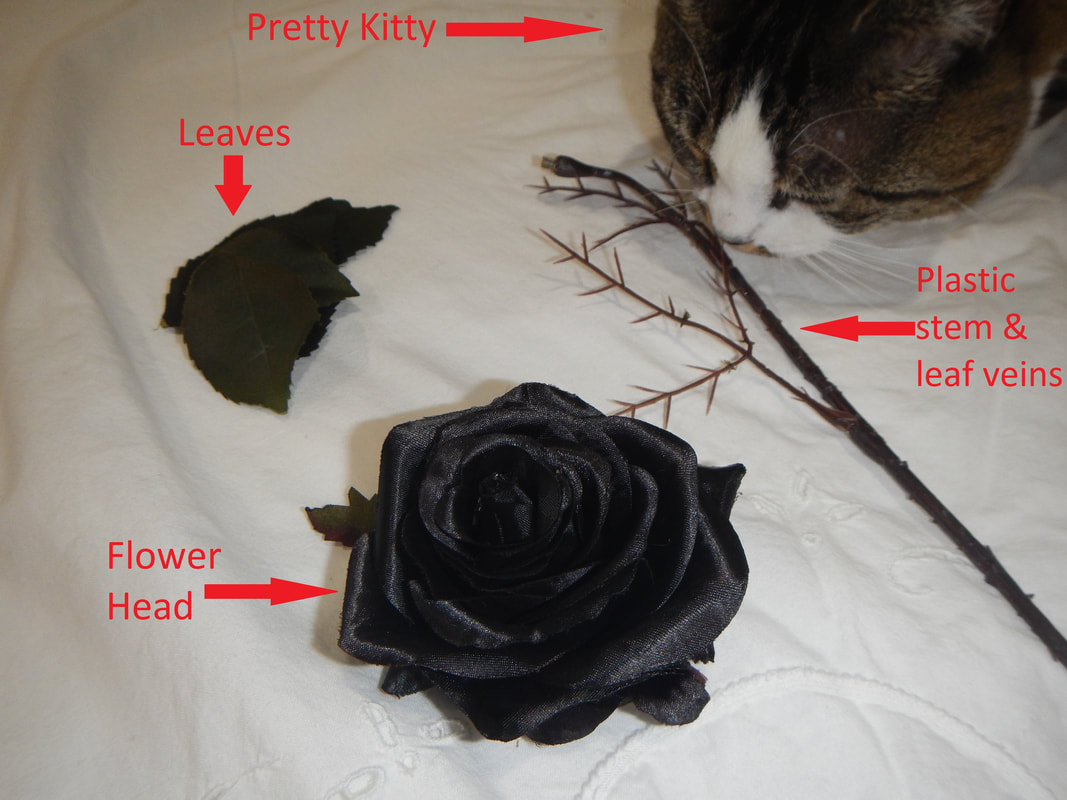
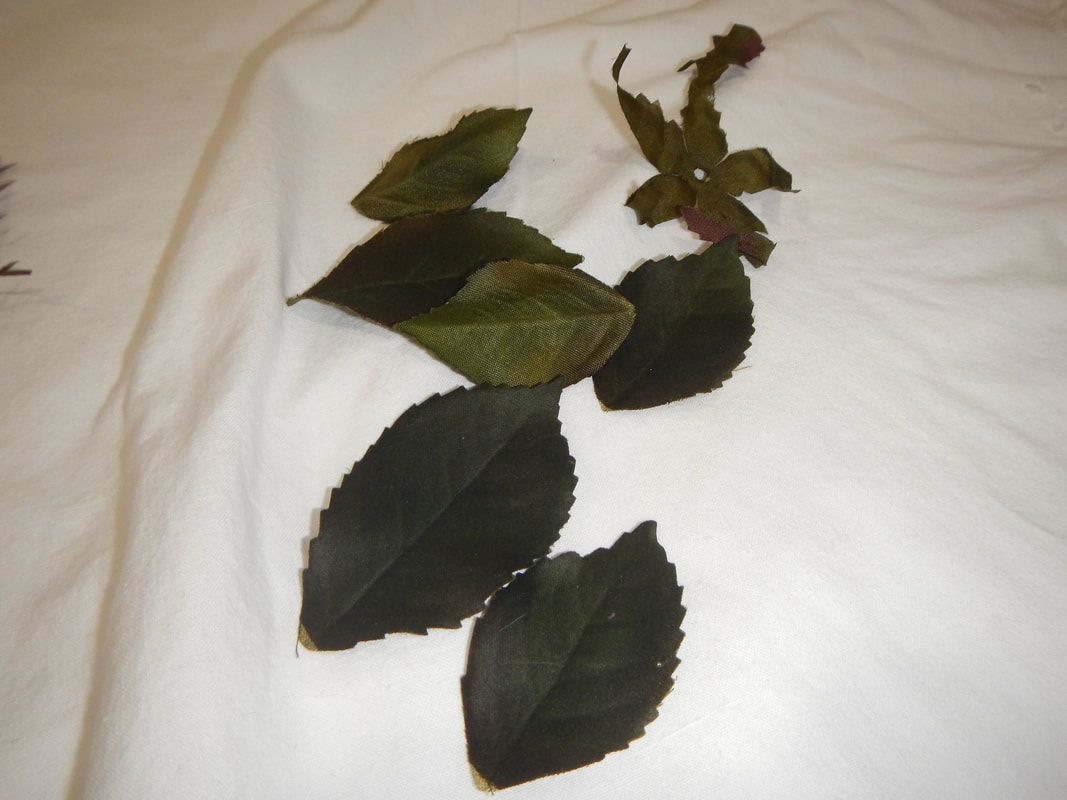
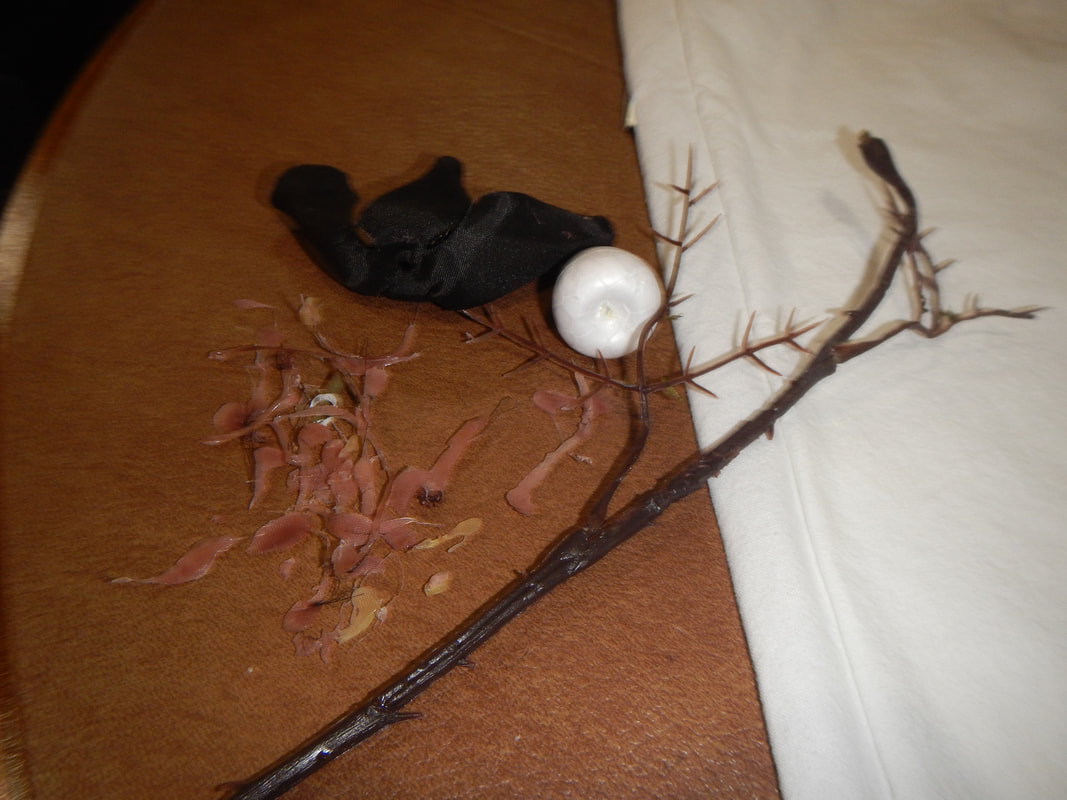
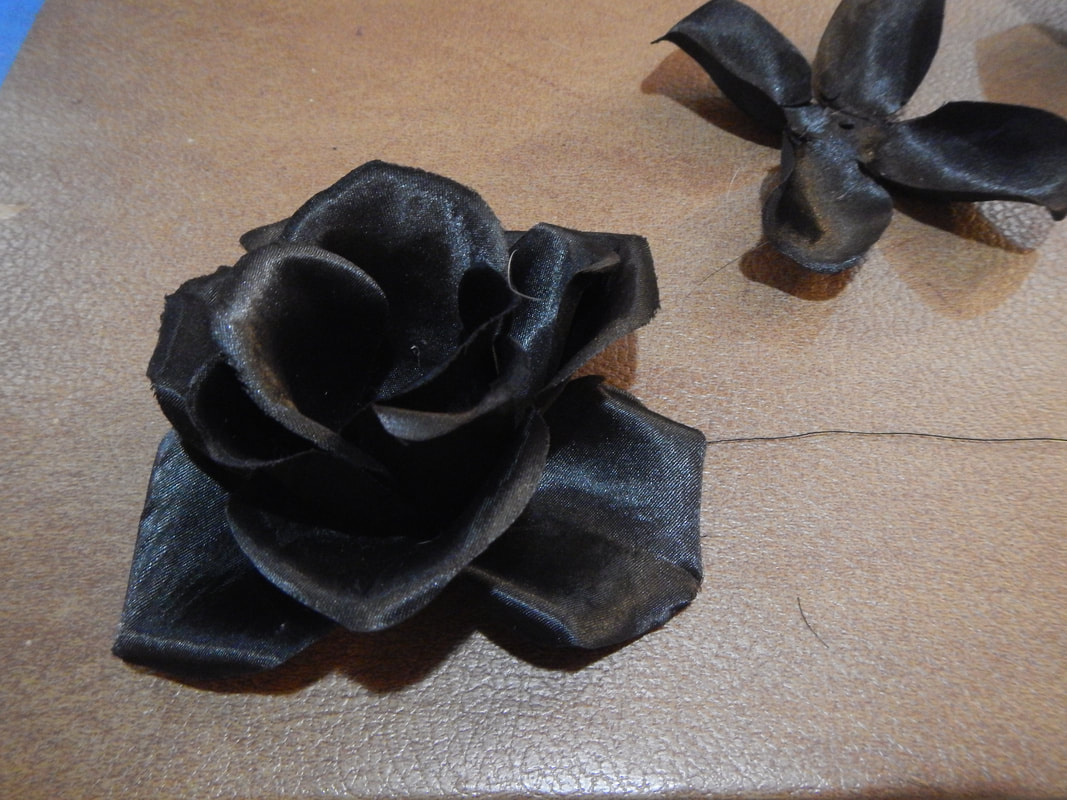
If not... well... how does your brain work, then?  I'm really interested, because it seems like such a normal thought to me, and I'd be curious to know how someone thinks who doesn't have that thought. 
When I was a kid, I had a fake flower (pink, but yellow on the inside) that I liked, so I dis-assembled it, and found to my dismay that it was made of a bunch of non-flowery templates and a lot of glue, and I couldn't get it back together.  Bummer.  But my skills have improved, and I now know how to do it! 

Today's post doesn't fit neatly into any of my categories... so I've tagged it Hand Sewing (because I hand sewed it), Alteration (although "transformation" would be more apt), and Millinery (because that's the best use I can think of for the flower when it's done). 

TURNING A FLOWER INTO A FLOWER IS REALLY A LATERAL MOVE...

Start with a fake flower, preferably of good quality.  The cheaper ones shred when you try to take them apart, but a nice fabric flower, with ombre dyeing or a satiny texture, usually withstands the operation better.  The first thing you have to do is figure out whether the plastic stem has a metal core to it.  This is easily ascertained: try to bend it; if it stays bent, it has wire in it.  So don't use your nice sewing scissors to try to cut it!  When it comes time to cut, try kitchen shears, or wire cutters. Sometimes pliers have a cutting edge at the inside, close to the hinge. 

Here's a pretty black rose my housemate had tossed in the giveaway bag:
Picture
The leaves are a little velvety and the petals have a satin texture.  Both leaves and petals have a definite right and wrong side. 

(In case you're curious, there is no black rose in nature.  The closest that rose cultivators can get is a very dark purple.  There is no blue rose, either, so when you see these colors at funerals or weddings, they are dyed.) 
I start to take it apart by carefully peeling the fabric leaves off the plastic veins, from base to tip.  They come apart easily. 

Then I try to pull the head off the stem, but it's stuck, so I cut it off instead.  As I take the head apart petal by petal, the type of glue becomes important: ideally, the petals should be glued with a gummy, plasticky glue that sits atop the fabric but doesn't permeate it.  Peel the glue off to clean the petals. 
Picture
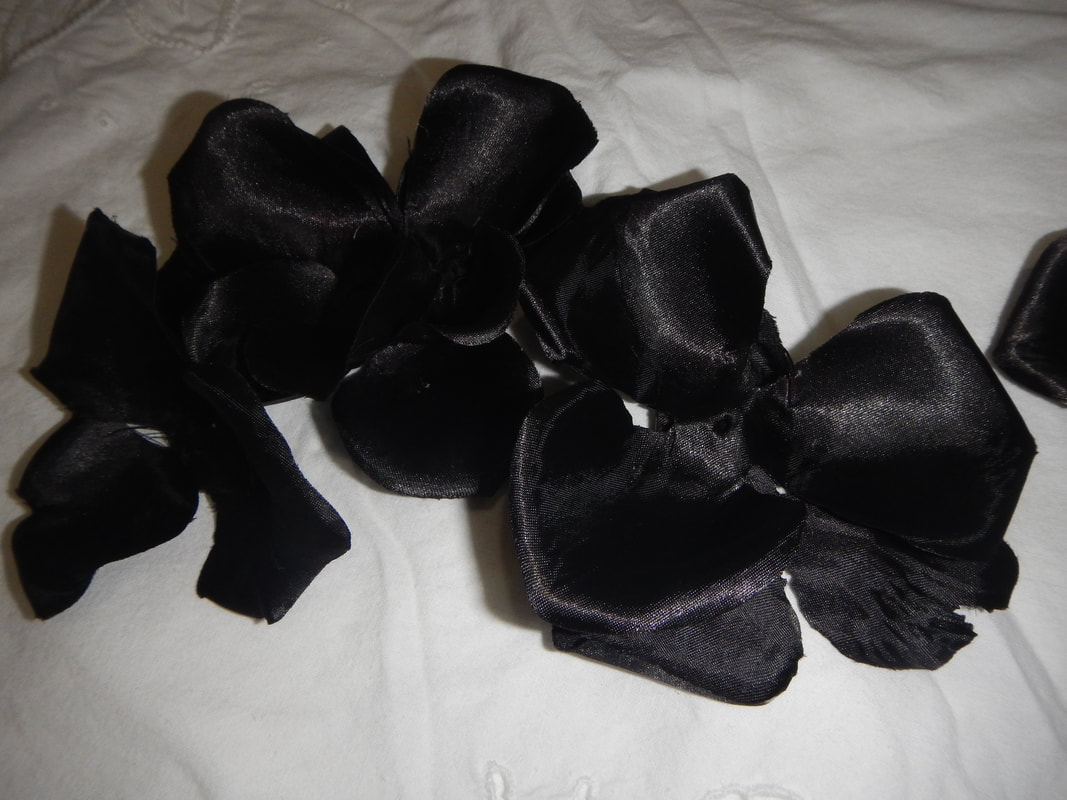
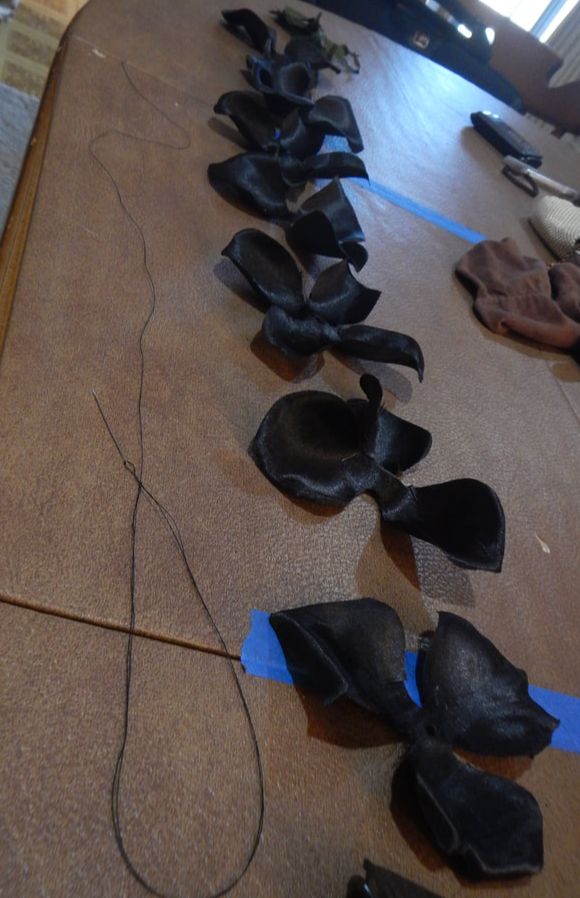
Soon I have three piles: petals, leaves, and trash. The petals are templates with three petals each, arranged around a center; they look like propellers.  The nicer the flower, the more variety to their shapes and textures.  These black petals are concave and different sizes.  The center ones were glued pretty firmly to a styrofoam "bud" shape, so I had to discard the innermost propeller. 
Picture
Petals
Picture
Leaves
Picture
Trash: plastic, glue, and styrofoam
Picture
Next I lay the petals out in order of size.  I'll be re-assembling them by stacking them, and I want the largest ones on the bottom, and the smallest ones on the top.  You can also see the needle I've threaded with black thread.  Though the stitches I'll use will mostly be un-seen, it's still a good idea to pick a matching color. 

Because these propeller shapes are similar, they'll want to nest into each other, petal in petal.  But that doesn't look flowery!  To get the rose to look like a rose, I need to off-set the petals.  Pins help hold them in place while I sew a simple circle of stitches around the center.  Once that's done with two propellers, I add two more, and stitch again.  I suppose I could pin them all at once, but you'd be surprised how slippery the layers get; two layers at a time is more manageable. 
Picture
Petals offset
Picture
A flower takes shape...
Once all the propellers are in place and sewn, I have a small problem to fix: the bottom/outside layers are floppy and want to fall too far open.  In the original flower, they were held together with glue.  This time, I cup the flower in my hand to hold a curved shape, and I make a second ring of stitches outside the first, sewing the outer few layers of petals to each other.  None of these stitches show on the front side of the rose, but they do the job. 
Picture
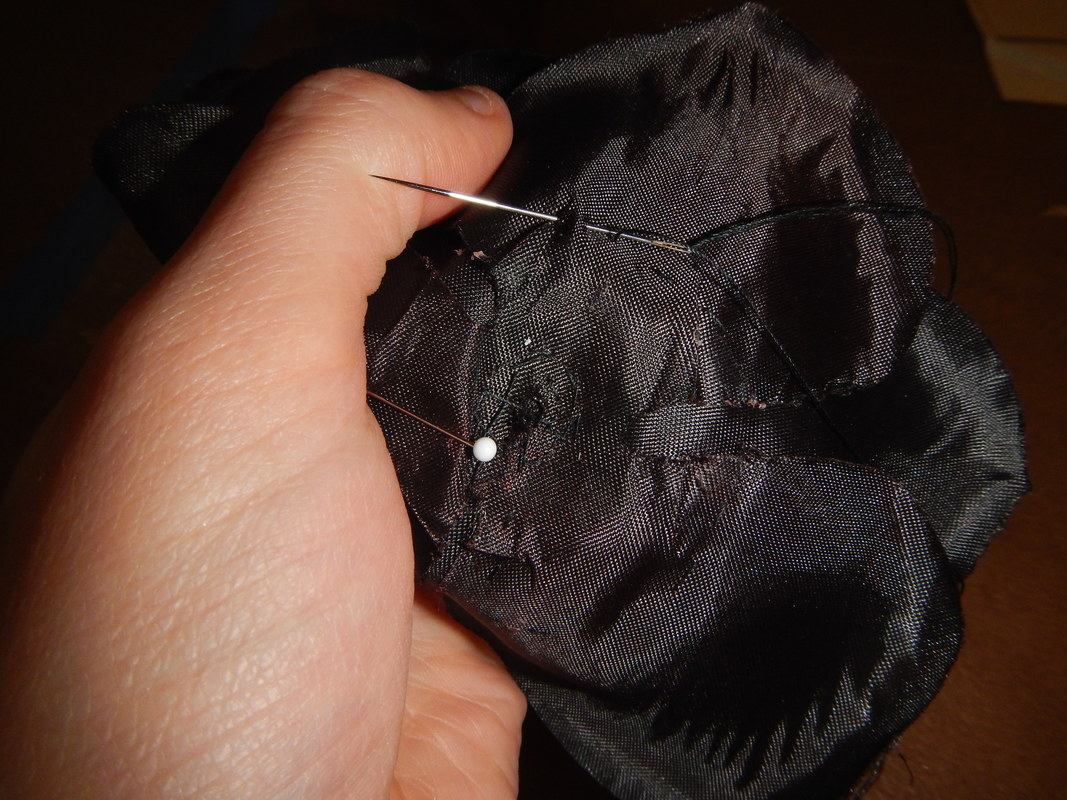
The next step is to sew the leaves onto the bottom of the flower, taking care to position them so they're visible from the front side when it's done. 
Picture
sewing leaves on
Picture
the front side
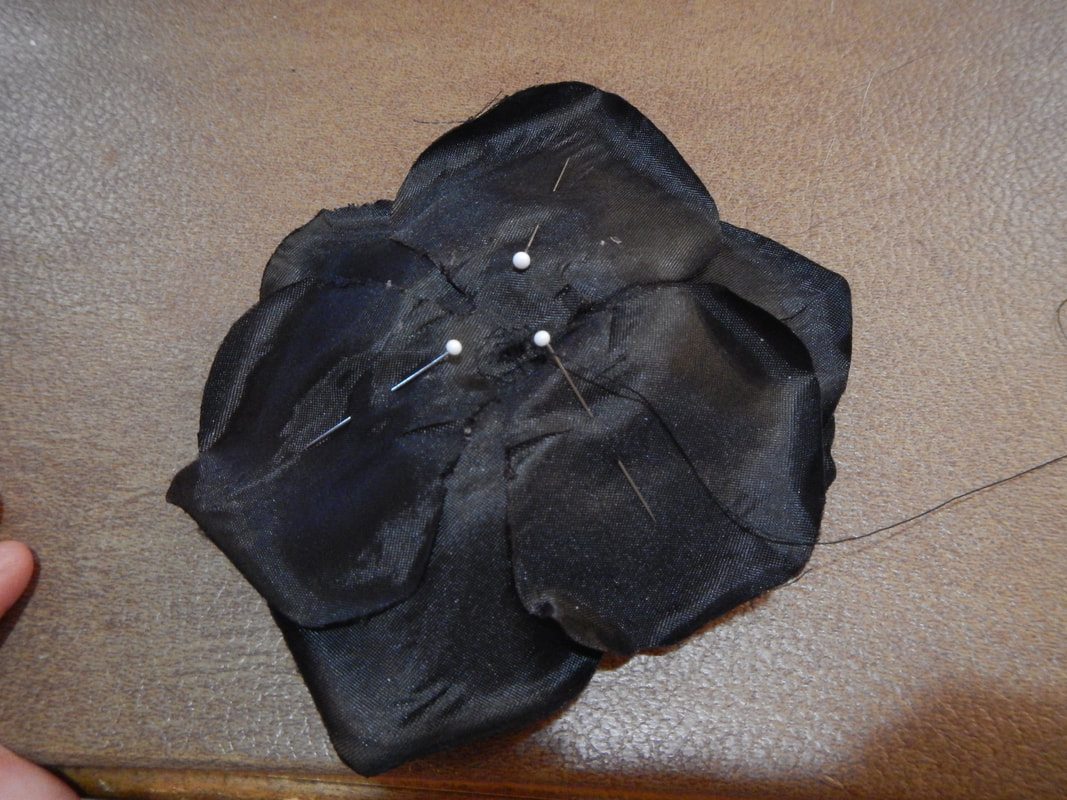
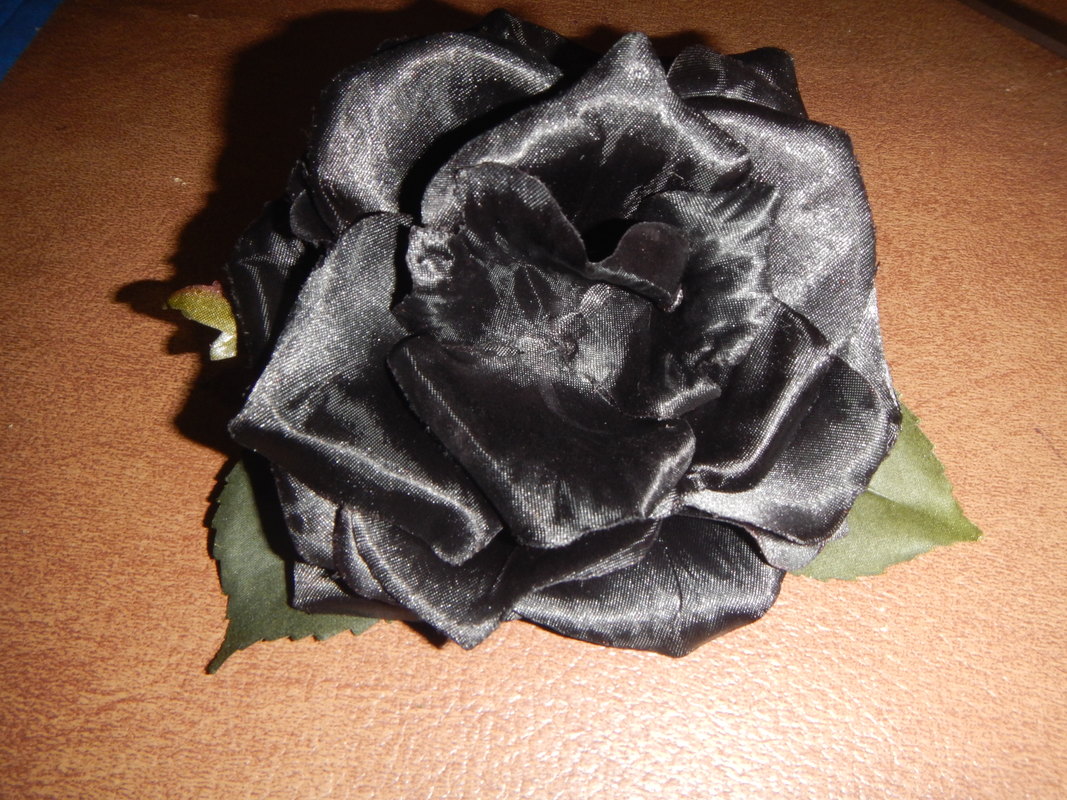
This flower is a whole lot softer and more versatile than the original.  It doesn't have styrofoam or plastic in it, and it can be attached to clothing or hats or pins.  If you use it to embellish clothing, you might want to remove it before laundering... I'm not sure how well it'll keep its shape in the wash.  The two problems I foresee are first that it might fray, and second that it might lose its contours.  But you could easily attach it to a pin, and then pin it to your clothes.  Or do like our grandmothers did and baste it on, then cut it loose when you wash the dress, then baste it on again.  Dry-cleaning should be fine. 

I don't think this one is quite done yet... I feel like it needs something in its center.  Like beads:
Picture
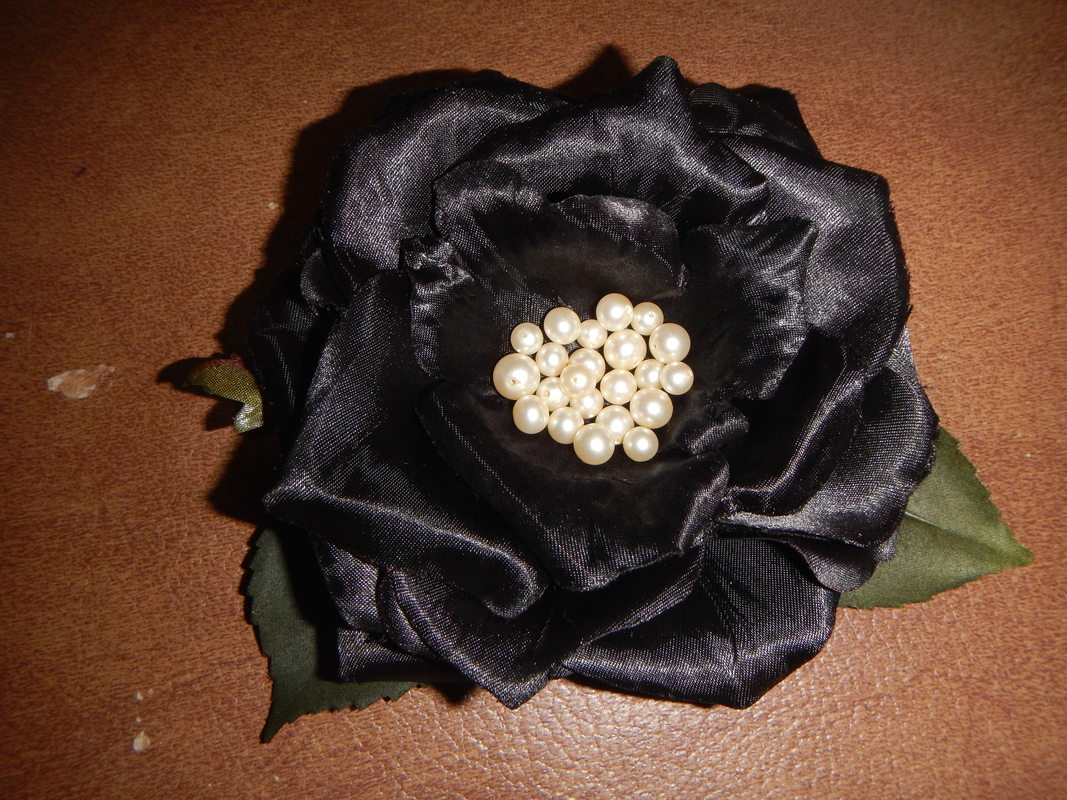
It's an idea...
But there's no point finishing it before I know where I'm gonna use it!  Once it has a place, I'll pick a center that works for the whole project. 
0 Comments


Leave a Reply.

    Karen Roy

    Quilting, dressmaking, and history plied with the needle...

    Categories

    All
    1910's
    Alteration
    Antique
    Dyeing
    Embroidery
    General
    Hand Sewing
    History
    Lacemaking
    Mending
    Menswear
    Millinery
    Modern Elizabethan
    Musing
    Other Sewing
    Philippians 4:8
    Project Diary
    Quilting
    Regency
    Retro
    Self Made Pattern
    Self-made Pattern
    Terminology
    Victorian
    Vintage

    Blogs I Read

    The Dreamstress
    Male Pattern Boldness
    ​
    Lilacs & Lace
    Tom of Holland
    Fit for a Queen
    Line of Selvage
    Mainely Menswear
    Bernadette Banner

    Archives

    January 2023
    December 2022
    November 2022
    October 2022
    September 2022
    August 2022
    October 2021
    September 2021
    August 2021
    July 2021
    June 2021
    May 2021
    April 2021
    August 2020
    June 2020
    May 2020
    April 2020
    March 2020
    January 2020
    December 2019
    November 2019
    September 2019
    August 2019
    July 2019
    May 2019
    April 2019
    March 2019
    January 2019
    December 2018
    November 2018
    October 2018
    September 2018
    August 2018
    July 2018
    June 2018
    May 2018
    April 2018
    March 2018
    February 2018
    January 2018
    December 2017
    November 2017
    October 2017
    September 2017
    August 2017
    July 2017
    June 2017
    May 2017
    April 2017
    March 2017
    February 2017
    January 2017

    RSS Feed

Blog

Quilting

Clothing

About

Copyright Karen Roy
​© 2017-2022