Robes de Coeur
  • Blog
  • Quilting
  • Clothing
    • Menswear
    • Womenswear >
      • Self-Made Patterns
      • Commercial Patterns
    • Hats
    • Miscellany
  • About
  • Blog
  • Quilting
  • Clothing
    • Menswear
    • Womenswear >
      • Self-Made Patterns
      • Commercial Patterns
    • Hats
    • Miscellany
  • About

My Dandelion Quilt - Pieced Dandelions

5/25/2021

1 Comment

 
Picture
Finally, I get to piece my dandelions!  The block I've made for this is a modified Blueberry Pie quilt block.  The modifications are that I add stitch-and-flip corners to the inside square (to give the appearance of more "petals", and remove the half-square triangles from the corners (to make the motif rounder instead of square).  I also choose to do the outer petals all with half-square triangles, instead of flying geese or more stitch-and-flip, because I think the extra seams will contribute to the multi-petaled look of a dandelion. 

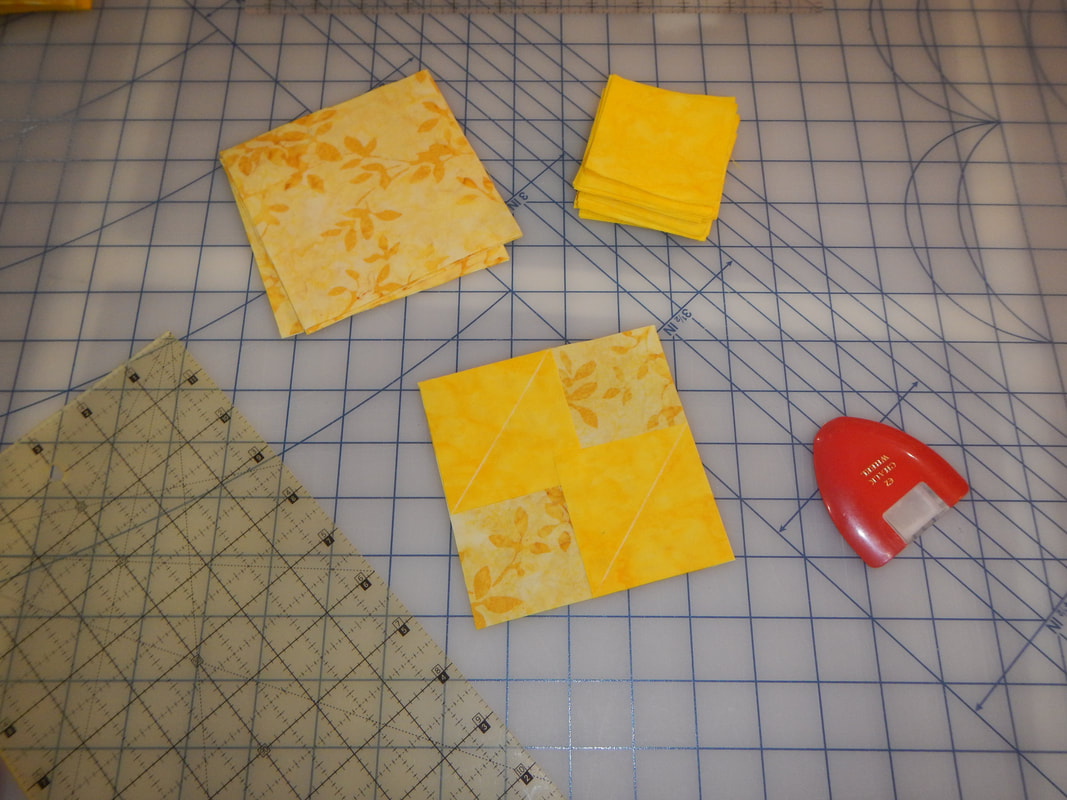
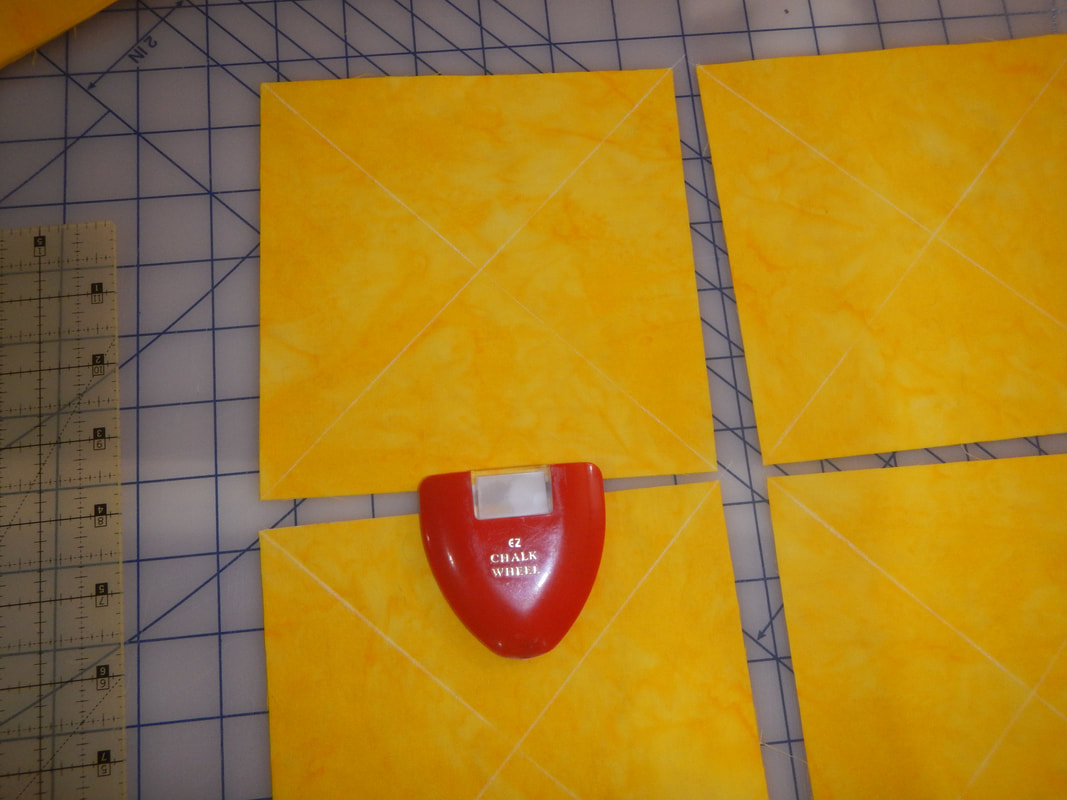
STITCH & FLIP

Stitch and Flip corners are easier for me than cutting and sewing triangles, so I use this method for the inside of the dandelion block.  Here's a brief tutorial:
Picture
I start with one patterned center piece (4.5" square) and two yellow pieces (each 2.5" square).  I snug the smaller squares into kitty-corner edges of the larger square, and use chalk to draw straight lines bisecting the smaller squares diagonally, as shown in this picture.  The chalk line is where I will stitch.  The yellow corners currently overlapping in the middle will be flipped outward. 
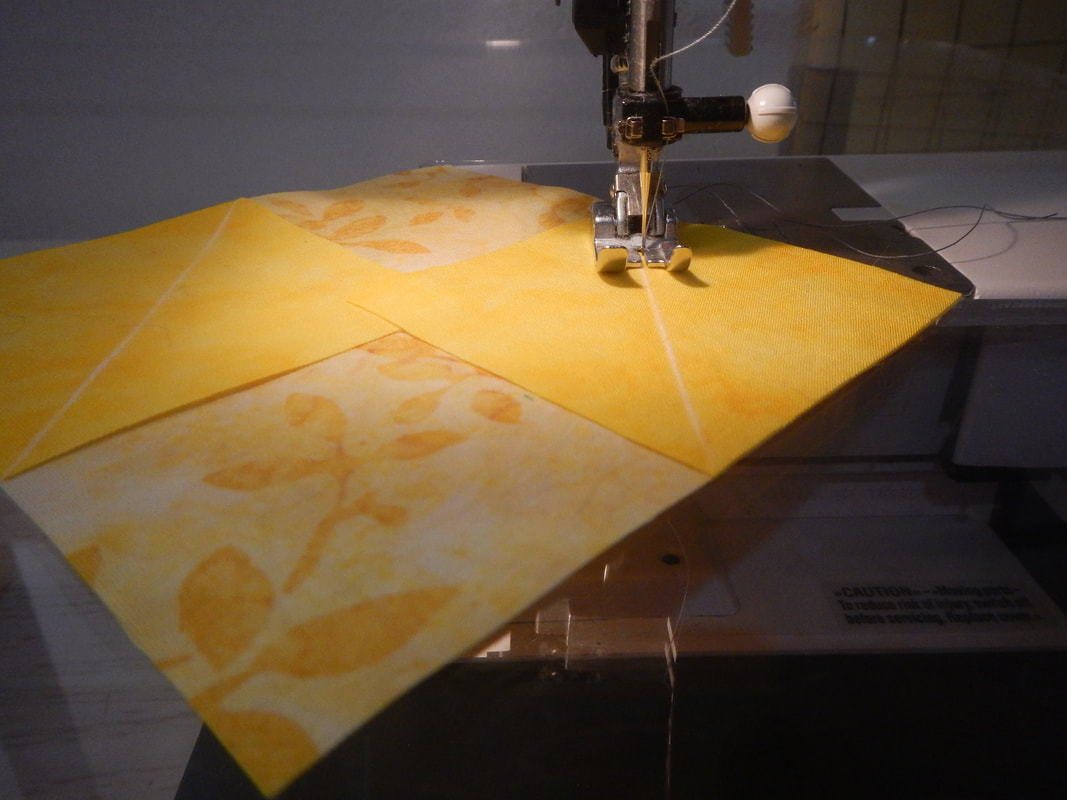
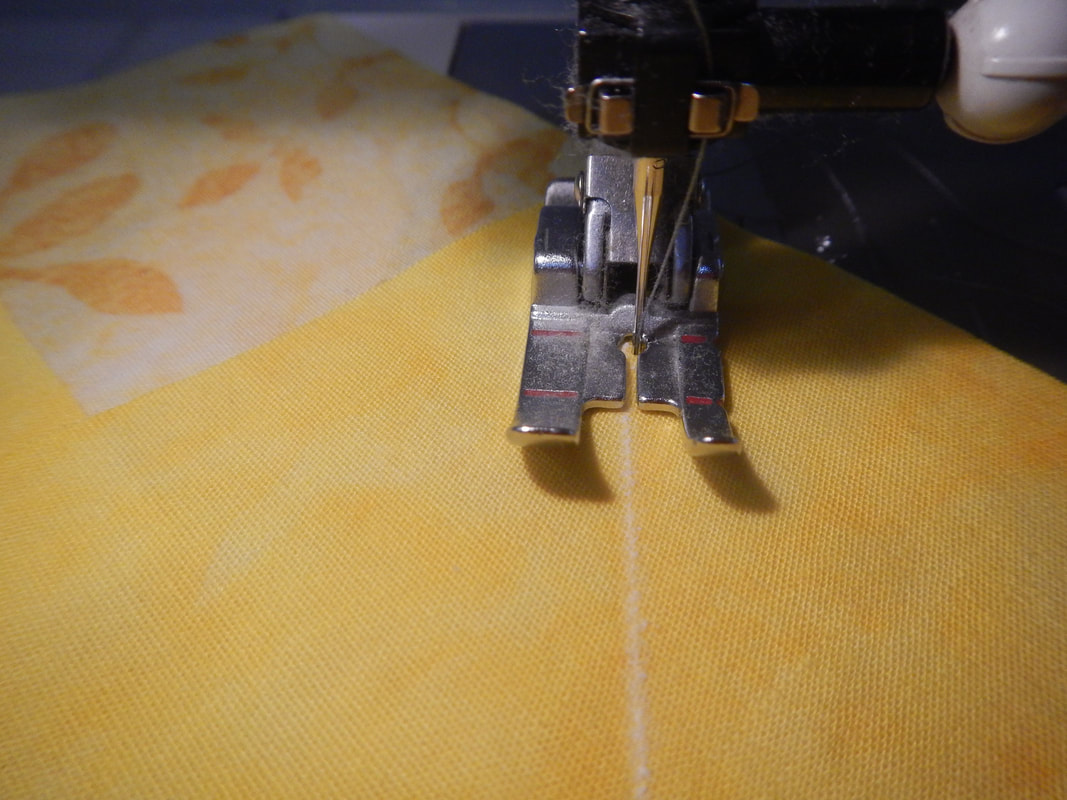
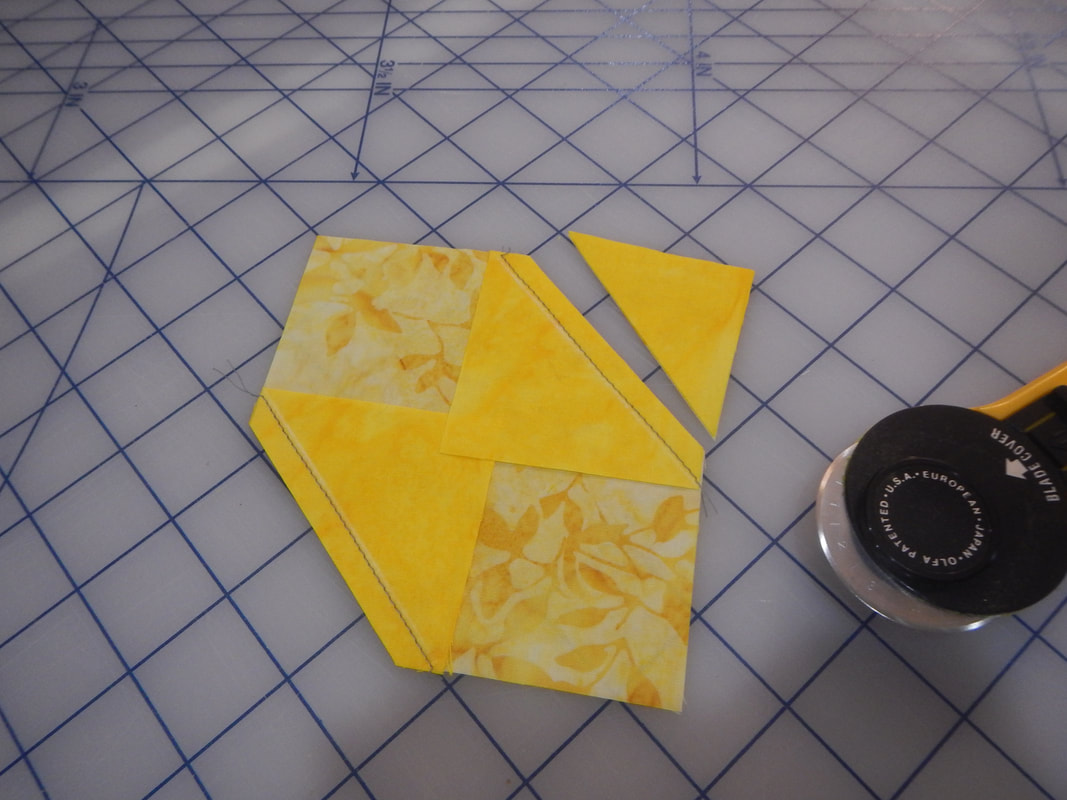
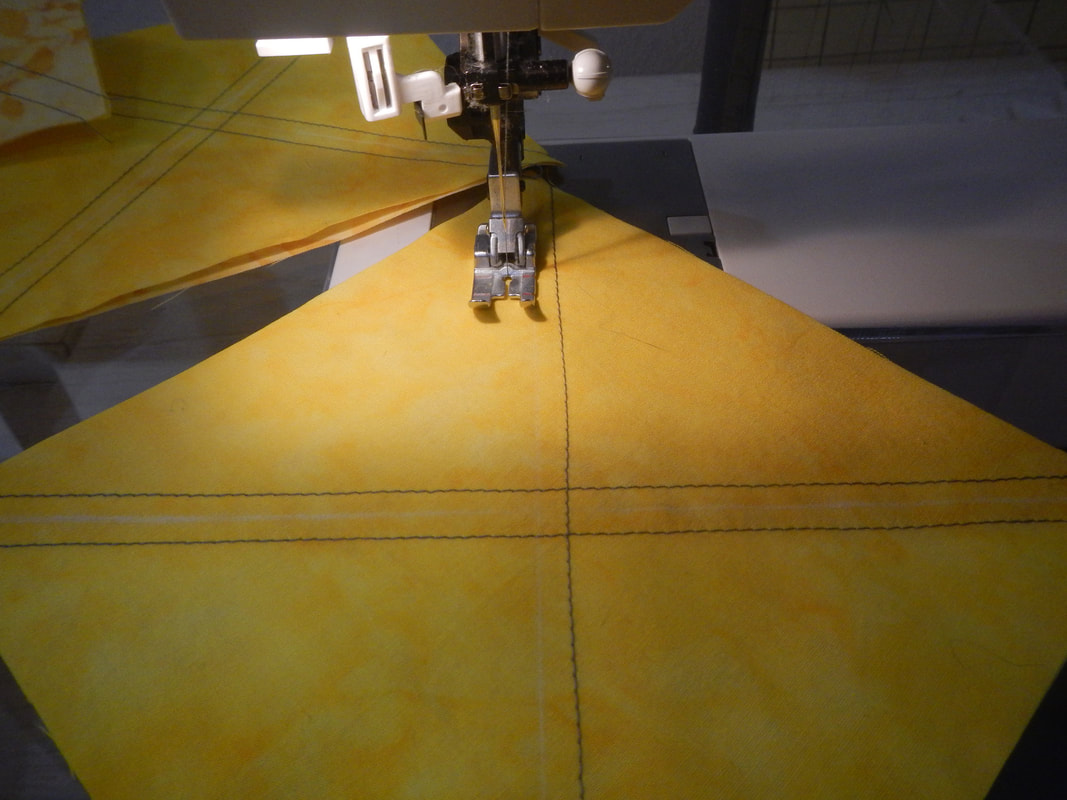
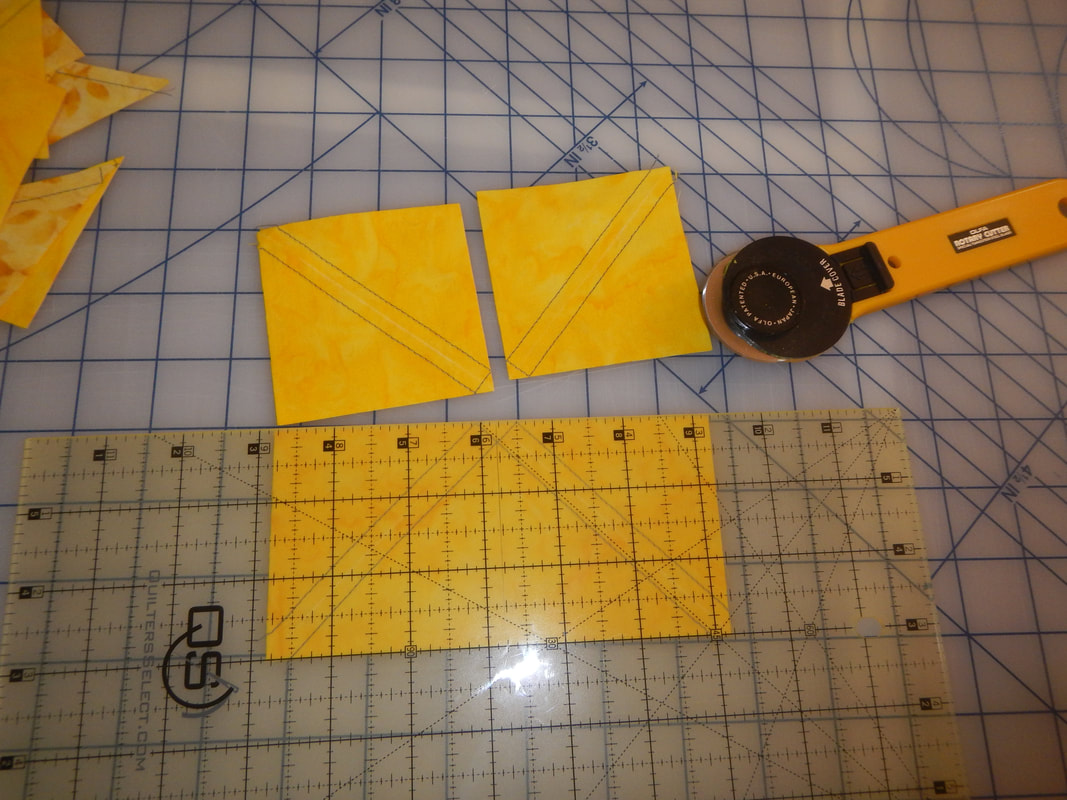
The next two pictures show how I sew the stitch-line... not directly on the chalk line, but just a hair to the outside of it.  This is because when I go to flip the corner out, a tiny bit of fabric will be taken up in the fold and the resulting triangular corner will be a little short.  Sewing just a hair into the seam allowances gives me that tiny bit back. 
Picture
Picture
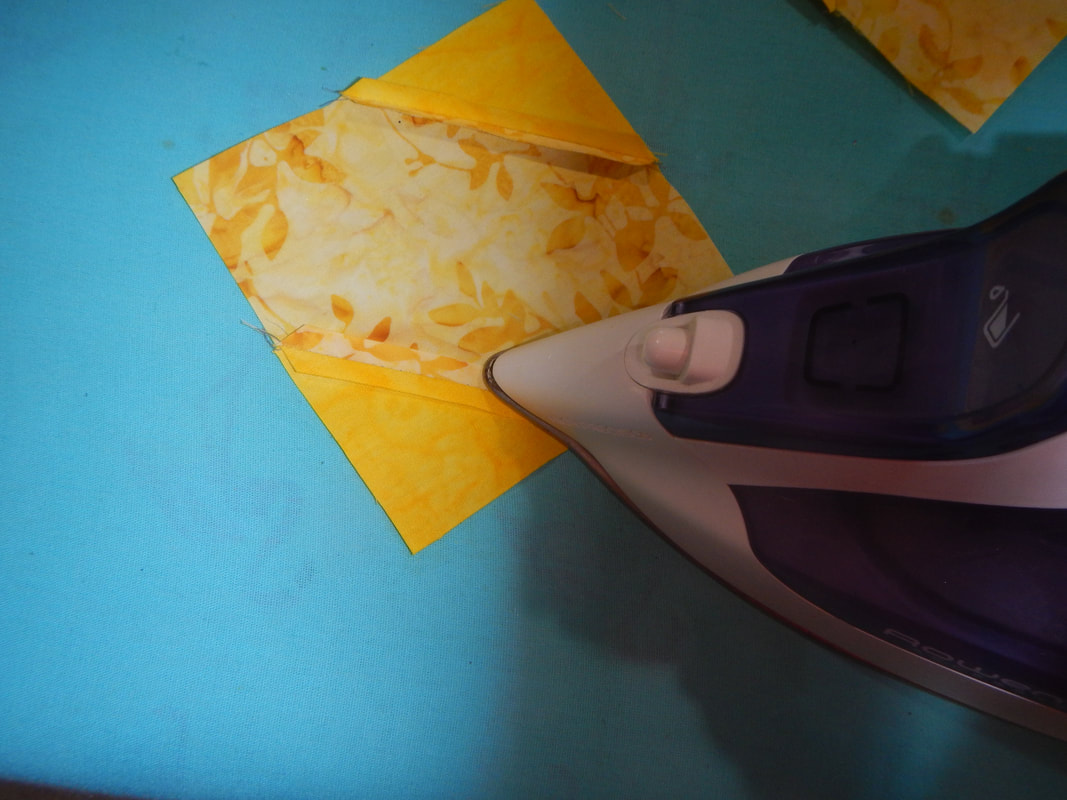
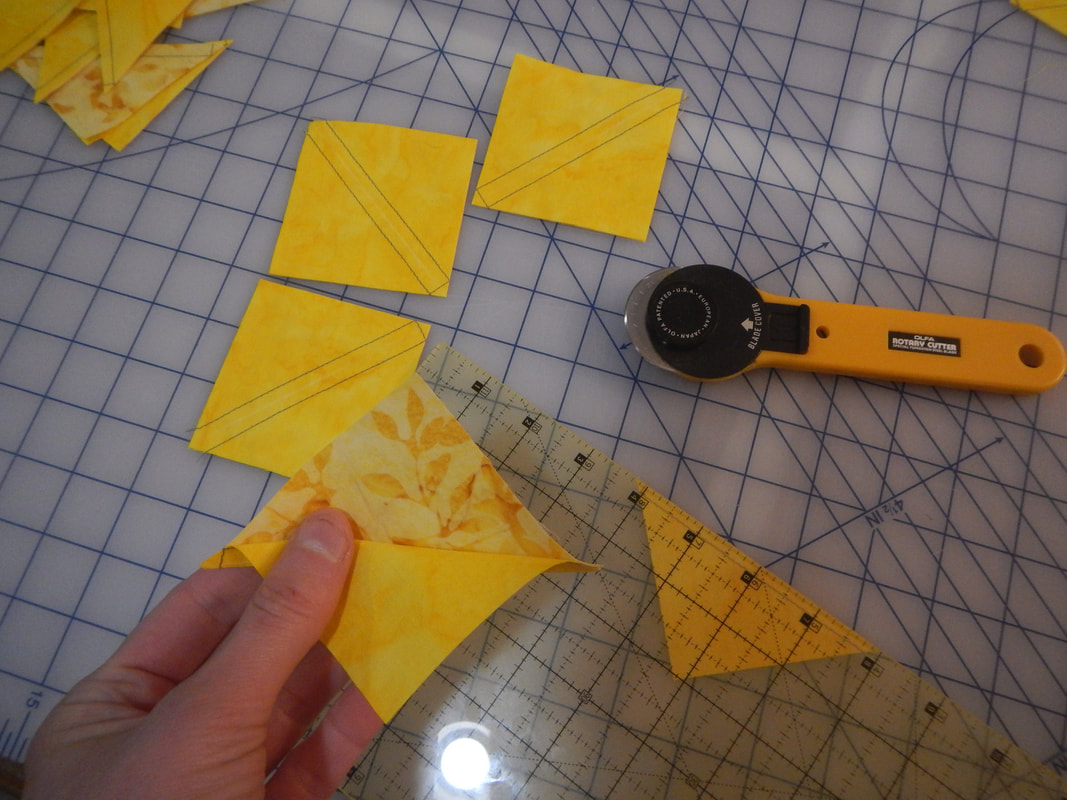
Trim the corners off a quarter inch from the stitch line, and then flip the yellow corners outward and press.  In the picture, you can see I pressed this seam open rather than to one side; that's because my two fabrics were both light colors and I thought it would reduce seam allowance show-through.  Later, Rosanne informed me that I need not have worried about that: once there's batting and backing, it all blends together.  If you have darker fabrics or more contrasting fabrics, you should press the seam allowances toward the darker piece.  However you decide to press, be consistent for every unit and all nine dandelion blocks. 
Picture
Picture
Once the unit is pressed, repeat the process on the other two corners, trim, flip, and press. 

As you sew, watch that the seam allowances from the first step do not get crumpled or flipped by the feed dogs or presser foot.  Always aim for a neat, flat back. 
Picture
Finally, square up the units.  The finished size should be 4.5" square.  If you have a clear ruler like mine, align the 2.25" mark with the center points, and trim the sides from there, so the block is not only squared off and rightly sized, but also well centered.  (I don't know how people did exact things like this before these tools were invented!) 
Picture
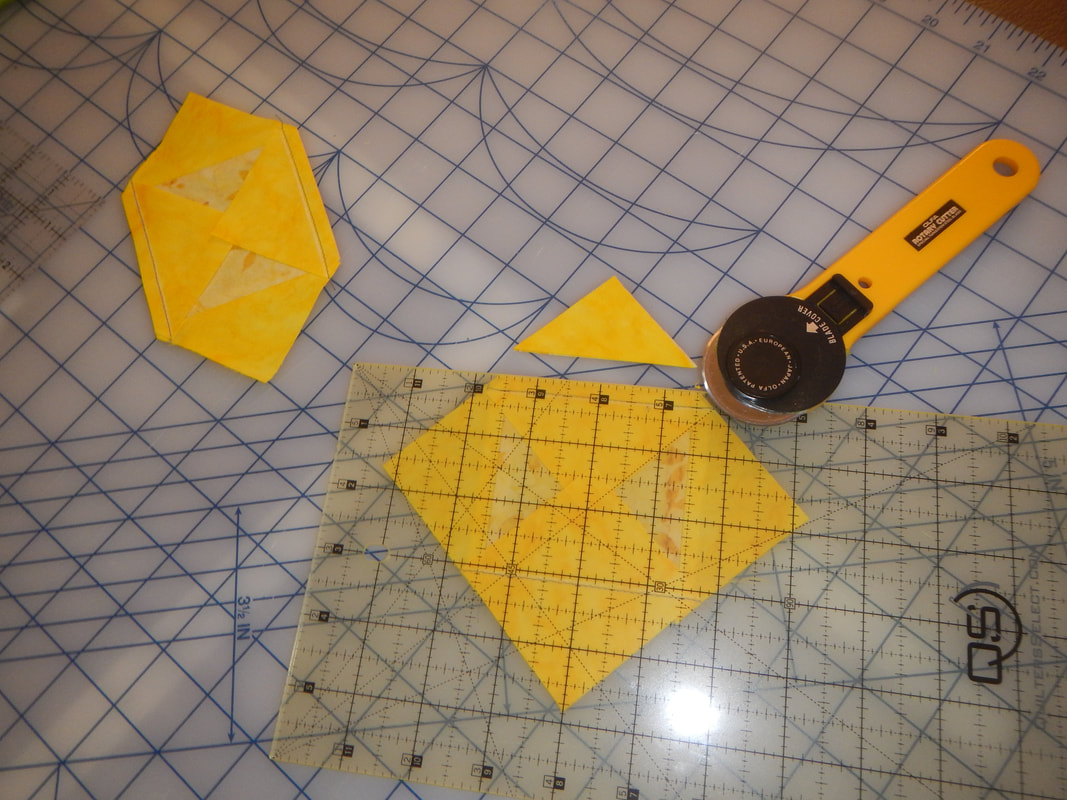
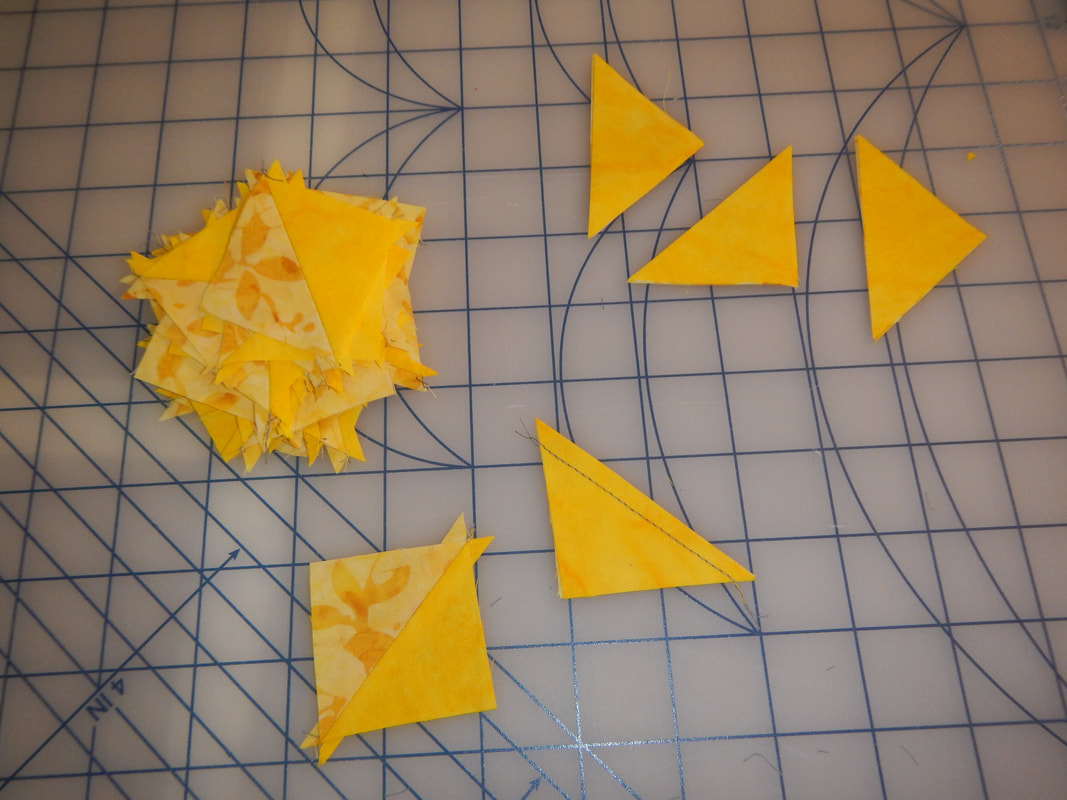
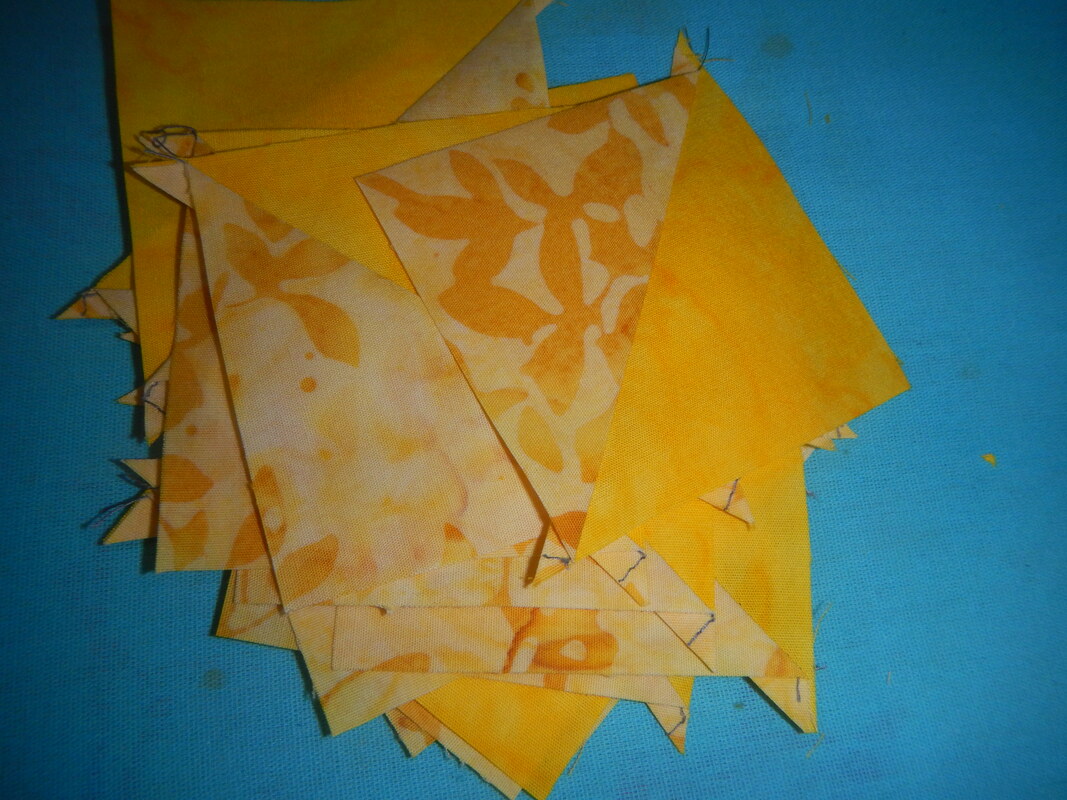
Since my quilt calls for nine dandelion blocks, I make nine of these units. 

BONUS TRIANGLES

The seam allowance that I trim off gives me a thirty-six right triangles, already conveniently stacked as if for sewing.  So I sew them!  I don't know what I'll use them for, but perhaps they can be a detail on the quilt back.  I play around with arrangements. 
Picture
Picture

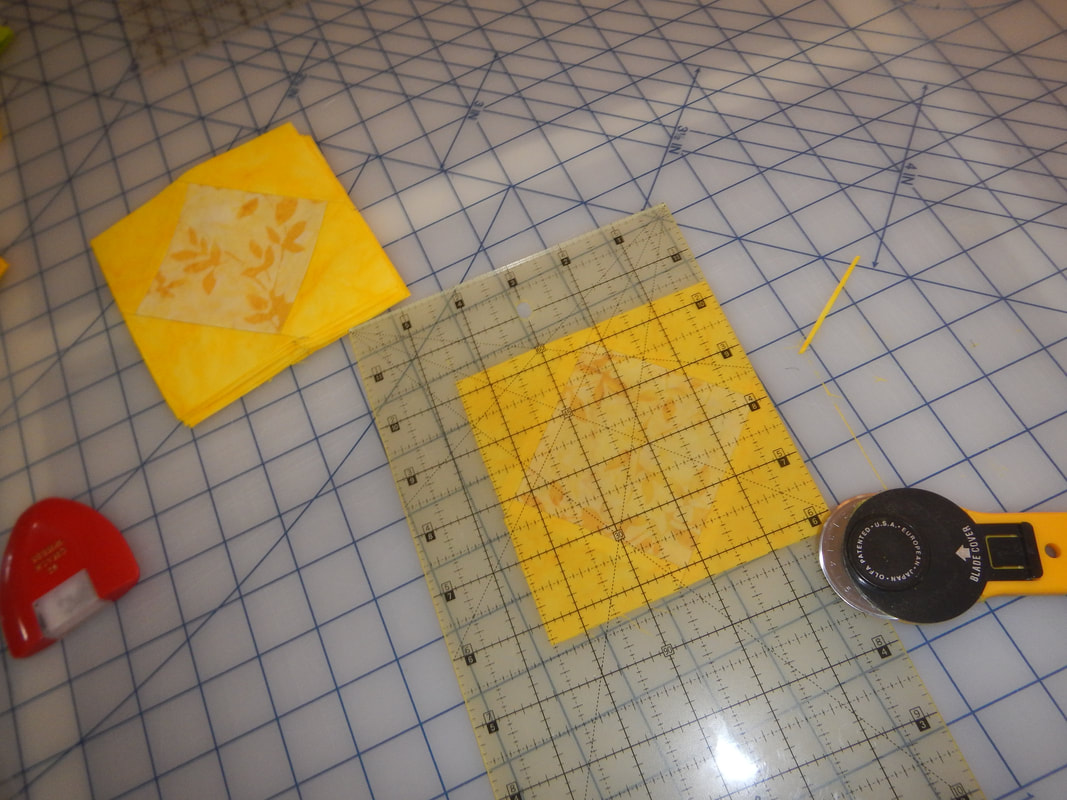
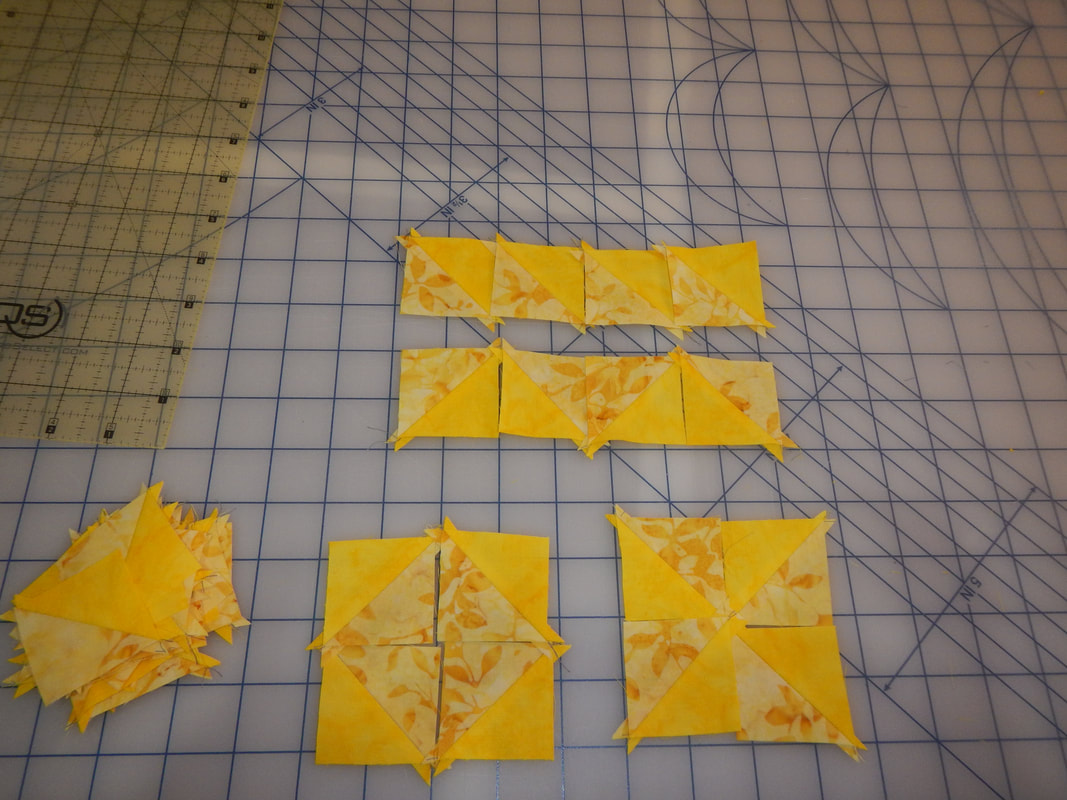
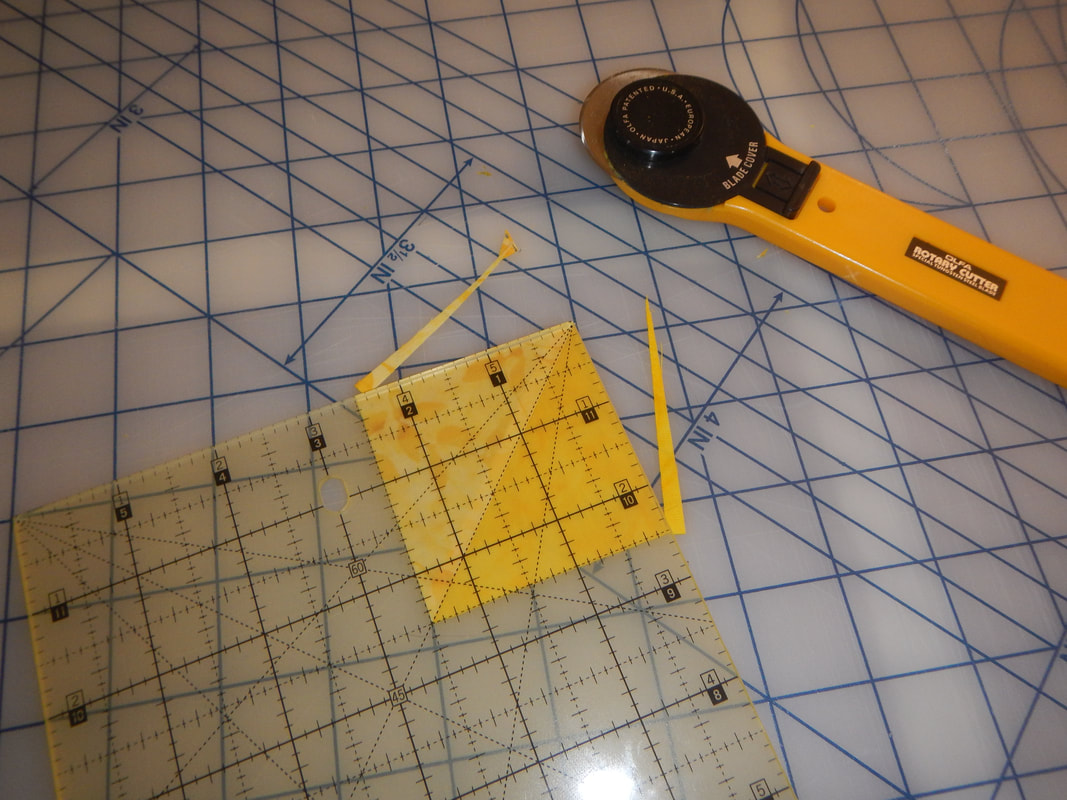
PIECES OF EIGHT...

...eight half-square-triangles, at least!  Each Dandelion block calls for eight HSTs of the two shades of yellow, and eight HSTs of yellow/green.  I sew them in a rather clever way I saw on Pinterest. 
Picture
First, lay the two different colored blocks one on top of the other.  This picture shows the dark yellow atop the patterned yellow.  Each dark yellow square you see is the top of a stack of two, in the two colors. 

Second, mark an X from corner to corner with chalk, marking pencil, or a light pencil line. 
Picture
Third, sew the stack of two together, with stitch-lines a quarter inch on either side of the chalk lines.  Think about those penmanship papers you did in elementary school, which had a top line, a bottom line, and a dotted line in the middle... imagine the chalk line is the middle, and you are sewing the top and bottom lines. 

(Once the sewing is done is a good time to press the stitch-lines, before cutting.)
Picture
Fourth, cut the square into quarters.  Your cut lines will be in the shape of a plus sign, and each quarter square will have parallel lines of stitching running diagonally through it. 
Picture
Fifth, cut between the stitch lines, along the chalk line you first drew.  This'll give you eight half-square triangles (HSTs). 

Sixth, open the HSTs, pressing the seam allowances to the darker side, and finally, trim the HSTs to size: 2.5" x 2.5". 
Picture
Picture
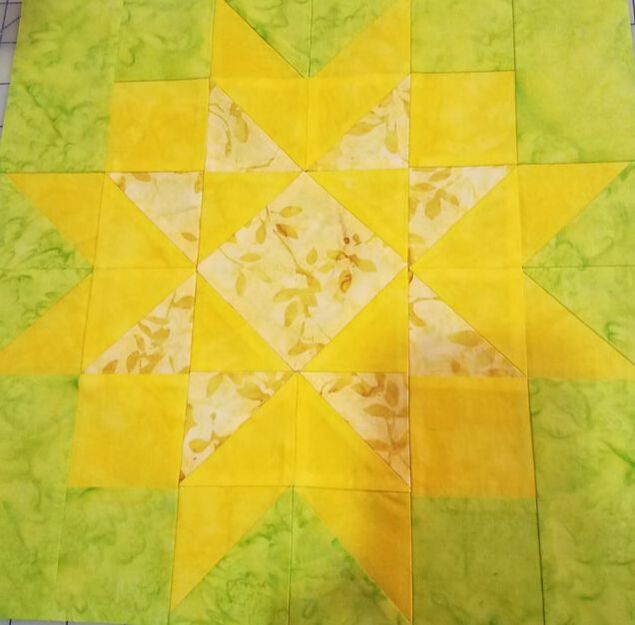
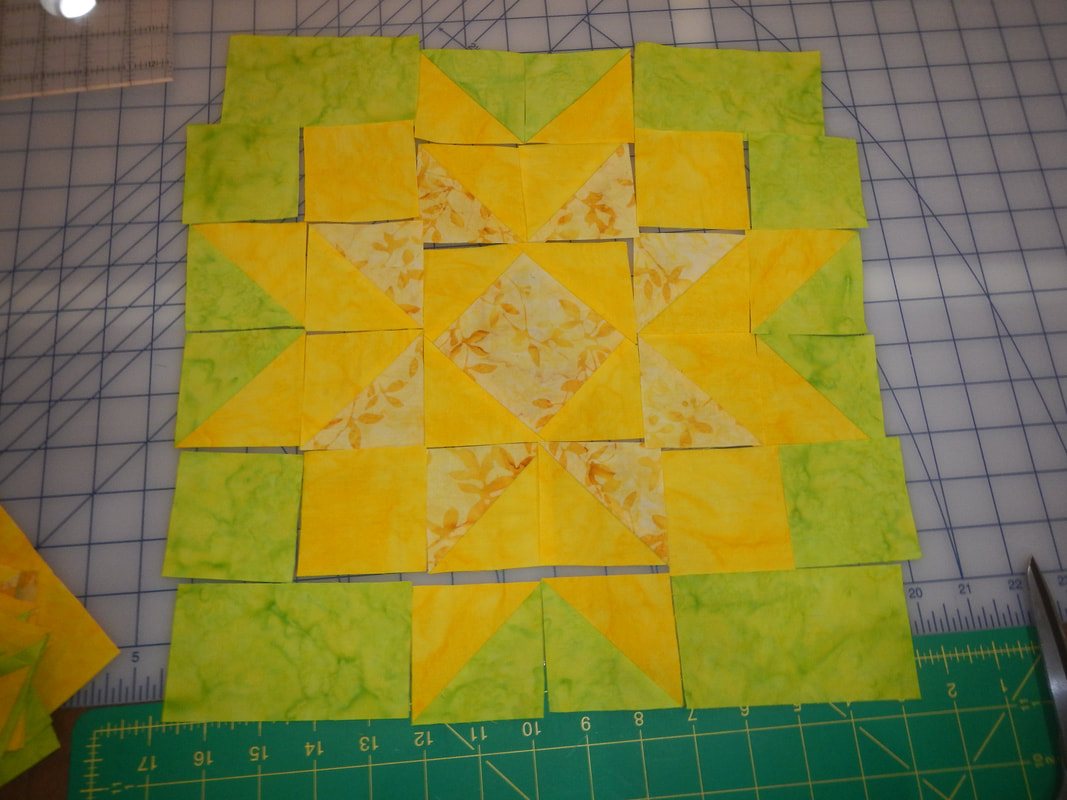
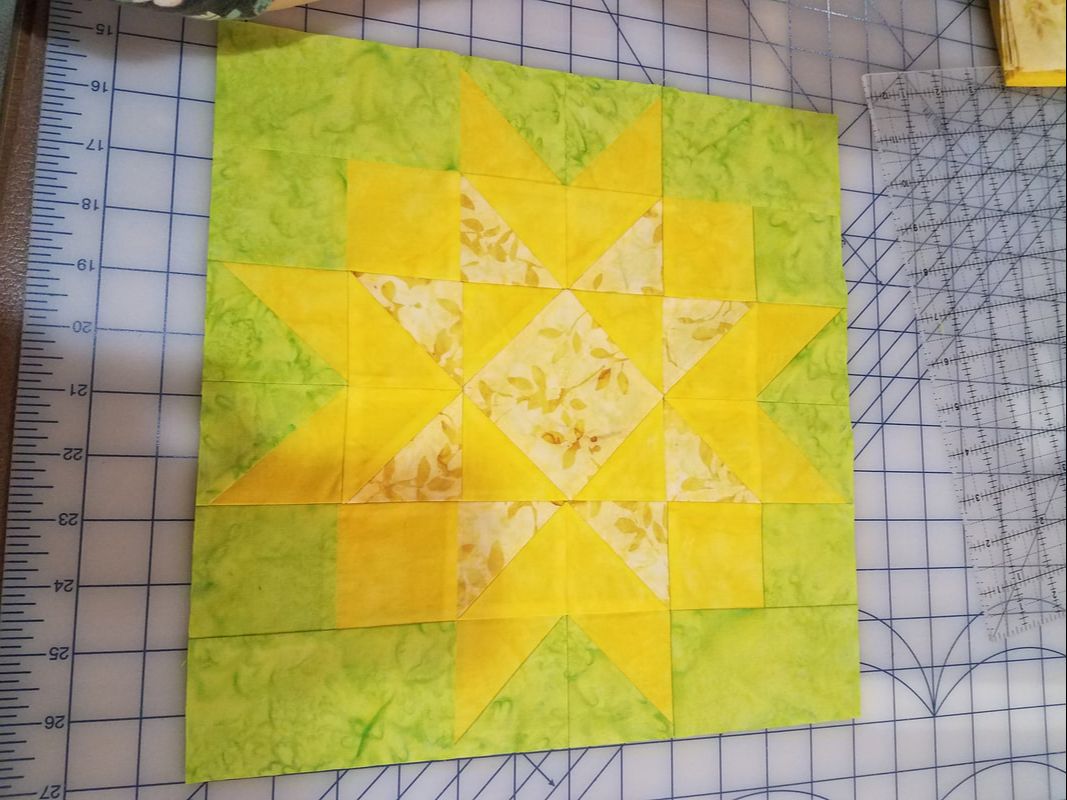
Here's the same process with green/yellow HSTs.  The contrast in colors is stronger, so you may prefer these pics, though the whole process isn't documented. 

DANDELION!

Here's the various units of the dandelion block, all laid out, then sewn together.  So pretty! 
Picture
dandelion block in pieces
Picture
finished dandelion block

Other posts in this project: Design, Sky and Wishies. 
1 Comment
The Sister
6/16/2021 07:27:30 pm

That's neat! This reminds me of a pot holder that Marilyn made; it was all squares and triangles lapped over each other so it ended up both sturdy and flexible.

Reply


Leave a Reply.

    Karen Roy

    Quilting, dressmaking, and history plied with the needle...

    Categories

    All
    1910's
    Alteration
    Antique
    Dyeing
    Embroidery
    General
    Hand Sewing
    History
    Lacemaking
    Mending
    Menswear
    Millinery
    Modern Elizabethan
    Musing
    Other Sewing
    Philippians 4:8
    Project Diary
    Quilting
    Regency
    Retro
    Self Made Pattern
    Self-made Pattern
    Terminology
    Victorian
    Vintage

    Blogs I Read

    The Dreamstress
    Male Pattern Boldness
    ​
    Lilacs & Lace
    Tom of Holland
    Fit for a Queen
    Line of Selvage
    Mainely Menswear
    Bernadette Banner

    Archives

    January 2023
    December 2022
    November 2022
    October 2022
    September 2022
    August 2022
    October 2021
    September 2021
    August 2021
    July 2021
    June 2021
    May 2021
    April 2021
    August 2020
    June 2020
    May 2020
    April 2020
    March 2020
    January 2020
    December 2019
    November 2019
    September 2019
    August 2019
    July 2019
    May 2019
    April 2019
    March 2019
    January 2019
    December 2018
    November 2018
    October 2018
    September 2018
    August 2018
    July 2018
    June 2018
    May 2018
    April 2018
    March 2018
    February 2018
    January 2018
    December 2017
    November 2017
    October 2017
    September 2017
    August 2017
    July 2017
    June 2017
    May 2017
    April 2017
    March 2017
    February 2017
    January 2017

    RSS Feed

Blog

Quilting

Clothing

About

Copyright Karen Roy
​© 2017-2022