EVOLUTION OF THE UNDIES! Stays--the long kind that go from high on the bosom to below the belly and are boned with long vertical strips of cane, reed, or baleen--were the usual undergarment for women's clothing for centuries. The late 1500's saw women starting to bone their bodices or stiffen them with heavy canvas, to make a smooth, stiff front to their outfits. The stiffened bodice was hard to launder, so it developed into stiffened stays, which were worn under the other clothes. The appeal of stays is interesting: they are like armor on the belly, yet they also push the bosom upwards, exaggerating its swell and softness. They enforce good posture and provide a foundation for heavy skirts. They can also be quite warm, which may be why they coincide with the Little Ice Age and not the earlier Medieval Warm Period. I'd rather be wearing stays in between my layers in the winter than not. At any rate, women used to wearing stays every day would no doubt feel naked and unprotected without them! But after the French Revolution, people associated that stiffened look with the old, detested, aristocracy. French women abandoned tall wigs, wide panniers, and stays, and began to dress in pseudo-Greek chitons, aiming to look like classical goddesses and thereby to reference the Greek democratic ideals of the new government. The style crossed the channel, and English women wore the same style, but more conservatively. Though English speakers refer to this style of dress as "Regency", the Regency period was in Britain. It borrowed clothing fashions from France even while being at war with France! In French terms, this period was the Empire (say "om-PEER"), which is why the super-high waistline is still called an "Empire waist". Though the dresses changed completely, the cultural idea of what a woman's body should look like didn't change. People wanted to keep the breasts high under the new dresses. So women compromised and began to make their own versions of stays, to get the silhouette without the stiffness. They kept the shoulder straps of the stays, but replaced boning with quilting and cording, and made high cups for their breasts. The abbreviated garment known as "short stays" was ideal for smaller women like me, who don't have much bosom to push around. Larger women found that short stays didn't give enough support, and the drag on their shoulders was bad, so they made "long stays" that went over waist and hips and often had a wooden busk inserted in a Center Front pocket. However, since the dresses didn't cling to the belly, there was no need to put boning there, and the whole garment was more like a quilted vest than anything. (Here's another blogger's research and musings on Regency stays, with lots of helpful fashion images from the era.) As the Regency period turned to the Romantic period, the waist settled back to its natural level. Then in the early Victorian era, the long Regency stays morphed into corsets, with the emphasis on compressing the waist. Victorian corsets, like earlier stays, were heavily boned, made by professional men, and supported off the hips. But like the Regency stays, they had curving seams and room—gussets, even!—for the bust. Standing as they do between stays and corsets, the Regency stays are sometimes called “transitional stays”. Here's a quick list of the major differences between earlier stays, Regency stays, and Victorian corsets:
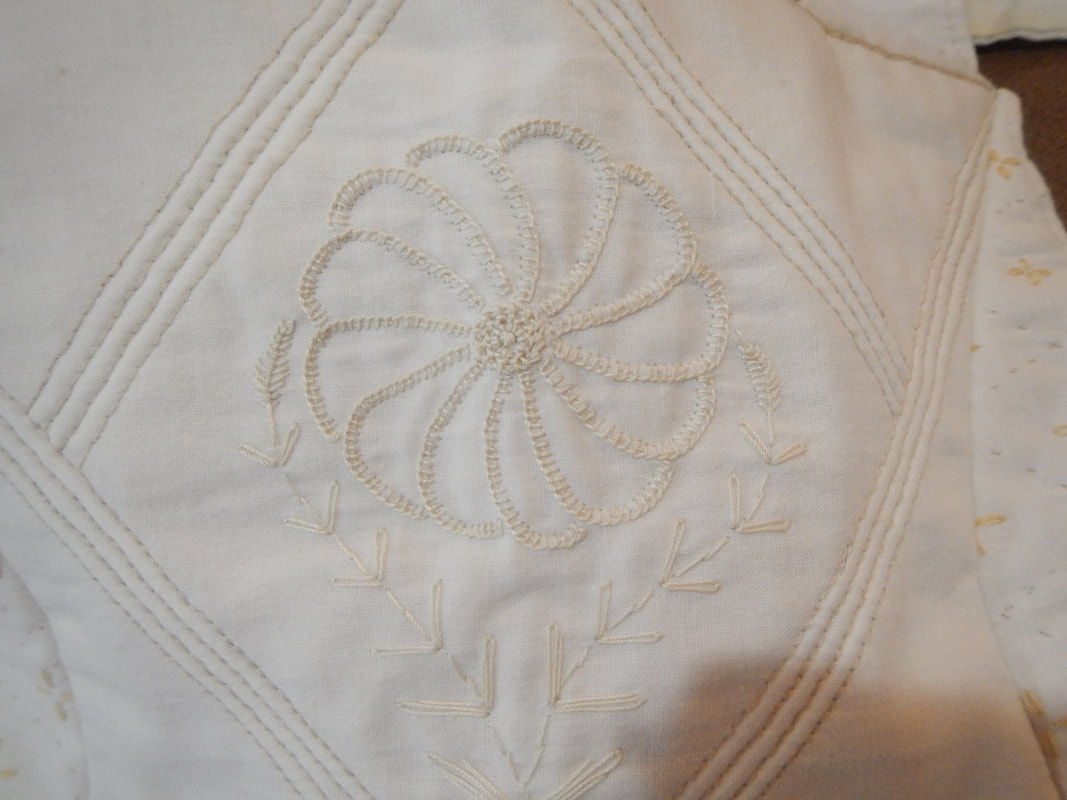
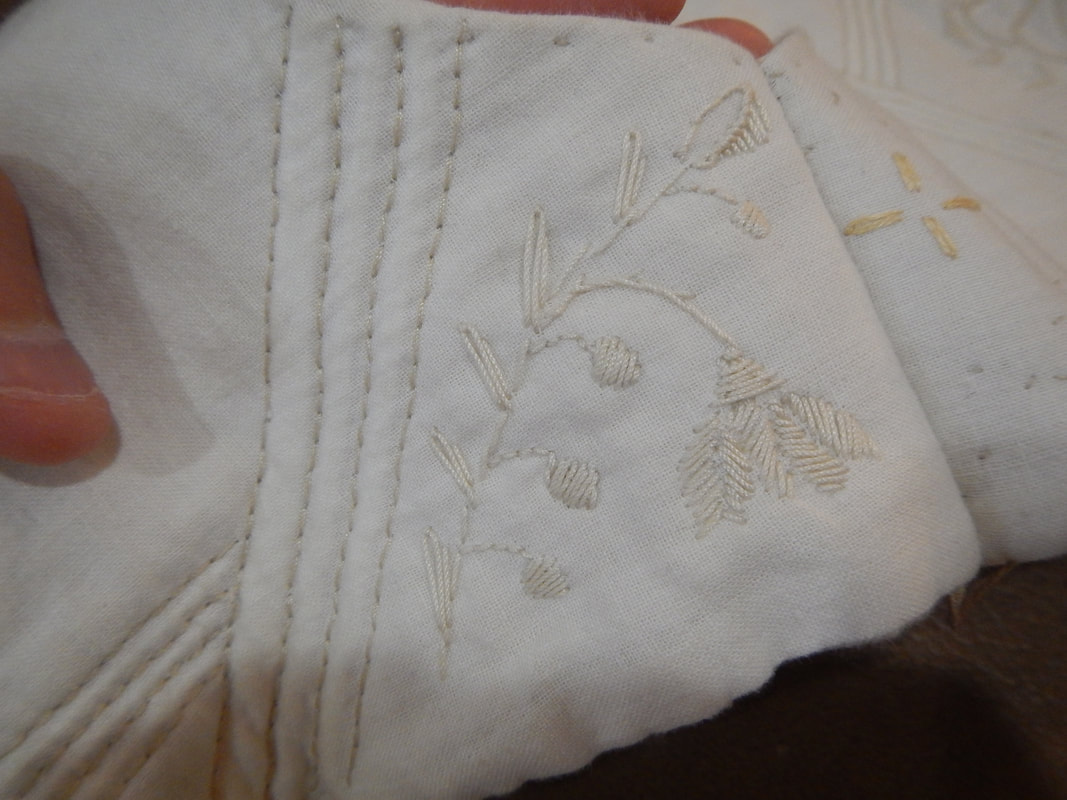
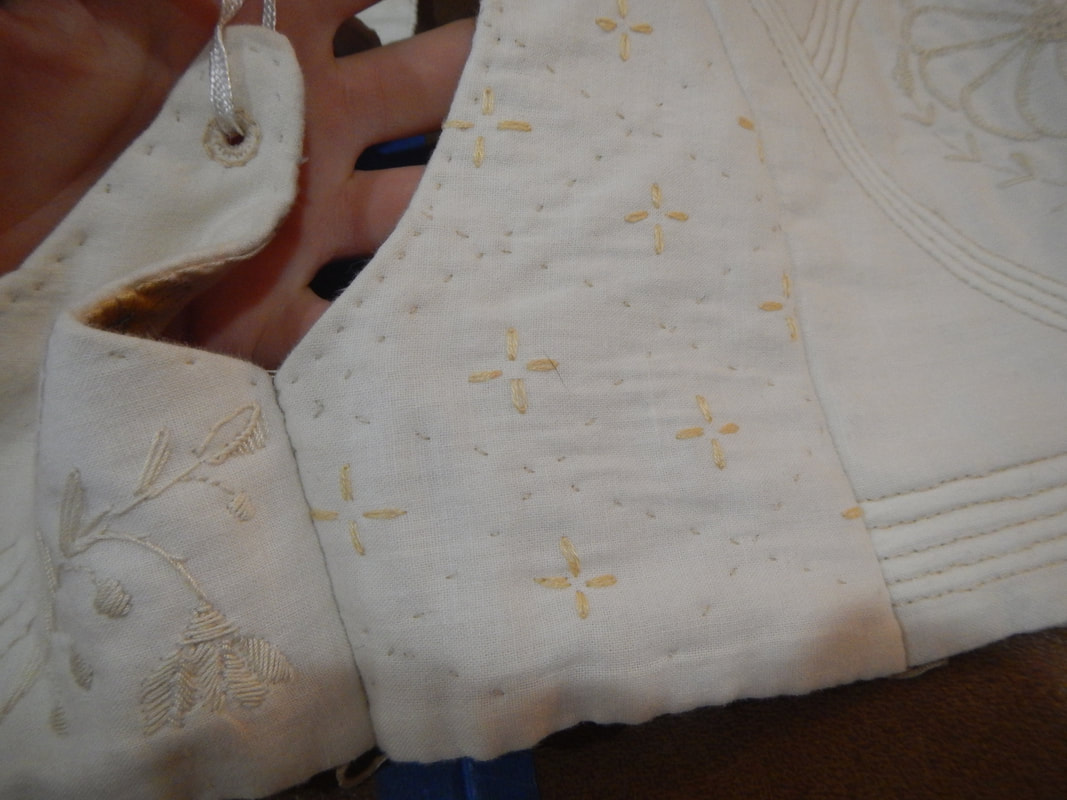
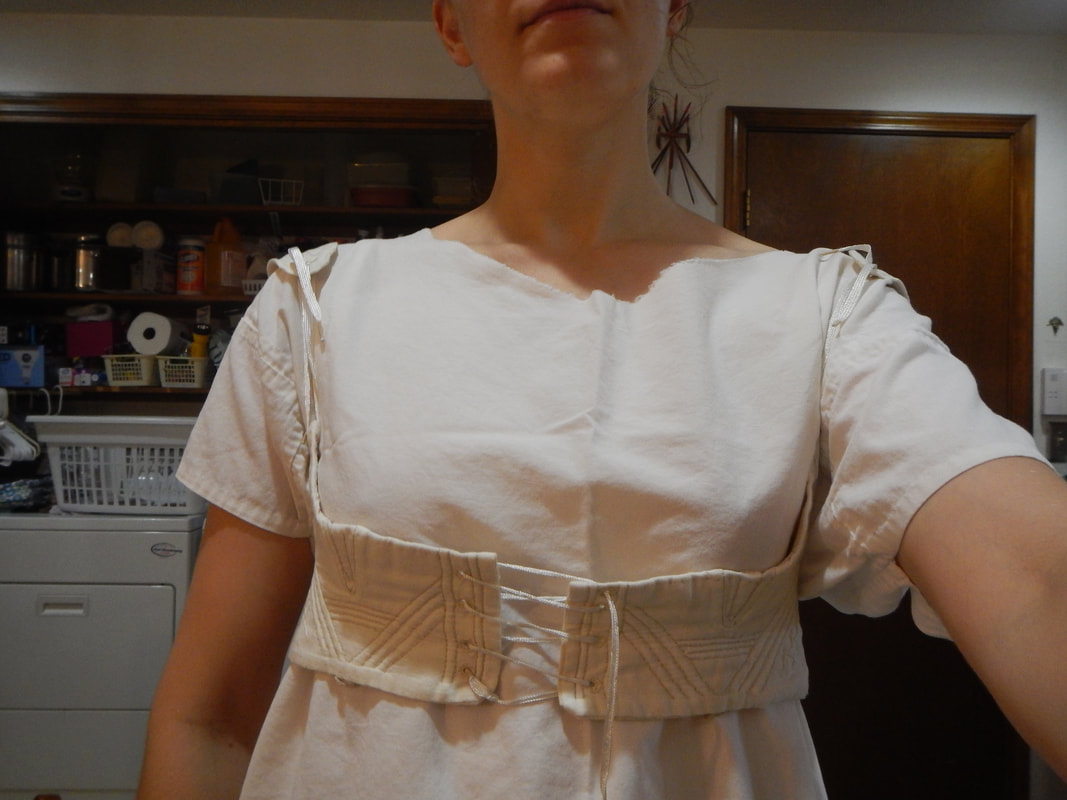
So the softer, homemade stays of the Regency were a little wink of time when women made their own supportive undergarments! MAKING THE SHORT STAYS When drafting my pattern, I used the guide to drafting short stays. written and diagrammed by Megan Martin, the Mistress of Disguise. The basic idea is that you're making a wide, skin-tight belt the girth of your ribcage just under the breasts. Then you insert gussets to flare the top of the belt so the breasts can sit on top. Finally, you make short shoulder straps that you can adjust the length of with ties. You put the belt on below your breasts, then shorten the shoulder straps so the belt is pulled up; your breasts, therefore, shift upward on their shelf. Short stays are a strange contraption: like an elevator for the bosom. 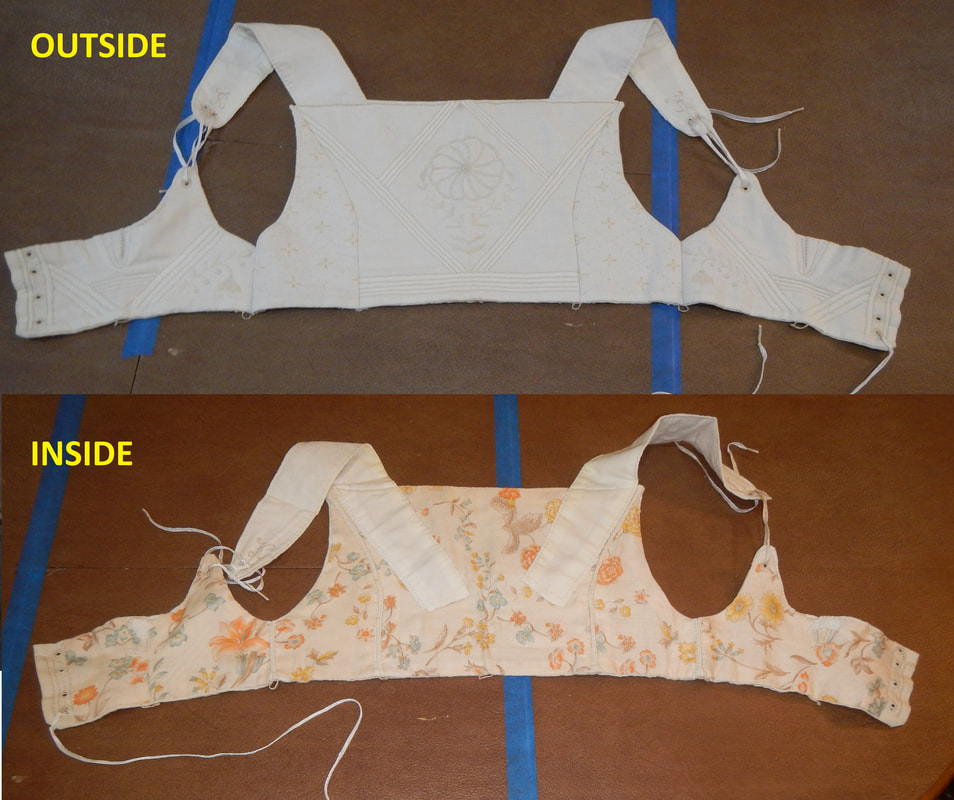 the finished short stays laid out The first change I made was to make only one bust gusset per side, instead of two. This is because I am smaller, and as I was drafting, I found that if I followed her instructions exactly, one of my gussets would be directly below the raised section for the strap. I.e. I couldn't place the second gusset because there wasn't room! Changing the number of gussets also meant changing the size of them. The difference between my underbust and my bust was four inches. Megan Martin says to divide this number by four to figure out how much each gusset should take in. Since I was only going to have two gussets in the end, I divided by 2 and got a tiny little two-inch gusset piece. I suppose two of them are better that four one-inch gussets! Another place where my smallness caused problems was in the half-shoulder measure. I measured from shoulder to shoulder and got 16 inches. Then I cut it in half (8 inches) and found that was longer than my whole half-back! There was no way I could mark my shoulder inside my piece like that! Thinking perhaps Megan meant the place where you want the straps to fall, I measured significantly inside my shoulders... like from clavicle end to clavicle end. That worked. The third change I made to the pattern was to curve the shoulder straps into a C, instead of leaving them straight. When attaching them to the garment, I made the convex side face the neck. It seemed to conform better to the lines of my body. 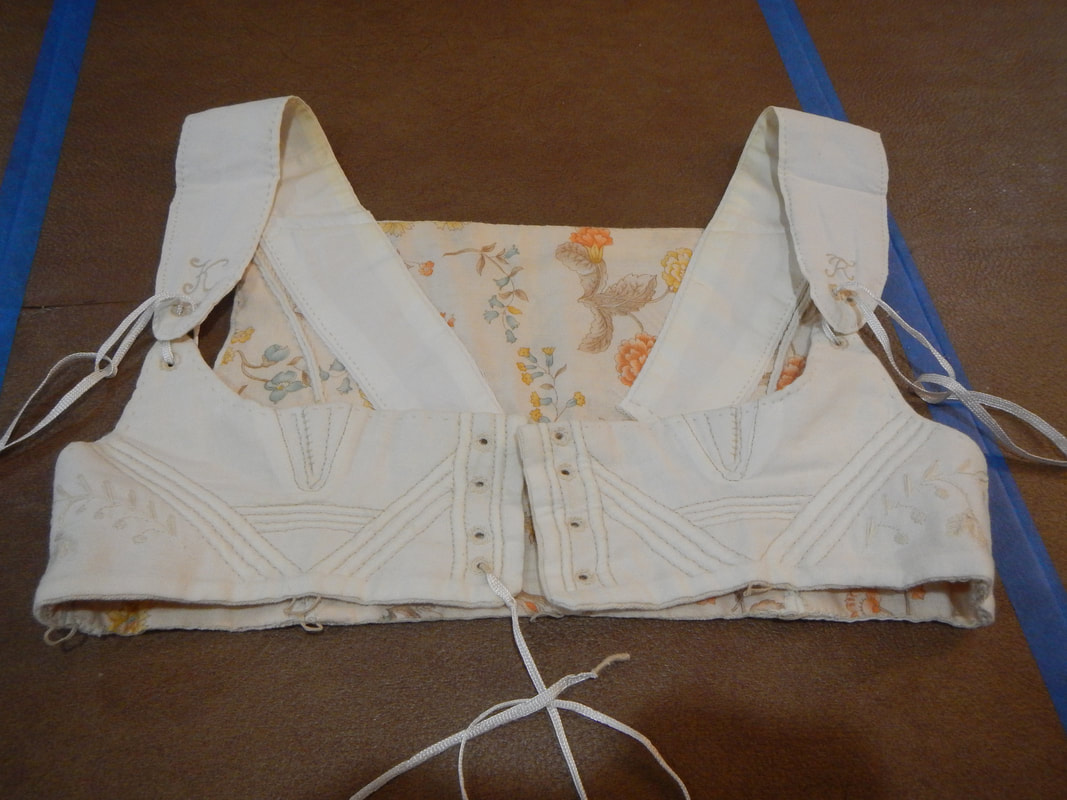 Like a handmade, cup-less bra! The pattern pieces were so small that I could use whatever scraps of fabric I had to hand. I finished each pattern piece separately, turning the seam allowances down and lining it with patterned lawn, before whip-stitching the pieces to each other. The benefit of this construction is that if I grow and need to add other panels, I can separate the pieces without damaging their lining. In the close-up pictures to follow, notice that the embroidery patterns and the cording (cords sewn into channels in between layers to stiffen things) are all contained within their panels. I hand-sewed these stays entirely, decorating them with embroidery patterns I selected from Ackermann's Repository. I also hand-sewed little loops at the bottom, for possibly attaching a petticoat's skirt later with hooks or ties. I have never used this feature, but I could if I wanted to. Things I enjoyed in this project: doing sewn eyelets instead of metal ones, cording between the layers, handsewing it all (yay!), making the most of a subdued palette (oatmeal and white, but I made it pretty!), and having it done so I could move on to Regency dresses. CLOSE-UP PICTURES 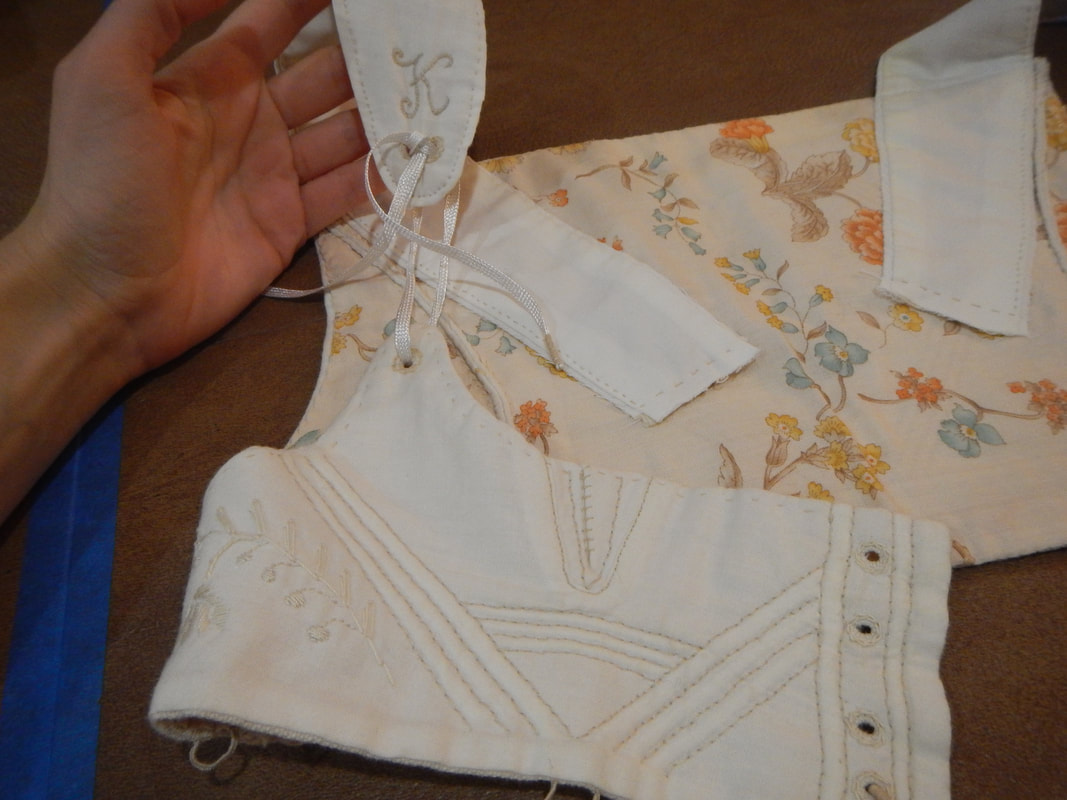 The front, right side. 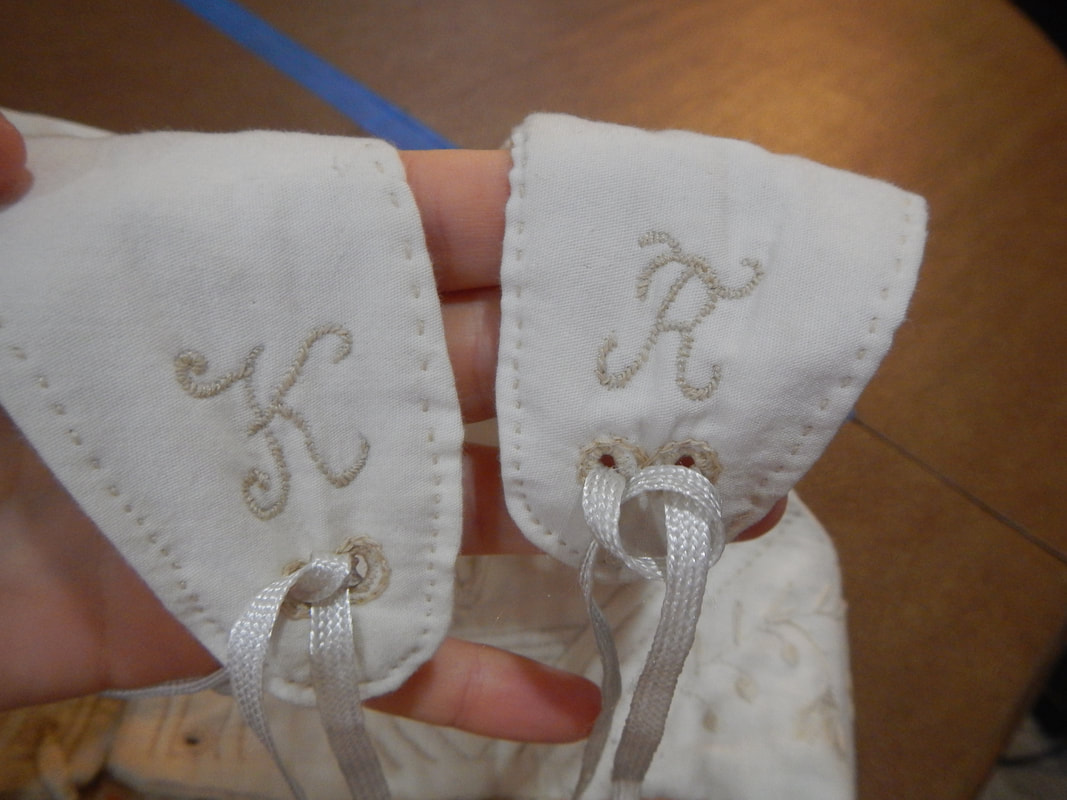 I monogrammed the shoulder straps.
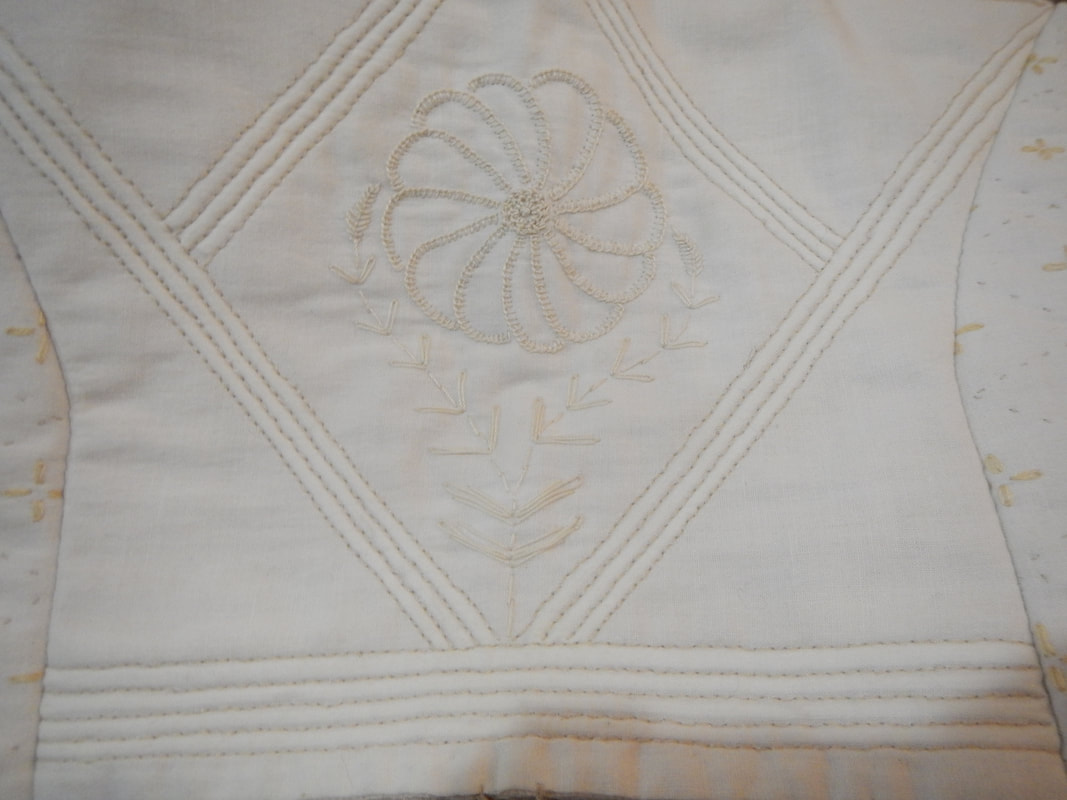 Back panel: embroidery and cording If you do an image search for extant Regency stays you'll see that this embroidery and detailed handwork is the norm for the period. WEARING SHORT STAYS
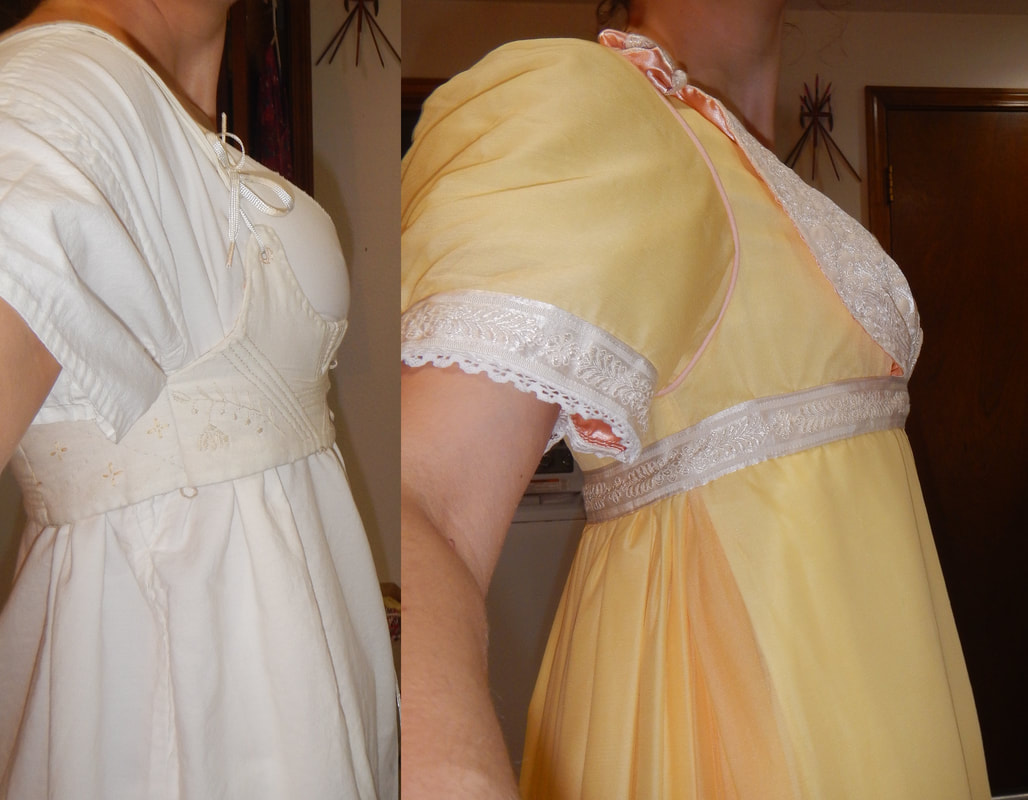 headless Karen! Wearing the short stays is a puzzling experience. One the one hand, it's nice to have my belly free, and to be able to eat freely and bend without trouble. On the other hand, the tight shoulder straps make these not quite the light and breezy affair I thought they'd be! I anticipated the effect of wearing them to be anti-Victorian, not restrictive at all. My experience, however, is that the tightness of the shoulder straps pulls my body into an unnatural rigidity in the upper back, and I feel pain in the muscles between my shoulder blades after a day of wearing the garment. I don't think my experience is enough to say that's how Regency short stays actually were, though. I may have made them or may be wearing them differently from how the women did back then. I'd be curious to know how other historical costumers feel in their short stays!
9 Comments
The Sister
10/9/2018 02:14:28 pm
I'm wondering if the tightness between your shoulder blades is simply from the forced improved posture...? I think I'd rather like the way it fits; it sounds nice to have support from underneath instead of digging into my shoulders.
Lisa
11/7/2019 12:46:28 pm
I think if you have pain in your shoulder blades, you may need long stays. The busk in the front and boning in the sides of long stays is where the support comes from.
Eleni Johnson
4/28/2020 02:20:13 pm
Lovely work! I'm also following this pattern, and I'm curious as to how you made the straps. I'm not sure if I should back-stitch the two layers of the strap together inside out and then flip the right way. I suppose the other option would be to hem each individual piece (or just fold along the line) and then back-stitch the layers together right-side out so the stitching is visible. Please let me know what you did or what you'd recommend. I'd appreciate any advice very much!
Hi Eleni! Thanks for your comment. It's been a while since I made them, so I can't be sure, but since I was hand-sewing, I think I pressed the seam allowances of the two layers in, pinned them together with the right sides out, and top-stitched. That way I only had to sew them once.
Eleni A Johnson
4/29/2020 06:02:58 pm
Ahh!! Thank you so much!! I'm also hand-sewing so just having to sew it once will be great! And thank you for sharing your work in general because I had the same problem with the gussets and this was very helpful! :D
Lisa2
12/4/2020 09:09:48 pm
Im in the process of making one from the same tutorial, and i noticed similar measurement wonkieness. However it doesn't really make any sense to have so much of the support come from the straps, it looks like the underbust is too big which might be causing your problems. I think if it fits properly the bottom of the stays should be almost parallel.
Emily Porter
8/22/2021 05:34:30 pm
This is a great resource, but just a nitpicky thing: most Victorian corsets weren't heavily boned with metal. The vast amount of extant garments have little to no metal boning, save for the busk. Whalebone (baleen) and cording was used, and the "compression" of the ribcage only really happened with tightlacing, which was relatively rare. It was much more common to simply pad out the chest and hips to make the waist appear smaller. In earlier stays, tightlacing was literally impossible without damaging the stays because they had no metal grommets. Boning was mostly corded and stiffened, so while very stiff, they were not meant to be really constrictive as is commonly believed. Thanks for that clarification, Emily! I have not examined many extant Victorian corsets (except what images are found on museum websites, which are hardly a complete sample set of the era). I know some were advertised as "fully boned", but it's also true that the corset was everyday underwear, and Victorian women had a lot of work to do, and active lives. So it makes sense that their corsets were not all tight-lacing fashion pieces. Leave a Reply. |
Karen Roy
Quilting, dressmaking, and history plied with the needle... Sites I EnjoyThe Quilt Index Categories
All
Archives
March 2024
|

 RSS Feed