Robes de Coeur
  • Blog
  • Quilting
  • Clothing
    • Menswear
    • Womenswear >
      • Self-Made Patterns
      • Commercial Patterns
    • Hats
    • Miscellany
  • About
  • Blog
  • Quilting
  • Clothing
    • Menswear
    • Womenswear >
      • Self-Made Patterns
      • Commercial Patterns
    • Hats
    • Miscellany
  • About

"Shell Stitch" - A Needlelace Edging

4/16/2018

0 Comments

 
Today, a brief needlelace tutorial!  This is a simple edging stitch, meaning you can use it to decorate your hems and other edges, even if you're not hard-core into lace-making! 

The stitch is called "shell stitch" in the Reader's Digest Complete Guide to Needlework, as well as in other sources.  However, several Victorian resources I've found online name it the "point de Venise", and Thérèse de Dillmont simply numbers her stitches (which is not memorable at all)!  As you may recall from my post about French Needlelaces, the nomenclature for lace is not consistent.  So "point de Venise" could mean Venetian needlelace in general as well as being a name for this particular stitch.  I'll stick with "shell stitch" for this tutorial, since the finished nubs look like wee shells. 
Picture
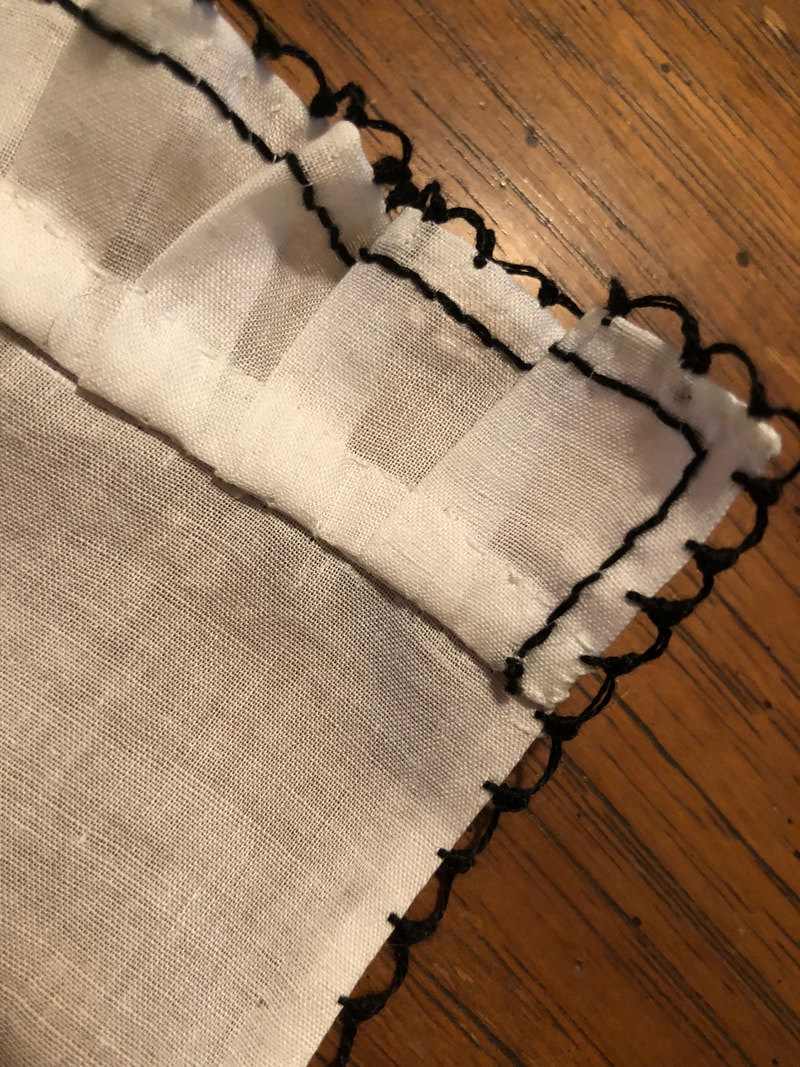
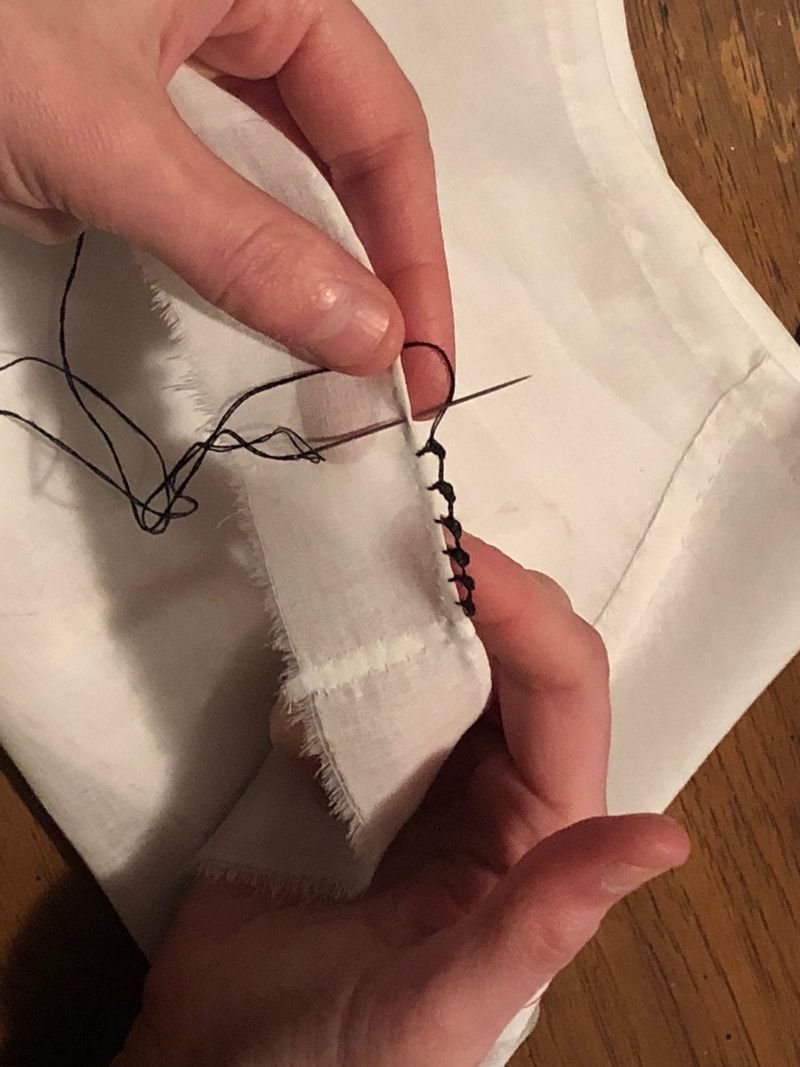
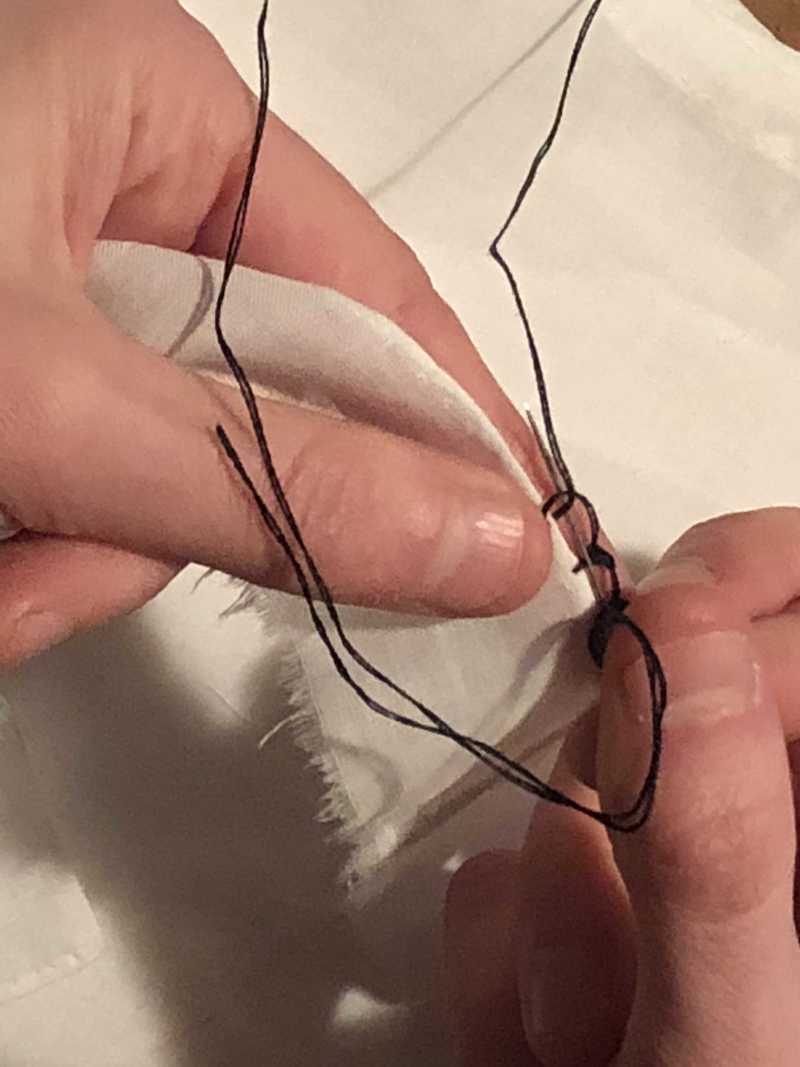
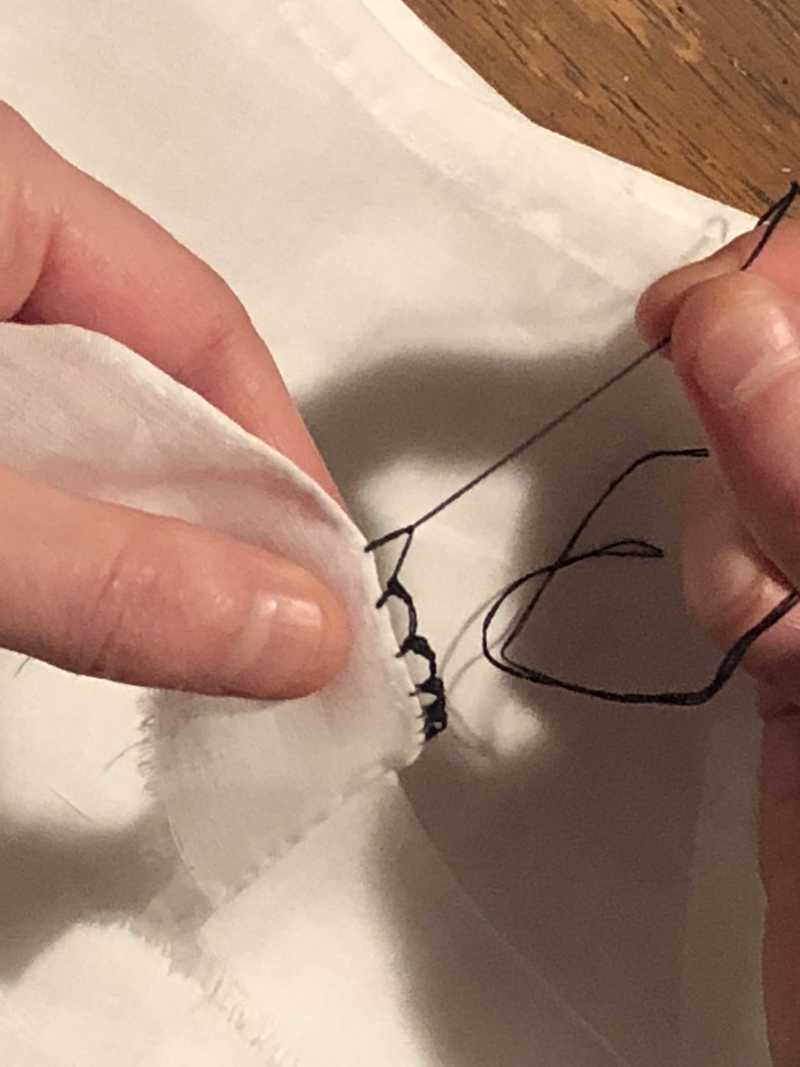
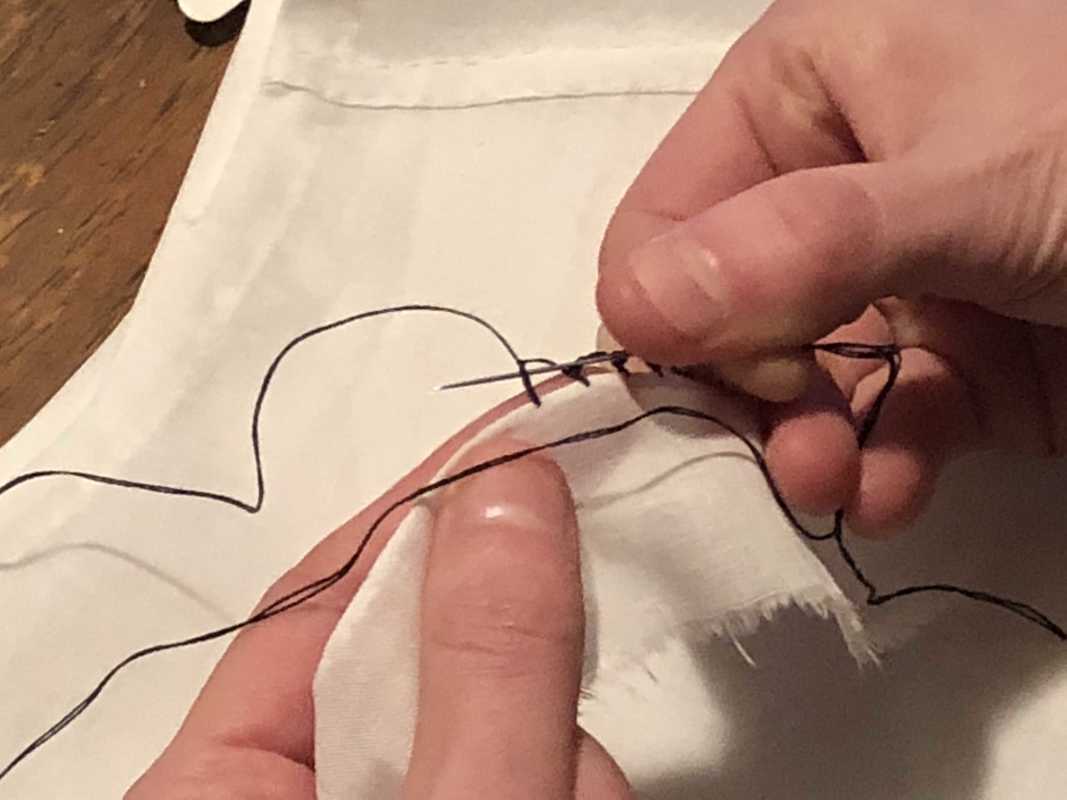
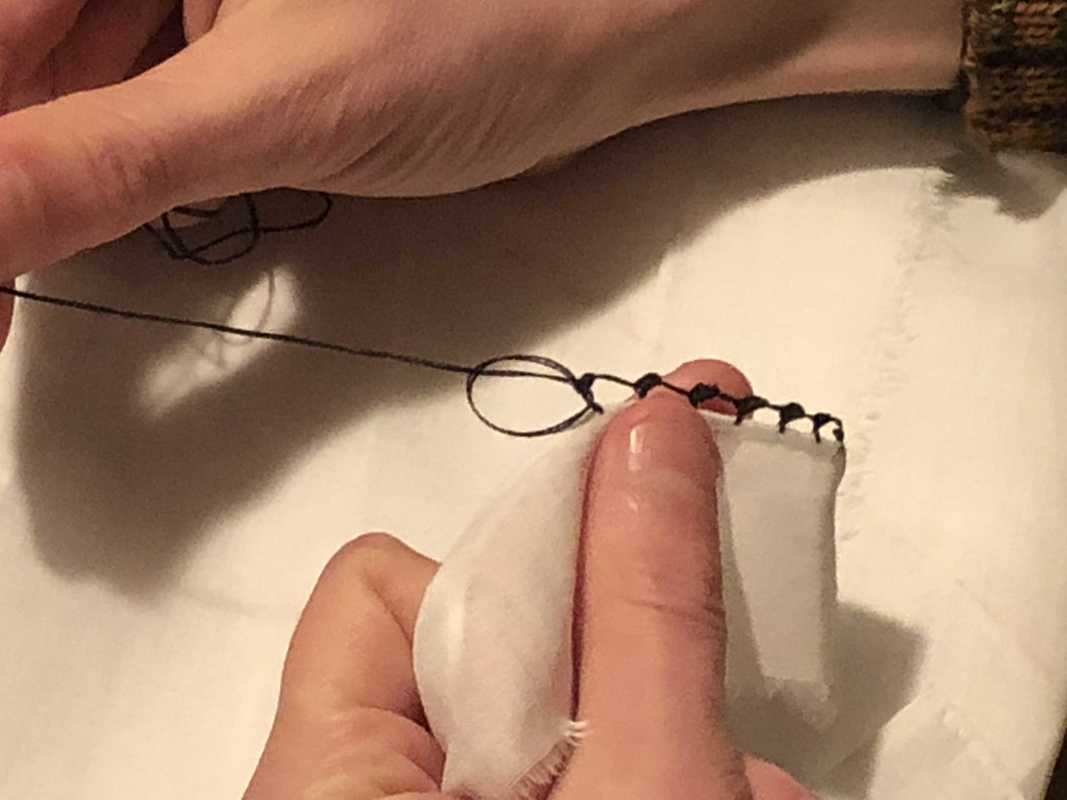
Here I am using black embroidery floss on white linen.  Many thanks to my sister for taking pictures over my shoulder so you can see my hands as you would see your own if you were sewing.  I am right handed, so I'm manipulating the needle with my right hand and guiding the thread with my left.  If you're left-handed, set a mirror at a 45 degree angle to your computer, and look at the mirror images. 

In the pictures below, the edging I'm sewing already has six finished shell stitches, and I'm working on the seventh. 
Picture
STEP 1
Working right to left, make an arch with your thread, stab into the fabric from front to back, and bring the needle through and up, in front of the arch.  This would be a blanket stitch if you pulled it snug, but for this edging you want to keep the arch loose. 
Picture
STEP 2
Now you have a closed arch with a half-hitch on the left side of it.  Your next goal is to do a blanket stitch right over that half-hitch, tying it together! 

So, poke your needle down through the center of your arch, come out the other side of the half-hitch, and over the loop of your working thread.  It's the same motion as in Step 1, except in Step 1 you stitched through fabric and in Step 2 you stitch through your previous stitch. 

Look at the next picture to see how to pull this stitch tight.
Picture
STEP 2, CONTINUED
Use your left hand to pinch the half-hitch so the arch from Step 1 doesn't collapse while you're tightening the next part of the stitch.  With your right hand, pull the thread away from your fabric, so the blanket stitch tightens above the edge of your fabric.  This picture shows the stitch just as it's tightened with my right hand and I've stopped pinching the half-hitch with my left hand. 

You've made a blanket stitch around the half-hitch and away from the edge of the fabric!  Now you don't have to worry about your arch collapsing or changing size; it's locked in place.  The double-thread of the half-hitch is all below the knot you just made. 
Picture
STEP 3
Make another blanket stitch around the half-hitch, tightening this one below the last one, closer to the fabric. 

Remember to sew around the half-hitch, where there are two threads.  The top of the arch only has one thread! 
Picture
STEP 4
Continue making blanket stitches around the half-hitch, until your working thread abuts the fabric edge.  This cluster of blanket stitches is the "shell"... to increase the resemblance to a real shell, make your first blanket stitch (step 2) tight, and the ones below it looser, so the "shell" increases in size. 

For this project, I did each shell with three blanket stitches. 
Practice a few times on scrap fabric to become consistent in size and tension before working on your project.
0 Comments


Leave a Reply.

    Karen Roy

    Quilting, dressmaking, and history plied with the needle...

    Categories

    All
    1910's
    Alteration
    Antique
    Dyeing
    Embroidery
    General
    Hand Sewing
    History
    Lacemaking
    Mending
    Menswear
    Millinery
    Modern Elizabethan
    Musing
    Other Sewing
    Philippians 4:8
    Project Diary
    Quilting
    Regency
    Retro
    Self Made Pattern
    Self-made Pattern
    Terminology
    Victorian
    Vintage

    Blogs I Read

    The Dreamstress
    Male Pattern Boldness
    ​
    Lilacs & Lace
    Tom of Holland
    Fit for a Queen
    Line of Selvage
    Mainely Menswear
    Bernadette Banner

    Archives

    January 2023
    December 2022
    November 2022
    October 2022
    September 2022
    August 2022
    October 2021
    September 2021
    August 2021
    July 2021
    June 2021
    May 2021
    April 2021
    August 2020
    June 2020
    May 2020
    April 2020
    March 2020
    January 2020
    December 2019
    November 2019
    September 2019
    August 2019
    July 2019
    May 2019
    April 2019
    March 2019
    January 2019
    December 2018
    November 2018
    October 2018
    September 2018
    August 2018
    July 2018
    June 2018
    May 2018
    April 2018
    March 2018
    February 2018
    January 2018
    December 2017
    November 2017
    October 2017
    September 2017
    August 2017
    July 2017
    June 2017
    May 2017
    April 2017
    March 2017
    February 2017
    January 2017

    RSS Feed

Blog

Quilting

Clothing

About

Copyright Karen Roy
​© 2017-2022