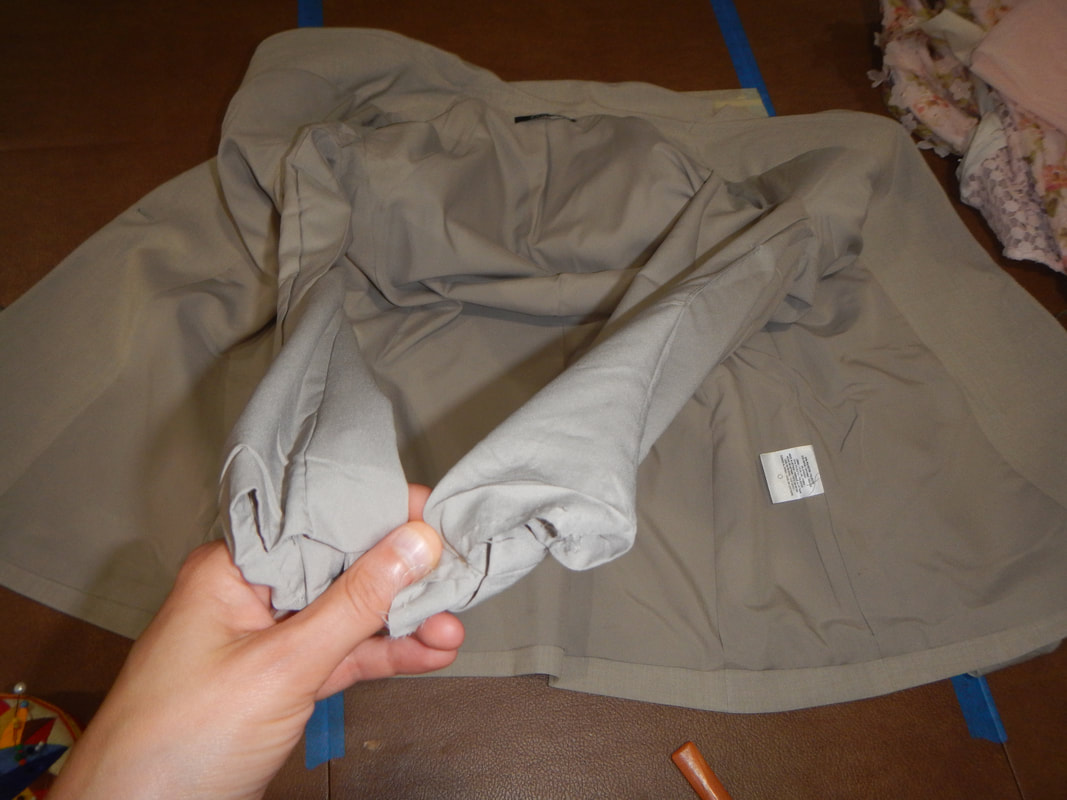
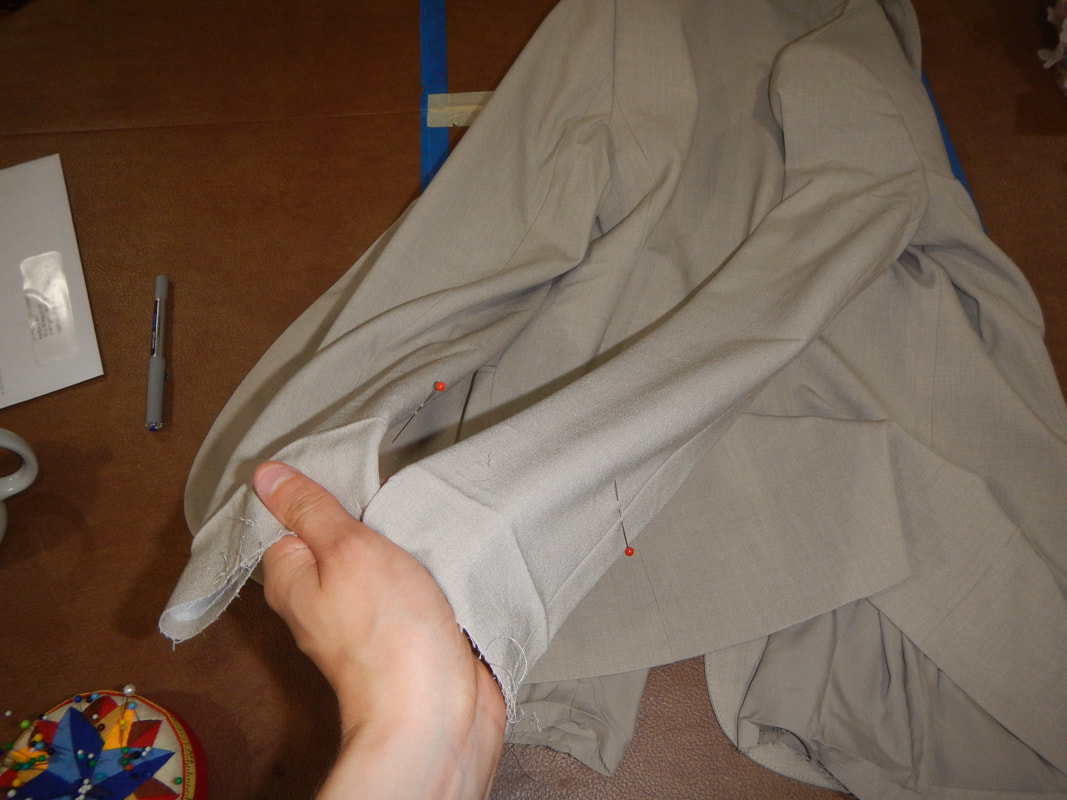
A NOTE ON PICTURES That tasty galette is the most colorful thing you'll see in this post, alas. The jacket is taupe, my new ironing board cover is beige, and Boudica is gray. Sorry! As usual, click on an image to zoom up, especially if I've put several in a row and they're too small to see details. TAKING THE JACKET APART... My client this time is a real estate professional. She bought this Tahari suit, which consists of a sleeveless sheath dress and a jacket, for showing houses and meeting her clients. She likes the neutral color so she can accessorize with colorful jewelry and scarves. When she tries the jacket on, it fits her torso and shoulders fine (thank goodness!), but is too long in the sleeves. Here's the jacket after the fitting, with the sleeves turned up and inward, and roughly pinned in place.  As a stylistic thing, I don't think it looks nice for jacket sleeves to end at the same point that the jacket does... that makes a really obvious horizontal line, cutting the body in half and widening the area where it falls. Jacket sleeves should be longer or shorter than the jacket. In this case, the sleeves will be shorter when I'm done. Since my client is roughly symmetrical, I decide to make the sleeves identical. (If she had one arm significantly longer than the other, I'd hem the sleeves un-equally, so that they'd give the same appearance relative to her body. If her posture were crooked and made one arm hang lower than the other, but the arms were actually the same length, I'd correct the shoulders with unequal shoulder pads before deciding on sleeve length.) I measure the new sleeves (from apex of shoulder to bottom, and from bottom of armscye to cuff) on each side, split the difference between the numbers, and put new red pins in at the new length. These new pins only go through the outer layer of cloth, because I need to unfold and un-sew the other layers. I un-sew the lining from the sleeve bottom. It's machine sewn, so I know that it was not the finishing step when the jacket was made.
At this point I can see how the sleeves were done originally:
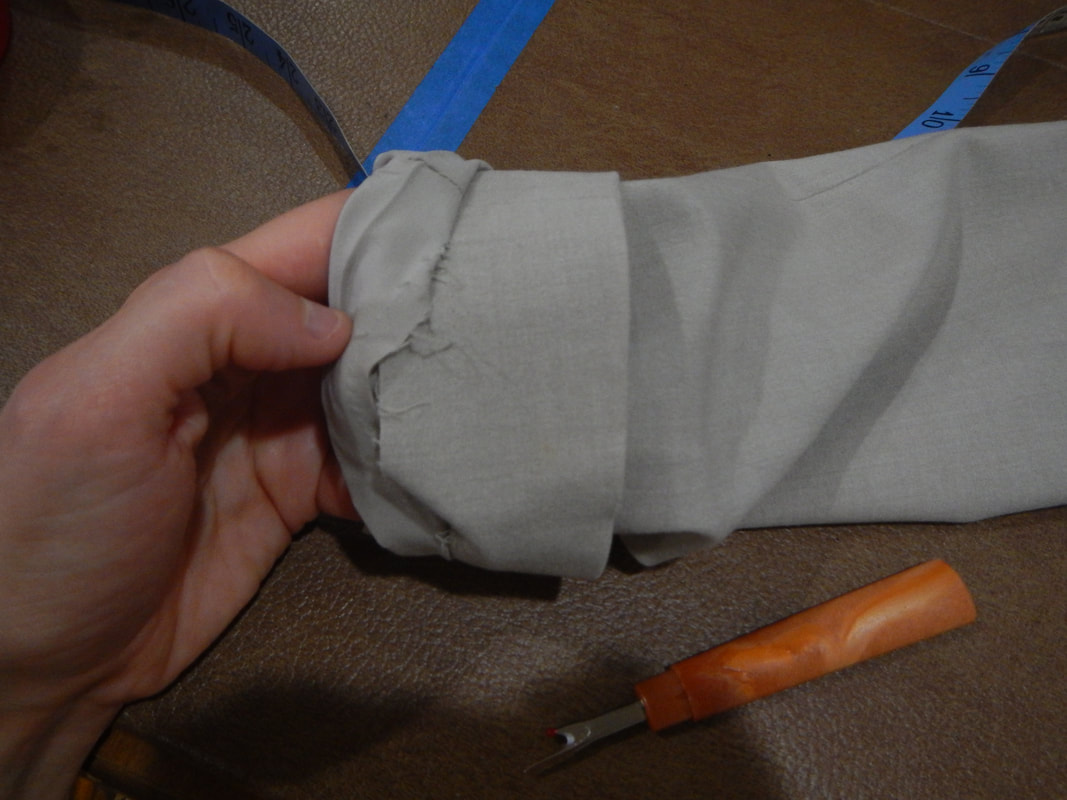
SHORTENING THE SLEEVES I pull the sleeve linings to one side (the inside) of the jacket and keep the sleeves on the outside so I can work on one layer at a time.
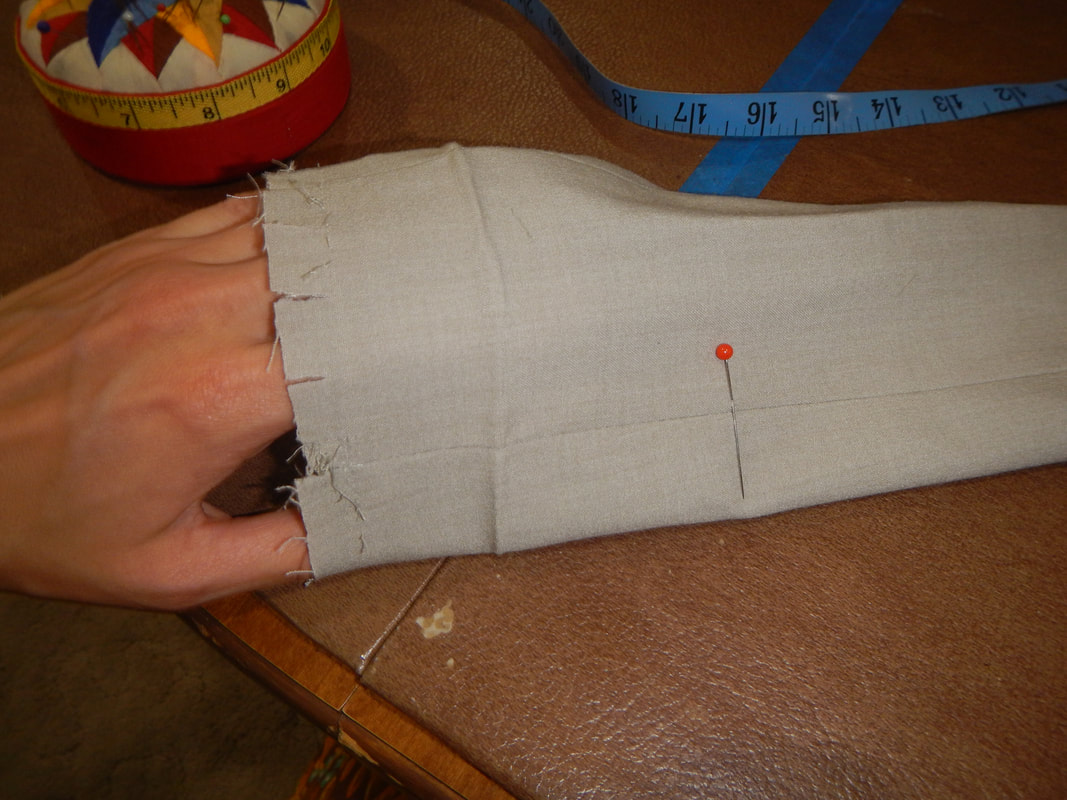
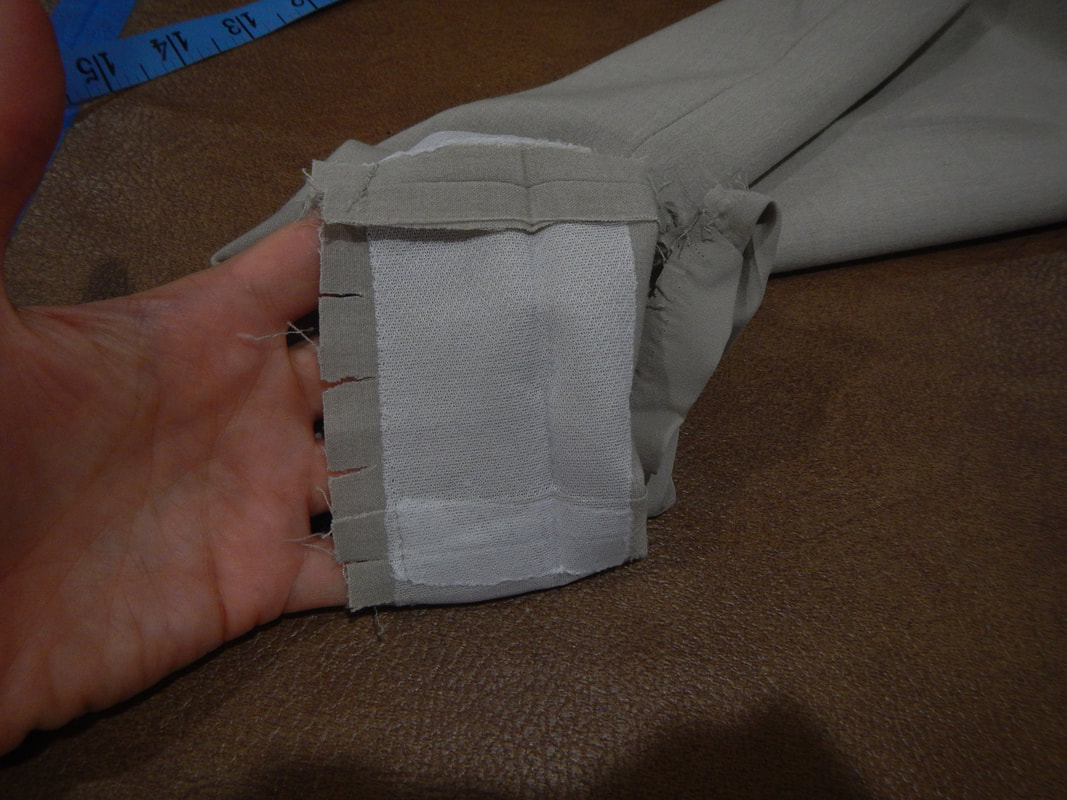
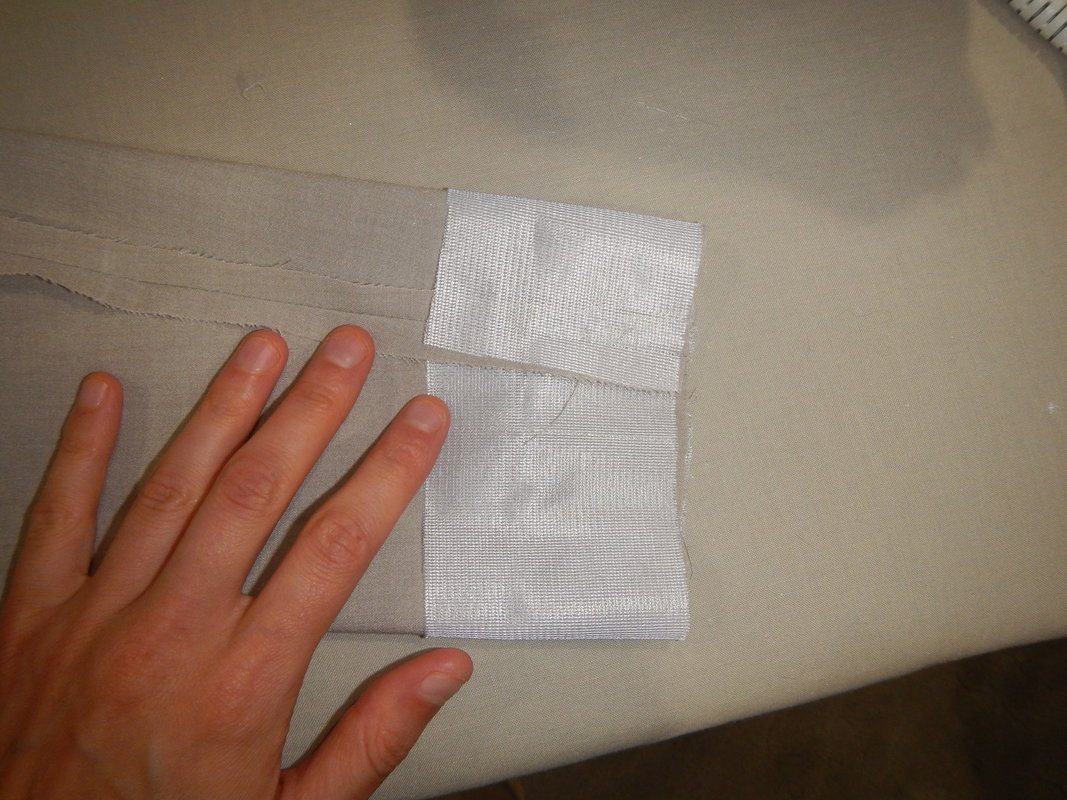
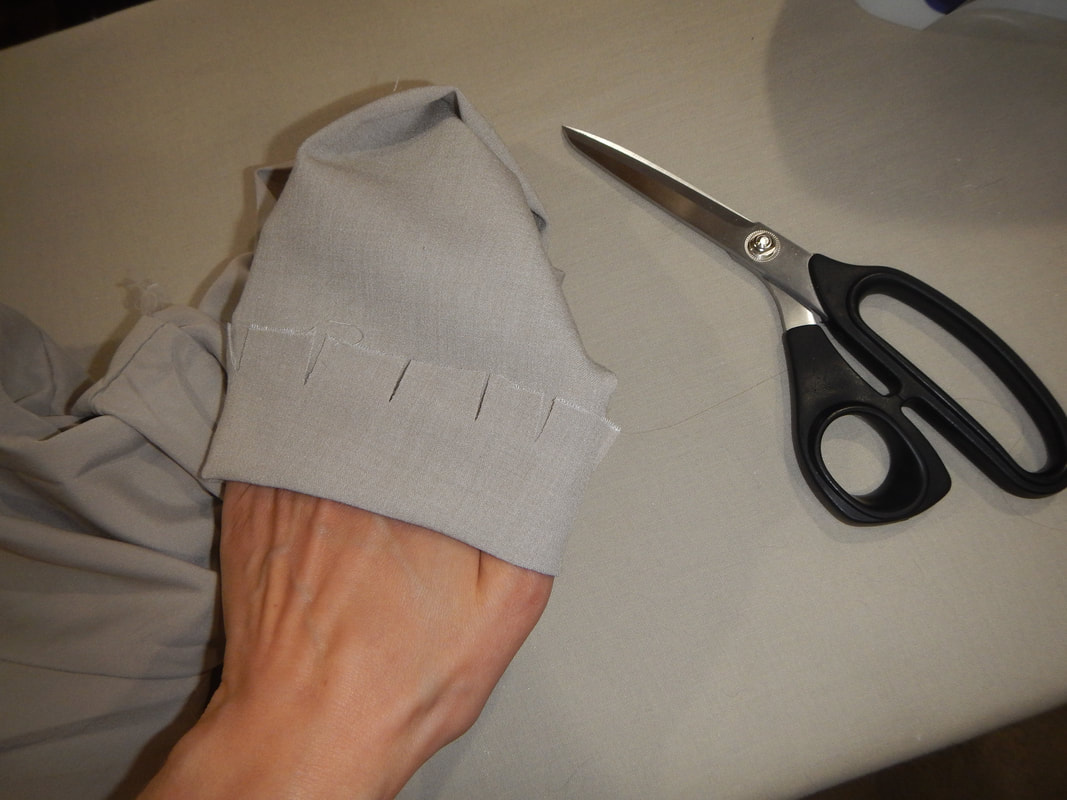
Then I iron the sleeve edges flat to make them easier to work with (no folds from the previous hem). Luckily, I only touch the iron to the area that'll be inside the next sleeve, since pressing it seems to change the color! It's subtle, and maybe you can't see it in this picture, but the ends of the sleeves are pinker than the top! 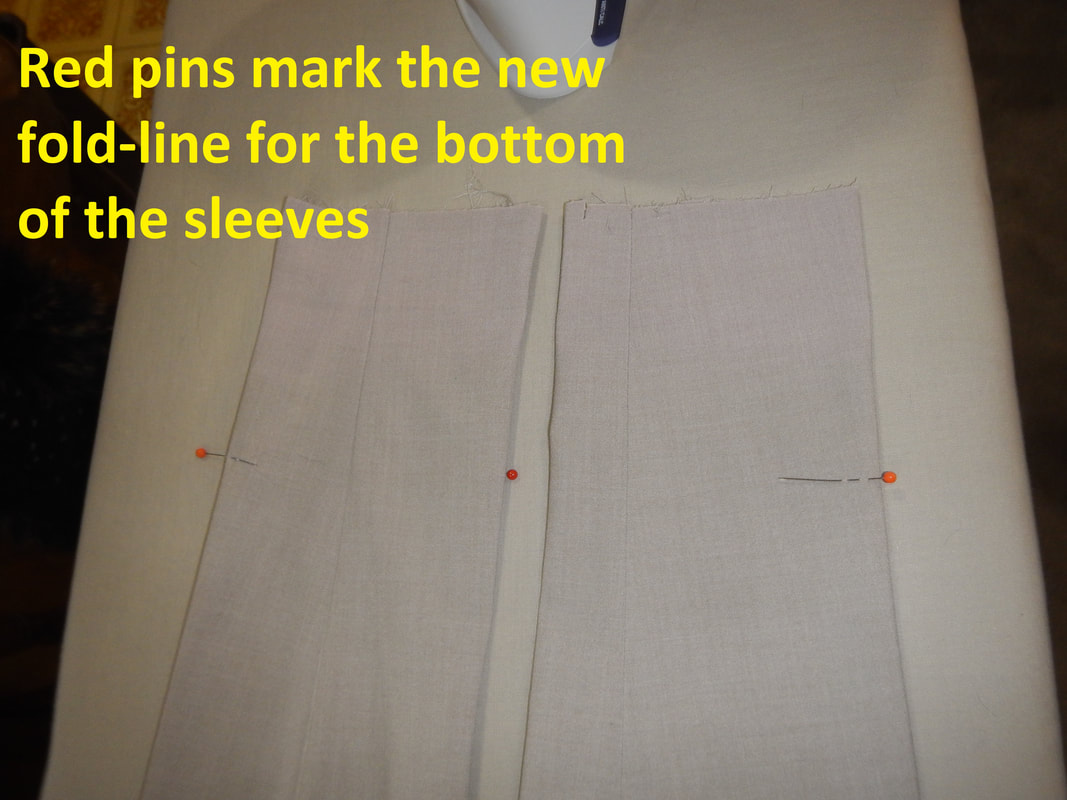 Chameleon fabric? I look at the label again to see if it says anything about magic, but nope; it still says polyester/rayon/spandex. Then I consider the possibility that it's the interfacing under the fabric which is changing color with heat, or maybe the glue reacting, but that doesn't make sense, because these things are designed for ironing! Finally, I set the iron aside and let the sleeves cool, and check back in a bit. The pink has disappeared! Did I hallucinate it? More likely there was always a little pinkness, and it didn't catch the light until the fabric was super-flat. Surface sheen can effect how we perceive color. I press the new fold-line carefully, then cut off the old edges. 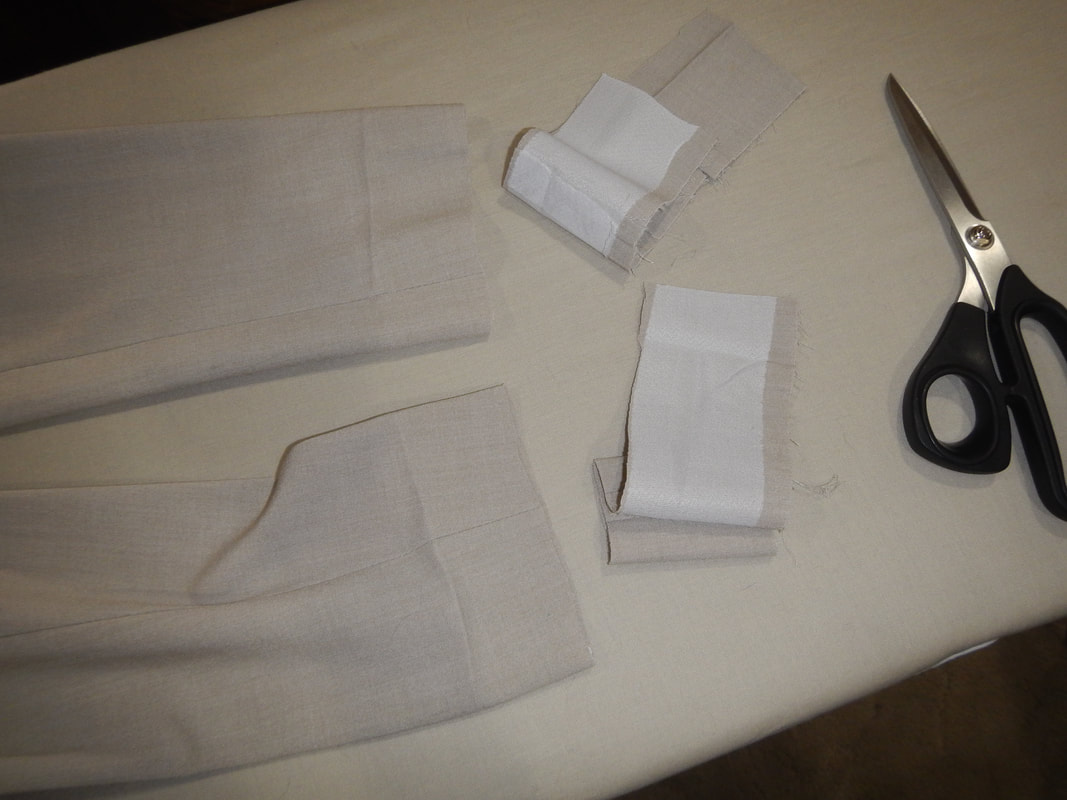 Goodbye old edges! Also, hello new ironing board cover! Since I don't want to lose the new fold I've made, I must apply interfacing carefully. I have a fusible knit interfacing, and I first make sure that I'm using it so its stretch matches the stretch of the sleeve (cross-grain not on-grain stretch). For each sleeve, I cut a rectangle of fusible interfacing wide enough to go all the way around the cuffs and tall enough to cover the fold-line. I press it gently into place on the hem allowance portion of the sleeves. The interfacing extends over the fold-line, but I only press the iron right up to the fold-line and not over it. Then I fold the sleeve at the fold-line, which brings the interfacing along with it, and press again, fusing the other side of the interfacing and making the fold permanent. I have to slash the turned up edge of the sleeve to allow it to spread into the wider area of the upper sleeve.
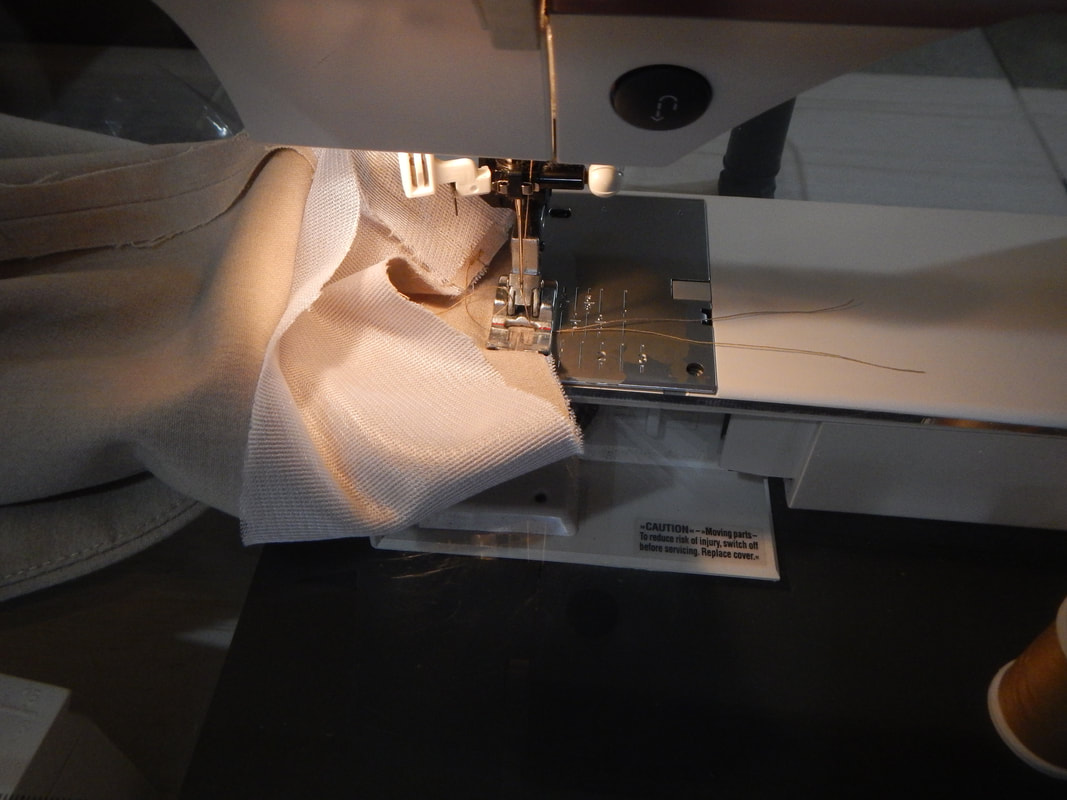
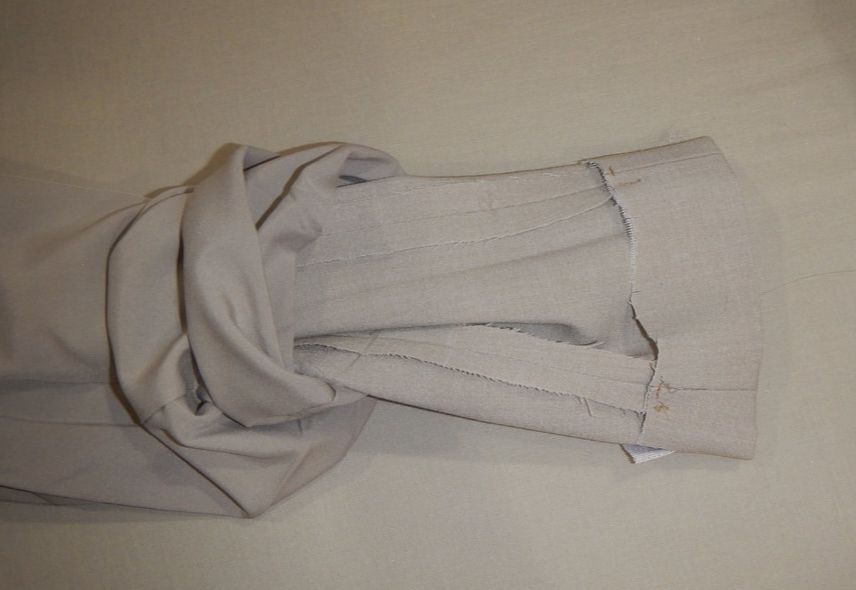
So far, lots of little details, but nothing complex. Now we get to the most tricky bit: tacking the hem in place with stitches that go through hem and sleeve seam allowance, but not through to the outside of the sleeve. It's not hard to do, just hard to explain. Hopefully, these annotated pictures will help. 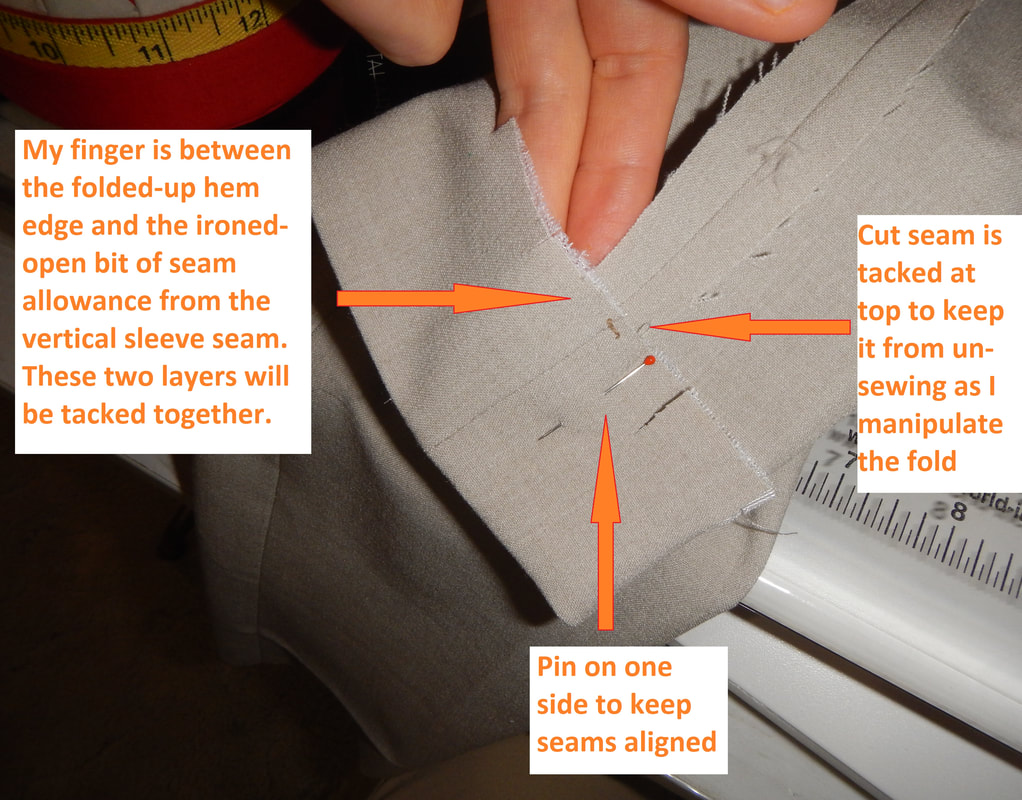 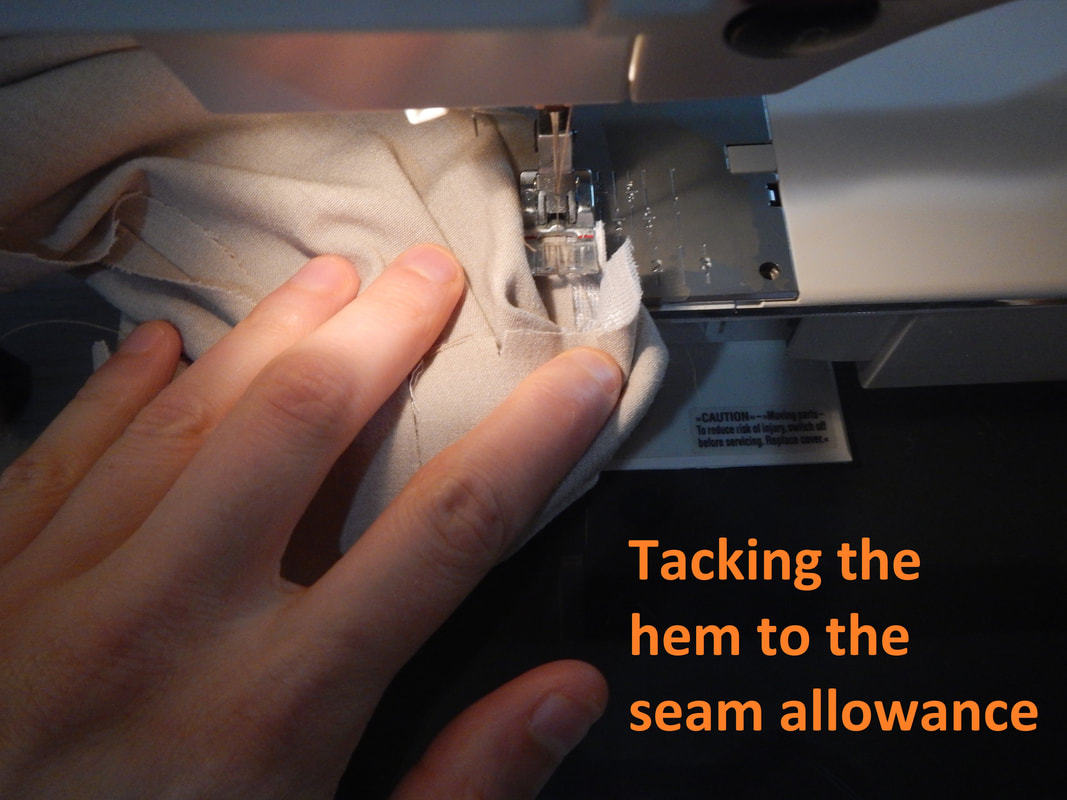 The presser foot is where my finger was in the last picture. 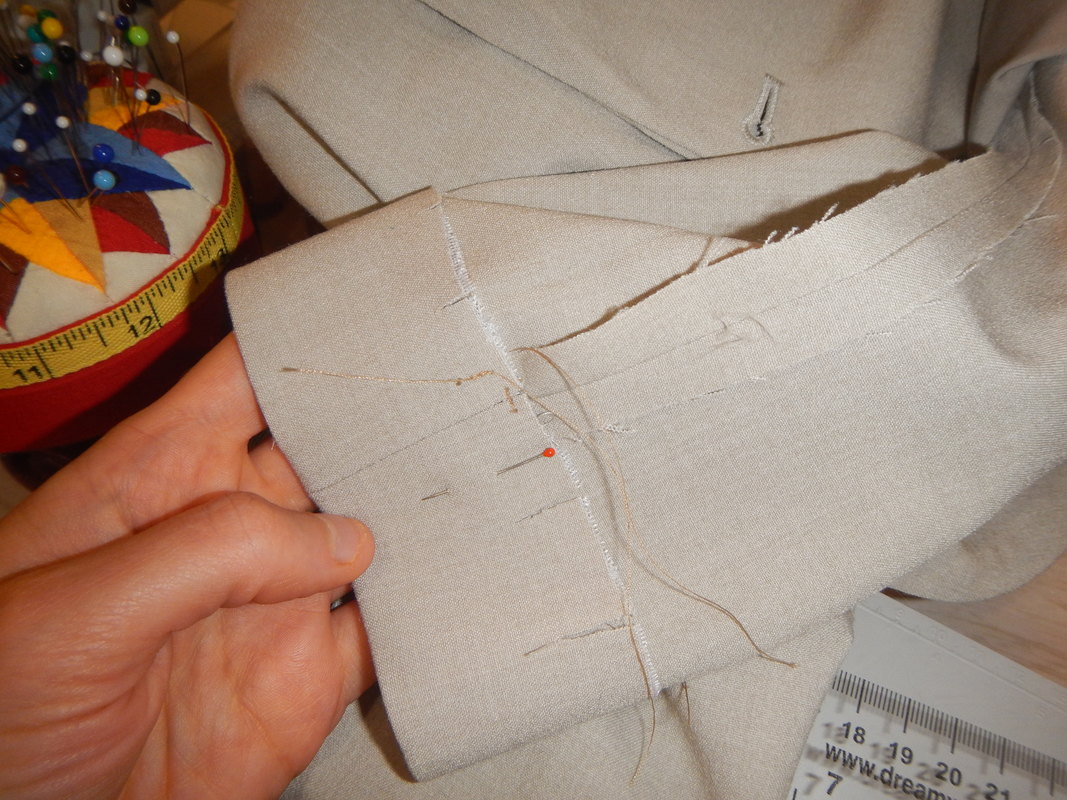 The finished tack... just need to trim the strings.
THOUGHTS ON TAHARI I have two Tahari jackets in my wardrobe, which I picked up at Goodwill. I've always liked them, and found them very useful because they class up an outfit with their crisp lines. They are what you might call softly tailored: well-shaped collars and cuffs but made of synthetic or semi-synthetic fibers, with none of the pad-stitching or canvas or horsehair or steam-shaped wool that comprise tailored jackets. Mine stand up well to careful hand-washing, but your mileage may vary; check the fiber content and use your judgement.
It was fun to take this Tahari jacket apart and see how much detail-work went into making something as simple as a folded edge! It's attention to small details, all added up, that make a professional result!
2 Comments
The Sister
9/7/2018 05:01:10 pm
First, the intro to this blog post was very much a "gee, I wish I had an Instagram account so I could share pictures of my delicious food to strangers!" plea. And it amused me. Also made me hungry and wondered why you haven't made on of these at our house! (Did we make it years ago with a chunk of Brie?)
Why would I want to share food pics with strangers? When I post it here, you see it! Leave a Reply. |
Karen Roy
Quilting, dressmaking, and history plied with the needle... Sites I EnjoyThe Quilt Index Categories
All
Archives
March 2024
|
 RSS Feed