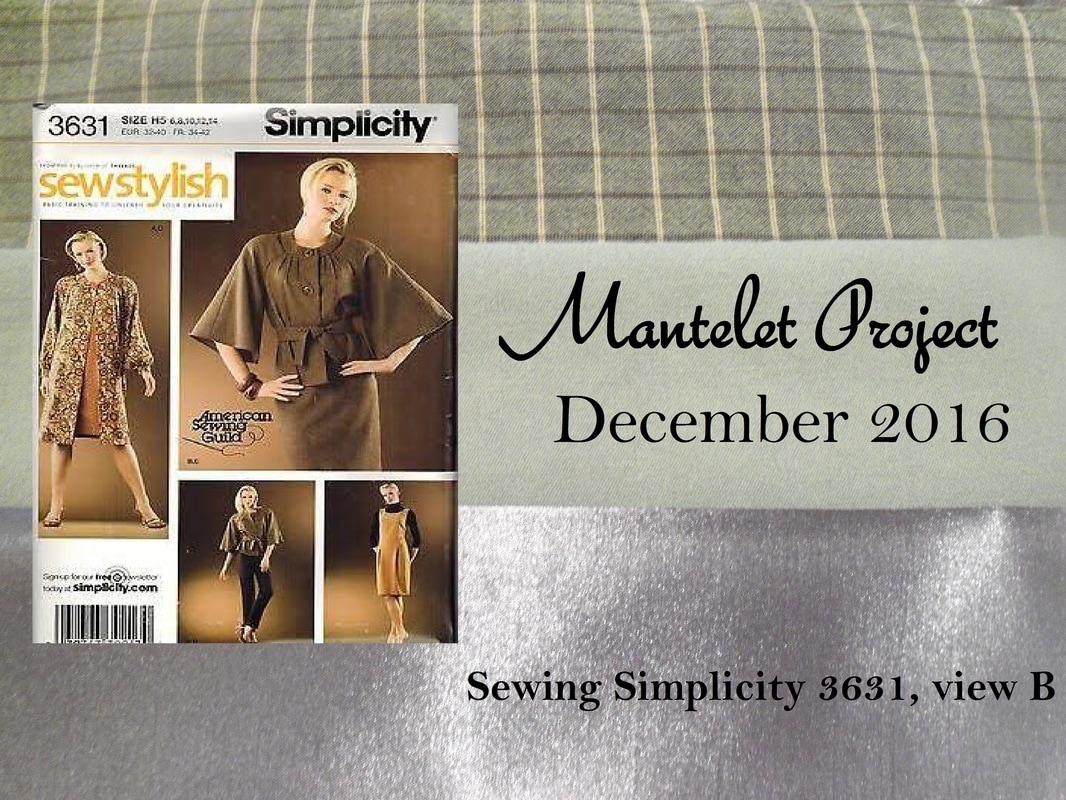
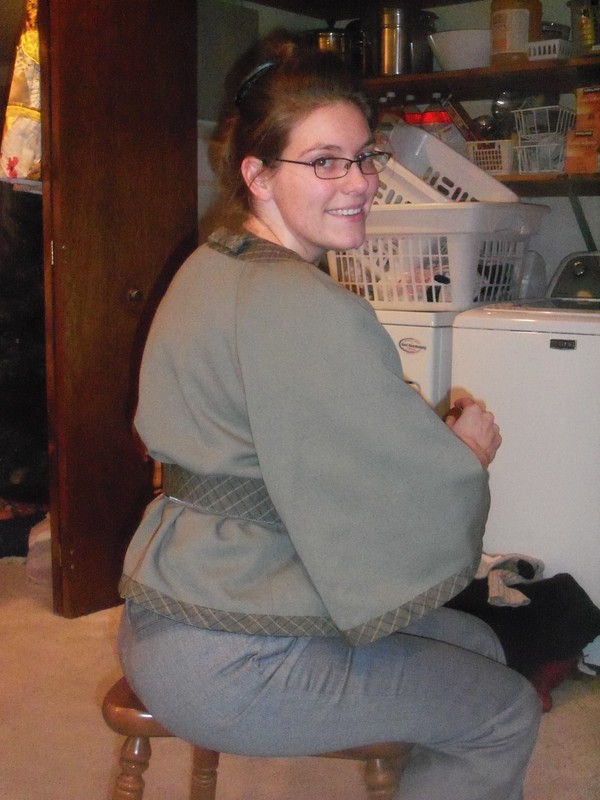
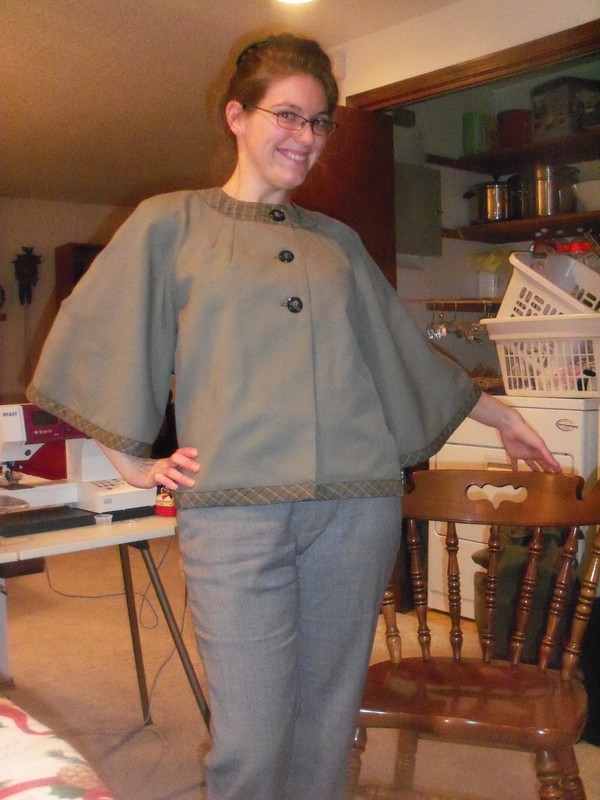
 A shopping trip to Goodwill landed me with a pattern ($0.99) and a small bit of green wool with a simple weave and a lovely drape ($2.99). The pattern is Simplicity 3631, and I like View B, the belted jacket with three-quarter length flared sleeves. When I got home, I realized that I might be smidge short on fabric, so I raided my stash and found a bit of green checkered wool of a similar weight. I also found some silver-taupe satin (unknown fiber) that would serve very well for a lining. PREP-WORKPre-wash and iron all the fabric. Yes, I put the wool in the washer. With rare exceptions, I don't make dry-clean-only garments; I want to be able to wash the finished garment, so I first wash the fabrics. "Abuse it before you use it" is my motto for fabric. I did not put any of it in the dryer, though, because I didn't want it to felt. True-ing the grain of the green wool was laborious. Its threads are slightly fuzzy, so the weave blends together to the eye; removing one thread so I could cut a straight line cross-grain was tricky, and involved a pin and patience. it was worth it, though. The fabric was skewed almost two inches off grain, and was more usable once I fixed it. PATTERN AND CUTTING Being averse to cutting tissue patterns (they're flimsy and annoying, and if I cut one size, I have effectively destroyed the other sizes on the tissue), I copied the size 14 pieces onto my own paper. When I laid the pieces on the green wool, I saw I had a puzzle on my hands... there just wasn't enough green wool to make the jacket all of the same cloth. So I played Tetris with the pattern pieces, slept on it, tried again. I decided to make the yoke and belt from the checkered fabric, but that still left the large pieces elbowing each other for room on the green wool. My breakthrough came when I realized the pattern pieces include seam allowances, and some of those seams are unnecessary. The sleeve is constructed with an underarm seam and an over-arm seam that becomes the shoulder. But the over-arm seam is mostly straight, only angling over the shoulder. Why not pin the pattern pieces together where they would be sewn straight, thus removing 1 1/4 inches of seam allowance from the pattern width? Then instead of an overarm seam, I'd have a shoulder dart, and the rest of the sleeve all of a piece. So I did: 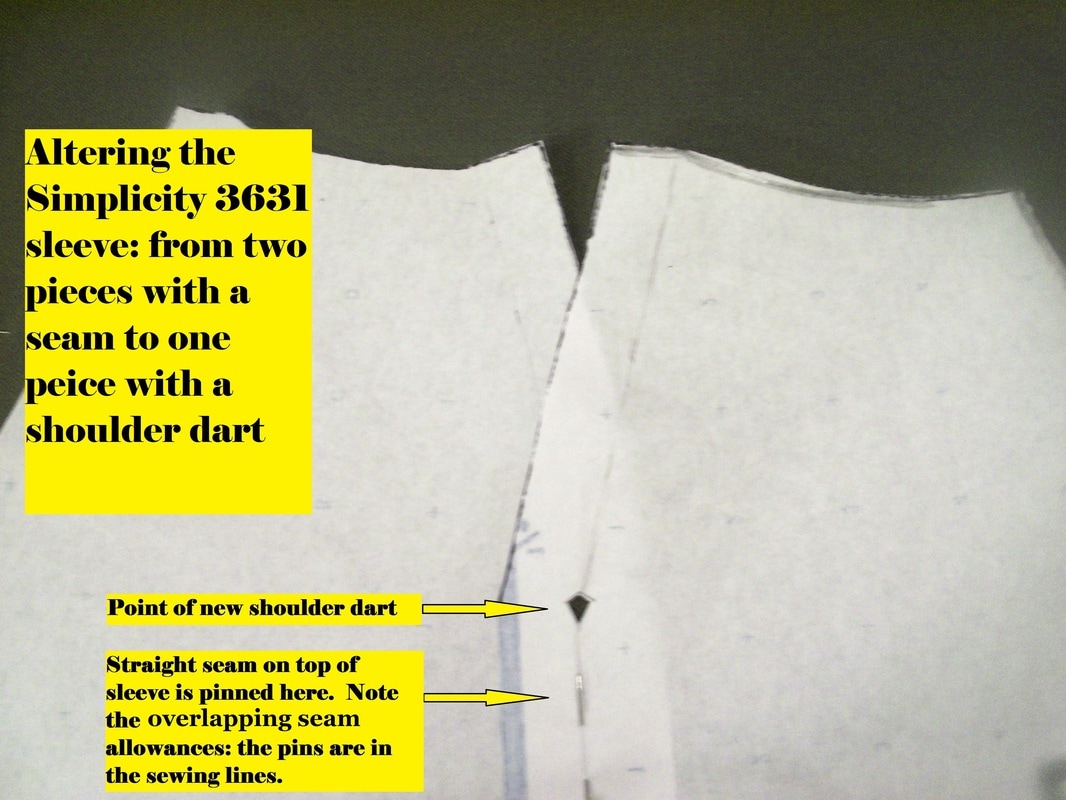 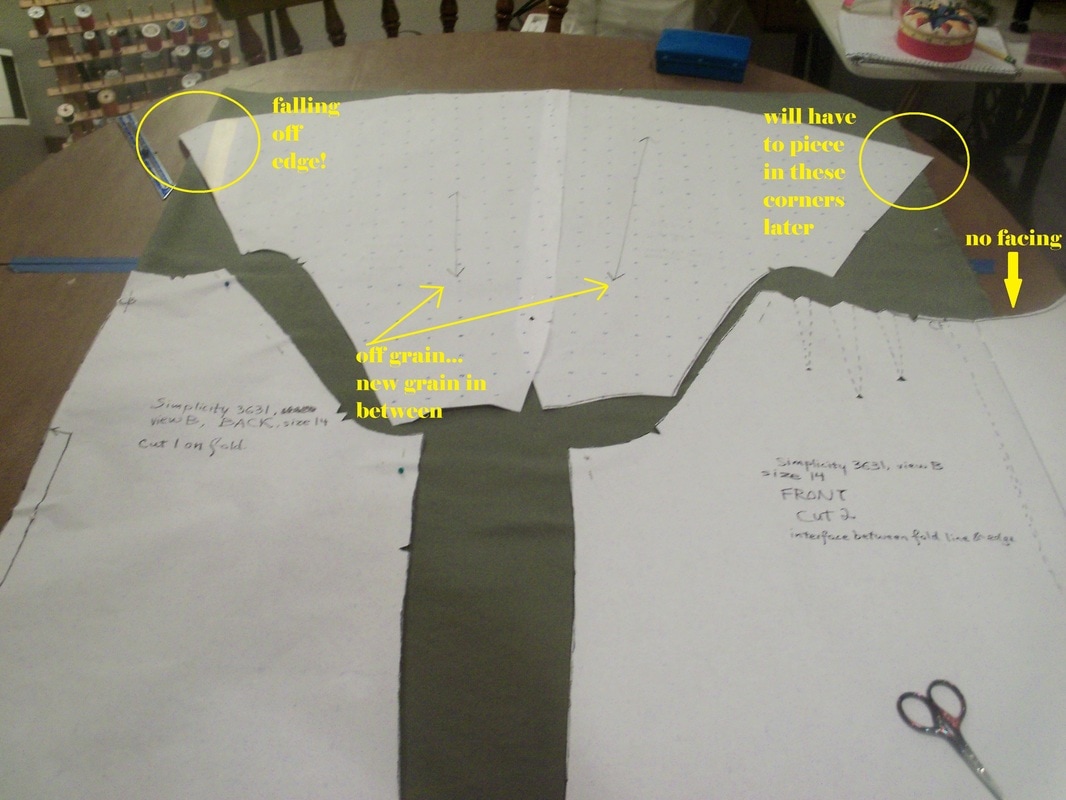 The picture above shows the final cutting layout: * the sleeve pieces are joined, and the new grainline is splitting the difference between the original grainlines. I don't like to go off-grain, but needs must when the devil drives... the "devil" in this case being my urge to cut that luscious wool! The new grainline is straight down the shoulder, emanating from the shoulder dart. * the edges of the flared sleeves run off the fabric. I pieced some smaller bits in to fill out the corners. No-one will notice, since those corners are mostly seam allowance. To reduce bulk in the underarm seam, I felled the pieced bits alternately up and down, so if the front side of the sleeve is felled up, the back side is felled down. * the back piece is cut on the fold with no alterations. * the front pieces are cut on the selvedge, and I had to leave off most of the fold-over facing in order to make room for the sleeves. I pieced in some extra fabric later to make up the difference... alas not green wool. I used a stiff cotton to stabilize the front opening, and covered it with the lining later. 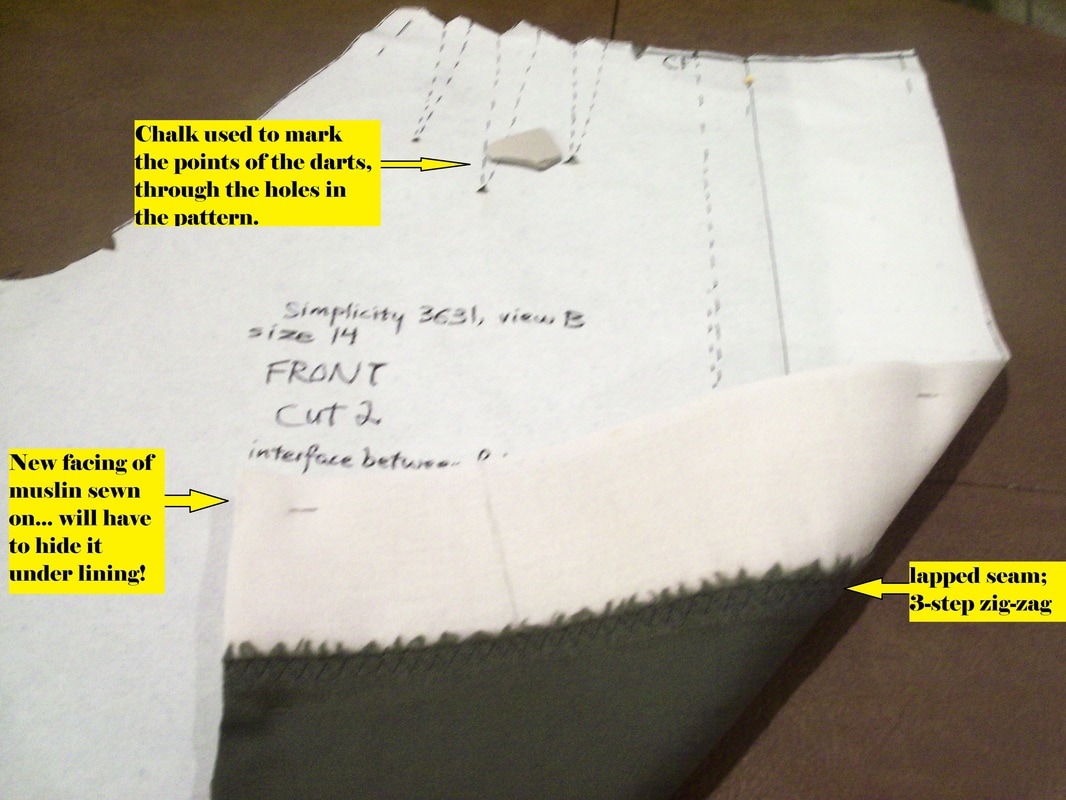 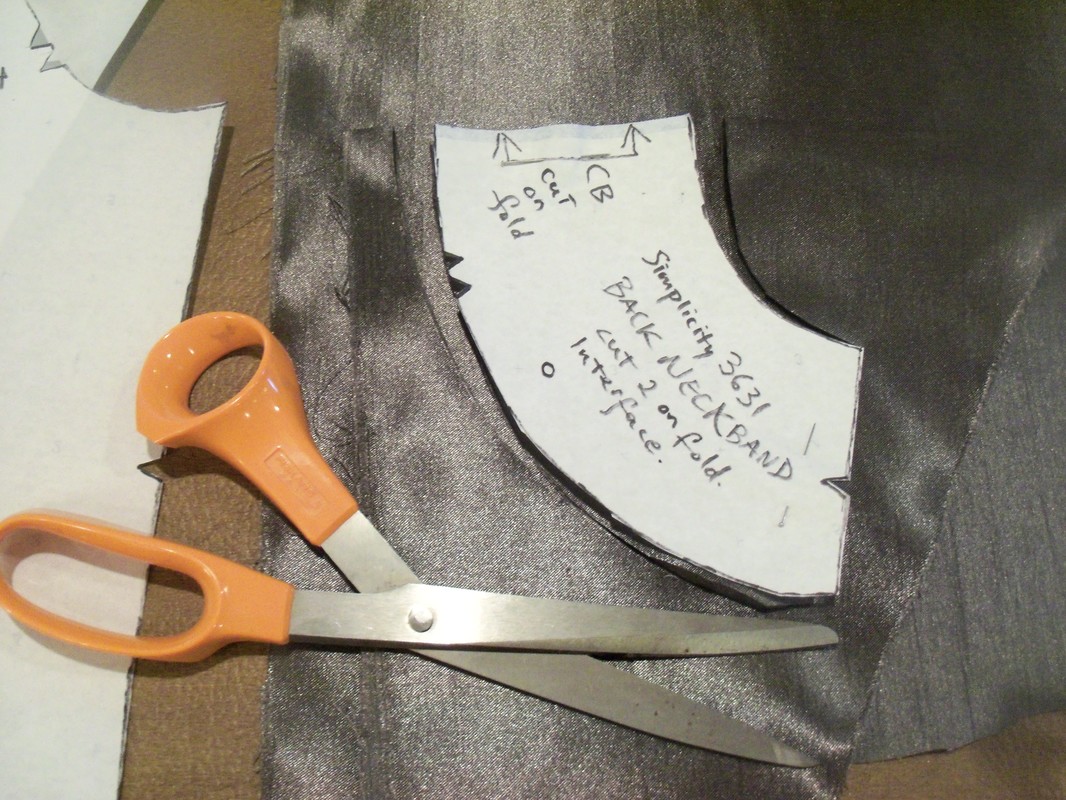  The lining was easy to layout and cut, since I had no shortage of fabric. I did choose to cut the back on the selvedge instead of on the fold, to use up some odd shaped bits I had. So the lining would end up with a center-back seam. As for the checkered wool, I thought that on-grain it might look a bit staid, but on the bias it would have a quirkier, jauntier look, to go with the easy swing of the silhouette. So I cut the belt pieces on the bias, carefully matched the pattern at the center back, and sewed them together. Per the pattern instructions, I interfaced the wool to stabilize it. For the yoke, I decided that matching checkers would be too finicky, so I pinned the pattern pieces together at the shoulder seams and cut on the fold at center back, making a single yoke piece, on the bias. For the collar, I interfaced the checkered wool and the satin lining, to make a sturdy foundation off of which the coat can hang. Now, the checkered pattern is not a balanced one: the light stripes run one direction and the dark ones the other, and together they make rectangles, not squares. I briefly considered cutting the collar with a center back seam, having the stripes reverse direction to balance each other, but decided against it because the belt would not echo that detail, and I wanted to be consistent more than I wanted to be clever. (Later this became a moot consideration when I decided I didn't care for the belt!) SEWINGThe pattern went together easily. The only difficult part was attaching the bottom of the yoke to the top of the neck (and outside curve matching up with an inside curve). I have never had much trouble with such curving seams before, and I think I only had trouble with this one because of the several layers I was working with: outer fabric, darts, inner fabric, more darts, facings and interfacing. I didn't get a smooth line, and I will attempt to iron it smooth and topstitch to fix it. FINISHING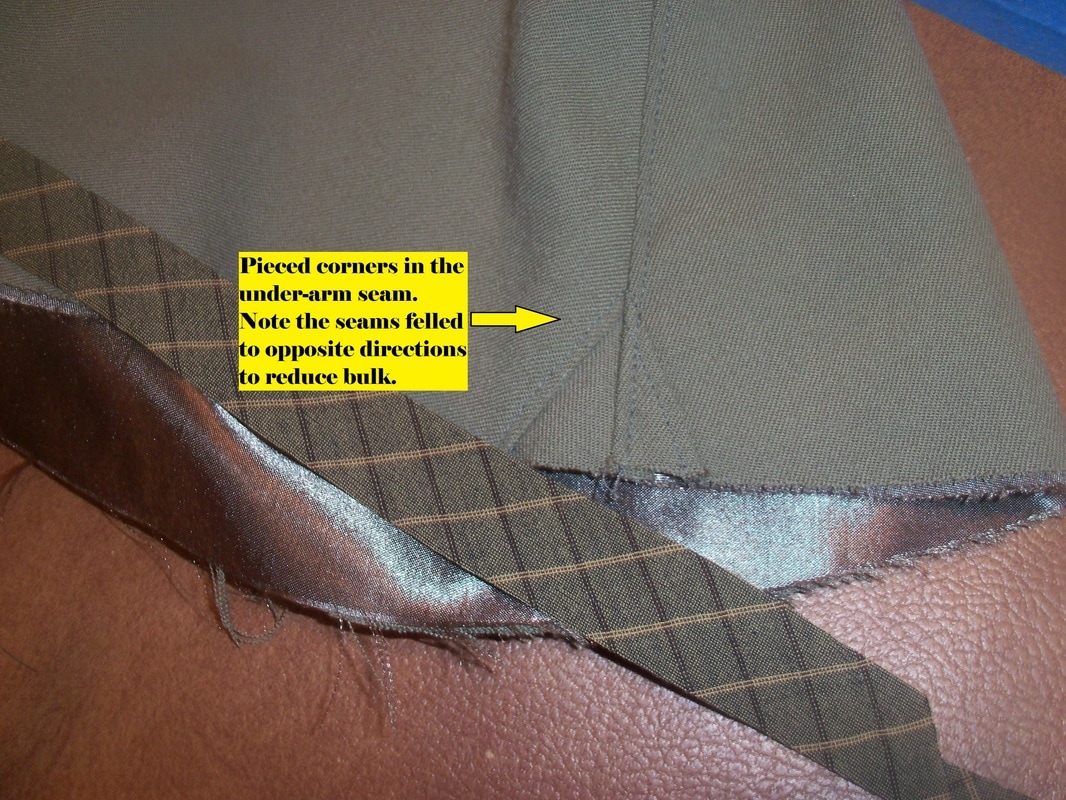 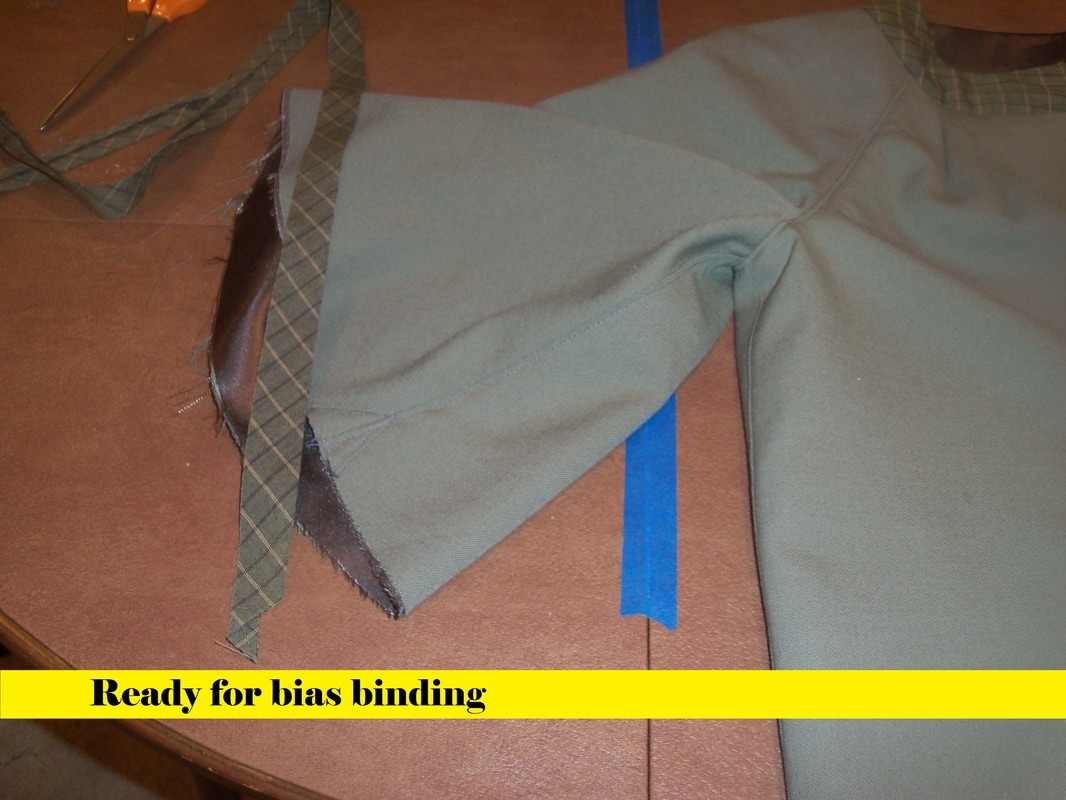 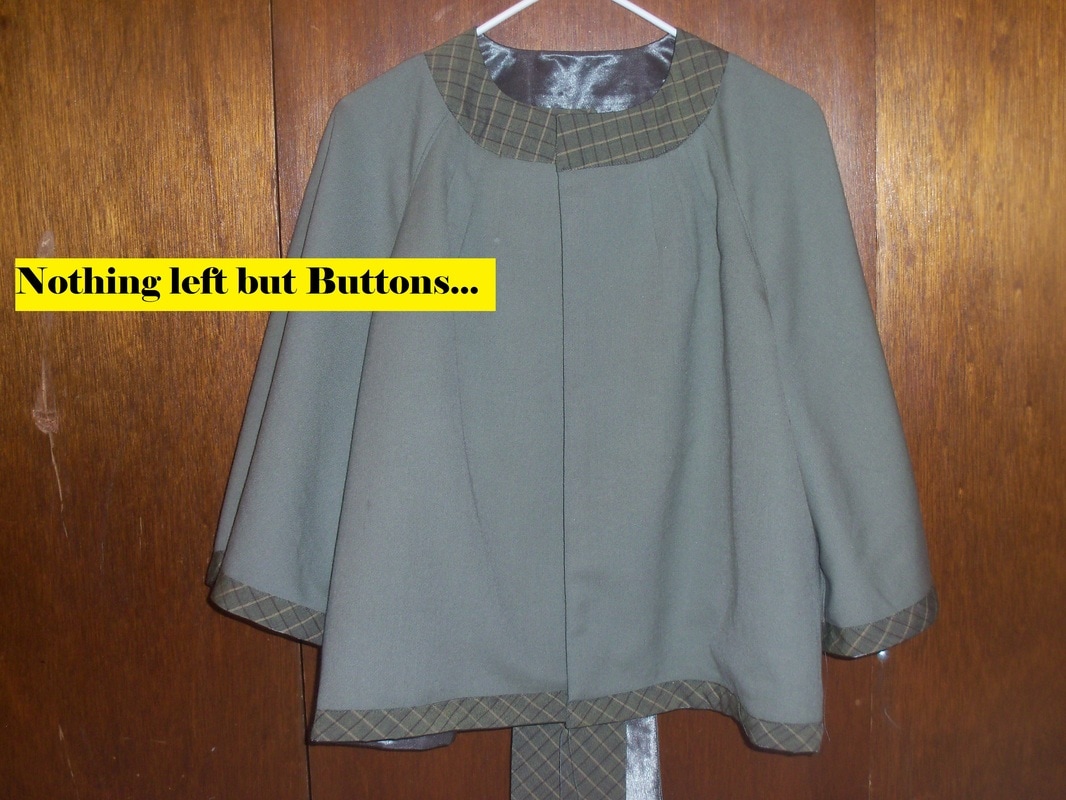 Once the top was sewn enough to try on, I realized I didn't like the length, so I decided to bind the edges with checkered wool bias tape rather than hemming, to keep it as long as possible. Once again, I debated fussing with the unbalanced checkering, and decided against it. I also noticed, with a wry head-shake, that somehow I'd overlooked a worn hole in the checkered wool, right in the center back of the collar! So I made a simple bow to cover it. Say it together, now: It's a design feature! ;) ALL DONE!
2 Comments
The Sister
2/16/2017 11:13:42 am
Your brother-in-law says that the coat is very reminiscent of all the great dictators in history, both real, fictional, and "wish-I-was" (Chairman Mao, Dr. Evil, and Hilary Clinton). We prefer it without the belt as well. :-) It's cute! I wonder how it'd look with a pencil skirt. Your comment will be posted after it is approved.
Leave a Reply. |
Karen Roy
Quilting, dressmaking, and history plied with the needle... Sites I EnjoyThe Quilt Index Categories
All
Archives
March 2024
|
 RSS Feed