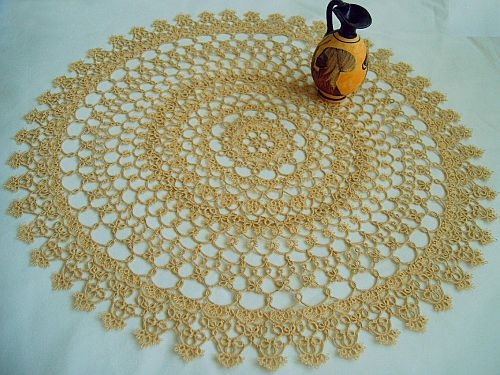
Dear Potential Tatter, Tatting is a fun, even meditative, way to make beautiful lace! The distinctive loops and curlicues are tight and durable, and make great embellishments as well as whole items. I hope you enjoy it! The first question you have to answer is whether you want to do needle tatting or shuttle tatting. Historically, shuttle tatting developed first, probably as an offshoot of net-making, and needle tatting came later for ladies who didn't have shuttles or didn't want to learn the hand positions of the traditional technique. The results look almost the same, but the methods and tools are different. You can search YouTube videos for each style to see how the methods look in action. NEEDLE TATTING
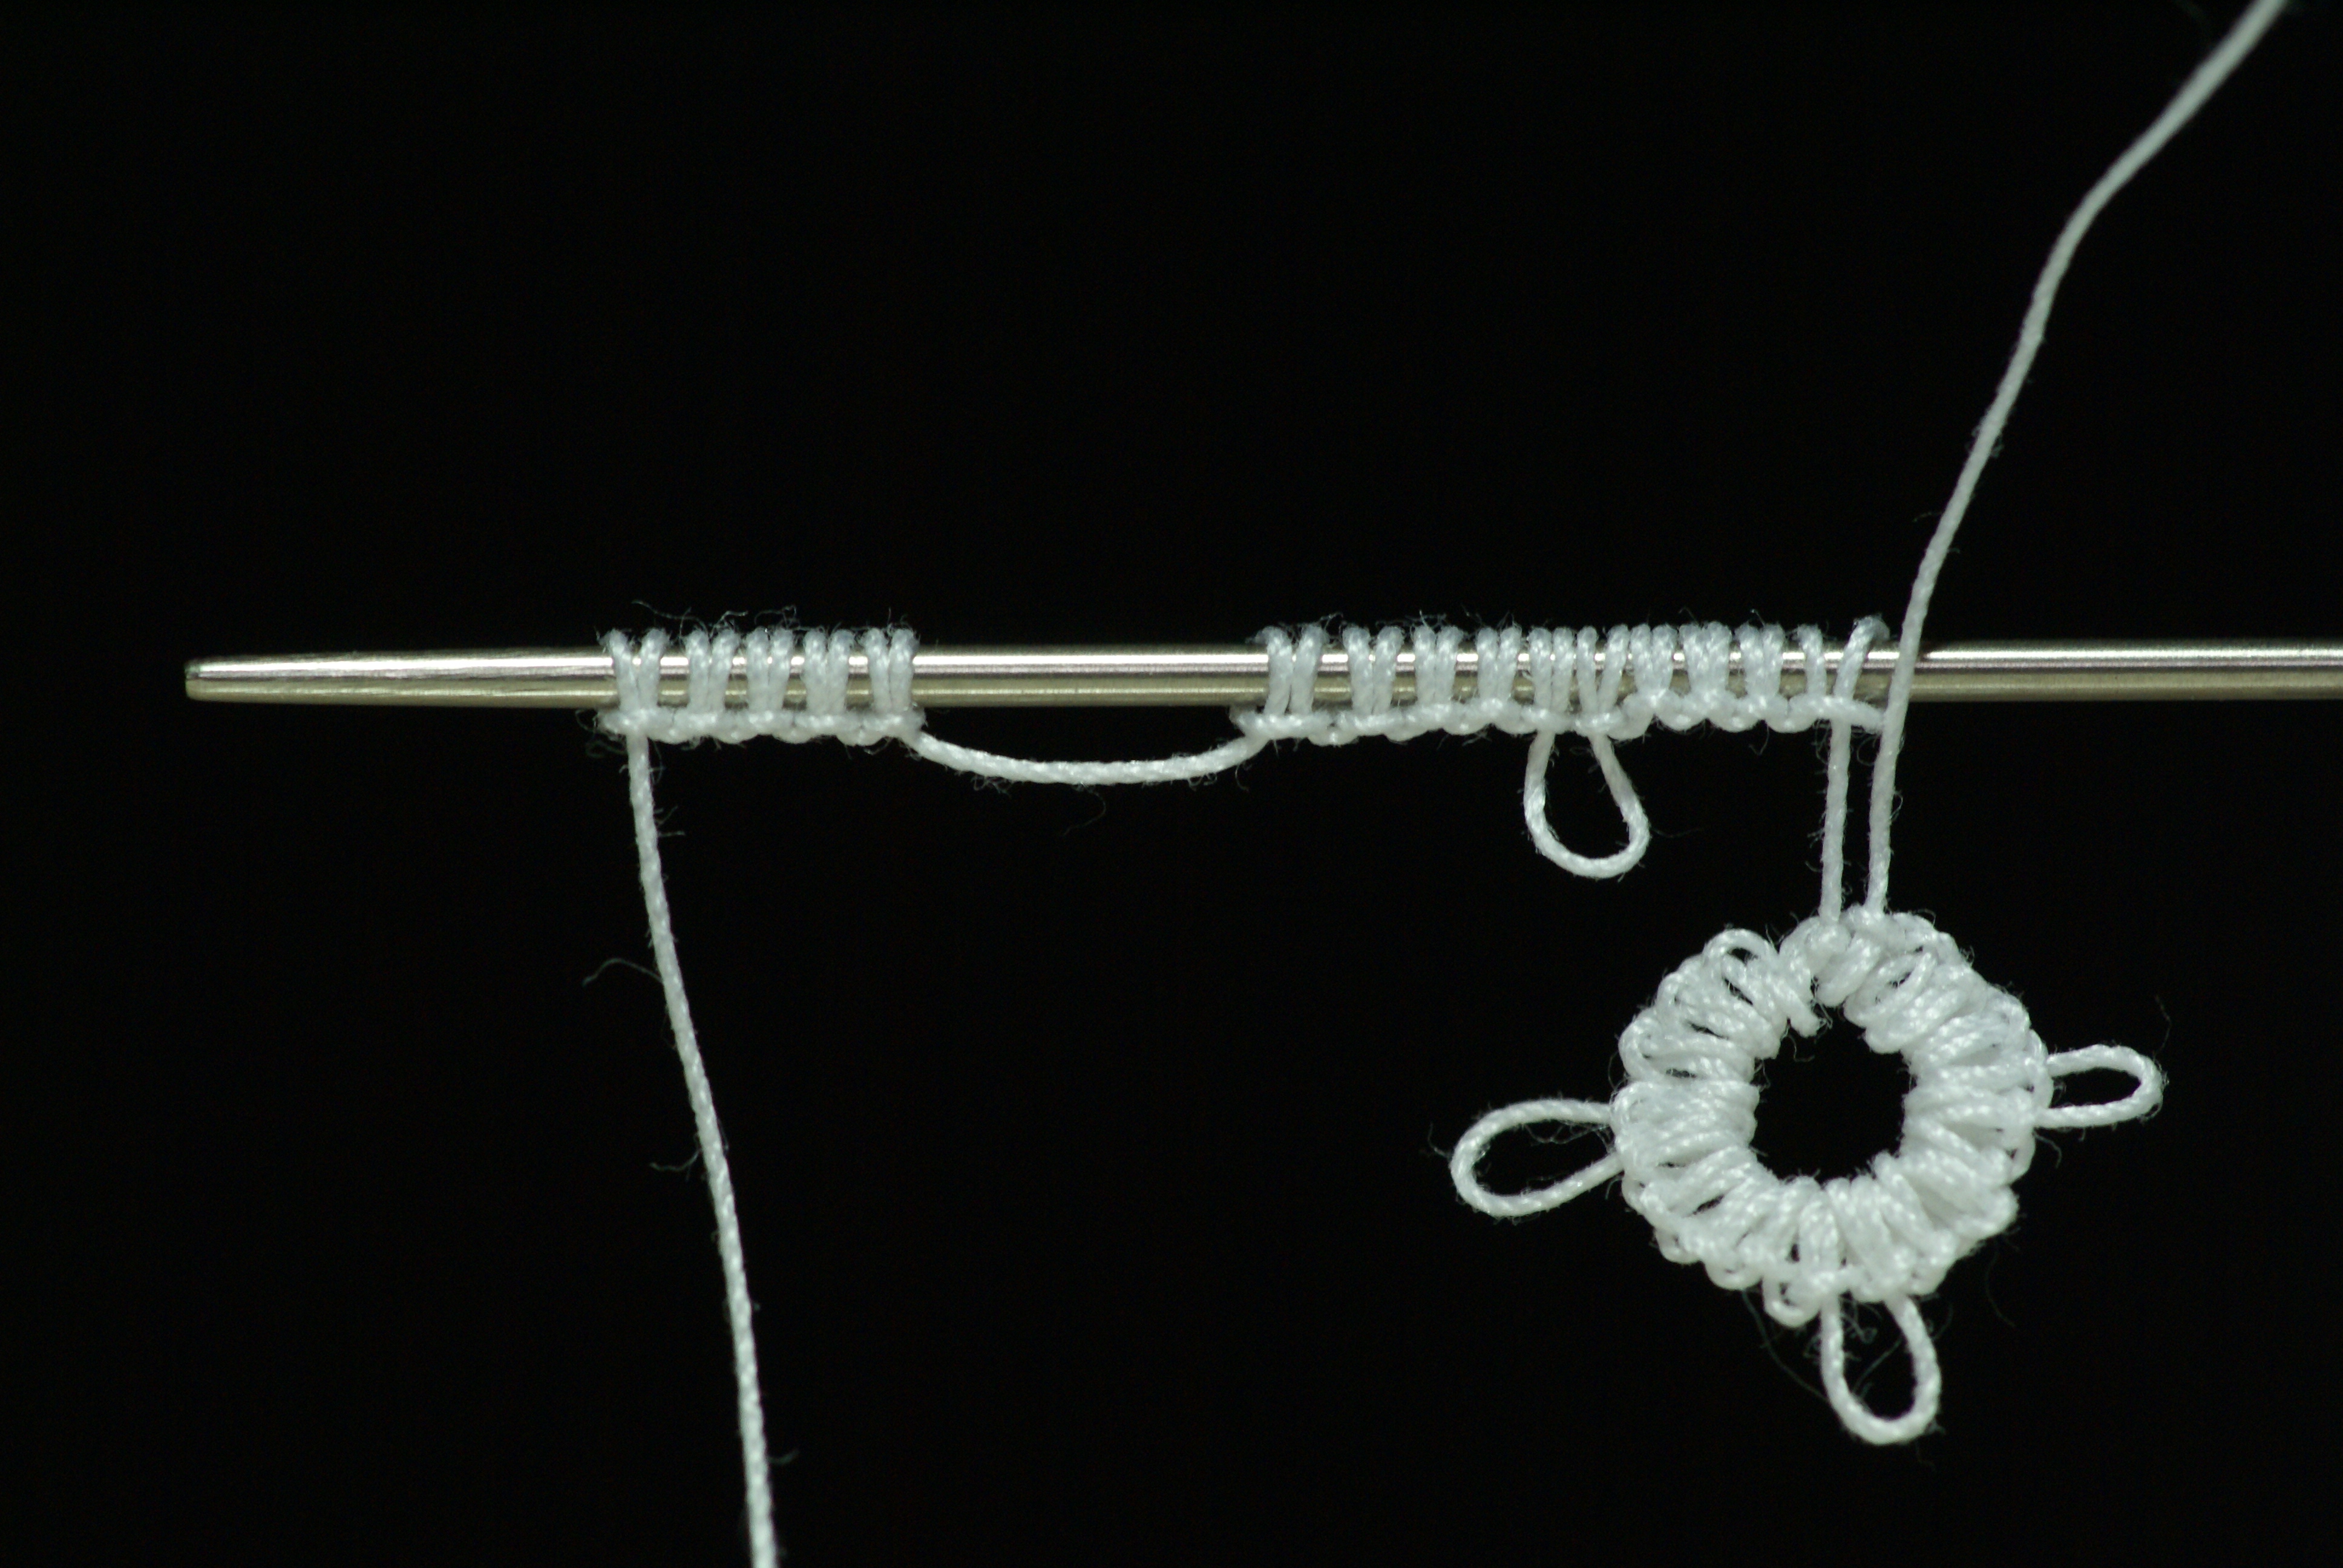
For my work, I bought what are called "doll needles"--long shafted needles which are the same diameter all along their length and have a long eye that is no bigger in diameter than the rest. I found the long shaft useful for looping lots of half-hitches to, and the low-profile eye necessary for pulling the thread through. There are tatting needles on the market, but they didn't have them at my fabric store, so I don't know how they differ from doll needles. Based on Dmeranda's picture above, I think the biggest difference might be the dull point. Your needle doesn't need to be sharp, because it's not piercing anything. Whatever needle you opt for, look for good length and strength: you'll be manipulating it a lot as you work, so you don't want a junky one. However, I eventually decided I didn't care for needle tatting, for three reasons: first, I found the body mechanics were stressful on my fingers (pinching and gripping the needle); second, I didn't care for the fact that I had to start with a super long thread and pull the whole length through each loop (I thought it was too much friction, would wear the thread out); third, I tended to over-tighten my half-hitches on the needle shaft, and then I had to struggle to pull the needle through and close the loop (the only way it worked was to have relaxed half-hitches, which made a looser lace in the end). Those cons shouldn't be deciding factors for you, since you might have different body mechanics or tolerances than I. If you like the way needle tatting looks in action, by all means try it! It's worth it to try, especially as it makes the principles of tatting easier to grasp. And you can always switch to shuttle tatting later, like I did. SHUTTLE TATTING
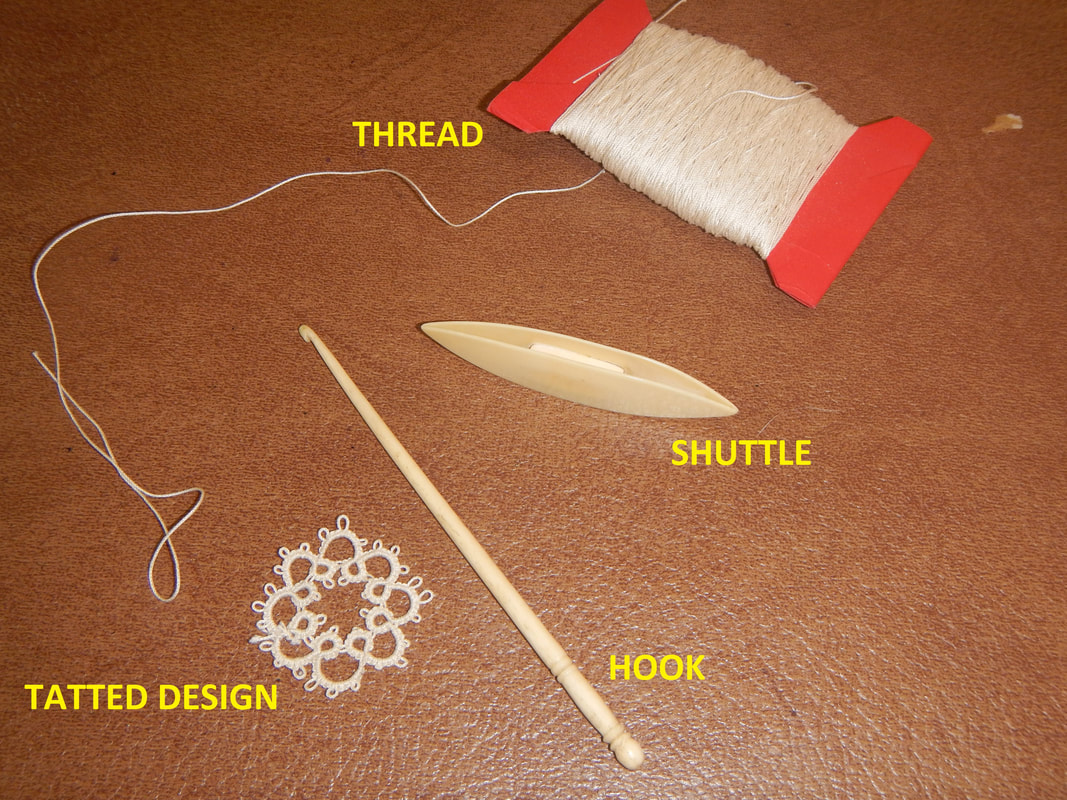
Here's a picture of my shuttle and hook so you know what they look like: I got them at a vintage shop (I think the shuttle is Bakelite or celluloid and the hook is bone), but you can find plenty of shuttles online. If you're anything like me, you may prefer to work with artistic tools: there are many pretty metal, bone, or wooden ones on Etsy; or antique ones to be found and collected! The standard plastic ones work fine, though, and usually have the built-in hook extending off one of the tips of the shuttle. Most tatting shuttles have a guard that covers the wound thread: you grip the guard as you work. Older shuttles may have a removable guard, to make winding easier or enable the attachment of a winding gadget, but modern shuttles are all in one piece, and are not hard to wind with both guards in place. Some shuttles have no guard, enabling you to wind a lot more thread. These no-guard types look a bit like the Coco Chanel logo, in various states of being stretched or pointed. The shuttle gets wound by wrapping the thread lengthwise, catching it in the open C's on each side as you go. If you go for the no-guard version, be sure your hands are clean when working, because you'll be gripping the wound threads as you work! Whether you go for guard or no-guard, remember to have a loose grip! As for the method, there are various books and websites that attempt to show through pictures, but I find them hard to figure out. The biggest hurdle is figuring out tension to get the stitch to "flip" from one thread to the other. Shuttle tatting, I think, really needs to be seen in action to be learned. For that reason, I highly recommend this video by kmemuse: Beginning Shuttle Tatting. (This YouTube user uploads videos about styling long hair, which are great, but she put up one brilliant video on shuttle tatting, and I'm very grateful!) I used it to learn the basic hand positions, and I watched it over and over, pausing it, rewinding it... There's one bit where the video gets blurry, but hang in there because then she zooms up and it's better. Wonderful resource! The biggest (perhaps only) difference in the finished appearance is that because each stitch can be pulled snug to the thread (instead of loose on the needle), shuttle tatting is tighter and sturdier than needle tatting. Look again at the two example pictures I got from Wikimedia Commons (above) to see what I mean: in the needle tatting, the stitches on the finished motif are loose and you can see air through them; in the shuttle tatting, the finished motif is tight and dense. TATTING TERMINOLOGY There are a lot of terms that you can learn as you go, but here are the basics for starting out: Half Stitch - A half-hitch. It's not used in isolation in tatting; it's always doubled, going first one direction and then the other to make a double stitch. Abbreviated HS. Double Stitch - two half stitches worked opposite each other. Also known to people who tie knots as a clove hitch or lark's head knot. In the needle tatting picture above, look at the threads that go around the needle: see how there are sets of two such threads that sort of stick together? Those are two stitches, which together make a double stitch. On the needle in the picture, there are five double stitches, then a picot, then five double stitches, then another picot, then five double stitches. The double stitch is the most basic unit in tatting. Abbreviated DS. Chain - a bunch of stitches in a row. Abbreviated CH. Picot (pronouced "PEE-koh") - a little loop made by leaving distance between two stitches while working and then scrunching them close together. You can use picots to attach one ring to another, but often they merely ornament the work. Abbreviated P. Ring - a bunch of double stitches and perhaps picots after the thread is pulled through and the loop is closed. Abbreviated R. Reverse Work - an instruction found on patterns, telling you to flip the work upside down ad work on the other side. Abbreviated RW. Join - a place where one element of the design is connected to another. Abbreviated J. TATTING IN OTHER LANGUAGES If you're looking for resources in other languages, try "frivolité" (French), "frivolitet" (Swedish), "Occhi" (Italian and German), "chiacchierino" (Italian), "Schiffchenarbeit" (German), "sukkulapitsi" (Finnish), "sustikpitsikudumine" (Estonian), or "nupereller" (Norwegian). PATTERNSThere are two types of tatting patterns: drawing and notation. Pick what works for your brain, is what I say! I prefer the drawn ones, which look like circles (loops) and lines (picots), because I'm visual. The notation ones which can be written out or extremely abbreviated, look like knitting notation, and work well for people whose brains think in sequences. Tatted Treasures has beginner examples of each type of pattern. PEOPLE YouTube is marvelous, but so are teachers! Especially in the early days of learning, you could really benefit from having someone to ask questions of! And regardless of your level of expertise, you can always benefit from having a friend or group of friends to meet on a regular basis. See if you can find a lacemaking group, guild, circle, or "stitch & bitch" around you. (I hate the term "stitch & bitch", but that might be what it's called where you are.) In Portland, OR, where I live, there is the Portland Lace Society, which meets monthly at the Sellwood Community Center. I went once, and enjoyed it very much. There were some tatters and some bobbin-lace makers, a few crochet lacemakers... no needlelace makers (except myself). Unfortunately, it was inconvenient for me to go regularly, on account of distance and my unpredictable work schedule, but it is good to know they are a resource should I ever get serious about tatting! Or ask around at work and church to see if anyone knows a tatter. Many elderly women tat, and you could make a friend by asking to be taught! If you find yourself with a much older teacher, remember to honor your elder, be a good ambassador for your age group, and appreciate the opportunity to learn not just about tatting but about history, the way the world used to be, how different people think and what they value, et cetera. Bring snacks, share tea, and chat. Open your heart and mind, and you'll benefit more than you can imagine! And years later, when you are an expert tatter, your skills will be more special because they'll hold memories of that friendship. OTHER RESOURCES Look online! The more you tat, the more problems you'll have to solve, and you can bet some else before you has already figured it out and blogged about it! One of the first problems I encountered while tatting was how to close a ring of rings but keep my working thread on the outside of it, with no twisting in the picots. To see what I mean about this problem, make a series of five rings, joined at their side picots: a simple edging. Then try to join the first ring to the last one in the same way (to make a ring of rings)... and you'll find the picots either get twisted in an ugly way, or your two hands end up on either sides of the work, and you can't continue. You'd have to tie off and start a new thread, tying it on to the work! Such a bother. Luckily, Lisa C. Trumble of This 'n' Tat had this same problem and took the time to explain a simple solution called a folded join. Thank you, Ms. Trumble!
Try your library, too. Your taxes pay for it, so you might as well use it! Many thanks to the University of Arizona's Department of Computer Science department for their lace archive! I have no idea why they put it up (it doesn't seem related to computer science, but what do I know?), but I use it all the time! They have only two files on tatting. Therese de Dillmont's book for DMC is an old resource with tricky hand-diagrams, but it does have patterns and illustrations. It also has old-style written instructions, which are long-form compared to modern abbreviated patterns. The Art of Tatting, by Katharin L. Hoare, is a whole book scanned into 3 pdfs. The first one has interesting cultural stuff about women's work, Roumanian royalty, et cetera, but if you're chiefly interested in the instructions, scroll down to page 19 for pretty good illustrations of the hand positions. They'll make more sense if you have first seen kmemuse's video, though! Part 2 and Part 3 are all black-and-white plates of examples of tatting, pretty and interesting, but not useful patterns for a beginner. (I was particularly interested in the combination laces where tatted motifs and edgings were sewn to machine-made net to mimic the look of needle or bobbin lace! I'd never seen tatting used like that before!) Good luck!
2 Comments
9/27/2018 07:00:47 am
Interesting post keep it up thanks for sharing it.
Reply
Leave a Reply. |
Karen Roy
Quilting, dressmaking, and history plied with the needle... Sites I EnjoyThe Quilt Index Categories
All
Archives
March 2024
|


 RSS Feed