Robes de Coeur
  • Blog
  • Quilting
  • Clothing
    • Menswear
    • Womenswear >
      • Self-Made Patterns
      • Commercial Patterns
    • Hats
    • Miscellany
  • About
  • Blog
  • Quilting
  • Clothing
    • Menswear
    • Womenswear >
      • Self-Made Patterns
      • Commercial Patterns
    • Hats
    • Miscellany
  • About

Tulip Skirt

1/17/2017

4 Comments

 
One of the first patterns I drafted was for a pencil skirt.  I found directions online, and followed carefully, measuring and drawing and fretting about quarters of an inch.  Those were early days!  I have since used my pencil skirt pattern many times, since it calls for so little fabric, making it a good go-to for stash-busting!
Picture
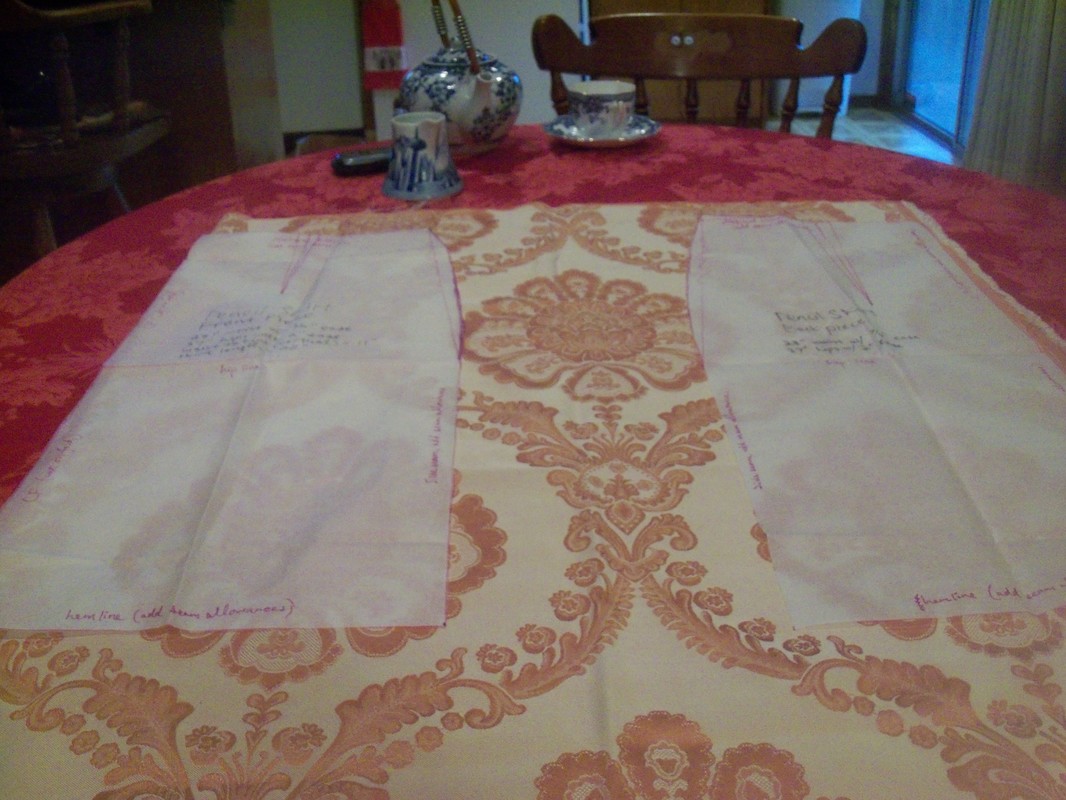
Little known fact: sewing can't happen without tea!
So here's a picture of a bit of lovely golden damask from my stash, folded selvedge to selvedge, with the pencil skirt pieces laid on top.  The Center Front (left side of picture) is on the fold.  The Center Back (right side) is on the selvedges.  Plenty of fabric for a pencil skirt, but why not use bit more of that lustrous fabric?

PLANNING

Picture
Picture
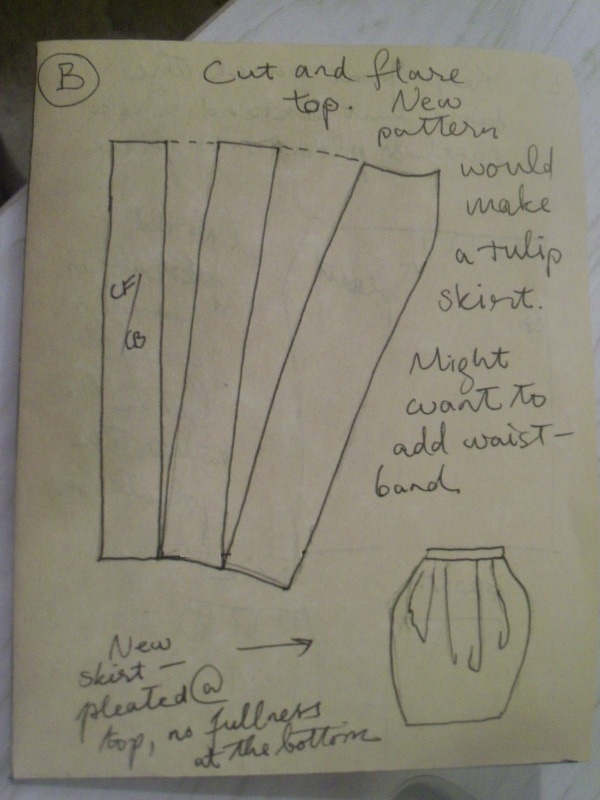
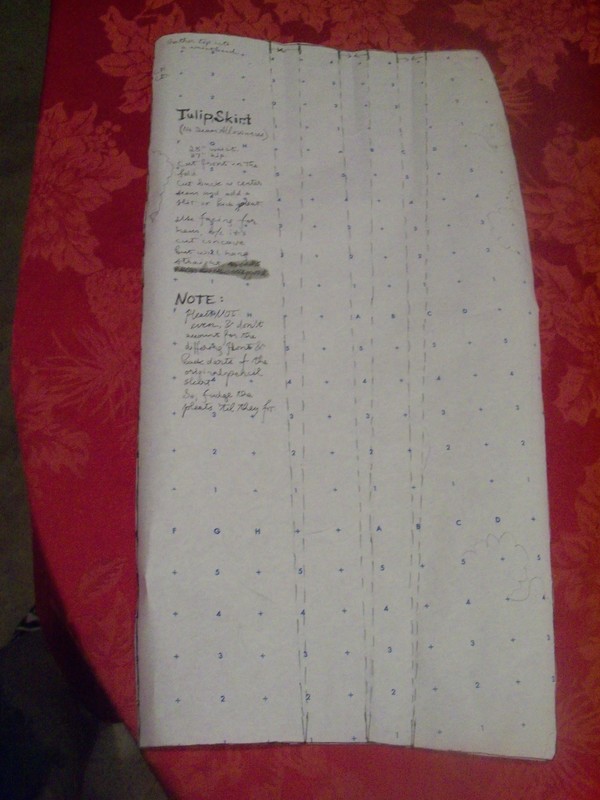
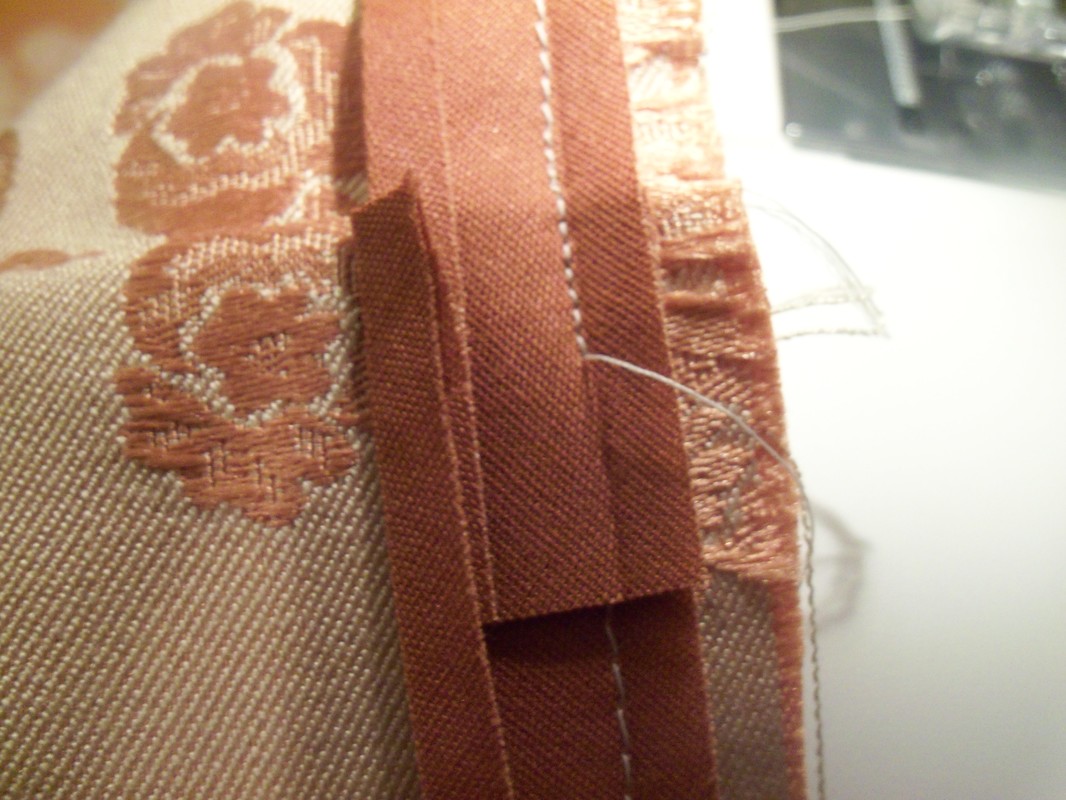
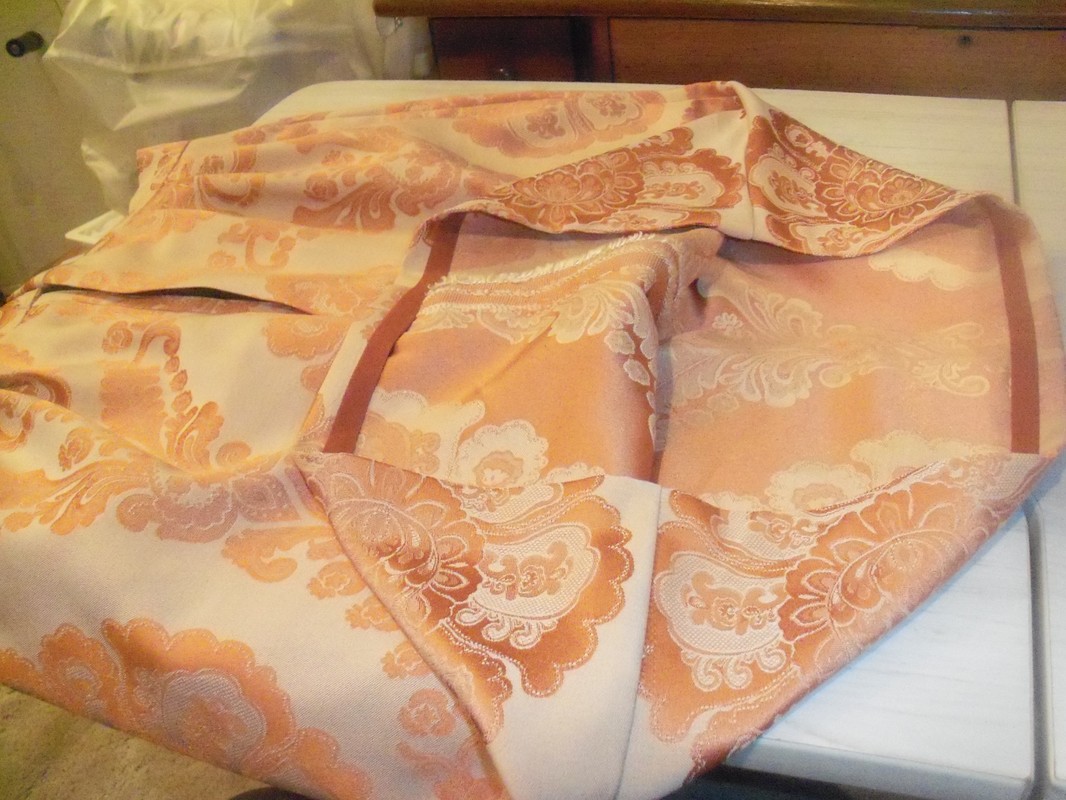
The left-hand picture above shows my quick sketch of the pattern manipulation that makes a tulip skirt.  A tulip skirt has fullness at the top, made with gathers or pleats, but no excess fullness at the bottom.  The right-hand picture is the altered pattern, slashed and spread at the top, with the new width determined by my fabric. 

Note that the new hemline (bottom) is curving, meaning that it is straight on grain at Center Front, but is bias on the sides.  This plays into my hemming later.  Also, ignore the directions of my arrows in the pleats at top; I drew them wrong... it looks like I intend to make a box pleat with each, but actually, I made knife pleats and never got around to correcting the pattern. 

Another interesting thing: while my pencil skirt has a front and back which differ in the size and depth of their darts, I did this skirt with only one pattern piece.  I figured that with the extra fullness, it would not need to be different in the back.  So I simply cut the front on the fold and the back as two pieces with a little extra seam allowance for a Center Back seam.  The Center Back edges are on the selvedge. 

CONSTRUCTION

Picture

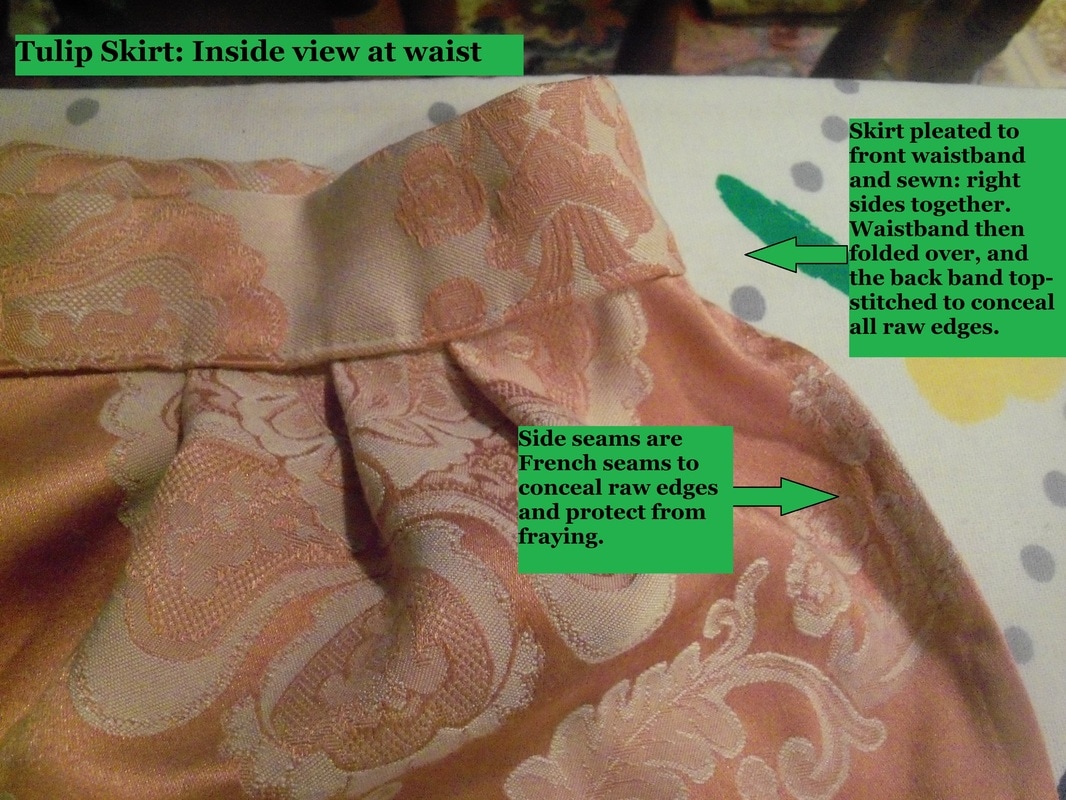
HEMMING

Click on the first picture to see up close and to read captions.
Remember how I said the bottom was partly on the bias?  So I thought it might make the hemming a little wonky... hard to turn up an even amount when some is off-grain.  Besides, I love finishing hems with tape: it's functional and beautiful.  In this case I used double-fold bias tape because I had it on hand.  Starting at the Center Back seam, I sewing the bias tape to the front of the skirt.  If you look at the first picture above, you'll see how I started the tape off with a folded edge.  The second picture shows the finish, overlapping the fold.  Once I fold the bias tape down, this hides all raw edges.  At this point, hemming was easy: fold it up and press it; pin in place, and hand-finish.  The best part was that I could conceal all my hand-stitches--on the outside of the garment they are tiny and go the same direction as the floater threads so they blend in; on the inside, they hide inside the fold of the bias tape.  

CENTER BACK CLOSURE

Picture
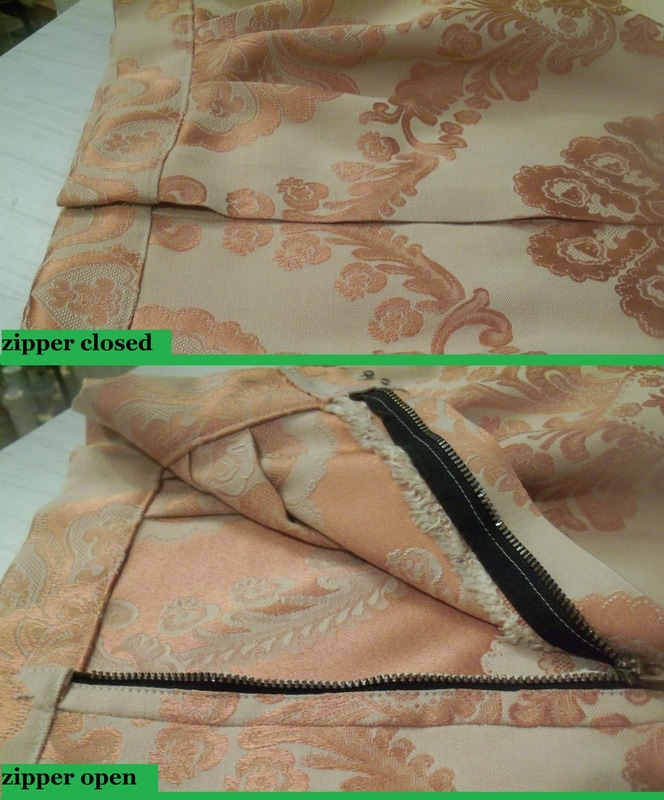
Yes, that's a zipper from a pair of jeans! Again: stash-busting.
Picture
Hooks and loops.

FINISHED

The work of a day, finally done!  It fits and is sweet and demure.  I shall get a picture of myself wearing it soon, and put it in my portfolio. 
Picture
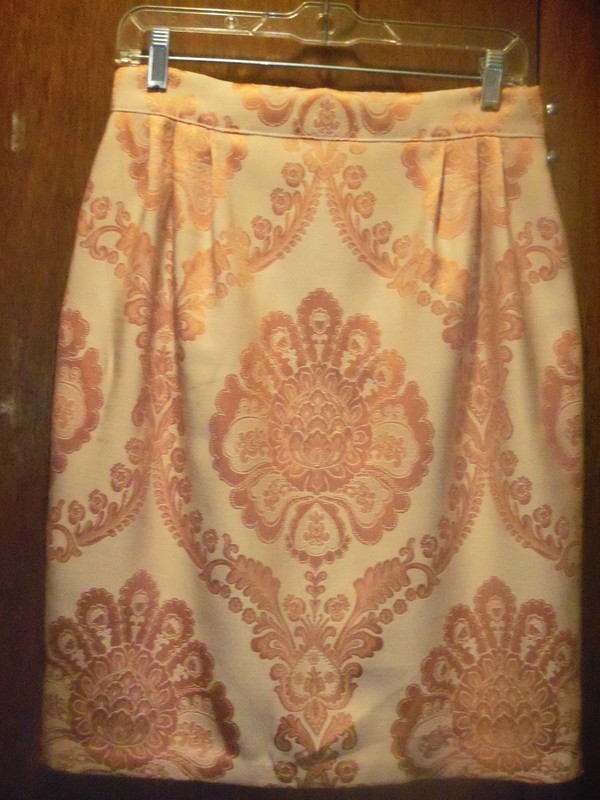
Ignore the creases at the hem...
4 Comments
Quinn Swoboda
2/22/2017 08:52:57 pm

Karen, I learned so much from this. I've never used bias tape because I didn't understand it. But it looks easy and so slick.
I love you for using an old jeans zipper. That, I understand and already excercise as a way to make sewing an economic savings not a drain as it often is, if you're not careful.

Reply
Karen Roy link
2/23/2017 09:39:25 am

Hi Quinn! I'm so glad it was useful! I enjoy teaching things (case in point: this blog), so it's wonderful to know someone is learning from them!

I love bias tape... you can also use it to finish an edge by folding the tape in half over it, or add a bit of string to it to make piping, or make it into a casing for boning or drawstrings.

Reply
Chantal link
4/18/2018 09:02:09 pm

Hello !
Your skirt looks great and your finishings do clean (Something I still struggle with). This was very helpful but I didn’t quite catch how to lay measure out new hem with the cuts for the pleats spread out : is the bottom of the adjusted pattern traced onto fabric as a half circle or do we keep it straight ? Like it’s original pattern and original hem width ?

Reply
Karen Roy link
4/19/2018 11:30:36 pm

Thanks for your question, Chantal! Let me clarify several things about the bottom of the paper pattern, and hope I answer your question in the process.

First, the pencil skirt pattern that I start with is a sloper, which means that the seam allowances are not drawn on there yet. When I slash all the way to the bottom and pivot the edges out, the very bottom of the pattern is still touching. This means I'm not adding any circumference to the hem: if the skirt was X-number of inches around before, it's still X-number of inches around. I've changed the shape, not the length of the line. Once I'm done my modifications, I add seam and hem allowances back on and make sure I cut the fabric with them; I'll get back to that in a few paragraphs.

Now here's where I think you're question lies: you're looking at the paper pattern... when you slash and pivot the pleats out, it makes the bottom of the pattern curve like a half-moon. You are wondering if you should really cut out your fabric like that, like a half-moon at the bottom of the skirt.

The answer in yes.

To test this, draw the pattern on a piece of paper, small if you want, just so you can experiment. Now fold the pleats as you would with fabric and watch how that effects the bottom of the skirt: you'll see how those folds lift the down-curved edge, and the half-moon straightens itself out as the hip takes shape above. It's really neat to see in action. The bottom of the pattern is curved when it's flat on the paper/fabric, but it straightens out when the pleats are made.

So, yes: when you cut the fabric out, it'll have a half-moon curve to the bottom. When you're done sewing the pleats, no-one will know that curve is there! If the sloper you started with had a nice straight hem, your finished tulip skirt should, too.

Now back to seam allowances: add them to the side seam like you normally would (I used a half inch, though 5/8 is more common for home-sewers). Then add your hem allowance to the bottom, starting at the Center Front and following the line of the half-moon curve. When you get to the side-seam, though, flare your hem allowance out in a mirror image of the flare above the hem. Imagine the hemline is a reflecting pool: the expanding shape of the skirt above it will be reflected in the hem allowance below it. That way when you turn the hem allowance up, there are no puckers. Again, try it in your mini-paper pattern first to make sure you understand, then you'll feel confident doing it with fabric.

I hope this answered your question! Also, I checked out your site: I love your blue damask skirt with the scalloped hem in your Kholod Collection. What a nice use of pleats and panels!

Thanks for stopping by,
Karen.

Reply


Leave a Reply.

    Karen Roy

    Quilting, dressmaking, and history plied with the needle...

    Sites I Enjoy

    The Quilt Index
    r/Quilting
    Wonkyworld

    Categories

    All
    1910's
    Alteration
    Antique
    Dyeing
    Embroidery
    General
    Hand Sewing
    History
    Lacemaking
    Mending
    Menswear
    Millinery
    Modern Elizabethan
    Musing
    Other Sewing
    Philippians 4:8
    Project Diary
    Quilting
    Regency
    Retro
    Self Made Pattern
    Self-made Pattern
    Terminology
    Victorian
    Vintage

    Archives

    April 2025
    March 2025
    December 2024
    March 2024
    December 2023
    November 2023
    September 2023
    August 2023
    June 2023
    May 2023
    March 2023
    February 2023
    January 2023
    December 2022
    November 2022
    October 2022
    September 2022
    August 2022
    October 2021
    September 2021
    August 2021
    July 2021
    June 2021
    May 2021
    April 2021
    August 2020
    June 2020
    May 2020
    April 2020
    March 2020
    January 2020
    December 2019
    November 2019
    September 2019
    August 2019
    July 2019
    May 2019
    April 2019
    March 2019
    January 2019
    December 2018
    November 2018
    October 2018
    September 2018
    August 2018
    July 2018
    June 2018
    May 2018
    April 2018
    March 2018
    February 2018
    January 2018
    December 2017
    November 2017
    October 2017
    September 2017
    August 2017
    July 2017
    June 2017
    May 2017
    April 2017
    March 2017
    February 2017
    January 2017

    RSS Feed

Blog

Quilting

Clothing

About

Copyright Karen Roy
​© 2017-2024