Robes de Coeur
  • Blog
  • Quilting
  • Clothing
    • Menswear
    • Womenswear >
      • Self-Made Patterns
      • Commercial Patterns
    • Hats
    • Miscellany
  • About
  • Blog
  • Quilting
  • Clothing
    • Menswear
    • Womenswear >
      • Self-Made Patterns
      • Commercial Patterns
    • Hats
    • Miscellany
  • About

TUTORIAL - A French Bustle

6/4/2018

7 Comments

 
Picture
I recently made a French bustle for a wedding dress.  Let me show you how I made it, and show the bridesmaid(s) how to bustle it on the day of the wedding! 

A bustle on a trained dress is a way of lifting the train off the floor so the wearer can dance or move in a crowd without disaster.  The first dance is usually a ballroom dance, so the woman walks backward the whole time.  She doesn't want to step on her train! 

There are different types of bustles, and in-consistent nomenclature.  The type of bustle your dress gets is partially determined by the type of skirt and train you have. 
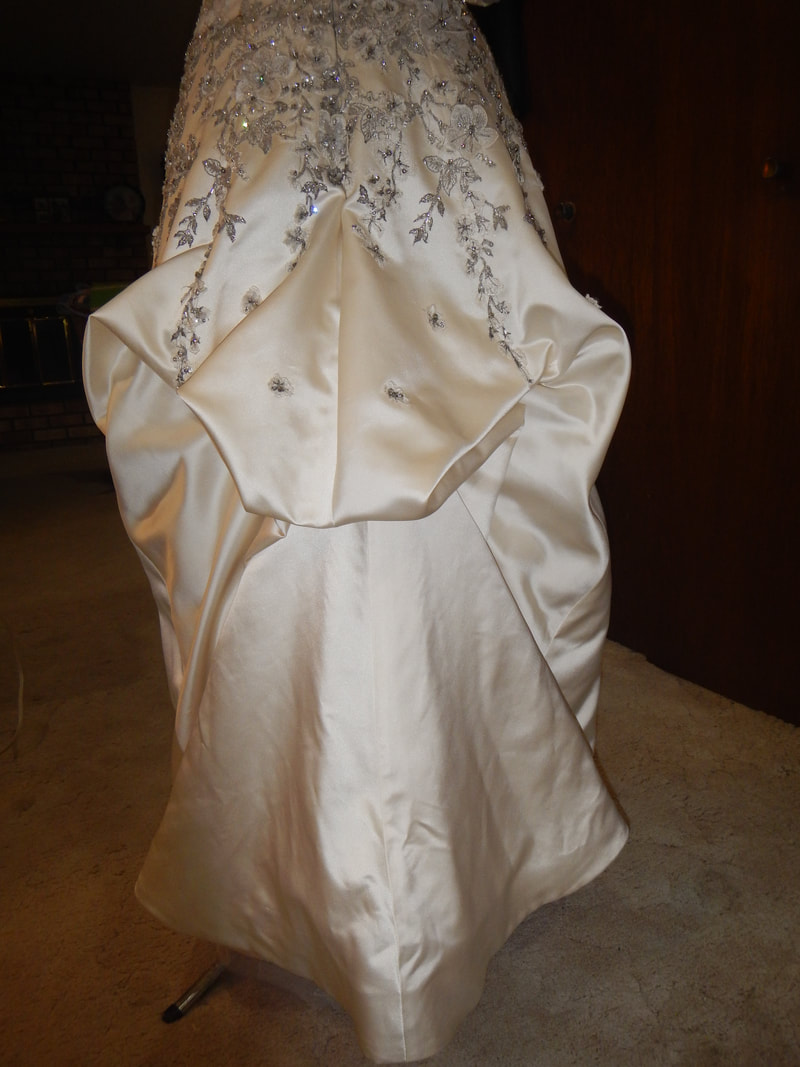
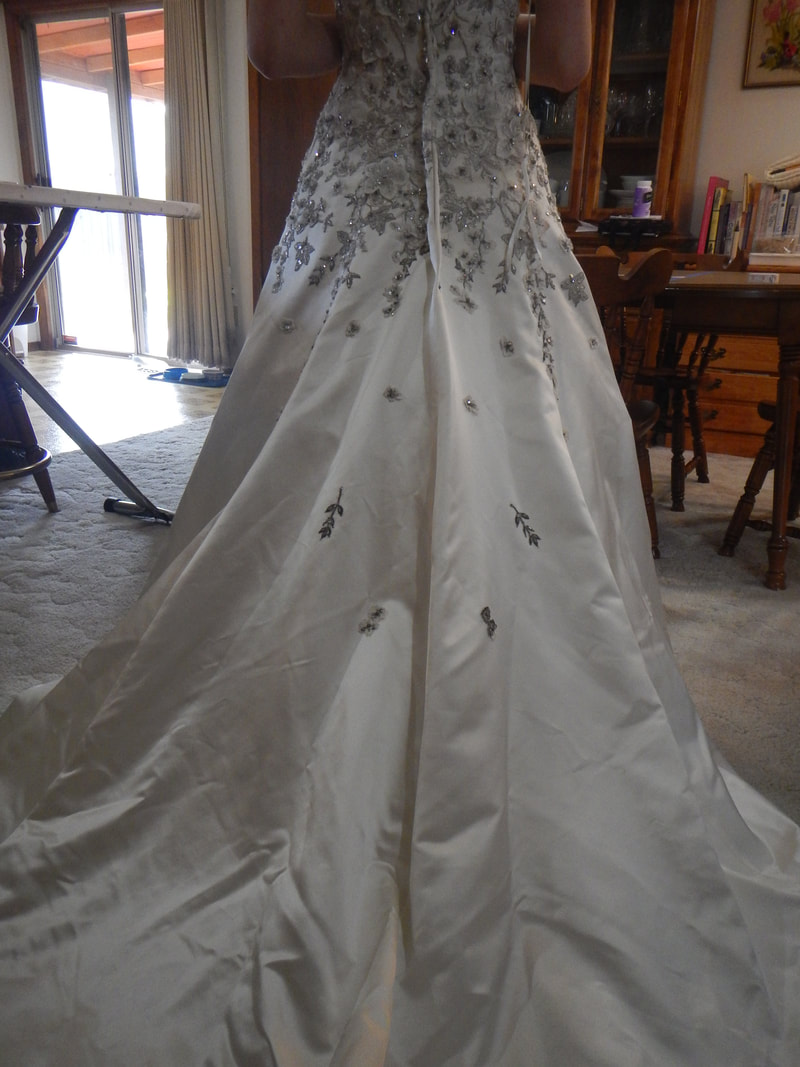
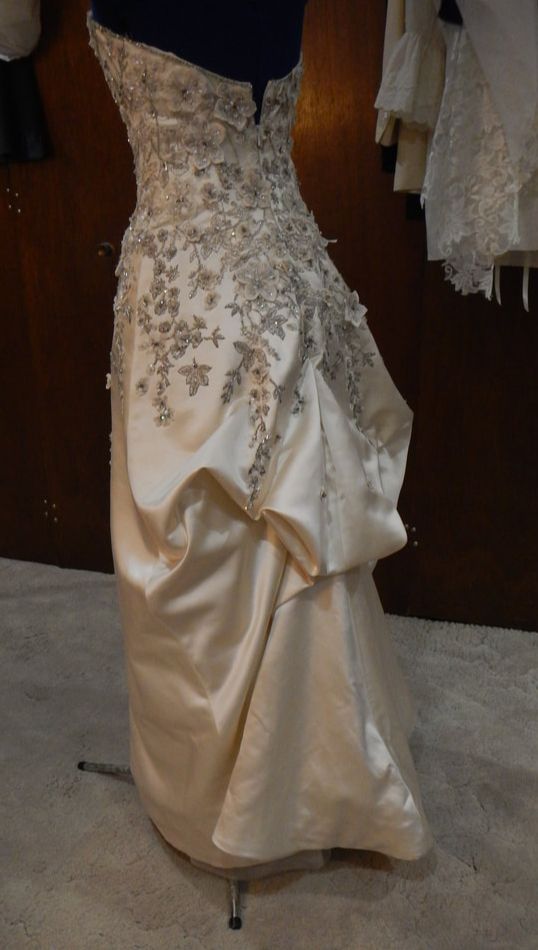
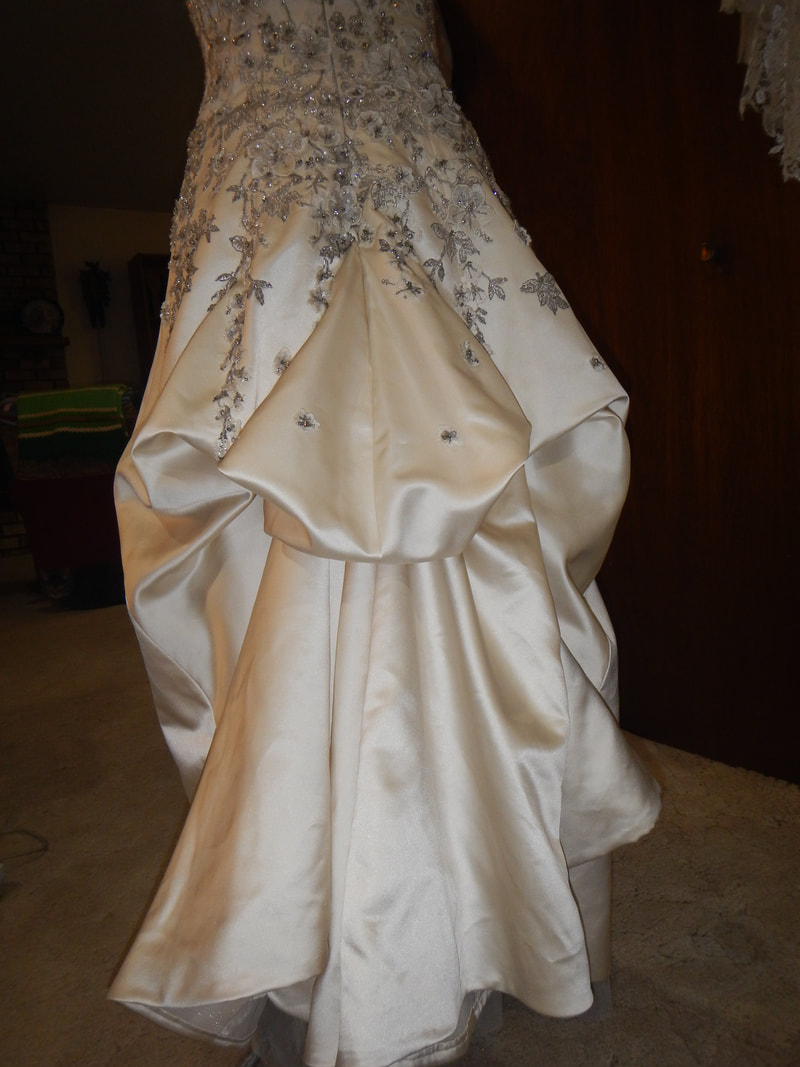
I'll be showing the French bustle, also called an under-bustle.  It looks a bit like the robe a la polonaise and works well with dresses that have details at the top of the skirt.  I like it especially when the train is full and long; when the train is not very full, the French bustle starts looking more like the bride went to the bathroom and caught her skirt in her undies...
(Bridesmaids of this bride, you can scroll down to the header "How to Bustle This Gown" for your tutorial!)

PINNING AND SEWING

Let's start with the train that I have to work with.  Here's the dress at the first fitting, with the zipper area pinned tighter and the original hem length.

You can see that the silver and sparkly floral motifs of the bodice are appliqued over the top of the skirt, too.  For this reason, I don't want to do an over-bustle, which would pick the train up and put it atop the back of the dress; that would cover the cascading flowers!  Instead I pin an under-bustle/French Bustle and take a picture of it to show my client, and she approves. 

My first attempt is clumsy, but when my client is gone I experiment some more and figure out a more attractive French bustle on my dress form. 
Picture
Picture
Here's my later experiment, after all the other alterations are finished.  It ends up being a three point bustle.  In bustling, each "point" is a place where you pick up a spot and attach it higher up.  If I could get the whole train up with one hook&eye or one button, that would be a "one point bustle".  This train has a wide expanse, so when I pick up the Center Back (first point), it creates floppy bunny ears on the sides, which I then have to pick up (second and third point).  In this bustle, all three points at the bottom attach to the same spot just at the base of the zipper. 

My goal as I pin and tuck is to get a flatteringly round shape that doesn't hide the appliqued motifs on the back.  And of course to get the hem up off the ground! 
(What about the petticoat net and tulle?, you may ask.  All the underskirts have been trimmed to be level with the front hem of the skirt, and the bustling happens just with the train fabric, on top of the petticoat net.) 
Picture
In my experimenting stage, I use large safety pins to mark the points and connect them to each other (pic to the left).  For the final bustle, I use plastic rings (Dritz sells them "for cafe curtains and tie-backs") and bias tape to make loops.  I could use twill tape loops, instead, but I have the rings in my stash.
Picture
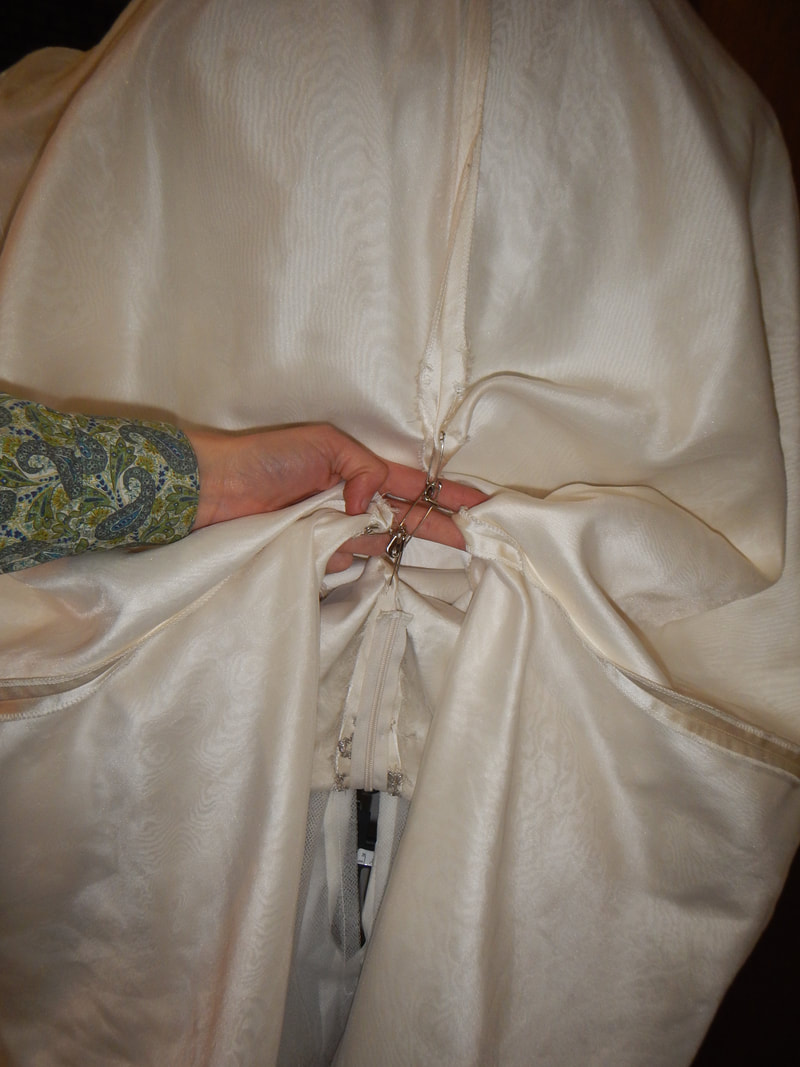
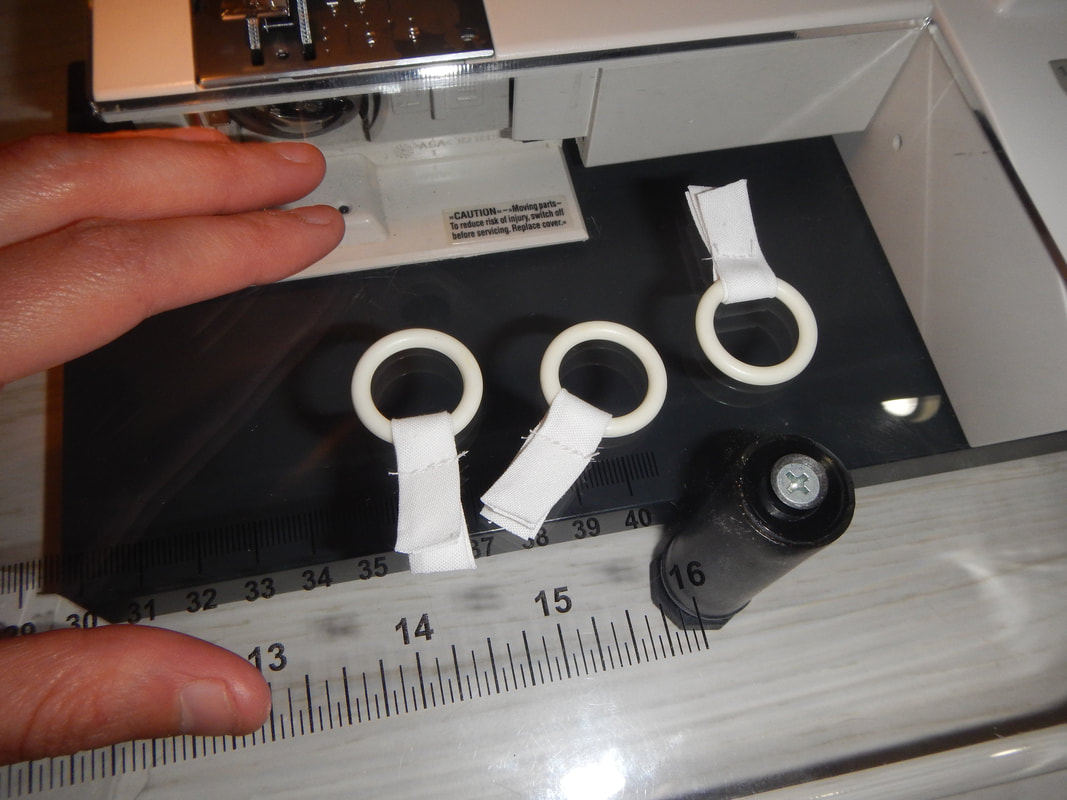
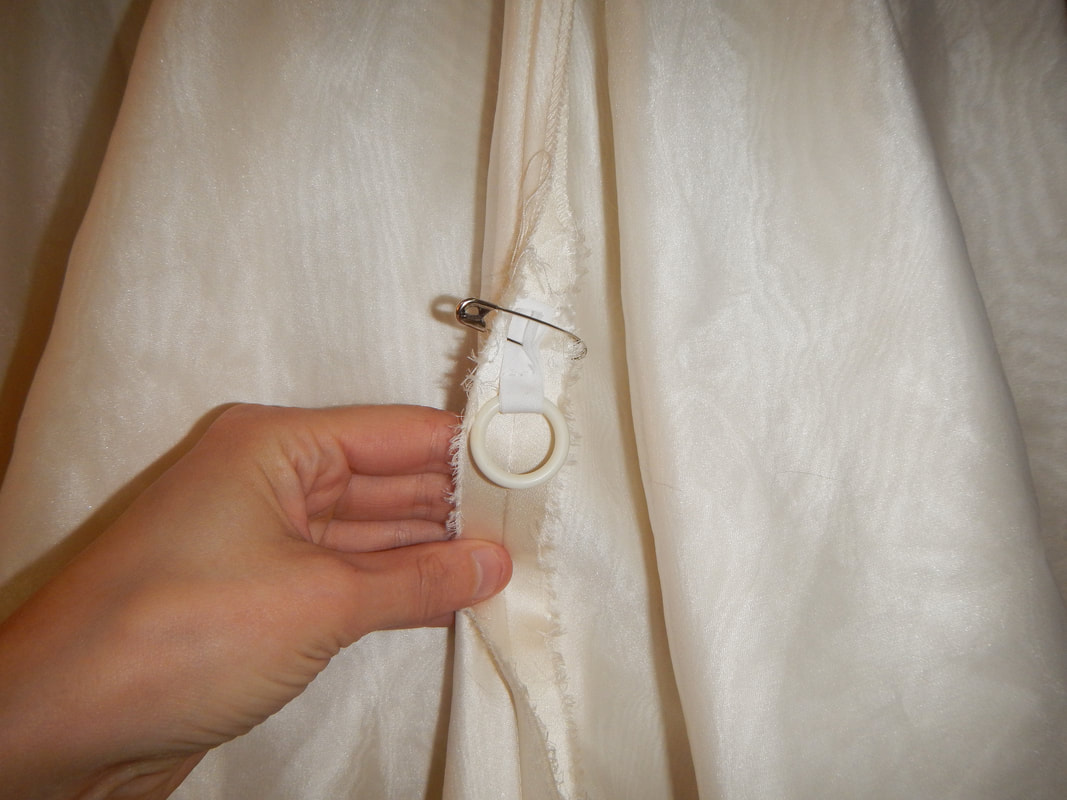
First I pin the rings to the seam allowances at the bustle points.  Bearing in mind that they'll be pulled upward, I sew them facing in that direction.  Then I take a scrap of red, somewhat coarsely textured ribbon and pin that to the bottom of the zipper and the seam allowances there.  Wanting to make things easy for the bridal attendants and secure while the bride is moving, sitting, and dancing, I choose red because it's visible in the midst of all that white fabric (and the skirt is opaque enough to conceal the color when the dress is down).  I choose a coarse texture to make it grippy when it's tied in a bow.  I test the bustle one more time before hand-sewing things in place, catching only seam allowances and zipper tape in my stitches, so nothing shows from the outside of the gown.
Picture
The plastic ring in place.
Picture
Notice the rings are pointing upward?

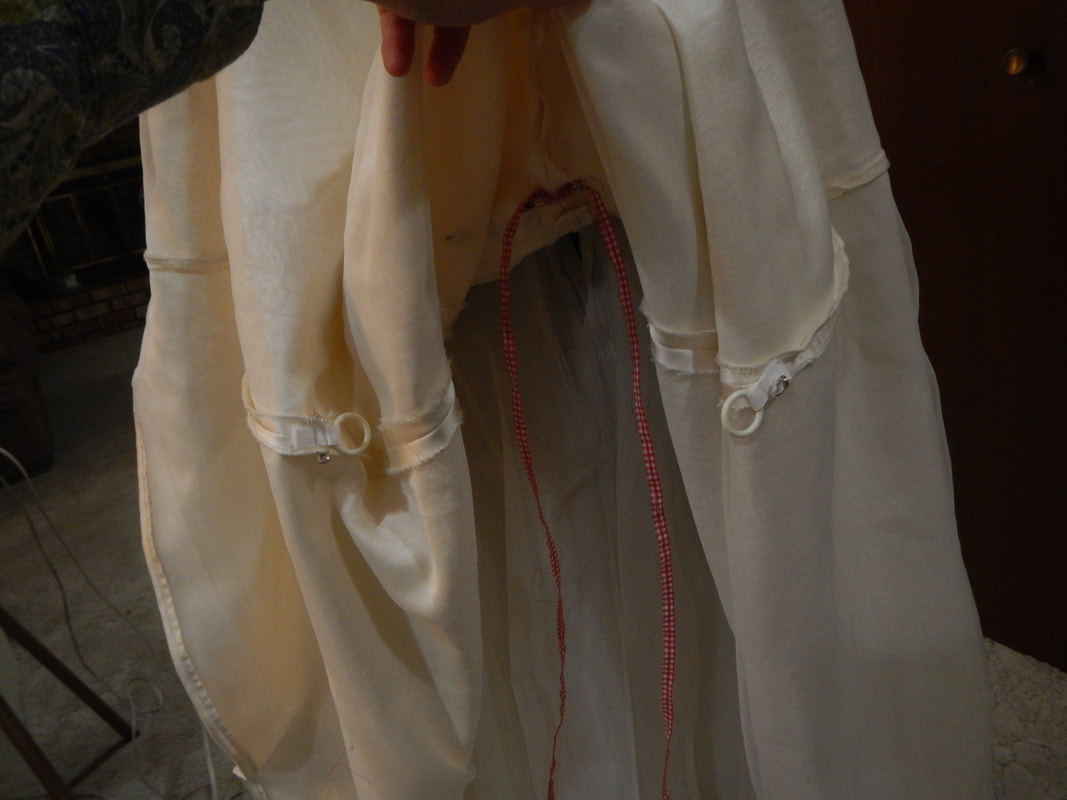
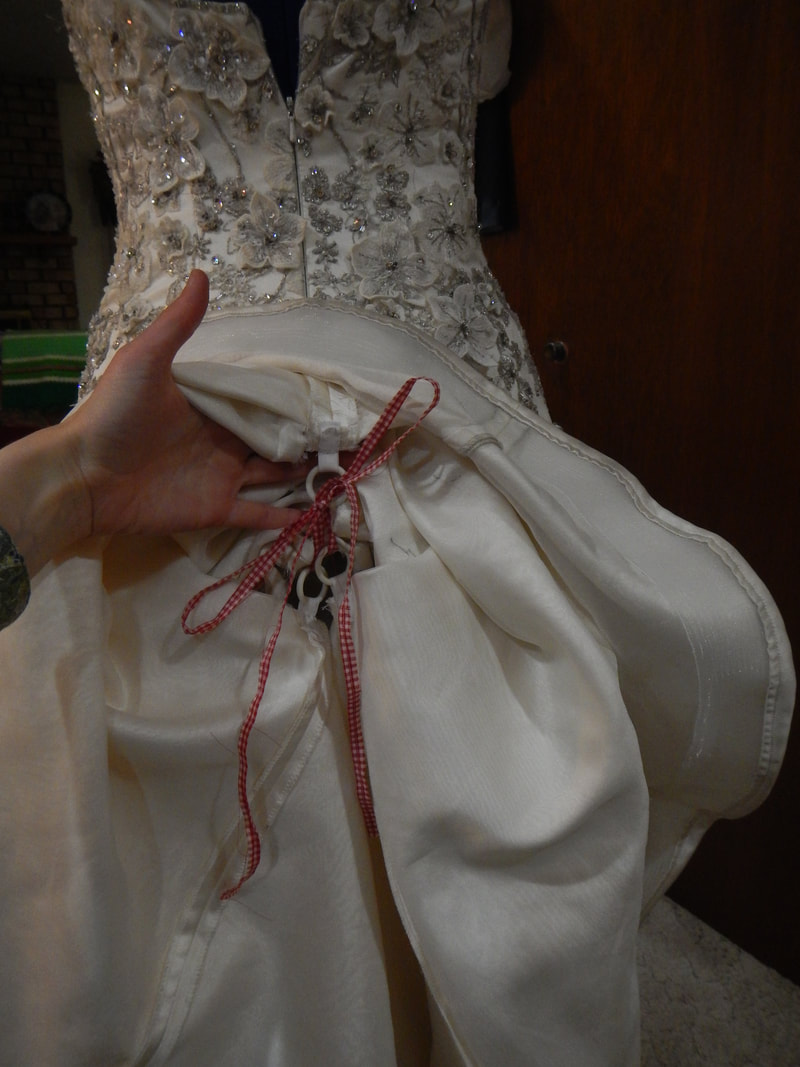
HOW TO BUSTLE THIS GOWN!

All right, bridal attendants, this is your section!  To bustle this gown, lift the train up (have the bride turn her back to a wall while you do this, of go into a private room!), find the red ribbons, and thread them through the three loops like so:
Picture
Notice that only one ribbon end goes through the Center Back ring (top one in picture)?  If you put both ribbon ends through it, they'll slide right out again.  Put one ribbon end through it and tie it to the other. 

But actually, you'll want to pull the whole thing tighter, almost up to the base of the zipper, and tie your bow there.  Then flip the train back down and fluff the skirt so it lies attractively. 
Picture
All tied up in a bow!
Picture
Finished bustle

RE: WEARING CONSIDERATIONS

  • I'm not sure whether the plastic rings may be annoying to sit on... I'd be curious to get feedback on that!  If they are annoying, it's a good argument for doing twill tape loops next time. 
  • I don't think a knot or double bow is necessary for holding this bustle up, because the red tape is quite textured and stays in a simple bow without slipping.  If the bride is dancing vigorously and the train wants to fall, though, by all means do a tighter bow or double bow... just be aware that it'll be annoying to untie later. 
7 Comments
The Sister
6/4/2018 02:12:18 pm

Good bustling is such a noticeable touch. I've been to weddings where the gown is bustled and looks like wings sticking out the back of the bride's posterior. Mistake!

Do you remember pricking your finger while bustling my dress, and bleeding all over the thing? You said it couldn't be a finished project without a little shed blood. Ha!

Reply
Karen Roy link
6/4/2018 05:59:06 pm

Haha! Yes, I remember!

Reply
Patt
10/4/2021 11:03:38 am

You do know that your own saliva will remove your own blood. As I’ve told many of my brides— “ of course I spit on your gown” ( if just a dot of blood, which it usually is, just soak a cotton thread with your saliva and then pull it through the spot.— I’ve used a Q-tip too, just work from outside the spot to the center to avoid “ bleeding”

Reply
Chris H., the Island Seamstress
8/19/2019 05:33:00 am

Thank you so much for this very clear tutorial. I have a bride that wants this type of bustle and I had never done one before. I was trying to talk her out of this type because pictures I had seen previously made it look like the bride had gone to the bathroom and her gown was tucked into her underwear!! Your pictures show a very attractive bustle and I've forwarded your tutorial to her so she can see how this would look.

Reply
Karen Roy link
8/22/2019 10:20:04 am

I'm glad it was helpful and wish you luck on your project! Take your time on the safety-pin step, experimenting until you get the most attractive look. Every gown and train-length is different; you might end up securing the bustle lower on the Center back seam rather than at the base of the zipper. Play with it until it looks good. You can do it!

Reply
Sue J. link
8/11/2021 03:41:23 pm

HELP! I finished shortening my daughter's a-line gown, but am having a hard time with the bustle! The dress has 5 layers - two tulle layers which have appliques on them, a sewn in crinoline, and then two underskirts. The back of the dress/train is quite full, but not exceedingly long, and also has appliques on it that stop about 18" from the end of the train.

Reply
Karen Roy link
8/24/2021 07:57:38 pm

Bustling a gown can be more art than science, and sometimes what's required is pinning, stepping back and looking, re-pinning, et cetera. With that said, here are a few tips on the multi-layer question, starting from the skin out:

* The underskirts and attached crinoline are usually shorter than the outer skirts and don't need to be bustled. Typically, they are above the floor to start with. If the skirt has a train, the crinoline doesn't.

* The two layers of tulle, with the appliques, can be bustled together; lay the two layers of tulle neatly one atop the other, and treat them as one piece for the busling process. The hooks/loops/whatever that you make for attachment points will be tacked though both layers.

* You can attach the tulle layers points on the crinoline if you want! They don't have to be attached to the back zipper or to each other.

* Depending on the unique dress, the appliques can either be above/below the bustle point, or (if smaller) can be gathered up in the bustle, or can serve as sturdy places to hide your hooks. Your mileage may vary.

Reply


Leave a Reply.

    Karen Roy

    Quilting, dressmaking, and history plied with the needle...

    Categories

    All
    1910's
    Alteration
    Antique
    Dyeing
    Embroidery
    General
    Hand Sewing
    History
    Lacemaking
    Mending
    Menswear
    Millinery
    Modern Elizabethan
    Musing
    Other Sewing
    Philippians 4:8
    Project Diary
    Quilting
    Regency
    Retro
    Self Made Pattern
    Self-made Pattern
    Terminology
    Victorian
    Vintage

    Blogs I Read

    The Dreamstress
    Male Pattern Boldness
    ​
    Lilacs & Lace
    Tom of Holland
    Fit for a Queen
    Line of Selvage
    Mainely Menswear
    Bernadette Banner

    Archives

    January 2023
    December 2022
    November 2022
    October 2022
    September 2022
    August 2022
    October 2021
    September 2021
    August 2021
    July 2021
    June 2021
    May 2021
    April 2021
    August 2020
    June 2020
    May 2020
    April 2020
    March 2020
    January 2020
    December 2019
    November 2019
    September 2019
    August 2019
    July 2019
    May 2019
    April 2019
    March 2019
    January 2019
    December 2018
    November 2018
    October 2018
    September 2018
    August 2018
    July 2018
    June 2018
    May 2018
    April 2018
    March 2018
    February 2018
    January 2018
    December 2017
    November 2017
    October 2017
    September 2017
    August 2017
    July 2017
    June 2017
    May 2017
    April 2017
    March 2017
    February 2017
    January 2017

    RSS Feed

Blog

Quilting

Clothing

About

Copyright Karen Roy
​© 2017-2022