Robes de Coeur
  • Blog
  • Quilting
  • Clothing
    • Menswear
    • Womenswear >
      • Self-Made Patterns
      • Commercial Patterns
    • Hats
    • Miscellany
  • About
  • Blog
  • Quilting
  • Clothing
    • Menswear
    • Womenswear >
      • Self-Made Patterns
      • Commercial Patterns
    • Hats
    • Miscellany
  • About

Advance 4914, view 2, CONSTRUCTION

7/27/2019

1 Comment

 
Picture
Rainier Cherries. Too expensive to eat, but I can wear them!
Now that I am ready to sew Advance 4914, let me introduce my fabric.  It is a polyester microfiber (more on that after the cut), which feels amazingly soft and has a gorgeous print of Rainier cherries.  The print is busy, but most of the cherries seem to be hanging in one direction, so I think it has a nap. 

The pattern calls for 3.125 yard at 42" wide, but this fabric is 60" wide (a fabric width not available in 1948, the year of this pattern).  I do a bit of math (read: Google it), round up, and buy 2.5 yards.

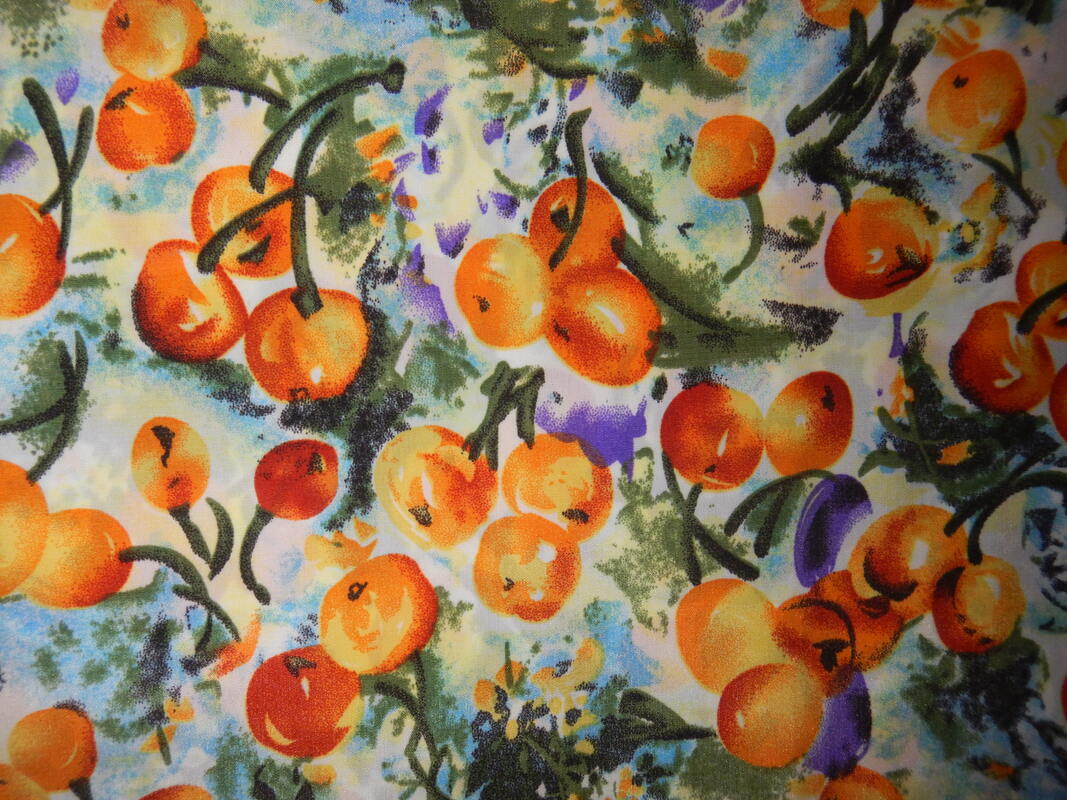
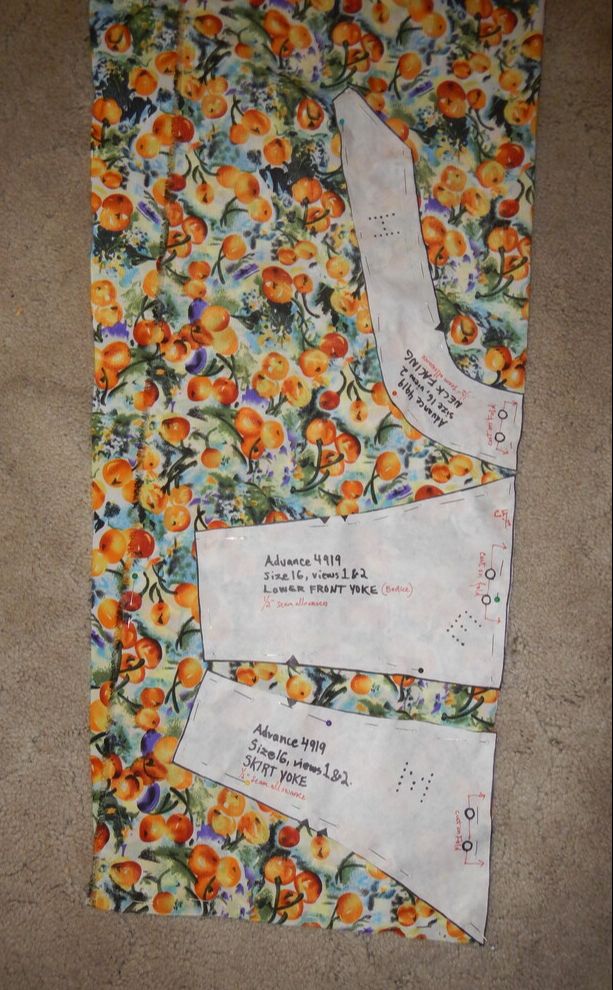
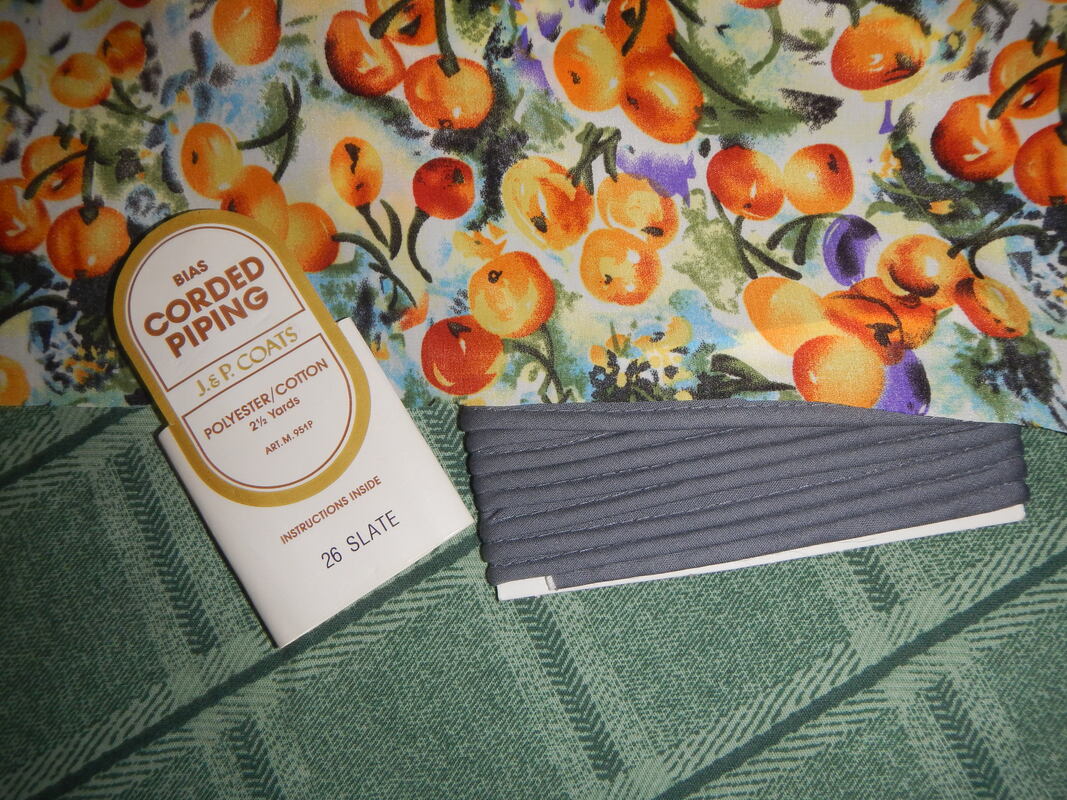
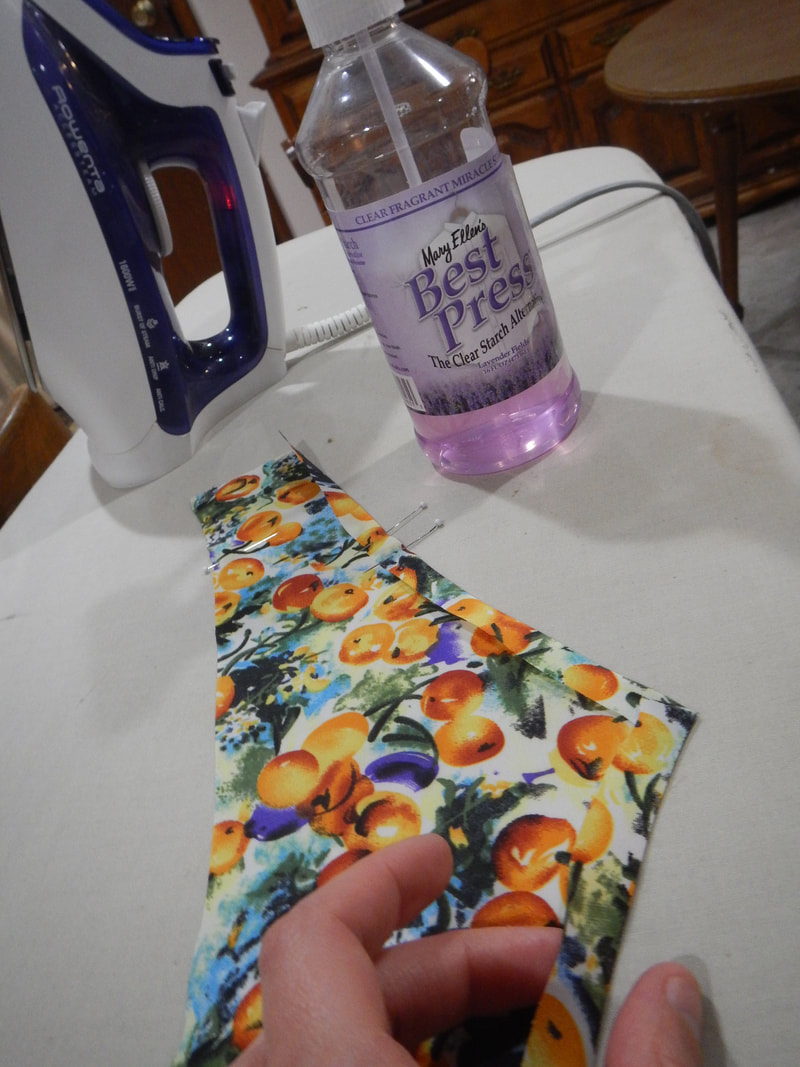
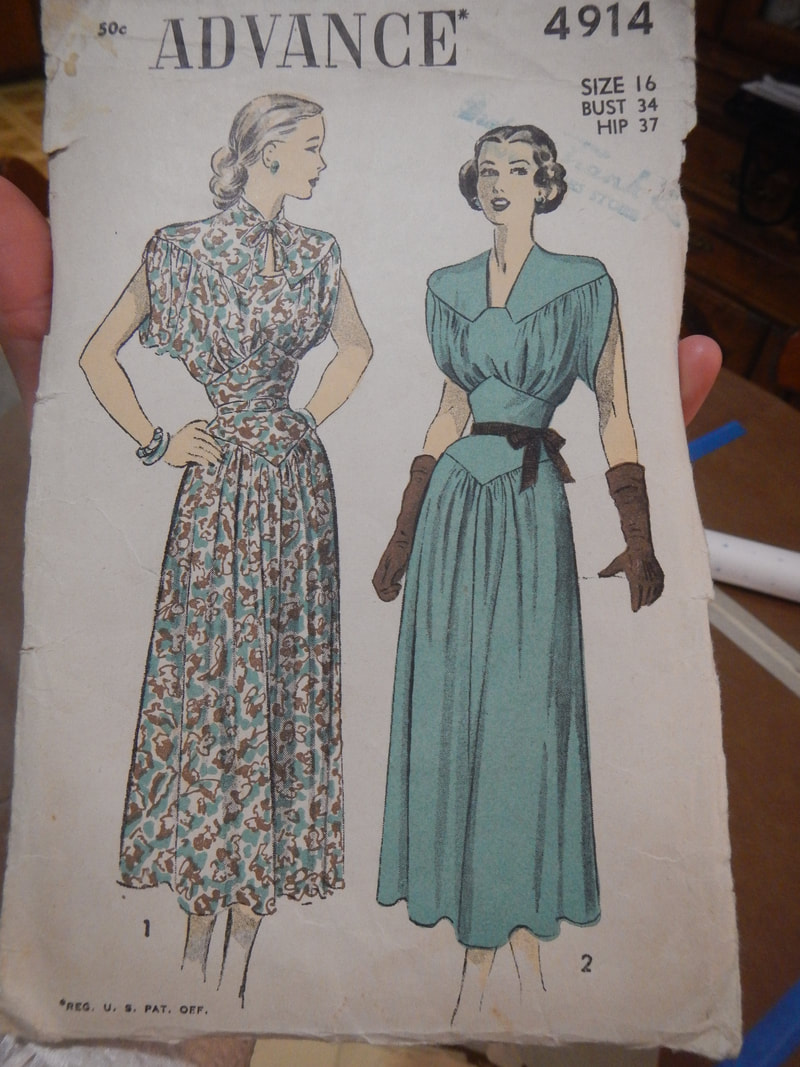
PSA: MICROFIBERS AND YOU!

A microfiber is a synthetic fiber which is less than ten micrometers (or microns, abbreviated μm) in diameter1.  This is really thin: for contrast, human hairs vary from 50-300μm2, tussah silk is 28-30μm and regular silk (bombyx silk, from the domestic silkworm) is 10-13μm3.  Microfibers can come from any synthetic fabric, whether polyester, nylon, or any number of polymides or blends.  Microfibers come off our synthetic fabrics every time we wash or dry them, and even, possibly, in daily wear.  This is not a good thing for the environment; for this reason, the recommended care of microfiber, to minimize its damaging effects, is to wash in cold water with liquid laundry soap and hang-dry, thus protecting the fabric from abrasion and damage.  So if microfibers come from any synthetic fabric when it degrades, what is a microfiber fabric?  Simple enough: a microfiber fabric is deliberately made with fibers of less than 10μm, like eyeglass cleaning cloths, microfiber dusters, moleskin, peachskin, Minky fleece, et cetera.  Such fabrics have a desirable softness (my Rainier cherry fabric is amazing in texture!), but if even regular polyester breaks down into microfibers, which are bad for the planet, then surely fabrics which are already microfiber are part of the problem! 

Well, I couldn't resist this microfiber because of the print and texture, but I will be caring for it to preserve its integrity and keep it out of a landfill as long as possible!  For notions, I shop my stash and find a zipper, hook-and-eye, rayon seam-binding, piping, and interfacing.  I also find a bit of gray cotton to use for the belt. 

PATTERN WORK

One thing I forgot to mention in my post about working with the pattern: this pattern calls for shoulder pads, but I will not be making them, which did effect how I fitted the bodice's yoke.  I have no need for shoulder pads, since I have broad shoulders already (I know this because I have compared my shoulders with various "standard" sized dress forms which otherwise match me pretty well), and since my chosen fabric is so light that the shoulder pads would show through in outline, most egregiously. I'll save shoulder pads for another project! 

So!  Time to cut the fabric!  Here are the pattern pieces laid out on the fabric:
Picture
The fabric is 60 inches wide, then folded down the middle.  The bottom three pieces are all meant to be cut on the fold, but I can't do so on the main fold, so I wait until everything else is cut out, then take the top layer of the bottom right corner and fold that. 

The bottom layer of that corner is the only scrap left uncut at the end.  I wonder what I'll use it for eventually. 

The fabric causes some trouble as I cut: it's so smooth and slippery that I have to pin it along every pattern edge to keep it from fleeing my scissors!
Picture
Cutting the last three pieces on the fold
Picture
You may recall that last time I calculated the waist measurement of the pattern at 29.5 inches.  Since I'm a little bigger, I decide to add a half inch at Center Back on the skirt panel.  I do this by placing the skirt panel piece on the fold of the fabric, then scooting it a quarter inch away.  That adds a half inch during cutting.  I don't need to change the bodice pieces because they are already quite roomy and get gathered to fit the skirt. 

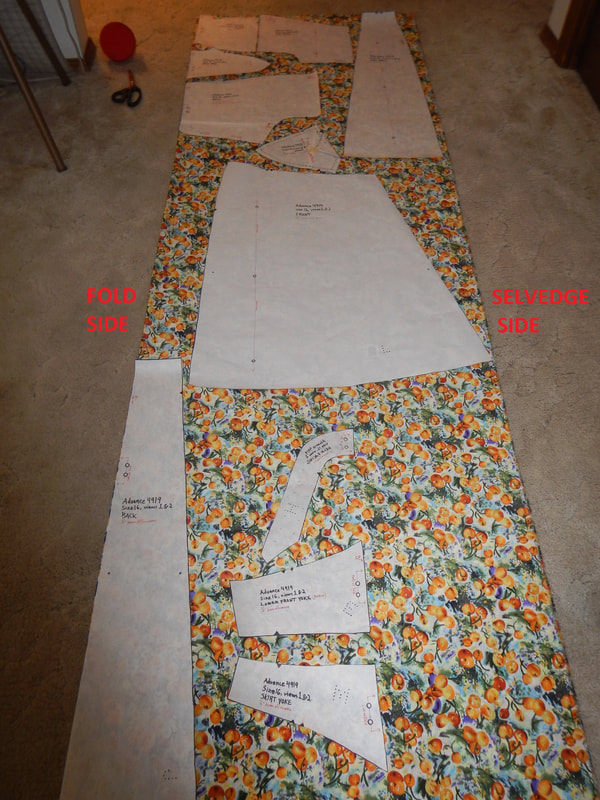
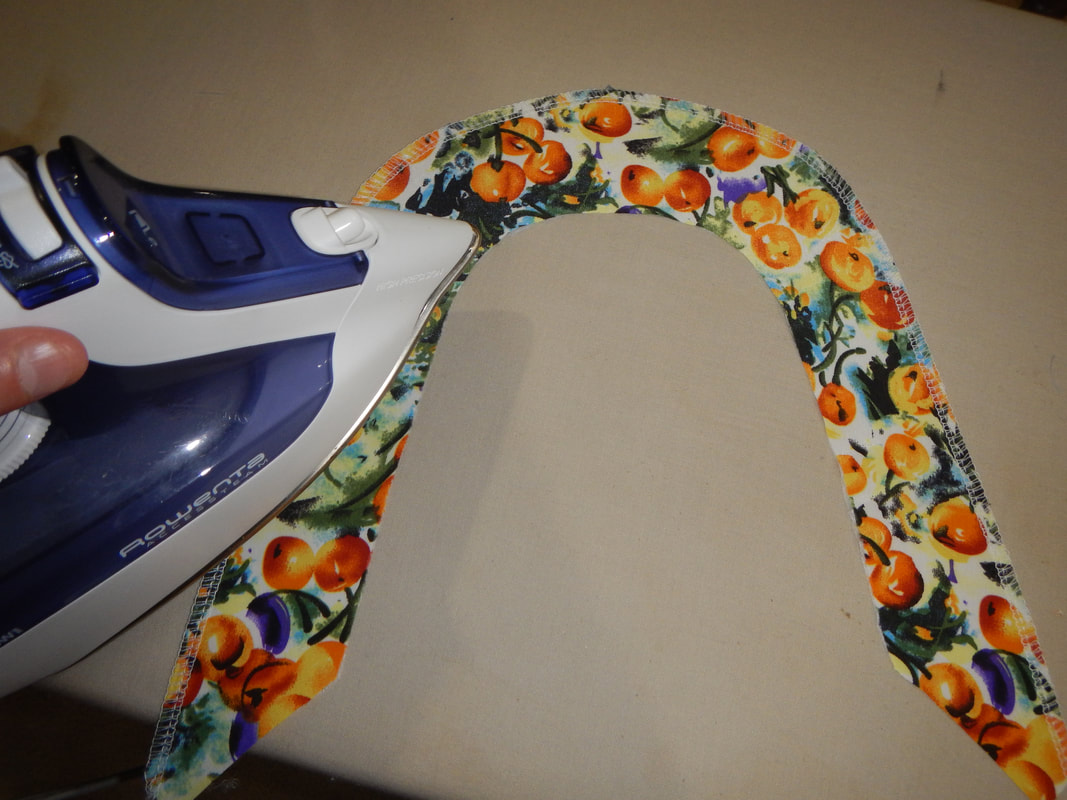
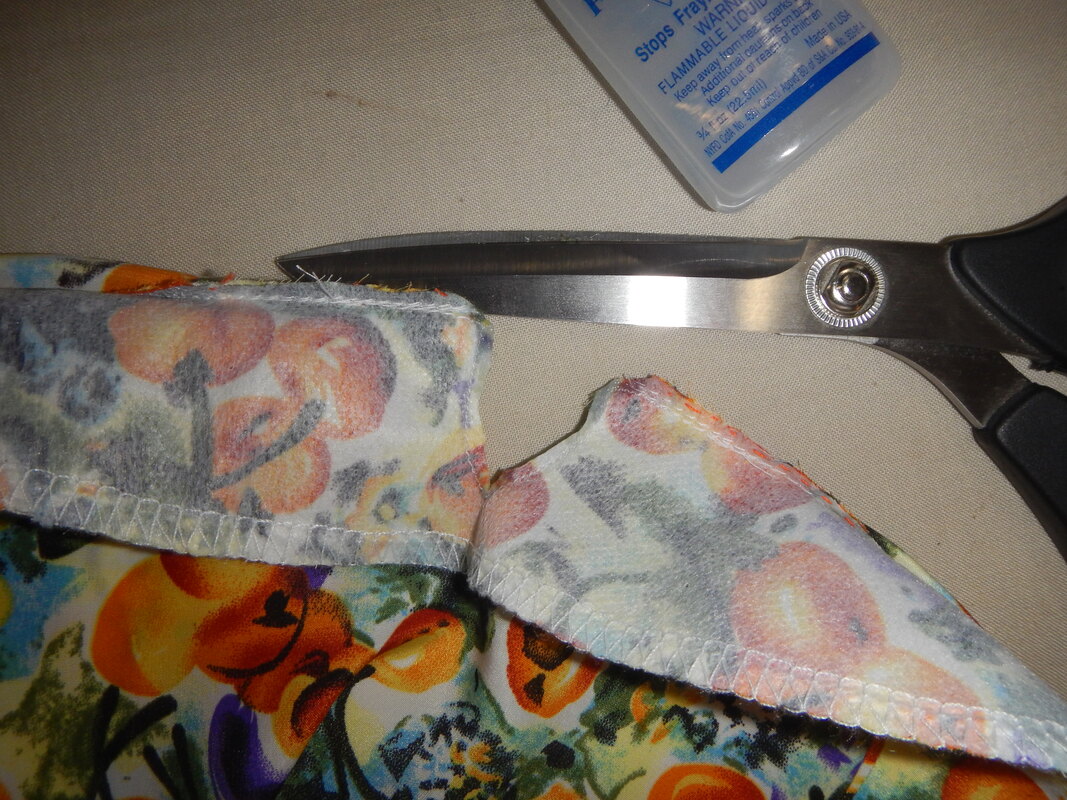
CONSTRUCTION - NECKLINE

Since the fabric is so floppy (I think it is a peachskin), I appreciate the structure added when I interface the neck facing. 
I serge the outer edges of the facing (which will not be sewn into a seam), then press the stitches in.  Everything that gets stitched, gets pressed! 
Picture
Picture
interfaced facing: nicely stiff
Picture
The needle and orange thread are basting the seam before taking it to the machine.
Then I sew the shoulder seams to make the top yoke.  The pattern had half-inch seam allowances rather than the five-eighths seam allowances which are standard today on home-sewing patterns.  I like the smaller seam allowances, since the extra stuff just makes easing curves more confusing. 

LEFT, I pin the facing onto the neckline of the yoke.  Professional seamstresses whiz through things like this with no pins... such skill!  For me, it's slow-going.
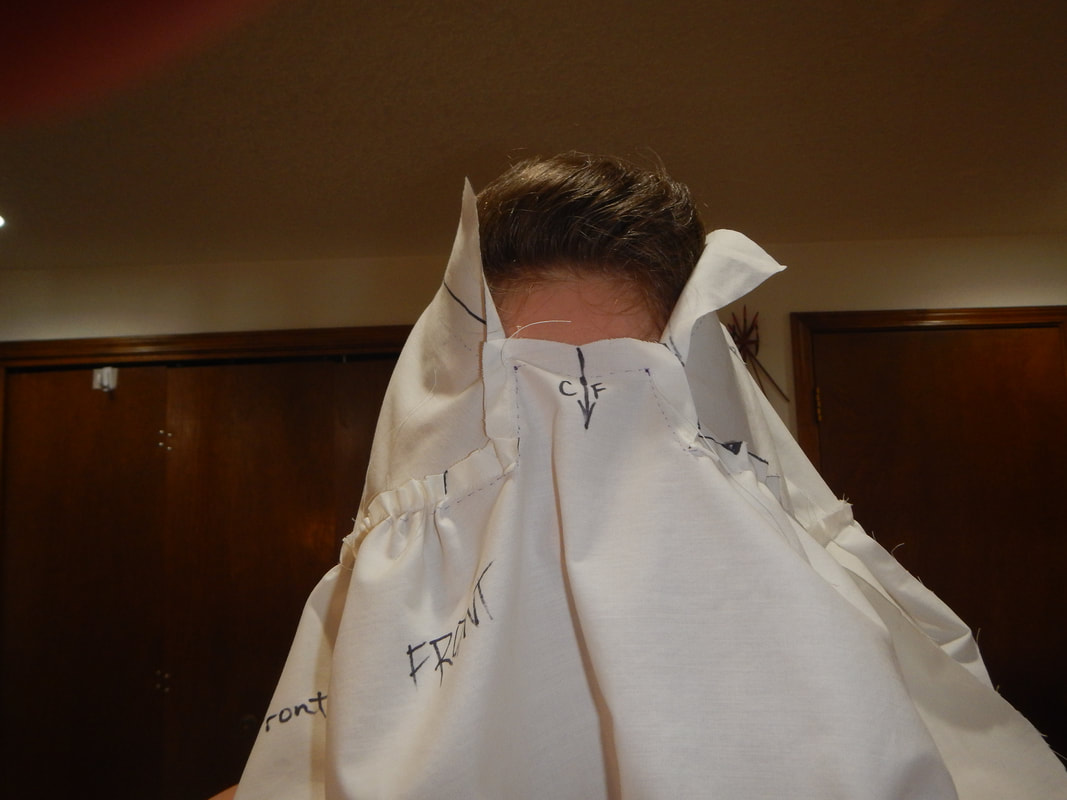
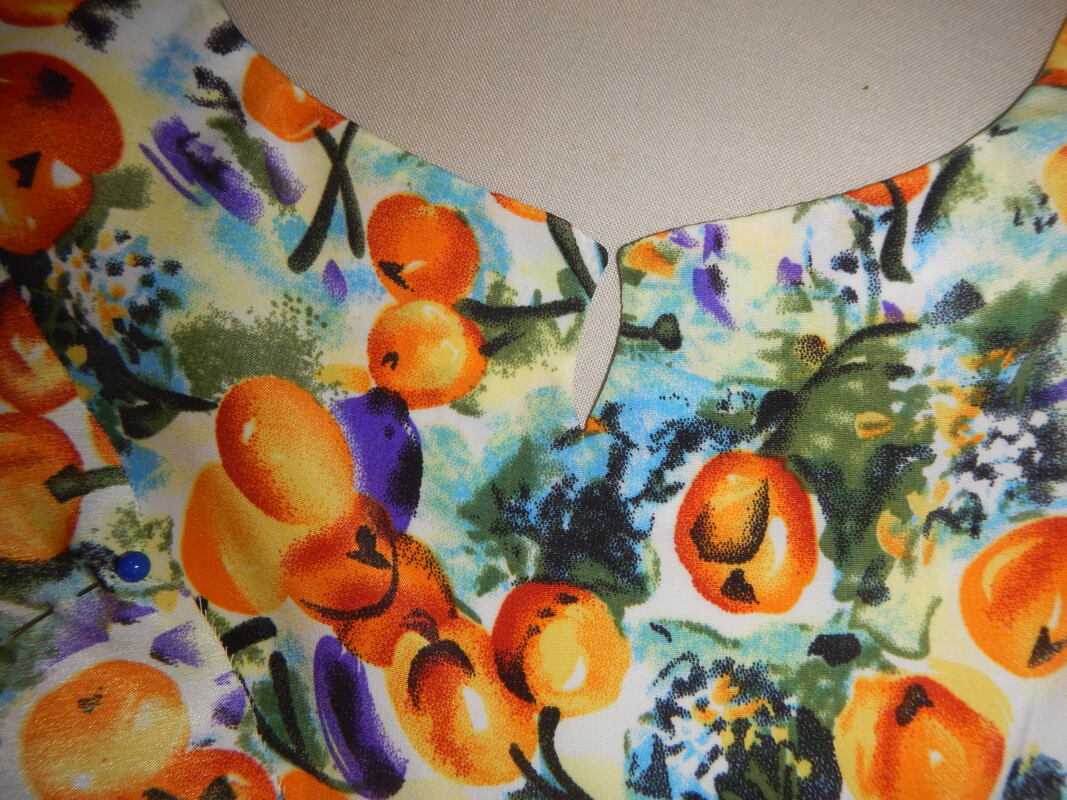
Let's flashback to the muslin.  Recall that it was too small in the neck?  It's not that I have a big head... actually, I think my head is quite small.  I have two hypotheses about the tiny neckline:
Picture
  1. The average woman's head was smaller in the 1940's.  Many possible factors: nutrition wasn't as good, especially in childhood; racial mixing wasn't common; artificial growth hormones weren't in meat and dairy; obesity wasn't affecting the hormone balances of fetuses and adults...
  2. Maybe Advance made bad patterns (more on this, later, under the heading "Waistline Woes").
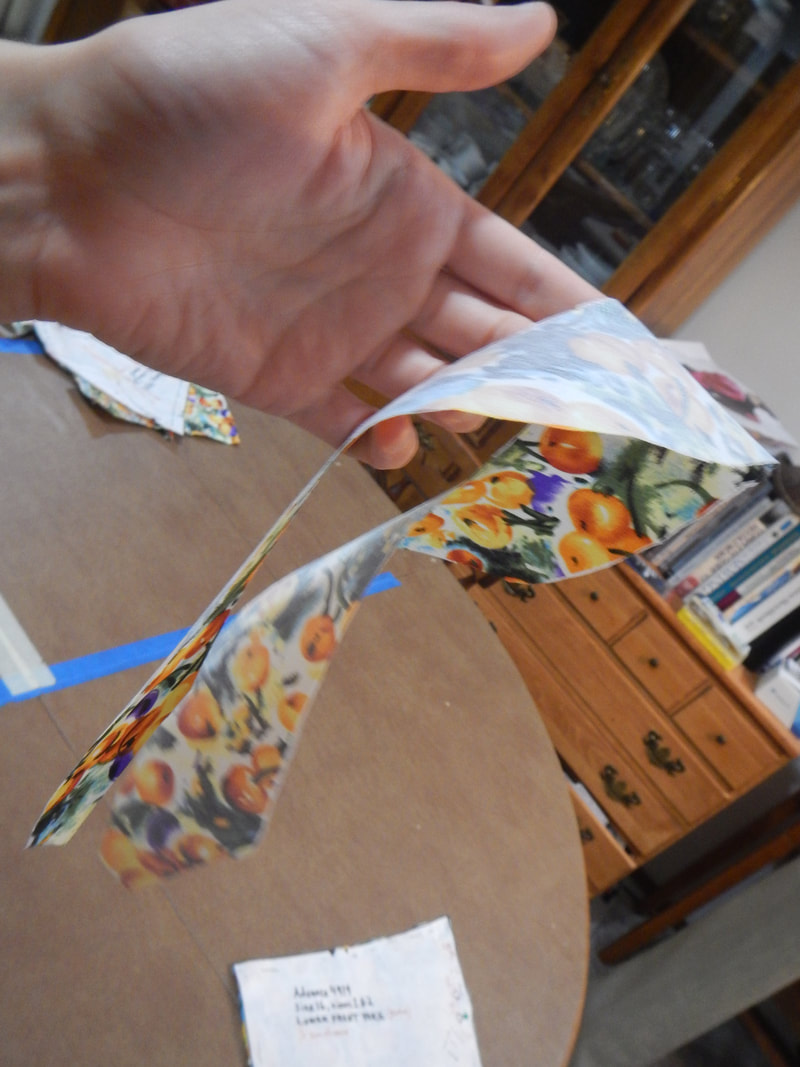
Well, after making the neckline in the dress fabric, I try again, and it's still too small.  Here's how I fix the issue:
Picture
1. At the Center Back, I draw a teardrop-shaped slit and sew it. The red head of the pin sits at the projected opening: I sew along the top seam to the red pin, turn and sew down the teardrop, and back up the other side. 
Picture
2. After sewing comes cutting.  I cut the slit open and trim the corners close to the stitches.  (While sewing, I shortened my stitch length in the tight corners, so it is safer to cut really close!  A little Fray-Check helps, too.) 
Picture
3. I turn the facing back to the inside and carefully poke the corners out with a point turner.  I press, and sew a hook and eye to the top, so I can close the slit after I get the dress over my head. 
At this point, I pin the pieces to my dressform Mimi to see how they'll come together, and to see if the skirt will be long enough to cover the petticoat I want to wear with it.  I love when the pieces start looking like a garment! 
Picture
only pinned in place, but still exciting!
Picture
Yay!

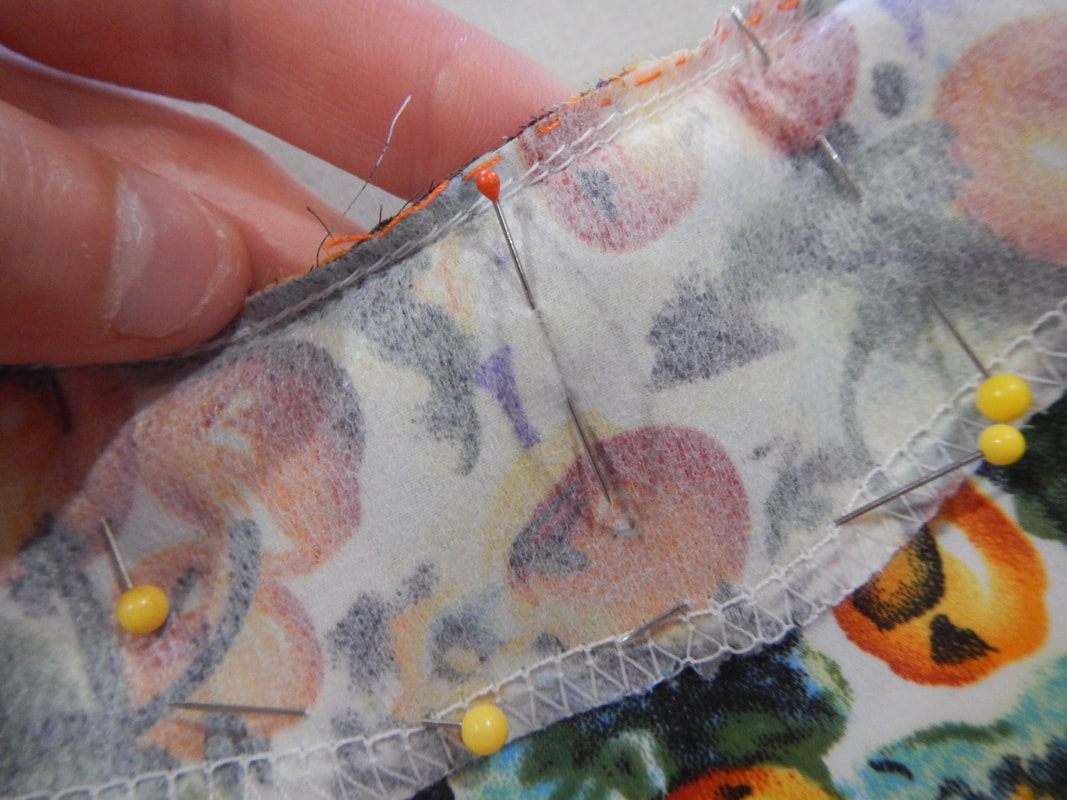
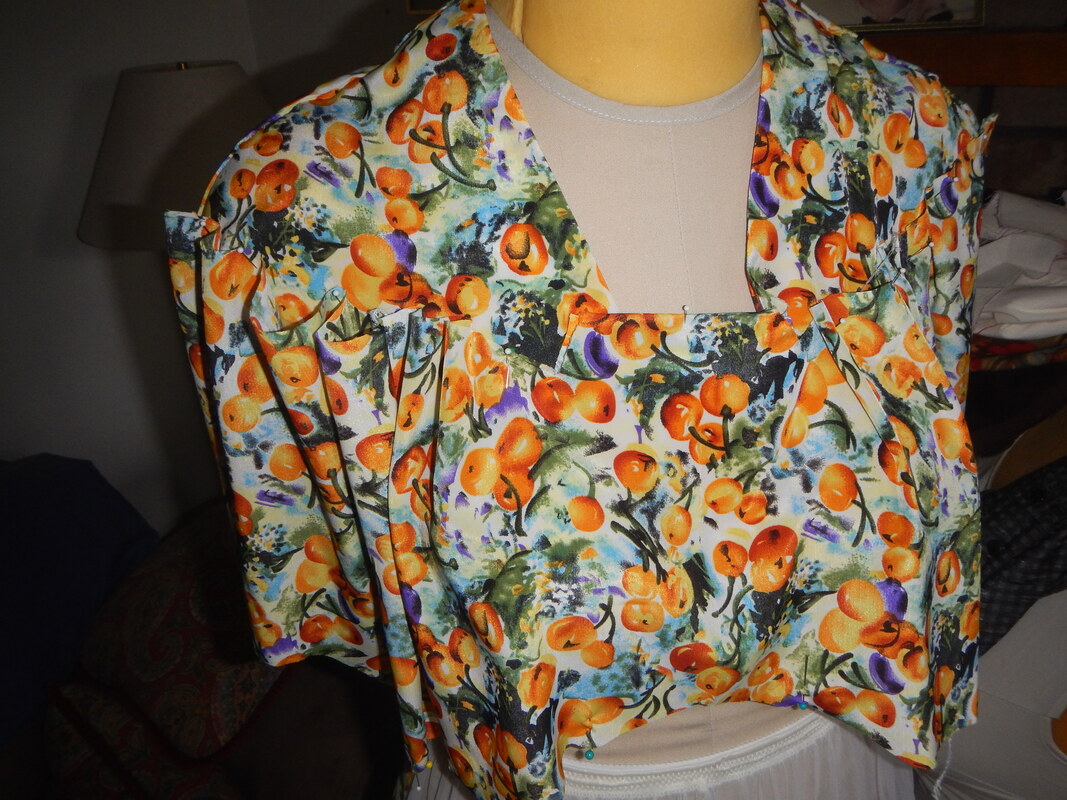
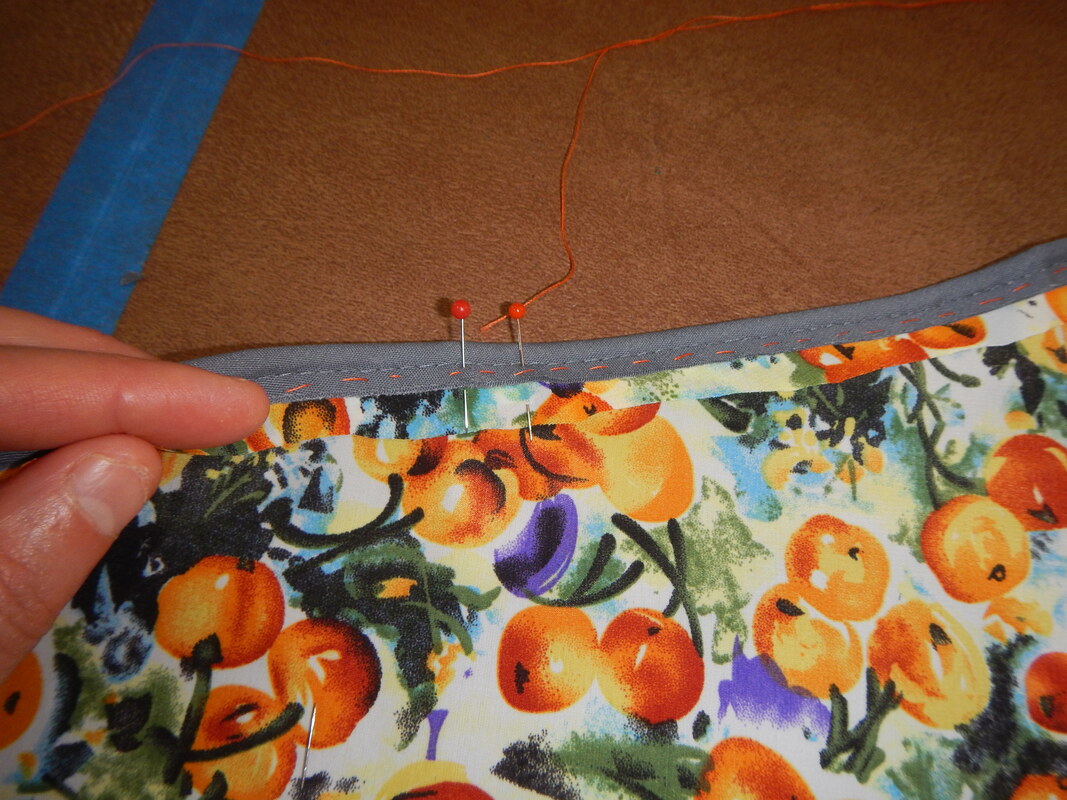
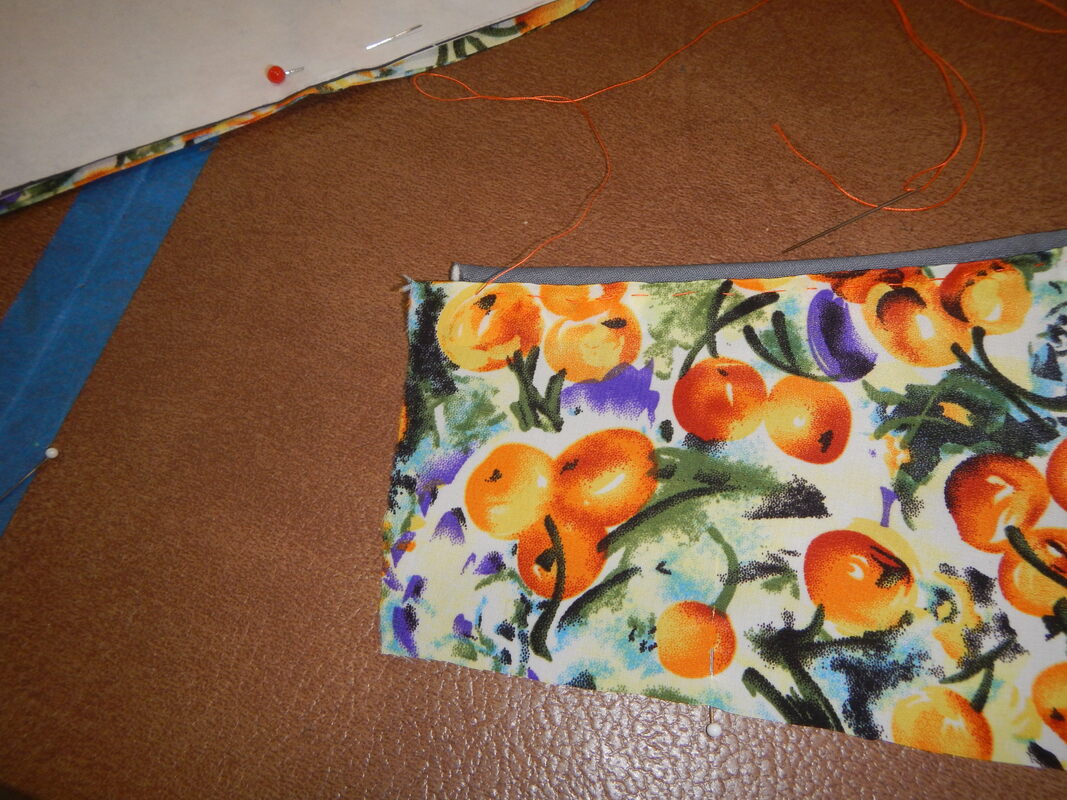
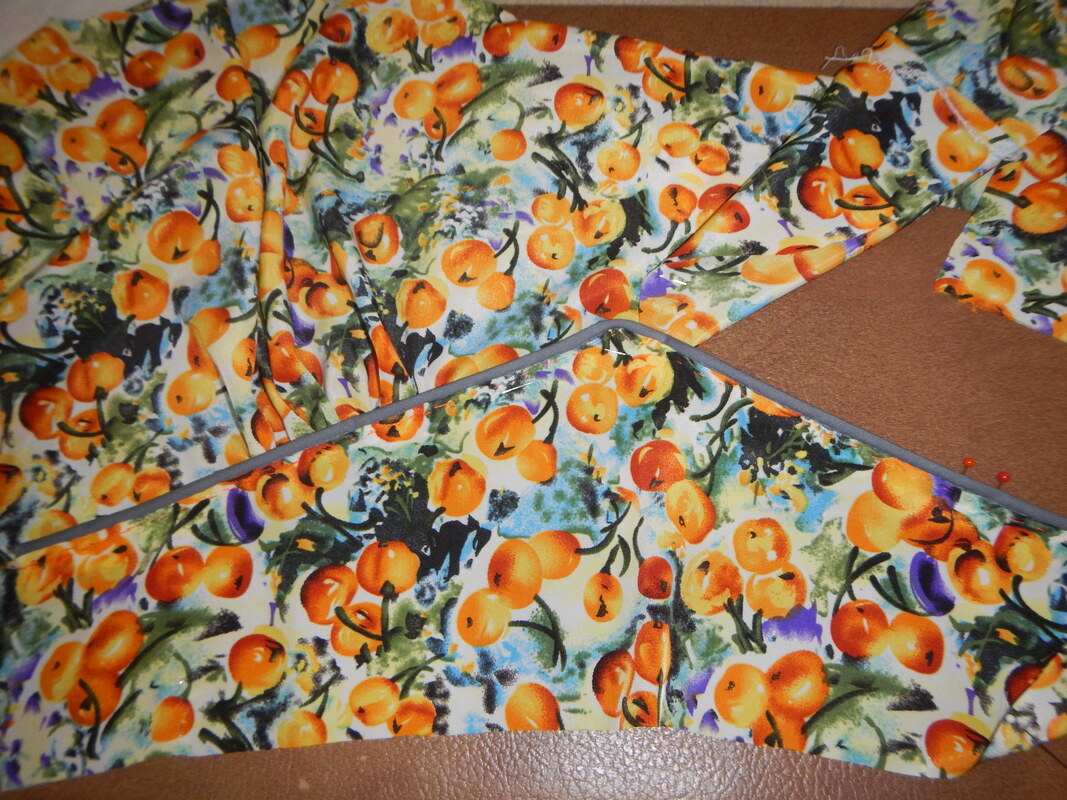
VINTAGE TECHNIQUE FOR YOKE APPLIQUÉ

In making the muslin, I did a modern-typical right-sides-together (RST) construction, and ended up with messy corners and trouble.  For this version of the dress, I paid attention to the original instructions and did it their way, which I'm calling appliqué construction.  
Picture
Doesn't that gray look unexpectedly nice?

It starts with taking the yoke pieces and ironing their seam allowances under.  This peachskin fabric makes it tricky, being so slippery and annoying to fold!  Once I have the corners and edges crisp, the pattern instructions tell me to baste them down.  I do so, but put some piping in at the same time.  I love piping! 
Picture
Inside view
Picture
Outside view
The next step is to gather the bodice pieces and pin/baste them to the yoke, with the yoke on top. 
Picture
Oh, I just love when it starts coming together!
Picture
Yes, TWO lines of basting stitches.
I go to work half-way through this process and complain to a co-worker about how annoying the fabric is to turn, and she suggests that I try starching it.  Oh!  I get in a zone and miss the obvious, sometimes!  Once home, I try Mary Ellen's Best Press spray sizing.  It is so much easier to do my last yoke with the sizing stiffening the fabric ever-so-slightly!  Look at those crisp corners! 

Once all the layers are basted in place, I top-stitch the yokes down atop the gathered bodice pieces.  The last step is to remove the basting stitches (and serge the seam allowances where I can fit them under my serger's foot), and the dress is really shaping up! 
Picture
Is it nerdy that I find this exciting?

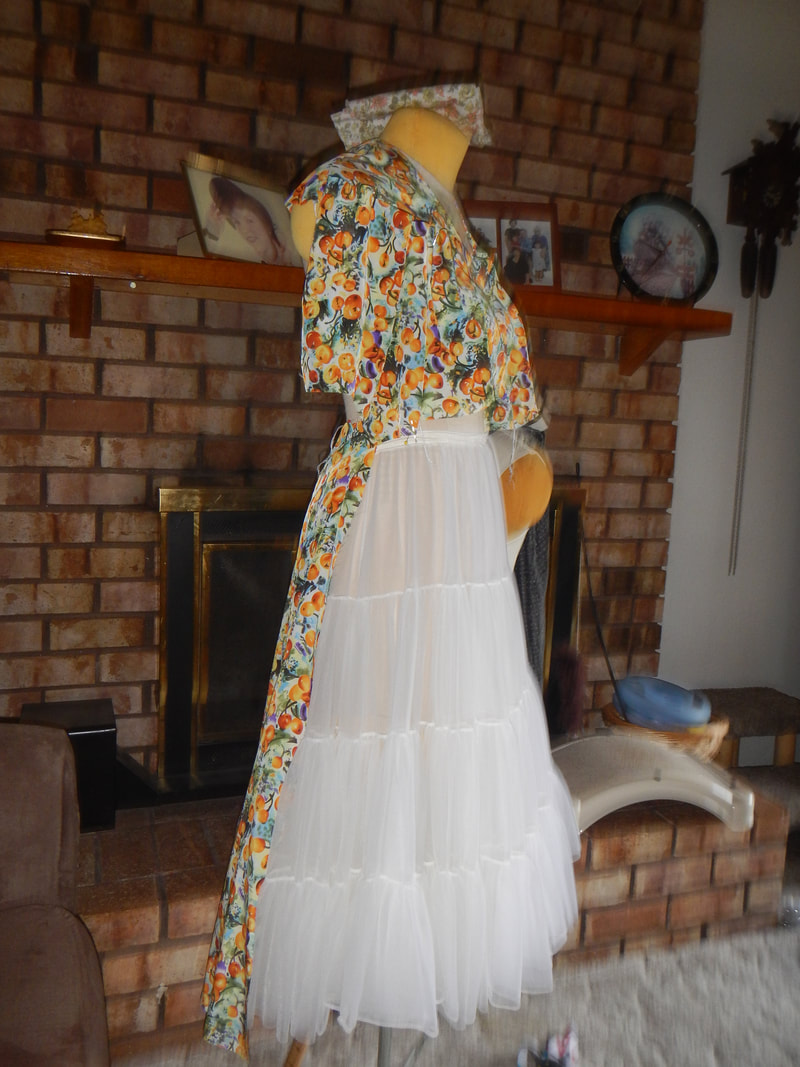
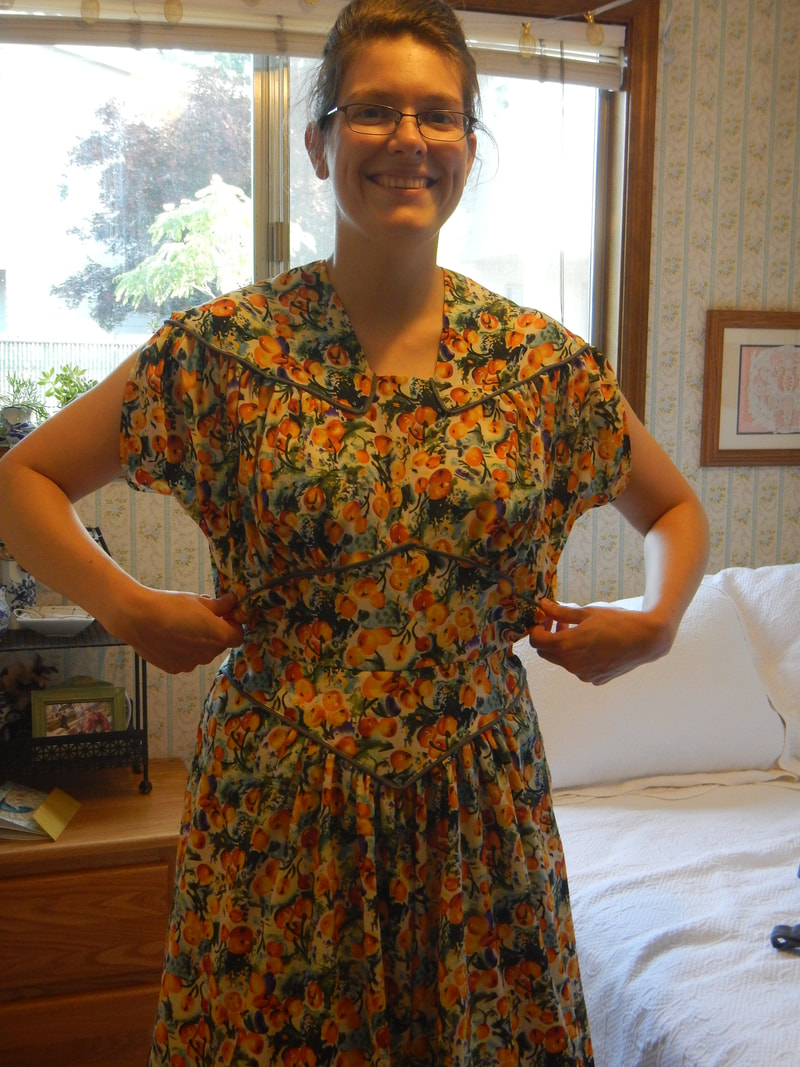
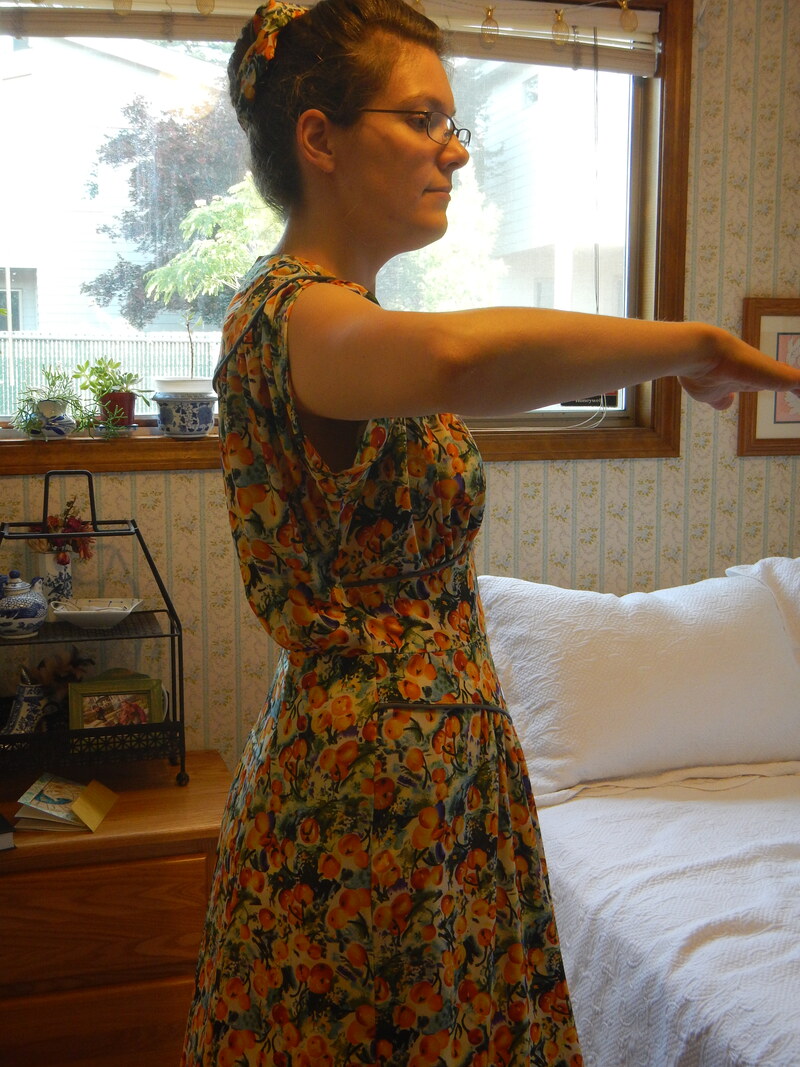
WAISTLINE WOES

Since the dress is finally wearable, I try it on and have an unpleasant surprise: instead of the front wasitline yokes hugging my body in the cute way the pattern illustration suggests, they sag forward into a shapeless bag!  The prblem is that the baggy back doesn't provide any tension to pull the top of the yoke snug! 
Picture
Oh so svelte!
Picture
Oh so saggy!
I consider briefly, and come up with an easy fix.  I stretch an elastic from yoke-side to yoke-side around my back, pulling it a little snug.  I tack the elastic to the side-seam allowances inside the dress.  When I put the dress on, I have to make sure not to get tangled in the elastic, but to put it behind my back. 
Picture
The elastic helps a little. See how the yoke sits snug on my body now?
Picture
But the baggy back is still visible from the front!
The more I think about this, the more it seems like a design flaw, possibly occurring because the dress was designed on paper and not tested.  Look at the side view:
Picture
I imagine myself as a pattern drafter for Advance in the 1940's.  The company no doubt has a basic sloper to work with.  I think "Hmm, wouldn't a yoke with gathered bodice be swell?"  I draw on the yoke lines, then cut-and slash the bodice pieces in between the yokes to get the fullness.  Then I look at the back and think "Hmm, wouldn't a simple natural waistline be nice, with fullness in the blouse?"  So I make the skirt gored, and cut and slash the back bodice for fullness.  On paper, the front works and the back works.  I don't stop to think about how the front and back will interact, that the front needs the back to be tight if it's gonna sit snug and tidy on the waist.  And maybe no-one ever tests the pattern before printing it and selling it!  Strange to think, but it may be so!  Well, let's see if wearing the belt helps.
Picture
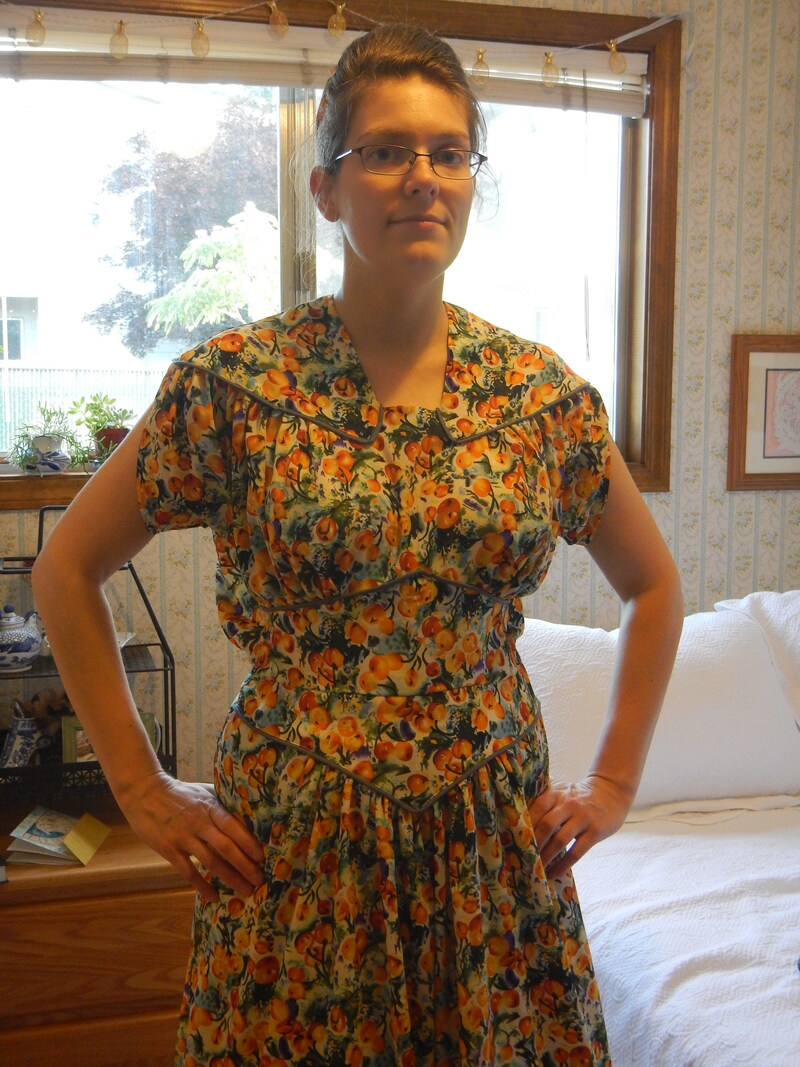
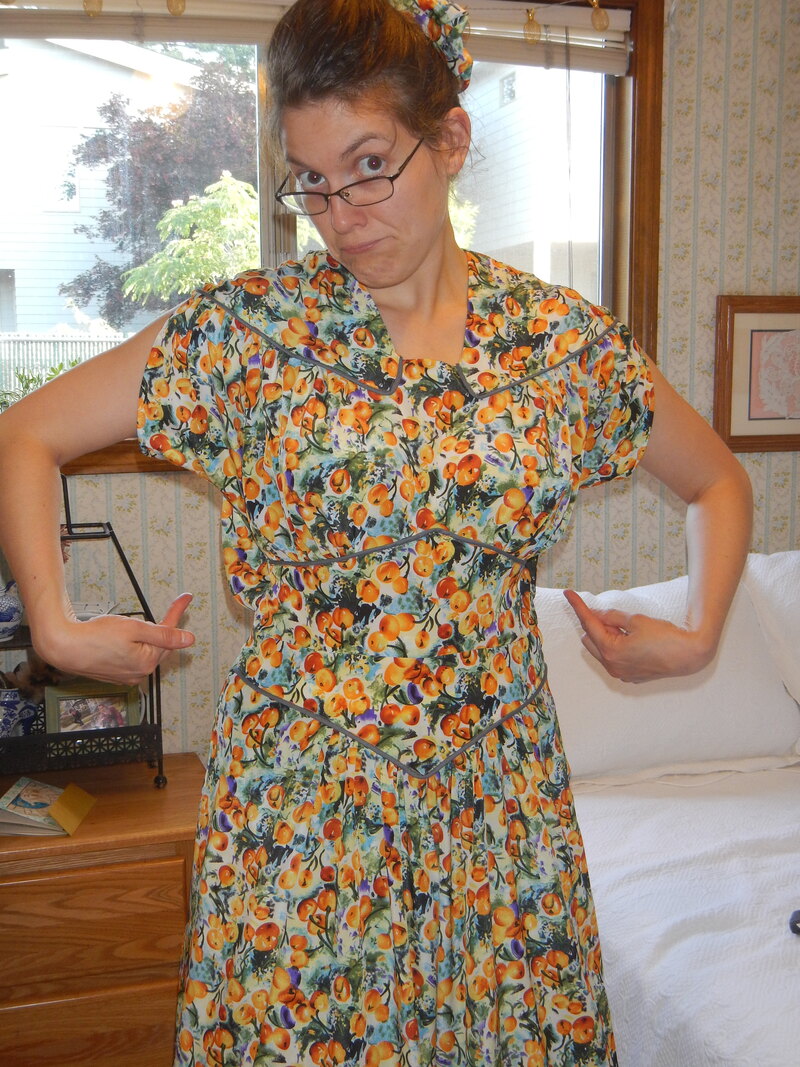
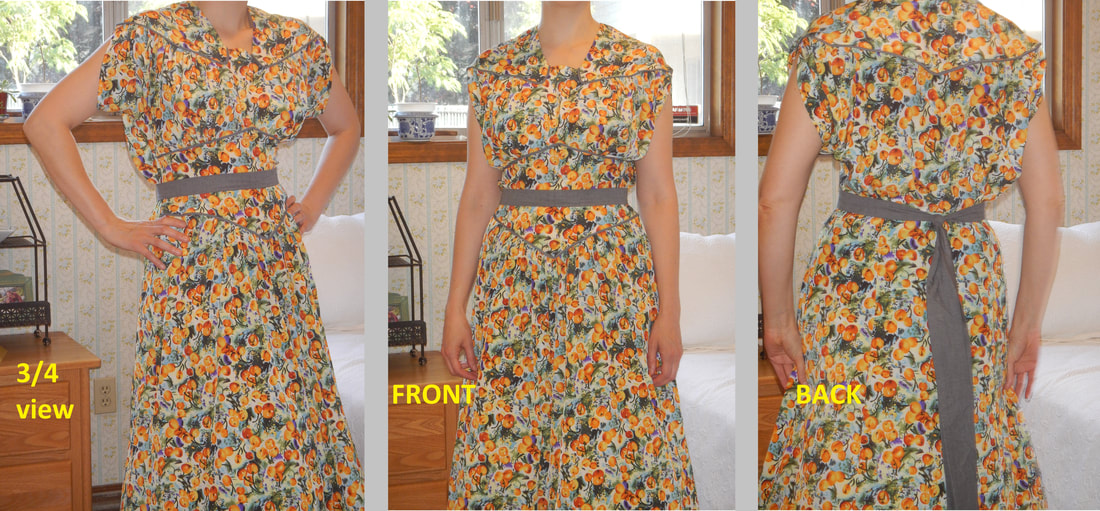
The belt does help, but I am still tempted to gather the back to the elastic, perhaps with a casing, so the waist looks better overall!  If I ever make this dress again, I'll make the waistline yokes extend to the back!  Not that I'm vain or anything (okay, a little vain), but I have an hourglass figure and I want to show it!  Weird side-back bagginess is not my cup of tea. 

COST

I paid $17.48 for the fabric: it was $9.99/yard (less 30% because I had a discount), and I bought 2.5 yards.  All other materials were from my stash. 

FINAL THOUGHTS

I LOVE this dress!  I love the way it swishes and billows when I walk (it does fit over my petticoat), and the colors and the fit (except for the side-back weirdness), and the style, and the way it makes me look taller and more curvy!  I will post some pretty pictures soon.  Happy happy happy! 
1 Comment
The Sister
7/30/2019 03:49:00 am

Nice job! I like the pattern; busy but cheerful and appealing. I’ll bet it’s fun to swish around in.

Reply


Leave a Reply.

    Karen Roy

    Quilting, dressmaking, and history plied with the needle...

    Sites I Enjoy

    The Quilt Index
    r/Quilting
    Wonkyworld

    Categories

    All
    1910's
    Alteration
    Antique
    Dyeing
    Embroidery
    General
    Hand Sewing
    History
    Lacemaking
    Mending
    Menswear
    Millinery
    Modern Elizabethan
    Musing
    Other Sewing
    Philippians 4:8
    Project Diary
    Quilting
    Regency
    Retro
    Self Made Pattern
    Self-made Pattern
    Terminology
    Victorian
    Vintage

    Archives

    April 2025
    March 2025
    December 2024
    March 2024
    December 2023
    November 2023
    September 2023
    August 2023
    June 2023
    May 2023
    March 2023
    February 2023
    January 2023
    December 2022
    November 2022
    October 2022
    September 2022
    August 2022
    October 2021
    September 2021
    August 2021
    July 2021
    June 2021
    May 2021
    April 2021
    August 2020
    June 2020
    May 2020
    April 2020
    March 2020
    January 2020
    December 2019
    November 2019
    September 2019
    August 2019
    July 2019
    May 2019
    April 2019
    March 2019
    January 2019
    December 2018
    November 2018
    October 2018
    September 2018
    August 2018
    July 2018
    June 2018
    May 2018
    April 2018
    March 2018
    February 2018
    January 2018
    December 2017
    November 2017
    October 2017
    September 2017
    August 2017
    July 2017
    June 2017
    May 2017
    April 2017
    March 2017
    February 2017
    January 2017

    RSS Feed

Blog

Quilting

Clothing

About

Copyright Karen Roy
​© 2017-2024