CORSET vs. BUSTIER The pattern is Butterick 5797, which is labeled a corset, but I think that is misleading. It's true that, etymologically speaking, a garment for the main part of the body could be a corset; we can hear the root word "cour", meaning "body" in the word. (The root word "body" is in the word "bodice", which was once a two-piece garment called a "pair of bodies", so etymologically speaking, "corset" and "bodice" are cognates.) In that sense Butterick 5797 is a corset. But in a more practical, everyday sense, it's not, because the word has evolved to refer to garments made with negative ease (i.e. made smaller than the body) so as to shape the body. Butterick 5797 is not made smaller than the body; it's made to fit the body closely but not squish or shape it, so it's a bustier (pronounced "BOO-stee-ay"). Bustiers can be underwear or outerwear; I intend this one for underwear. I guess that means that once again I am blogging about my unmentionables... salacious! PATTERN
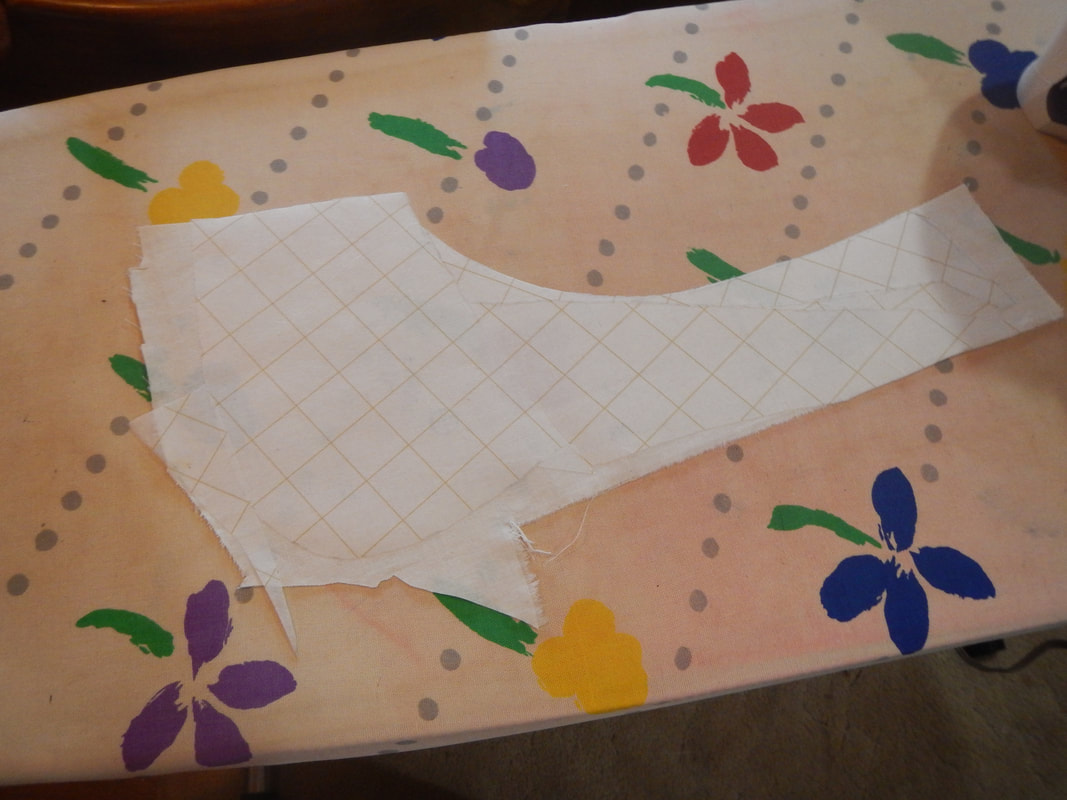
The next step is to firm up my muslin with interfacing, since I want it to mimic the firmer hand of my intended fashion fabric plus boning. Plus, I want to be able to sew it and unsew it without distorting it, so I can re-use the pattern again.
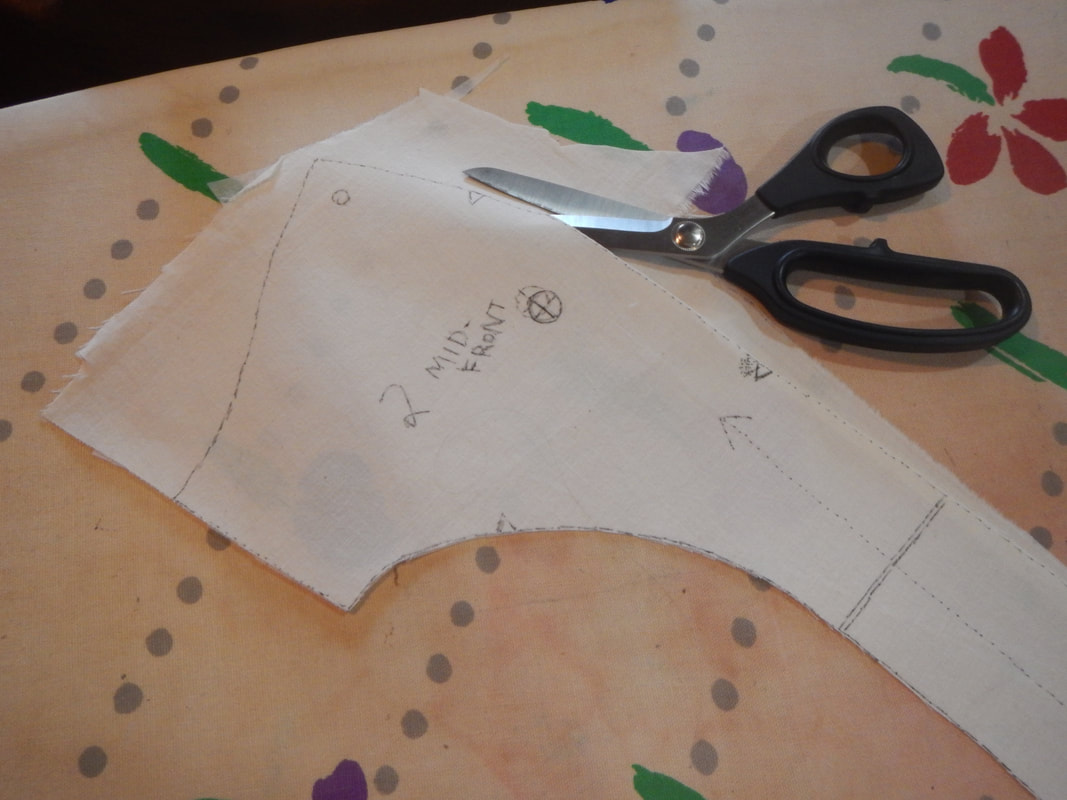
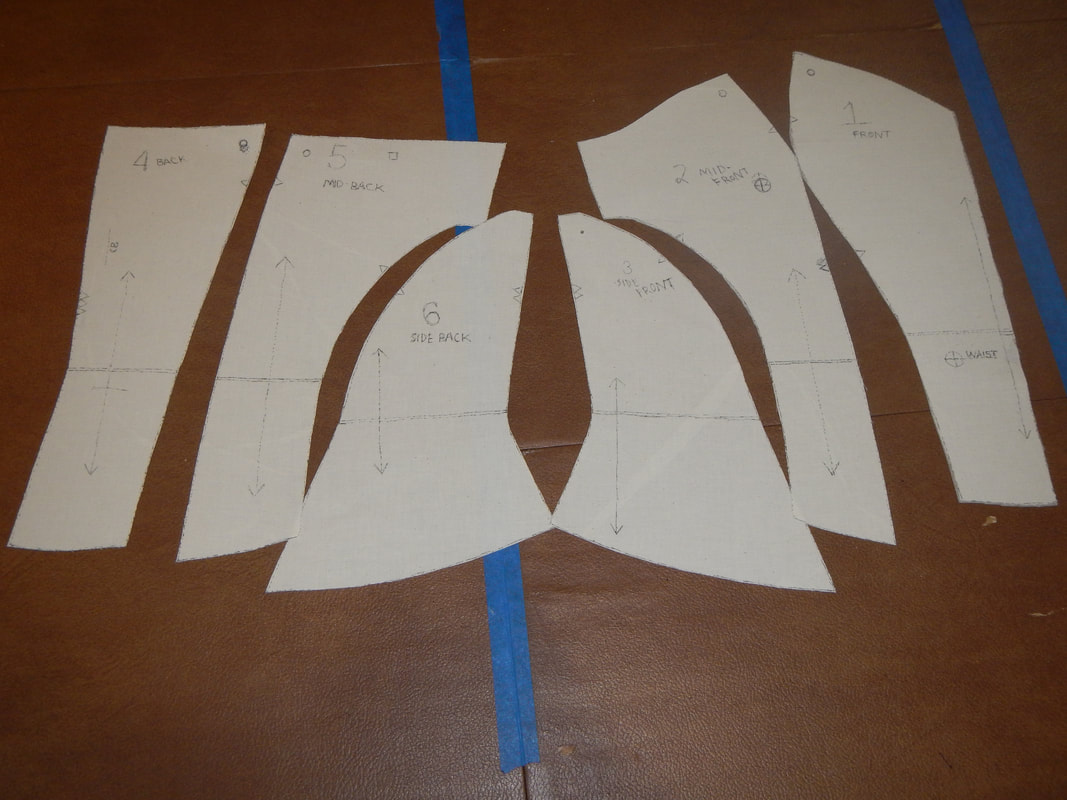
The pieces all laid out on the table give me a moment's pause: why are they numbered out of order? When I make a pattern, I usually start at Center Front and number them from there, but this pattern does that only for the front three pieces, then starts again at the Center Back. So when they're all laid out as they should be sewn, the numbering is 4, 5, 6, 3, 2, 1 (or 1, 2, 3, 6, 5, 4, if you flip to the reverse side). I'm puzzled for a moment wondering if I've laid them out wrong! Luckily the other markings on the pattern clear things up. Is there a standard method for numbering?
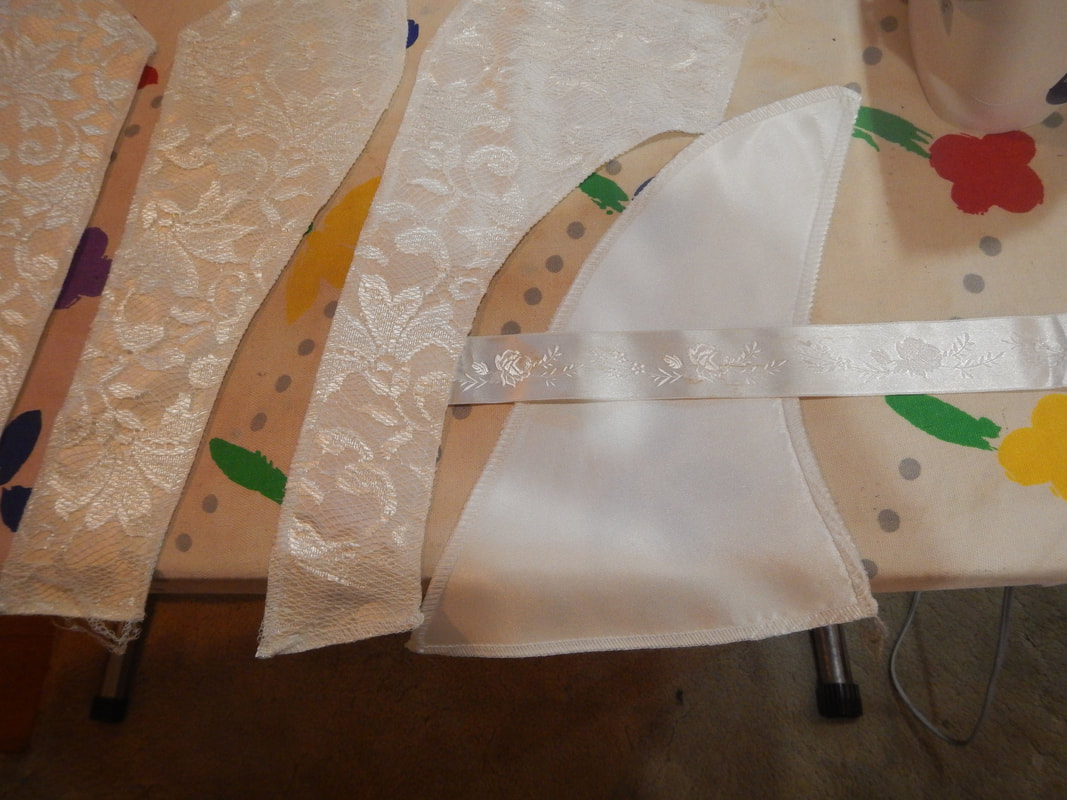
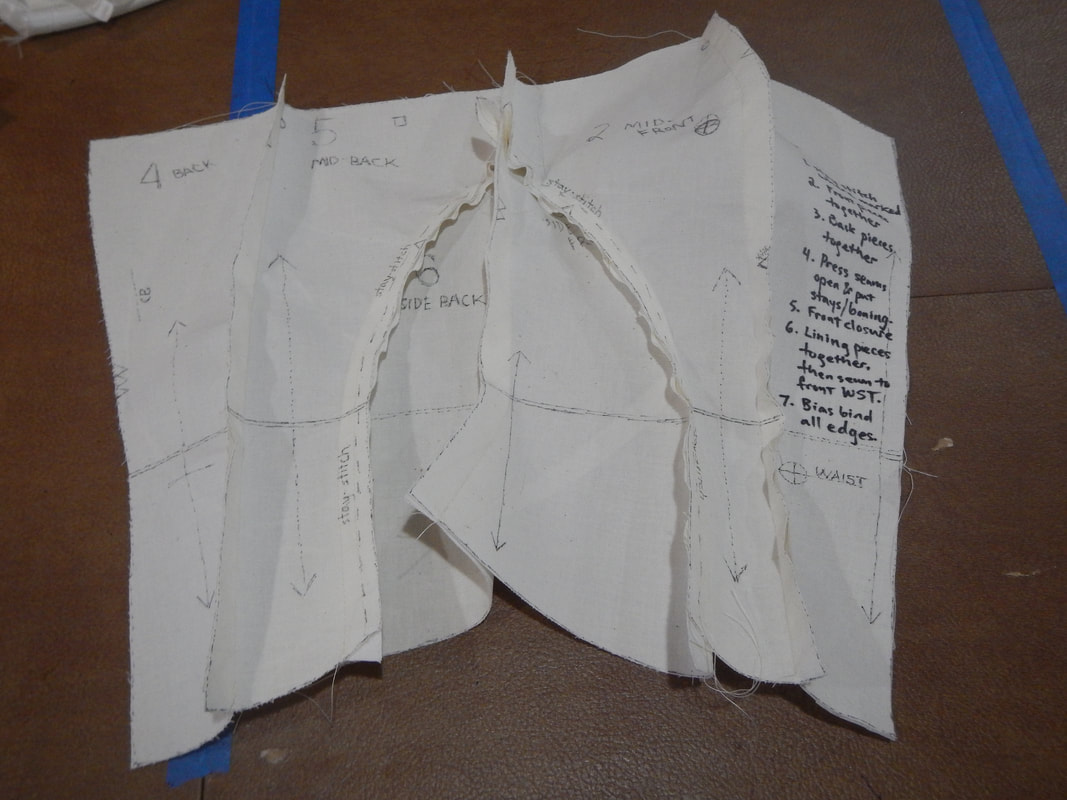
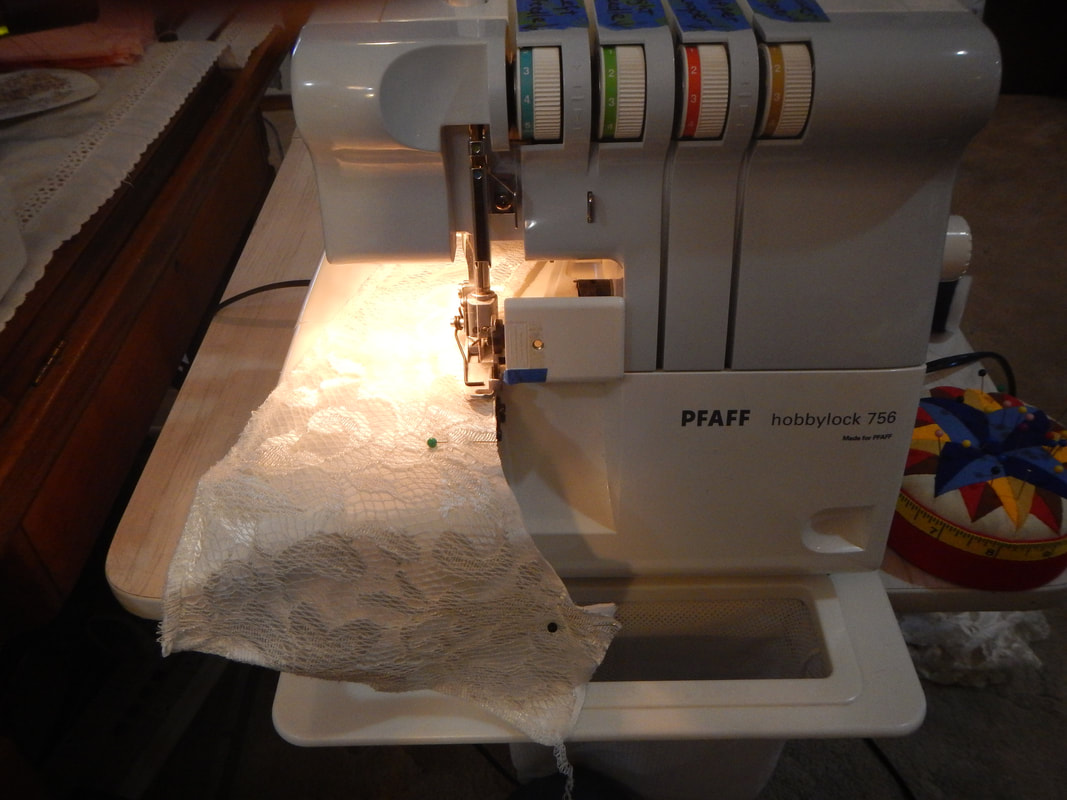
The pieces go together easily, and I test it by holding it to myself. It seems mostly right, only a bit roomy in the bosom, so I decide to make it up in my chosen fabric, and fine-tune the fit at that stage. The fabric I use for the project will behave slightly different from the interfaced muslin, so I think it'll make the most sense to fit the final garment. Before I unsew the pieces, I write up the basic order of construction on piece #1; that way I can put the Butterick instructions away, and if I ever give the pattern away I'll still have the version that works for me. THE FABRIC A year or so ago, a friend's mom gave me her circa 1980's wedding dress so I could use the fabric. It was polyester satin with a lace overlay, and very Princess Di in its styling. I have previously used the princess-seamed bodice for another costume (it got turned into a "wench" top!). Now it's time to use the gigantic poofy sleeves! Here's one dis-assembled sleeve with the pattern pieces laid on top. There's just enough satin and lace for the main pattern pieces (1, 2, 4, & 5), but not the side/underarm pieces (3 & 6). Those will have to be made with plain satin and no lace. 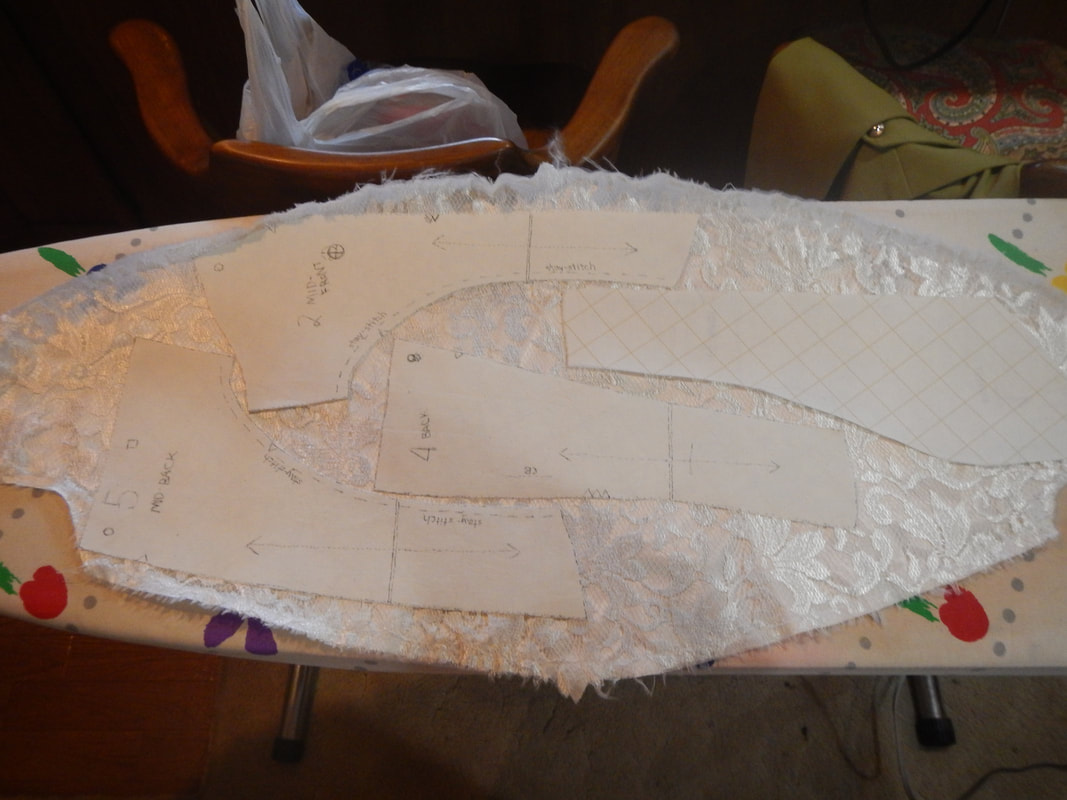 Piece number 1 is face down, so when I lay out these pieces on the other sleeve, I reverse all of them so #1 is face up and the others are face down. That way I get each piece in a right side and a left side. (I could keep the pattern pieces as is and simply cut out the other fabric up-side-down, with the lace on bottom, but I don't want to, because the lace is prone to sliding all over the place and I want it on top where I can see it.) In addition to the two layers (satin and lace) from the wedding dress, I cut a third layer from shirting cotton to put something natural next to my skin and to stabilize the softer fabrics. (It's really nice fabric, a remnant from Fabric Depot when they had a lot of Italian shirting on sale. It's a pleasure to work with.) Then I take all three layers and serge the edges of them to make them one usable piece:
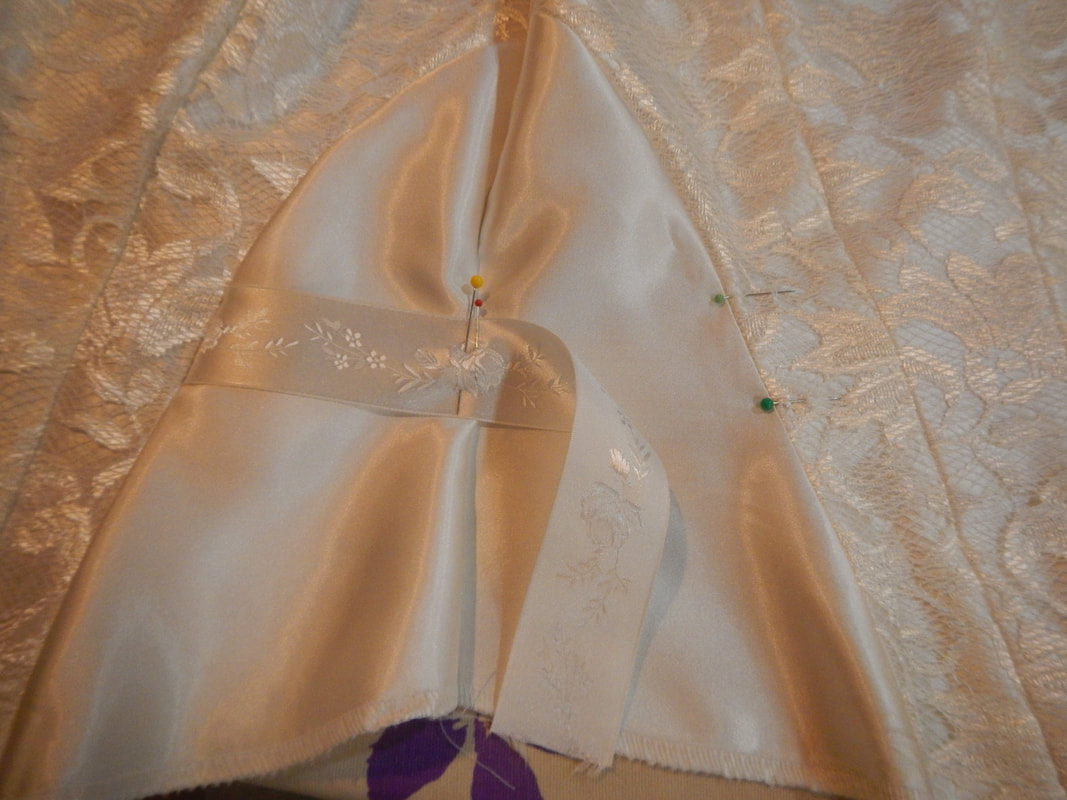
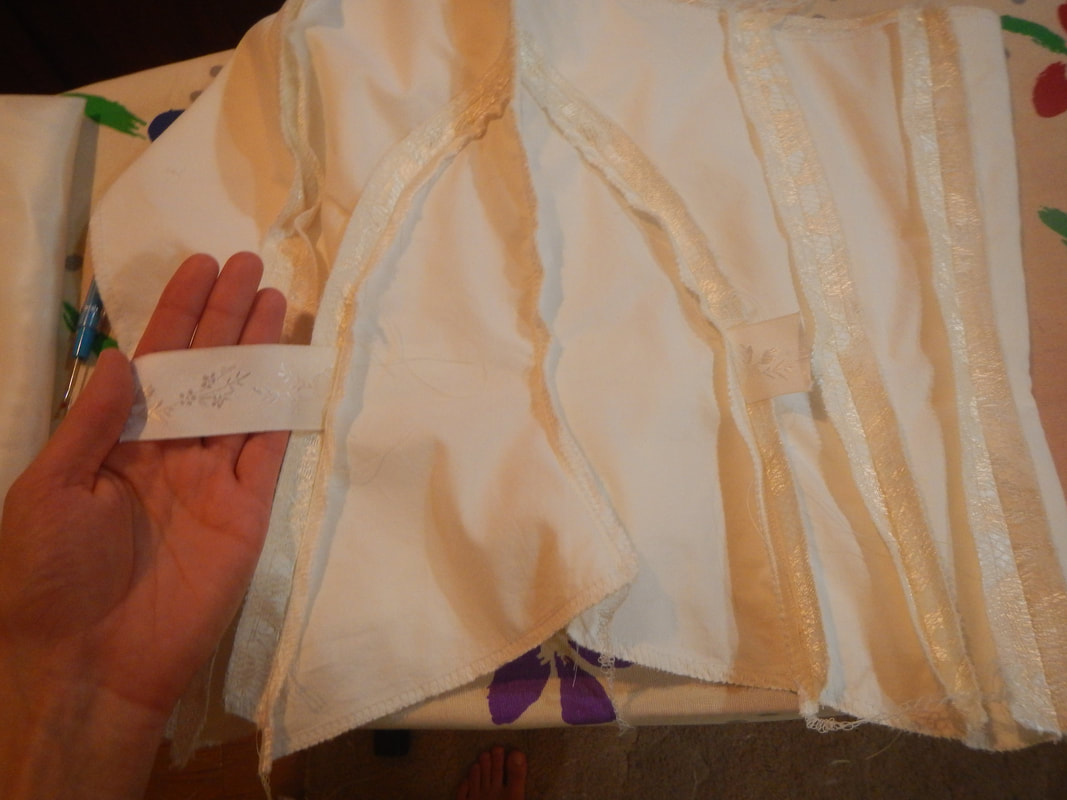
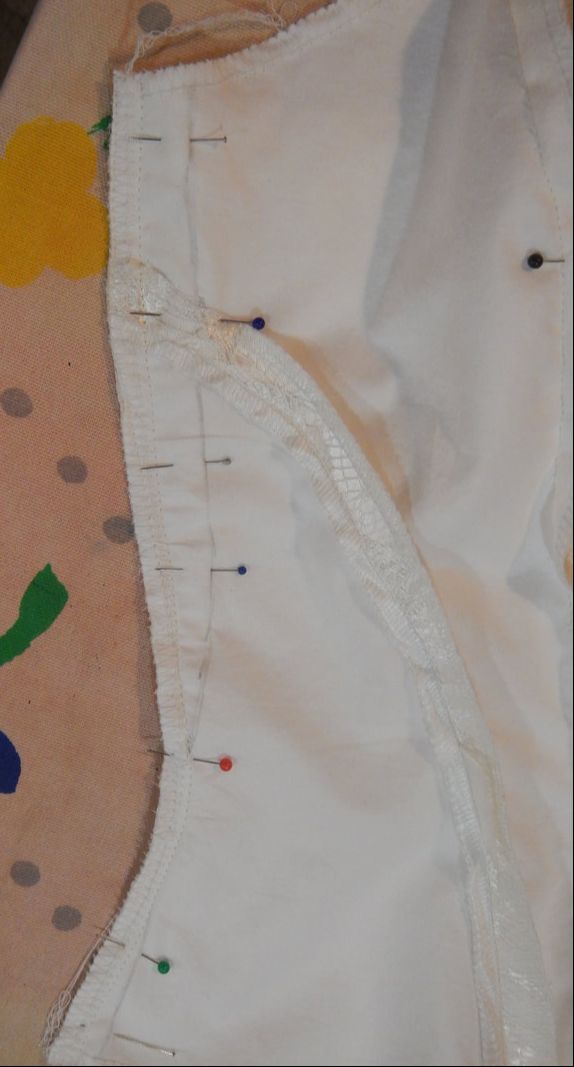
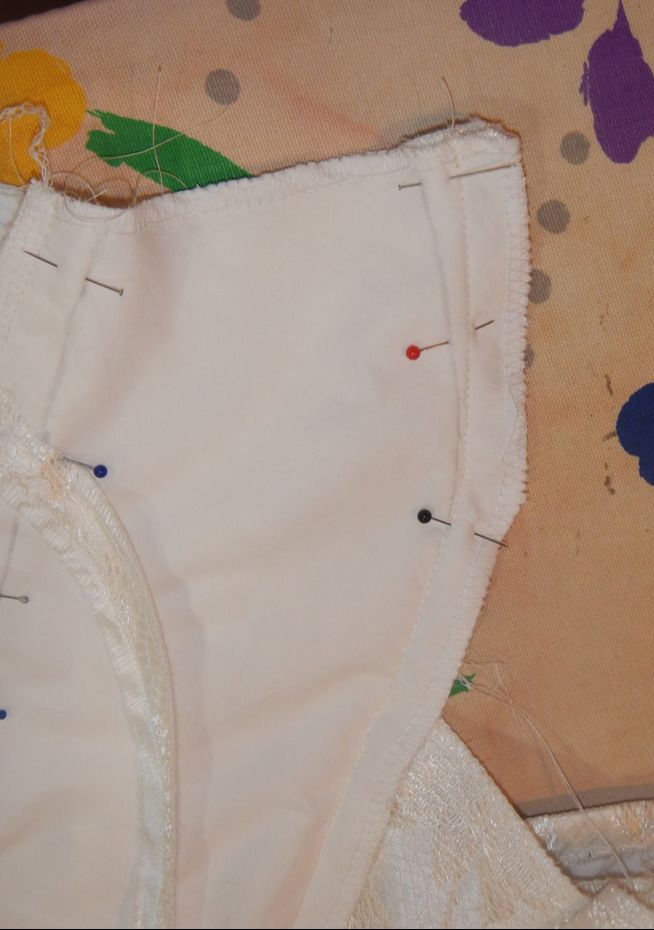
A PRETTY RIBBON After I sew the side seams, I put the bustier on and find my natural waist in it. I have two strips of pretty rose ribbon (rose motif not rose color), so I pin them in place at my natural waist, crossing the plain satin panels. Then I mark the place where I'll un-pick the seams (green pins in the picture below) and insert the ribbon. (Why don't I insert the ribbon when I'm first sewing the seams? Because I don't yet know where my waist will be when I wear the bustier!) Once the seams are re-sewn, I un-pin the center and let the ribbon serve as a bridge between lacy panels.
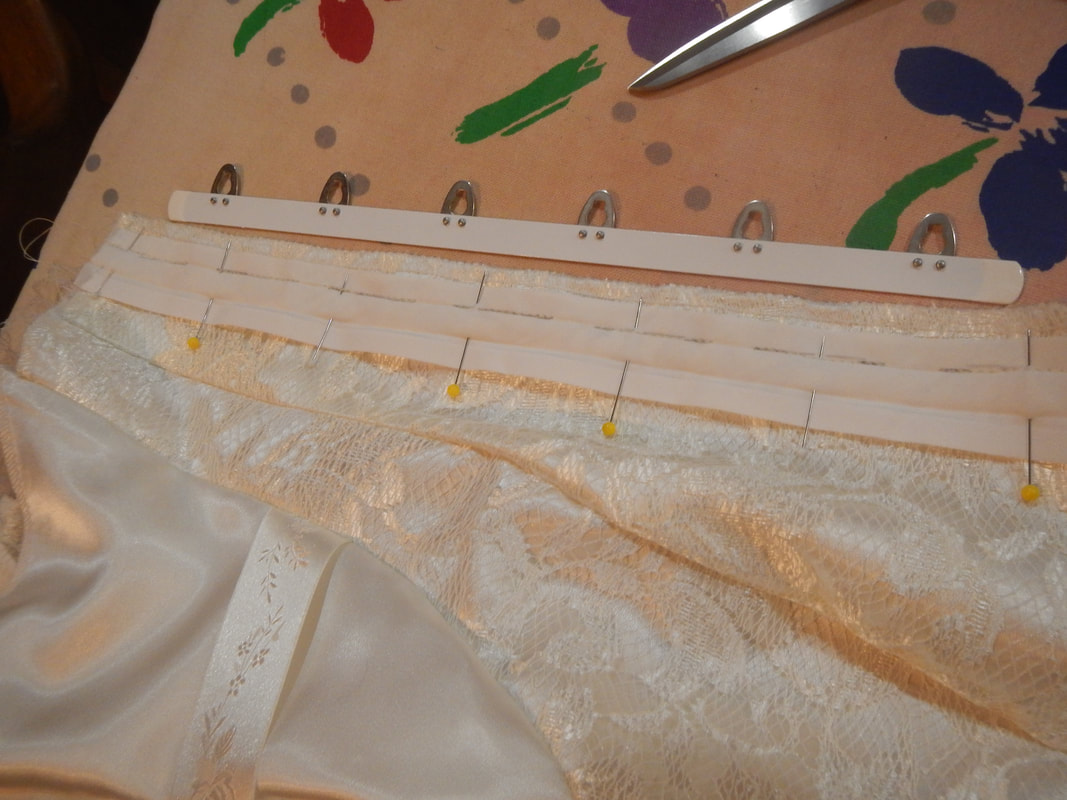
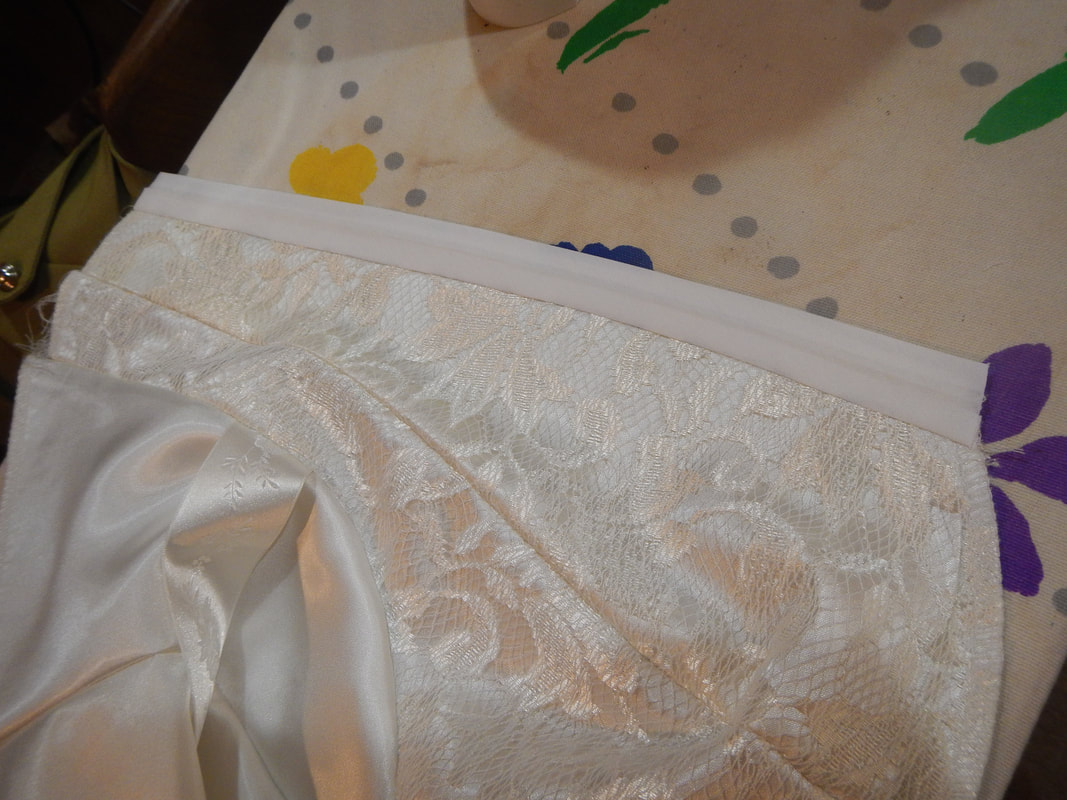
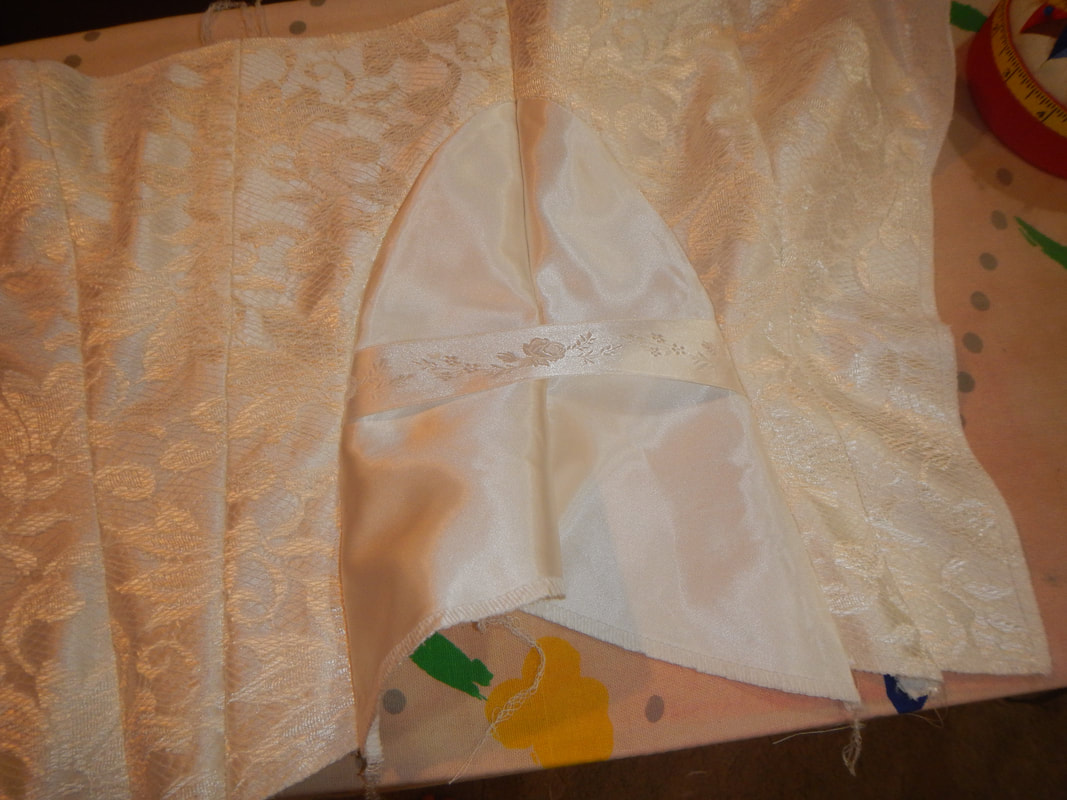 How pretty is that! BUSK AND BONING Butterick 5797 calls for a separating zipper, but I don't have one in my stash. However, I do have a separating corset busk, so I use that. A separating corset busk is two stiff pieces of steel boning, with little eyes sticking out of one side and little nubs on the other. It's a very good closure under tension, but in a slack garment is prone to falling open. I start with the side with eyes, which I put on the left side of the bustier (when worn), to be manipulated with my left hand. (I don't actually think too hard about it, actually; the busk works either way.) To put it in, I lay a facing on top of the Center Front and use a pencil to mark the lines for sewing. There are regular gaps, as you can see in the picture below-left, for the eyes to protrude. I use my sewing machine and do a back-and-forth tack at the start and finish of each line. I don't bother cutting the thread, thought, I just lift the presser foot and slide the fabric along to make the gaps. Below-right you can see the facing ironed forward, and below that, the facing ironed over and the busk inserted.
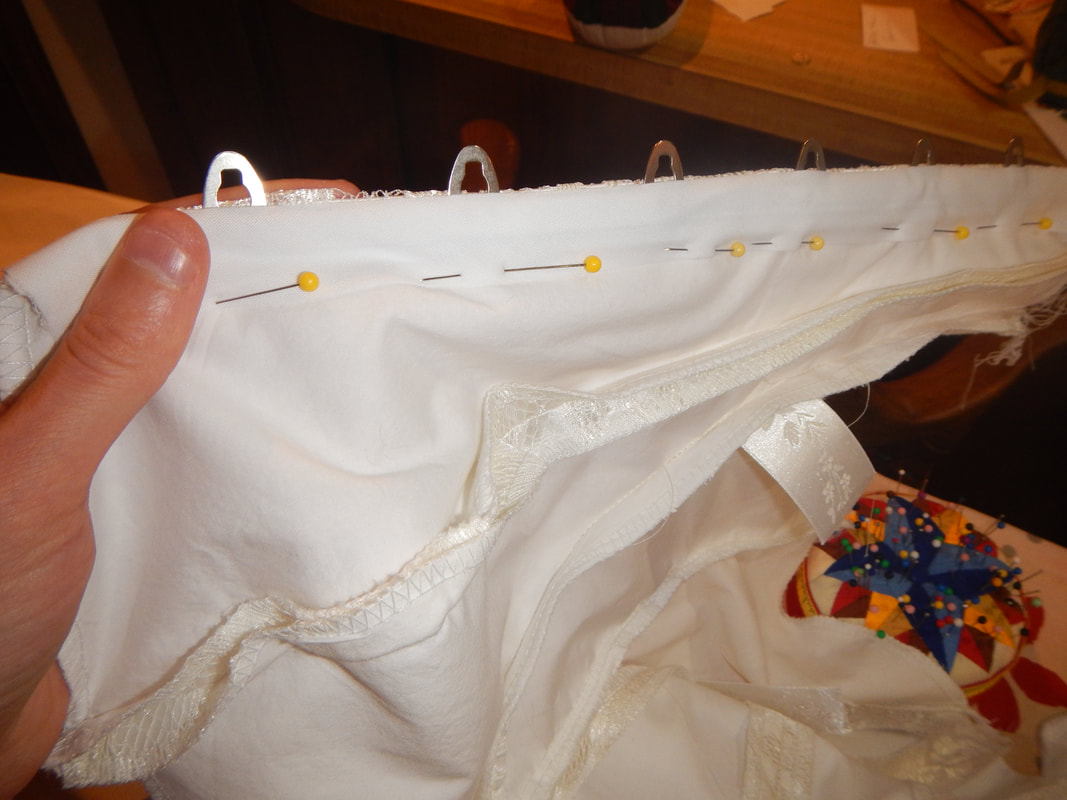 Then I use Boudica's zipper foot to sew the facing down as close as I can get to the busk. The less the busk can shift around in its channel, the less wear and tear on the fabric from use. The other side of the busk is more annoying. First I iron the seam allowance on that side over and close the corset so the CF edges abut each other. The eyes of the corset busk overlap the other side of the bustier. I use pins with small heads to poke straight through the center of the eyes, thus marking the position where the little nubs should go. Then I carefully pull the pins out, using a pencil on the inside of the garment to mark the spot for the holes. To stabilize the area, I iron some interfacing on the inside. The next step involves an awl, which is a pointed tool that gets larger toward its handle. I use the awl to make the hole where the pencil mark is, trying to shift the threads around the hole rather than cutting or tearing them apart. Then, carefully, I work the nub through the hole, using the awl to push threads out of the way. Once the nub is through, I use the awl to nudge the threads back in place, to close things up.  One hole at a time, rather a frustrating task. Then I fold the seam allowance over the busk and sew it, same as the eyelet side. I also put some boning at the back of the bustier: one bone on each side of the CB seam, and one each along the curving side seams. I simply tuck the bones under the seam allowance and sew the seam allowance down using my zipper foot. This creates the channels for the bones and holds them snug inside. Below, you can see I'm using spring steel bones for this, which I got at the Mill End Store. 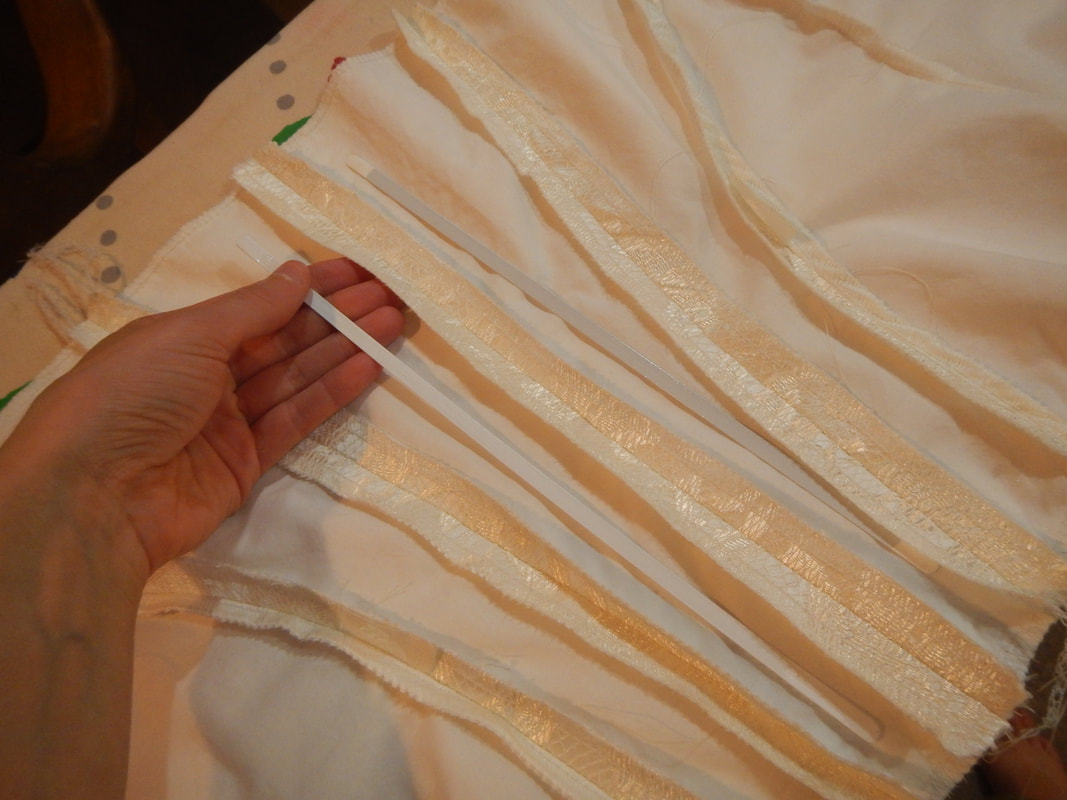 ALTERATIONS The time has come to fine-tune the fit at the front! I put the bustier on inside-out and pinch and pin out the excess in the side seams. There are three areas that get altered: the upper side seam, under my armpit, is baggy; the lower edge of the side seam, over my hip, is a teensy bit too big; and the bust seam at the very top needs to come in. I take out over an inch of girth at the upper side seam and upper bust. I wonder what cup-size or rib-cage size the fit model at Butterick had? Just goes to show that size 12 is not always size 12! Once I'm satisfied with the fit, I transfer the changes to my muslin pattern for next time.
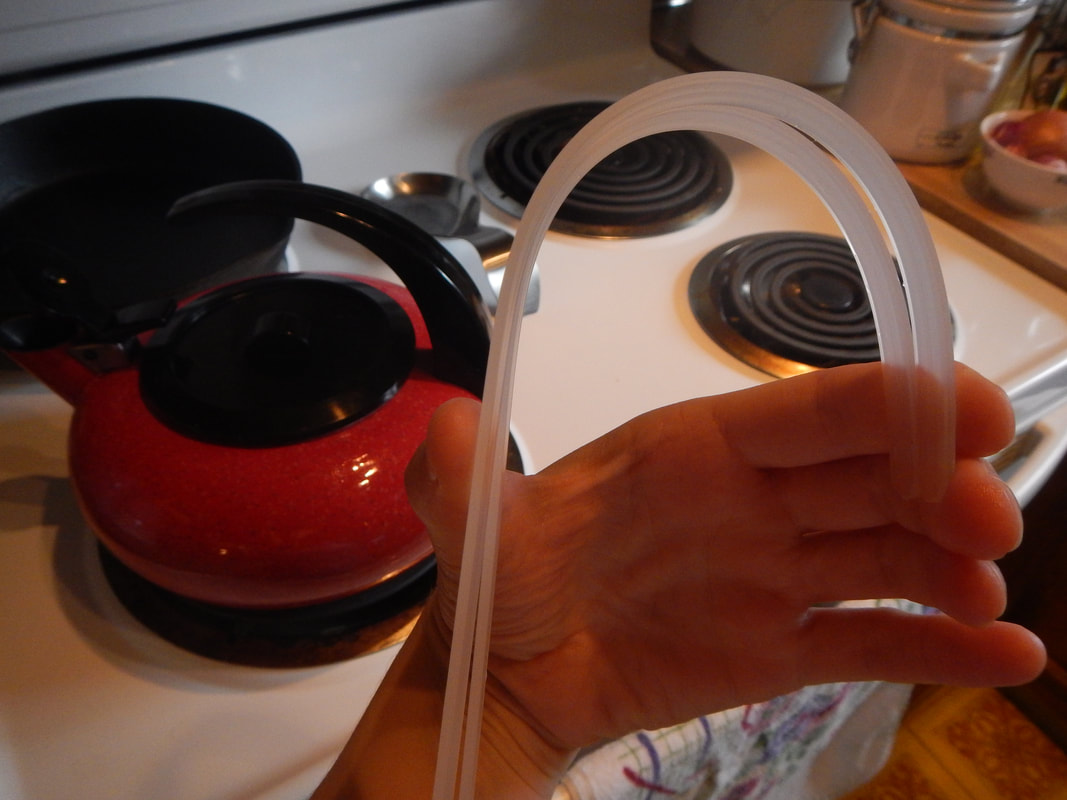
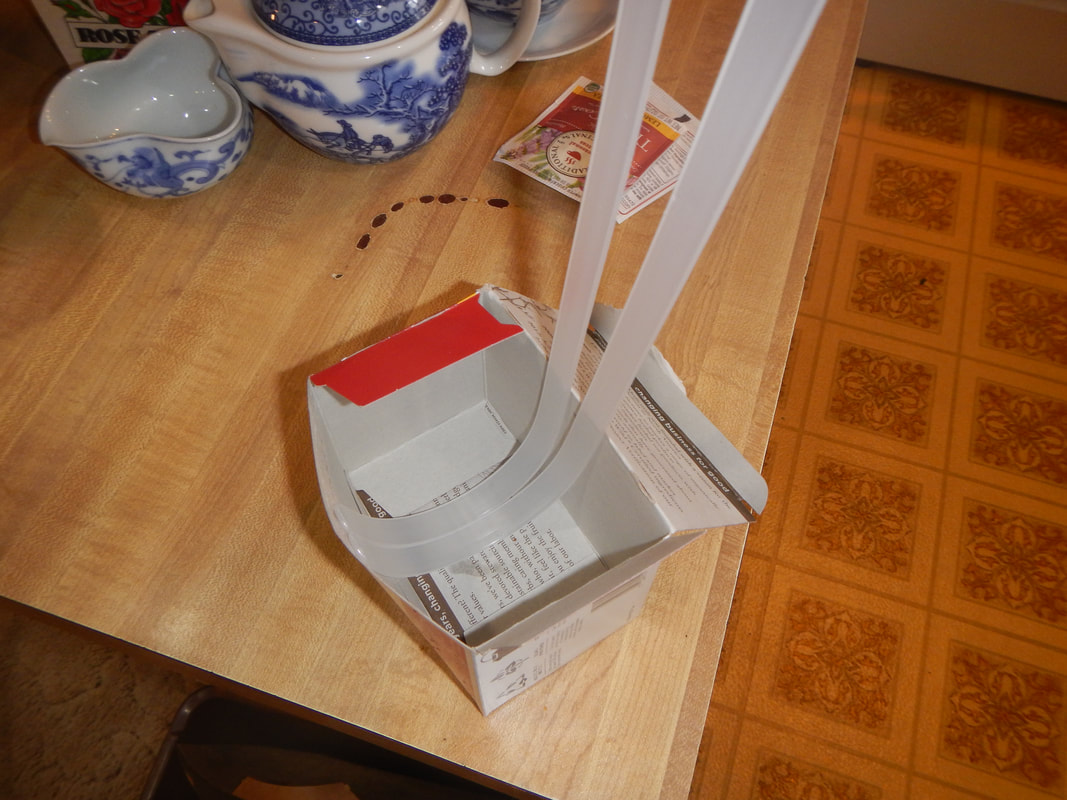
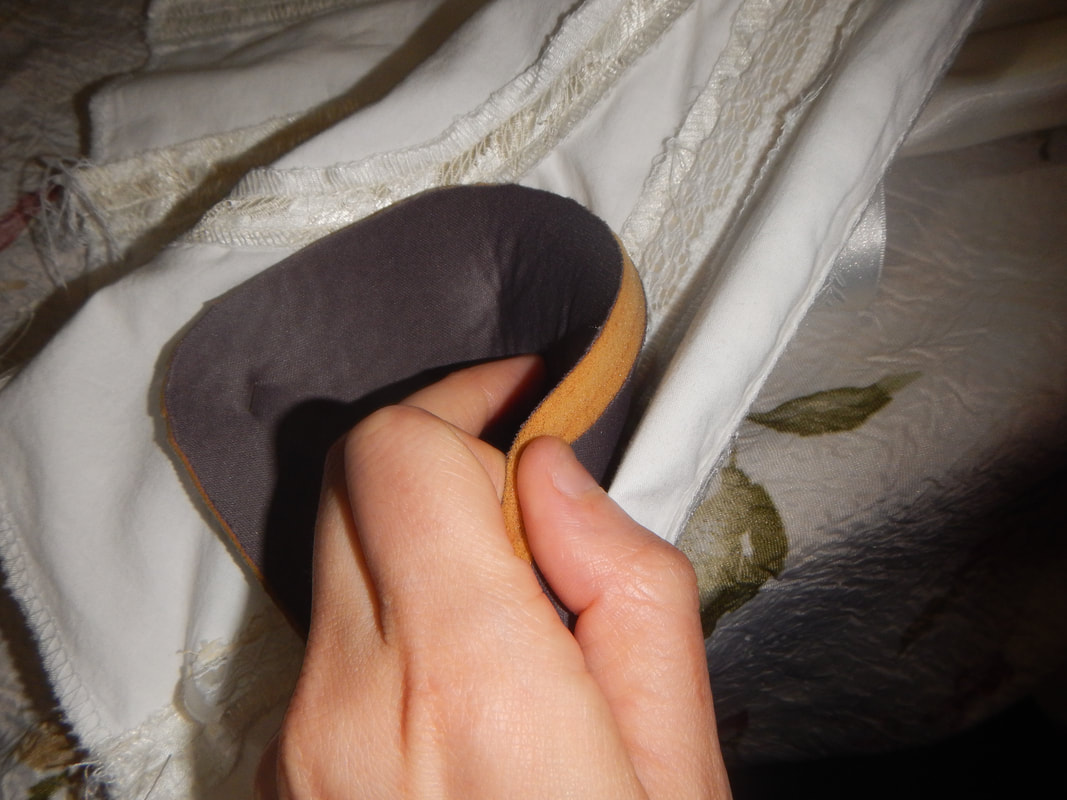
MORE STRUCTURE Once the side seams are right, I tuck a spring steel bone in each of them, too. Now, corsetry has taught me many lessons about the engineering of tight garments, which I apply to this bustier. Knowing that there will be stress around the waist pulling perpendicular to all the vertical seams, I take some grosgrain ribbon and sew it into the back, intersecting with the ribbon from the outside side-seams. Using the two ribbons, I have created a belt around most of the bustier. If I had more ribbon, I'd do a waist stay around the whole inside, but I don't have enough, and I'm working from stash for this project. Hopefully the color-coding below makes sense. 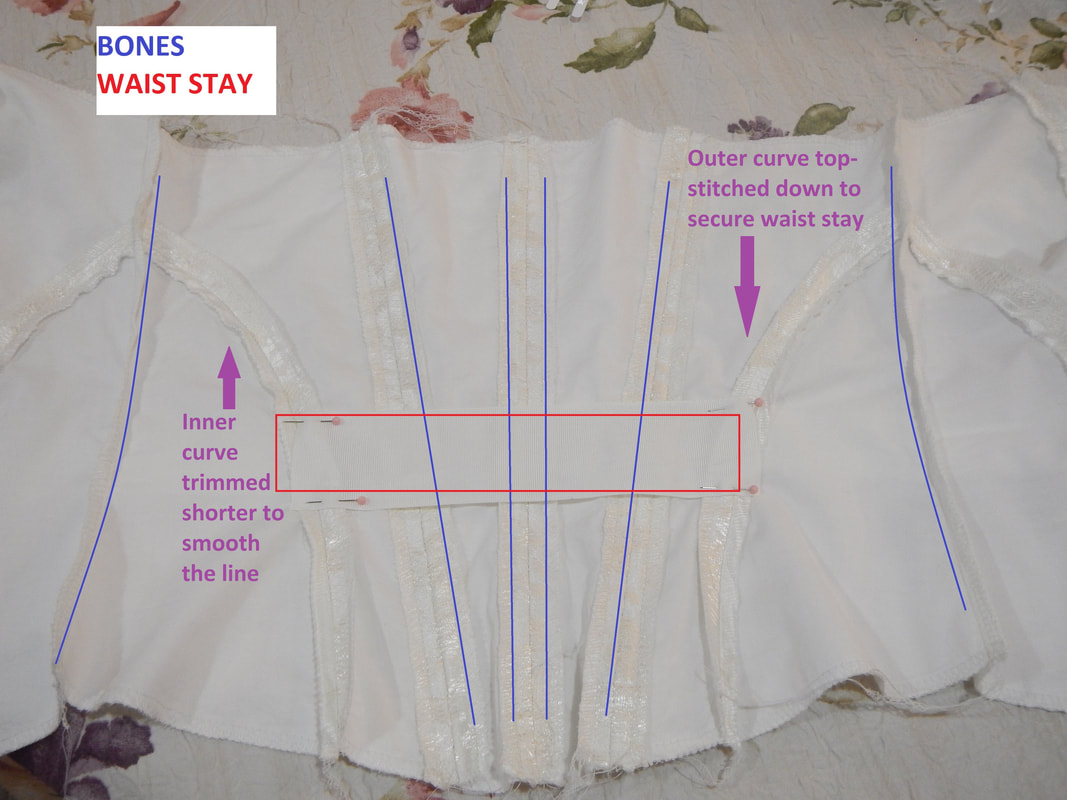 Then I look at the bust area. Even when the bust seam is the right curve and size, it still looks a little collapsed and wrinkly when I wear it. My solution is three-fold. First, I trim the seam allowances over the apex of the bust really small and serge them. That eliminates the wrinkles caused by excess seam allowance bunching up in the cup. Then I make some curved bones to hold that seam up. For this, I use some thicker plastic bones I have in my stash. They're a little long, so I trim them to size using kitchen shears, and file the rough edges with an emery board. Then I push their ends into some just-boiled water to soften them into the curve I desire. Here's that process in pictures:
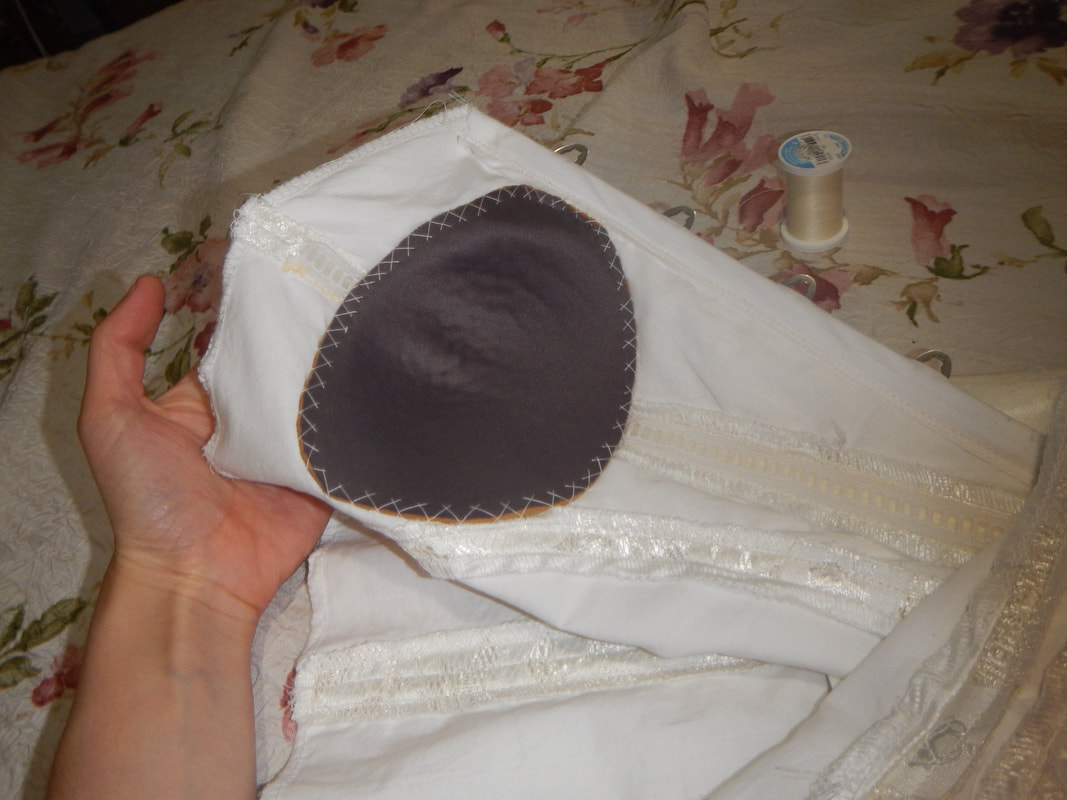
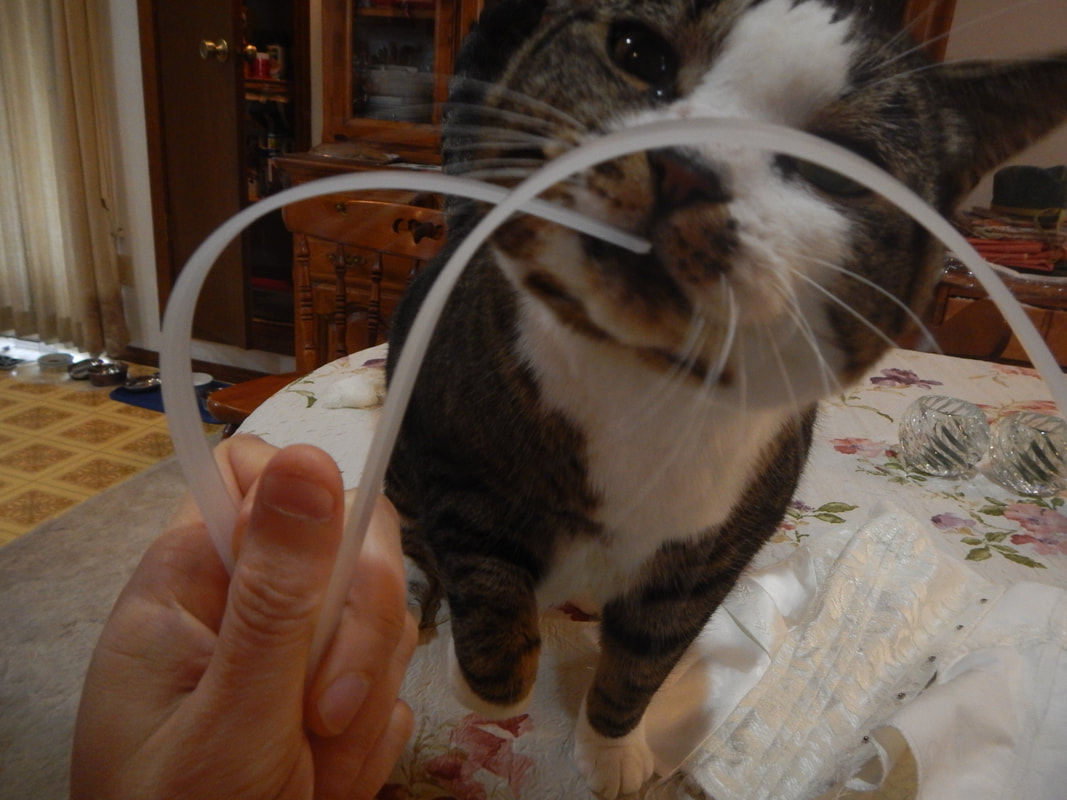 Pretty Kitty inspects the bones before I insert them in the bustier. I use some scrap lace (because I've run out of tape!) to make channels for the boning right down the center of the seams, and slide the bones into place. This solves the problem of the cups collapsing downward: now they have bones to hold them up! Finally, I take some foam cups off an old bra (a sad, worn out bra I don't feel bad cutting up!) and insert them into the bustier as I wear it, pinning them when they get to the right place. 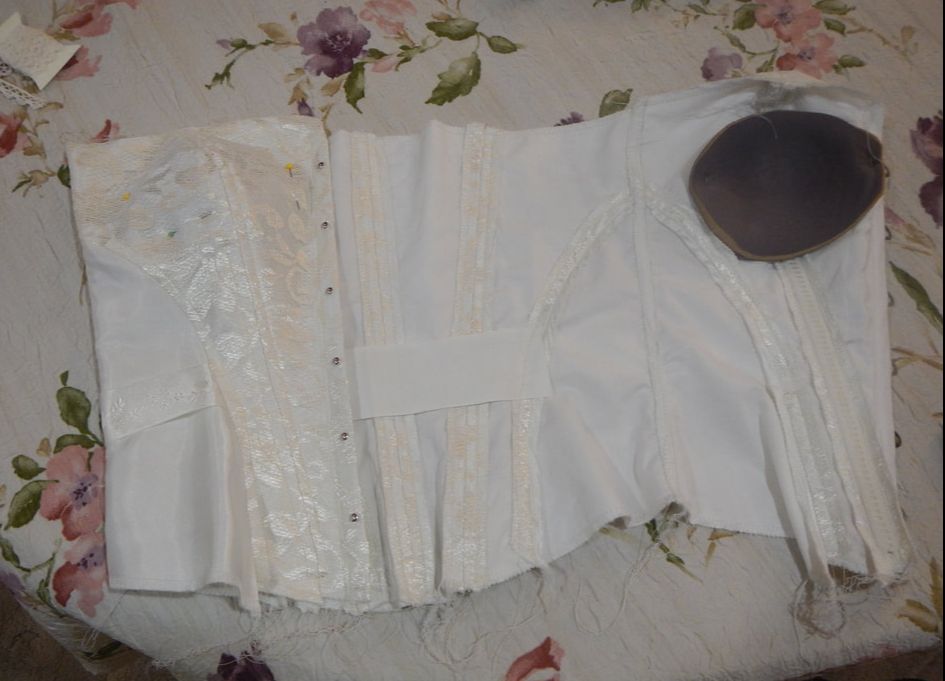 The cups pinned in place I trim the foam into gentle curves so it'll integrate smoothly into the bustier. Then I sew them in place by hand, catching the foam cups and the cotton inner layer of the bustier in the stitches, but not going through to the front of the garment. This final step creates the pleasing curve and full look I want for the bosom.
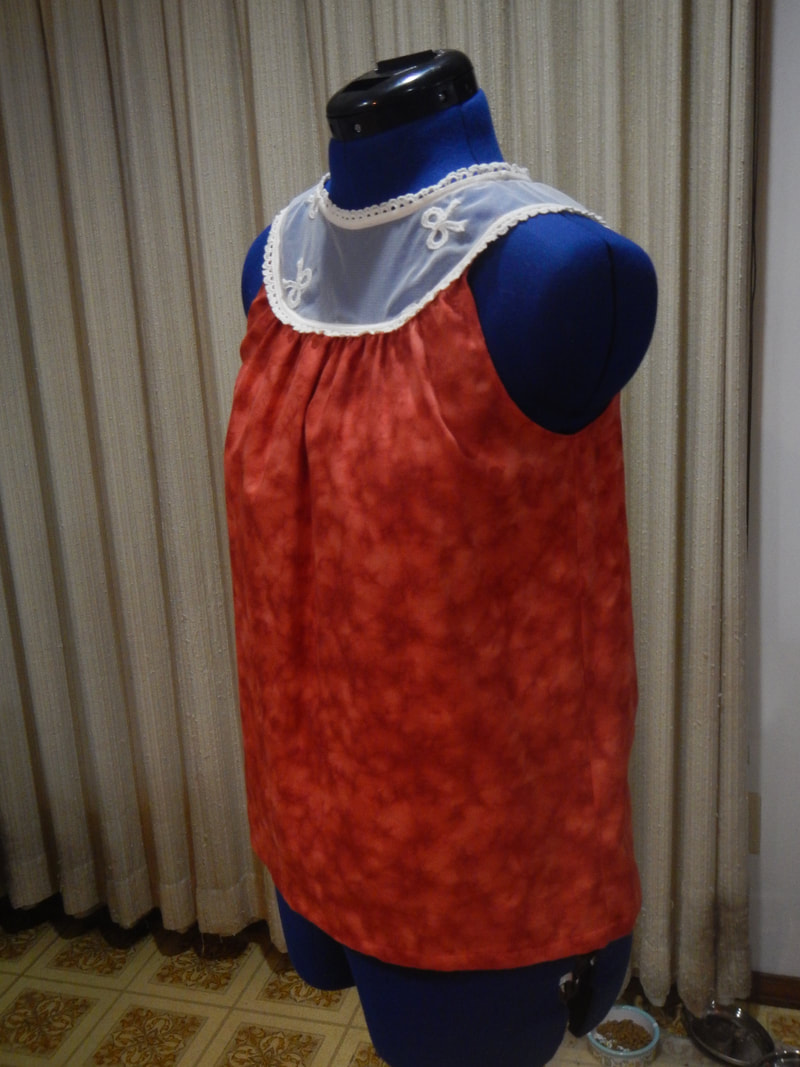
FINISHING TOUCHES The Butterick directions call for using bias tape to enclose the top and bottom edges of the bustier. I opt for an easier option, mostly because I don't want to fuss with the bulk of turning bias tape under at the ends. And because I'm a perfectionist: every time I do a bias binding I end up hand-sewing the outside with slip-stitches, and it takes a while, and I'm trying to learn to be quicker so I can work on the other things on my to-do list! So this time I try something new to me: I trim the bottom into a smooth curve and serge over it from CF to CF. This means sometimes serging over raw edges and sometimes serging over previous serging, but in the end it's all serged. Then I take the chained off ends of the serger thread and bury them so they can't unravel. Finally, I pin a pretty scrap of lace on the front of the bustier, covering the serged finish. I use two lines of stitching to secure the lace, which keeps it lying flat and further secures all the serged stuff. Pretty! 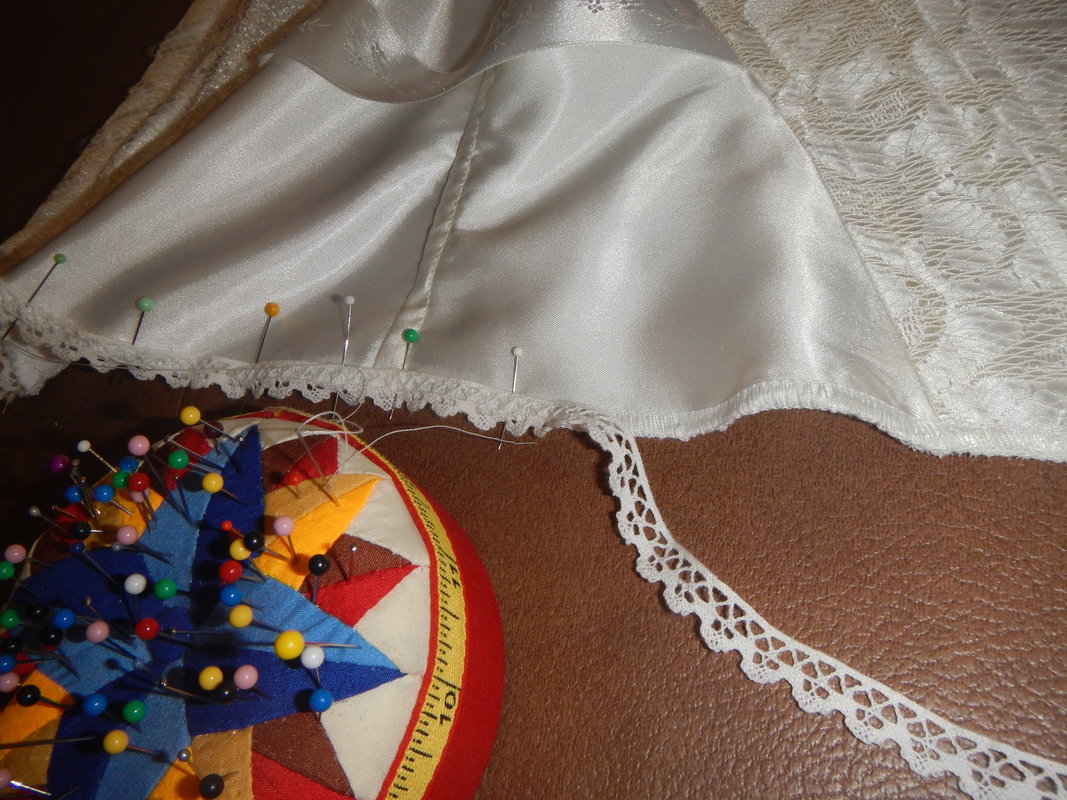 pinning the lace to the serged bottom edge I try the bustier on with my new shirt and mark where the armpit of the shirt sits so I can trim the bustier lower than that. I take off at least an inch at the top, which is not a surprise: I am short-waisted. Then I do the same to the top edges as I just did to the bottom: serge, bury the thread ends, sew lace on with two lines of stitching. The most important thing in this step is to push the bones out of the way of the serger so I don't bust a needle hitting metal! 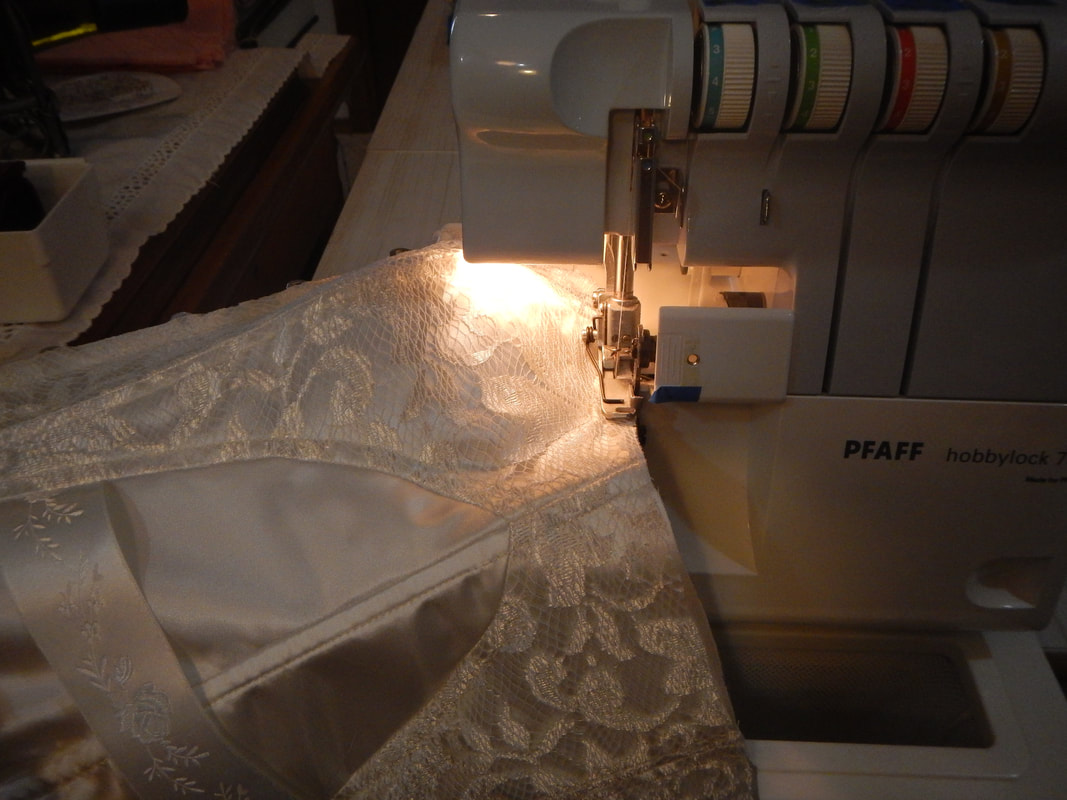 serging the newly trimmed top edge-- carefully! Two ribbons for a pretty bow at the CF top finish the job! These are not entirely whimsical; they have the practical function of holding the top together when I bend and move, when the busk might want to pop open because it's not under constant tension like it would be on a corset. FINISHED! The Blue Lady models the finished bustier: 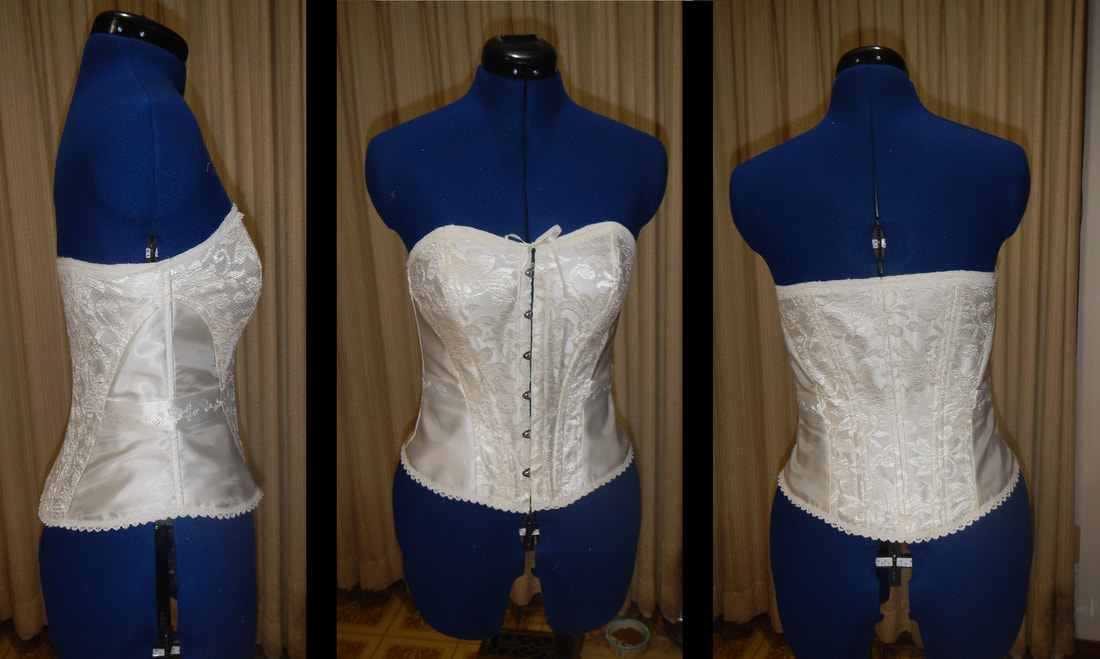 ...and gives a little twirl!
THOUGHTS AFTER WEARING I have worn the bustier several times now, and my follow-up thoughts are as follows:
2 Comments
The Sister
10/18/2017 02:39:24 pm
"...blogging about my unmentionables...salacious!" Bwahahaha! And you are a clever wee buttons, rounding out the edge of the foam cups! I wouldn't have thought of that. Leave a Reply. |
Karen Roy
Quilting, dressmaking, and history plied with the needle... Sites I EnjoyThe Quilt Index Categories
All
Archives
March 2024
|


 RSS Feed