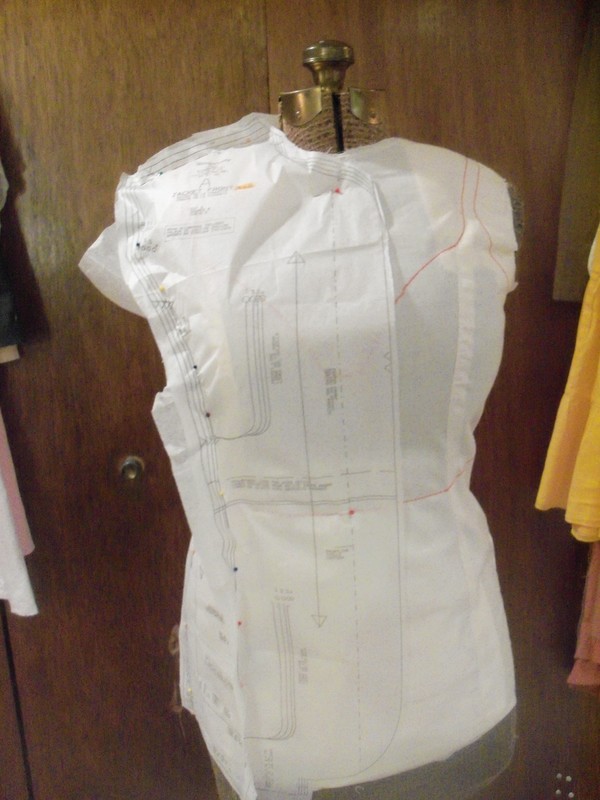
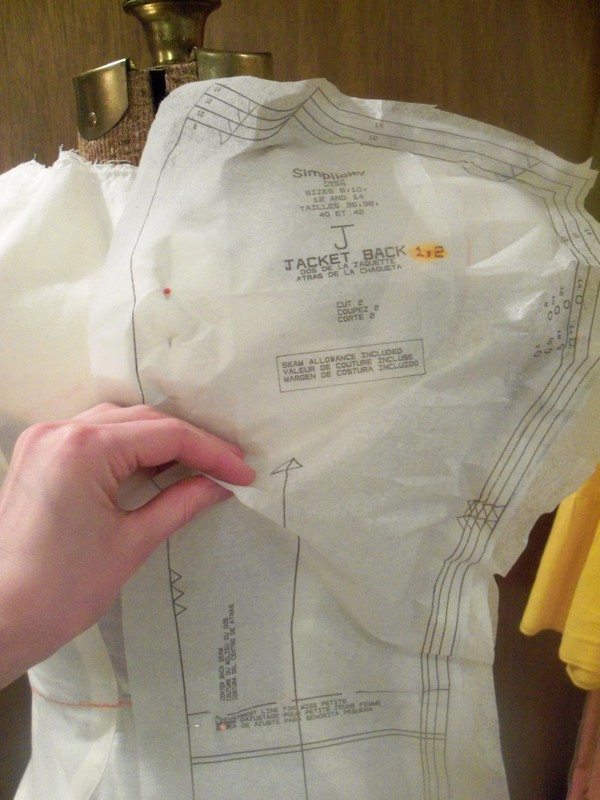
 This "Five Hour Jacket" pattern came from a thrift store, cut out by the previous owner. She obviously had some inspiration for it, since she had clipped an ad for Hancock Fabrics, showing a similar pattern made up in a red plaid. I decided to eliminate the shoulder pads and make it a V-neck, and make it in denim for my sister. I'm very pleased and excited by this latest project, which I conceived as a "jean jacket" but which now looks so cute I think I'll upgrade it to "denim blazer" because it sounds fancier. Based on feedback from a previous post ("I thought you were done, and then you just kept gooooing!"), I am going to use an outline to tell you what you're getting into. The outline below is the whole project. The bolded items are the ones I'm going to talk about/show pictures of. Yes, it'll still be a long post. But now you know! PATTERN WORK Figure out size (fortunately, the pattern was pre-cut to the right size already) Pin fit tissue pattern / Shorten back panel / Re-draw armscye Make neck a V and square-off the bottom CUTTING OUT Approximate yardage: a little over a yard at 60" width Careful layout to put sleeves on grain Not enough for facings or full hem SEWING Sew vertical seams with zipper-teeth piping Sew shoulders Serge seam allowances Interface front edge and facing, sleeve hems, bottom hem at fold Top-stitching BUTTONHOLES Picking buttonhole size, making test Mini-rant about making buttonholes Wax thread for cord filling Mark positions on facing Sewing success! POCKET FLAPS Position at angle on hips Serge edge and sew down. Finish with smaller buttons Finished! PATTERN WORK I started by pin-fitting the tissue pattern to the dress form (which is still in my sister's shape and size). The front was perfect. The side shows some wonkiness, due to the back being too long in the torso.
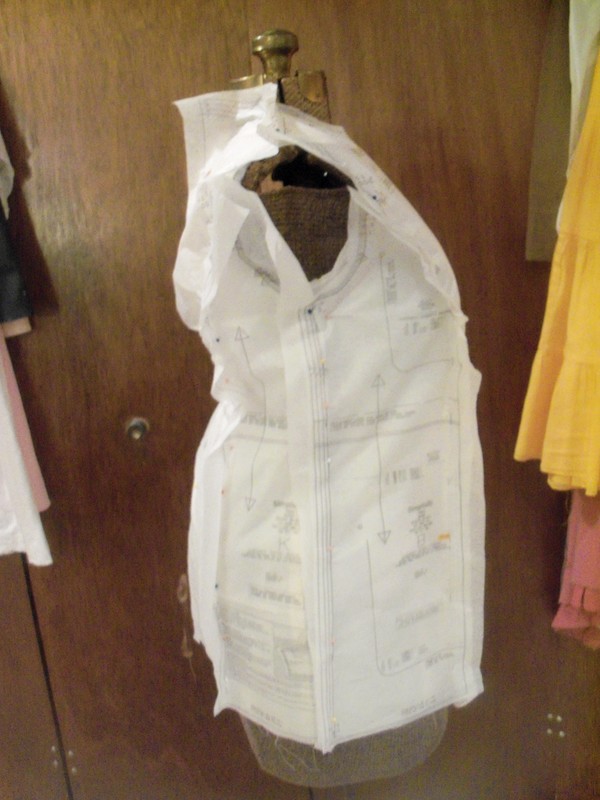
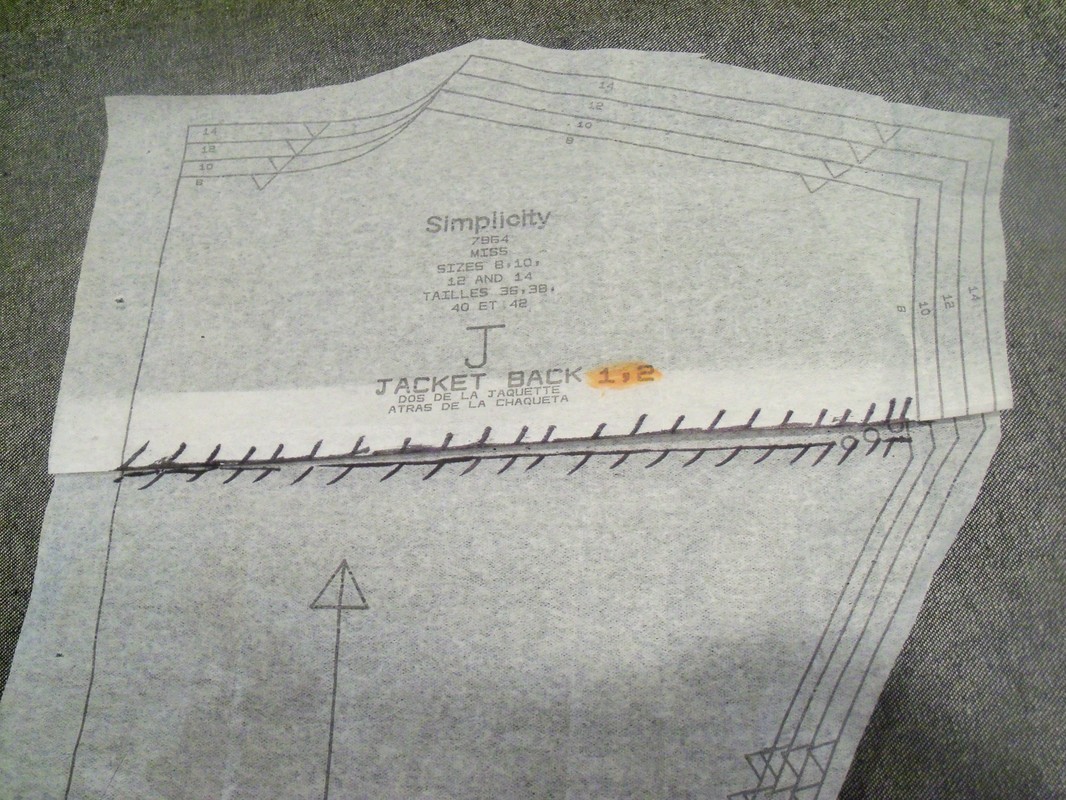
Naturally, I asked myself whether I could fix the problem by shortening the back panel in the waist region. That would be easiest, since it wouldn't interfere with the armscye. Alas, the bagginess wasn't in the waist region, it was in the upper back. So I had to take it out of the upper back, and that would mess up the armscye. Le sigh. I pinned out the fold of extra tissue: 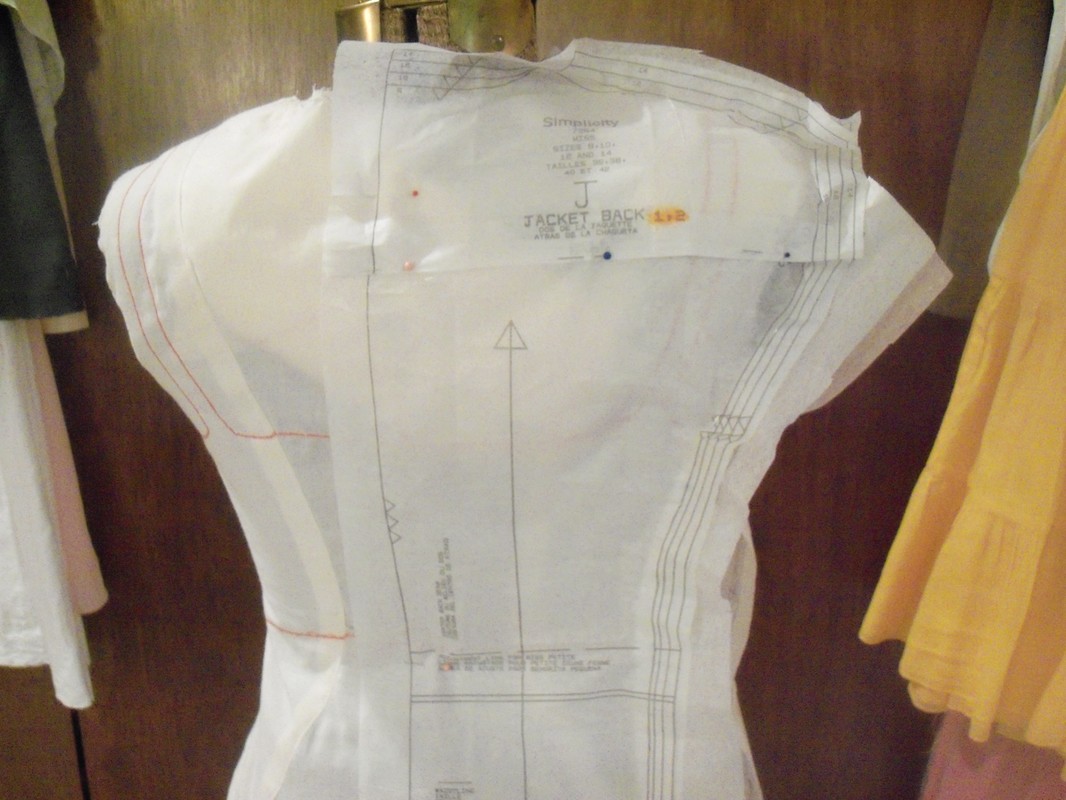 Ah, now it hangs perfectly! I marked the change on the pattern with a series of slash marks over the fold. When I unfolded it, I saw the fold had taken out a full two inches of length! Now, I know my sister's back is short (see RTW FIT ISSUES in this post), but it's not that short. I think the pattern was made a little long in the back on purpose, to allow for shoulder pads. I didn't want shoulder pads anyway; they would exaggerate her inverted triangle shape.
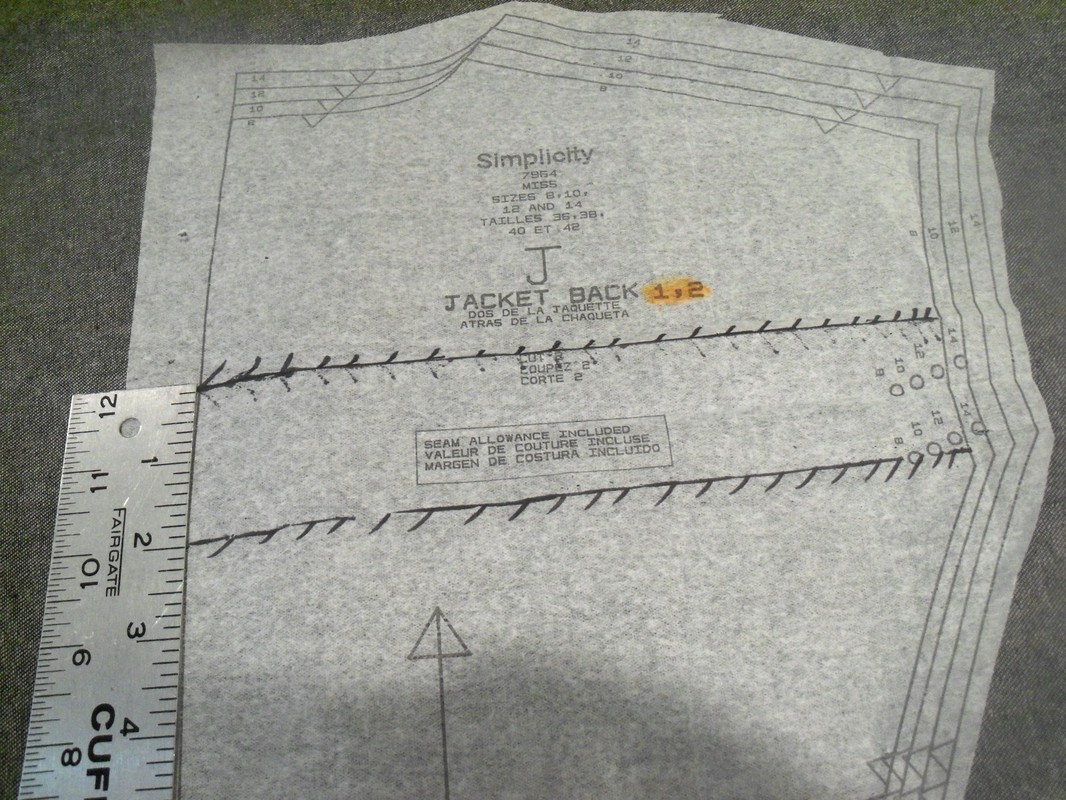
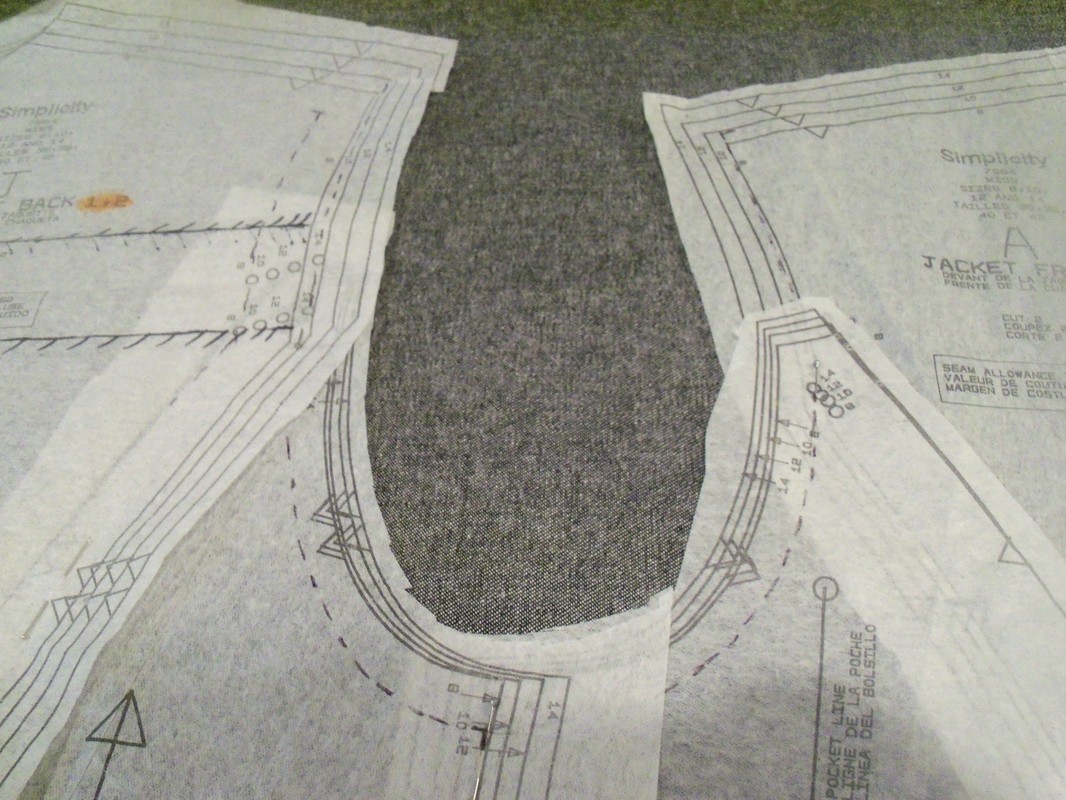
So now I needed to re-draw the armscye. After all, just because the back is two inches shorter doesn't mean the arms are two inches smaller! So, disclaiming any expertise and acknowledging that I might be doing things wrong, here is how I re-drew the armscye. First, I used dotted lines to mark the stitch line for the original pattern. I pinned the panels at their stitch lines to get the original armscye. This is an occasion where a sloper, with no seam allowances added, would be better than a pattern with seam allowances. At ever step, I had to make sure I was altering the seam-line and not the cut line.
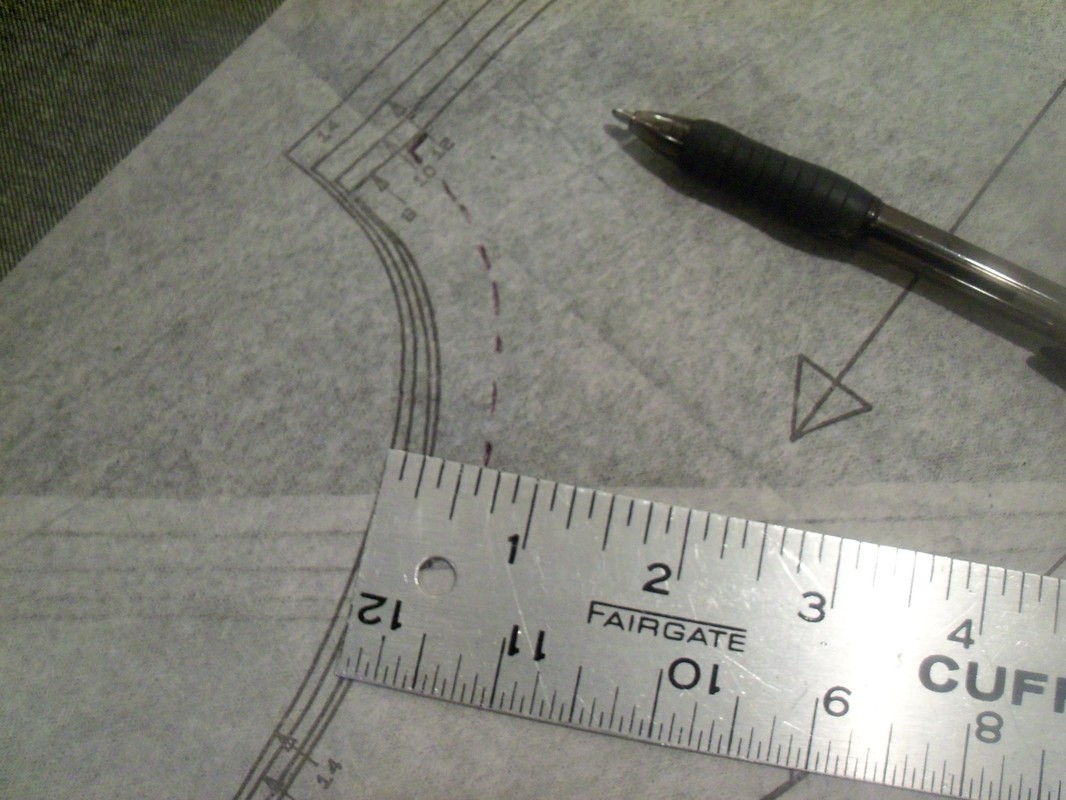
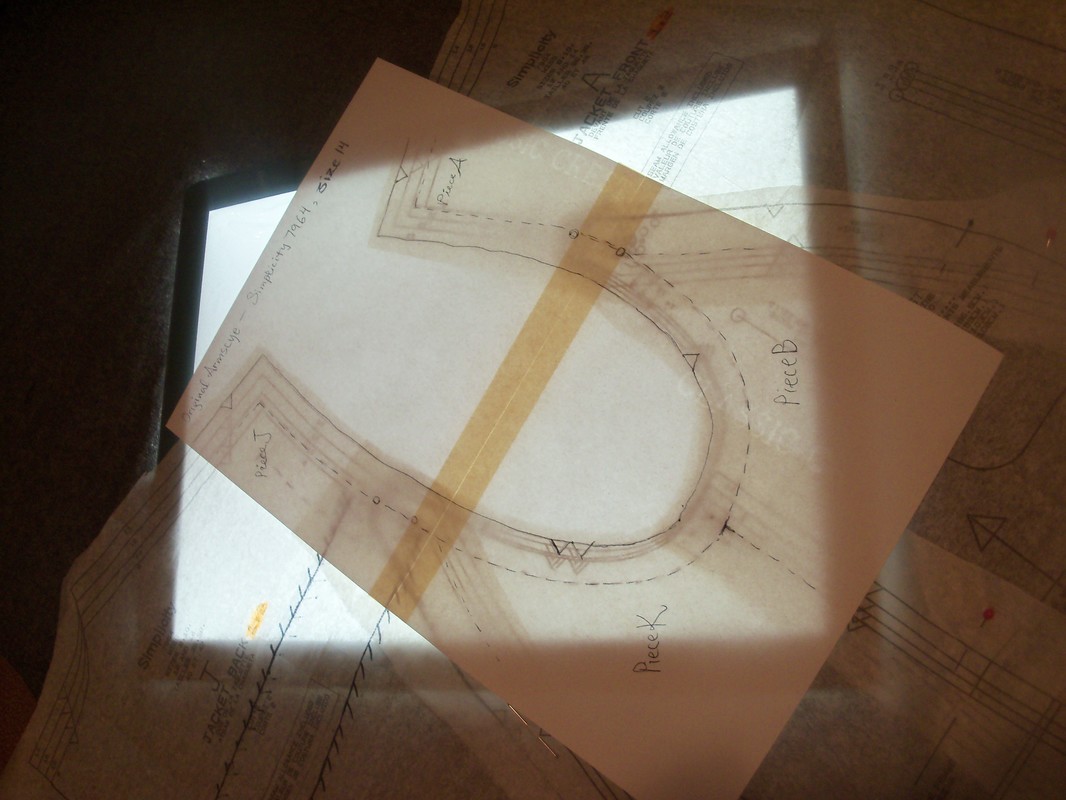
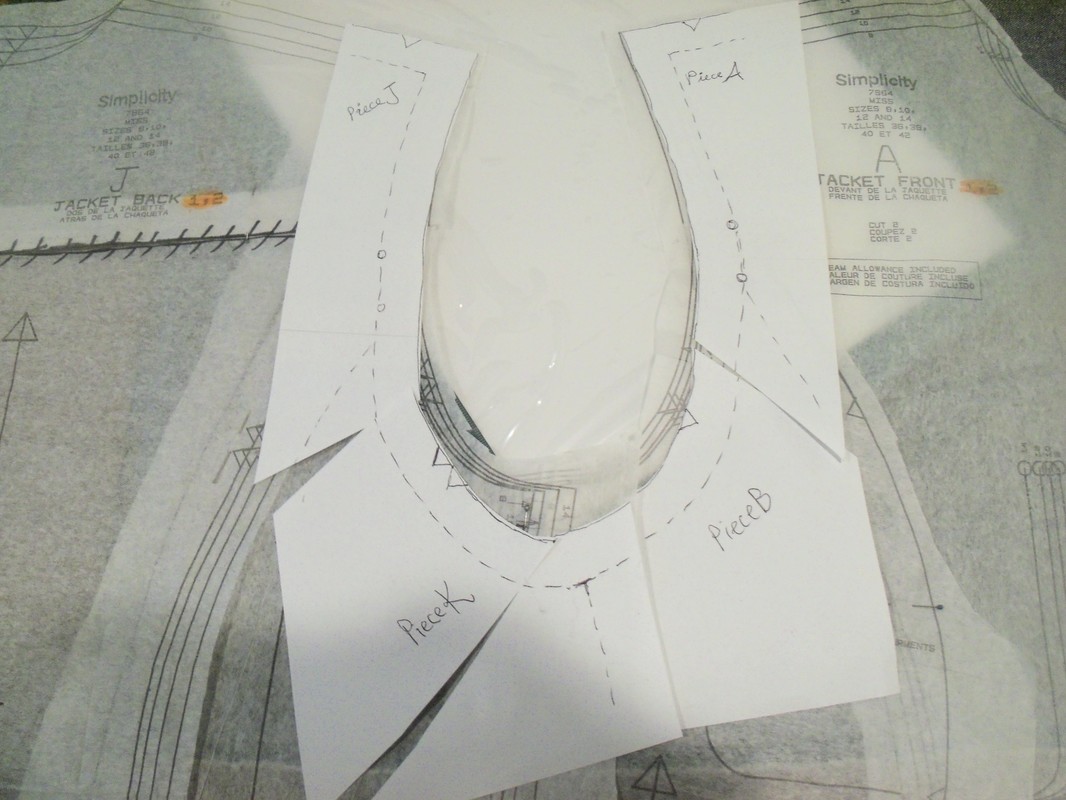
Then I used a lightbox (Thanks Rosanne!) to trace the original armscye. The most important thing, from my beginner's perspective, is the length or the armscye. I don't want to (or fully understand how to) re-draw the sleeve, so I knew the armscye had to at least have the same length of seam as the existing sleeve! I folded the tuck into place on the Center Back panel, and positioned the original armscye on top of the new panel configuration. It took a couple slashes and pivots to make it work, but I did.
I traced the new armscye onto the tissue, and cut the excess away.
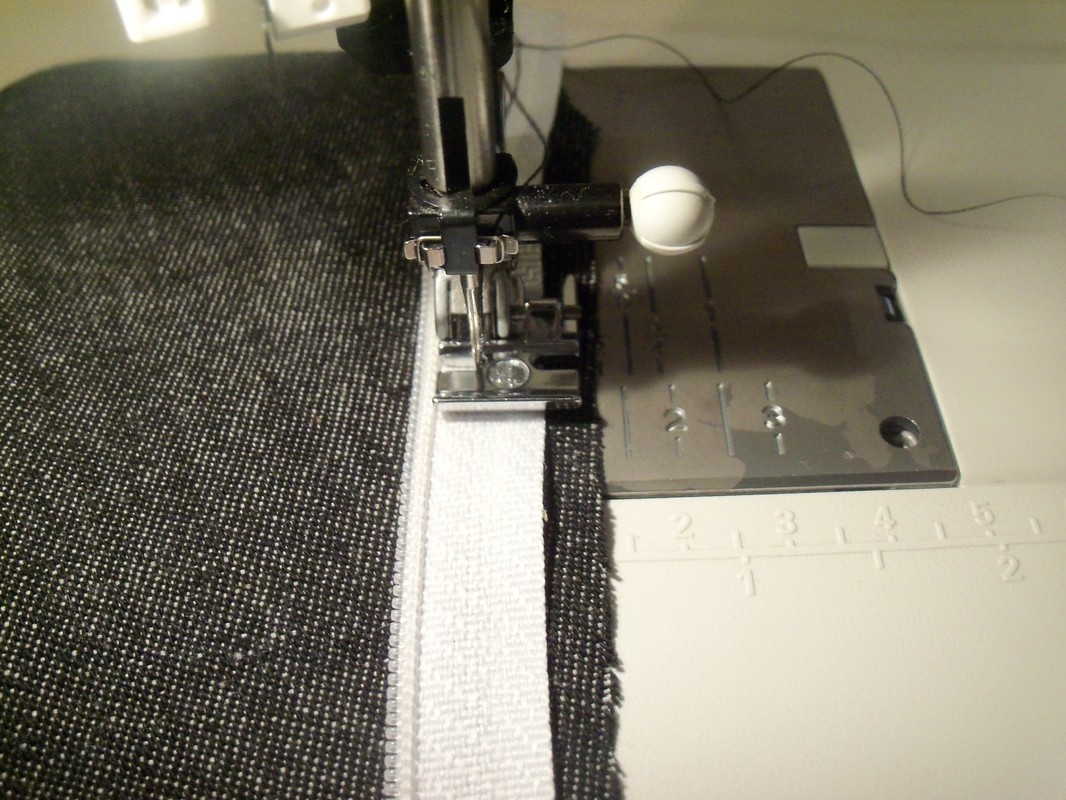
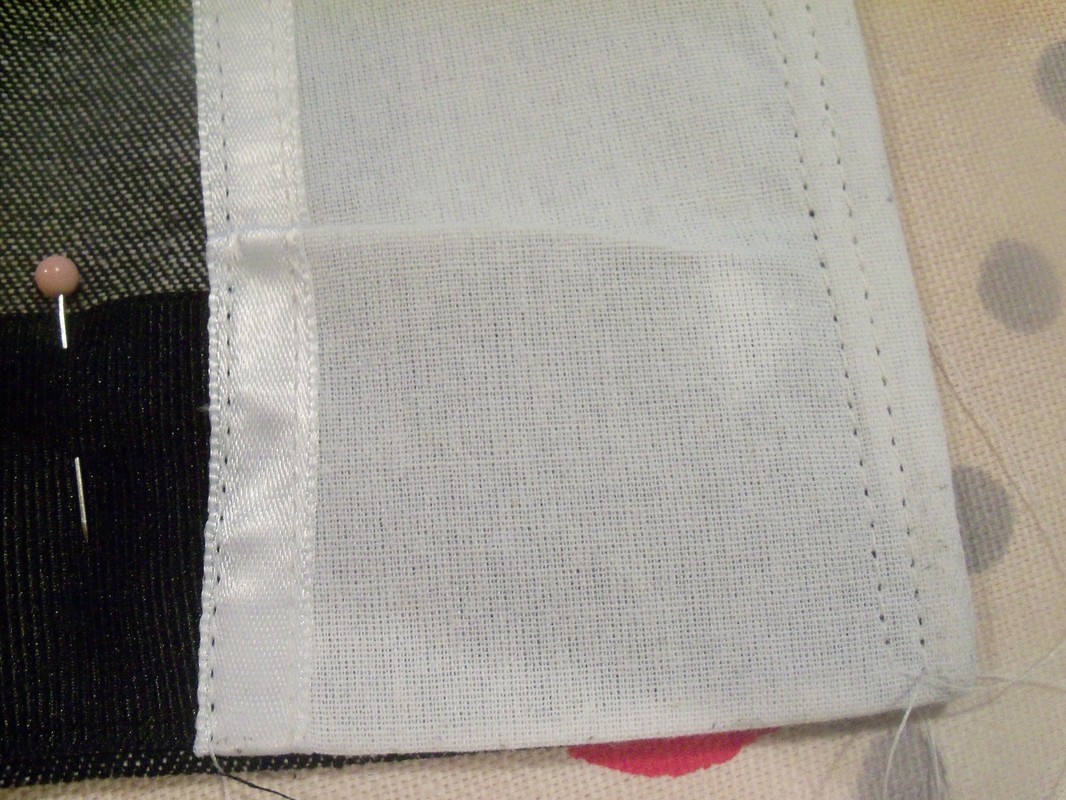
FABRIC SHORTAGE The denim I was using was a remnant from making the charcoal jeans. I had no remnants from the white or black jeans, even though I'd bought the three fabrics all on the same day and in the same length, so I guess the charcoal denim was woven wider. At any rate, if I folded Simplicity's jacket pattern to the shorter length, there was just enough to get the major pieces all on grain. Not enough for facings, though. I'd have to make the facings of a different fabric. 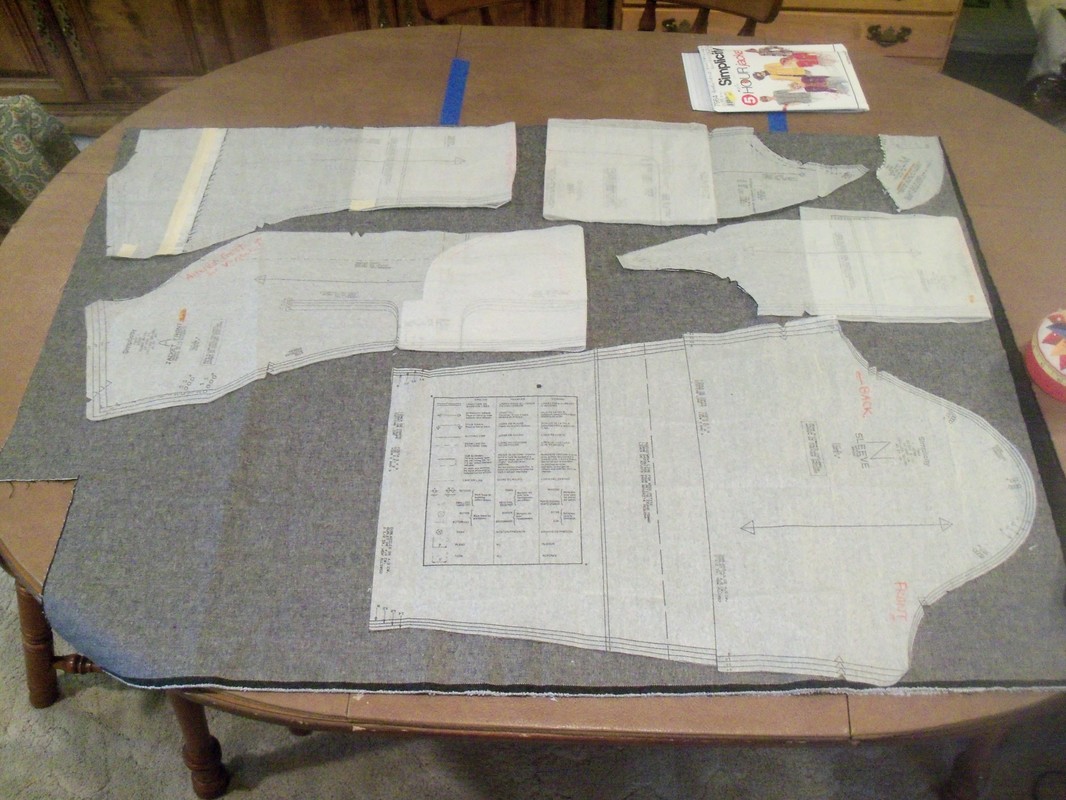 ZIPPER PIPING Several years ago, someone gave me a zipper which had been salvaged from some kind of bedding. It was super-long, white, with plastic spiral teeth. I used some of it to make my sister's final block, so I could get it on and off Claudia. That left me with two long strips of zipper teeth and no zipper head to hold them together. In this jacket project, I decided to use them as piping in the curving princess seams. In the past, I'd had trouble sewing piping into curved seams, because there are so many layers of fabric shifting around under the presser foot. But in the past I'd sewn the seams right sides together, then opened them up. Thus, the piping was hidden in the seam "sandwich" while I was sewing, and only exposed when I opened the seam. Invariably, I'd open the seam and see a wobbly line of piping, some in and some out of the seam. This time, I decided to try something different... a construction technique sometimes seen on historical garments. I loved how easy it was, and how perfect it turned out, with the piping protruding an even amount the whole length of the seam... no wobbles. Here's how to do it: TUTORIAL: PIPING WITH LAPPED SEAMS
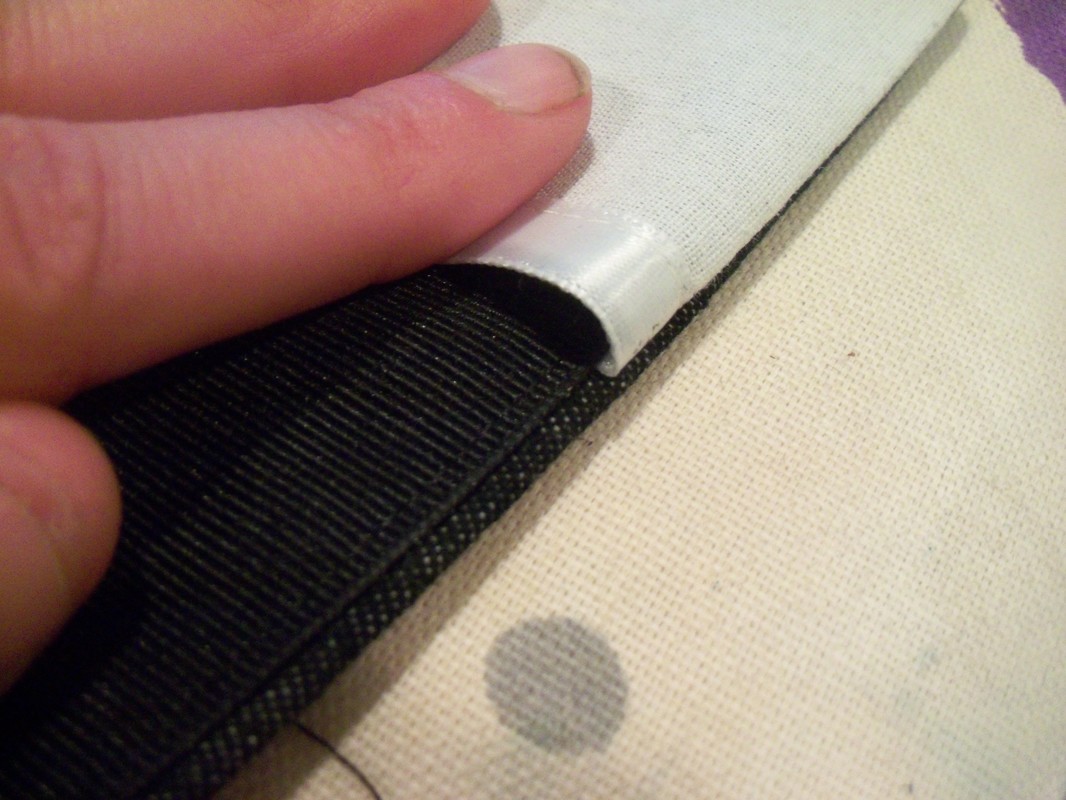
Optionally, you can finish the raw edges of the seam allowance with zig-zag stitch or serging. If serging, pre-trim the layers so you're not asking the serger's knife to gnaw through too much fabric at once. Each seam will have two layers of fabric and two layers of the piping fabric (or in my case a tough bit of zipper ribbon). INTERFACINGPer the advice of Kathleen Fasanella in her blog post Interfacing: 10 tips, I chose to interface the front facing area and the hems, wherever the fabric got folded. This included the sleeve hems and the bottom hem (which was really a grosgrain ribbon facing). Below are some pictures. 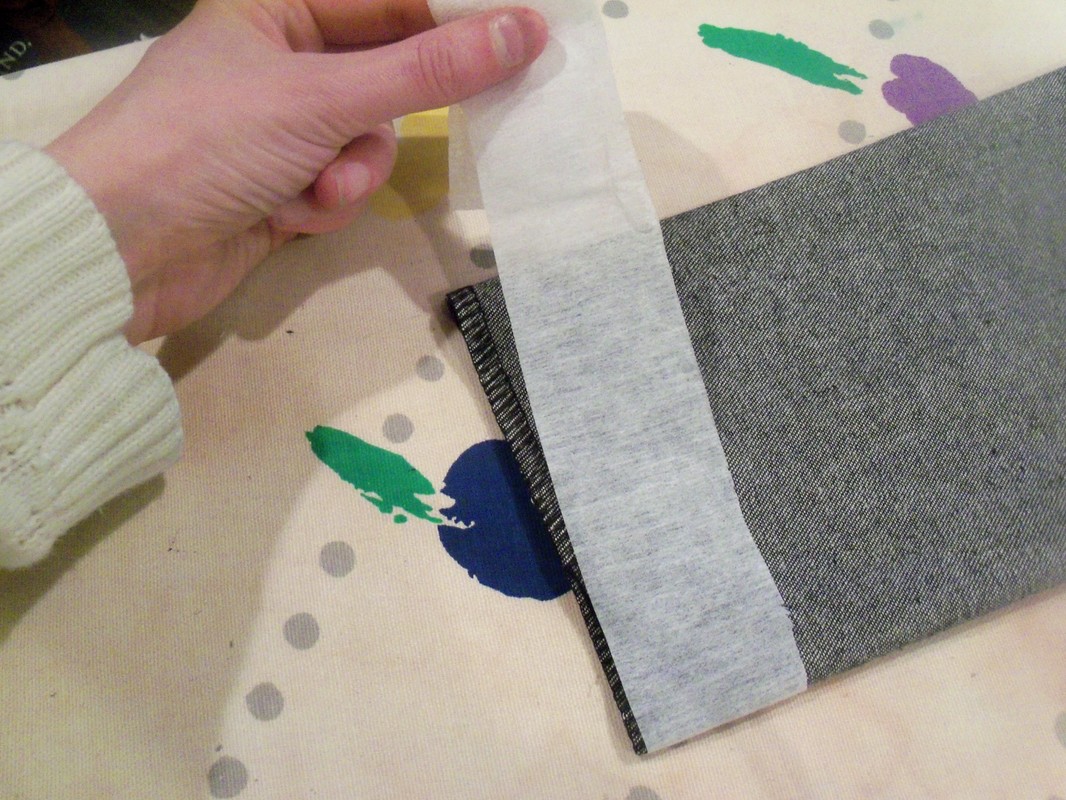 Interfacing the sleeve hem. I pressed it first with this strip of fusible interfacing, and then folded the hem up and pressed it again before sewing. The fold line is in the middle of the interfacing, so there's stability in the fold. The front facing area is more complex, so I've annotated the pictures. Click on any picture to see it larger. 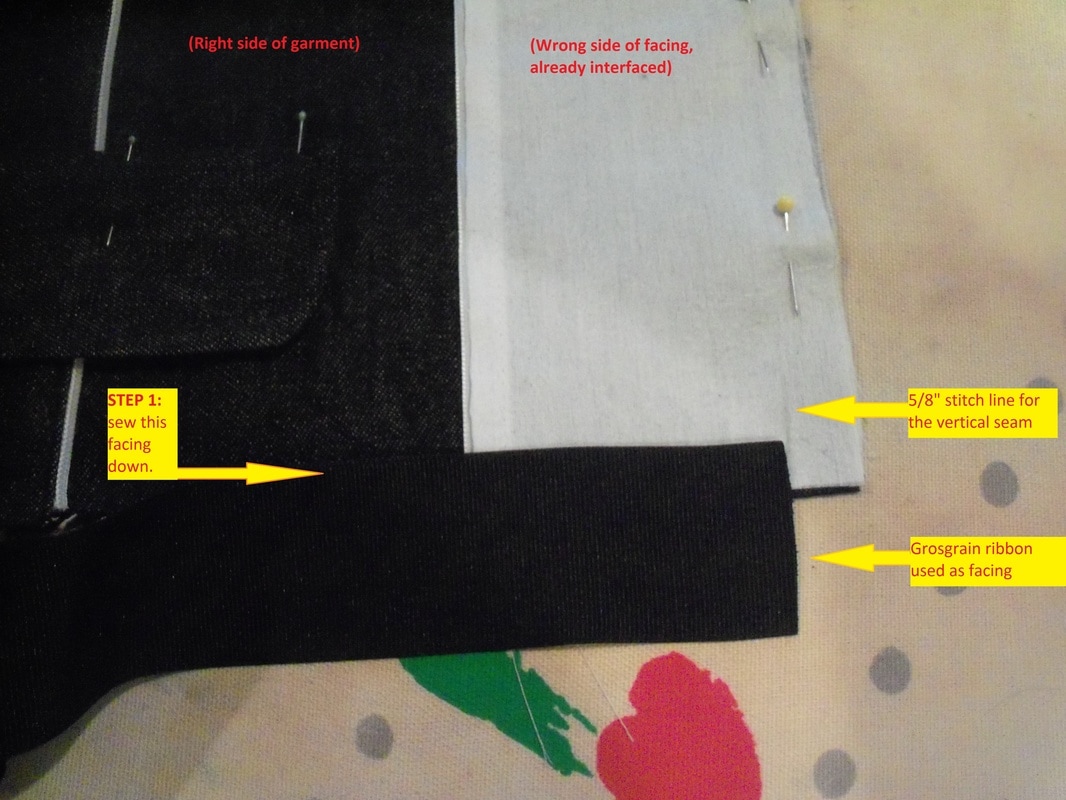 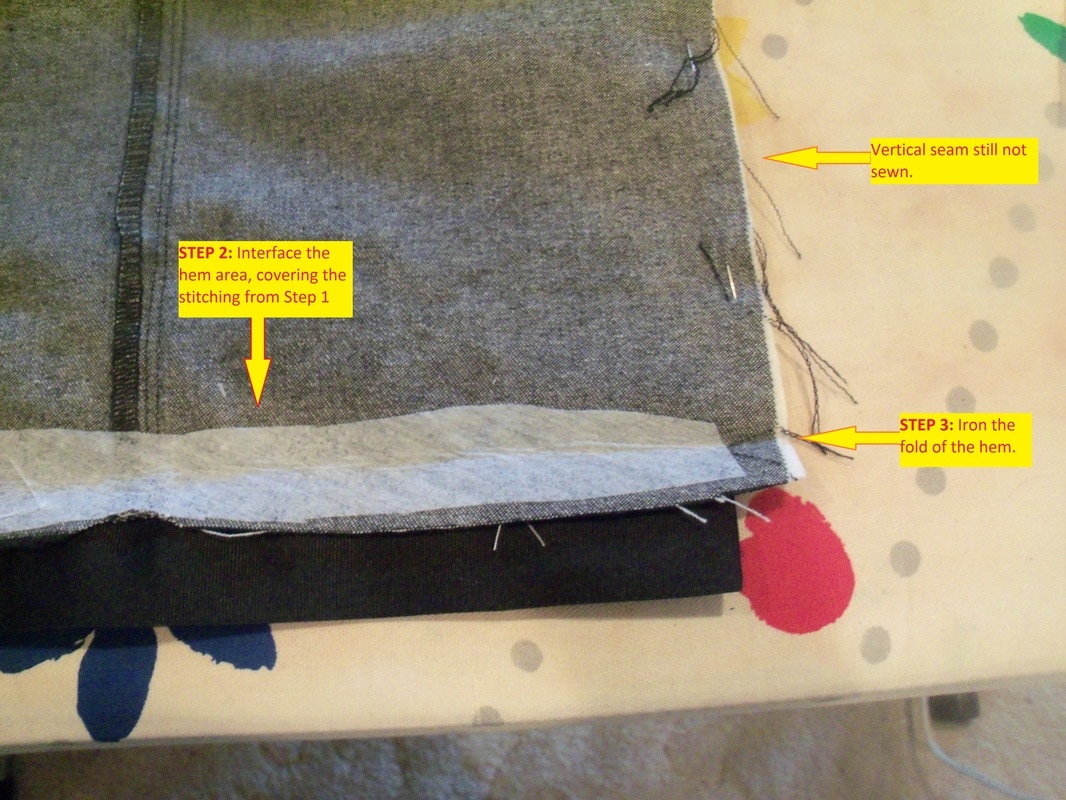 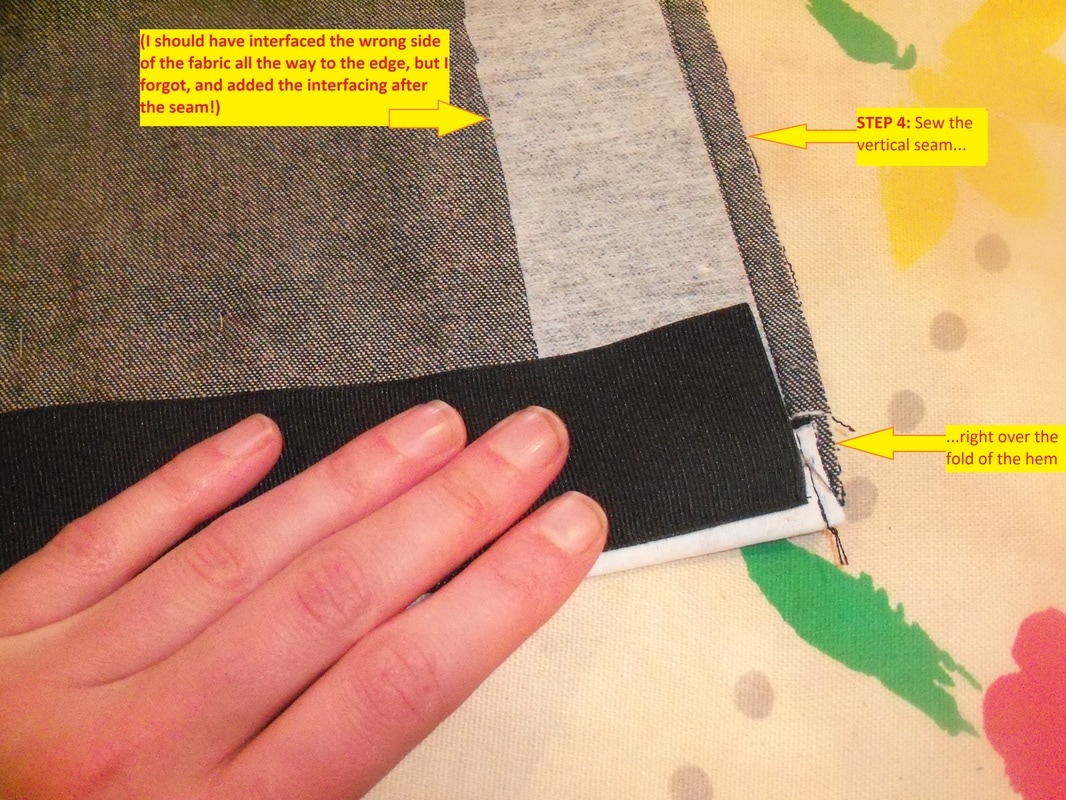 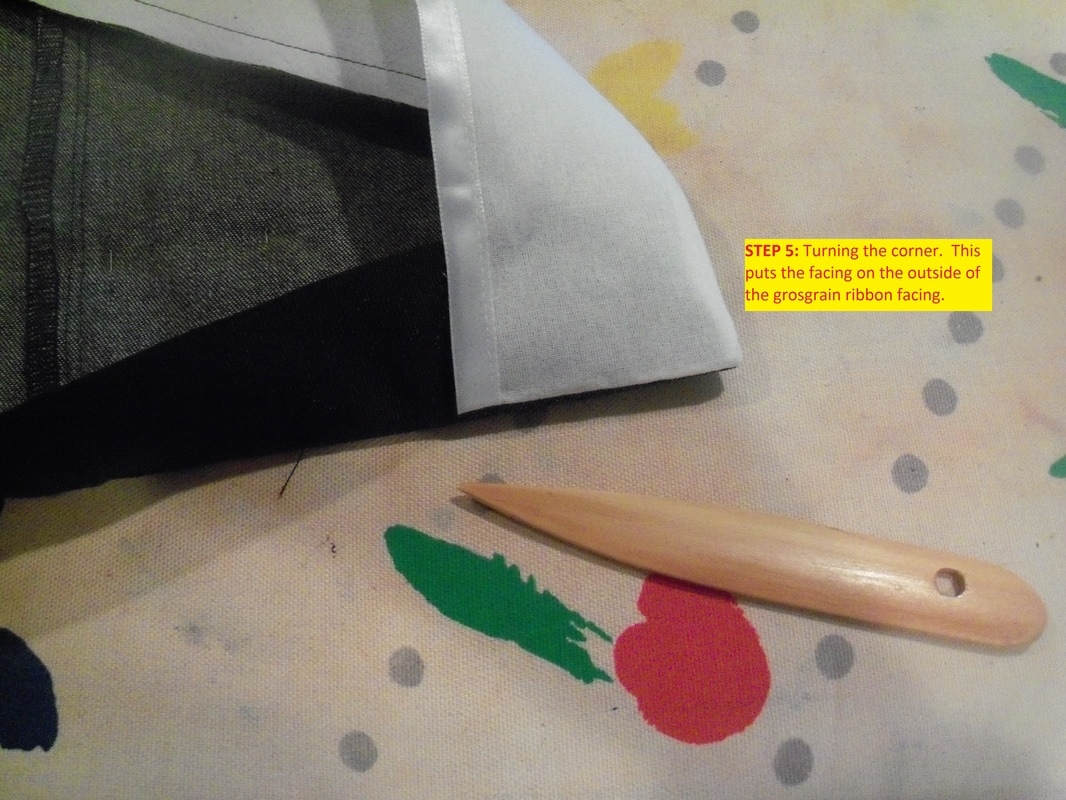 I made one mistake in this process... I forgot to think of the turn of the cloth: when the facing and the garment are laid one atop the other, they're the same length, but if I sew it that way, the facing might show from the outside of the garment. I want the facing to be shorter than the garment so that when I sew and turn, it doesn't show from the front of the garment. Here's the problem with the way I sewed things:
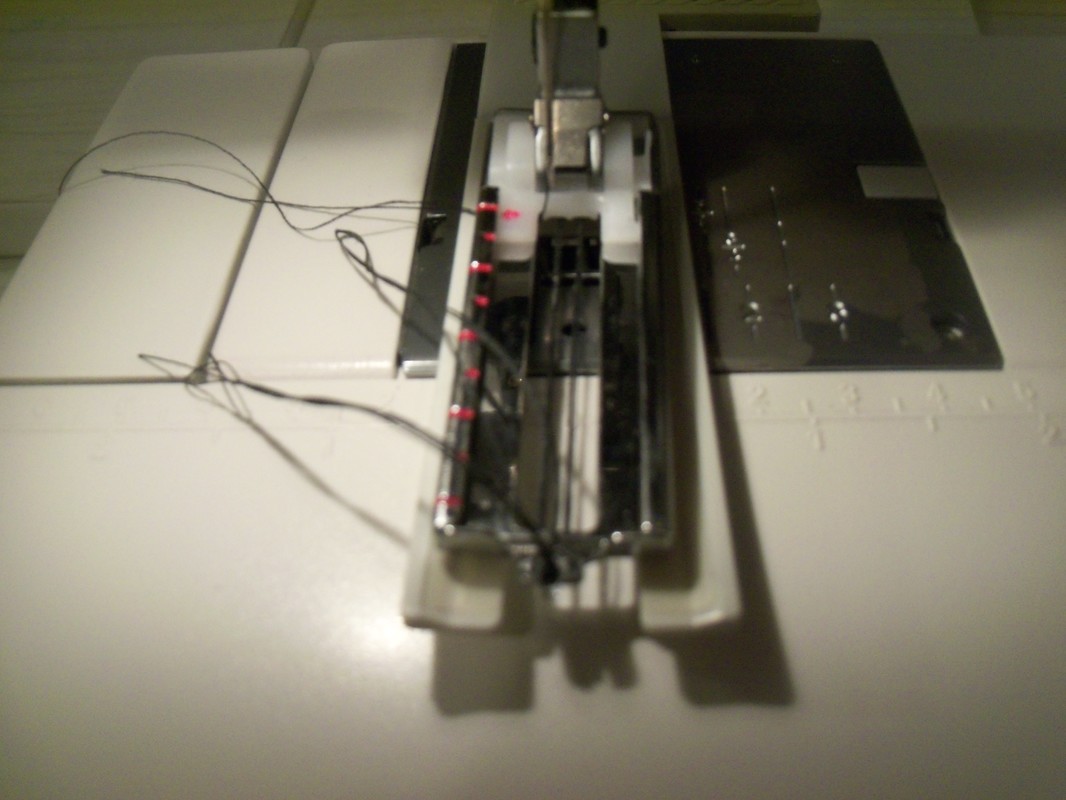
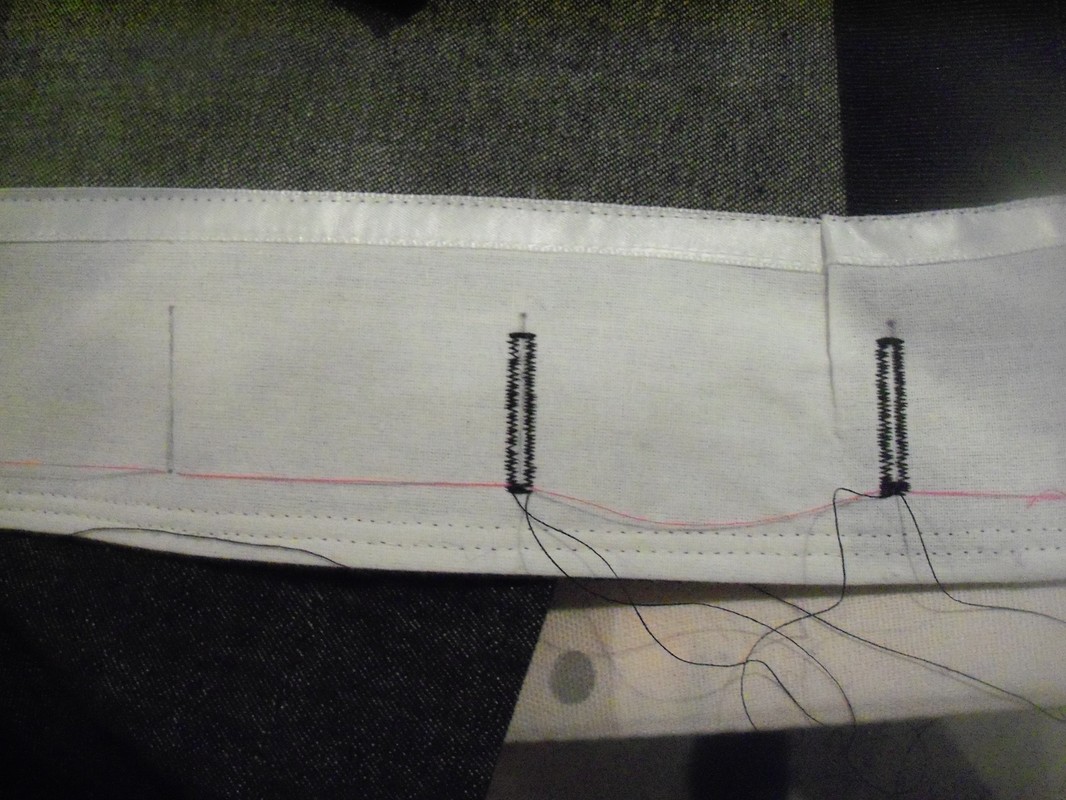
Next time I sew a facing like this, I'll pull it a teensy bit tight as I sew, so it's shorter than the garment. BUTTONHOLES... BANE OF MY WORKFLOW! Boudica, my warrior sewing machine, has several automatic buttonhole functions and specialized buttonhole feet. YouTube videos of other people using their machines show the machine flawlessly sewing buttonholes, which is very exciting. Alas, Boudicca has never done that for me. I don't know if it's because of operator error, or some hidden settings that need to be changed, but when I sew buttonholes, Boudicca starts out great, makes the right-hand side of the buttonhole perfectly, and then falters. On the return trip, she feeds the fabric slower, resulting in denser stitches on the left-hand side. Then at the end of the buttonhole, when she should do a back-stitch or two to tie off and be done, she instead just keeps sewing the same spot until there's a huge blob! The picture below, which is all the buttonhole sizes on my machine (I use it to test buttons and pick buttonhole sizes) shows the problem. 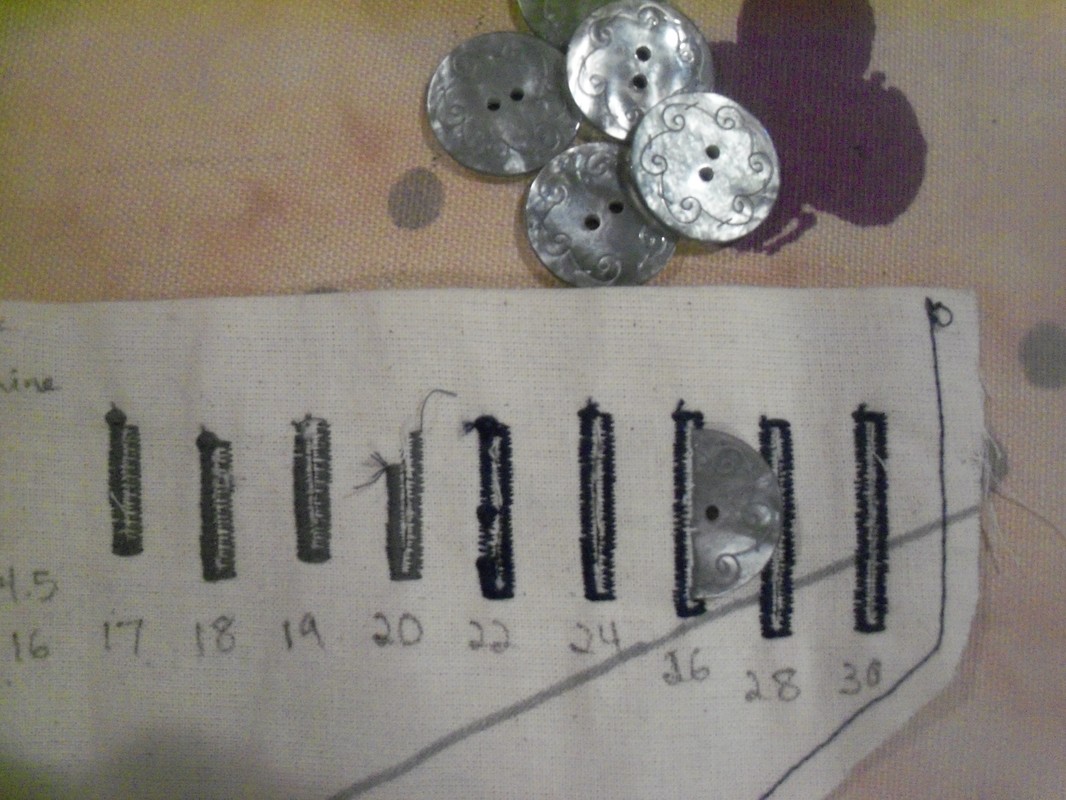 In other news, how lovely are those buttons? So pretty! I have read the manual and can't figure out how to fix the problem at the source, so I resort to Kentucky windage. I start the buttonhole normally, letting Boudicca pick her pace. When she reaches the end of the right side and starts heading back, I apply steady pulling pressure to the fabric, force-feeding the fabric. When she reaches the end and just wants to gnaw at the same spot endlessly, I decide for myself when to stop and remove the fabric. Then, because Boudica's computer thinks the buttonhole is half-finished and won't start a new one, I have to manually switch to a different stitch program and then back, to start a new buttonhole. Naturally this takes a lot of time and care, and I can't rush the process. Putting six buttonholes on the blazer took me two episodes of Father Brown. In the end, though, I was quite pleased with the result. Here are some progress pics:
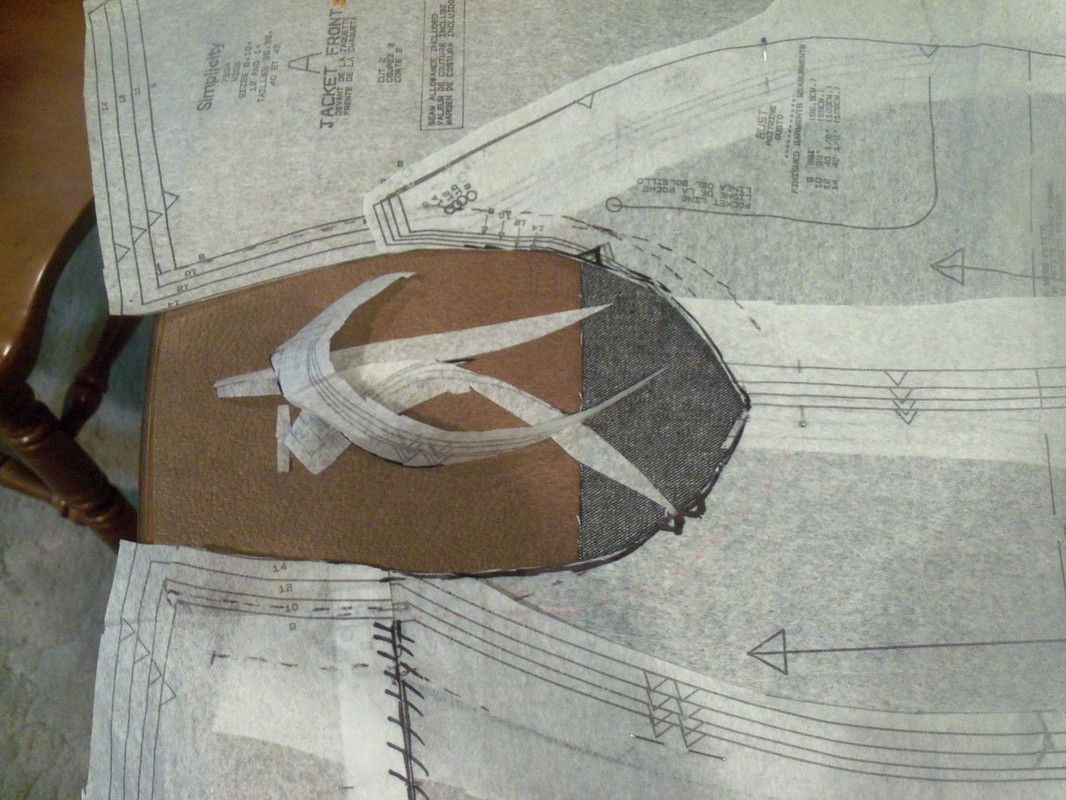
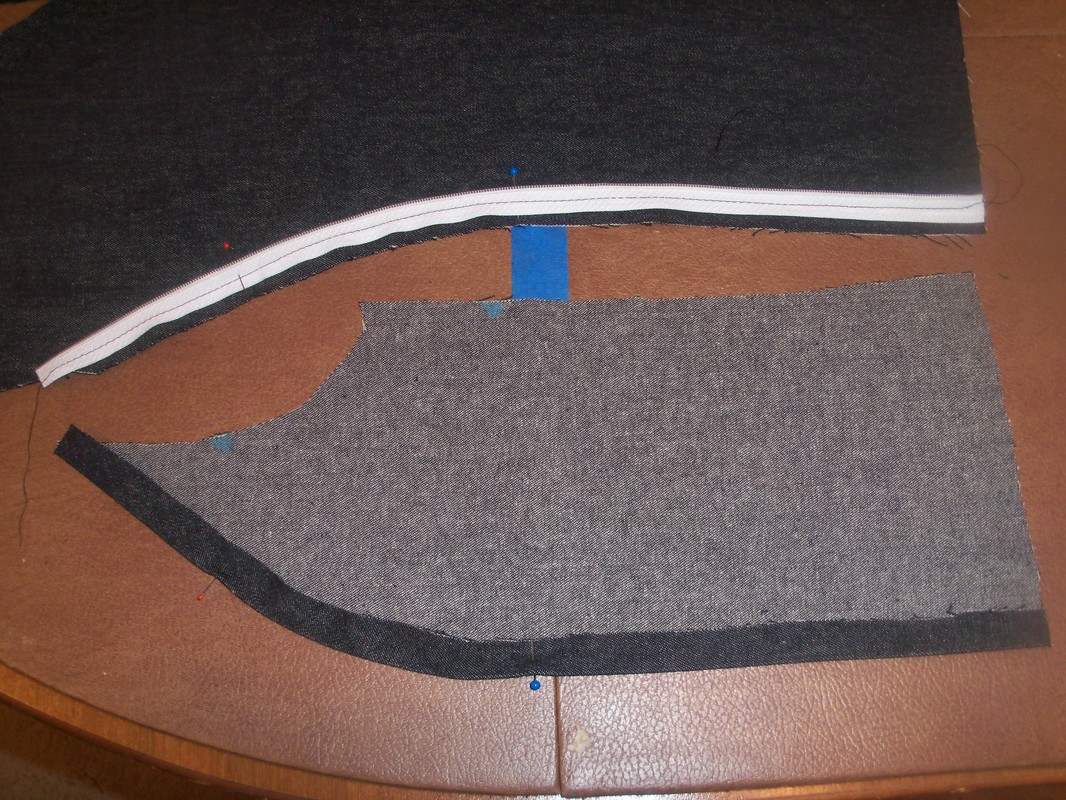
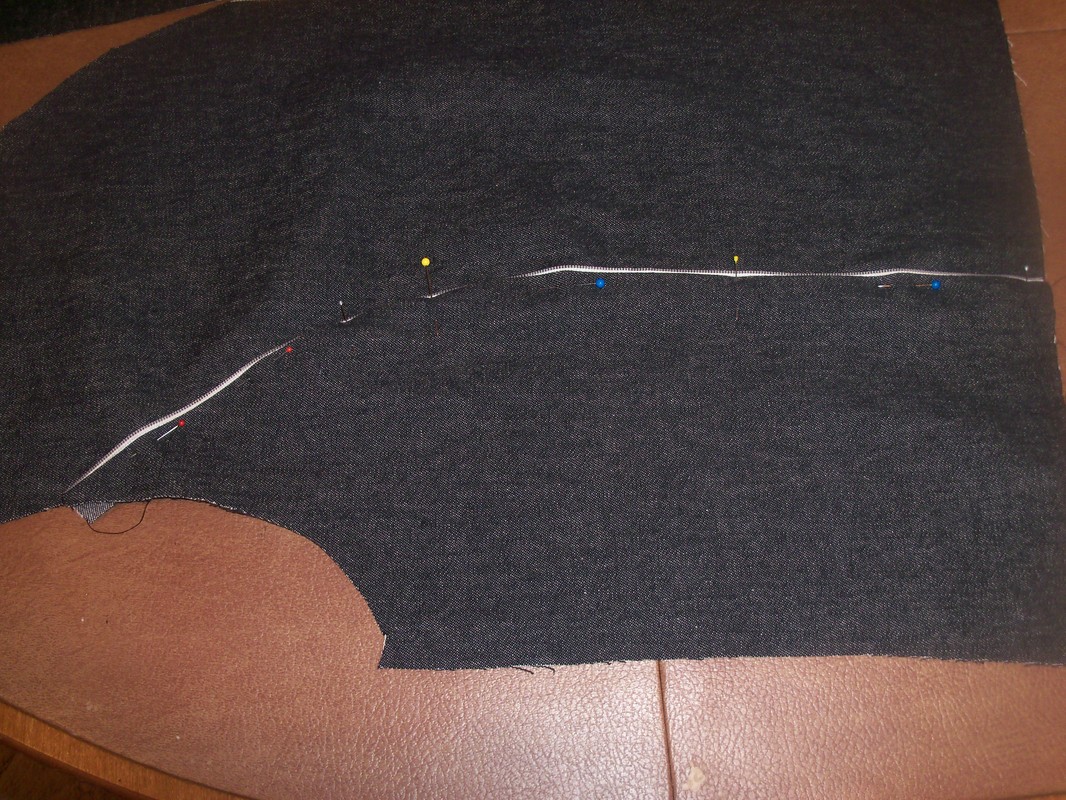
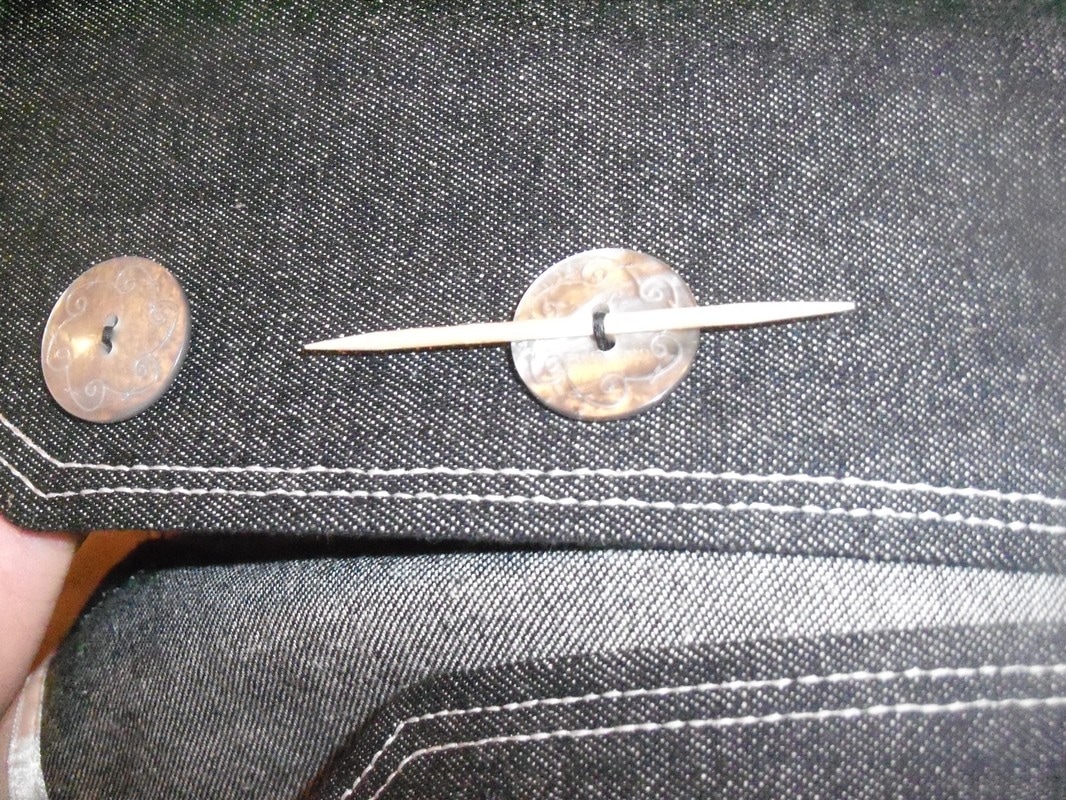
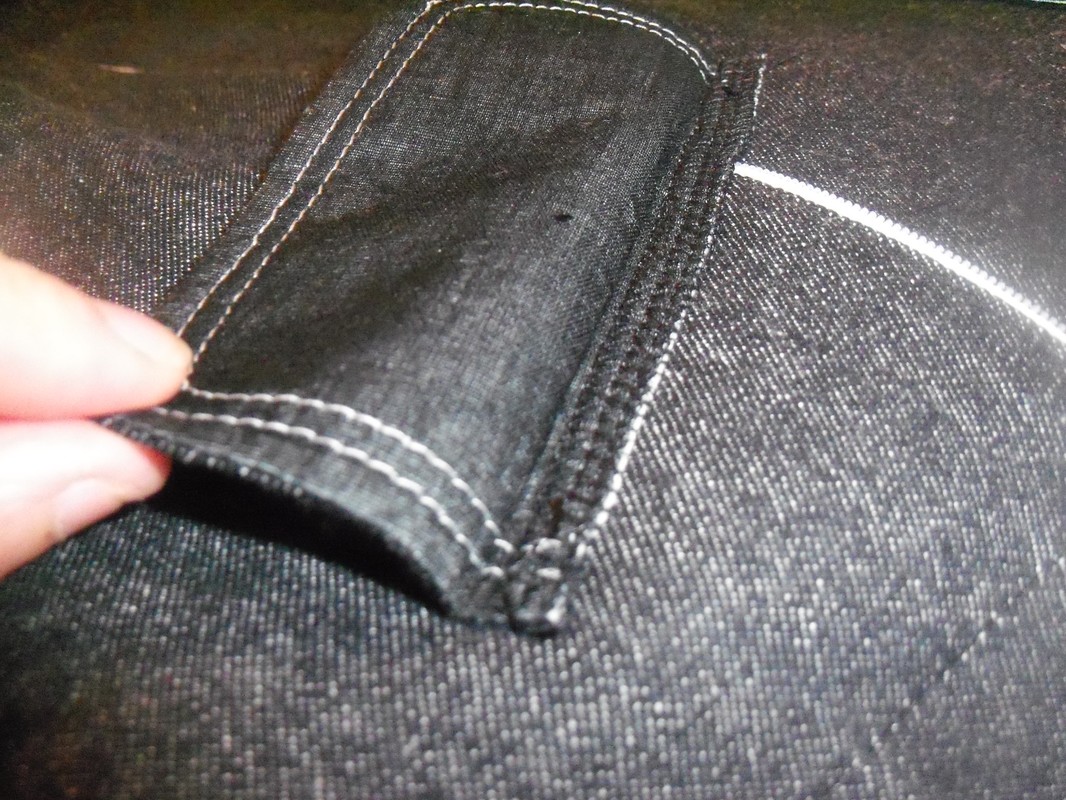
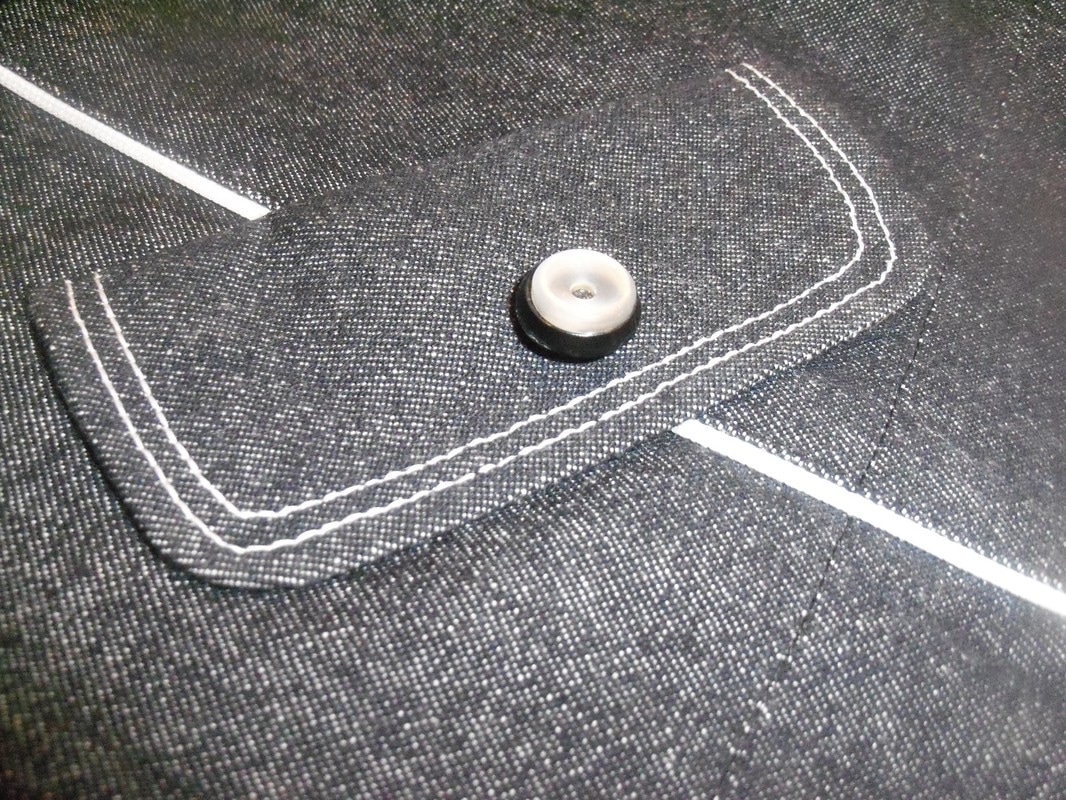
POCKET FLAPS I decided to make faux pockets, even though I think faux pockets are dumb, because I didn't want to cut pockets through the zipper piping. I feared such seams would be bulky and would wear badly over time. So I made pocket flaps and sewed them on for decoration. I put them at the hips and angled them to accentuate the hips and look stylish. The application was simple. First, I finished the raw edges at the top of the pocket flap and ironed them into a fold, making sure the two flaps were the same size and shape. Then I sewed the flaps onto the garment, putting my seams right at the folds, using some scrap selvedge of the denim as a stabilizing line on the inside of the garment. Finally, I tacked the flaps down with buttons.
In the picture of the left pocket, you can also see how I did the final hem seam in sections, so I wouldn't sew over the zipper piping. I think it looks nice with the unbroken line of white. FINISHED! 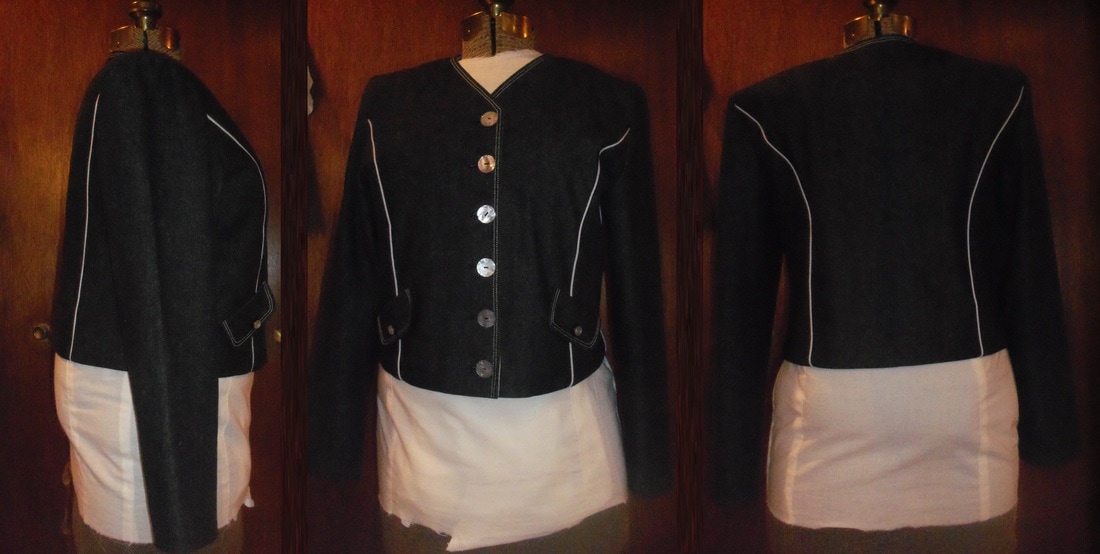 Looking dorky on shoulder-less Claudia, but I have hope that it'll look good on my sister!
1 Comment
The Sister
6/20/2017 08:27:40 am
I'm so crooked! *le sigh* It's a cute blazer; thank you! Leave a Reply. |
Karen Roy
Quilting, dressmaking, and history plied with the needle... Sites I EnjoyThe Quilt Index Categories
All
Archives
March 2024
|


 RSS Feed