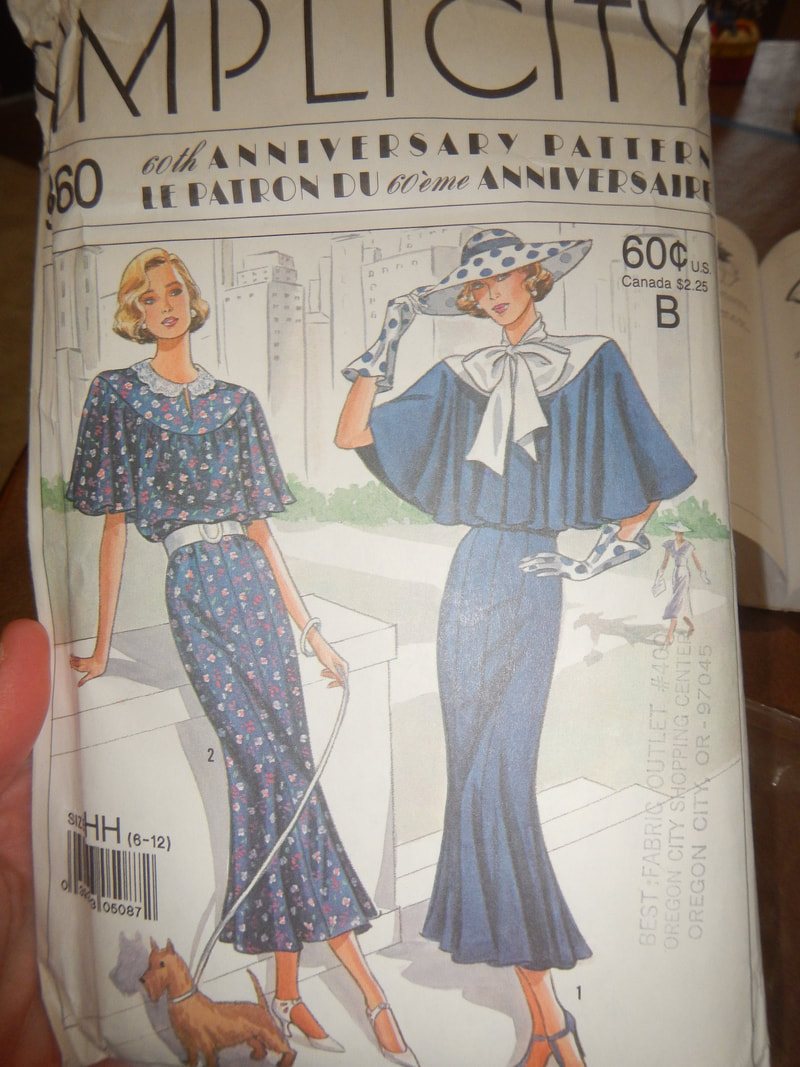
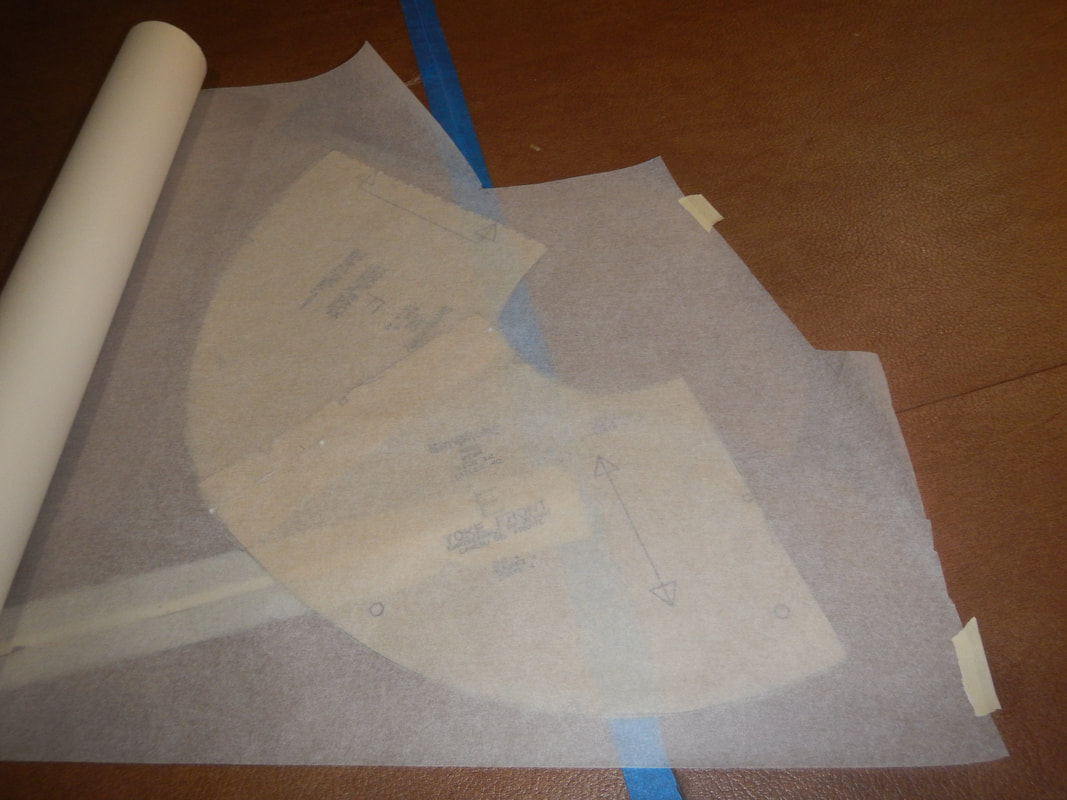
I highly recommend David Suchet's Being Poirot for insight into the making of the series. COSTUMING I enjoy all aspects of the show, but germane to this blog is the costuming! As Poirot rarely moves in poorer circles, the fashion we see is that of well-to-do and middle class during the Depression, not the folk hardest hit. The costuming for the series is remarkably good, I think. Consider this lady's top from the episode Four Clocks and a Blind Woman (left) and a dress advertised in the Sears catalog in 1937 (right): 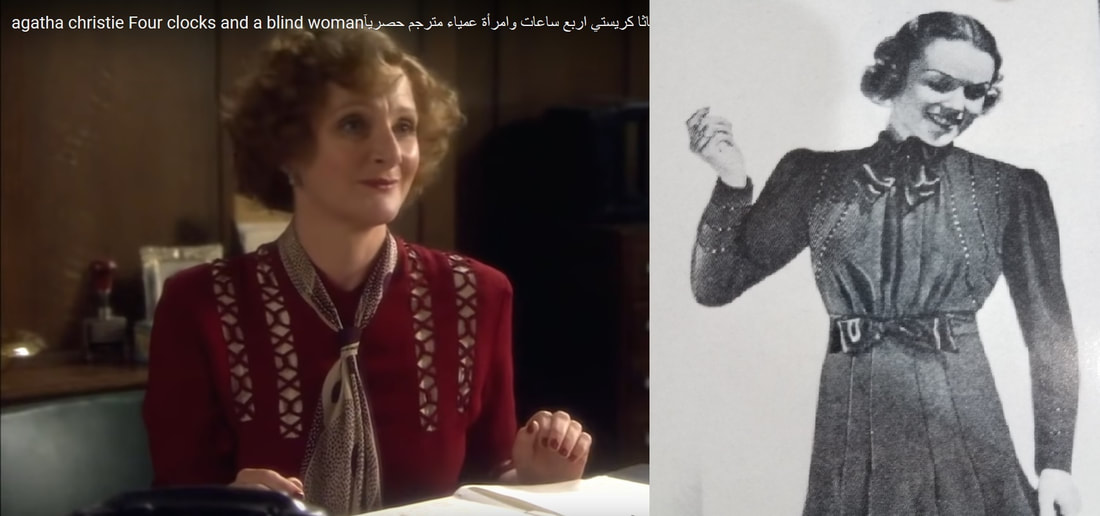 The dress from Sears was available in Forest Green, Ruby Wine, and Royal Blue: A NEW SWING TO YOUR SKIRT -- $4.98 The faggoting is the ladder or criss-cross of fabric filling cut-out holes in the main fabric of the bodice. I don't know what a "Nevagape placket" is, but I guess the dress closes with a side zipper (dresses from that era often do), and the placket is designed to cover the zipper. A Center Back zipper wouldn't need a placket. Anyway, since I have Poirot on the brain, when I pull out my patterns to pick my next project, I am drawn to a Simplicity pattern with Art Deco lettering across the top. PATTERN
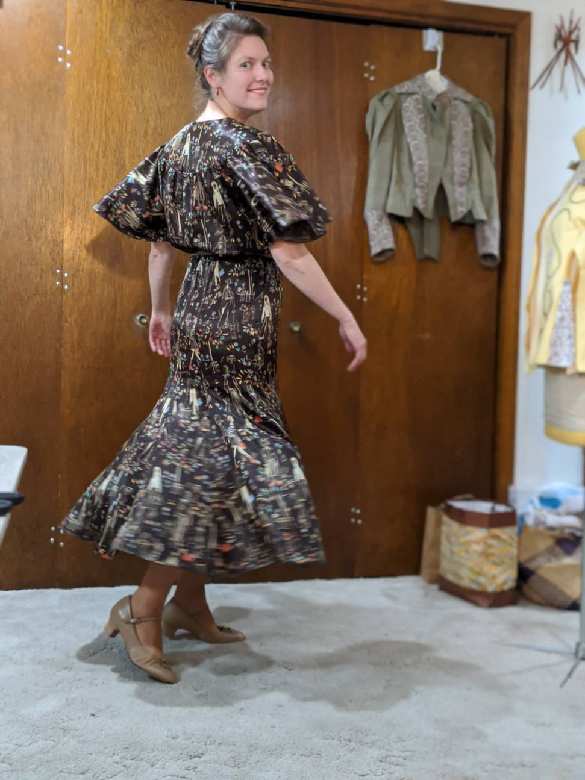
This 1928 pattern represents the latter part of the Roaring Twenties. Starting around 1927, hemlines were dropping lower, so this just-above-ankle length is on trend. The Wall Street Crash that started the Great Depression happened in the fall of 1929, at which point fashions became even more conservative. The trumpet-shaped flare of this skirt is a 20's feature, not a 30's one. See, this pattern is quite a fabric hog, because the flutter sleeves take up a lot of fabric, much of it on the bias, and the trumpet skirt makes it hard to get pattern pieces next to each other on the fabric. I decide to make View 2 (sleeves not capelet). Assuming a 45" wide fabric, view 2 requires 4 7/8 yards without nap, and 5 1/8 yards with nap. That takes me to the next section: the fabric I have to sew with! FABRIC For this project, I have a polyester/spandex charmeuse, the color of dark chocolate. I sew it with a microtex needle, since the regular needle was making pulls in the threads around each stitch.
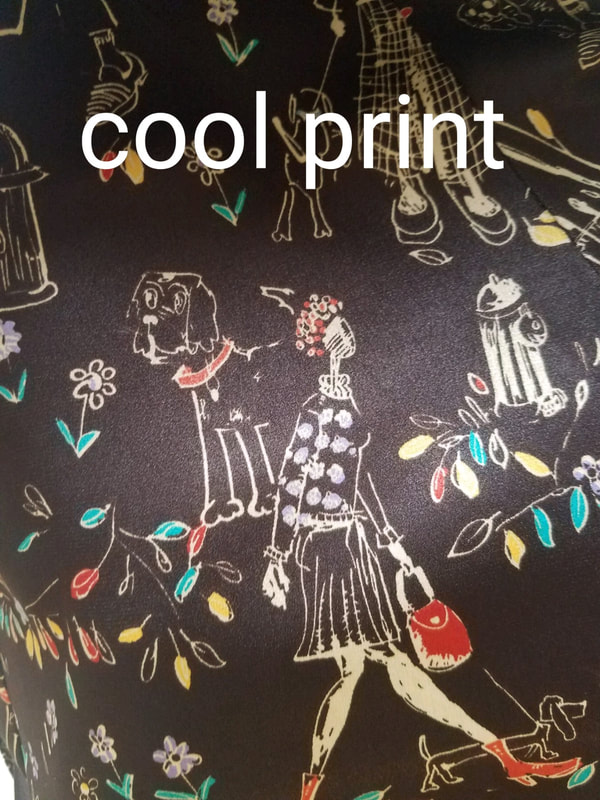
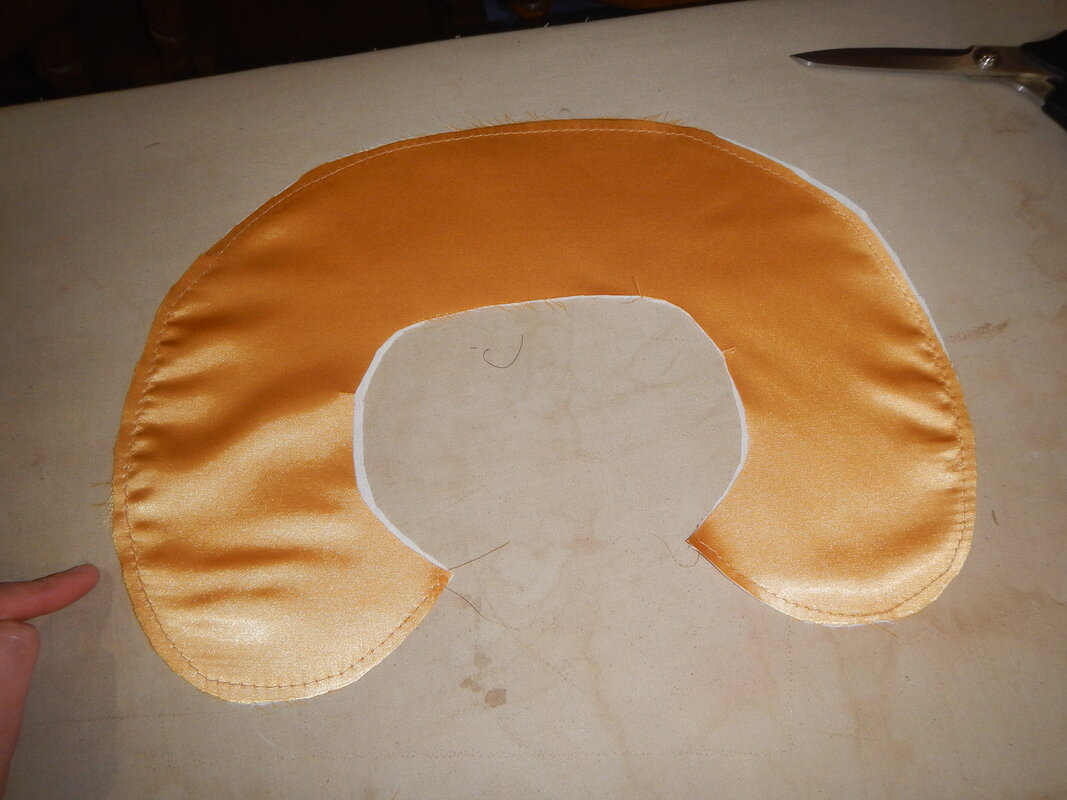
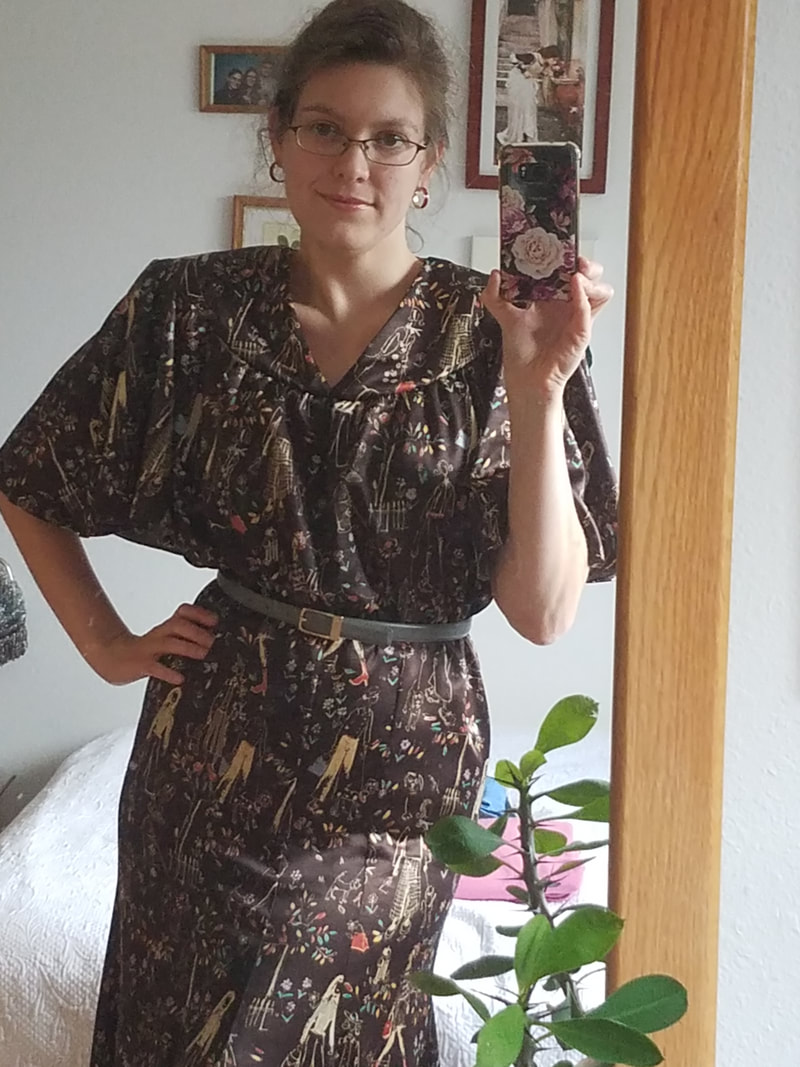
* Everyone I know who's trying to buy quarter-inch elastic is at a loss, as every fabric store is out of it, and internet retailers are back-ordering it. People are using it to make COVID19 face masks. (The mask pattern I made calls for ties, rather than elastic around the ears.) Anyway, I happen to have some, because I disassembled a fitted sheet ages back. I'm calling this project my "Quirky Quentin" dress because the quirky print reminds me of Quentin Blake's work. You mightn't think nomenclature very relevant for dressmaking, but it's relevant for blogging! When I pick memorable names, I find it so much easier to reference and link to previous posts. TO PAD, OR NOT TO PAD? The 1920's and 30's were all about slim hips. Nowadays, in the age of aesthetic insanity, people who want slim hips can diet, drink shitty "detox" teas, or get their fat sucked out by doctors. Our great-grandmothers were wiser: they just wore shoulder pads! So, should I have shoulder pads? I must decide early on, because the shape of the yoke is predicated on the shoulders being padded. If I don't want shoulder pads, I need to alter the yoke to fit my real shoulders. 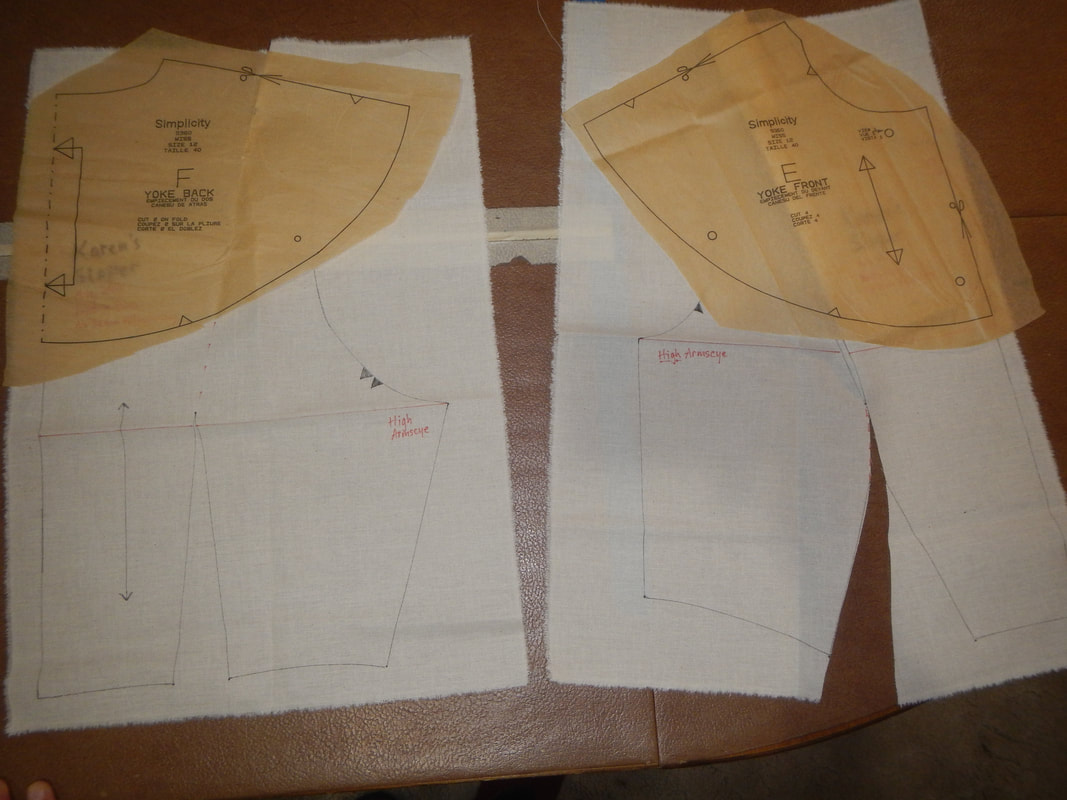 Comparing the pattern yoke pieces to my sloper. I send out a text poll to friends, and they are split between "Rock the football shoulders, guuuurrrrl!" and "Egad, eschew those loathsome bulky bits!". I decide to have the shoulder pads. If I'm making a 1928 dress, I shall commit to the silhouette. As it turns out, the required shoulder pads are not too big. Here's a picture of the back of the dress with shoulder pad on the (viewer's) left side, and no shoulder pad on the (viewer's) right. The fold of fabric on the right side is what happens when a pattern designed for shoulder pads is deprived of them. Sad yoke, all droopy. 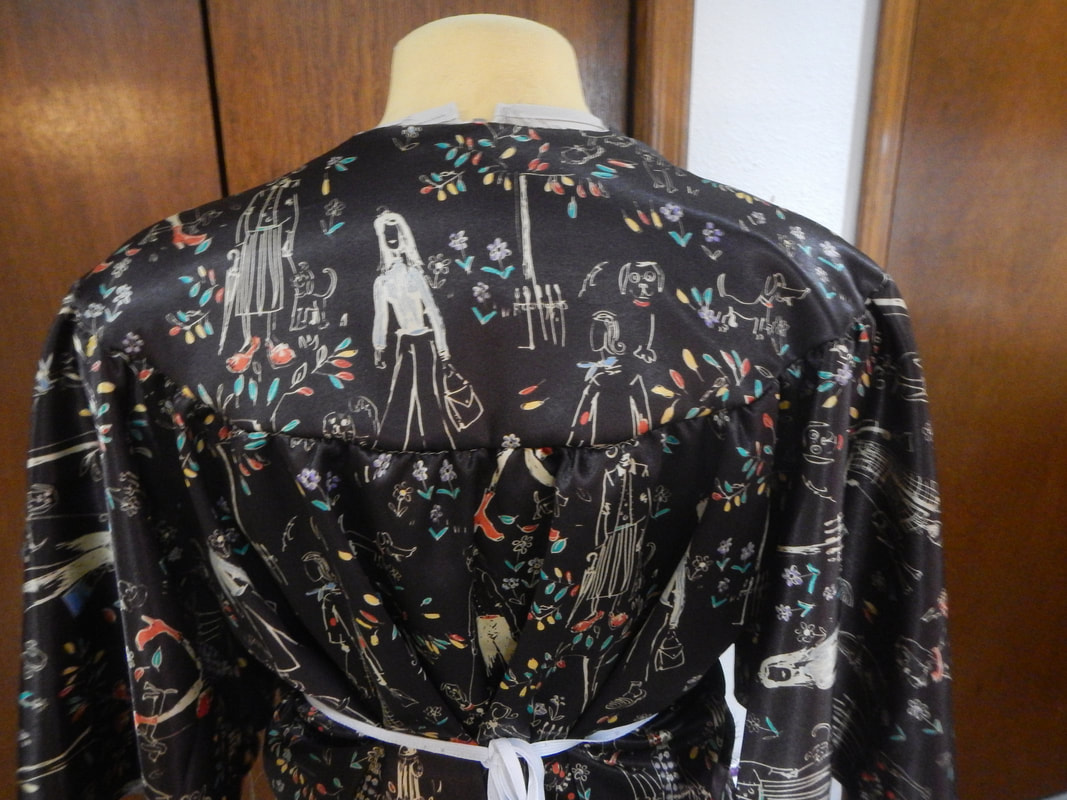 The pattern gives a piece for making the cloth cover, but I have to make my own pads. To do so, I use several layers of quilt batting: I stack, cut, stagger, shape, and trim them until they smoothly fill the gap between my shoulders and the dress' shoulders. Then, curving them over my fingers, I use big stitches to hold the curved shape. Finally, I cover them with the fabric and serge the edges. 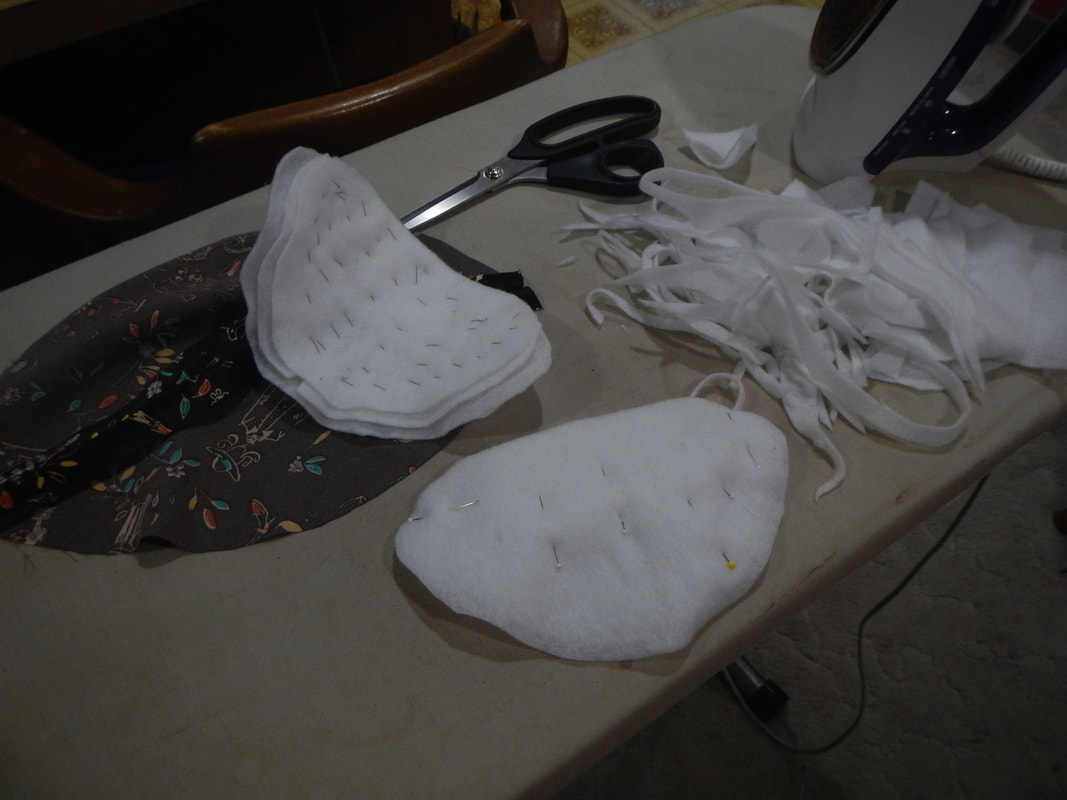 (I don't know what I'm doing...!) I attach them to the dress' yoke before putting the facing in, so that they'll be sandwiched between yoke and facing. I tack the shoulder pads down at the shoulder seam, then again on each side of the yoke, so there's no shifting around. 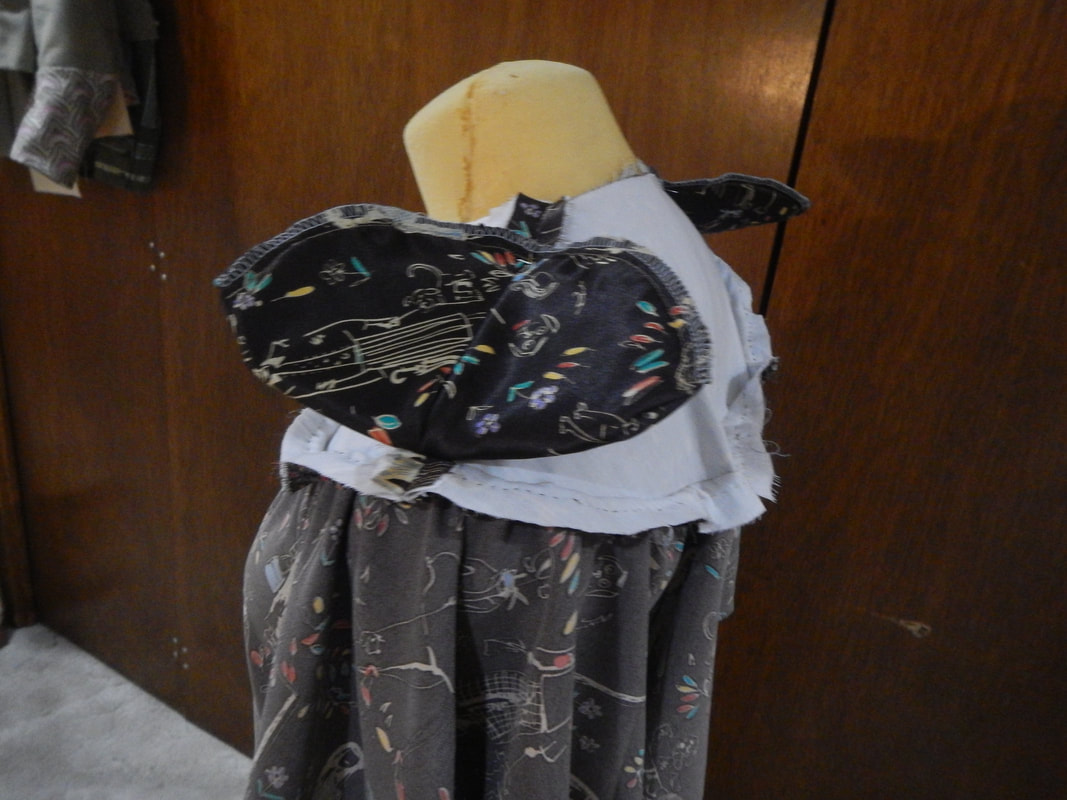 Soon I can FLY!!! PETER PAN COLLAR The pattern has two options for the neck: View 1 has a tie at the neck and View 2 has a store bought lace Peter Pan collar. Poly/Spandex is basically plastic/rubber, so there's no way I want to stifle myself with a high neckline! That leaves the Peter Pan collar. I draft one and sew it up in the golden charmeuse.
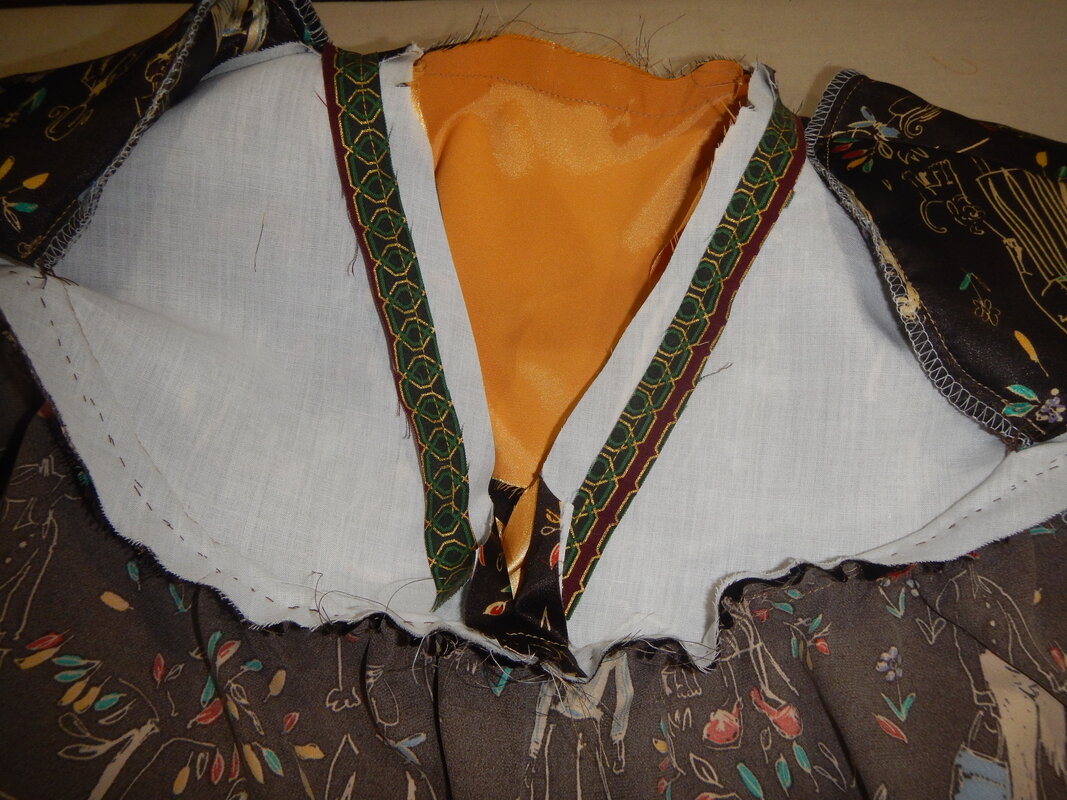
Again, a quick poll by text message: which side should I display, the shiny side or the matte side? The results are split down the middle. Irresolute, I fiddle with both options, and like neither. The color is too bold, maybe. Or maybe the proportions are wrong. Eventually, I decide to do no collar at all. I can just make a V neck. Would you believe this is not the first, nor the second, but the third time I've drafted and made a Peter Pan collar for something, only to decide I don't like the look? Maybe I just don't like Peter Pan collars? V-NECK AND YOKE FACING
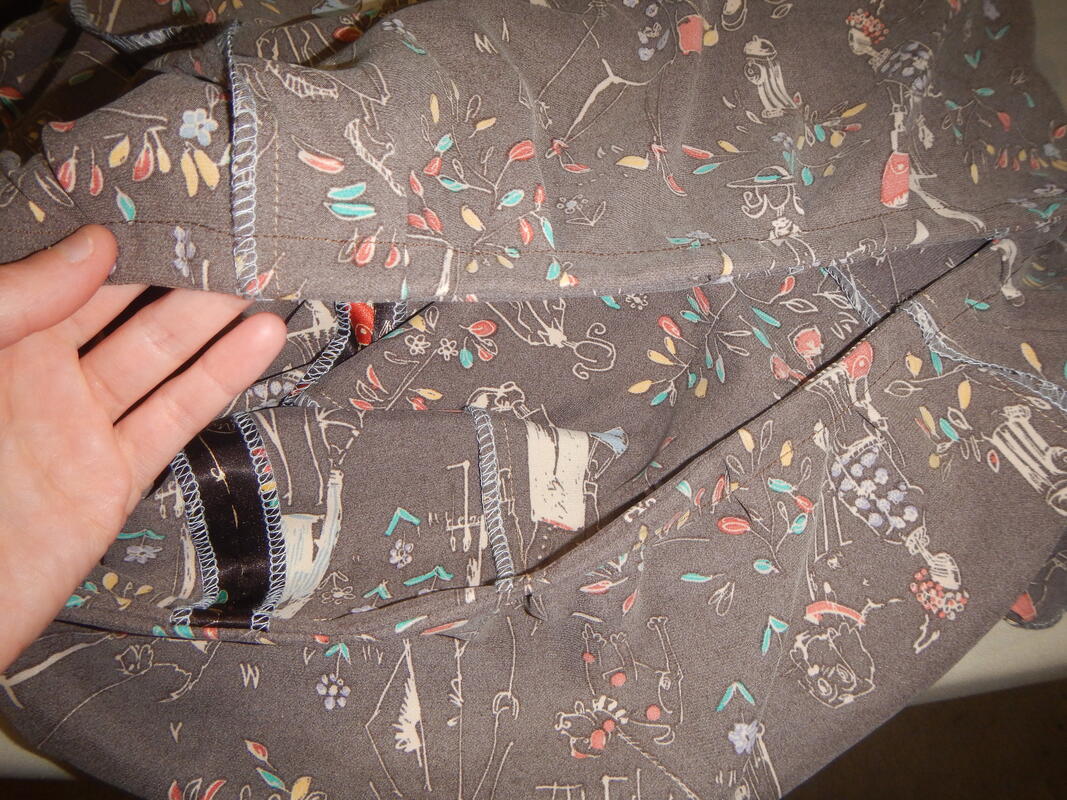
Putting the shoulder pads in between yoke and facing necessitates one change in construction: the instructions tell me to sew the facing to the neck and then hand-finish the bottom edge by turning all raw edges up and in, and slip-stitching; but because the shoulder pads are in the way at the lower seam, I sew the facing to the neck, then sew and serge the lower edges together, seam allowances out instead of tucked in. WAISTBAND I do a French seam for the waistband, inserting the quarter-inch elastic in between the two lines of stitching.
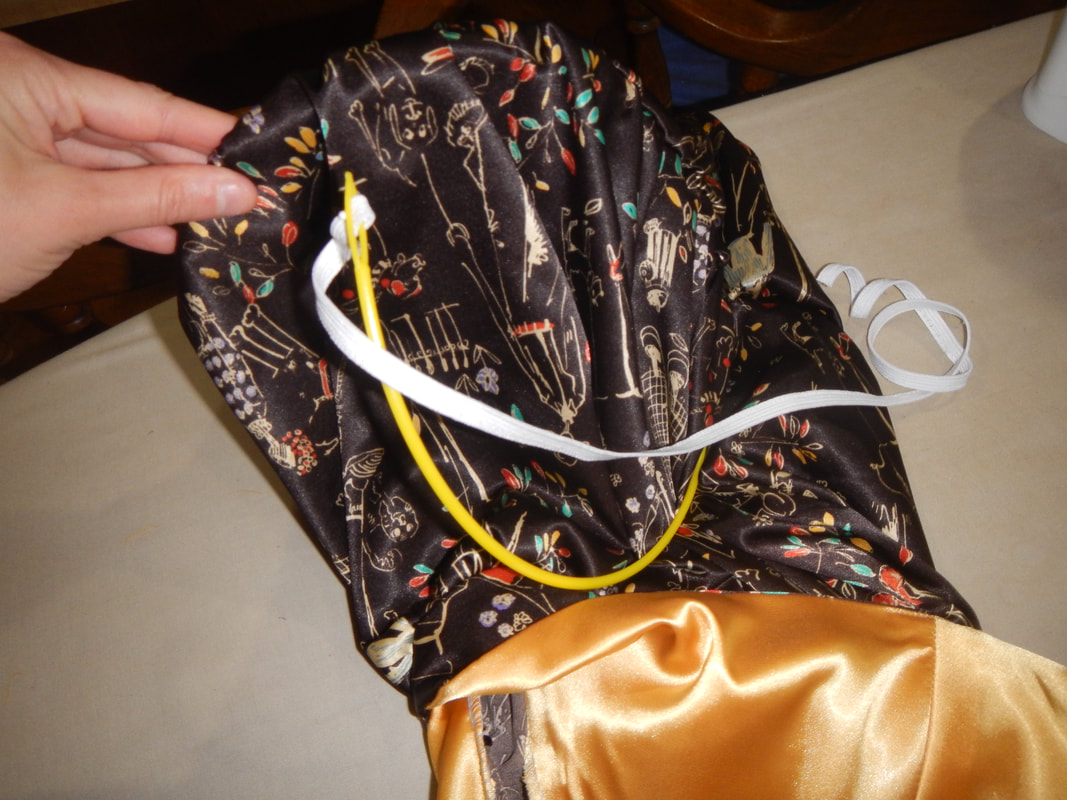 using a bodkin to thread the elastic through the casing The last step is the hem, which I do narrowly because it's a bunch of big curves with lots of bias. The bigger the hem turnover on a curve, the more rippling you'll get. So, to avoid ripples, I serge the raw edges, turn them up once, and sew them down with two parallel lines of stitching. The resulting hem is narrow and flat. SHOWING OFF
3 Comments
The Sister
6/1/2020 11:32:27 am
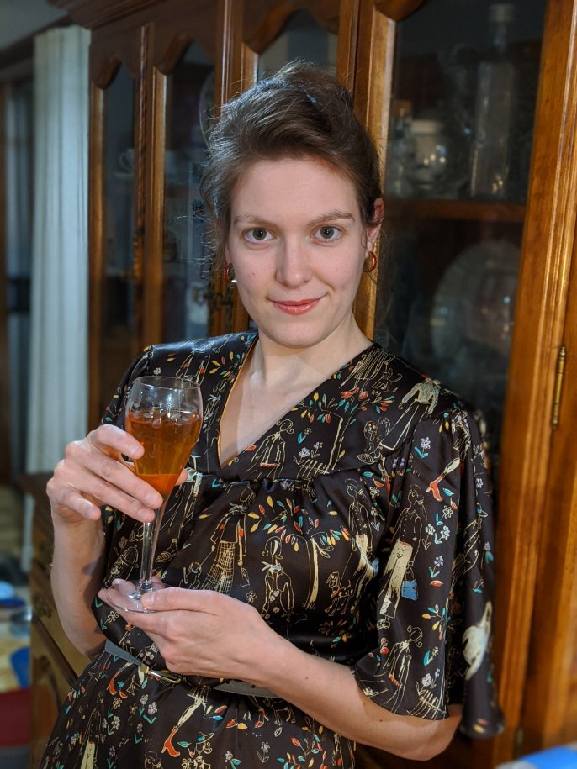
I like the gray belt! It's a nice touch that pulls the gold from the pattern, and I'm glad you didn't go for the collar! I think it's probably safe to say you don't like Peter Pan collars. :-) Good job, my sister. <3
Taryn Fletcher
4/17/2021 07:19:25 am
Thank you for this! I was very happy to see the v-neck variation since when studying this pattern I found most photos and illustrations from the period had a v-neckline. I'm relatively new to sewing and am not sure I understand the on-grain tape... is it just the fabric that you cut off lets say a cotton fabric piece, the selvage? I.e. can I use the finished edge piece I usually cut off cotton fabric?
Hi Taryn! Leave a Reply. |
Karen Roy
Quilting, dressmaking, and history plied with the needle... Sites I EnjoyThe Quilt Index Categories
All
Archives
March 2024
|


 RSS Feed