|
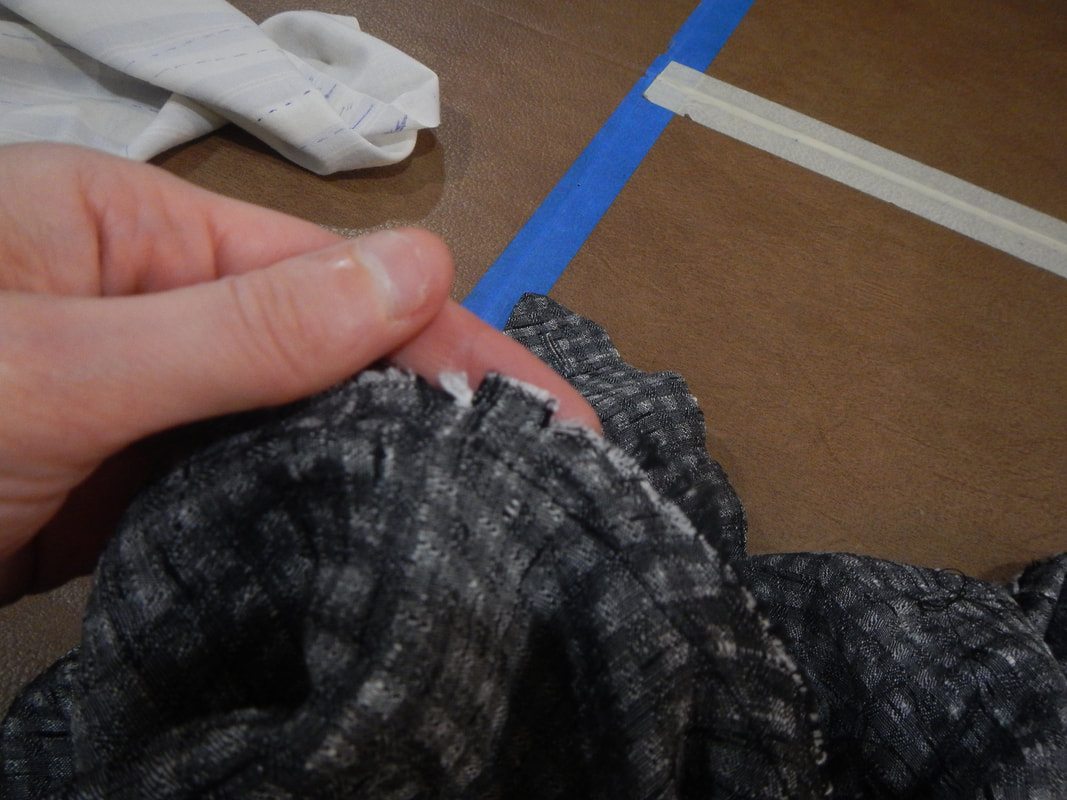
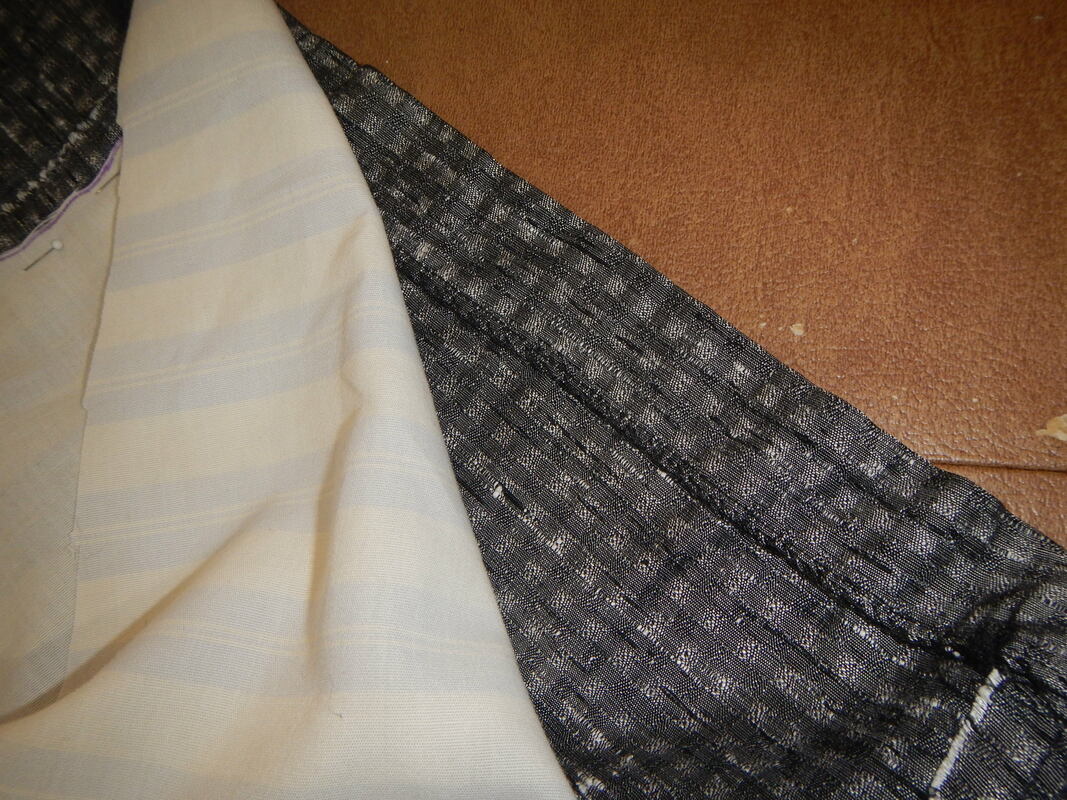
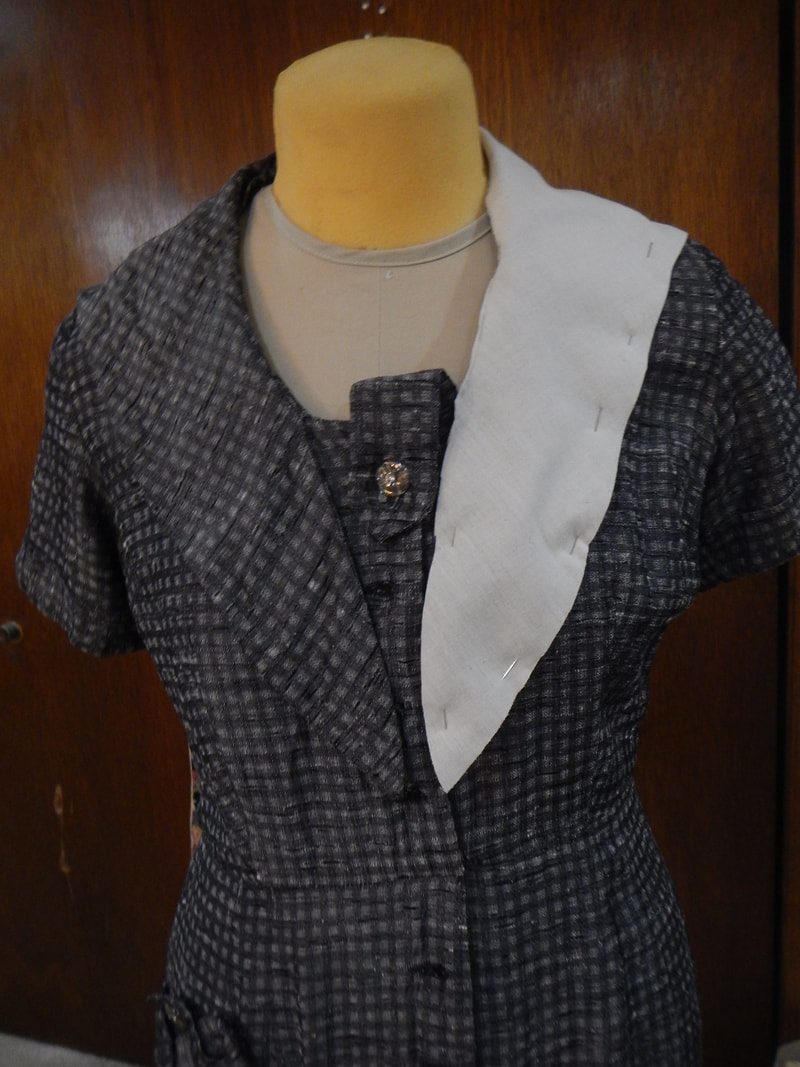
I'm calling this project my "Red Fox Vintage" dress because I bought the original dress at Red Fox Vintage in Woodstock, Portland. I tried it on because I was intrigued by the collar, which has two long lapels that criss-cross in front and are held by a buttoned-down tab. I found it fit perfectly, and I loved the silhouette (late forties, early fifties is my guess), but not the color. Still, I brought it home, because it fit my back in a way that I have a lot of trouble getting patterns to fit my back. (I'm high-waisted with a slightly forward shoulder). Let us change the tense for convenience. THE ORIGINAL Once at home, I look at it more closely. The interior construction says that the dress is likely a home-made project. There is no seam treatment (serging or binding or the like), but there are occasional little snips in the seams that indicated matching lines (where triangles are usually drawn on home-sewing patterns). The hem is uneven, suggesting either a good hem for an uneven body, or a bad hem done by an amateur; I lean toward the first interpretation.
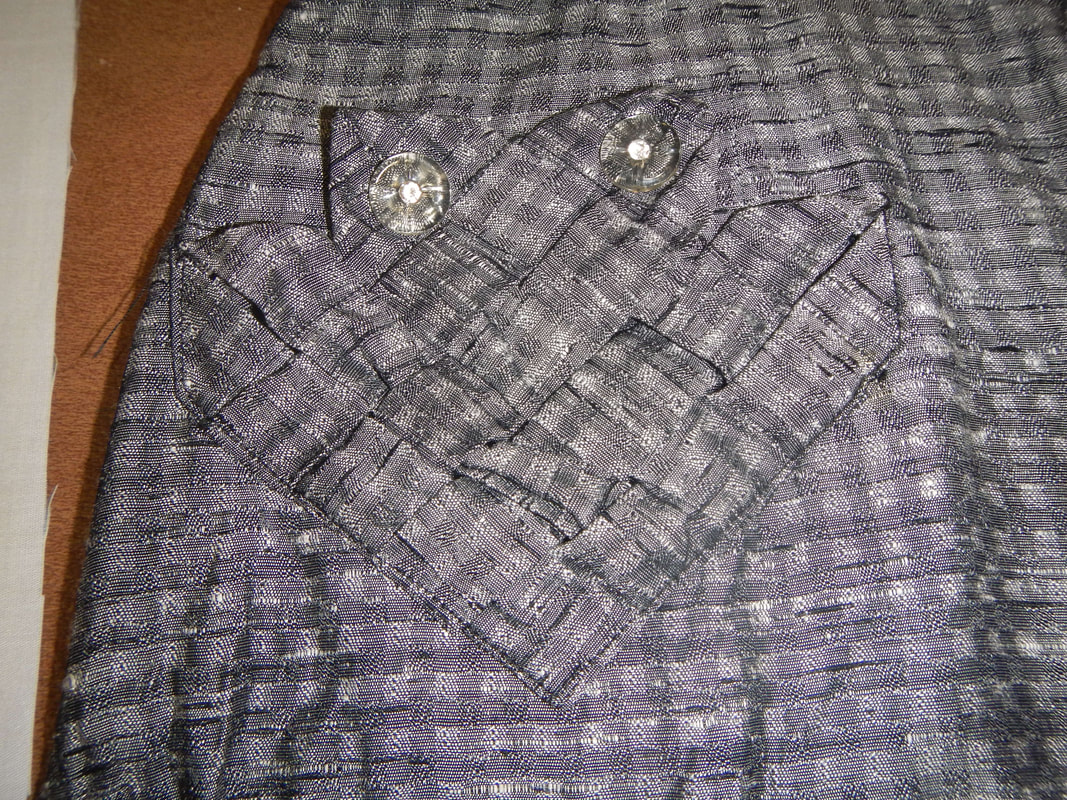
Then there's the hip pocket in the skirt, which is almost unbearably twee:
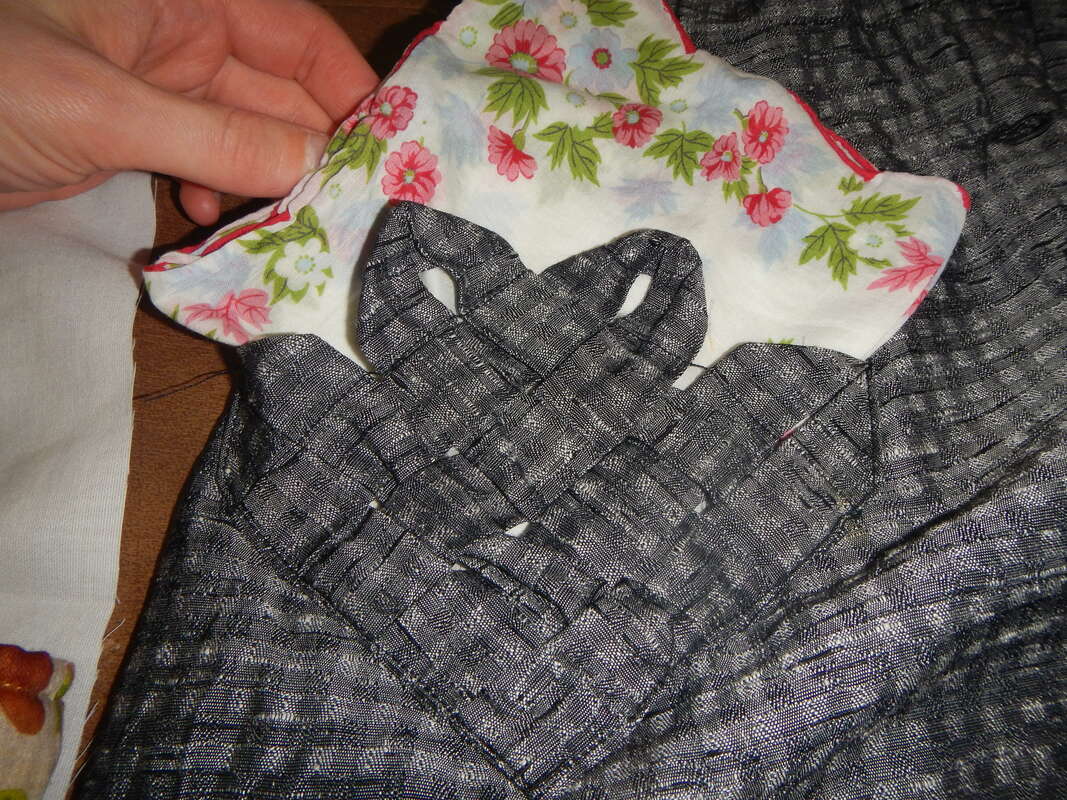
That's right, it's made of woven strips of the skirt fabric, fashioned into a basket shape, and closed with buttons that match the top button on the collar. It's not usable for anything small, because of the holes in the weave. It's just cute. I hate it. While we're on the topic of things I dislike... I find the charcoal rayon objectionable on me, but not bad as a fabric. However, the clear plastic buttons neither match not contrast. I don't know why the maker chose them! RUBBING OFF - THE EASY PIECES I could take the dress apart and use its pieces as a pattern for the new dress, but sentimentality stops me... I figure the dress has been around for some time; it would be a shame to ruin it now. But that means I have to get the pattern the hard way: rubbing it off. Rubbing off a pattern is a way of taking a pattern from an existing garment without damaging the original. It's useful when the original is still in good shape, or an antique, or not yours. I've rubbed off patterns before, like the Aloha shirt I made for my brother.
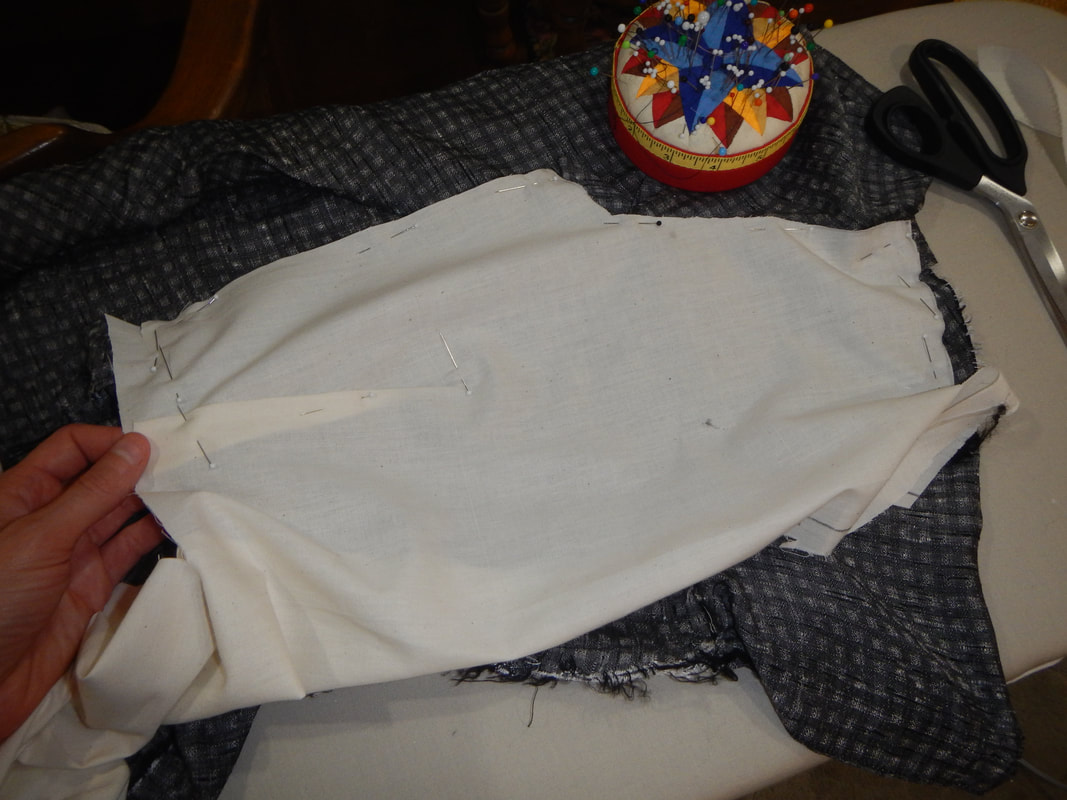
When I have a good copy of a piece, I label it well and set it aside: 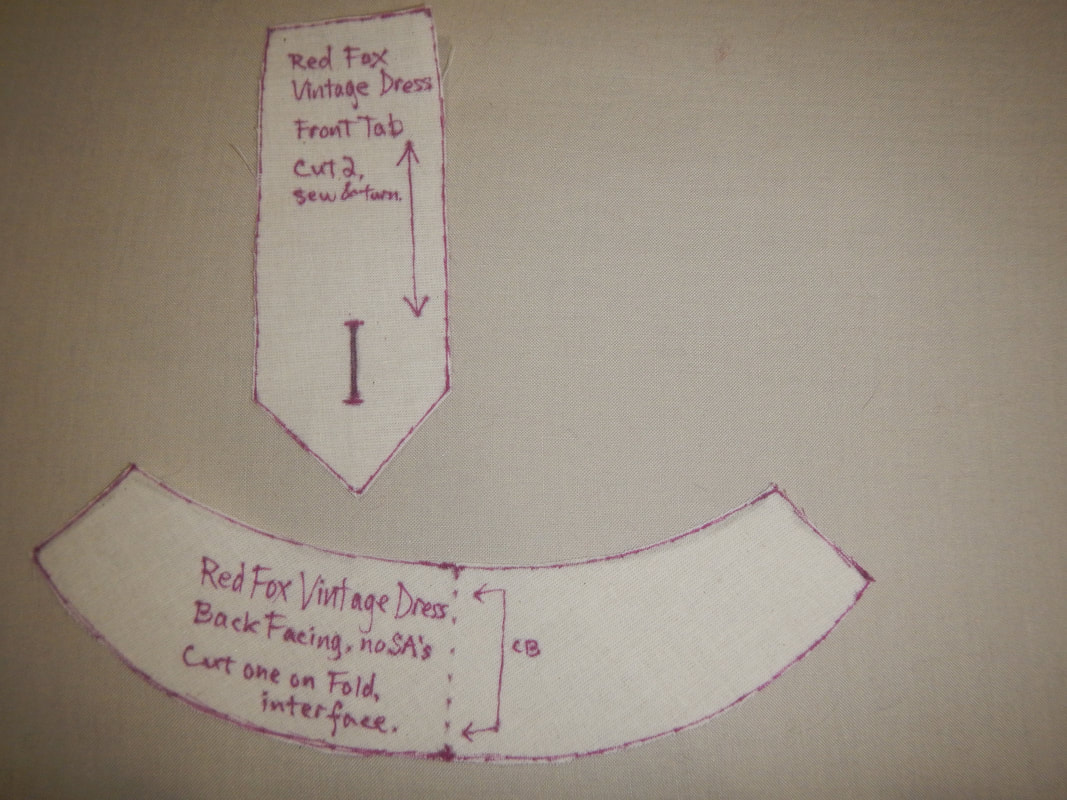 The back is another easy piece:
Labeling seam intersections makes it all go together easier, later. Here's the shoulder seam and the sleeve; see how I mark the place where they intersect?
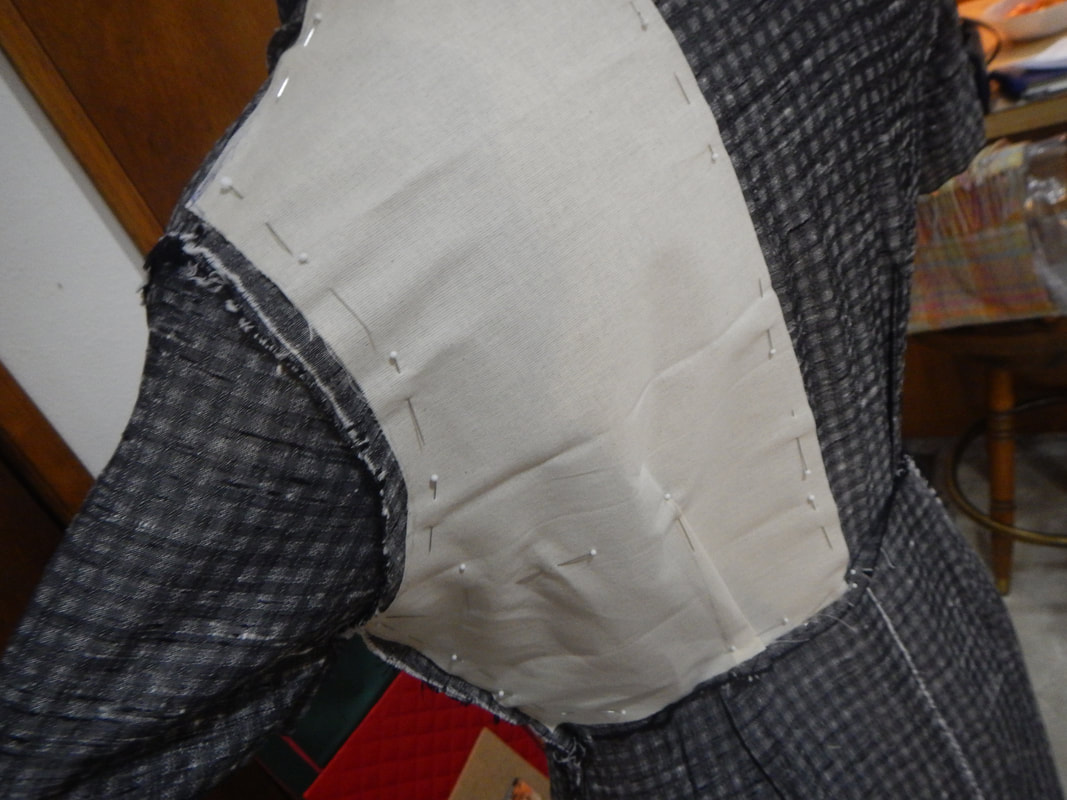
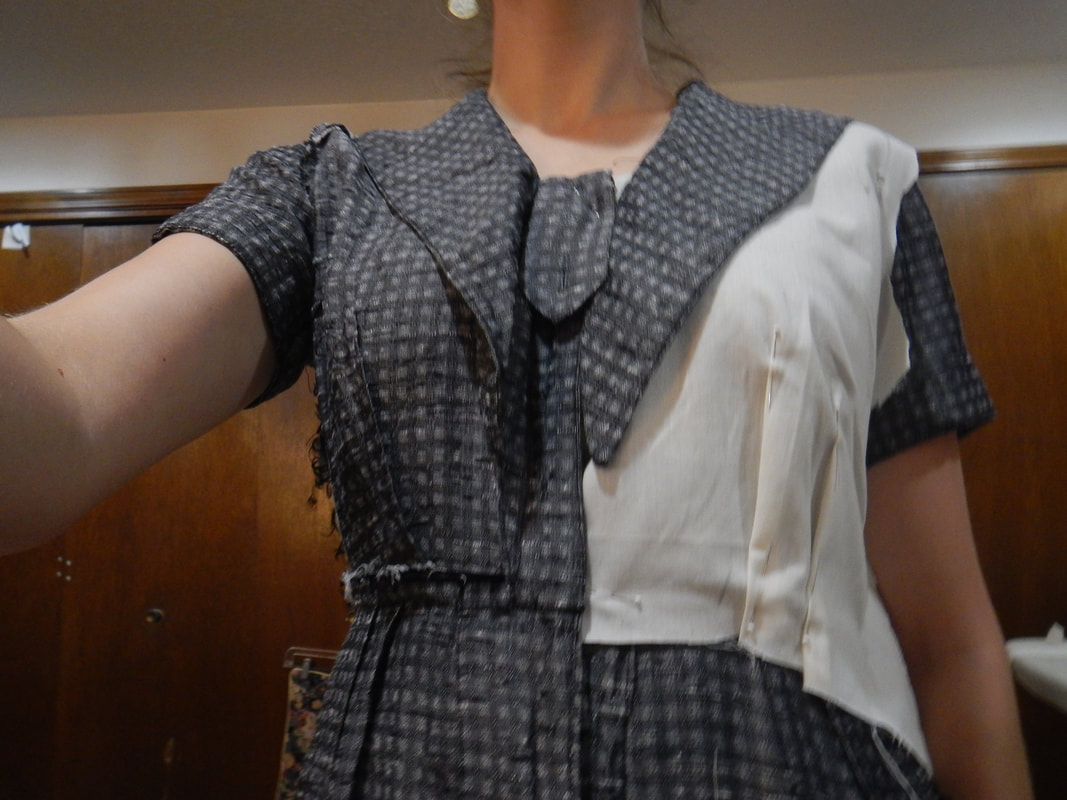
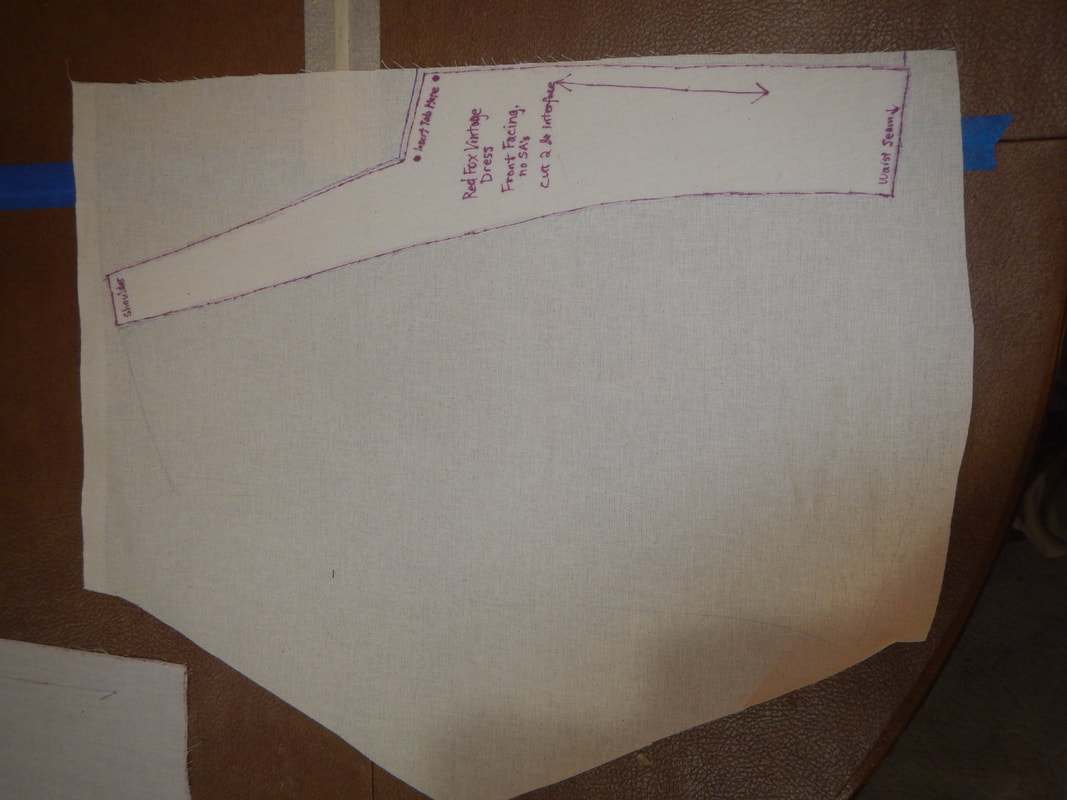
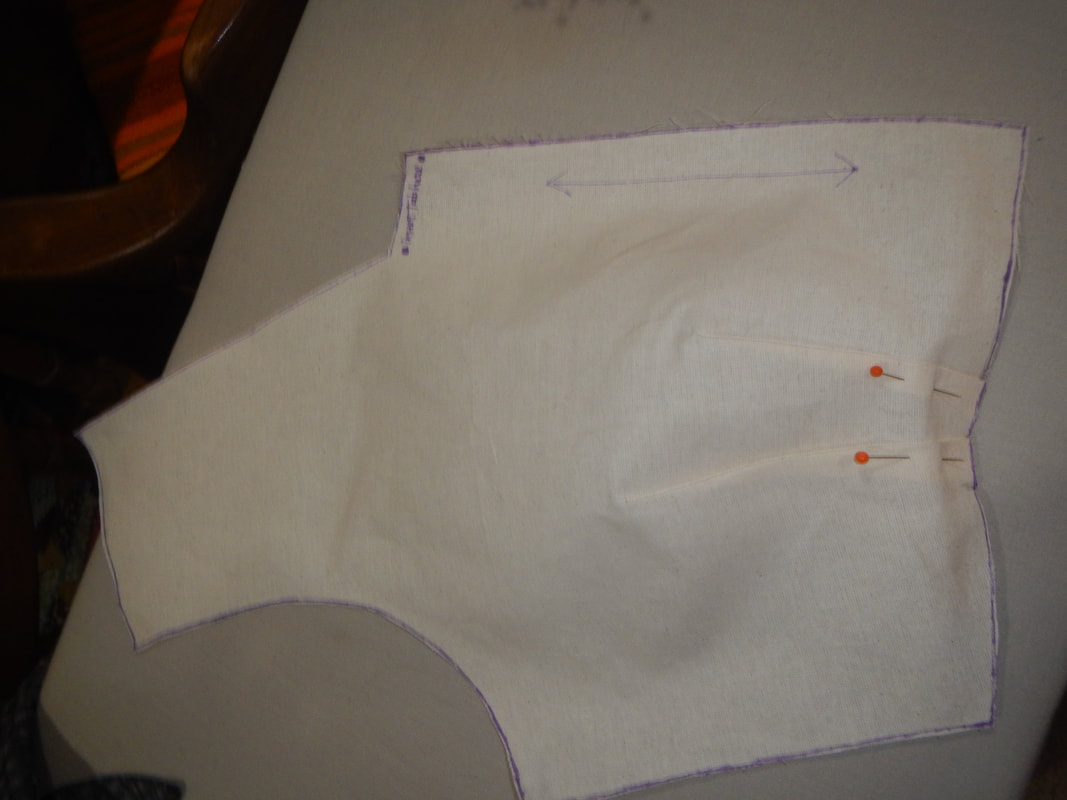
THE FRONT BODICE - ALTER AS I GO The front bodice is more of a process. It is on the grain down the Center Front, and has a vertical dart under the bust and a side-bus dart under the armscye. Right off, I know I will be rotating the side-bust dart down. See, I have opinions about darts... I think that vertical darts are easier to work with on striped or plaid fabric, because vertical darts can be lined up with a vertical stripe. Side-bust darts are rarely perfectly horizontal, and usually take out a section on the bias, which easily looks messy in a plaid or a stripe. Moreover, side-bust darts add a horizontal (or diagonal but more horizontal than vertical) line where it does me no good. Better to have a vertical line under the bust to slim the waist and make me look taller. That at least serves me! Then, of course, when I look at the skirt of this dress I see two waistline darts on each side. Why shouldn't I have two underbust darts as well, and line them up to match the waistline darts? That would look fetching! The first time I rub off the bodice I think I do quite well: I pin the CF on the grain; pin the underbust dart closest to the CF; smooth the muslin over the shoulder and trace it; smooth the muslin straight down over the side-bust dart (ignoring it), and to the side corner; and take up the excess material into a second underbust dart next to the first one, making the seamlines match the darts in the skirt.
 cutting at the seamline (add seam allowance later!) Then I trace it out neatly, put my facing on top of it, and see a problem: 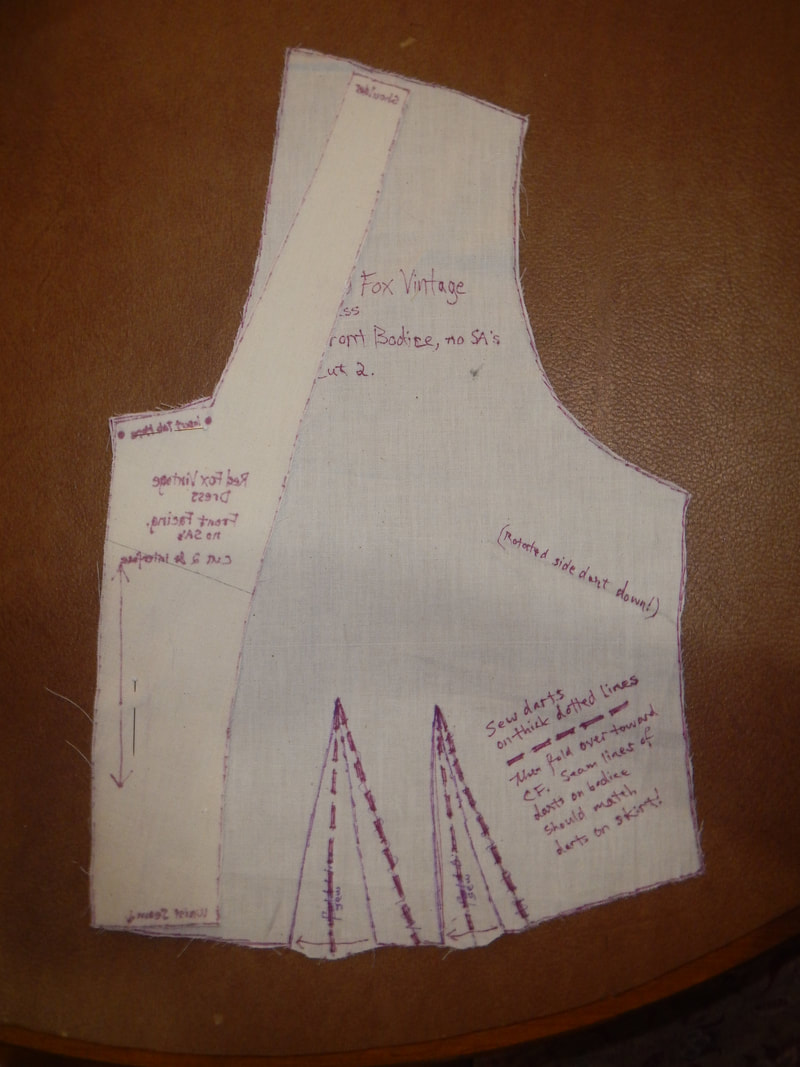 "One of these things is not like the other!" So which one should I trust? I decide to trust my tracing of the facing, because the original facing was interfaced and is therefore more stable than the rest of the dress, which drapes and skews easily. So I start anew, this time beginning my rub-off with the facing as my baseline, and then pinning the rest of the bodice as before.
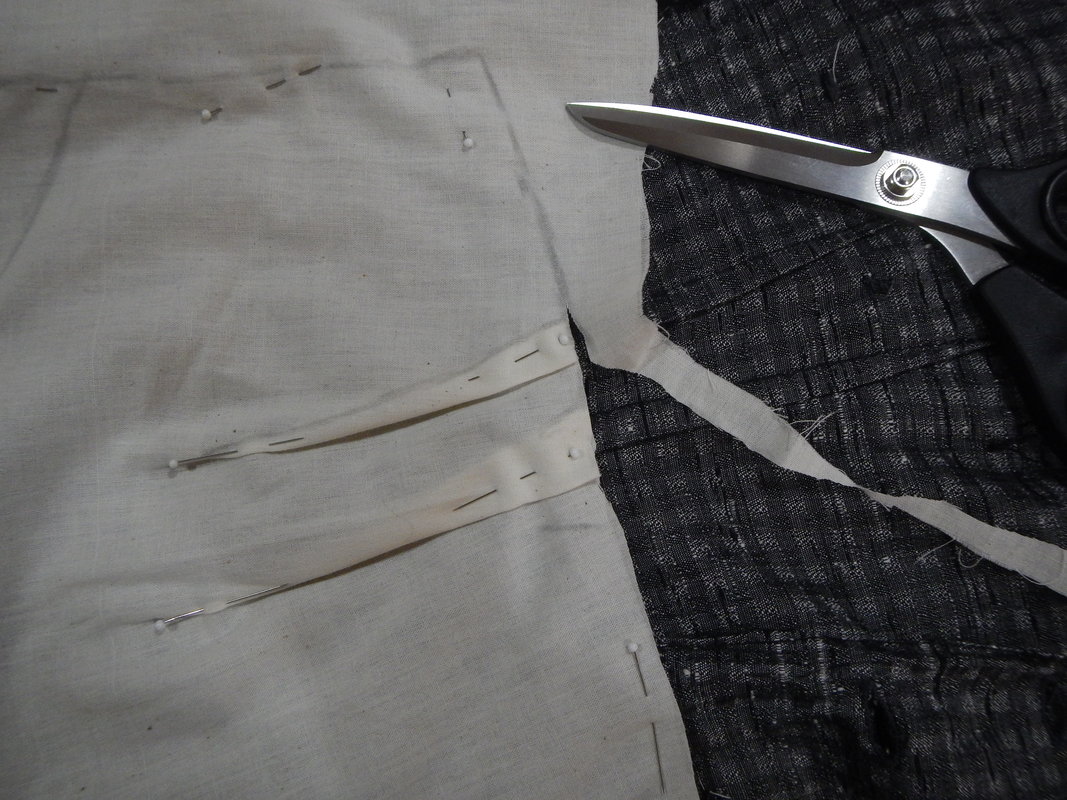
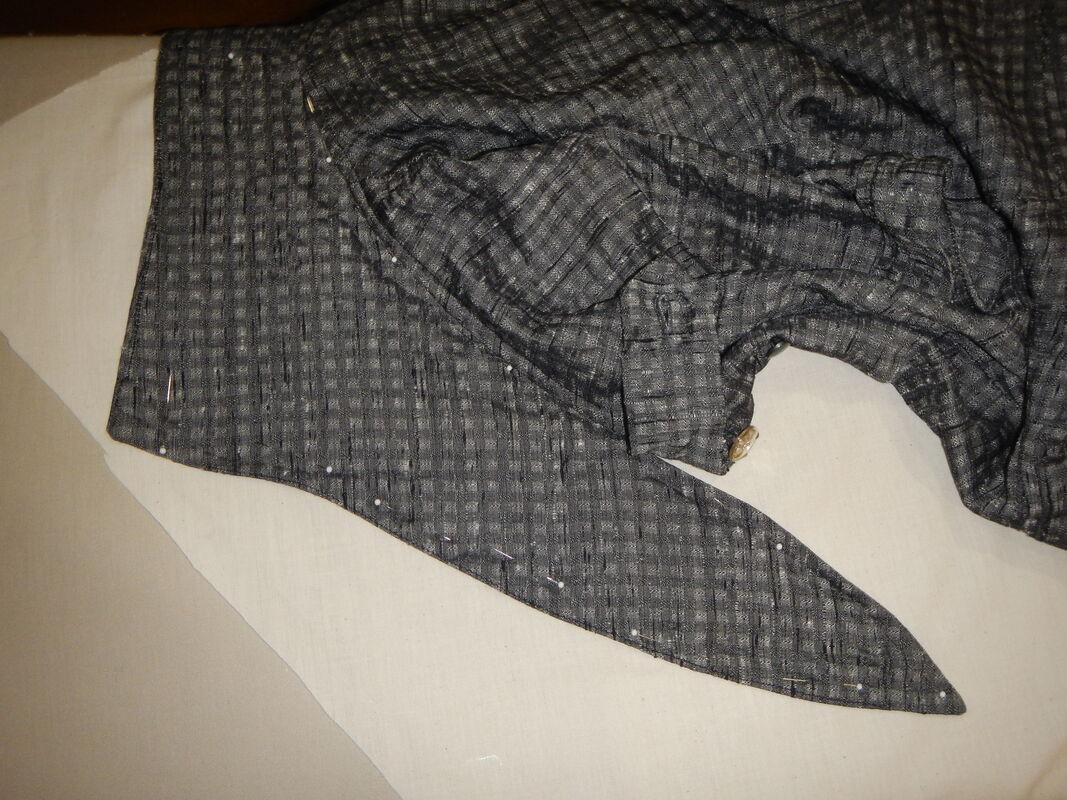
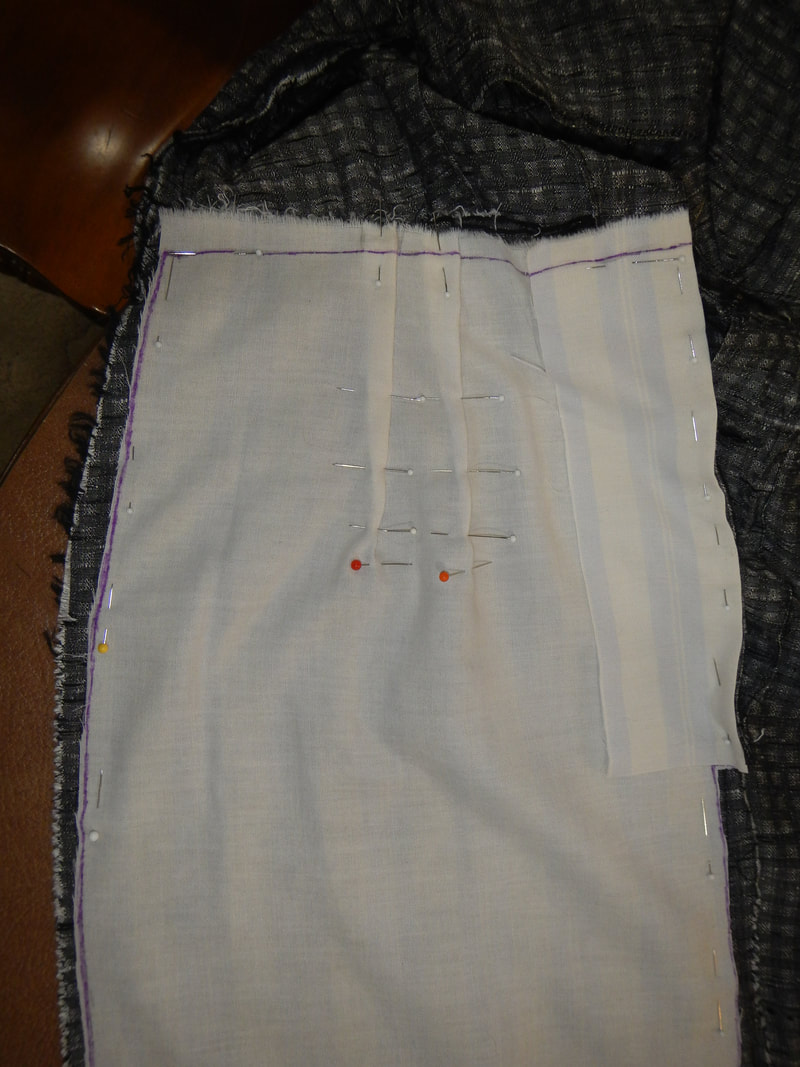
THE FRONT SKIRT The front skirt provides two problems (I mean, opportunities to learn). The first problem is the uneven hem, but the more I look at it, the more I think it was hemmed that way, perhaps on purpose. Maybe the woman who made the dress has a big bottom, and so hemmed the skirt longer in the back than in the front. Or maybe she wore high heels, which has a similar effect and requires a similarly uneven hem. I usually wear flats or very small heels (I don't like the lurching, ungraceful gait high heels give most women), so I might need to adjust the hem anyway. For now, I simply leave the bottom of the skirt piece un-traced. The second problem is more complex: the dress has a CF opening, buttoned, with placket extending into the skirt. Below the placket, the CF seam of the skirt still preserves the appearance of the right side overlapping the left. Moreover, inside, the placket is made with foldover facing on one side and sewn-on facing on the other. It seems, therefore, that the right and left sides of the skirt front come from two different pattern pieces. But I wonder if there might be some way to streamline the assembly. Like, could each side of the placket have a fold-over facing? Could I somehow cut right and left the same? To start with, I rub off the left side. Then I flip it and lay it on the right side to see how different they are. Grrr... pretty different. The right side is at least an inch wider, and the darts seem to be in a different spot. But I can't move these darts around willy nilly, because they need to match up with the darts on the bodice. I'm beginning to think I need to scrap the idea of rubbing off this part of the dress, and simply draft the skirt piece(s) myself, using my bodice pattern to ensure dart matching. But to start, I take two small pieces of muslin and try to replicate the front closure of the original in miniature. Here's a slideshow, since there are a lot of pictures: Using the measurements and the model, I draft a new front piece. Here are the rubbed-off pattern (left side) and the drafted pattern side by side: 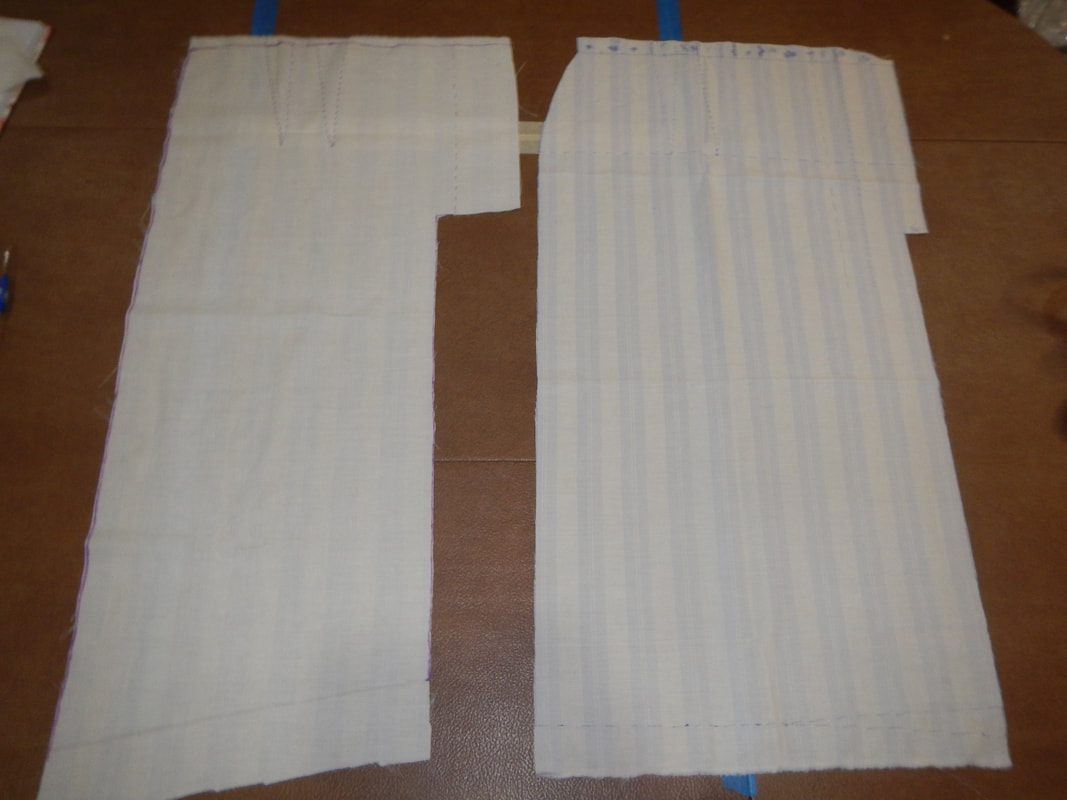
4 Comments
The Sister
3/15/2019 07:45:19 am
The Mark Twain quote made me smile, and your hatred of the cute pocket made me laugh aloud. As did "problems... I mean, opportunities to learn." This is a very cute dress! It's interesting to see the signs of handmade garments.
"Placket" means a slit or opening in a garment to make it easier to get in and out of. Plackets usually overlap when they are closed, so you can't see skin underneath. A button-front shirt has a Center Front placket with buttons, and a placket at each sleeve/cuff.
The Sister
3/17/2019 12:38:17 pm
Yep, my life is full now. Thanks for the education!
Michelle M Harrison
3/21/2019 06:56:58 am
I'm so impressed by your knowledge and your drive to complete what looks like a very difficult task. I cant wait to see the next chapter in the Red Fox Dress. Leave a Reply. |
Karen Roy
Quilting, dressmaking, and history plied with the needle... Sites I EnjoyThe Quilt Index Categories
All
Archives
March 2024
|


 RSS Feed