Robes de Coeur
  • Blog
  • Quilting
  • Clothing
    • Menswear
    • Womenswear >
      • Self-Made Patterns
      • Commercial Patterns
    • Hats
    • Miscellany
  • About
  • Blog
  • Quilting
  • Clothing
    • Menswear
    • Womenswear >
      • Self-Made Patterns
      • Commercial Patterns
    • Hats
    • Miscellany
  • About

"Red Fox Vintage" Dress - wearable muslin

3/18/2019

1 Comment


Last week I told how I rubbed off a pattern from a vintage rayon dress I found at Red Fox Vintage store in Woodstock, Portland.  The rub-off is a collection of muslin pieces, which doesn't include seam allowances but does show all the seamlines and the places where they intersect.  It's the start of a pattern! 

Today I'll show you some more of the process.  I picked two fabrics to test the garment, and used the rub-off pieces as pattern pieces, adding seam allowances as I cut. 
Picture

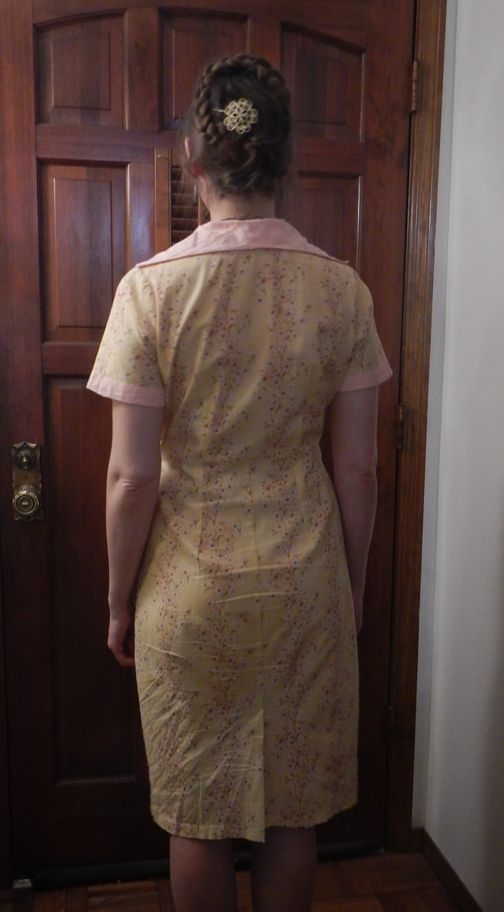
MATERIALS/COST

For the contrasting cuffs/collar, I pick a pink cotton with a grid made of pin-tucks sewn into it.  I have very little of that one, so there will be no chance of pattern-matching the grid-lines or anything, but they add texture. 

The main dress fabric is a quilting cotton from Moda Fabrics (Morning Glory, designed by Robyn Pandolph, "the quintessential creator of sophisticated floral romance").  Quilting cotton isn't ideal for clothing; it doesn't move or drape very nicely, and tends to wrinkle in the seat.  (Okay for little-girls' dresses, though, since its stiffer body makes the skirts stand out, and it's very washable and durable.)  On the other hand, its lack of drape makes fit issues more obvious, which is desirable for this project.  And the color and print are so lovely, I've been dying to wear it, regardless of wrinkles! 
Picture
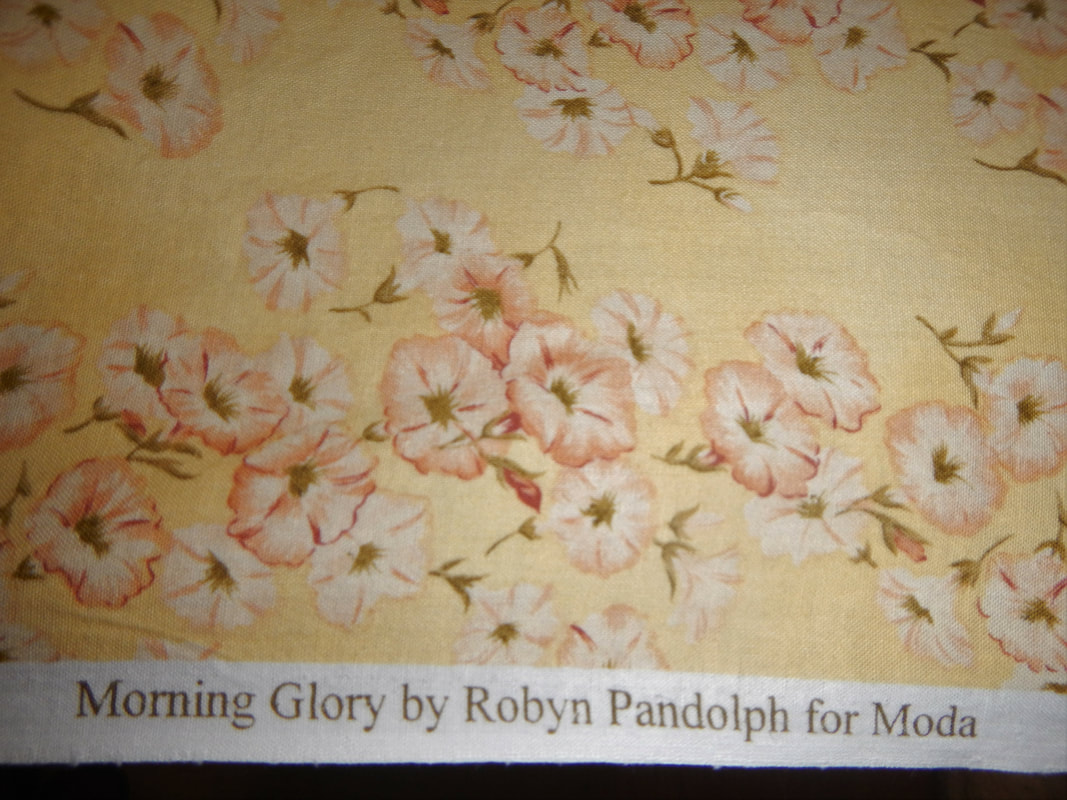
Color not quite right in this picture... in person, the yellow is soft and cheerful.
Cost is hard to calculate, because I'm using stash fabrics.  I know I got the pink stuff for free, but I paid for the yellow cotton, years ago when a friend from my steampunk group was having a de-stashing sale.  I don't remember what I paid... probably under $10.  I buy the buttons for the front, at $0.25 each.  I buy eight and use seven.  My total cost for the buttons is $2.  The pink button at the very top is from my stash, and was given to me by my housemate when she was de-stashing her buttons (free!).  So:

Total out of pocket at time of sewing?  $2.00 
Estimated total including fabric?  $12.00

PREP WORK

  • Wash/dry, iron, and true the fabric. 
  • Determine whether there's a nap (I think there is, but very slight... more of the morning glories face one direction than the other)
  • Walk the pattern to make sure seam lines match and darts line up. 
  • Get paper and write what I think a sensible order of assembly would be, based on the way the original is put together. 
Picture
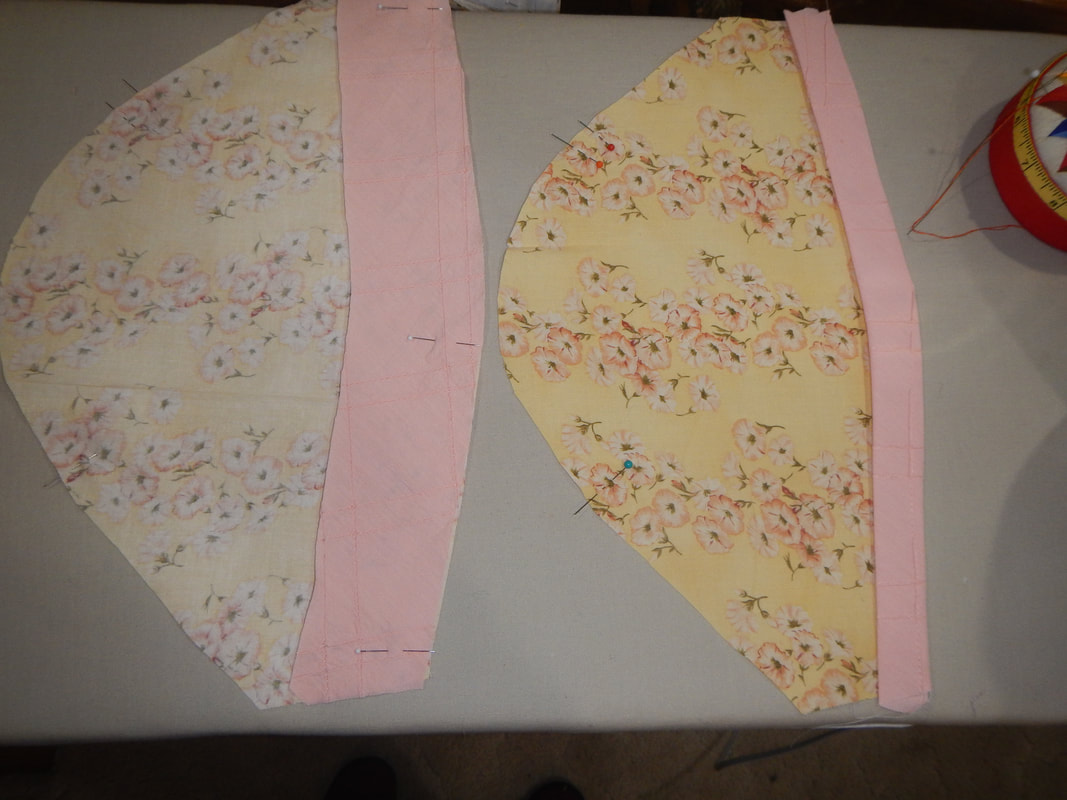
At this point I get very absorbed and don't take many pictures.  I am very careful with the layout to make sure that the prominent stripes of morning glory match up across the waistline seam, but I have no advice about that except the advice that always applies to pattern-matching: before you cut, visualize where things will end up!  As for the order of assembly and the problems I encounter, I take notes, transcribed here:
sew contrast cuffs on sleeves
sew and turn contrast collar -- NO INTERFACING!
sew front & back neck facings together at shoulder, press SA to front (Need to mark this in SA on paper pattern).  Interface the joined piece.  Serge outside edge of facing & press.  
sew & turn tab -- NEEDS INTERFACING!  Make buttonhole in tab. 
sew shoulder seams on bodice.  Press SA to back. ( Mark this on paper pattern SAs.)
*The V-neck may stretch with handling, so finish neckline ASAP, before worrying about bodice darts!*
baste tab and collar to neckline in SAs
sew facings to neckline.  Turn and understitch.  Pull tab & collar to front and press. 
sew front & back bodice darts
sew front & back skirt darts
*I think the left skirt (underlap side) will need a facing for the placket after all!  Do test in muslin!*
Further thoughts on skirt front... cut 2 in Larger size, decide which'll be underlap (wearer's left side), and trim that panel down to smaller size?
Either need to square off the CF neckline, or keep it at the angle but then angle the top of the tab
PROBLEM with CF skirt overlap and CB kick-pleat... they have to be hemmed BEFORE the vertical seams are sewn, since the vertical seams are meant to make permanent creases! 
arrange facings at placket opening.  wrap bodice facings around skirt placket facings.  match dart seams.  sew skirt fronts to bodice fronts. 
sew skirt back to bodice back at waist, matching darts
set sleeves in armscyes
sew side/underarm seams
NOW I HAVE TWO HALF-DRESSES, RIGHT SIDE AND LEFT SIDE! 
interface CB kick-pleat on left side
hem the skirt bottom on each side. 
sew CB seam.  top-stitch and press kick-pleat
(What the heck, might as well taper top of kick-pleat... no reason for a right angle.)
put buttonholes in CF placket area. 
sew CF skirt seam.  Press overlap.  Top-stitch CF line over the fold. 
sew on buttons
ALTERATIONS... SMALLER HIP-SPRING NEEDED.  BACK DARTS BUCKLING?  FRONT SKIRT SAGGING?  Need to adjust angle of attachment for waistline seam. 
Those notes don't reflect how much pressing is involved.  Anyone who wants to make clothes must learn to love their iron!  Every seam gets pressed as sewn, then pressed again in the direction you want it to lie. 
Picture
contrast cuffs
Here is the assembly of the contrast cuffs:
  • Sew right side of cuff to wrong side of sleeve.  PRESS SEAM AS SEWN!
  • Trim/grade seam allowances. 
  • Turn cuff to right side of sleeve.  PRESS. 
  • Turn raw edge of cuff under.  PRESS. 
  • Top-stitch cuff in place.  PRESS. 
Sleeve is now ready for setting into bodice. 
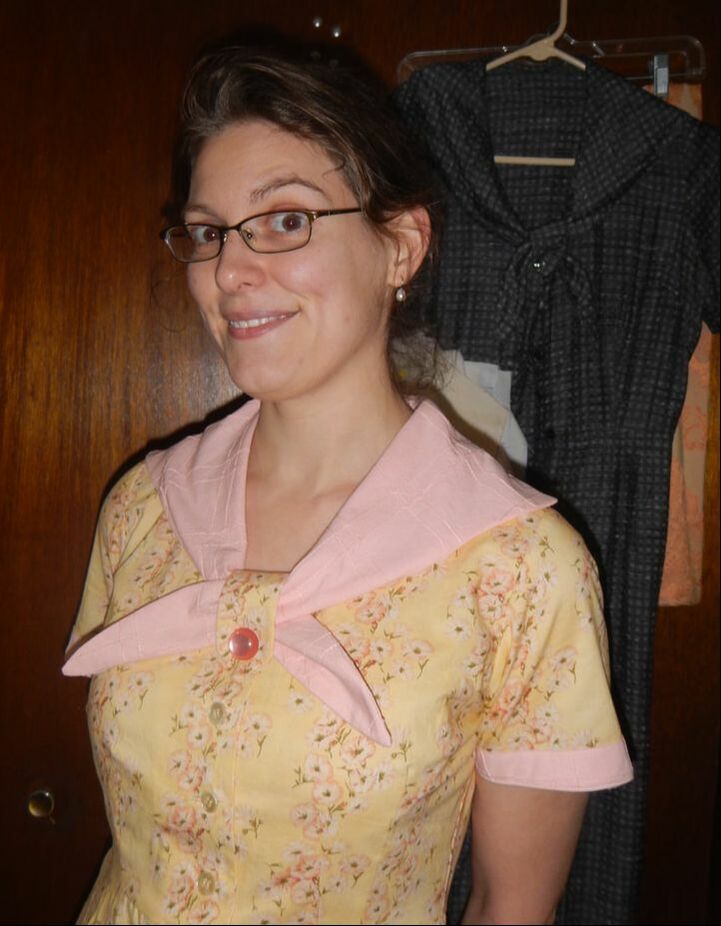
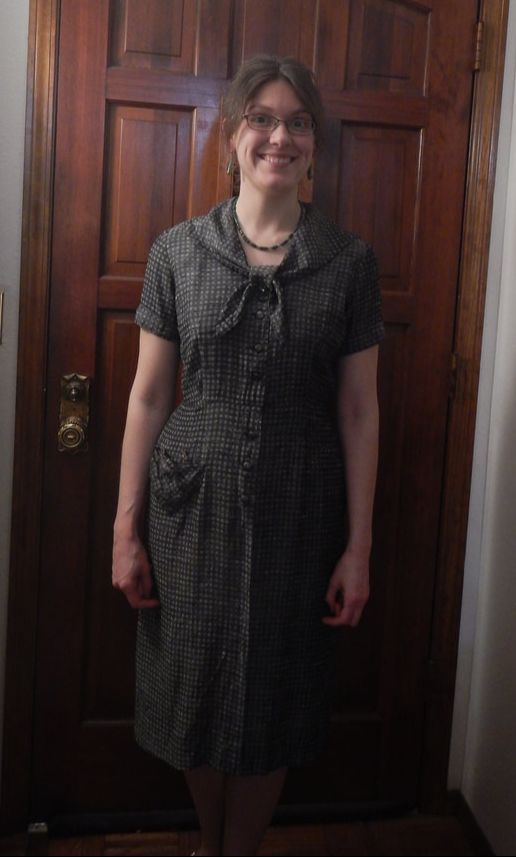
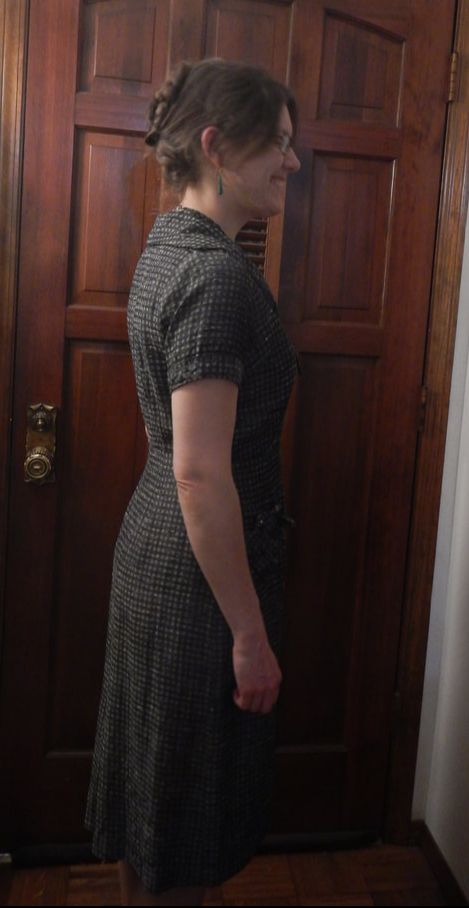
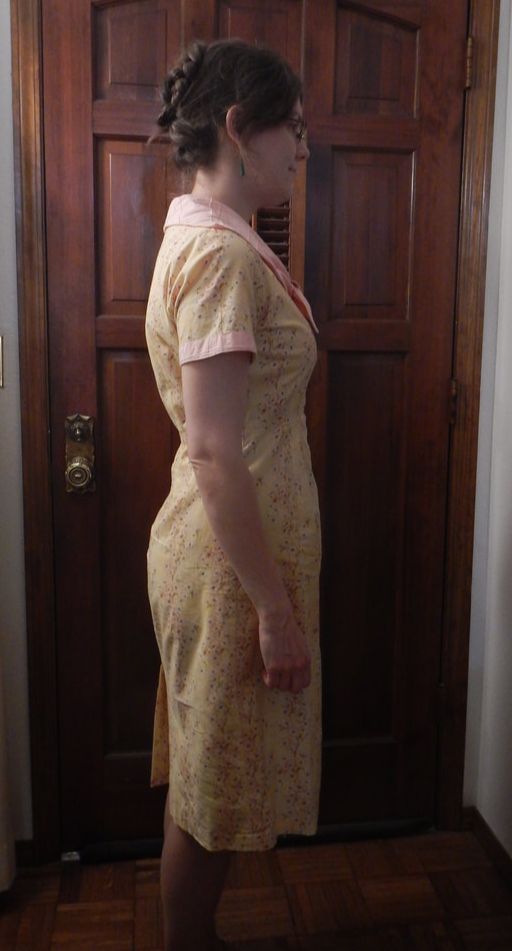
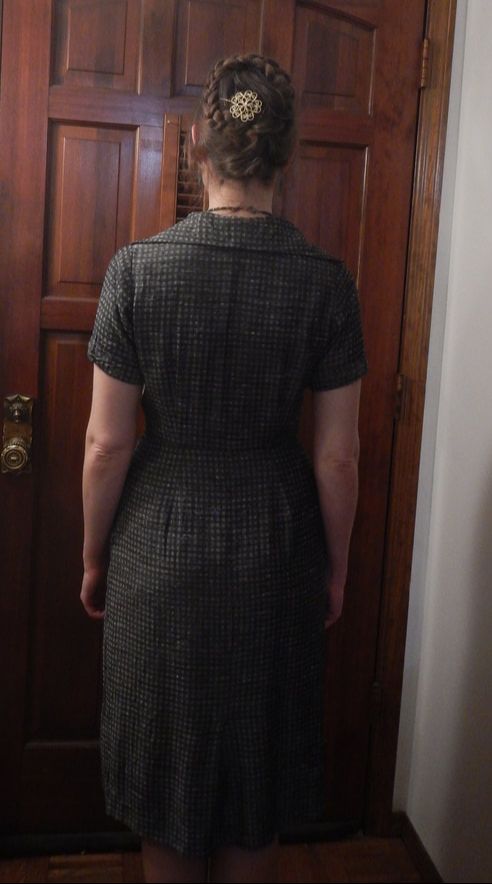
And in case you're confused by my notes about the order of assembly for the hem and CF/CB... I don't blame you, since they confuse me as I write them!  Here's a picture of the CB kickpleat if the CB seam is sewn before hemming... see the problem?  Because that vertical seam is meant to lie flat as sewn, it's impossible, now, to hem the skirt!  The front seam, with its faux-overlap to make it look like a shirt-dress, causes the same problem. So the two sides of the skirt need to be hemmed first, then the vertical seam sewn and pressed in place.  Figuring this out means doing a lot of un-picking of seams and furrowing of my brow. 
Picture

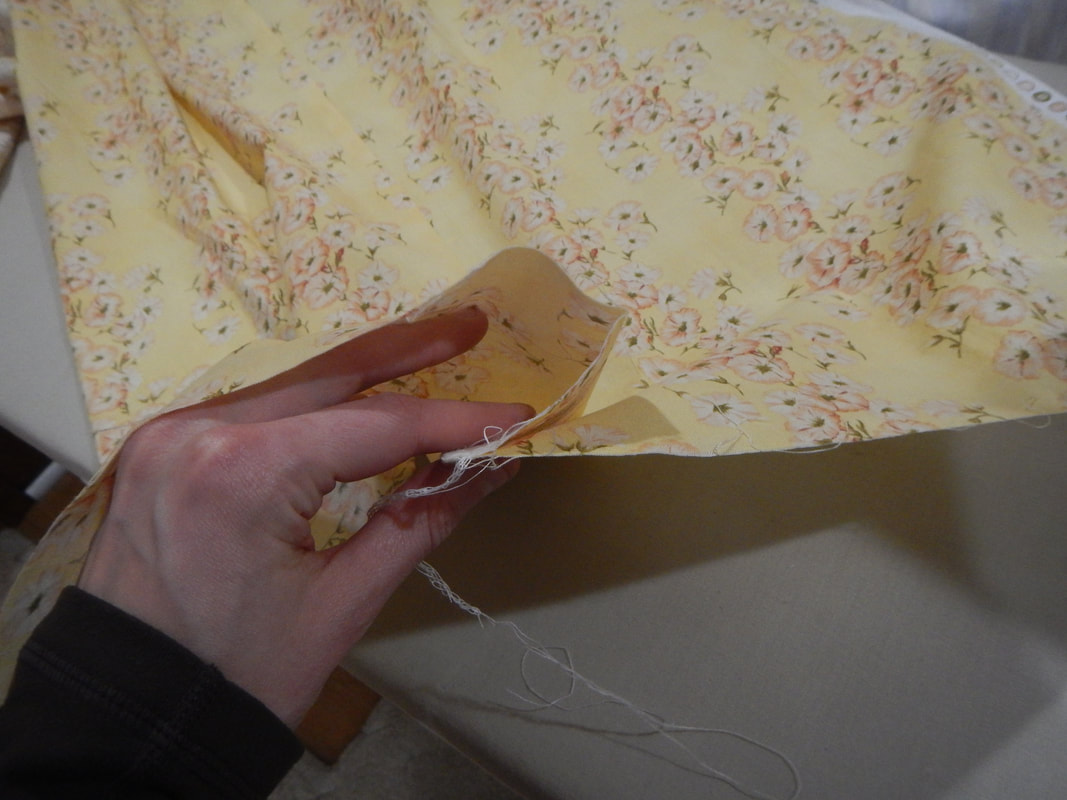
FINISHED

I wear it with a nylon tricot slip to make the cotton hang smoothly.  It's okay, but not right yet.  The biggest changes I need to make are to the fit of the skirt... the Moda cotton shows the problems better than the drapey rayon of the original... or maybe the rub-off created problems that are not in the original, but either way I need to make corrections on my pattern.  Here are some comparison shots:
Picture
Picture
The front skirt needs to be lifted by perhaps a half-inch where it attaches to the bodice, to correct very slight "smile lines" that create a false "belly" at my belly. 
Picture
Picture
The diagonal line from front rib-cage to back bum tells me there is too much length in the skirt over the bum.  I can fix it by lifting the skirt from the waistline a bit.  The fit of the sleeve is dreadful, but that is a problem in the original, too.  Yikes! 
Picture
Picture
This back view confirms what the side view suggested: I need to lift the skirt at the CB waistline seam.  That smile line needs to go! 

I'm a bit puzzled by the diagonal line over my left shoulder... is that shoulder lower on my body?  Or is my body twisted a bit in the picture? 
Overall, I think the original fits better, but the wearable muslin is a more flattering color and much more fun to wear.  The kick-pleat gives enough room for walking, and the interfacing on the kick-pleat prevents it from crumpling up and sticking out like a previous skirt I made did.  (No pictures of that skirt... it was terrible!)  It's light and springy.

What's next?  Ultimately I want to make this dress in a cotton "barkcloth" I have, with a brown velvet collar.  I have the fabrics set aside!  But first I need to make the alterations mentioned above, then copy the pattern to paper, walking the seams and squaring corners where needed, putting in proper seam allowances, and all that.  I want to learn more about patterns, and doing this one to the best of my ability is part of that!  Expect, therefore, two more posts about this... one for the pattern work and another for the final dress. 
1 Comment
The Sister
3/18/2019 09:32:05 am

The picture of the contrast cuffs looks like two little baby hats. :-) I think the darker color for a final piece is a good idea; it will be svelte and tailored rather than making you look like Aunt Bea or a 19050's housewife. (Who doesn't love Aunt Bea?) Actually, you look a lot like Mom as you come into full womanhood. How lovely!

Anyway, the idea of a practice garment made of unforgiving fabric is an excellent idea for finding the areas that need work!

Reply


Leave a Reply.

    Karen Roy

    Quilting, dressmaking, and history plied with the needle...

    Categories

    All
    1910's
    Alteration
    Antique
    Dyeing
    Embroidery
    General
    Hand Sewing
    History
    Lacemaking
    Mending
    Menswear
    Millinery
    Modern Elizabethan
    Musing
    Other Sewing
    Philippians 4:8
    Project Diary
    Quilting
    Regency
    Retro
    Self Made Pattern
    Self-made Pattern
    Terminology
    Victorian
    Vintage

    Blogs I Read

    The Dreamstress
    Male Pattern Boldness
    ​
    Lilacs & Lace
    Tom of Holland
    Fit for a Queen
    Line of Selvage
    Mainely Menswear
    Bernadette Banner

    Archives

    January 2023
    December 2022
    November 2022
    October 2022
    September 2022
    August 2022
    October 2021
    September 2021
    August 2021
    July 2021
    June 2021
    May 2021
    April 2021
    August 2020
    June 2020
    May 2020
    April 2020
    March 2020
    January 2020
    December 2019
    November 2019
    September 2019
    August 2019
    July 2019
    May 2019
    April 2019
    March 2019
    January 2019
    December 2018
    November 2018
    October 2018
    September 2018
    August 2018
    July 2018
    June 2018
    May 2018
    April 2018
    March 2018
    February 2018
    January 2018
    December 2017
    November 2017
    October 2017
    September 2017
    August 2017
    July 2017
    June 2017
    May 2017
    April 2017
    March 2017
    February 2017
    January 2017

    RSS Feed

Blog

Quilting

Clothing

About

Copyright Karen Roy
​© 2017-2022