Robes de Coeur
  • Blog
  • Quilting
  • Clothing
    • Menswear
    • Womenswear >
      • Self-Made Patterns
      • Commercial Patterns
    • Hats
    • Miscellany
  • About
  • Blog
  • Quilting
  • Clothing
    • Menswear
    • Womenswear >
      • Self-Made Patterns
      • Commercial Patterns
    • Hats
    • Miscellany
  • About

Something Blue (McCall's 9133)

7/30/2018

1 Comment

 
A seamstress friend from my Steampunk days referred this bride to me back in November 2017, when she found her own plate too full.  G. came with dress pattern, her chosen fabric, and even a muslin made up by my friend.  I finished the dress for her by the new year, but am only posting now, after the wedding! 

The pattern is McCall's 9133, and it's view A that she wanted.  She chose electric blue satin for the dress, and white lace for the overdress with sleeves.  In particular, because she's a practical woman, she requested that the two layers be made entirely separate, so she could shorten the blue dress later and wear it to other events.  For notions, I bought a blue invisible zipper, white loops & buttons, and horsehair brain for the hem. 
Picture
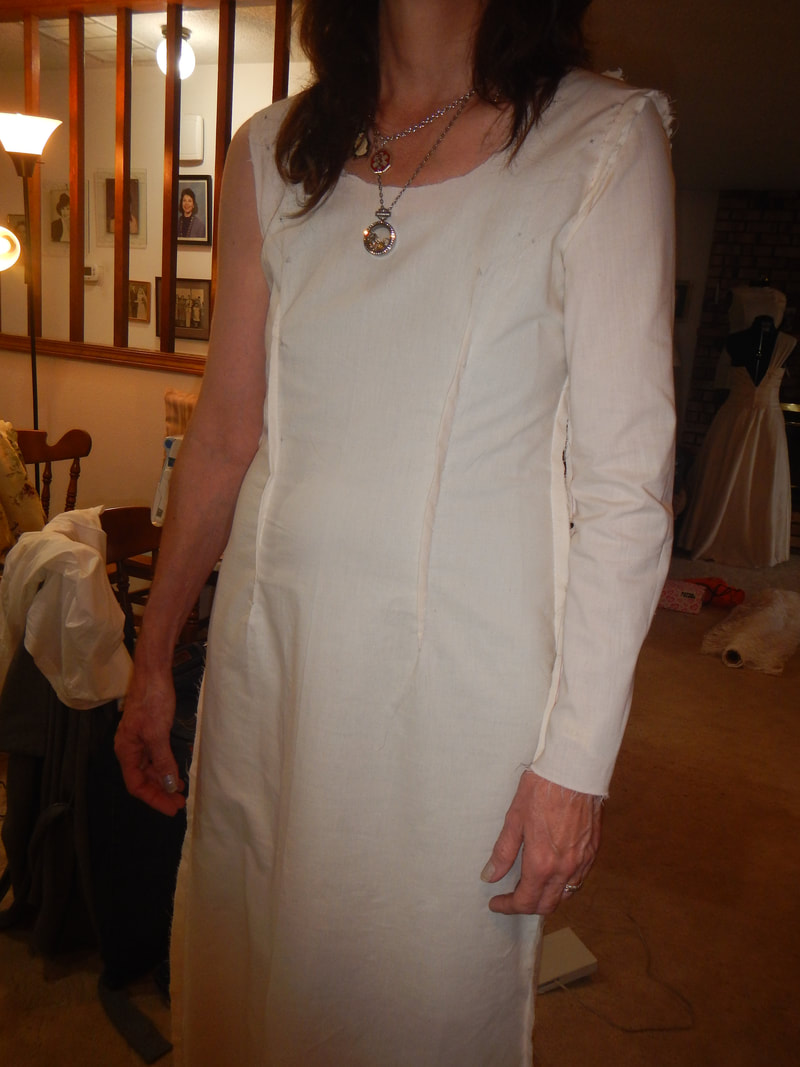
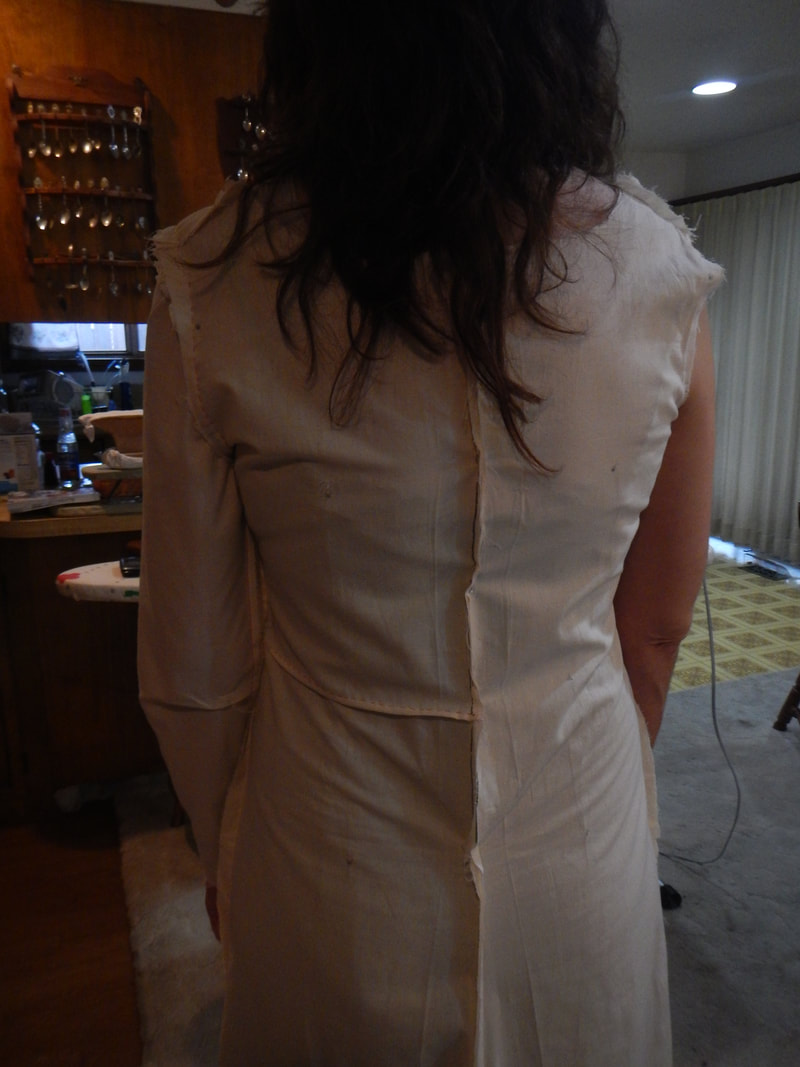
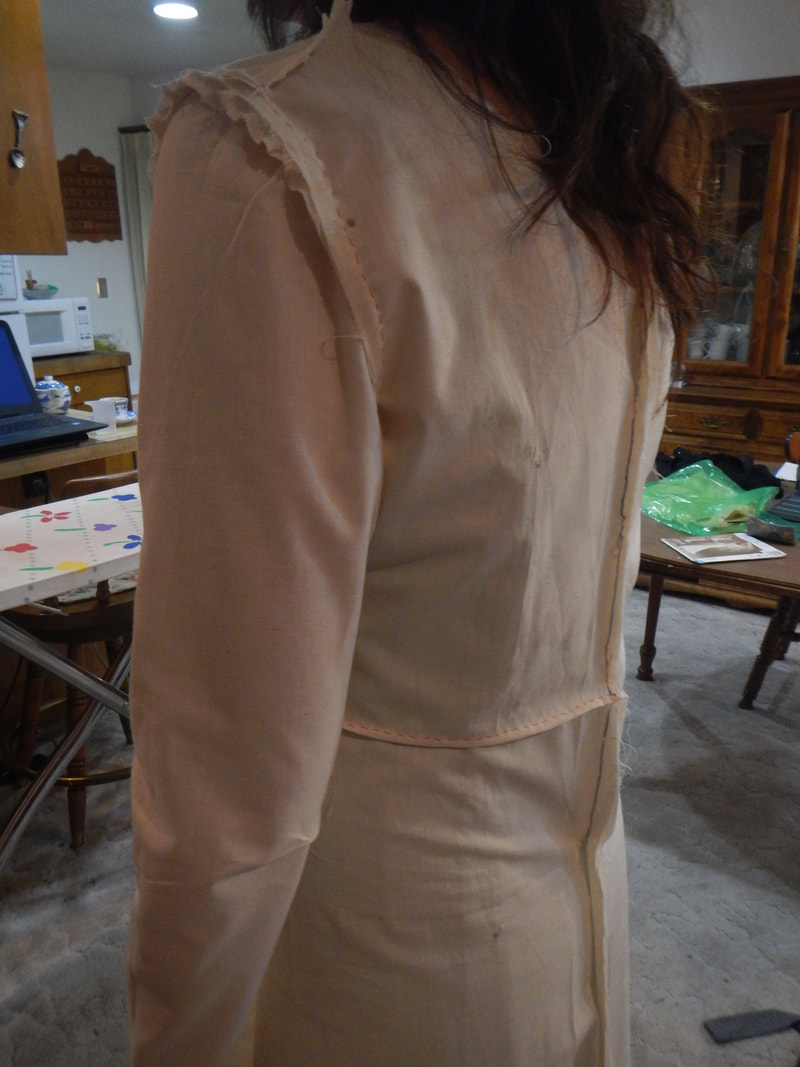
Present tense for the Project Diary! 

FITTING THE MUSLIN

Since the muslin was made already, I have her try it on and I fit it to her.  The first, most radical, change was already made by my friend who'd started the project: McCall's 9133 calls for a shoulder-to-bust dart starting in the armscye and projecting to the apex of the bust, but that was too binding on G., so my friend left it un-sewn and adjusted sleeve and armscye to use that extra fabric.  The front fish-eye darts will stay, but I will fine tune their fit later, when G. has her wedding day bra.  I advise her to buy something supportive but without extra padding, and wear it to the second fitting, when I'll make the darts fit that.  Also, I find the sleeve is too short and tight, especially over the hand.  Easily fixed; I just re-sew it with a smaller seam allowance and mark my changes on the muslin. 
Picture
Picture


The back of McCall's 9133 also calls for fish-eye darts for shaping, but G. doesn't need them.  In addition to taking out the back darts, I also add some width at the Center Back.  To do this, I pin the Center Back seam to fit, and then use a Sharpie marker to mark the new seam line.  When I cut the fabric later, I'll have to add the requisite seam allowance onto the new seam line. 

Now look on the left side of the picture, at the waist, and you'll see a horizontal fold of fabric sewn in the muslin.  That fold was buckling up, so I sewed it out, a minor swayback adjustment. 


This side view shows how the swayback adjustment makes the back of the dress fit better.  It also shows an area of concern for the future: the fullness around the back sleeve cap is fine for the white lace overdress (she wants ease for movement), but the blue dress underneath is sleeveless, so it needs to fit better so it doesn't have gaping that exposes the bra.  To do this, I think I'll make the white lace dress completely, but leave the blue dress sans front darts and sans armscye finishing until the second fitting.  When G. comes for the second fitting, I'll make the front darts fit her new bra, and will perhaps need to put slight darts around the armscyes to make the dress fit smoothly on its own. 
Picture

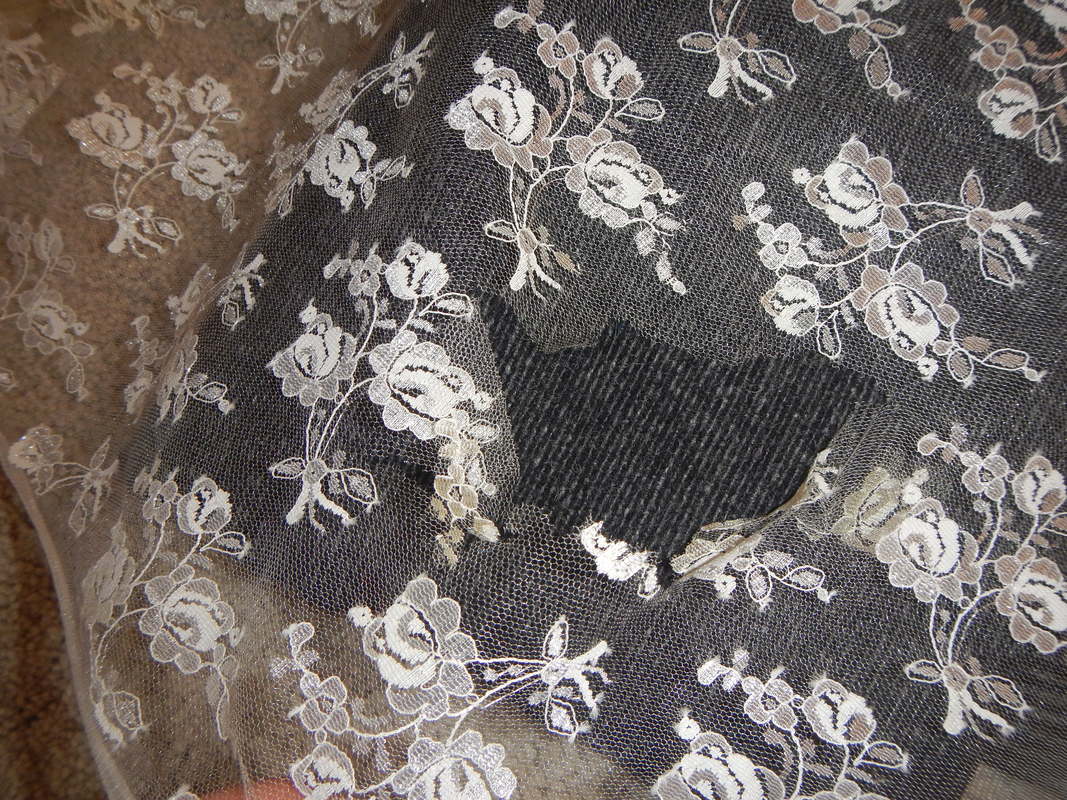
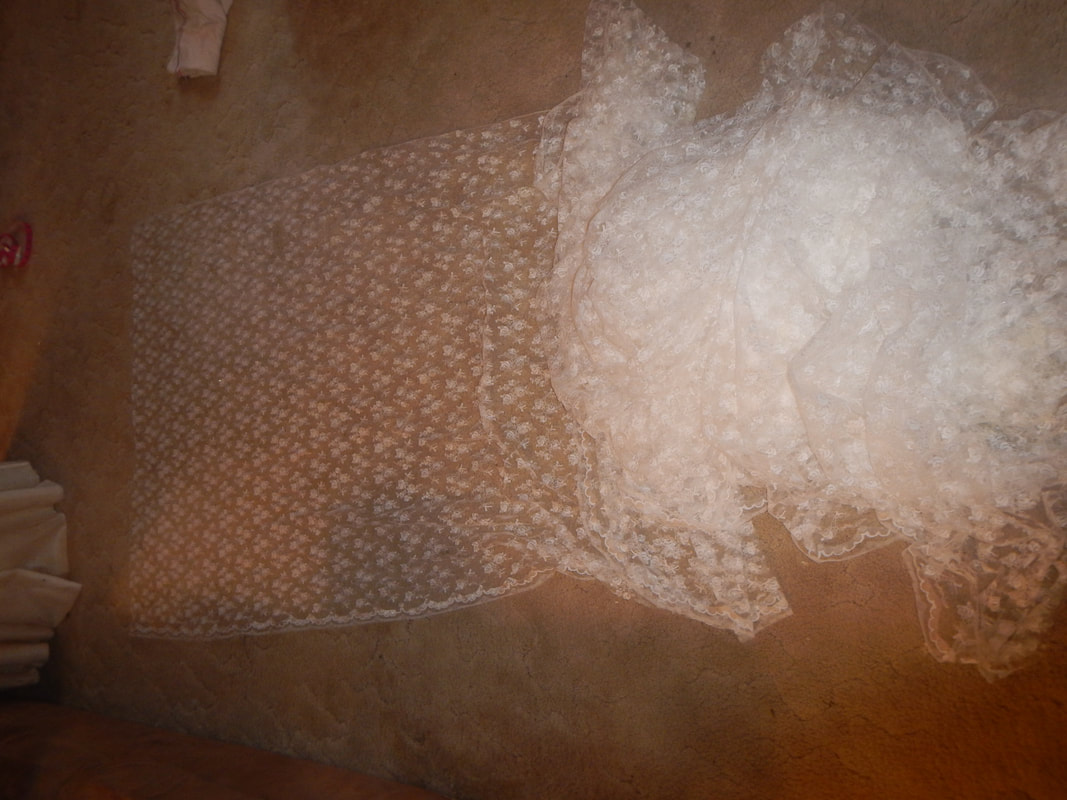
MATERIALS & LAYOUT

The first problem is the lace, which is damaged goods.  It has a "stain".  But since it comes on a roll, the stain goes through layer after layer, making a dotted line of yellowed stains all along the top of the piece.  And whatever stained it was corrosive, because the stains are brittle and falling into holes.  Before I do anything, I wash it all to get the last of the corrosive stuff out and see what I really have to work with.  The stains fall out of the lace, leaving regular perforations which you can see below.  (Also leaving a mess in the washing machine!) 
Picture
Picture
Picture
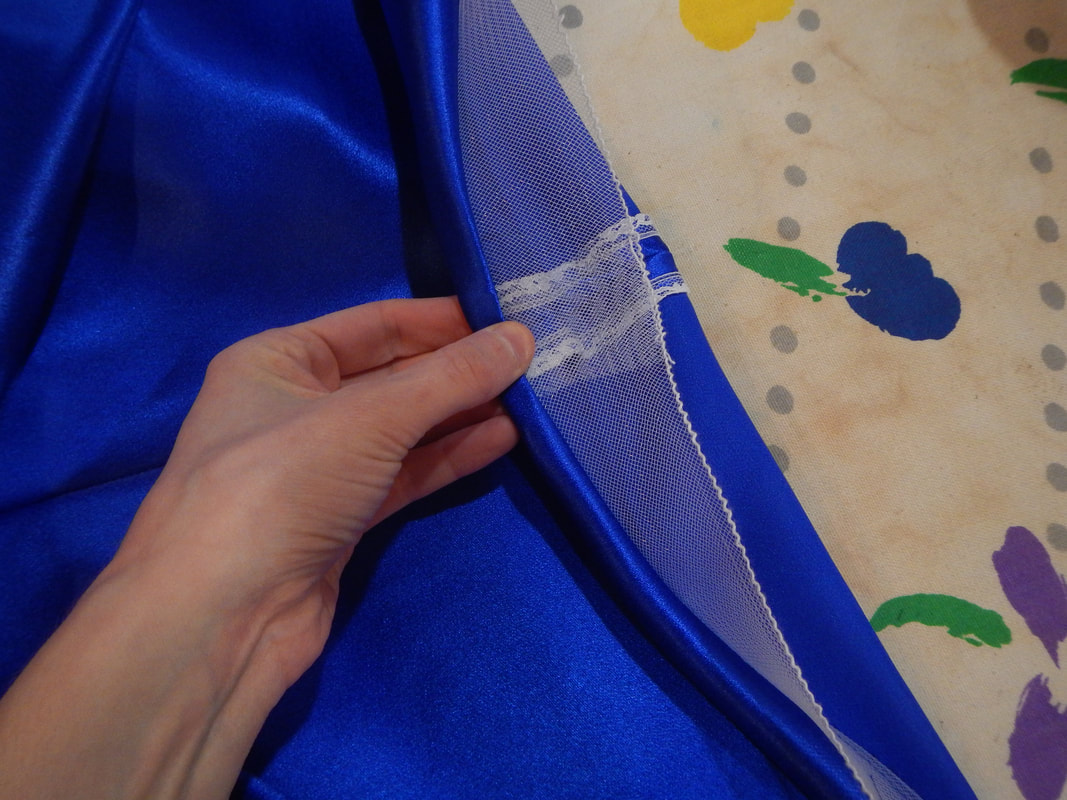
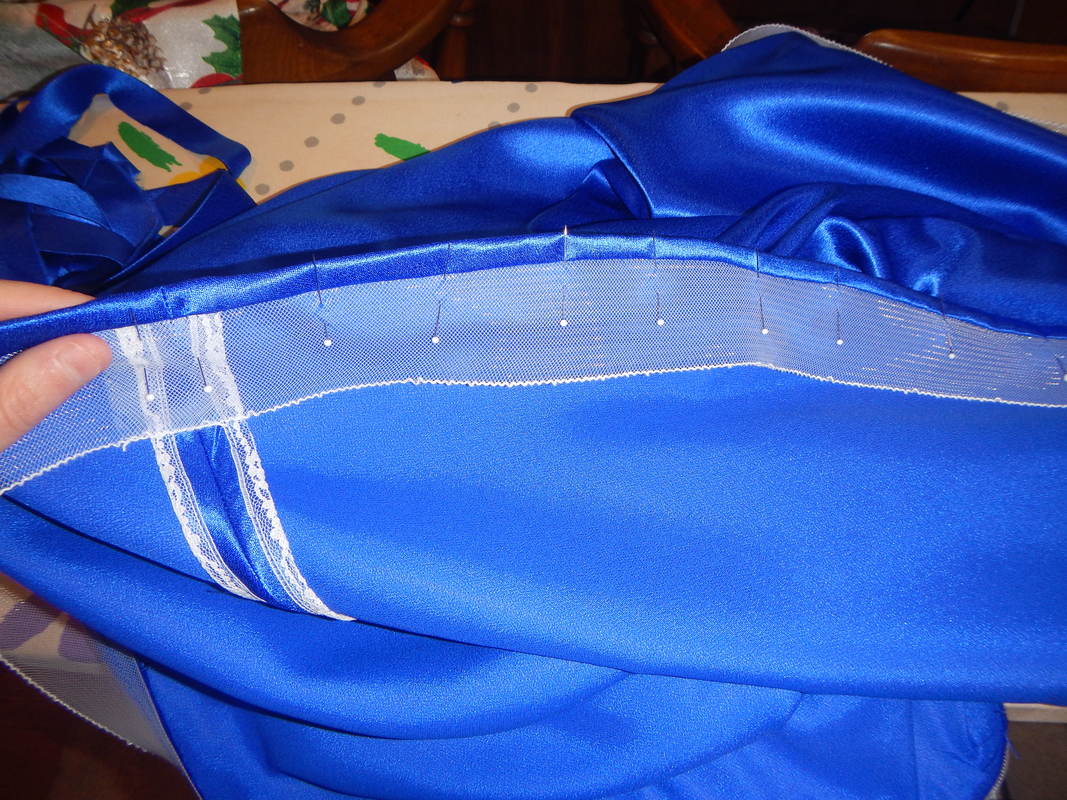
So to get the dress cut in lace, I have to be careful about layout.  The front piece can be cut on the fold, as long as I make sure the corroded holes aren't in the area, and the back pieces have to be positioned so the pointy tip of the train goes between holes.  I also take care when cutting out back pieces to lay the one piece atop the other and line up lace motifs before cutting the second one, that way I can get a nice symmetrical look to the center back seam.  The sleeves are cut cross-grain to use the scalloped edges as a natural hem.  As for the scalloped edges that were next to the other pieces, I salvage them carefully to make a trim. 
The blue satin was in fine shape, and there was tons of it, so I was able to get all the pieces I needed on grain.  The back pieces flare out to make a train, so I unfolded the blue satin and cut one piece at a time to get the width I needed.  Below is the front piece being cut on the fold:
Picture
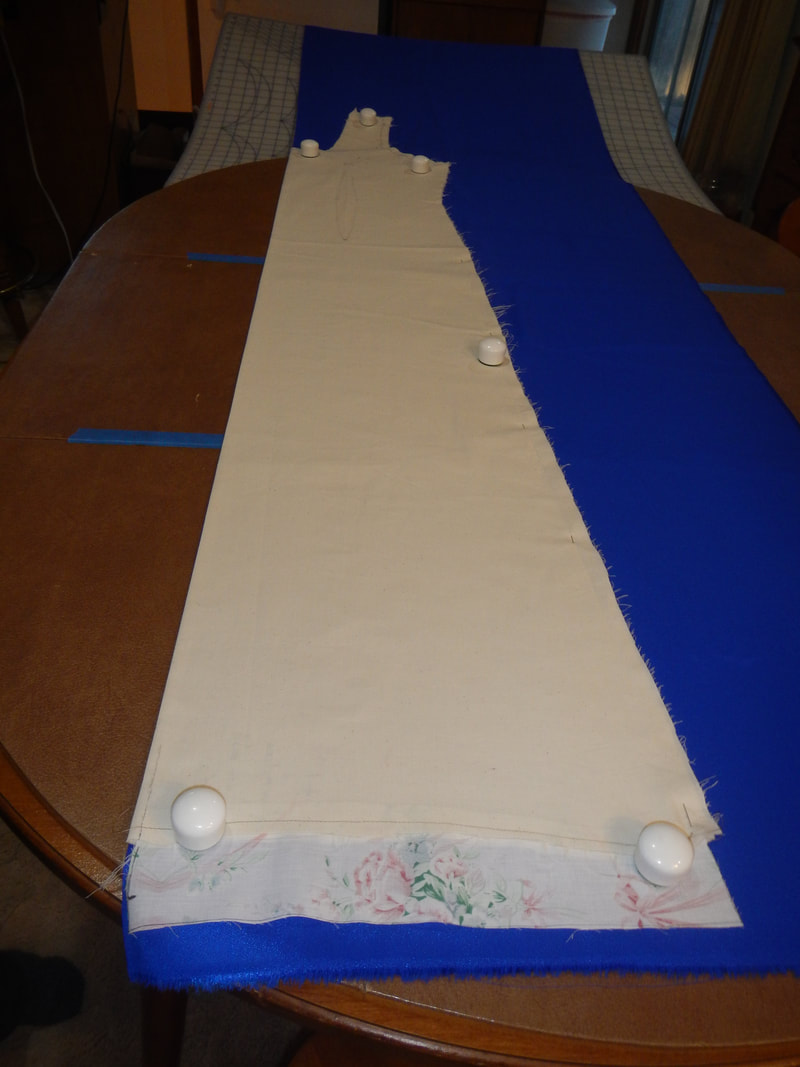
Notice the old flowered sheet fabric sewn to the bottom of the muslin?  That's the added length I knew I needed: a full inch plus hem allowance in the front, tapering at the side seams to join the train in back. 
Picture
Altering the muslin before using it as a pattern.

CONSTRUCTION

Because the blue satin was ravelly, I used lace hem tape as seam binding for the center back seam, and did the other seams as French seams.  The reason the back got the lace treatment was that I would be ironing that seam open and inserting an invisible zipper at the top, so each piece had to be finished separately.  The side seams and shoulder seams could be ironed to the back and done. 
Picture
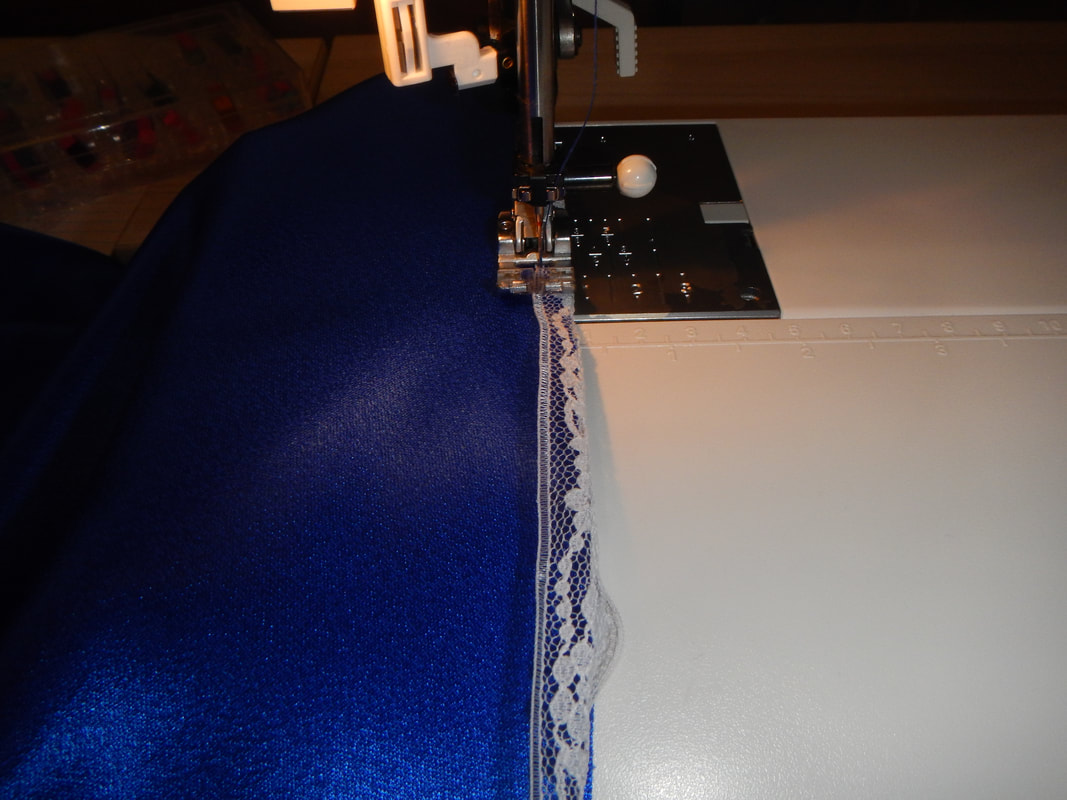
Sewing seam binding on the Center Back edges. I do this first thing, so they don't unravel as I work.
Picture
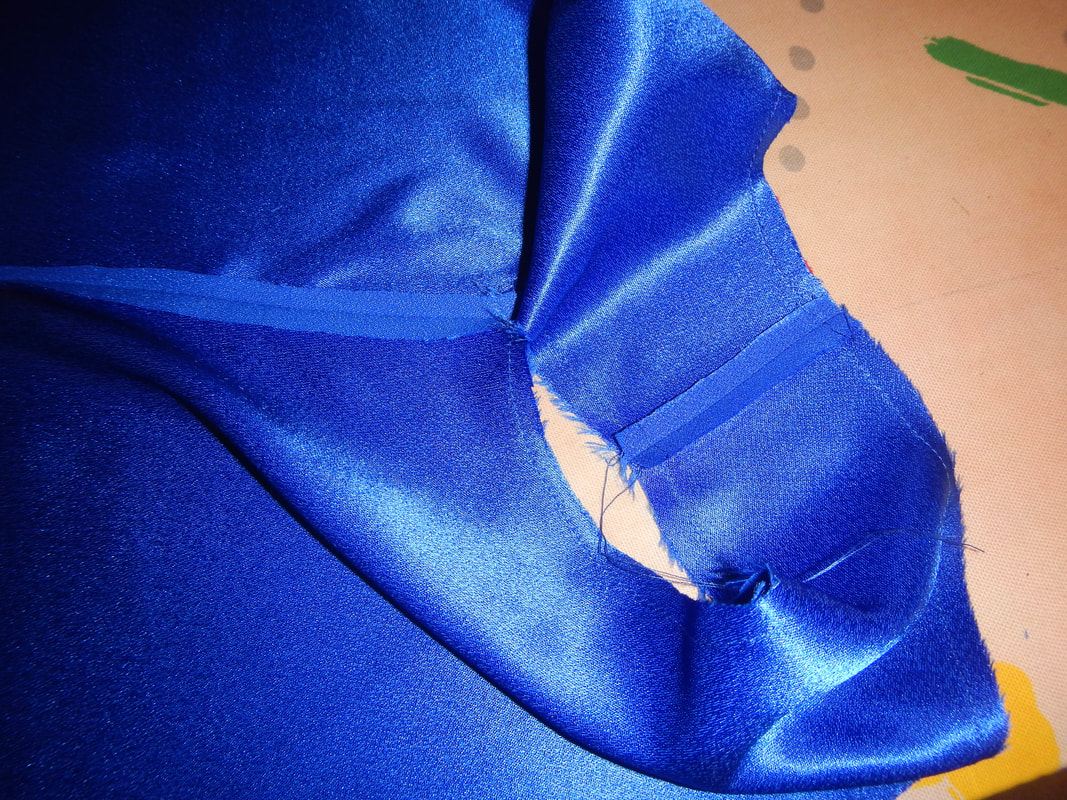
Side and shoulder seams sewn wrong sides together, then pressed open, before being turned right sides together and re-sewn into a French seam.

ANOTHER HORSEHAIR HEM

Remember the horsehair braid tutorial from way back when?  Here I go again!   
Picture
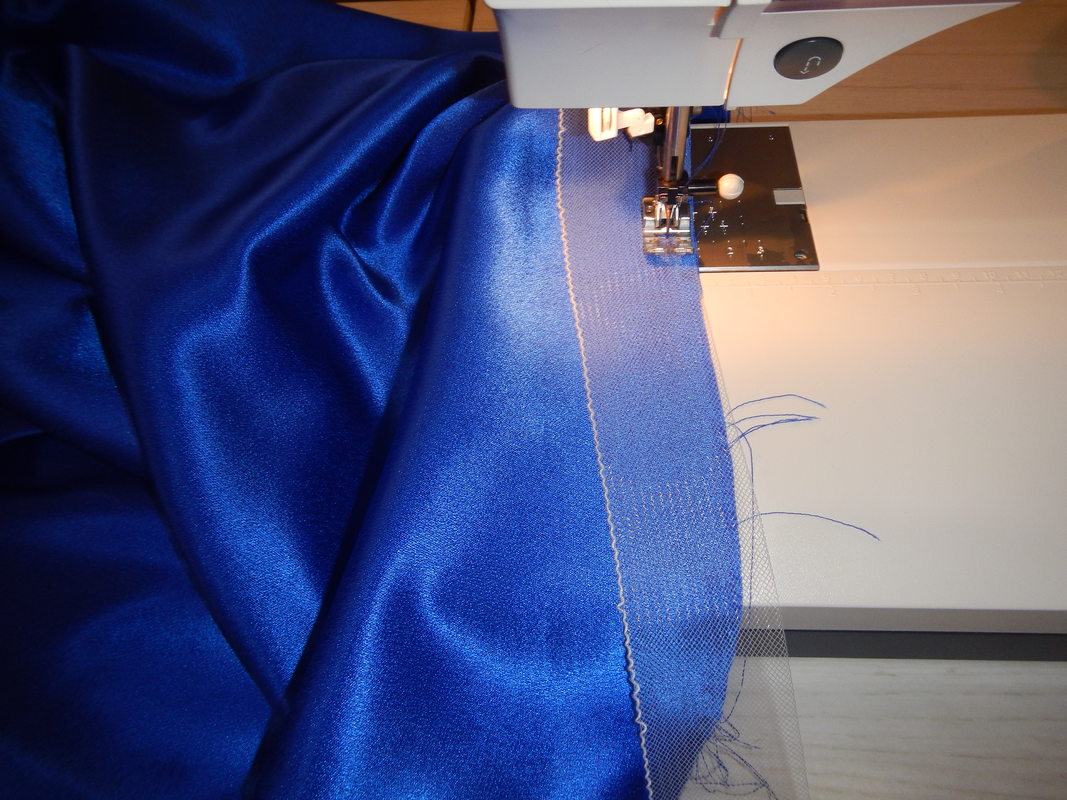
Sewing braid to right side of skirt
Picture
turning braid to wrong side of skirt
Picture
braid pinned to wrong side of skirt
Picture
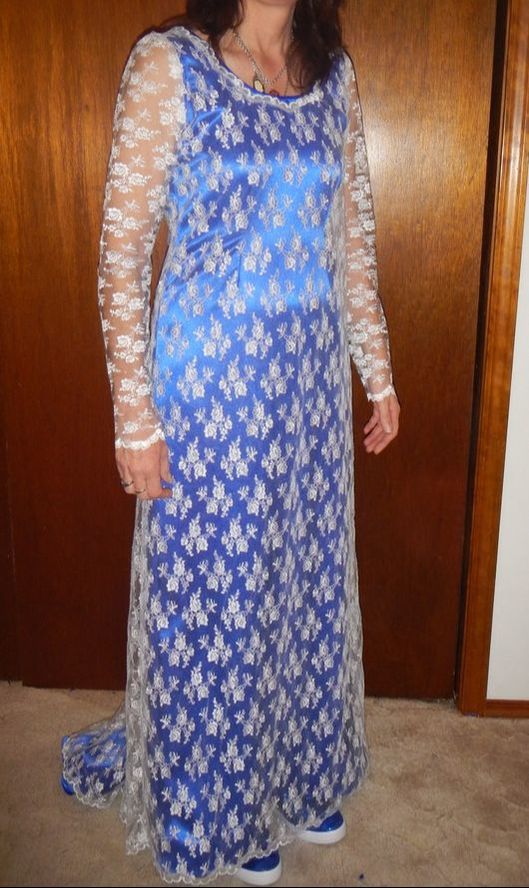
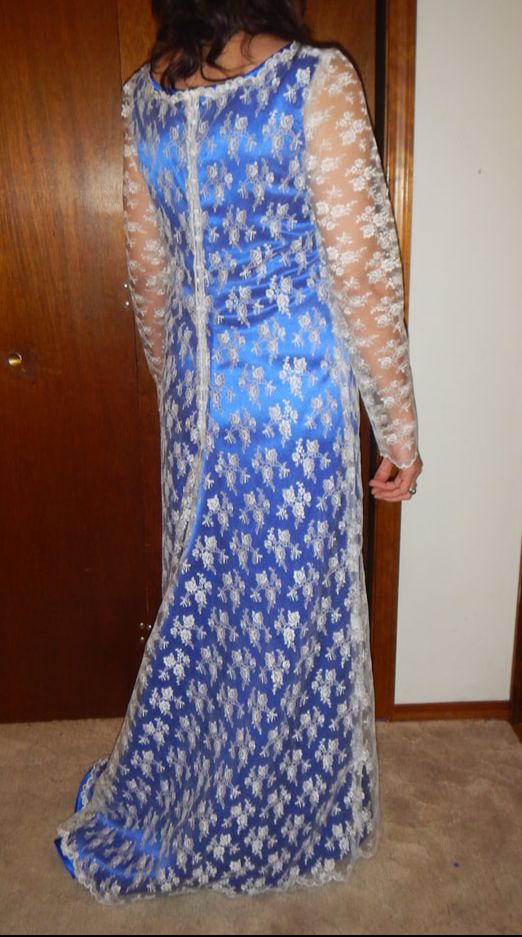
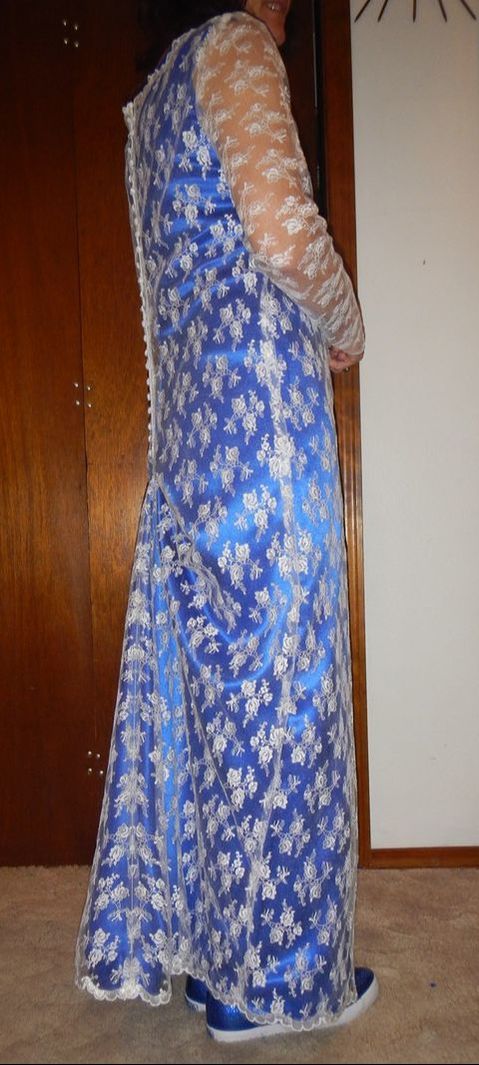
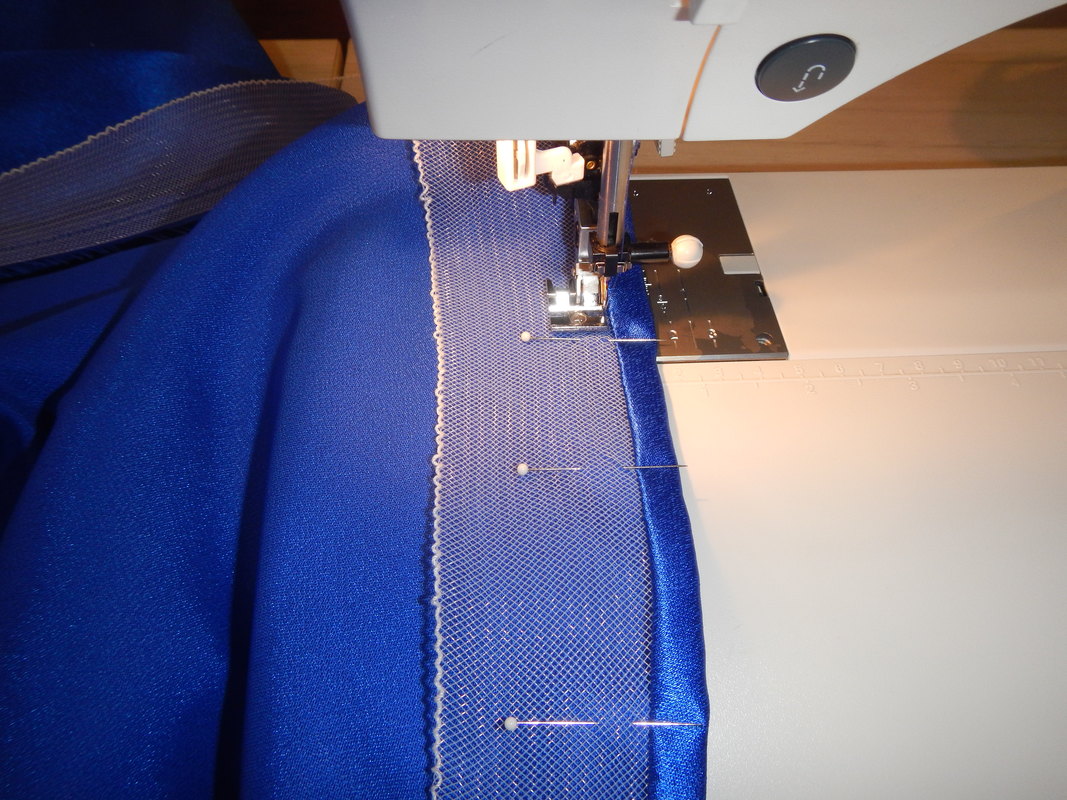
sewing braid in new position, using zipper foot to "stitch in the ditch"
Picture
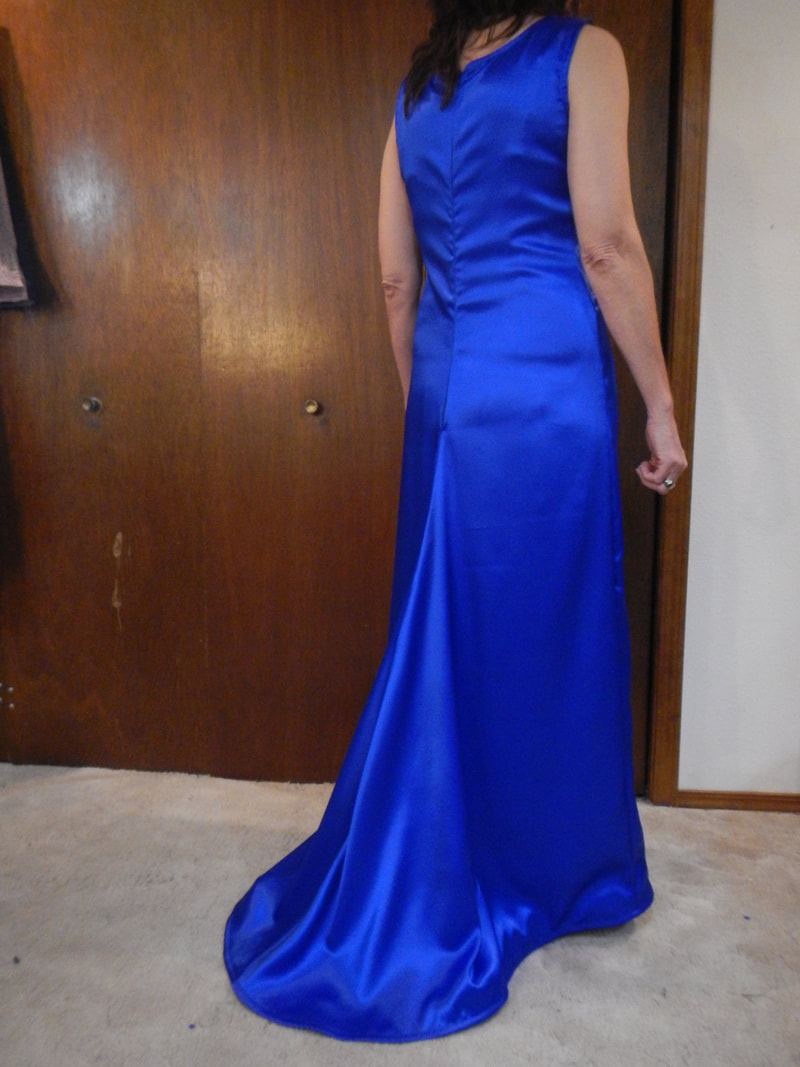
The finished hem

FINISHING DETAILS AND PICS

On the Blue Dress: snap-catchers in the shoulders, invisible zipper, HH hem.  On the lace dress: scalloped hem, buttons.  Lace attached to blue dress with three snaps: one at each shoulder, and one at the bottom of the hem. Lace and blue dress bustled together as one layer with two hooks and eyes. 
Picture
Lovely!  She looks medieval! 
Picture
Picture
1 Comment
The Sister
8/2/2018 07:16:24 pm

How lovely! I particularly like the swell of train in the blue satin. That looks nice!

Reply


Leave a Reply.

    Karen Roy

    Quilting, dressmaking, and history plied with the needle...

    Sites I Enjoy

    The Quilt Index
    r/Quilting
    Wonkyworld

    Categories

    All
    1910's
    Alteration
    Antique
    Dyeing
    Embroidery
    General
    Hand Sewing
    History
    Lacemaking
    Mending
    Menswear
    Millinery
    Modern Elizabethan
    Musing
    Other Sewing
    Philippians 4:8
    Project Diary
    Quilting
    Regency
    Retro
    Self Made Pattern
    Self-made Pattern
    Terminology
    Victorian
    Vintage

    Archives

    April 2025
    March 2025
    December 2024
    March 2024
    December 2023
    November 2023
    September 2023
    August 2023
    June 2023
    May 2023
    March 2023
    February 2023
    January 2023
    December 2022
    November 2022
    October 2022
    September 2022
    August 2022
    October 2021
    September 2021
    August 2021
    July 2021
    June 2021
    May 2021
    April 2021
    August 2020
    June 2020
    May 2020
    April 2020
    March 2020
    January 2020
    December 2019
    November 2019
    September 2019
    August 2019
    July 2019
    May 2019
    April 2019
    March 2019
    January 2019
    December 2018
    November 2018
    October 2018
    September 2018
    August 2018
    July 2018
    June 2018
    May 2018
    April 2018
    March 2018
    February 2018
    January 2018
    December 2017
    November 2017
    October 2017
    September 2017
    August 2017
    July 2017
    June 2017
    May 2017
    April 2017
    March 2017
    February 2017
    January 2017

    RSS Feed

Blog

Quilting

Clothing

About

Copyright Karen Roy
​© 2017-2024