Robes de Coeur
  • Blog
  • Quilting
  • Clothing
    • Menswear
    • Womenswear >
      • Self-Made Patterns
      • Commercial Patterns
    • Hats
    • Miscellany
  • About
  • Blog
  • Quilting
  • Clothing
    • Menswear
    • Womenswear >
      • Self-Made Patterns
      • Commercial Patterns
    • Hats
    • Miscellany
  • About

TUTORIAL: Hemming with Horsehair Braid

11/30/2017

8 Comments

 
On Monday I showed how I hemmed the sheer overlay of a wedding dress using a Calvin Klein hem.  Today I'll show the way I hemmed the heavier skirt underneath, using horsehair braid. 

I figured out this technique simply by reverse engineering the hem as it was done originally, before I altered the dress by cutting off several inches.  It's pretty basic. 
Picture
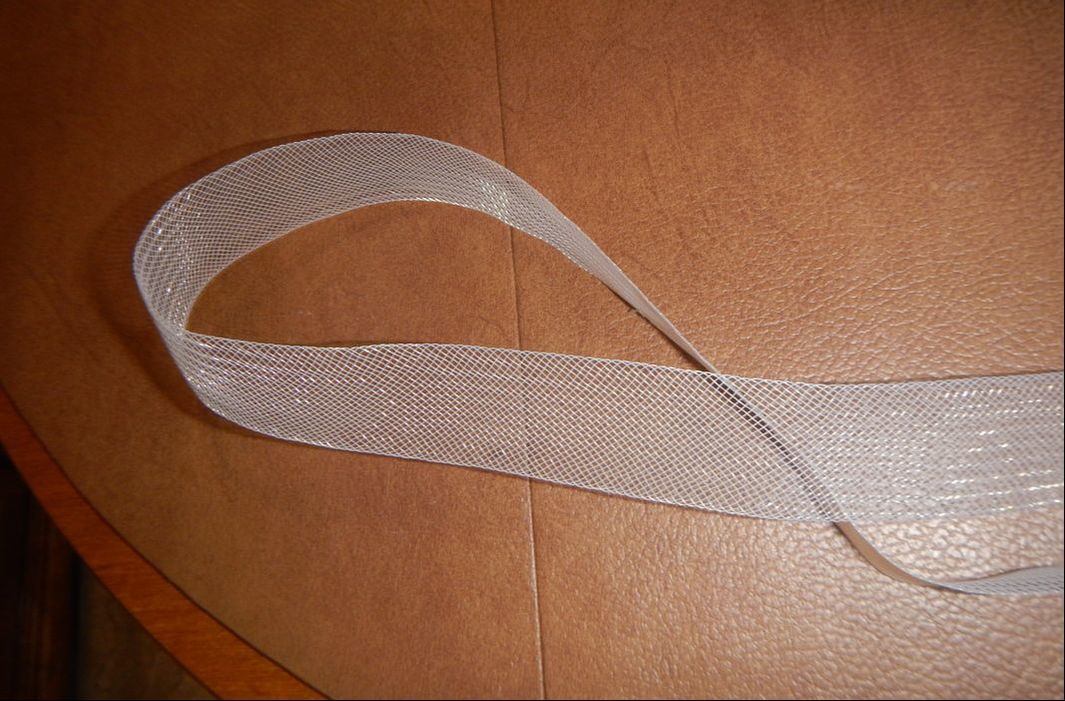
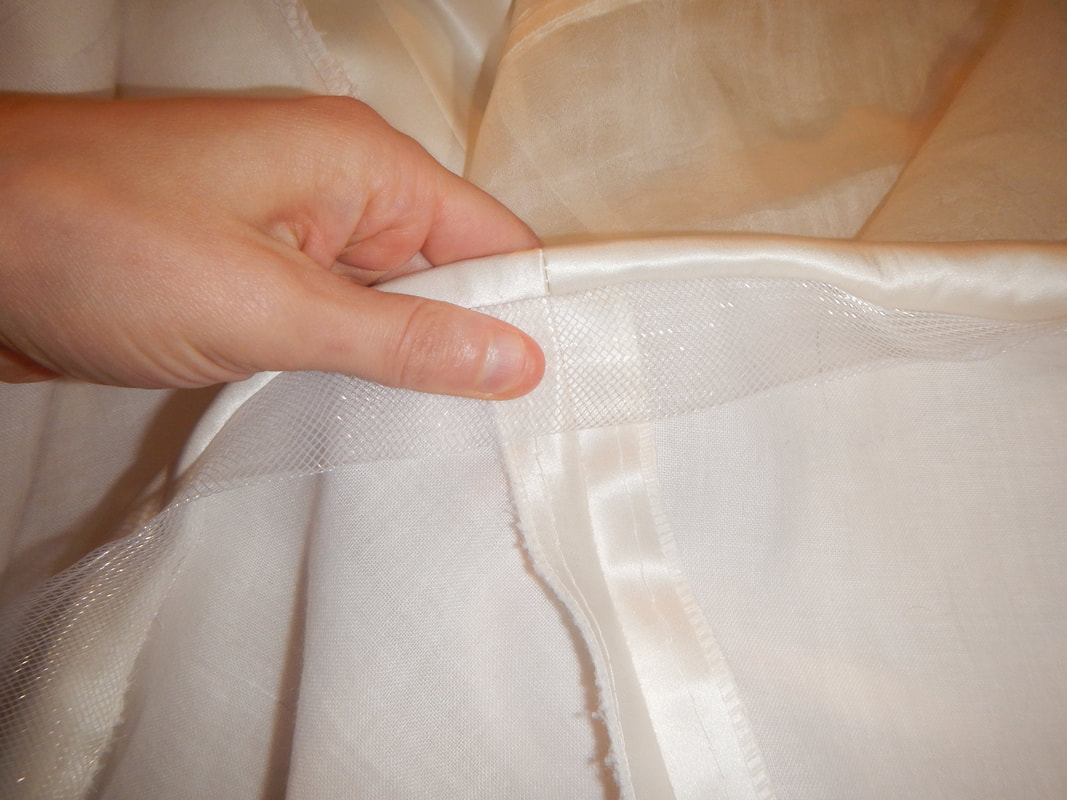
Horsehair braid is not (currently) made of horsehair: it's actually a flexible plastic braid, with considerable springiness to it.  You can pull it taut, and its plastic filaments will scrunch together like a Chinese finger trap, or push it against itself, and it'll give easily.  But let it go and it'll spring back to its middling state of tension.  The purpose of horsehair braid is to stiffen and stabilize the hem of a skirt without making it completely rigid.  The benefit of this stability is that the skirt will keep a smooth line at its bottom, and if there's a train, the train will be less apt to crumple up on itself if the wearer turns abruptly. 

(The problem of the train crumpling on itself has a different but similar solution in Japan: an uchikake, or long formal wedding kimono/overcoat, has padding stuffed into the end of the train, visible on the floor as a soft roll of satin, that wiggles enticingly when you walk and prevents the train from getting twisted.) 

TUTORIAL: HEMMING WITH HORSEHAIR BRAID

Picture
First, look how the skirt panels are flat-lined.  The top layer is a thin silk, and the bottom layer is a sturdy cotton.  The cotton underlining gives body to the silk, and makes the dress heavy and structured rather than light and drapey. 
Picture
For measurements, cut the skirt to a little more than a quarter-inch longer than you want it to be when hemmed.  (I use my pinky nail as a guide, since numbers confuse me.)  There will only be a little seam allowance turned up with the horsehair braid. 

I use a serger to hold the two layers together at the bottom of the skirt, but you could use a zig-zag stitch or even just a straight stitch on your regular machine to do the same thing.  All the raw edges will be concealed in the end, so there's no need to serge if you don't have a serger. 
Picture
Use a regular sewing machine to sew the horsehair braid on the right side of the skirt.  In this picture, you can see I lay the skirt right side up, and lay the horsehair braid on its bottom edge, with the braid completely on the fabric.  I sew just above the serged edge, so all the thread from serging is in the bottom seam allowance and won't show when I'm done. 

Be careful not to either scrunch or stretch the horsehair braid as you sew!  Let it rest in its middling state. 
Picture
Turn the horsehair braid to the inside of the skirt.  As you turn it, the seam allowance from the last step will be concealed in the roll and the stiffness of the braid will pull some of the fashion fabric to the inside.  That's why I suggested measuring a little more than a quarter-inch of hem allowance: serging/sewing the two layers together takes up about a quarter inch, and turning takes up another few eighths of an inch. 
The last step is hand-finishing, which I forgot to take a picture of.  It's pretty easy: first tug the braid snug into the bottom of the skirt (there should be no excess in the turned area) and pin it in place; then use your favorite hand stitch to catch a few threads of the cotton lining to the top of the horsehair braid.  I just did large whip-stitches, but a catch-stitch would probably be better.  Be careful not to catch the outside fabric: you want the hem to be invisible from the outside.  One of the benefits of the horsehair braid's stretchiness is that it stretches and scrunches to go around the curves of your dress, so in some places you'll want to mold it to your desired shape and make smaller stitches to ensure it stays that way. 
Here is the bottom of the hem as worn: the dress and its brush train are hemmed with horsehair braid; the sheer overlay has a Calvin Klein hem. 
Picture

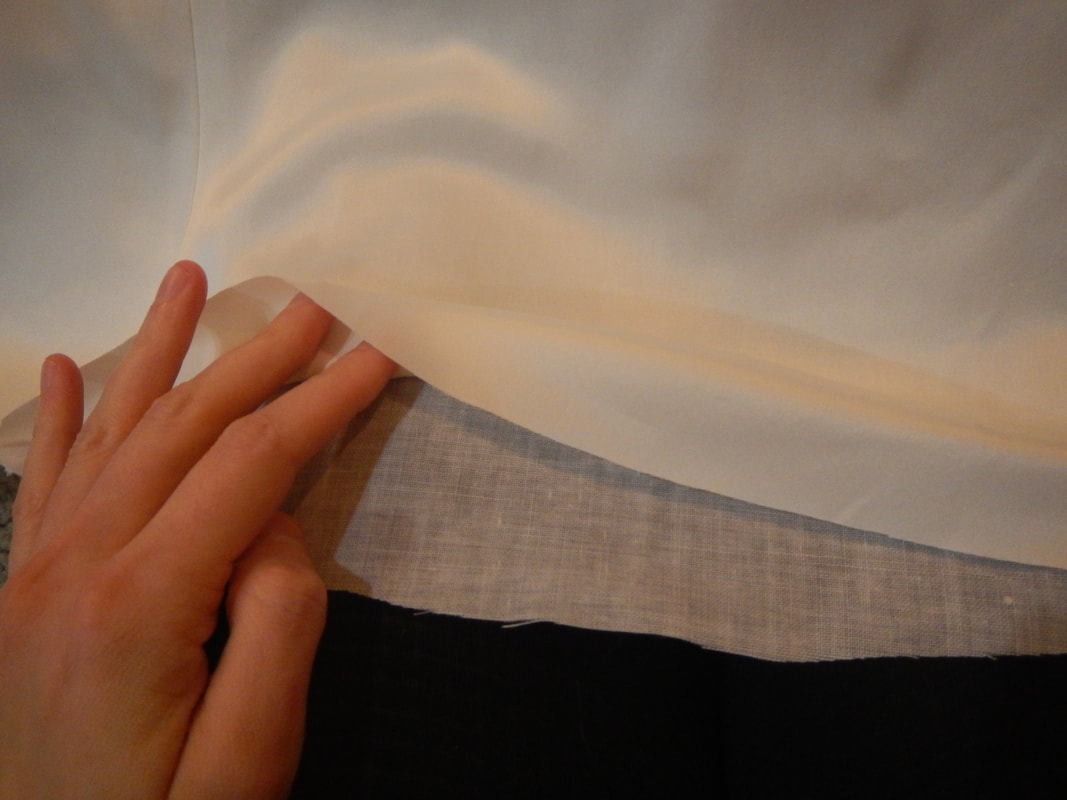
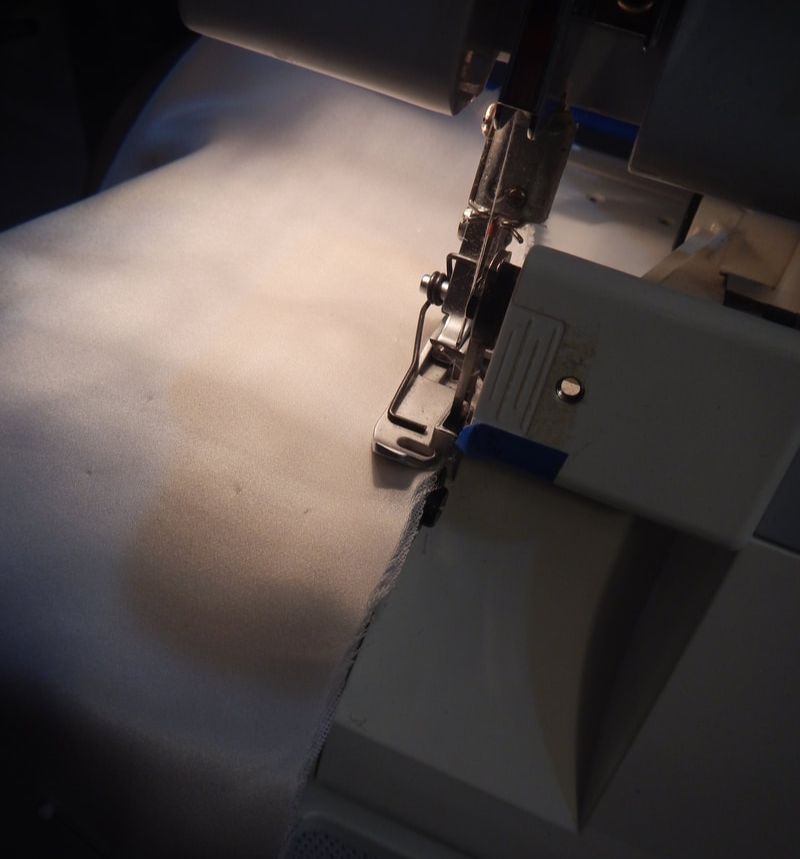
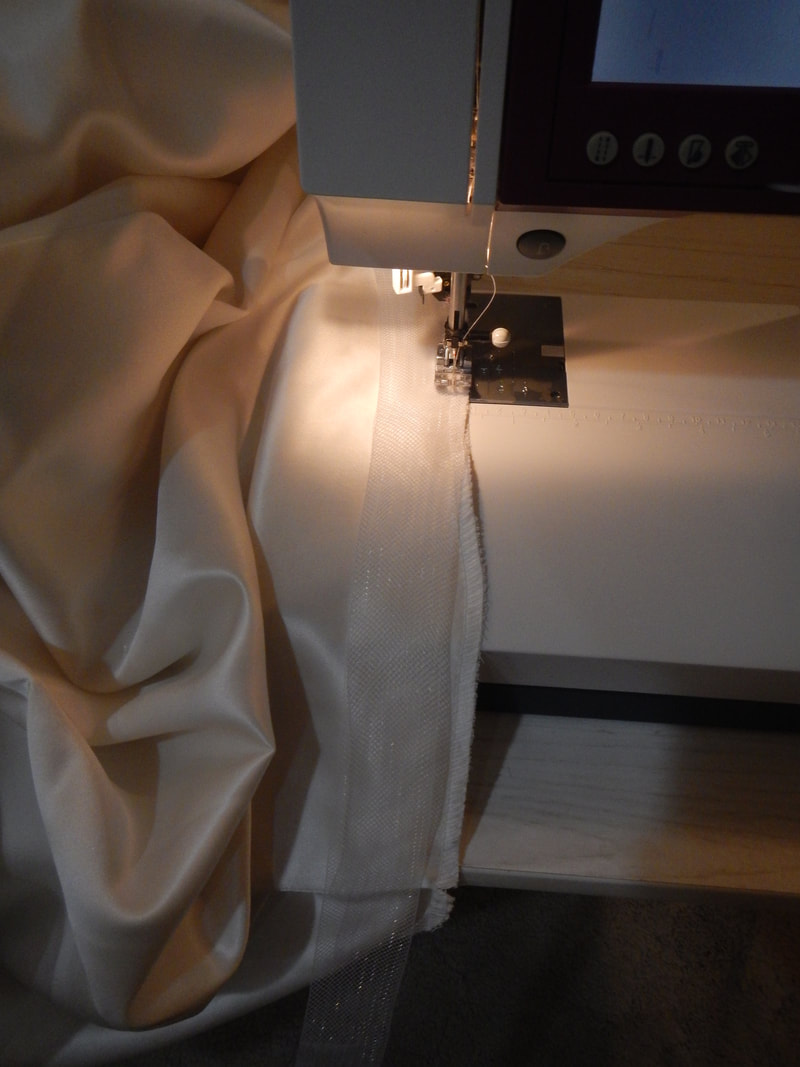
WHAT IF THERE'S NO UNDERLINING?

In the first picture I showed how this skirt was made with an underlining, so there were two layers of fabric to be held together, and an inner layer to be hand-sewn in the last step.  But what if your skirt only has a single layer?  You can still hem it with horsehair braid.  Just measure as above (a little over a quarter inch of hem allowance), then skip the serging step and go straight to sewing the horsehair braid to the right side of the fabric.  Turn the braid to the inside of the skirt, snug it tight at the turn, and pin it in place.  Then you can finish by machine-sewing on top of the folded fabric and horsehair braid, right next to the first seam which is concealed in the turn.  This last seam will be visible on the front of the fabric as a narrow hem.  Or you can finish by hand if you're good at nearly-invisible stitches. 
8 Comments
The Sister
12/5/2017 09:41:07 am

I want to see a fully body picture when it's time! Looks lovely!

Reply
Karen Roy link
12/8/2017 10:58:22 am

Oh, you will! In January the whole project will get blogged! (Spoiler: It looks really cool!) :)

Reply
Tara
7/25/2019 01:31:58 pm

Any tips on what to do when the horsehair braid flips out on the train???

Reply
Karen Roy link
7/28/2019 01:55:48 am

Hi Tara! It sounds like your problem relates to the one part of the process I didn't get pictures of: the hand-stitching of the loose top edge. In the following, I'll abbreviate Horsehair Braid to HHB.

The wider the HHB, the more likely it is to want to roll back outside the dress. A skinny HHB may stay put with just the hem stitches, but a wide HHB needs the hand-stitching step.

IF THE DRESS IS LINED OR FLAT-LINED, you can sew the upper edge (the loose edge) of the HHB to the lining only, with hand-stitches. The stitches can be pretty big... a good way of gauging them is to ask "could a high heel get caught in this?" If so, make the stitch smaller. If not, you're fine. The trick in this case is to keep your hand-stitches in the HHB and lining ONLY, not going all the way through to the outside of the dress.

IF THE DRESS IS NOT LINED, then you can still hand-stitch the top/loose edge of the HHB to the dress itself. Either use tiny stitches (if you are good at nearly invisible stitches), or tack the HHB to the seam allowances at Center Back and Side seams. The more places you can discreetly tack it down, the better.

I'm sorry I didn't take pictures of that part of the process! I hope this explanation helps. Also check out this video: https://www.youtube.com/watch?v=n3iolWa0h1g

She is working with only one layer of fabric (an un-lined skirt).
At 2:25, she sews the HHB to the outside of the skirt.
At 2:52, she shows the flip to get the HHB inside the skirt.
At 3:53, she stitches the narrow hem. (I stitch in the ditch, but she goes a bit lower still.)
At 7:43, she starts to demonstrate the handsewing.

I hope this helps!

Reply
Paula Hopper
1/29/2021 06:53:16 am

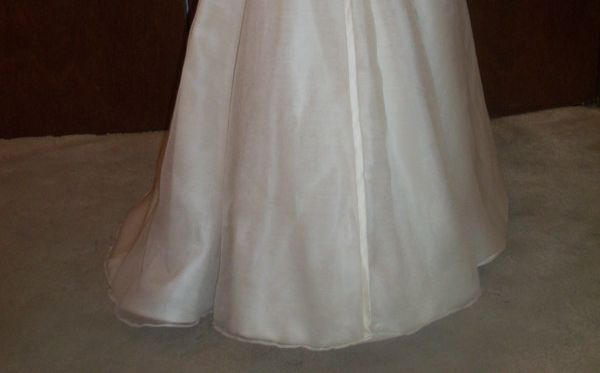
I have a question about the second step, where it says to use a serger to sew the layers together: do you mean you sewed the silk layer to the cotton layer? Because the end dress looks like the outer silk layer is separate (which I prefer). So I'm confused about what "layers" you sewed together . . .

Reply
Karen Roy link
5/4/2021 10:14:09 am

In this dress, there were three layers of skirt (not including petticoat net: stiff cotton, floppy silk, and crisp sheer silk. The cotton organdy was used as flat-lining for the silk charmeuse to make the soft silk behave more like a stiff duchesse satin, in other words to make a less expensive silk act like a much more expensive silk. Those two layers were treated as one throughout construction, including being sewn together in side seams, so it would not be possible for them to hang separately. It was those two layers together hat I serged and hemmed with HHB. The sheer overlay, a silk organza, DID hang seperately, and was hemmed with a narrow hem, not HHB. I hope that helps!

Reply
Lizzie Kevan Ideastap link
9/22/2023 10:32:07 pm

Appreciate this blogg post

Reply
Sarah
5/8/2024 07:17:43 am

Do you have any advice on how to bring up the front hem of a dress with a 3 inch horse tail braid without touching the train of the dress? The fabric is organza and so I’m Not quite sure how to achieve a seamless blend . Any advice you might have would be very greatly appreciated!

Reply


Leave a Reply.

    Karen Roy

    Quilting, dressmaking, and history plied with the needle...

    Sites I Enjoy

    The Quilt Index
    r/Quilting
    Wonkyworld

    Categories

    All
    1910's
    Alteration
    Antique
    Dyeing
    Embroidery
    General
    Hand Sewing
    History
    Lacemaking
    Mending
    Menswear
    Millinery
    Modern Elizabethan
    Musing
    Other Sewing
    Philippians 4:8
    Project Diary
    Quilting
    Regency
    Retro
    Self Made Pattern
    Self-made Pattern
    Terminology
    Victorian
    Vintage

    Archives

    April 2025
    March 2025
    December 2024
    March 2024
    December 2023
    November 2023
    September 2023
    August 2023
    June 2023
    May 2023
    March 2023
    February 2023
    January 2023
    December 2022
    November 2022
    October 2022
    September 2022
    August 2022
    October 2021
    September 2021
    August 2021
    July 2021
    June 2021
    May 2021
    April 2021
    August 2020
    June 2020
    May 2020
    April 2020
    March 2020
    January 2020
    December 2019
    November 2019
    September 2019
    August 2019
    July 2019
    May 2019
    April 2019
    March 2019
    January 2019
    December 2018
    November 2018
    October 2018
    September 2018
    August 2018
    July 2018
    June 2018
    May 2018
    April 2018
    March 2018
    February 2018
    January 2018
    December 2017
    November 2017
    October 2017
    September 2017
    August 2017
    July 2017
    June 2017
    May 2017
    April 2017
    March 2017
    February 2017
    January 2017

    RSS Feed

Blog

Quilting

Clothing

About

Copyright Karen Roy
​© 2017-2024