Robes de Coeur
  • Blog
  • Quilting
  • Clothing
    • Menswear
    • Womenswear >
      • Self-Made Patterns
      • Commercial Patterns
    • Hats
    • Miscellany
  • About
  • Blog
  • Quilting
  • Clothing
    • Menswear
    • Womenswear >
      • Self-Made Patterns
      • Commercial Patterns
    • Hats
    • Miscellany
  • About

TUTORIAL: Calvin Klein Hem

11/27/2017

0 Comments

 
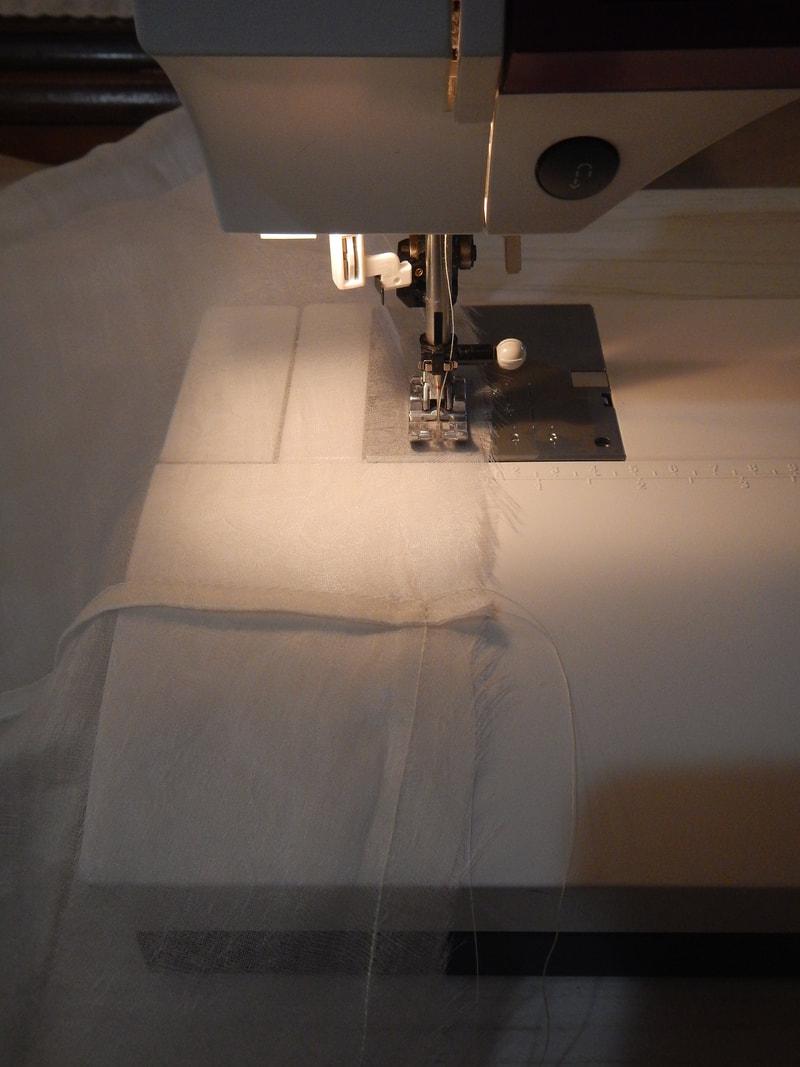
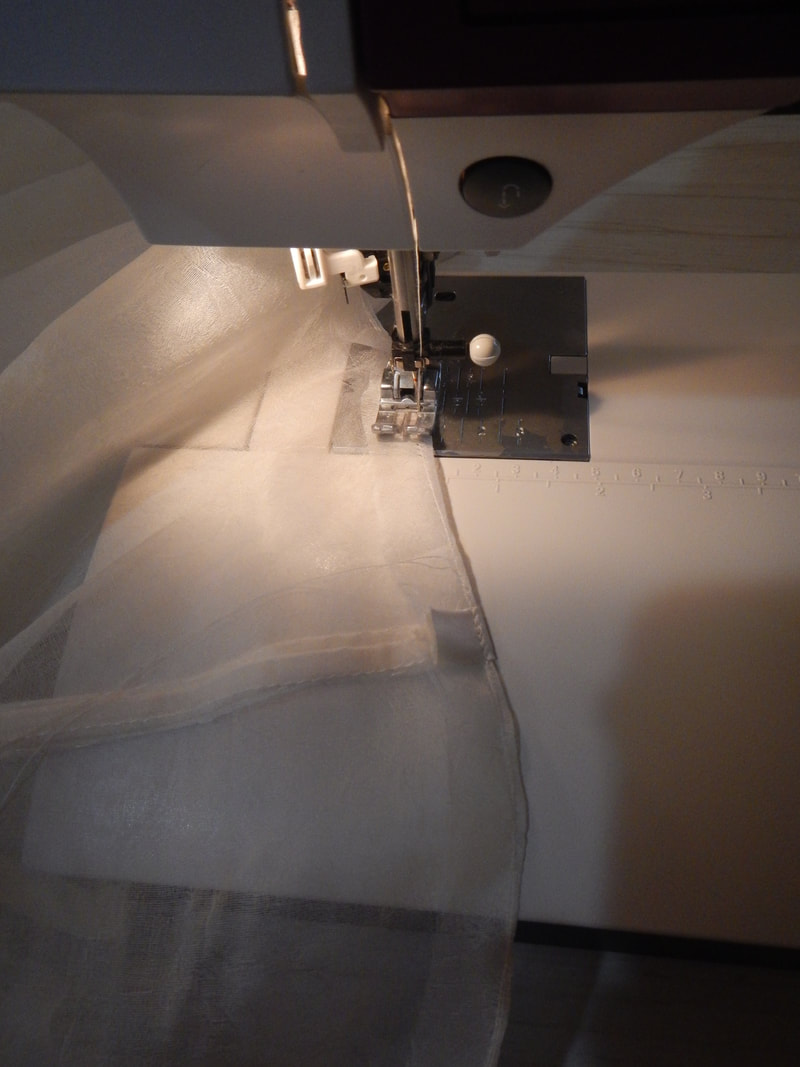
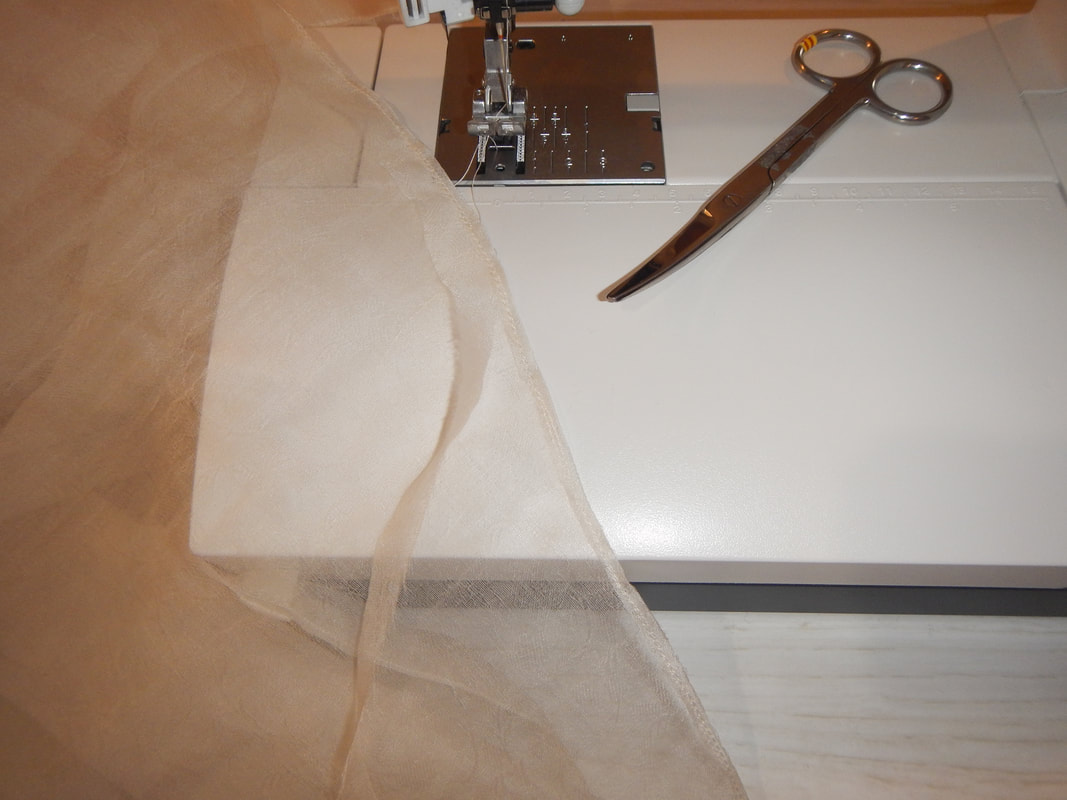
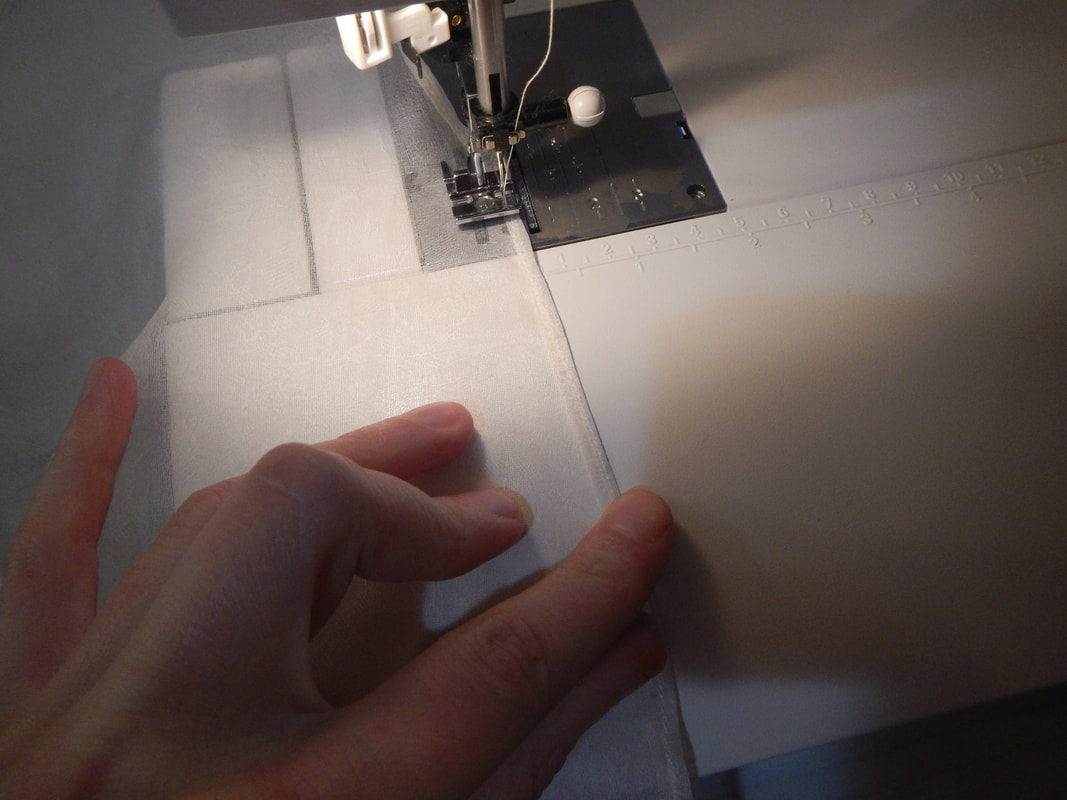
Remember this from May 2017, my post about draping a peplum top? 
The hem of the peplum is a skinny Calvin Klein hem, so called because at one point Calvin Klein garments used it a lot, not because Calvin Klein invented it.  (I'll do a tutorial soon on the Calvin Klein hem, since I'm rather fond of it.)  
Well, "soon" has become "today"!  I was recently working on hemming a wedding dress, and decided to use the Calvin Klein hem for the sheer silk overlay.  The biggest advantage, for me, is that the hem is thin and inconspicuous.  It also looks professional, not Becky-Home-Ecky.  I got some halfway decent photos, so here is the process in pictures! 

TUTORIAL: CALVIN KLEIN HEM

Picture


STEP 1
After lightly creasing the hem-line so you know where you want the hem to end, unfold the fabric and sew a single line of machine stitching on a single layer of the skirt, a few millimeters lower than the ironed crease. 

In this picture, looking from left to right, you can see the bulk of the skirt, the crease of the ironed hem (which was opened up again after ironing!), the line of stitching, and the raw edge of the fabric. 
Picture
STEP 2
Lay the fabric right side down and iron the hem, folding the single line of stitching up (to the wrong side).  Turning a small bit of slippery or sheer fabric up by an even amount can be difficult, but with the line of stitching, it's easy because the stitches are more stable and manipulable.  Note that this fold puts the stitches on the wrong side of the fabric, the inside of the garment. 
Picture


STEP 3
Wrong side up, sew a new single line of stitches directly atop the old one.  From the wrong side of the garment you'll see two lines of stitching in the same area, but from the right side of the fabric you'll only see one (because the first line is concealed in the fold). 

To get your stitches just on the edge like this, a zipper foot is useful, or variable needle positions.  I'm using a regular foot but putting my needle to the far right. 
Picture
STEP 4
Carefully trim the raw edges away from the hem.  The scissor in this picture have curved blades, which are nice for trimming close to things, because the cutting edge is always angling away from the danger zone.  I think they're called applique scissors*.  If you don't have them, fold the hem over your finger so the raw edge sticks out but the rest is on your skin, then trim the stuff in the air. 
* I have also seen them called "medical bandage scissors", "embroidery scissors", and "cuticle" or "nose hair scissors"! 
Picture
(Yes, I did switch to a zipper foot for this pic.)

STEP 5
No iron needed this time: the relative bulkiness of the seam compared to the sheer fabric makes it easy to turn by hand!  So fold it one more time into the inside of the garment, and sew one more line of stitching on top of the previous two.  Now three lines of stitching are visible on the inside, only one on the outside.
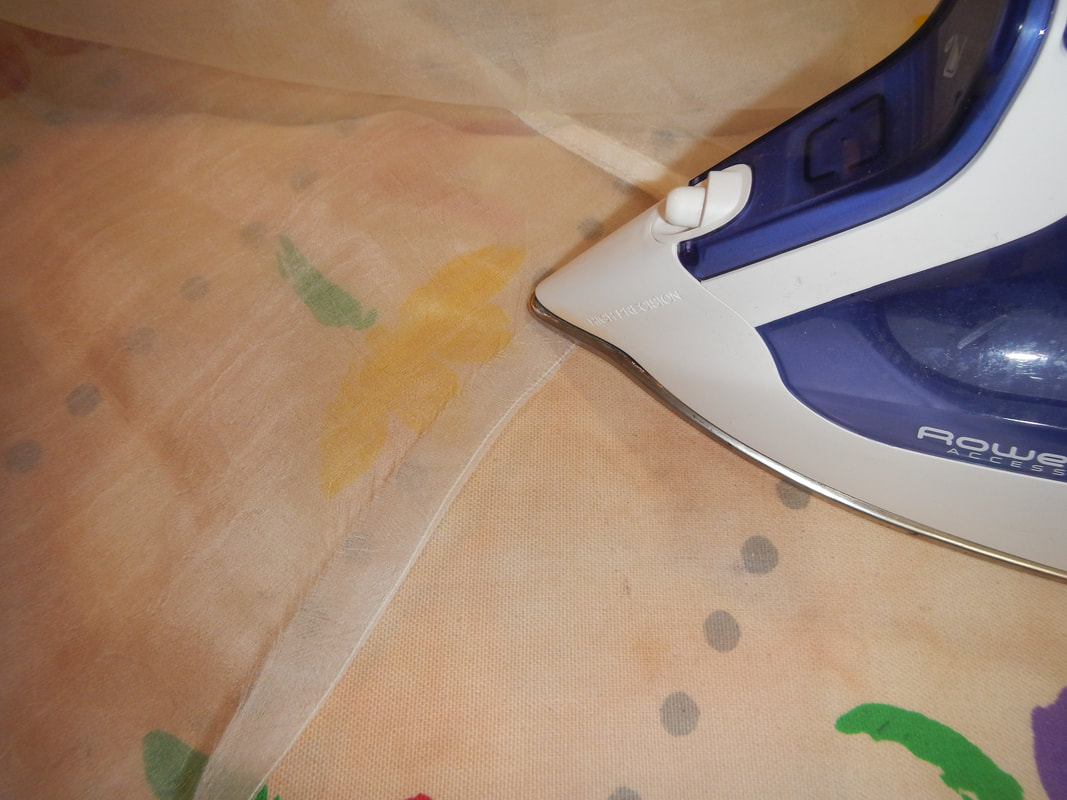
When you're done, press your hem.  The Calvin Klein hem works well on sheers, thin fabrics, and even quilting cottons, when you want the hem to hang smoothly (no ruffly lettuce effect).  The heavier the fabric, obviously, the bulkier the hem; I'd stick with lightweight fabrics.  Also, the heavier the fabric, the more space you'll use in each turn, so start a little further from the creased hemline if your fabric is thicker.  This technique also works best on straight hems or gentle curves; if the curves are too sharp, you'll have either buckling and bunching (depending on whether the curve is concave or convex) when you turn the hem up. 
0 Comments


Leave a Reply.

    Karen Roy

    Quilting, dressmaking, and history plied with the needle...

    Categories

    All
    1910's
    Alteration
    Antique
    Dyeing
    Embroidery
    General
    Hand Sewing
    History
    Lacemaking
    Mending
    Menswear
    Millinery
    Modern Elizabethan
    Musing
    Other Sewing
    Philippians 4:8
    Project Diary
    Quilting
    Regency
    Retro
    Self Made Pattern
    Self-made Pattern
    Terminology
    Victorian
    Vintage

    Blogs I Read

    The Dreamstress
    Male Pattern Boldness
    ​
    Lilacs & Lace
    Tom of Holland
    Fit for a Queen
    Line of Selvage
    Mainely Menswear
    Bernadette Banner

    Archives

    January 2023
    December 2022
    November 2022
    October 2022
    September 2022
    August 2022
    October 2021
    September 2021
    August 2021
    July 2021
    June 2021
    May 2021
    April 2021
    August 2020
    June 2020
    May 2020
    April 2020
    March 2020
    January 2020
    December 2019
    November 2019
    September 2019
    August 2019
    July 2019
    May 2019
    April 2019
    March 2019
    January 2019
    December 2018
    November 2018
    October 2018
    September 2018
    August 2018
    July 2018
    June 2018
    May 2018
    April 2018
    March 2018
    February 2018
    January 2018
    December 2017
    November 2017
    October 2017
    September 2017
    August 2017
    July 2017
    June 2017
    May 2017
    April 2017
    March 2017
    February 2017
    January 2017

    RSS Feed

Blog

Quilting

Clothing

About

Copyright Karen Roy
​© 2017-2022