Robes de Coeur
  • Blog
  • Quilting
  • Clothing
    • Menswear
    • Womenswear >
      • Self-Made Patterns
      • Commercial Patterns
    • Hats
    • Miscellany
  • About
  • Blog
  • Quilting
  • Clothing
    • Menswear
    • Womenswear >
      • Self-Made Patterns
      • Commercial Patterns
    • Hats
    • Miscellany
  • About

TUTORIAL - How to sew a button on a jacket

1/15/2018

0 Comments

 
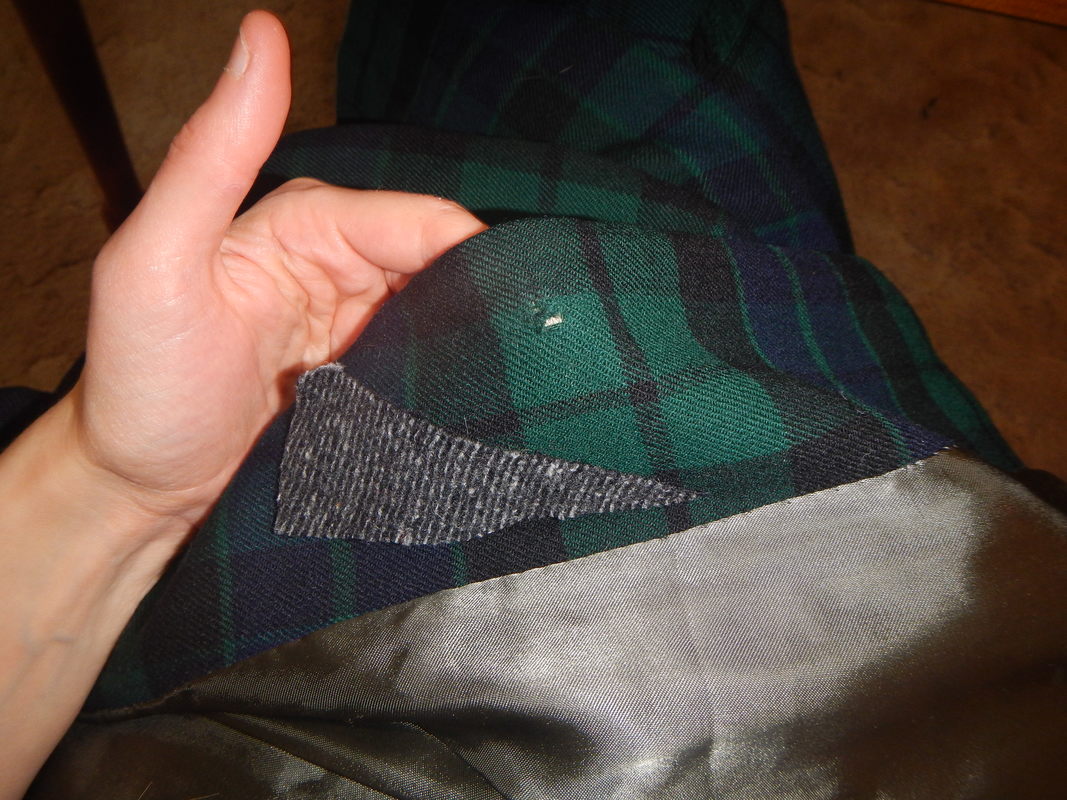
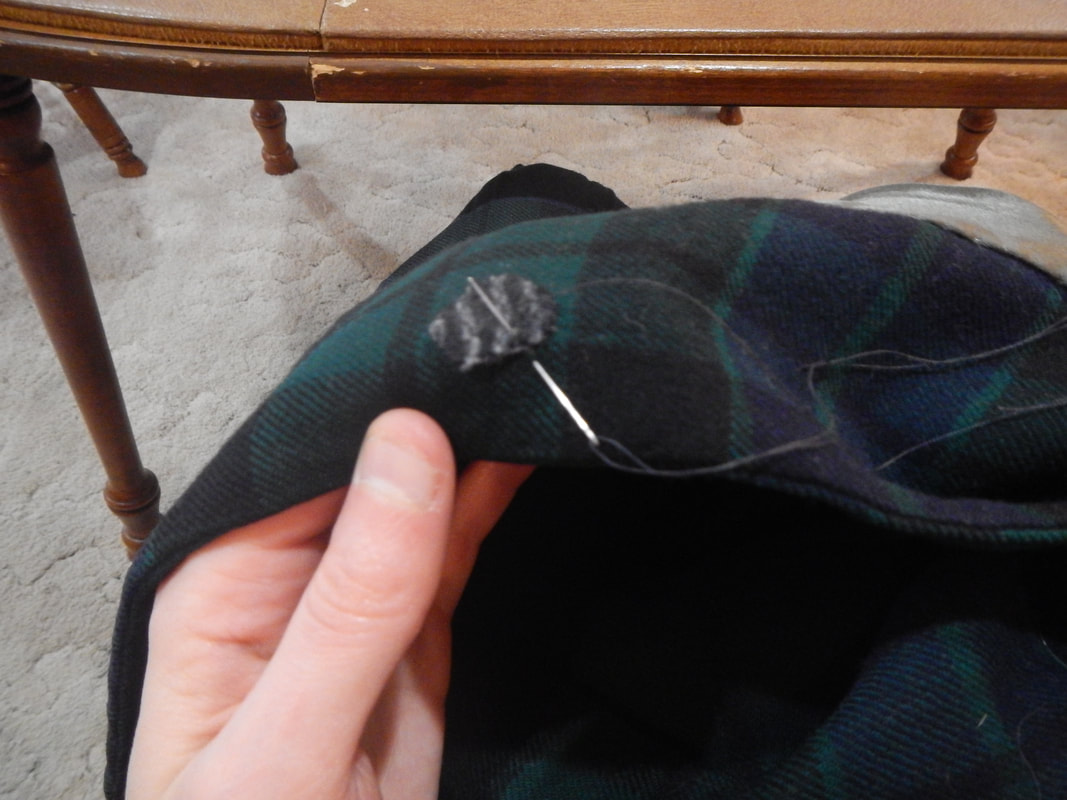
One of my medium-weight jackets (a nice wool tartan labeled Moss Brothers Covent Garden*, which has been very serviceable to me) lost a button on Christmas day, while I was shoveling ice off the driveway.  Since another button was loose, I took the opportunity to change all three buttons for prettier ones, and took pictures along the way!  The original buttons were plain black plastic shaft buttons.  The new ones are bronze flat buttons with maple leaves on them in bass relief.  There was even a worn area that needed patching, which makes me childishly excited.  If such things interest you (or childishly excite you), read on!

*It's a women's jacket, but I don't see any women's stuff on their website now, so perhaps they no longer make womenswear.
There are different ways to sew on a button, depending on the type it is and the fabric it's going on.  Buttons on jackets get a lot of wear, because they can be pulled quite hard if you're bundling up.  And unlike shirts or vests or other garments, which might only get worn once a week, a jacket gets worn every day when the weather is cool.  So the area under the button might need reinforcement, and the best way to do that is with a second, flat button, as you'll see in a moment.  Plus, jackets are thicker fabrics than shirts, so the button needs to stand up above the fabric to make room for the buttonhole side of the front.  Some buttons have a shaft on them, like a stalk they stand on, but if they don't have a shaft, you need to make one with your thread.  I'll show you that in this post, as well. 

THIS PROJECT

  1. sew a patch over a hole in the jacket's facing
  2. sew on inner and outer buttons
  3. make a shaft for the outer button

TUTORIAL - SEWING A BUTTON ON A JACKET

Click on any picture to enlarge. 
Picture
wool and hole
I first remove the original buttons, using a seam ripper to cut the threads but not the fabric.  Nevertheless, one area is torn from wear and tear.  Thankfully, it's on the facing, inside the jacket, so I can patch it without changing the jacket's look.  I select a scrap of wool to cover the hole.  (You may recognize that wool from my Yoko Saito skirt.) 
Picture
Overcasting stitches
Since the wool is a little felted already, I cut it in a circle a little bigger than the hole, and don't worry about turning the edges under.  I sew the patch down with overcasting stitches, very simply.  I'm careful to keep my stitches shallow, so as not to go through to the outside of the jacket.  When I'm done, I tie my working thread off to its last stitch, then take the thread under the patch and come out in the middle of it, ready to sew on the button. 
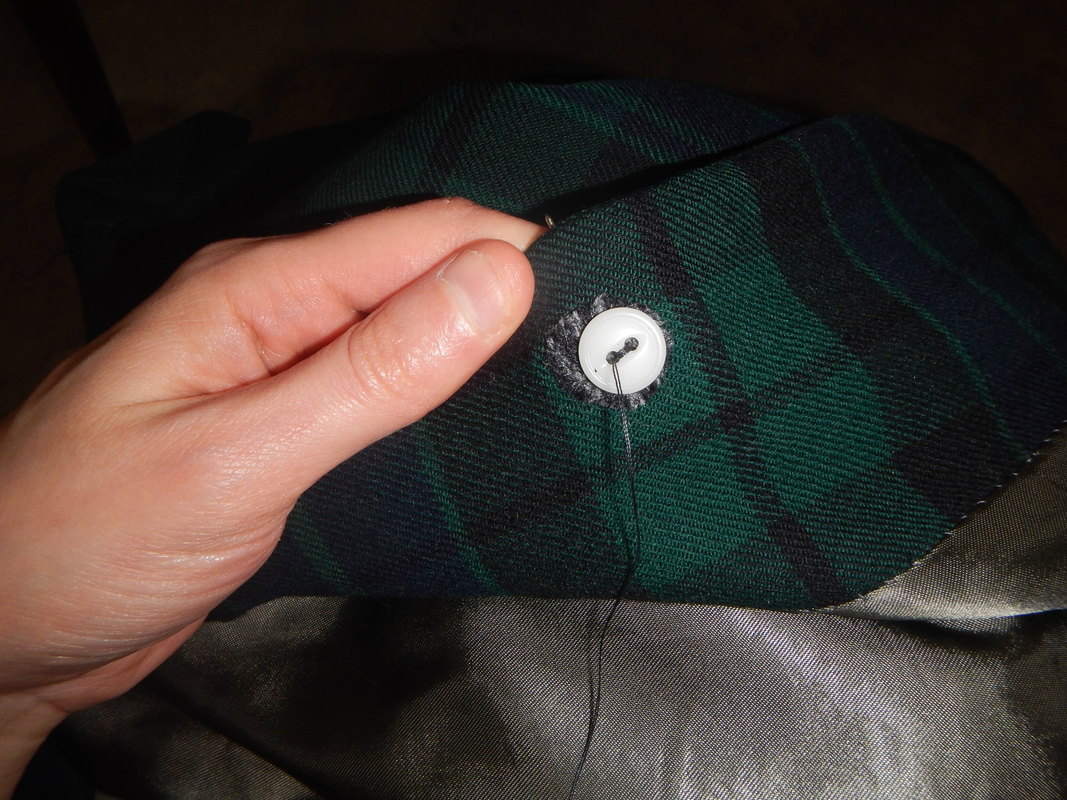
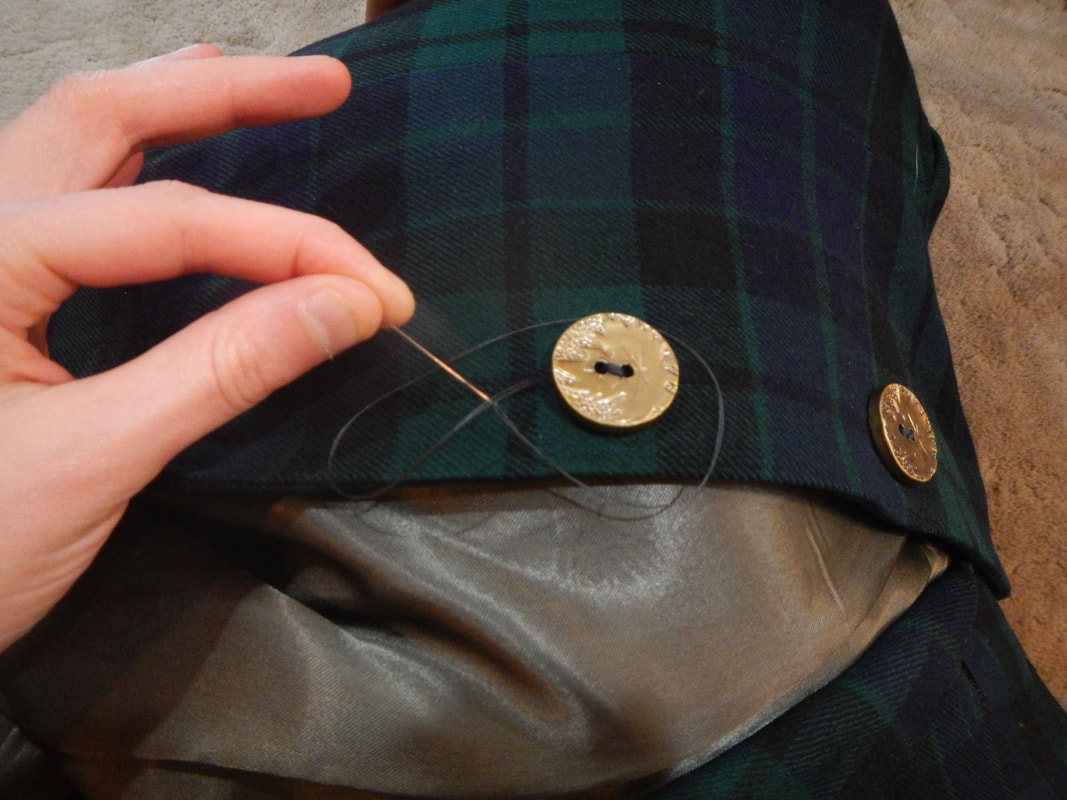
Now it's time to put the inner button on.  What's the inner button for?  Well, let's imagine a jacket with the outer buttons sewn to the fabric alone, no inner button.  Every time you manipulate the outer button, you pull on its threads, which means pulling on a tiny area of your fabric.  This is how holes in the fabric happen!  But if there's an inner button sewn in the same loops of thread as the outer button, that creates a new foundation: when you manipulate the outer button, the tension transfers to the inner button and thus a stronger and wider area than just the fabric.  The fabric is sandwiched between the two buttons, and therefore cannot twist and get damaged. 
Picture
The inner button, atop the patch
The inner button, on the inside of the jacket, is flat and small.  Its diameter should be smaller than that of the outer button!  I'll explain why in a few more steps.  Its holes should be oriented the same as the outer button's holes, so you can stitch directly from one through the other.  In this case, the two holes are vertical, in order to position the maple leaf the way I want on the outer buttons. 
Picture
The outer button, with toothpick spacer
As I stitch the outer button down, I also stitch over a toothpick, which serves as a spacer.  The width of the toothpick is similar to the width of the jacket front. 

Each stitch starts by going through one hole in the inner button, up the corresponding hole in the outer button, over the toothpick, down the other hole, and through the corresponding hole in the inner button.
Picture
You can kinda see the outline of the inner button near my thumb.
Once done, I bring the needle and thread to the front.  Then remove the toothpick/spacer and bend the fabric over my thumb, tilting the button out of the way, so I can stitch the needle through to just behind the outer button.  This step is only possible if the inner button is smaller in diameter that the outer one!  (Remember that caveat from before?)  If the inner button is too big, it makes a non-bendy sandwich and it's nigh impossible to slide the needle between the layers! 
Picture
With the needle and thread now just behind the outer button, I pull the button to the top of its loops (the area previously occupied by the toothpick) and make several overhand knots, one after another, to tie the threads together firmly under the button.  This creates the shaft, so the button sits up above the fabric, not directly on it.  When I button up the jacket, the thickness of the jacket around the buttonholes will fill that area! 
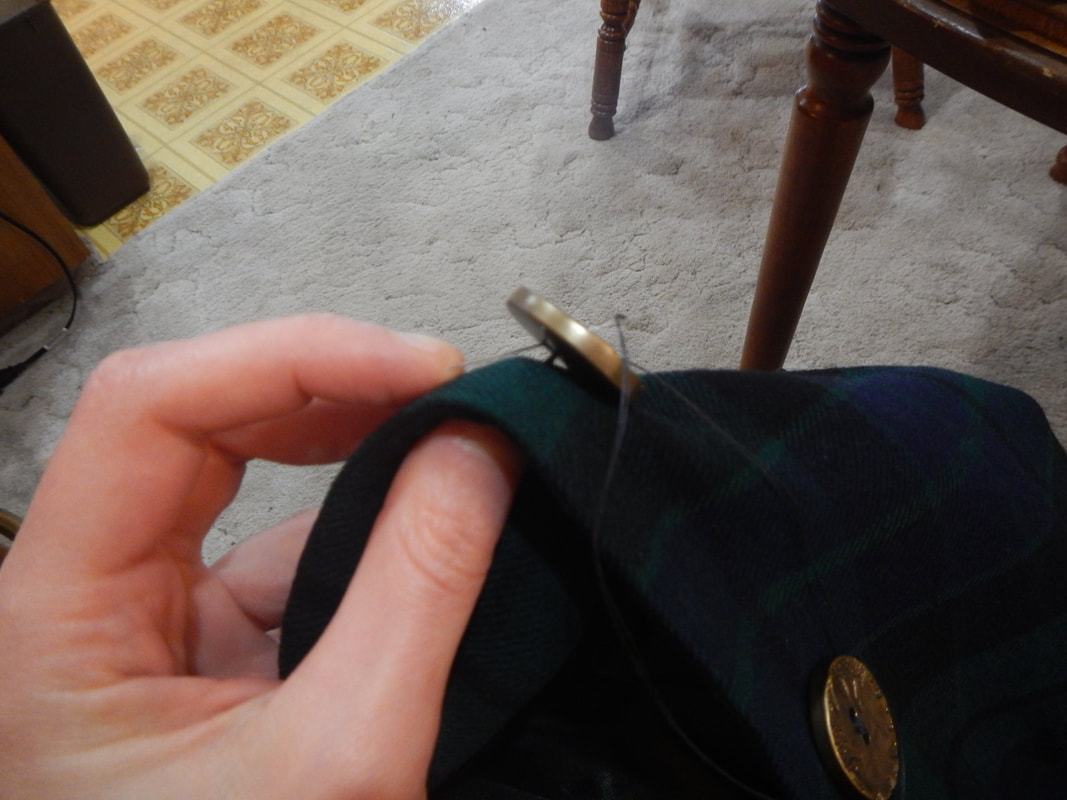
The final step is to tie the thread off somewhere where it won't be subject to wear.  In this case, I was able to poke the needle through to the back and knot the thread around some of the threads back there. 

I think the new buttons step up the style of my already stylish jacket!  There are still plain black plastic buttons on the (non-functional) sleeve vents, but I don't mind them.  The front, though, looks great with the interesting bronze buttons. 
0 Comments


Leave a Reply.

    Karen Roy

    Quilting, dressmaking, and history plied with the needle...

    Categories

    All
    1910's
    Alteration
    Antique
    Dyeing
    Embroidery
    General
    Hand Sewing
    History
    Lacemaking
    Mending
    Menswear
    Millinery
    Modern Elizabethan
    Musing
    Other Sewing
    Philippians 4:8
    Project Diary
    Quilting
    Regency
    Retro
    Self Made Pattern
    Self-made Pattern
    Terminology
    Victorian
    Vintage

    Blogs I Read

    The Dreamstress
    Male Pattern Boldness
    ​
    Lilacs & Lace
    Tom of Holland
    Fit for a Queen
    Line of Selvage
    Mainely Menswear
    Bernadette Banner

    Archives

    January 2023
    December 2022
    November 2022
    October 2022
    September 2022
    August 2022
    October 2021
    September 2021
    August 2021
    July 2021
    June 2021
    May 2021
    April 2021
    August 2020
    June 2020
    May 2020
    April 2020
    March 2020
    January 2020
    December 2019
    November 2019
    September 2019
    August 2019
    July 2019
    May 2019
    April 2019
    March 2019
    January 2019
    December 2018
    November 2018
    October 2018
    September 2018
    August 2018
    July 2018
    June 2018
    May 2018
    April 2018
    March 2018
    February 2018
    January 2018
    December 2017
    November 2017
    October 2017
    September 2017
    August 2017
    July 2017
    June 2017
    May 2017
    April 2017
    March 2017
    February 2017
    January 2017

    RSS Feed

Blog

Quilting

Clothing

About

Copyright Karen Roy
​© 2017-2022