|
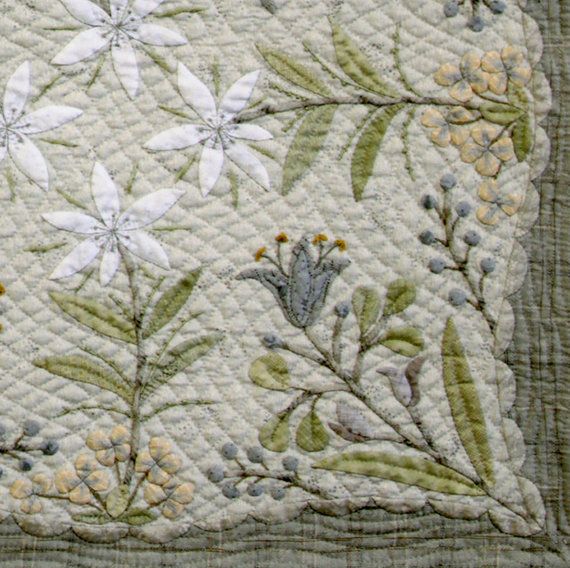
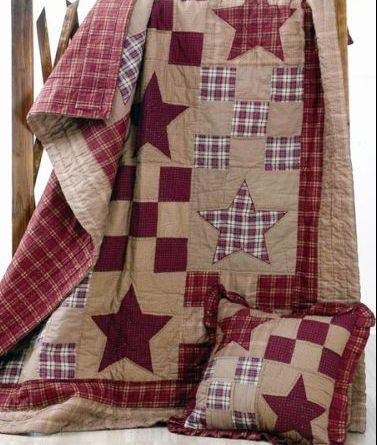
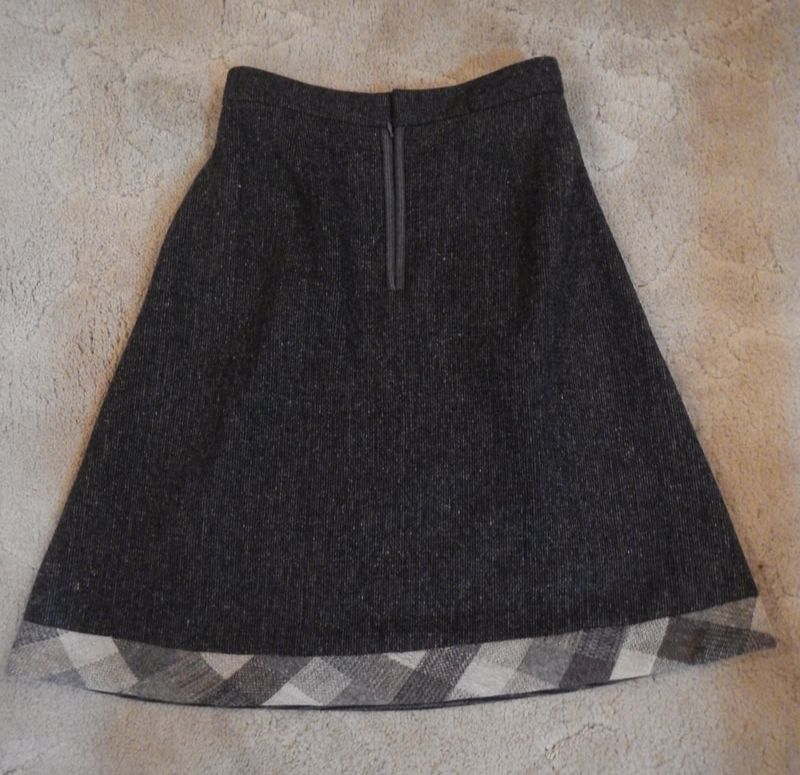
Today's post is about Yoko Saito's artwork, and about a skirt I made recently, from the same stash and pattern as the A-line of last week. It includes a strip of bias-cut wool in very soft taupe colors, appliqued onto a darker wool using Yoko Saito's instructions, so I've taken to calling it my Yoko Saito skirt! Yoko Saito is a famous quilter. Her work is very Japanese in its sensibilities: subtle colors, subtly combined, with impeccable stitching and attention to minute detail. There are three elements which come together to make a Yoko Saito quilt really distinctive to me: the taupe colors; the complex and often layered applique; and the hand-quilting. Doing an image search for "Yoko Saito" will give you a pretty good idea of her aesthetic; it's the kind of work that rewards close study. Be aware as you look that Saito has many students and followers who replicate her style, so not everything you see is definitely made by her; but it represents her school of quilting. TAUPE Saito is so fond of the color taupe that she's developed a Taupe Color Theory, and put together color wheels for various shades of the taupe family. What is taupe, you ask? Simply, it's brown-gray, the color of a European mole. But its expanded definition includes various other shades that have the brown-gray cast to them, what Yoko Saito describes as being "tea stained". Wikipedia's entry for "taupe" lists various examples including "sandy taupe" and "taupe gray". (I like taupe gray, since it's a warmer gray I can use as a neutral tone with my warm-toned skin.) Saito expands the range further with blues and reds that share the tea stain. Here's an interesting article about her and her students' Beatrix Potter quilts which show the range of her taupe color schemes. The effect of the muted tones and how they're combined is eye-restful and softly nostalgic, like looking at a sepia-toned photo or a formerly bright cloth now muted and faded with age. In that respect, Saito's taupe colors are very similar to the "country primitive" aesthetic that is popular in the US: lots of tea stained shades evoking a time past when things were (or from our perspective today seemed to be) simple and wholesome. But put a Yoko Saito quilt next to a Country Primitive one and there is no doubt they are different schools of art! I prefer Saito's stuff, but then I do love intense detail work!
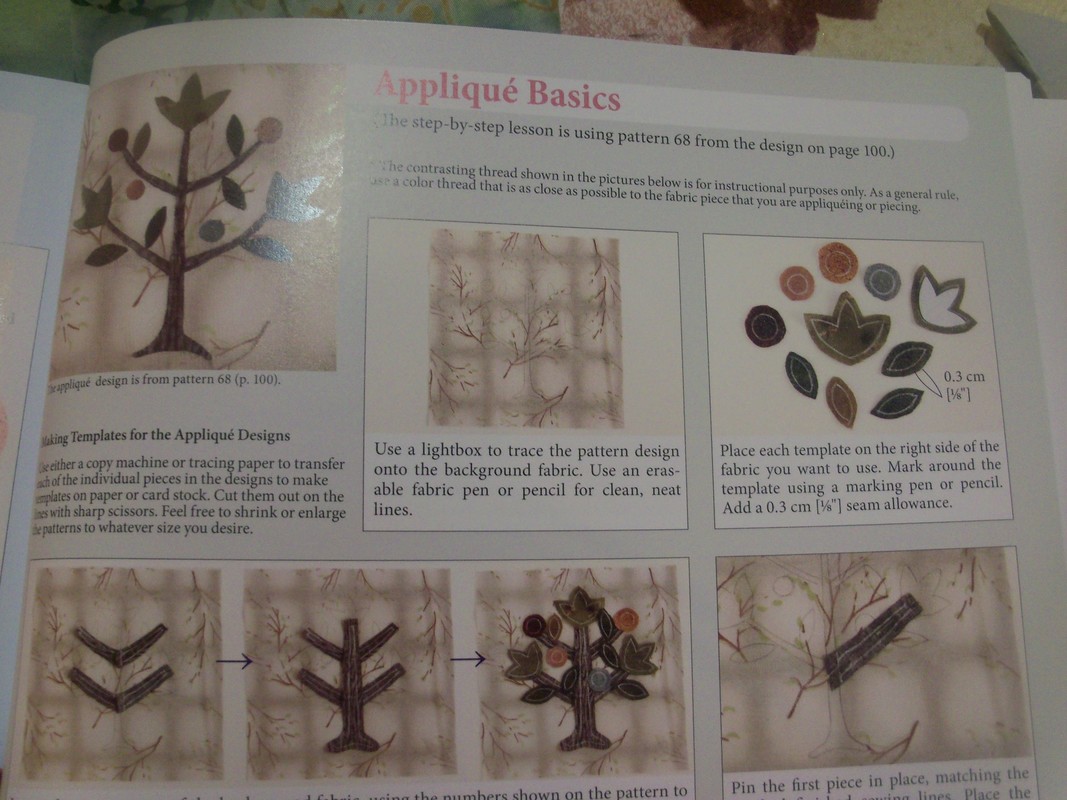
APPLIQUE
STANDING BEFORE KINGS Proverbs 22:29 says that the person who excels in their work will stand before kings. Various translations offer different versions of the same idea: being good at your work, diligent in your business, skilled or hardworking means you will stand-before/serve/work-for kings. Working for a king was an honor and an aspiration for people of that time. Nowadays we have few kings and most people could care less about serving them, but we still know who the best companies are, the most prestigious organizations, the art critics, the bosses... The proverb holds true that excellence in our work promotes and elevates us in any field. And powerful, wealthy people of today seek out artisans just as kings used to do. When I look at Yoko Saito's work, I think here is a woman who could stand before kings. Her attention to detail and craft is extraordinary. Her artistic vision is true and fully fleshed out. And she teaches others to work with the same diligence and care. MY SKIRT, IN A BORROWED PALETTE I appreciate Saito's artwork very much, but at the same time don't strongly resonate with the taupe colors. If I had my druthers, I'd make color schemes all sun-dappled, not tea stained! I want to add yellow, not gray-brown, to everything. But it sure is fun to play with other people's colors sometimes, and that's what I did with this skirt. The base pieces are charcoal gray, already cut out by the seamstress whose stash they came from. The strip of bias-cut wool was from the same stash. It looked like it had been a blanket binding, since it was folded in half lengthwise and had stray threads in it. The lady whose stash it was had many such disassembled blankets.
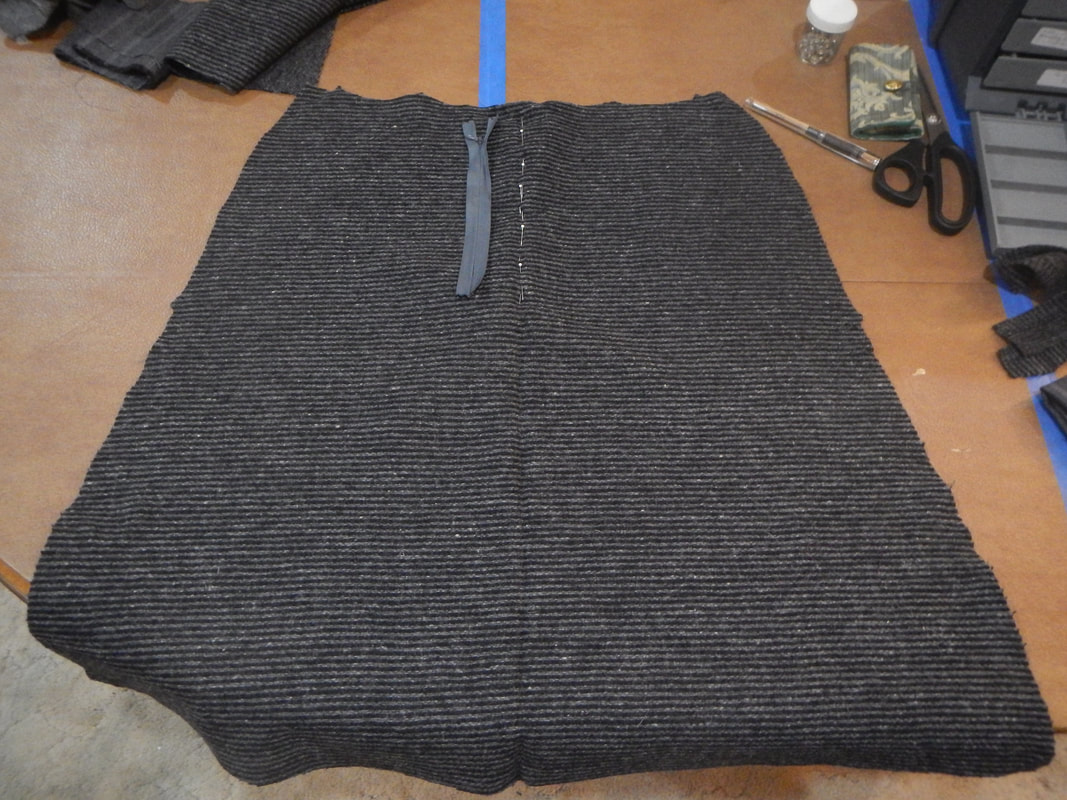
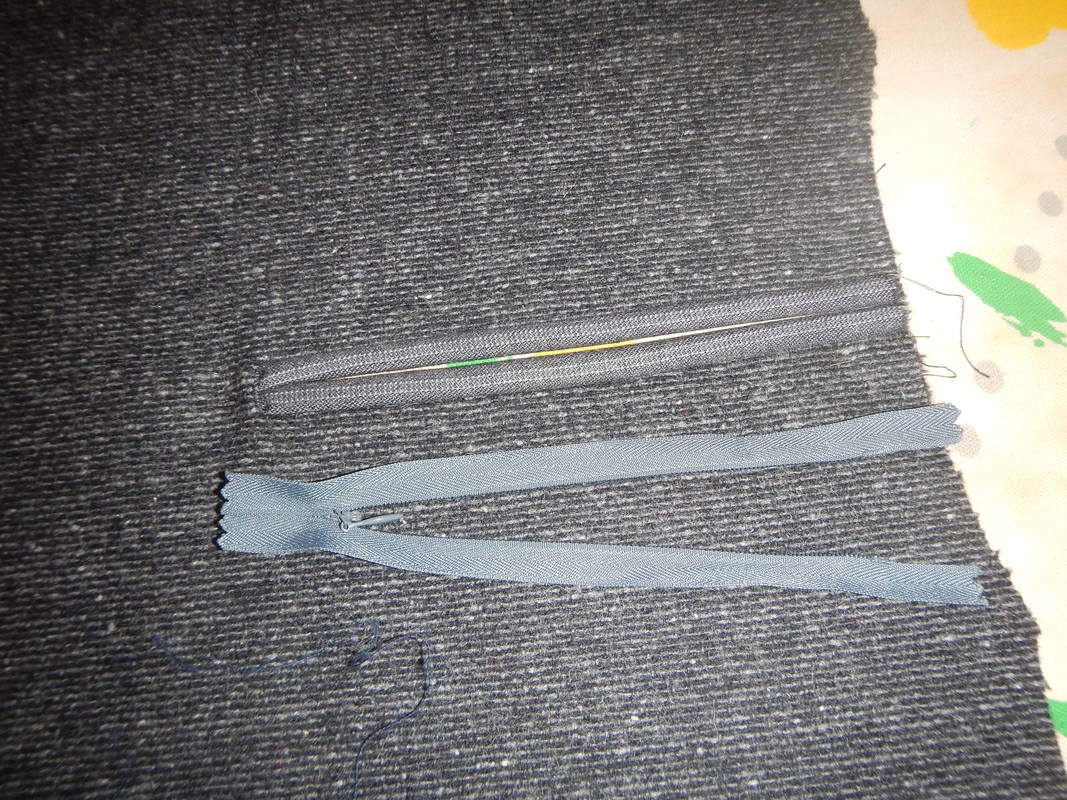
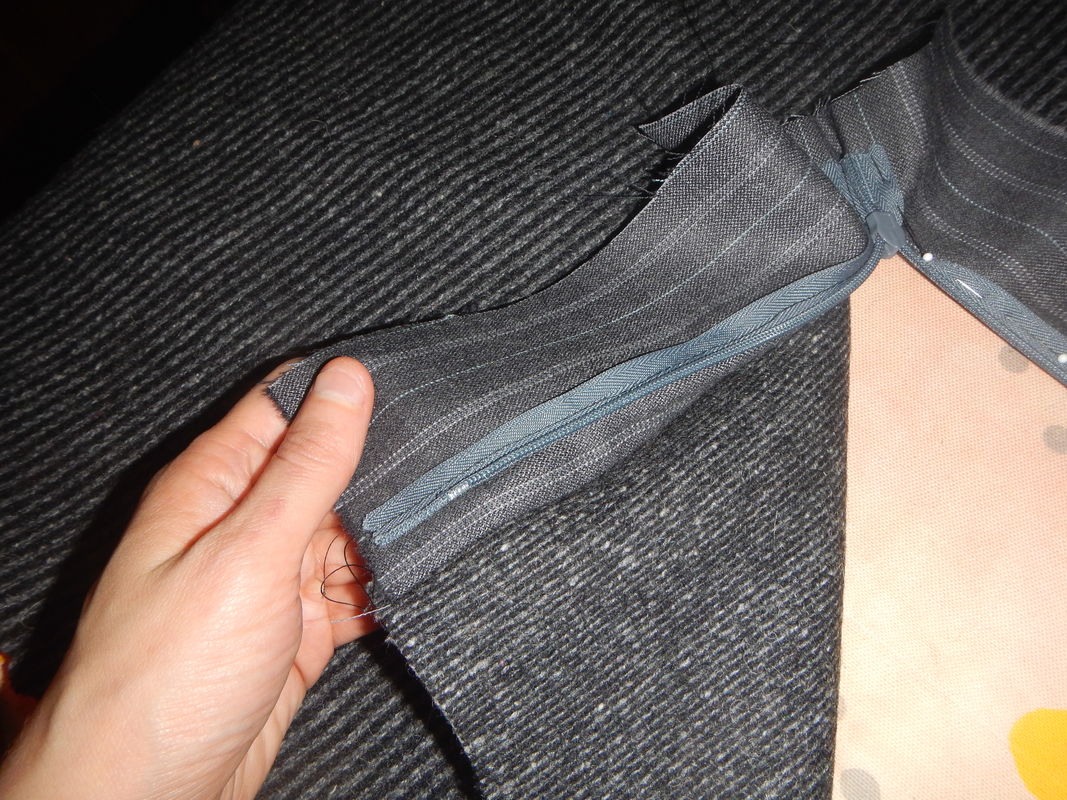
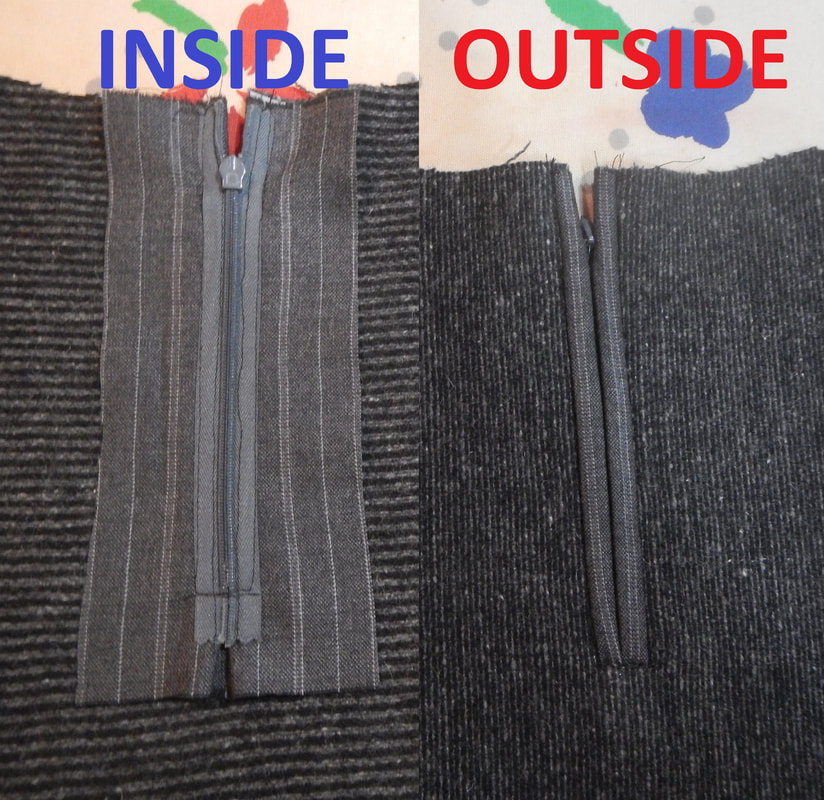
INSERTING THE ZIPPER The previous time I made this skirt (the light gray version), I inserted the zipper in the side seam, but didn't like how it showed when worn. The side seam curves sharply over the hip, so it's only going to conceal a zipper if the skirt is loose. These skirts are tight, not the least because they came from a pattern for a 25.5" waist! Yowza! I added inches by making them up with tiny seam allowances and using smaller darts, but they are still slim-fitting.
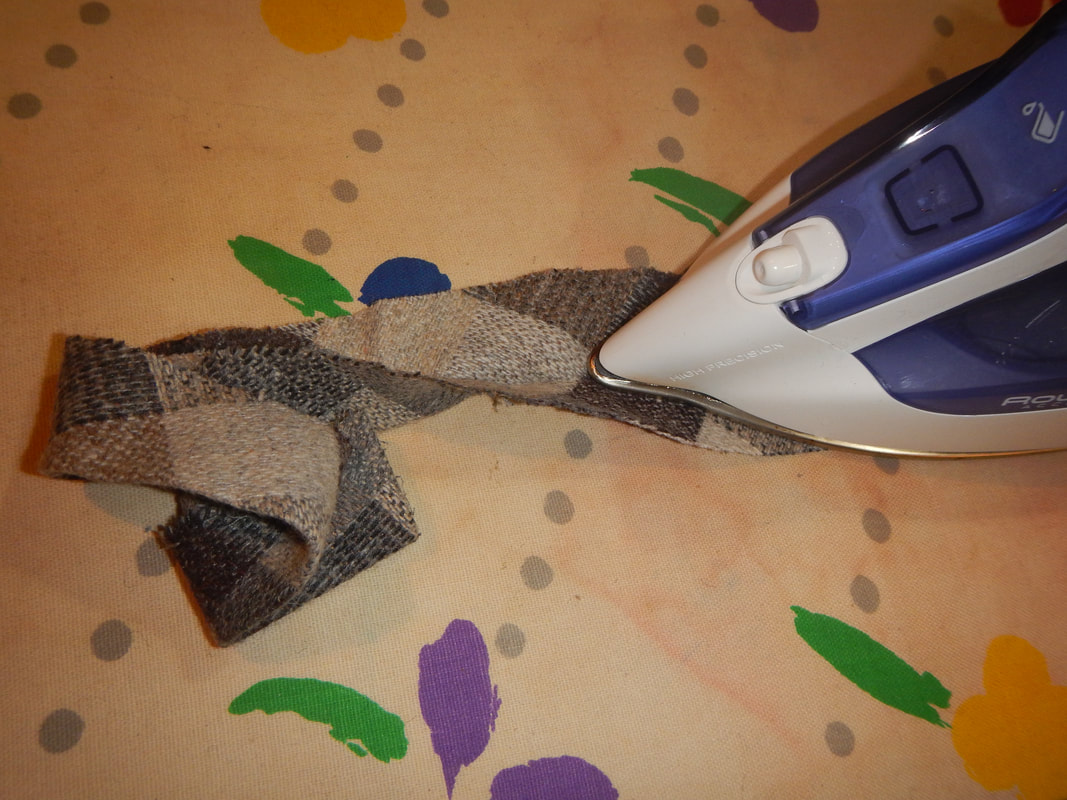
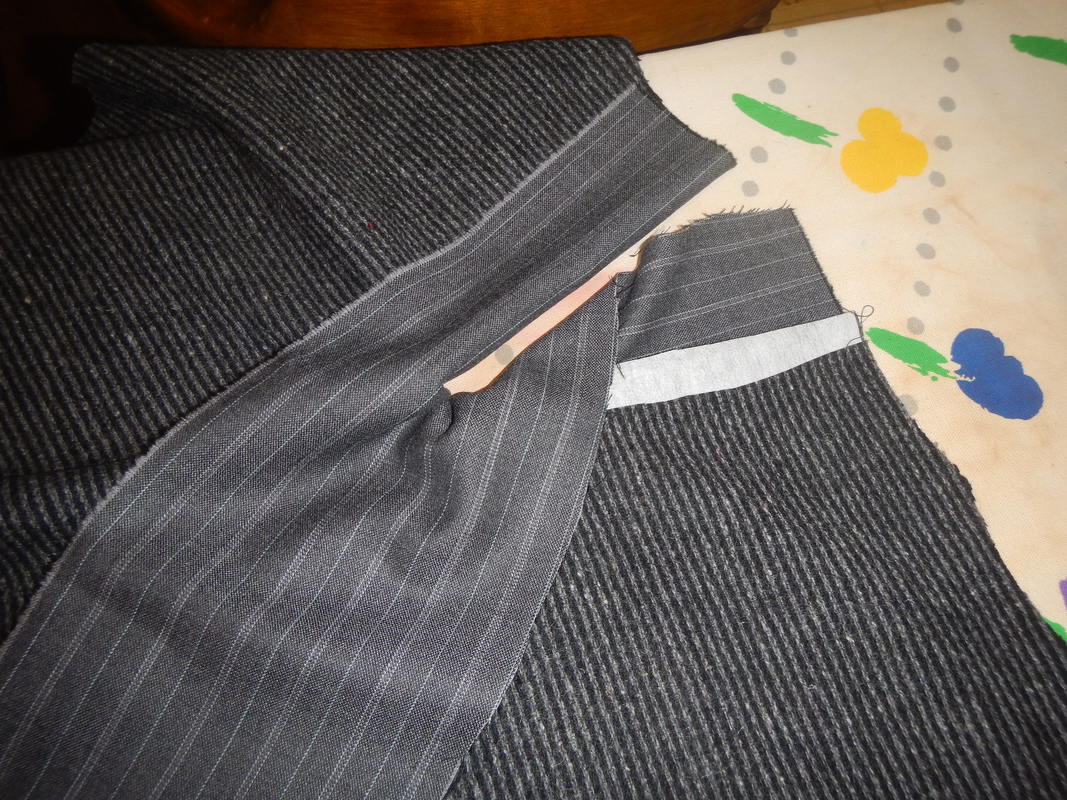
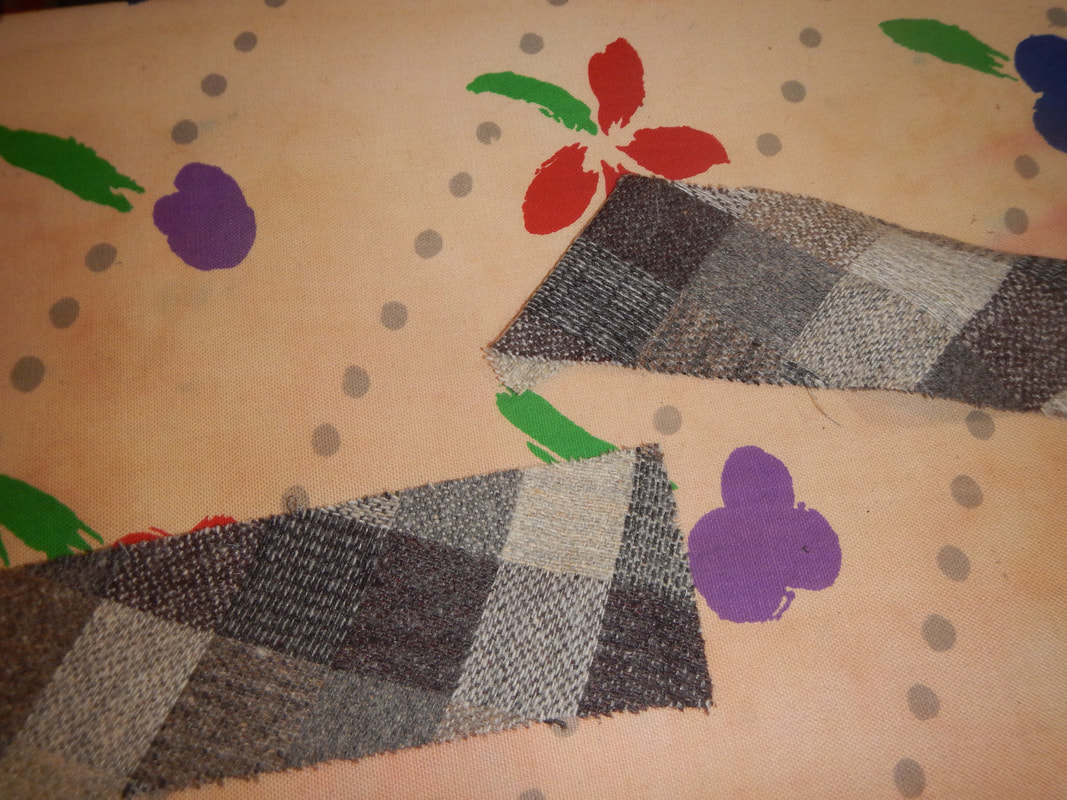
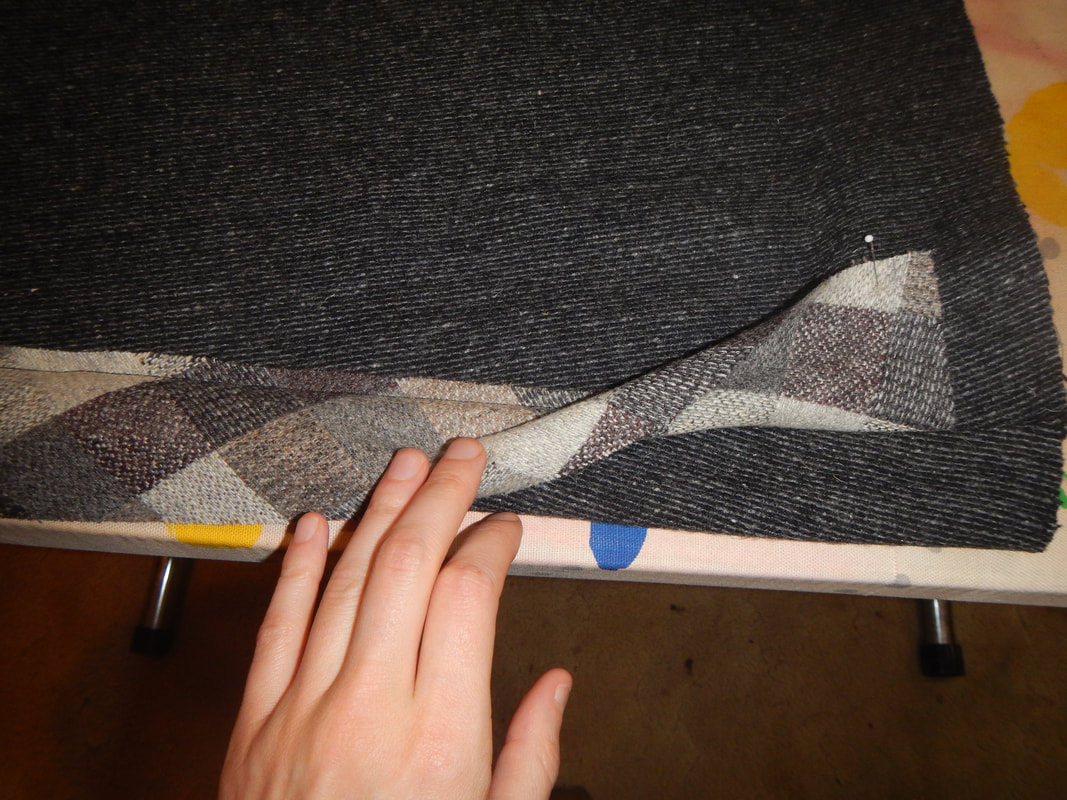
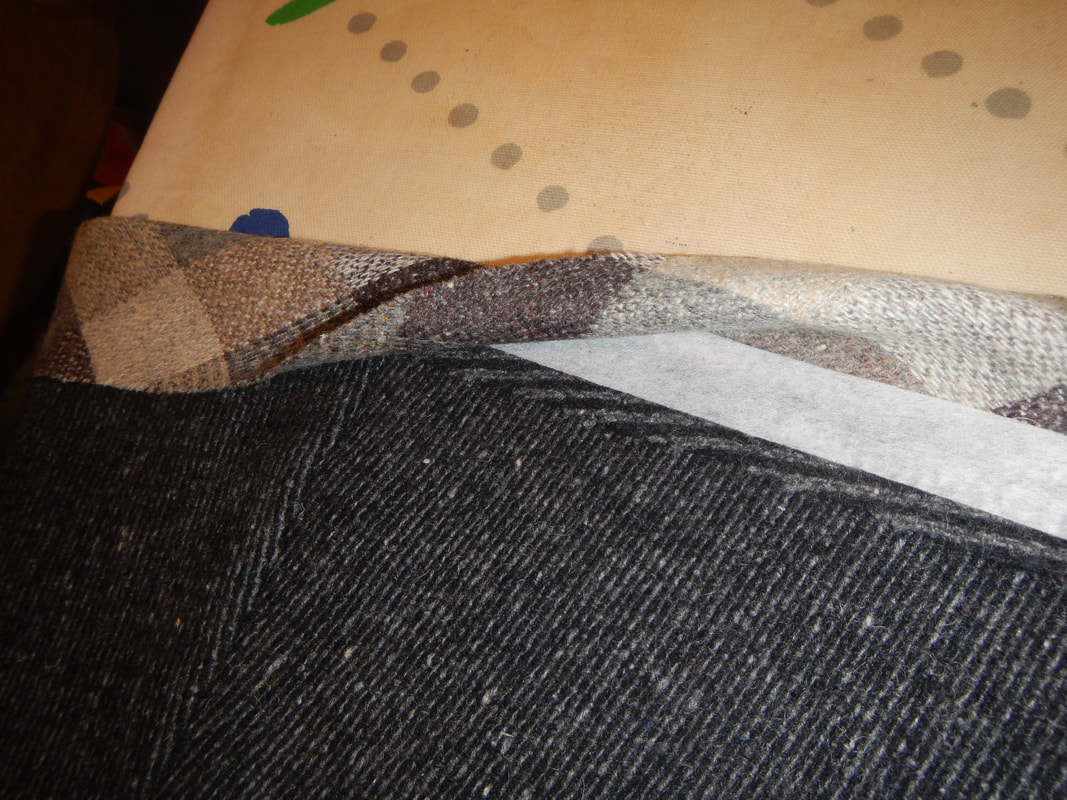
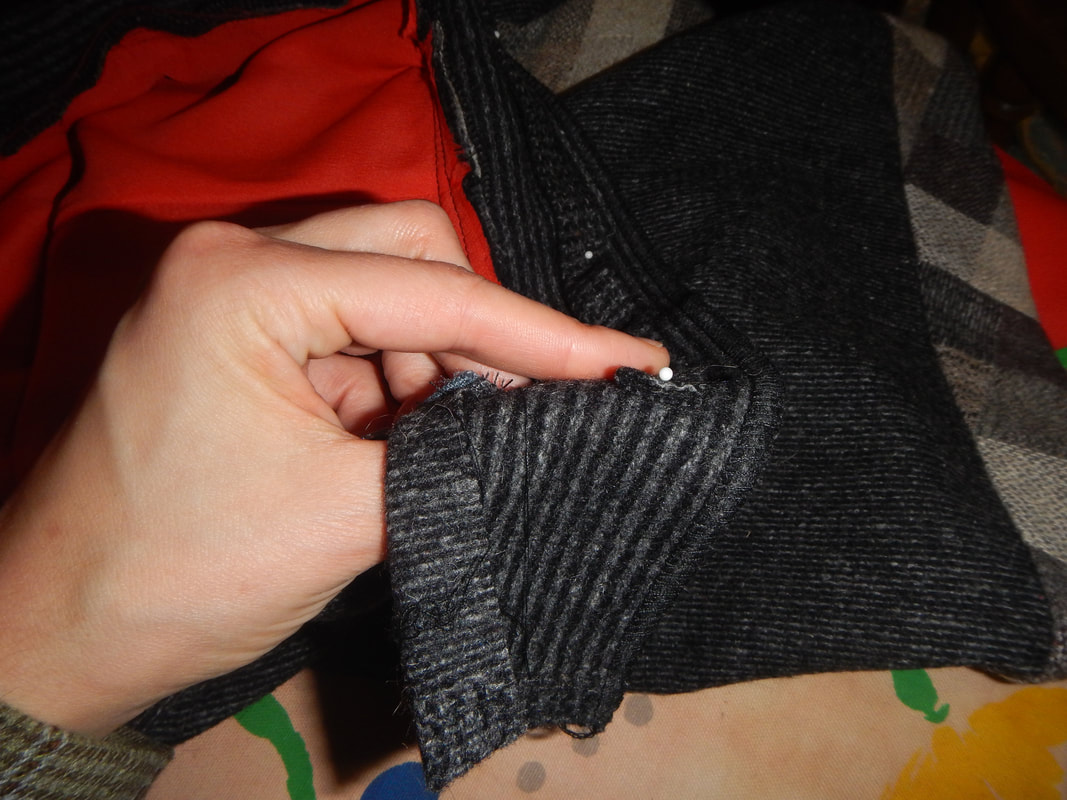
ADVENTURES IN BIAS TAPE Then I took a look at the bias wool strip which I wanted to use for contrast. It was two long strips sewn together, but the join was not well done: 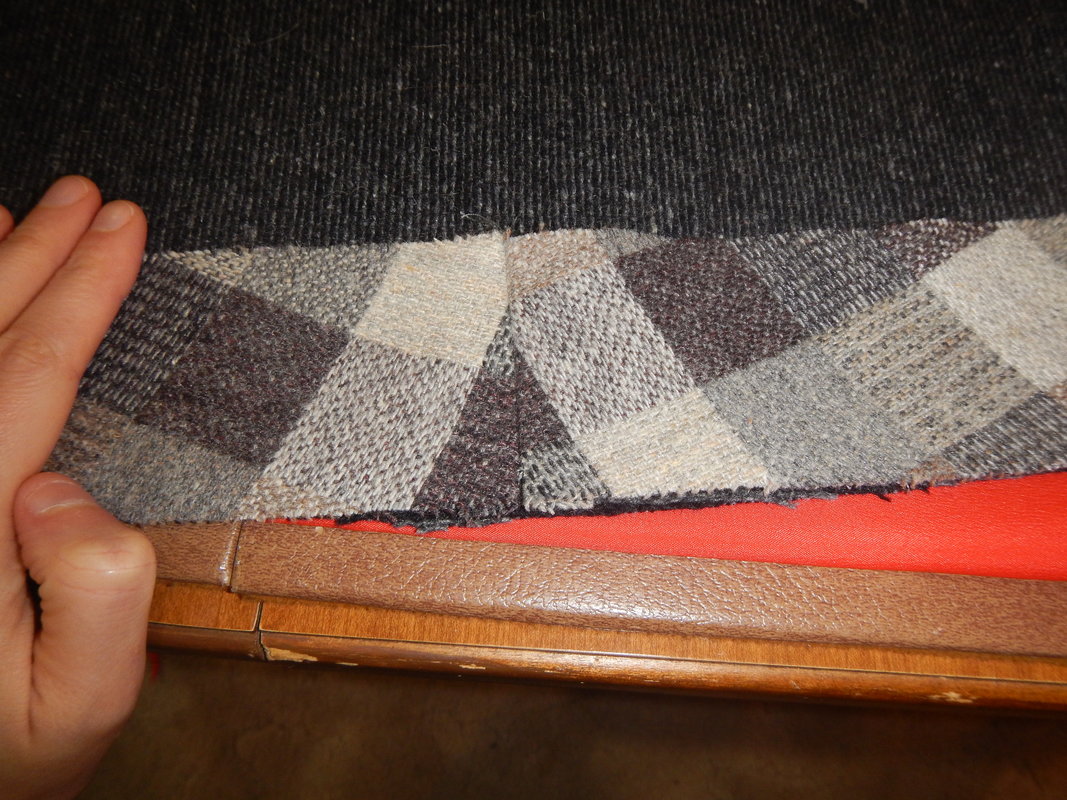 badly matched plaid! I knew I had to undo that seam and do a better one. I wouldn't be able to match the plaid exactly, but if I turned the one strip around I could at least get the angles slanting the same direction! And so I did:
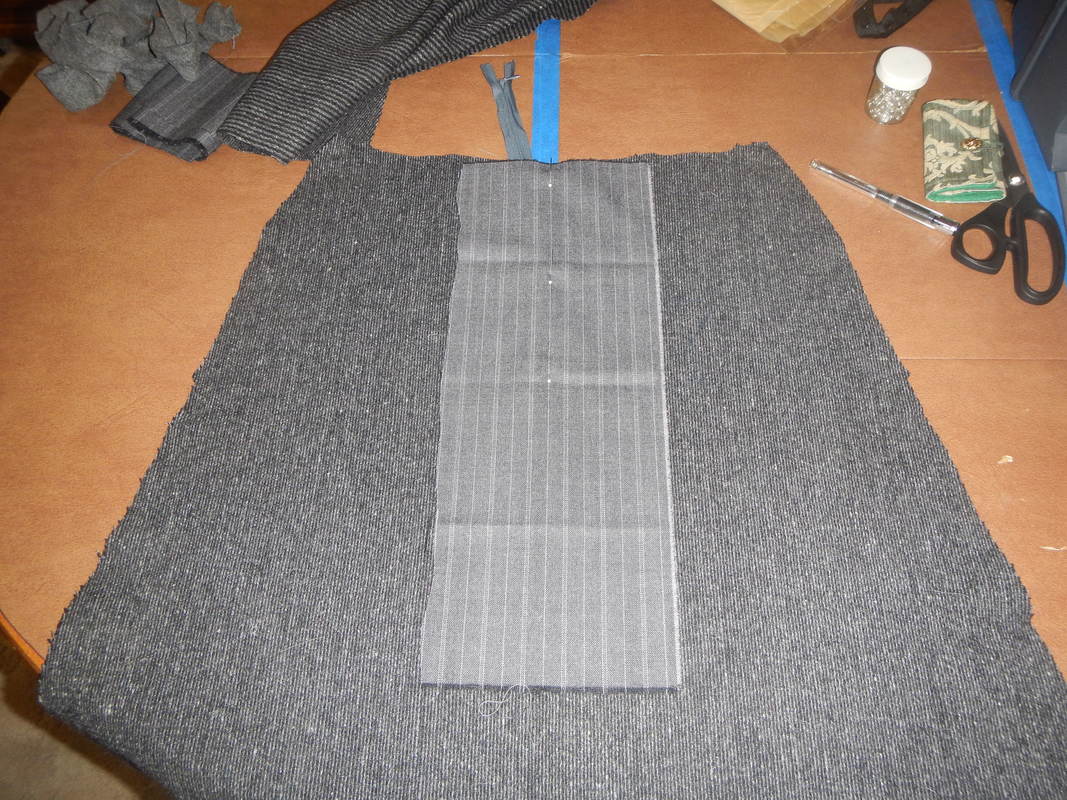
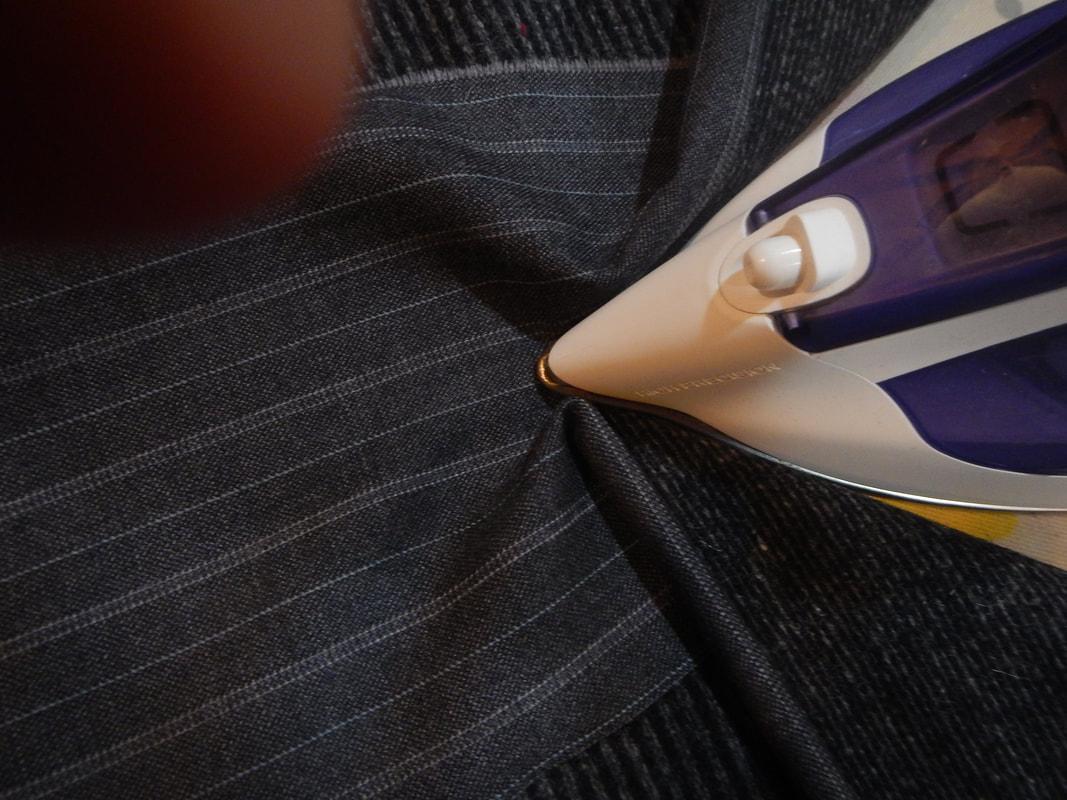
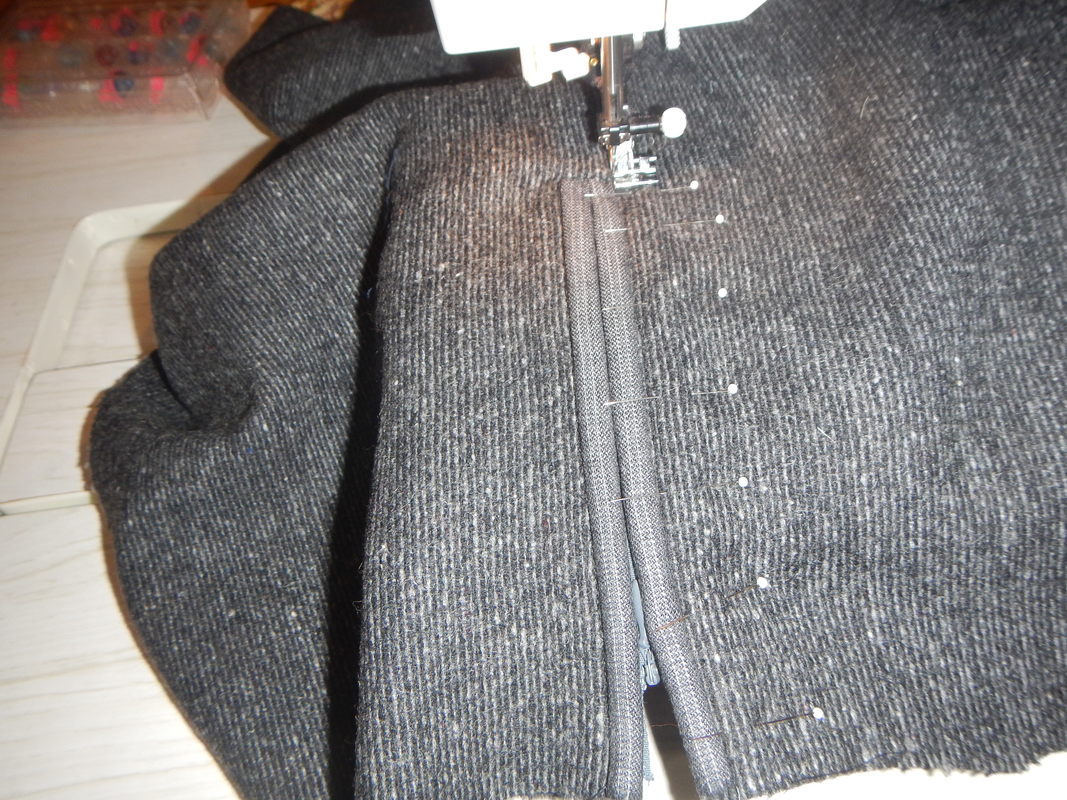
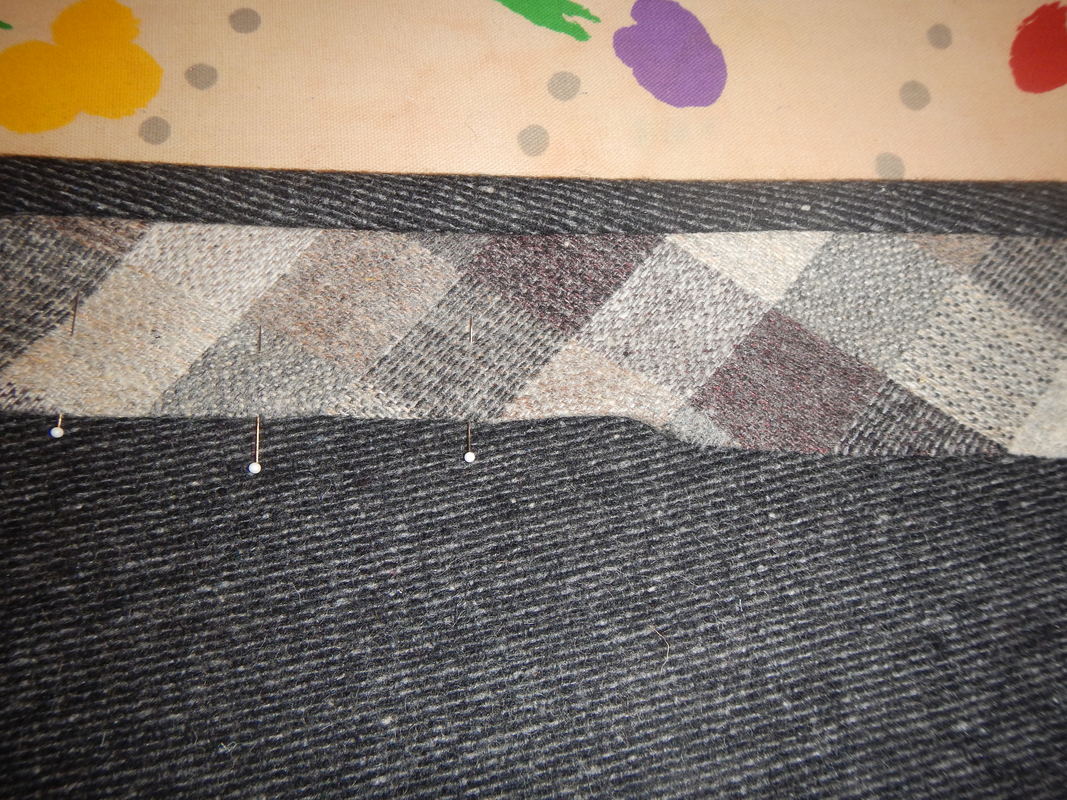
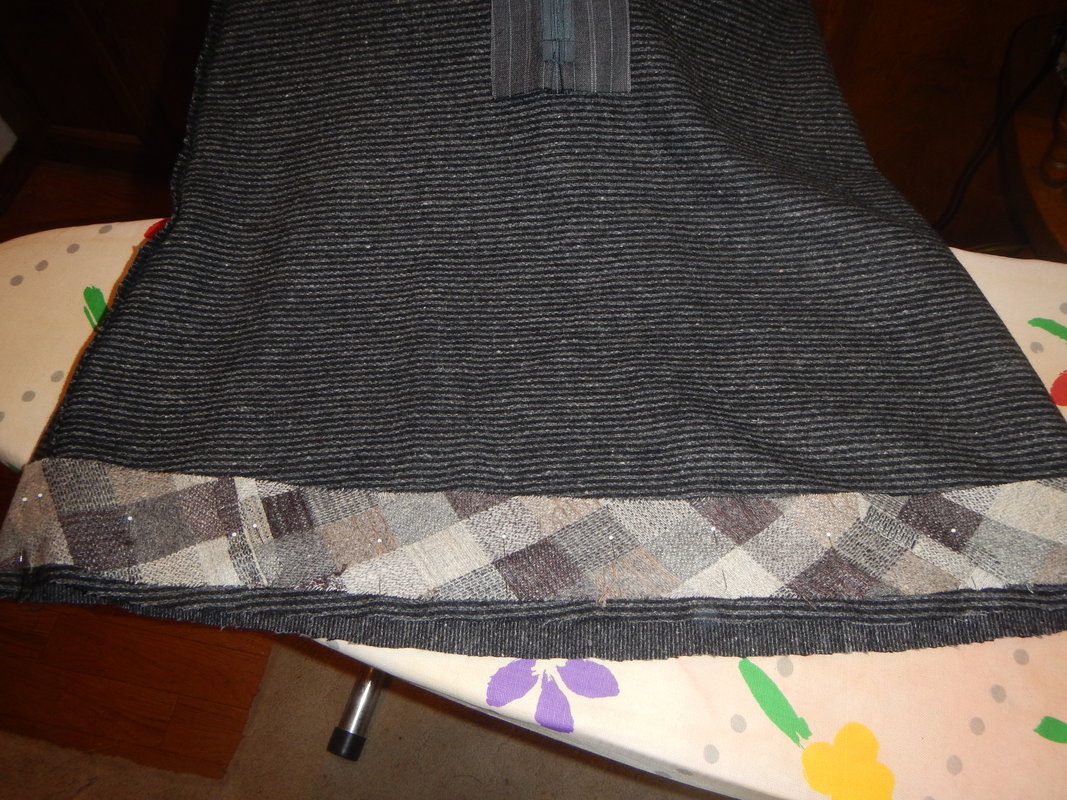
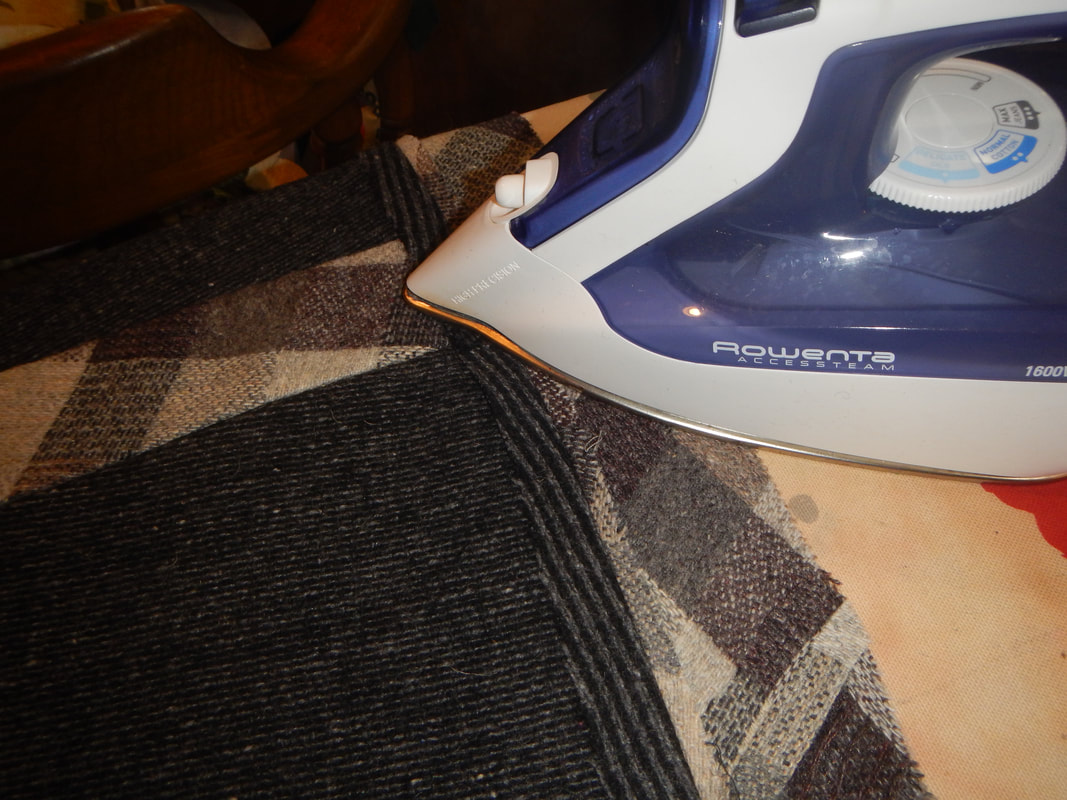
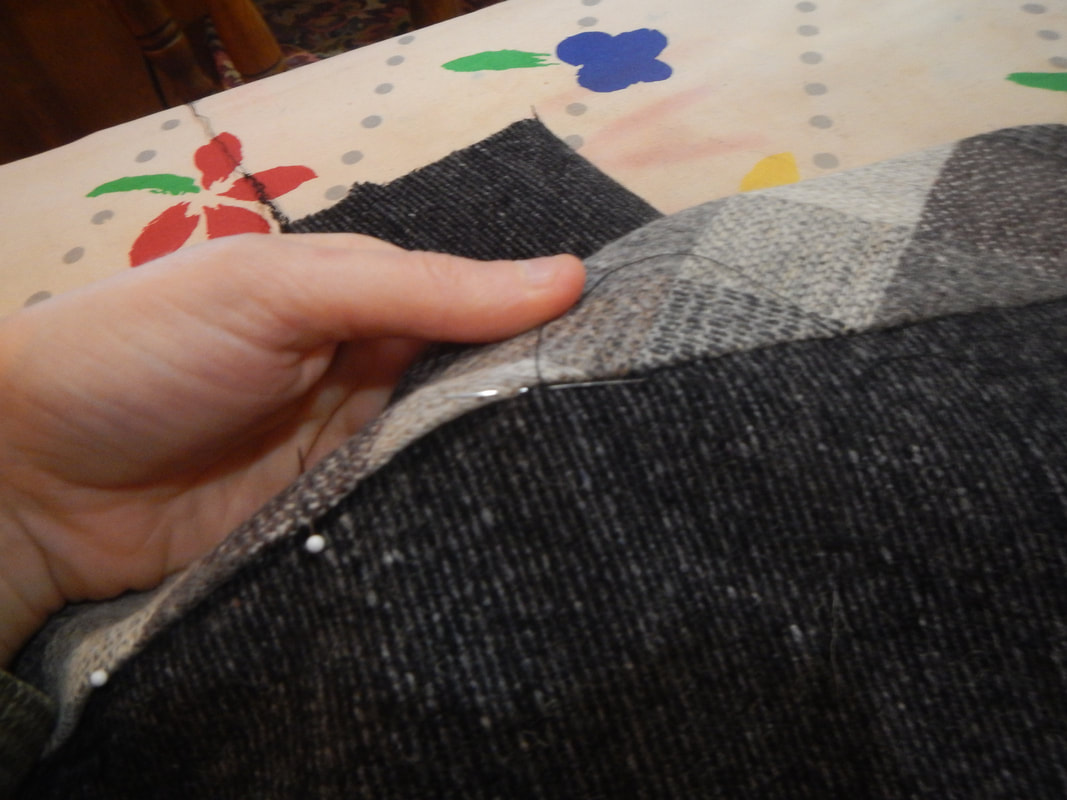
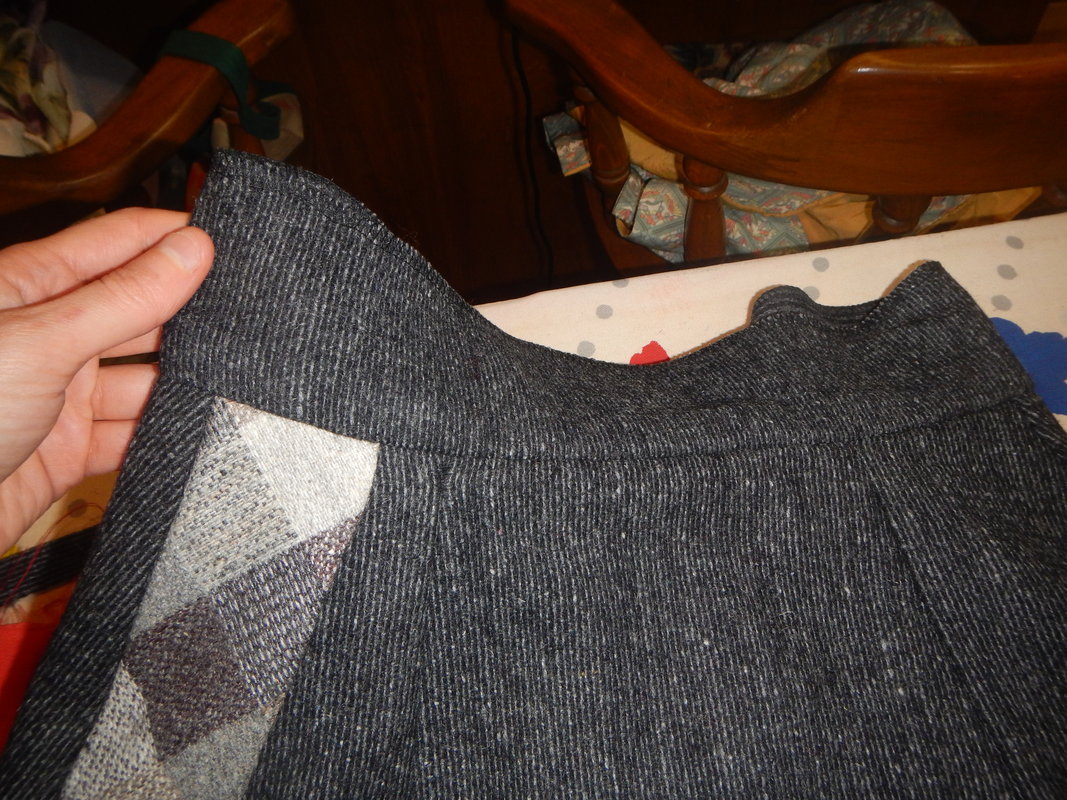
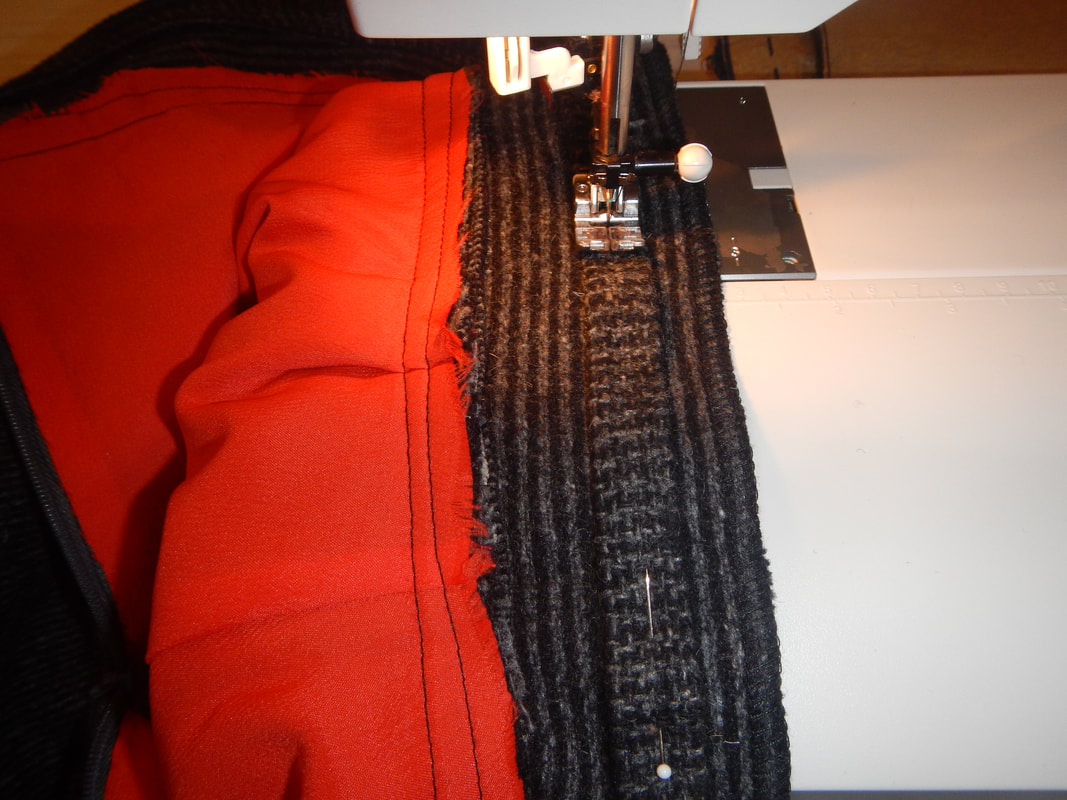
Then I laid the strip along the bottom edge of the skirt and figured out how I would close the circle, again thinking of matching the plaid as much as possible: 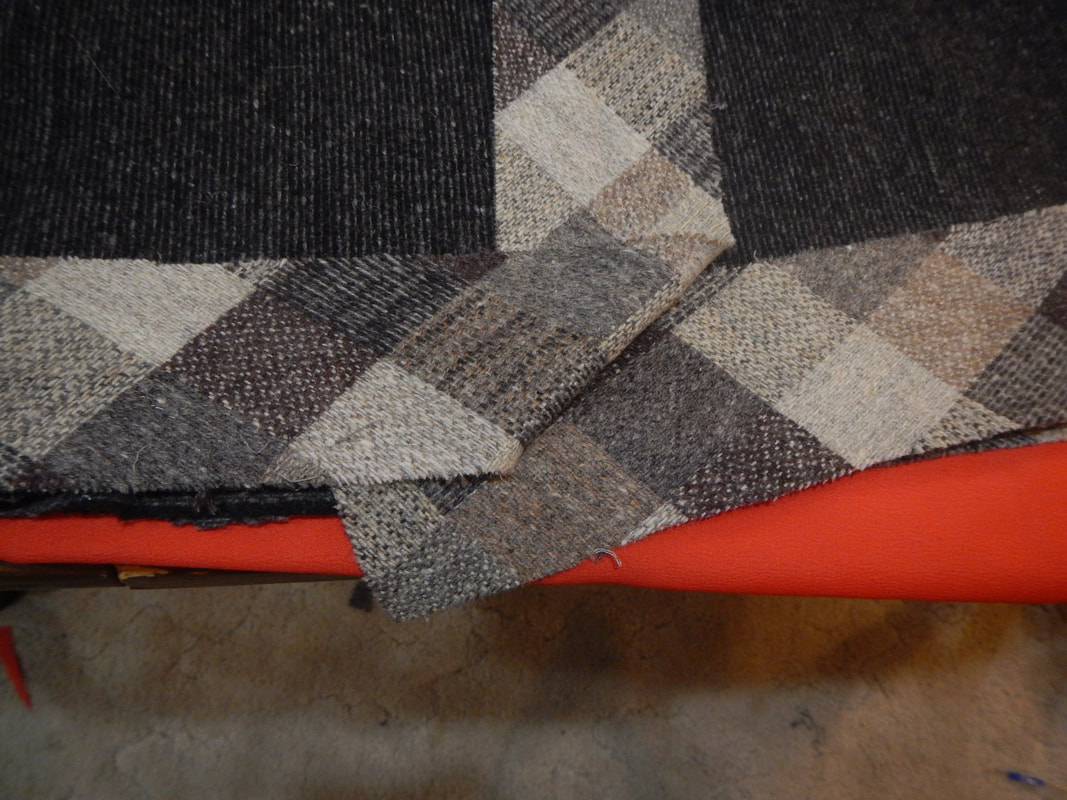 To make sure it would be perfect on the finished skirt, I sewed that seam too, ironed it open, and thus had a big loop of bias tape to eventually pin to the bottom of the skirt. But first, I wanted to add a vertical strip of the same stuff. I sewed/serged/ironed the vertical side seams of the skirt, then (right sides together) sewed one side of the strip right next to the side seam. When I ironed it over and folded the raw edges under, it had the right side out and was ready to be slip-stitched down by hand:
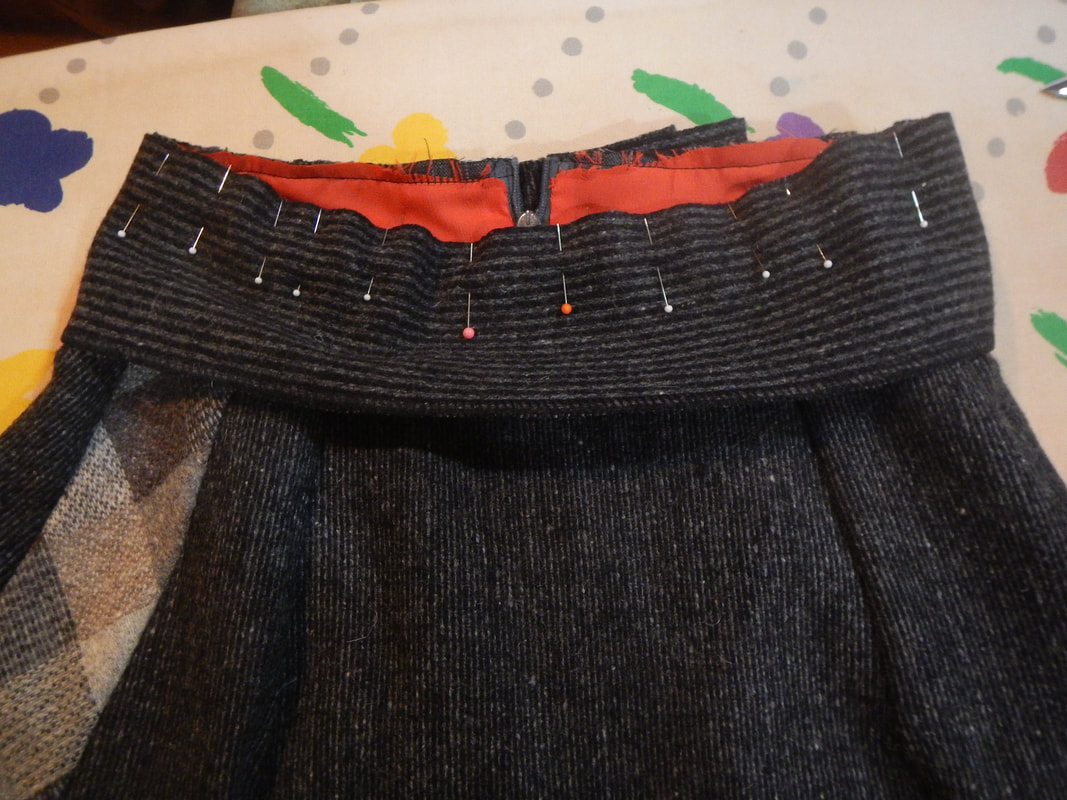
I put the skirt on, pinned the darts to fit, and sewed them. I selected a tomato colored lining fabric (mostly because I had enough yardage), and cut out two pieces the same as the skirt pieces. I made the lining to fit the skirt, hand-stitched the lining around the zipper slit, and machine-stitched the lining to the skirt along the top edge, so there wouldn't be loose ends or pins in the next step. DARTS AND WAISTBAND The light gray skirt didn't have any extra fabric for a waistband, so I made it with a fold-over facing. This dark gray skirt did have extra fabric, so I decided to make a waistband after all. I cut a long strip on the grain, so the stripes would line up with the stripes of the skirt. I serged one long edge of the waistband, for reasons that you'll see momentarily. Then I sewed the waist into the waistband along the non-serged edge:
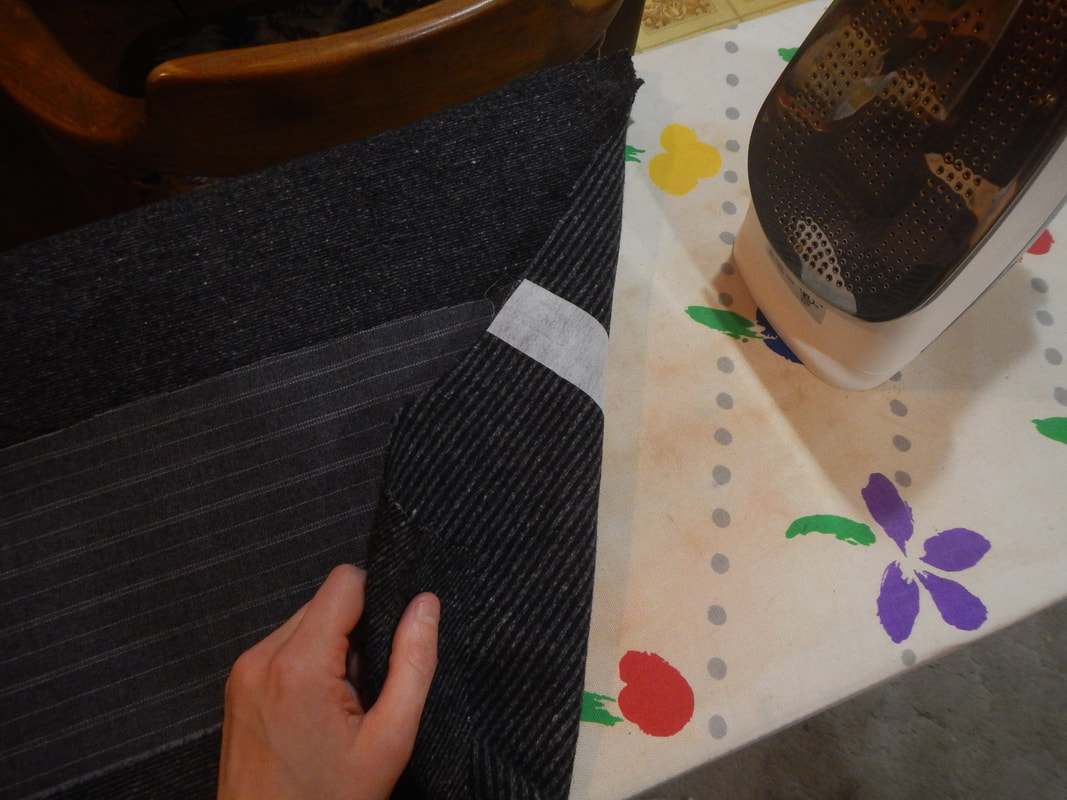
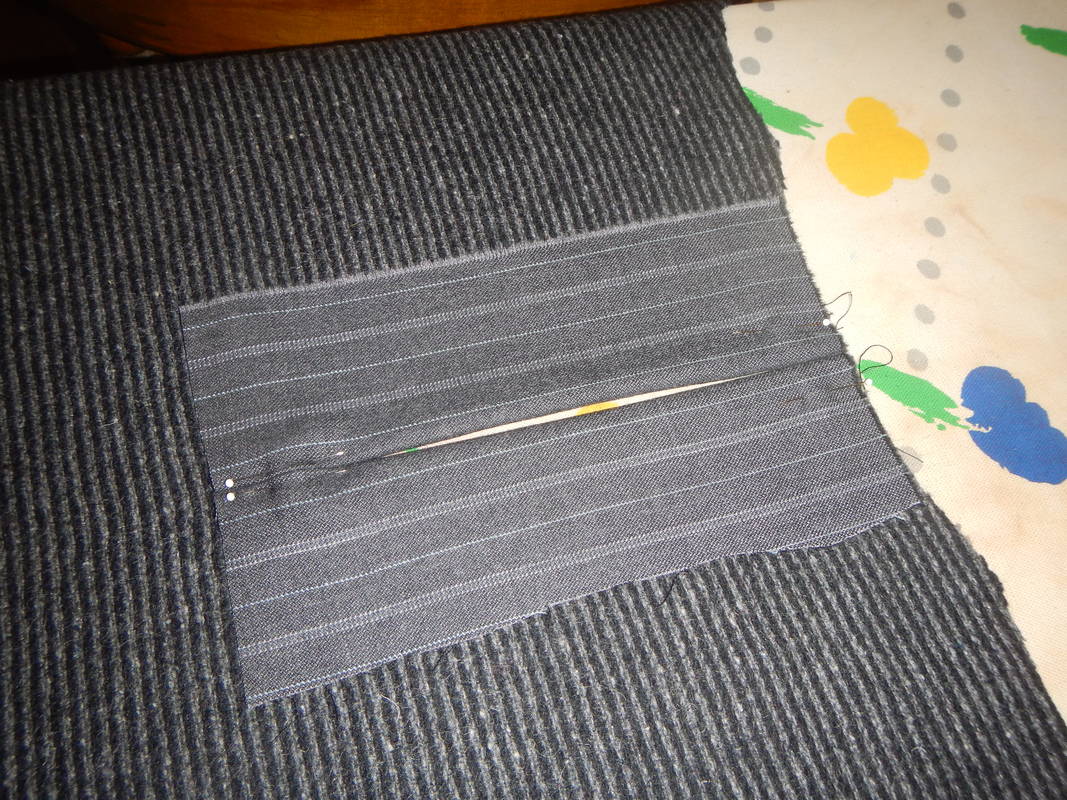
Now, when I folded the serged end over, it became clear that there was a problem of bulk. The multiple layers of thick wool in the waistband seam (skirt fabric, seam bulk, bias panel, and waistband fabric), combined with the folded over layer made it really thick. Generally, I would trim and grade the seam allowances to reduce bulk, but I sensed that wouldn't work with all this wool. So instead, I decided to keep the waistband seam bulky, and simply add bulk to the waistband above the seam to create a waistband with an even thickness. Here are two pictures of the doubled over strip of selvedge that I inserted into the waistband to fill the gap:
Then when I folded the waistband down over the seam allowances, the spacer took up the empty space. The serged edge of the waistband covered the waistband seam, and I could hand-finish it. 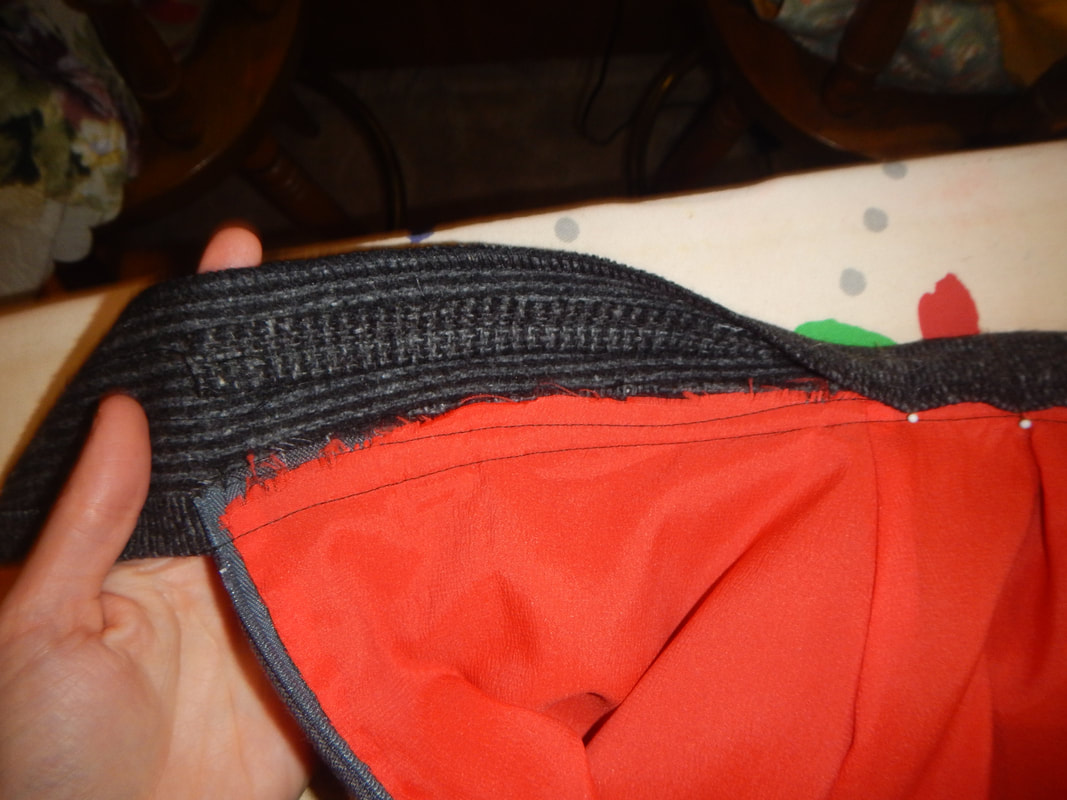 FINISHINGI finished the skirt by closing the center back with a trouser hook and hemming the lining to be shorter than the skirt. I used French tacks to hold the lining to the side seams of the skirt. 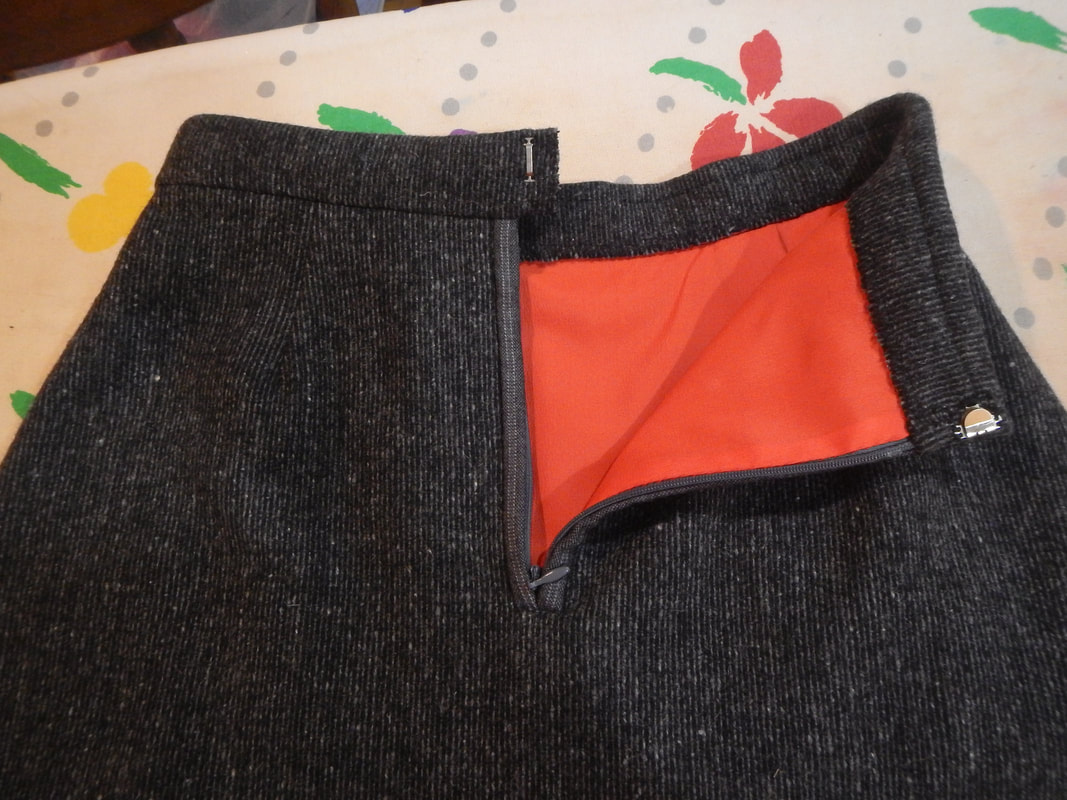
Because of the waistband, this skirt ended up being a little tighter than the light gray one, but not enough to be uncomfortable. In fact, I like it so much that I wore it three days in a row just after making it! I paired it with a lighter gray cashmere sweater and green-&-gold jewelry, then with a tomato-red shirt and red earrings. 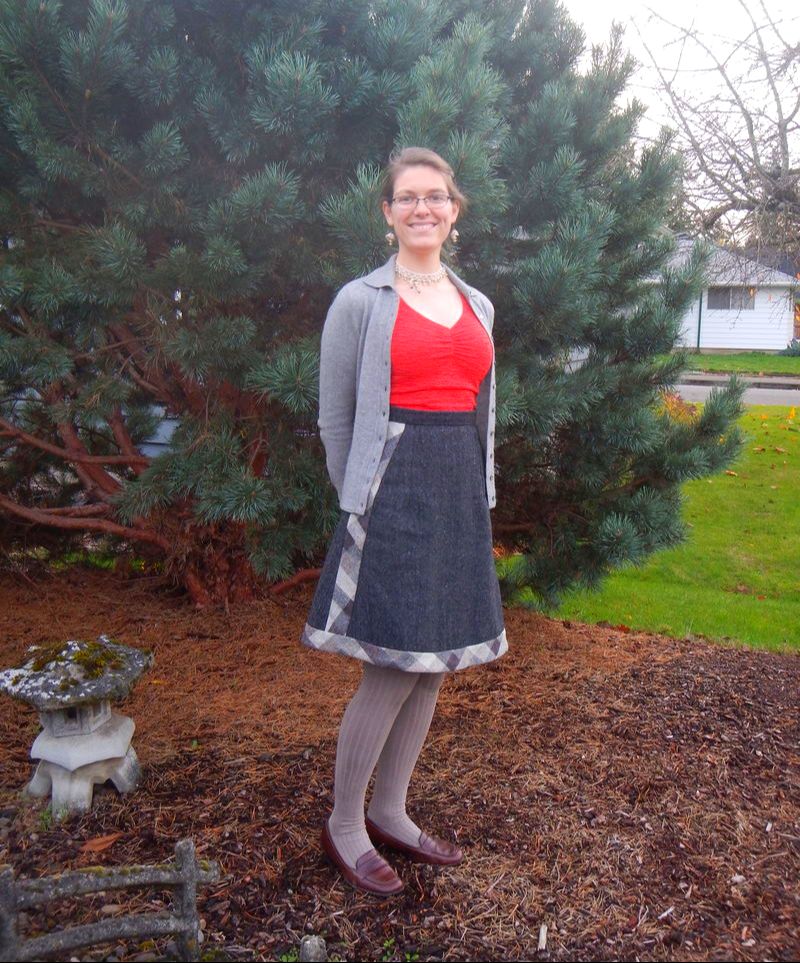 Now I want to make A-line skirts for my sister! Such fun! But not just now... I have actual work to do, projects I'm getting paid for and which have deadlines.
Karen! Get back to work!
2 Comments
The Sister
11/20/2017 10:22:57 am
Oh, my clever sister. What a cute skirt! I love the plaid up the side. How fetching you are! Your niece saw the picture as I scrolled to it and said "Oh my WORD! She is so pretty." Leave a Reply. |
Karen Roy
Quilting, dressmaking, and history plied with the needle... Sites I EnjoyThe Quilt Index Categories
All
Archives
March 2024
|


 RSS Feed