Robes de Coeur
  • Blog
  • Quilting
  • Clothing
    • Menswear
    • Womenswear >
      • Self-Made Patterns
      • Commercial Patterns
    • Hats
    • Miscellany
  • About
  • Blog
  • Quilting
  • Clothing
    • Menswear
    • Womenswear >
      • Self-Made Patterns
      • Commercial Patterns
    • Hats
    • Miscellany
  • About

Ahsoka Tano Cosplay - Finishing touches

11/2/2017

1 Comment

 
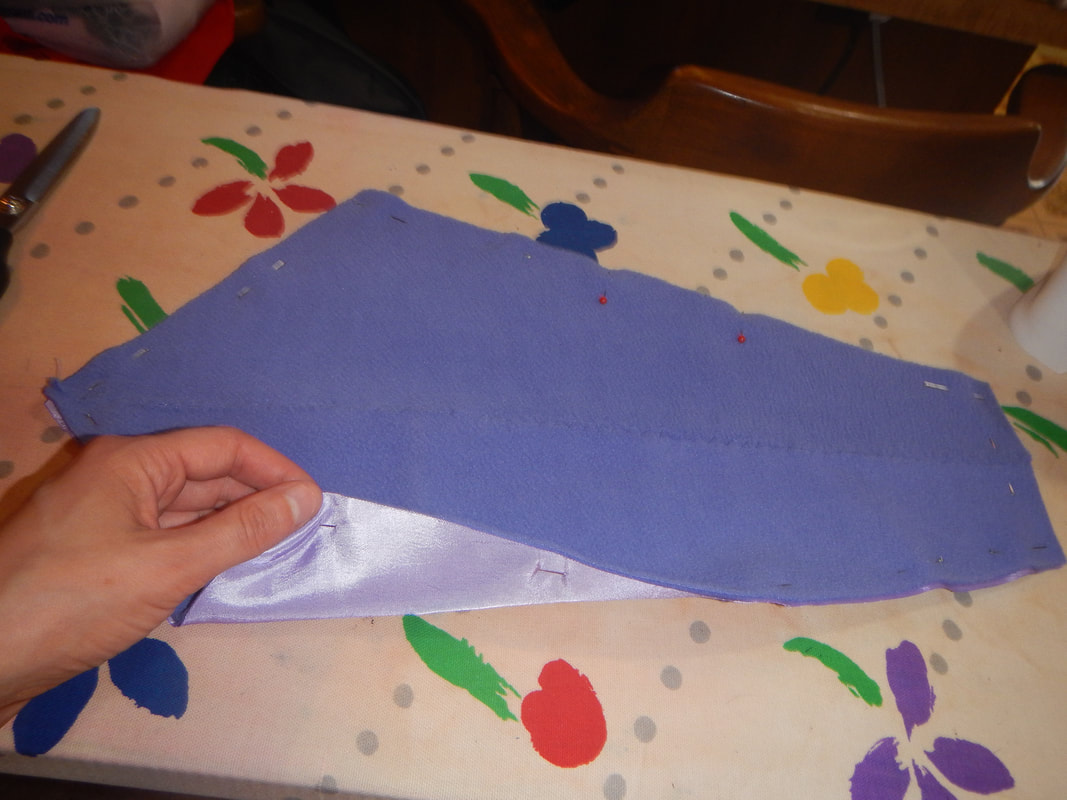
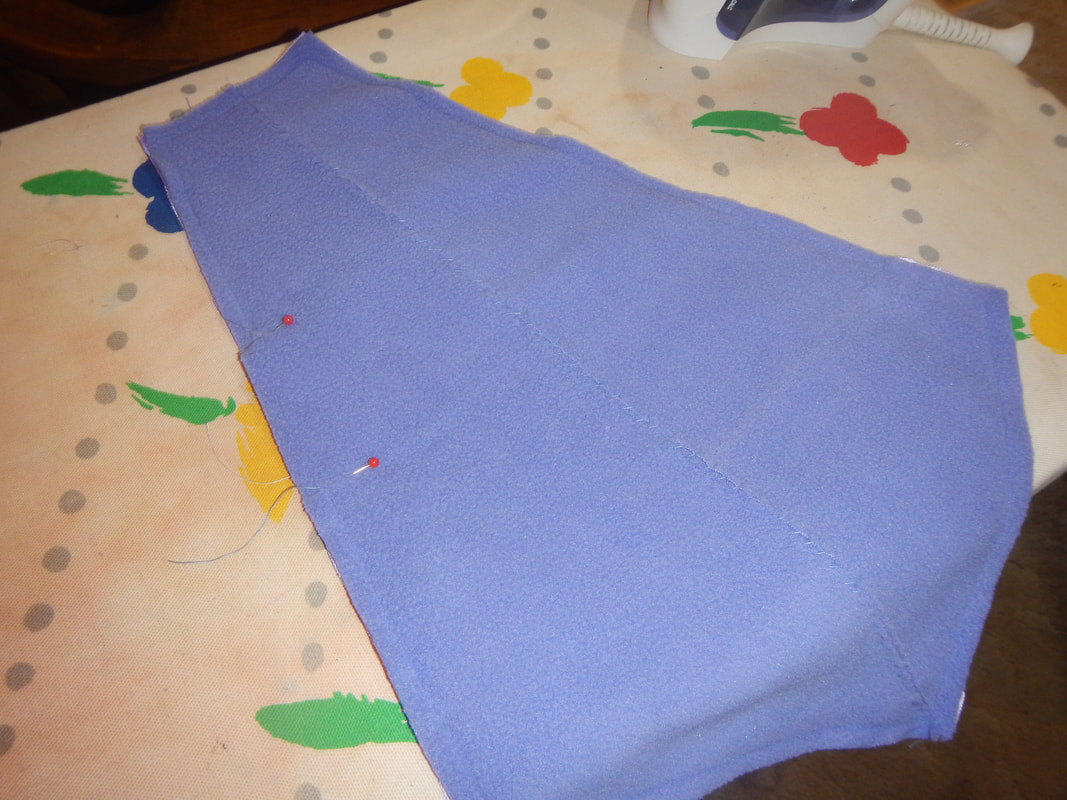
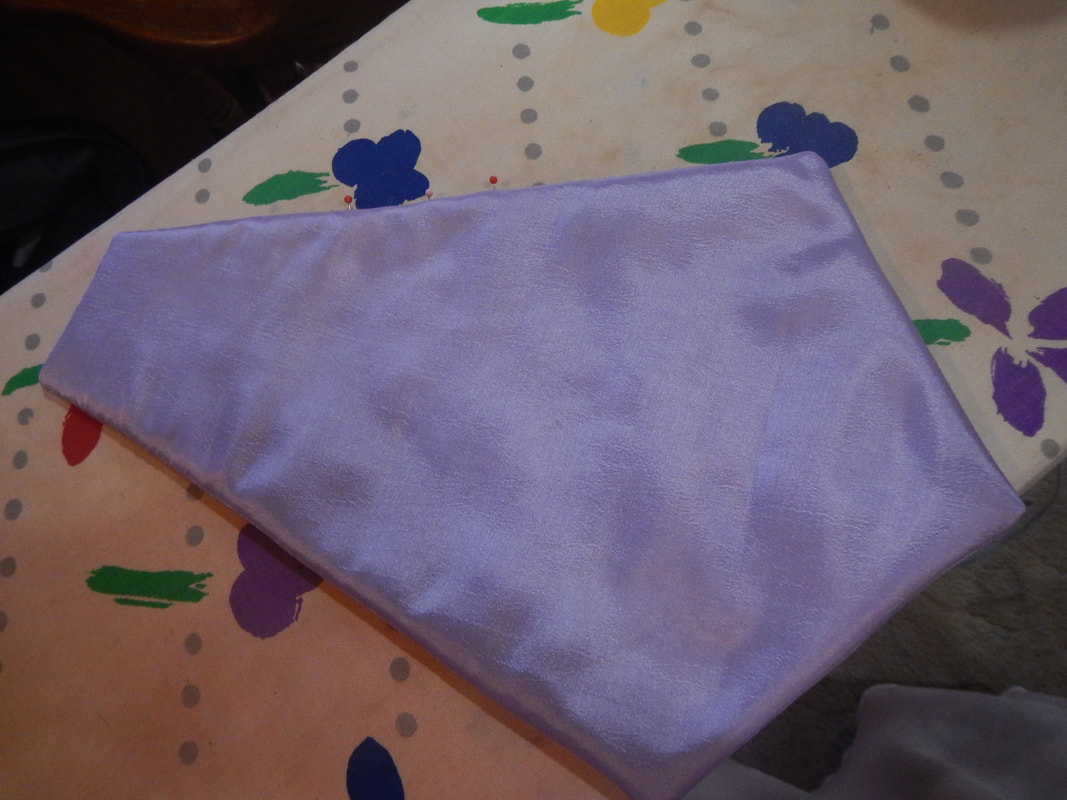
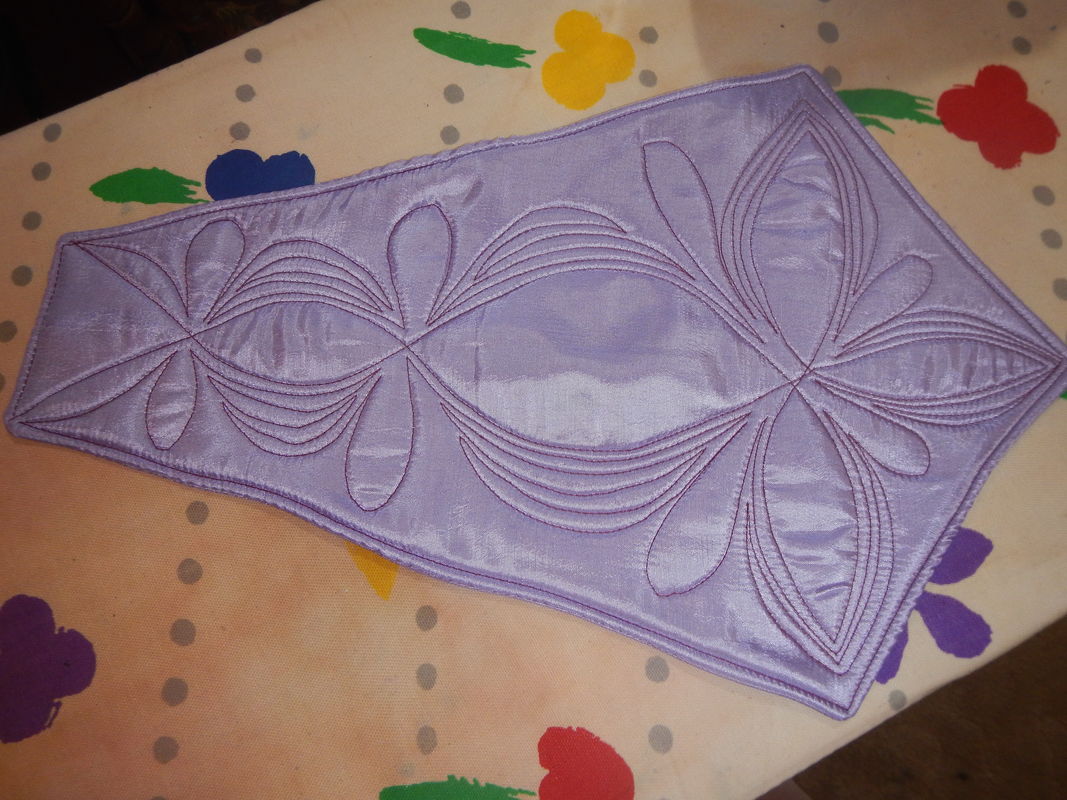
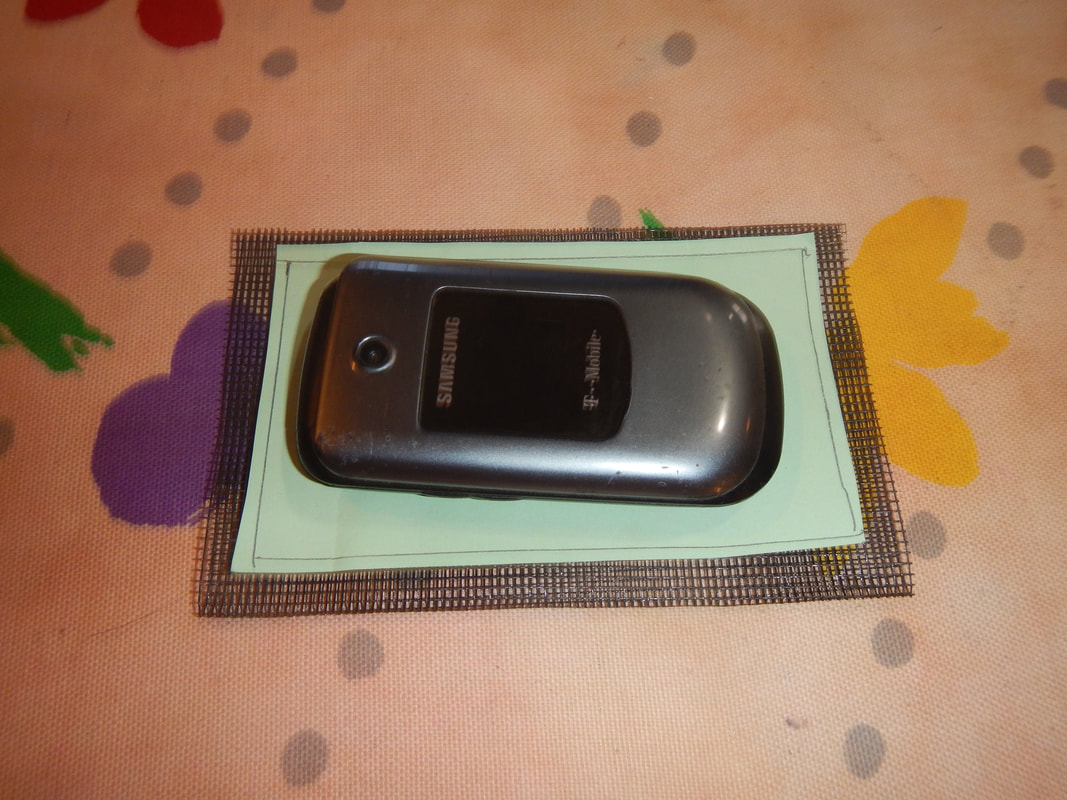
The Ahsoka Tano dress being done, I had to make a few accessories to really create the character.  The biggest thing was the belt with its apron front.  Then gaiters for the feet, and leggings with diamond-shaped cut-outs.  I'll post about the belt and leggings today, but not the gaiters, because (I'll be honest) I found the gaiters really annoying to do and I'm not happy with them.  They're not bad... just not gonna be in this post.  Maybe I'll post about them in future, when time has passed and I can be objective. 

THE BELT

The inspiration pic I found for the costume had a tone-on-tone purple pattern on the apron front, which I approximated by quilting.  First I cut out the shape I wanted and sketched the swirly, symmetrical pattern on it:
Picture
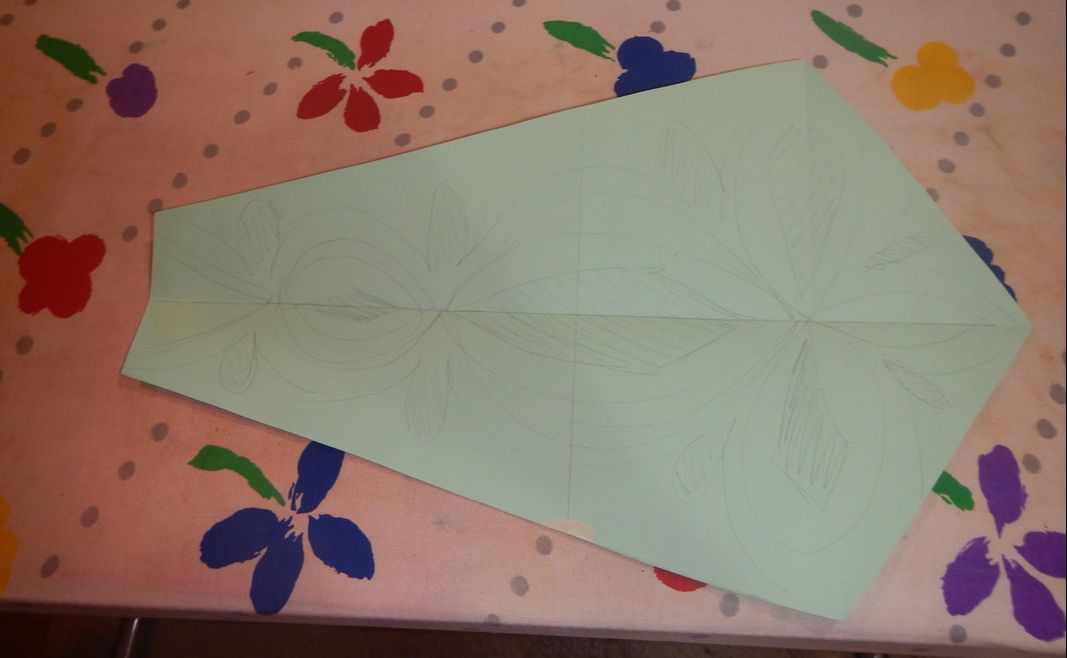
Then I cut two layers of the purple fabric, and pieced some fleece together for the batting.  Remember the quilt sandwich method I used before ?  Since it works well for small quilting projects, I'm doing that again.  So I start by laying the two pieces of purple fabric, right sides together, down, then put the batting on top.  Then I sew around the perimeter, leaving an opening (between the two red pins) so I can turn it right side out. 
Picture
The quilt sandwich
Picture
Sewn and ready to turn.
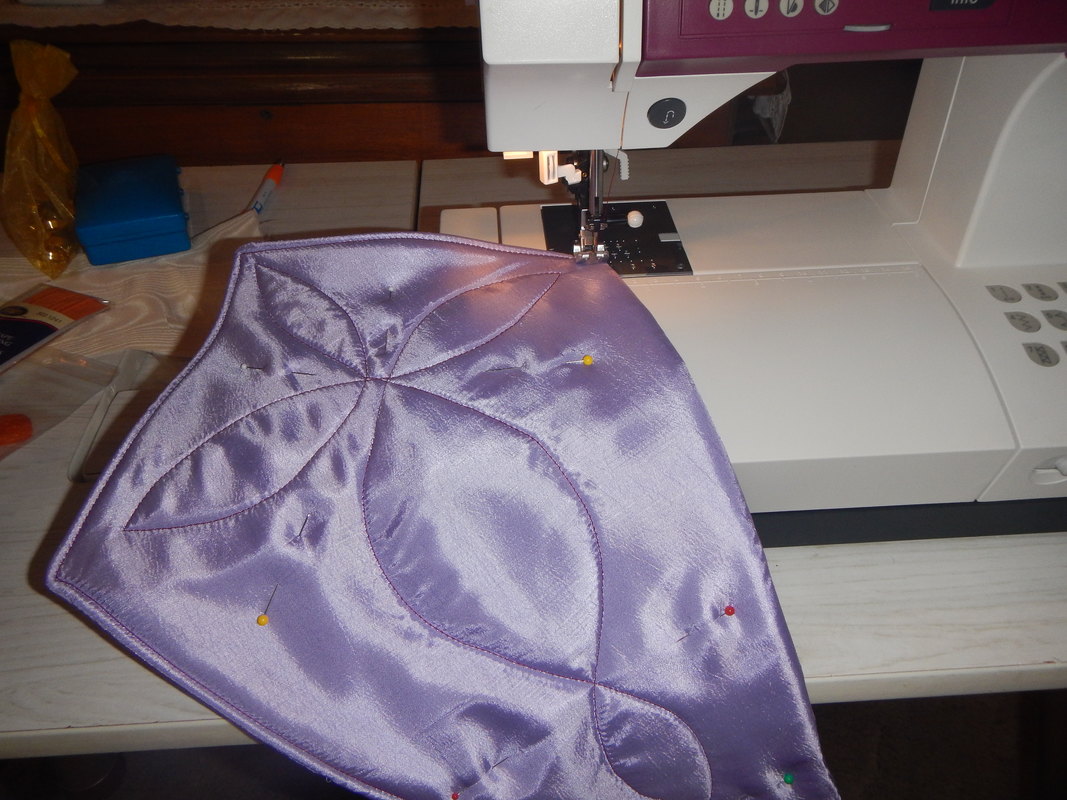
Then I turn the sandwich/bag so the purple fabric is right sides out, and that puts the batting in the middle.  (That's why I didn't mind using stained batting!)  I use chalk to transfer the basic lines of the pattern onto the apron, and begin quilting.  Quilting right next to the edge of the piece closes the hole from the before, so I don't need to slip-stitch it. 
Picture
Picture
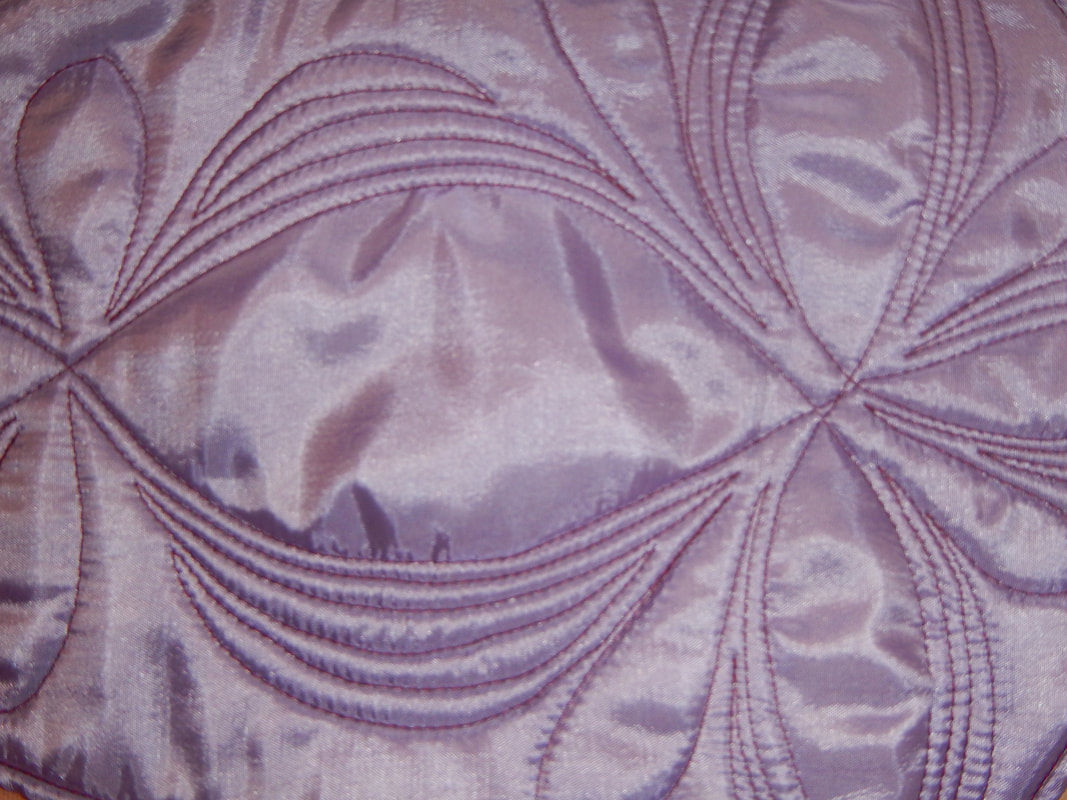
I really love the look of quilting! 
Picture
Close up of texture
Picture
The whole design
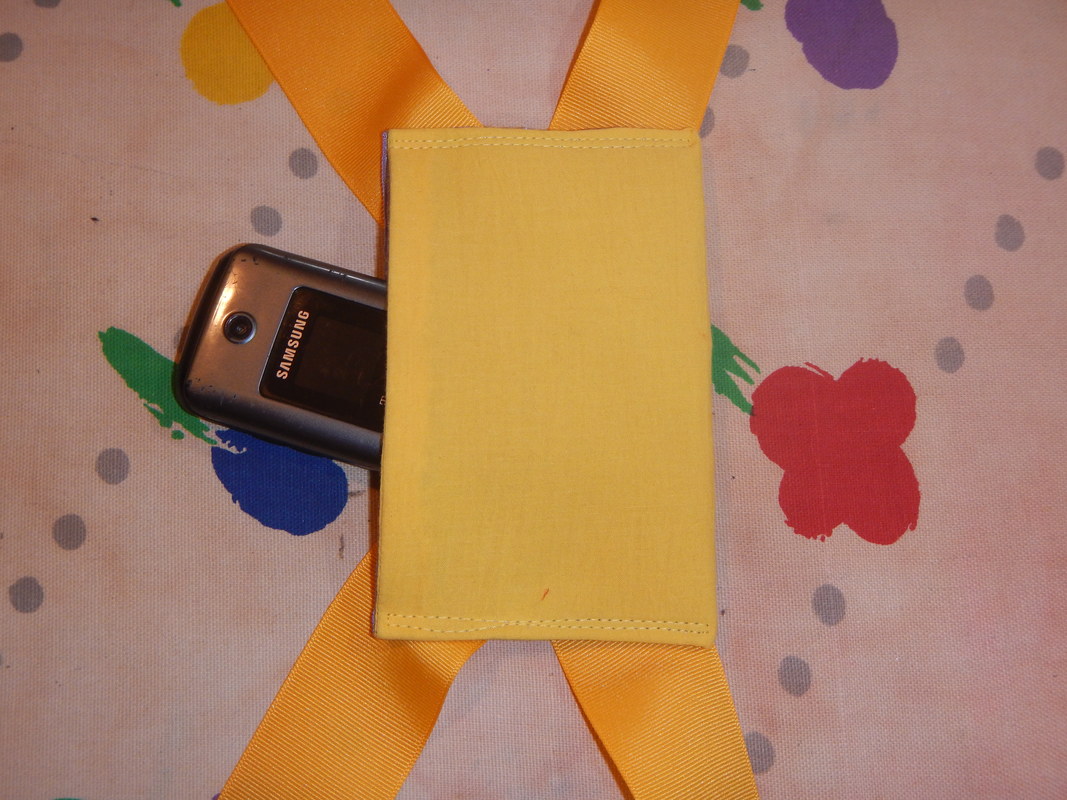
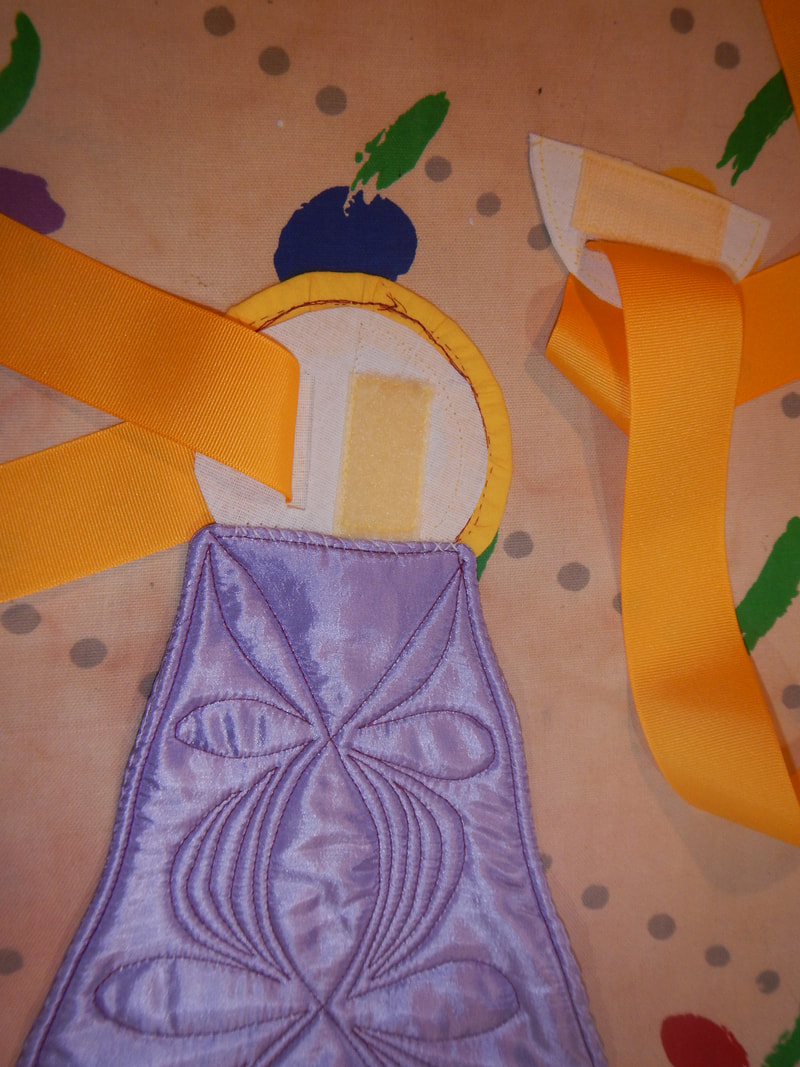
The next step was to make the belt that holds the apron.  There's a rectangle in the back, which I made to contain a small pocket for a cell phone or ticket stub:
Picture
The black mesh is old screen door fabric (same as I used for the two Glengarry Caps), which I used here for interfacing to make the rectangle stable, so it wouldn't stretch and warp with wear. 

I took the yellow grosgrain ribbon and sewed the ends to the front and back pieces it to make the belt.  The interesting part was making the velcro closure in front, which I stabilized with buckram.
Picture
back pocket (outside)
Picture
Back pocket (inside). I used safety pins for the bottom straps so I could adjust the size later
Picture
Front (inside view) - Closed
Picture
Front (inside view) - Open

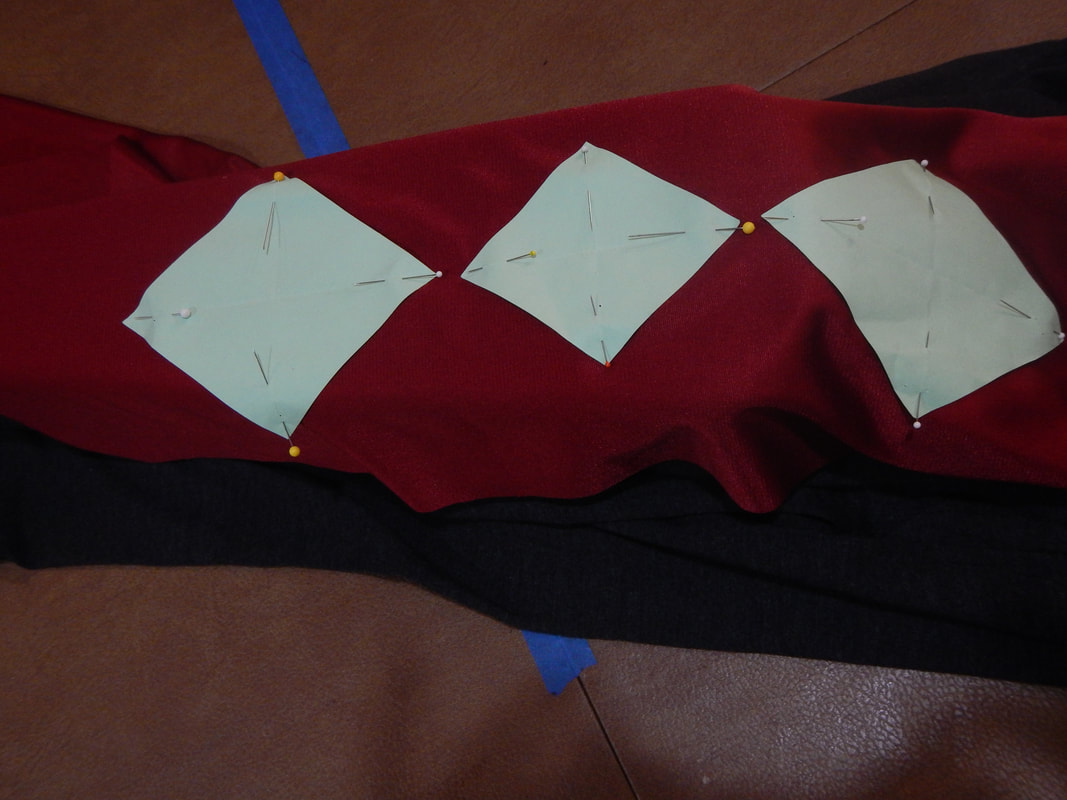
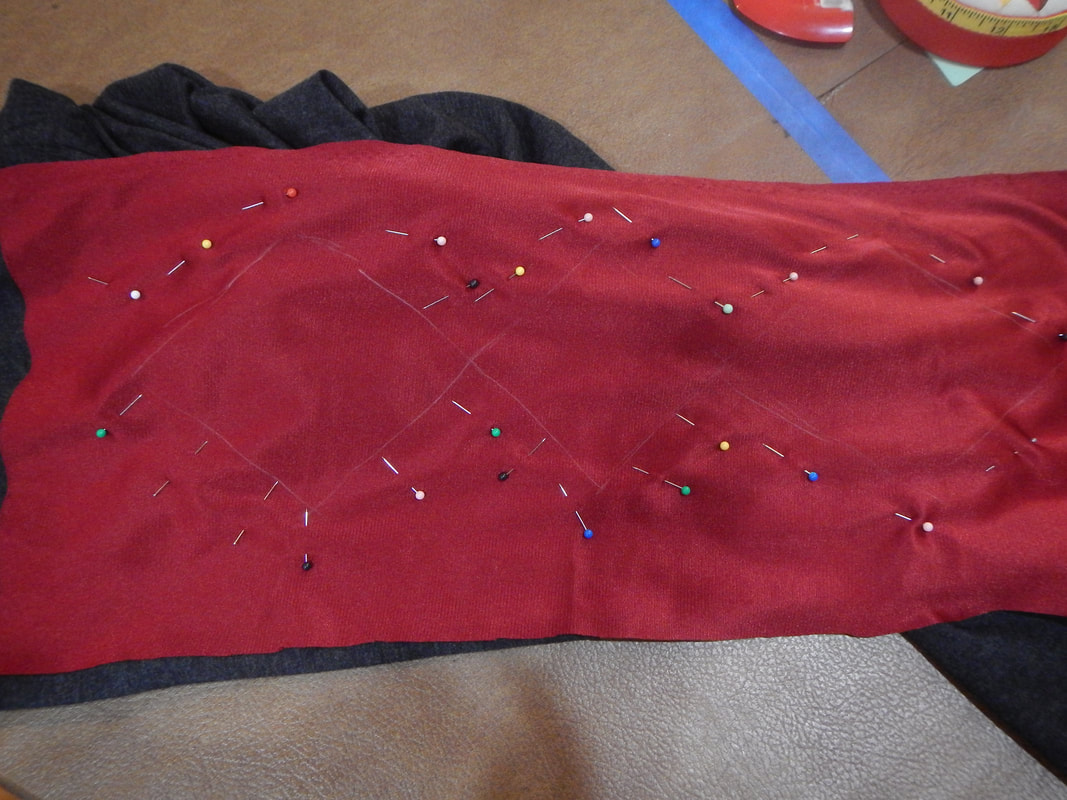
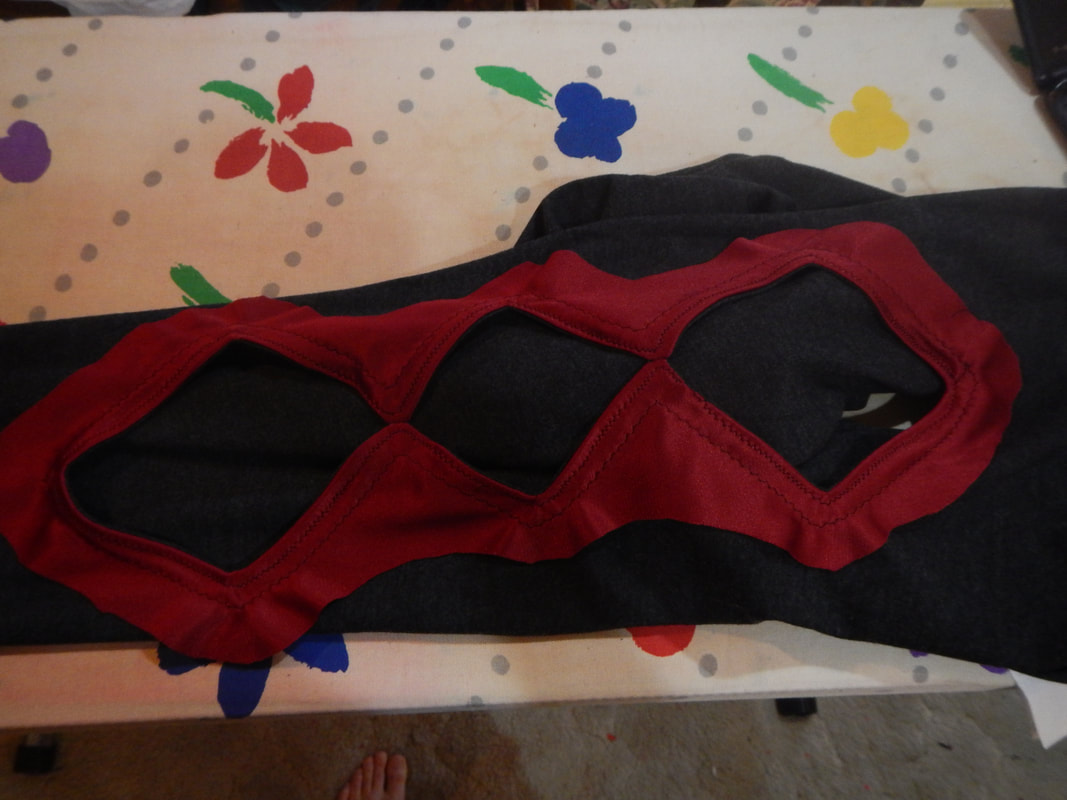
THE LEGGINGS

The leggings are a last minute project.  Simply put, I mark the location of the diamond-shaped cut-outs on the RTW leggings while C. is wearing them.  Then:
  1. I lay a knitted facing fabric on top of the right side of the legging leg, and transfer the markings to the facing.
  2. I sew the facing to the fabric along the marked lines, with a slight zig-zag stitch.  Just slight, just so it has some give when the fabric stretches.  I sew the shape as one big loop, never crossing my stitching lines with each other.  So in the center where the diamonds meet at their pointy tips, I sew in almost to the center, then turn and sew out. 
  3. I cut out the ziggy-zaggy hole
  4. I turn the facing to the inside, press, and top-stitch. 
  5. I hand-sew the points together to turn the big jagged hole into several diamond shaped holes. 
Picture
Step 1: the pattern on the facing, on the leg. The pattern is green paper, the facing a red nylon knit, and the leg gray knit.
Picture
Step 2: the pattern marked and ready for sewing.
Picture
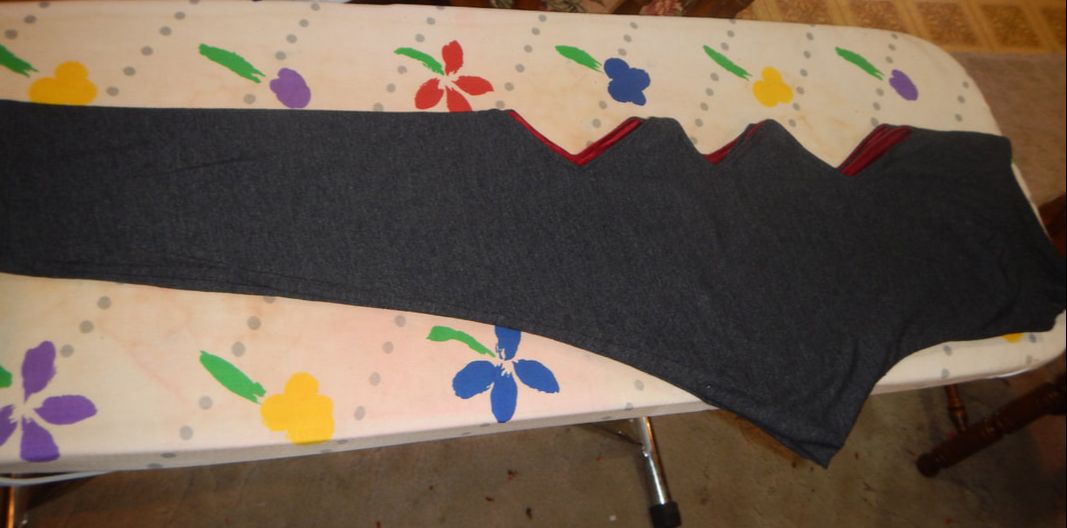
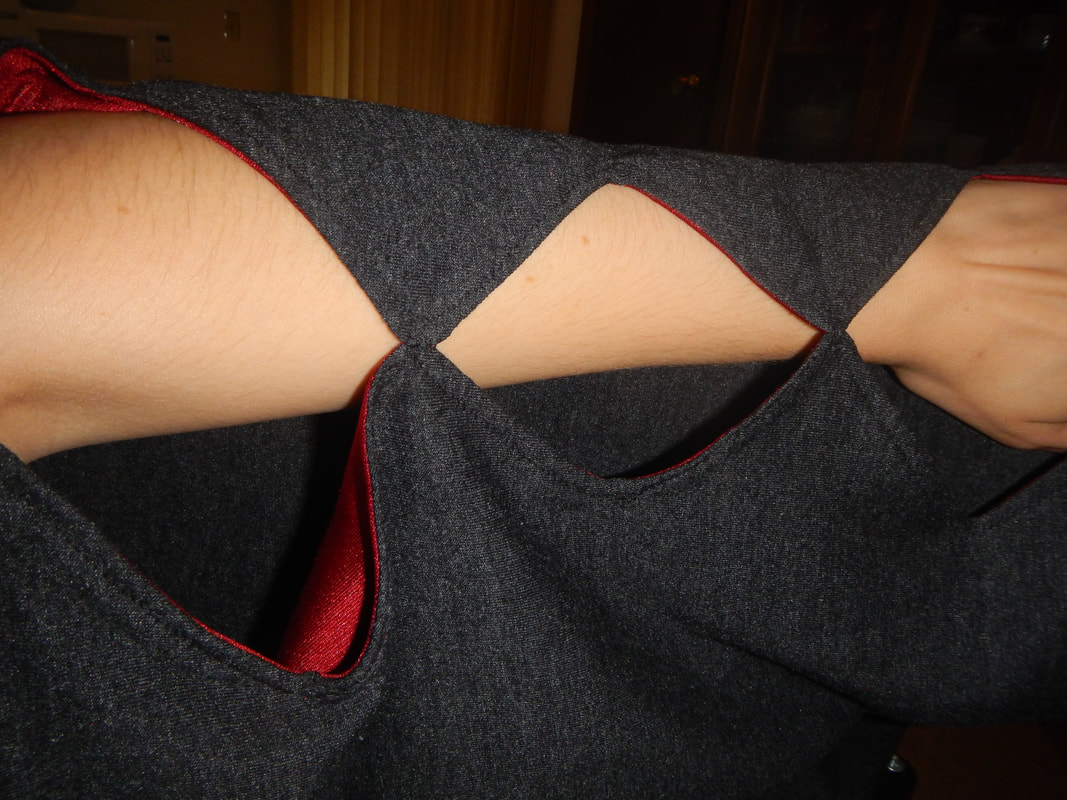
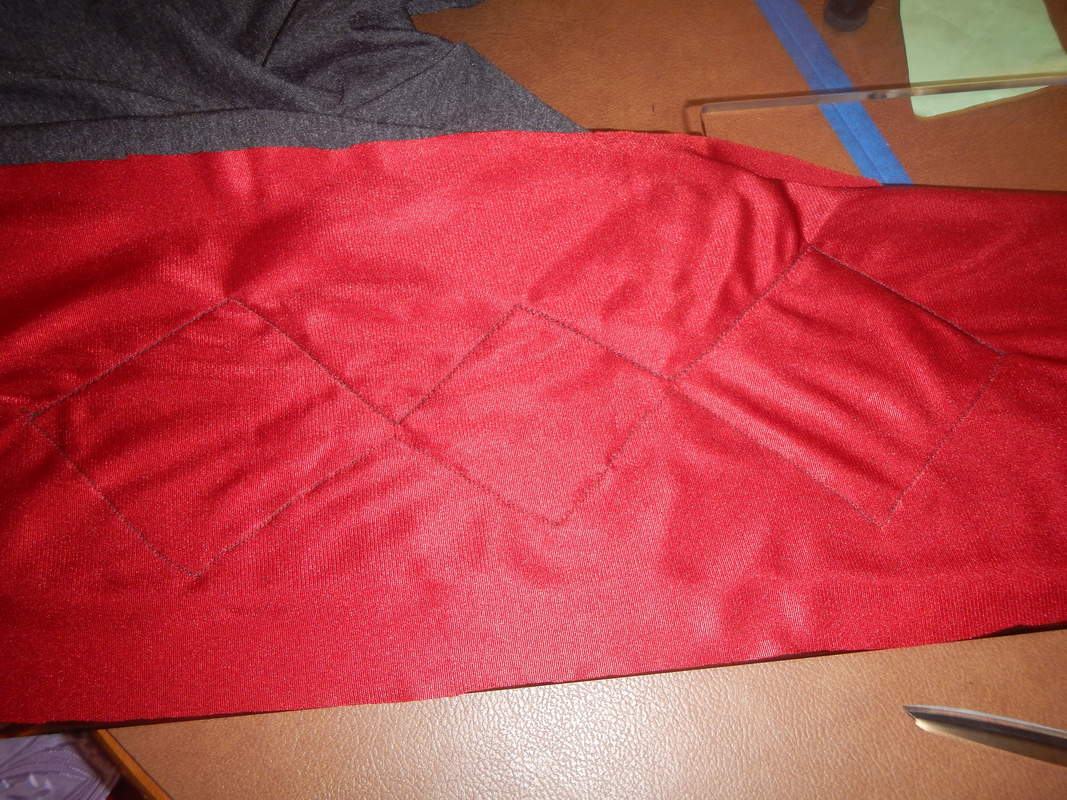
Step 2: the facing sewn on. See the center, how the lines don't cross?
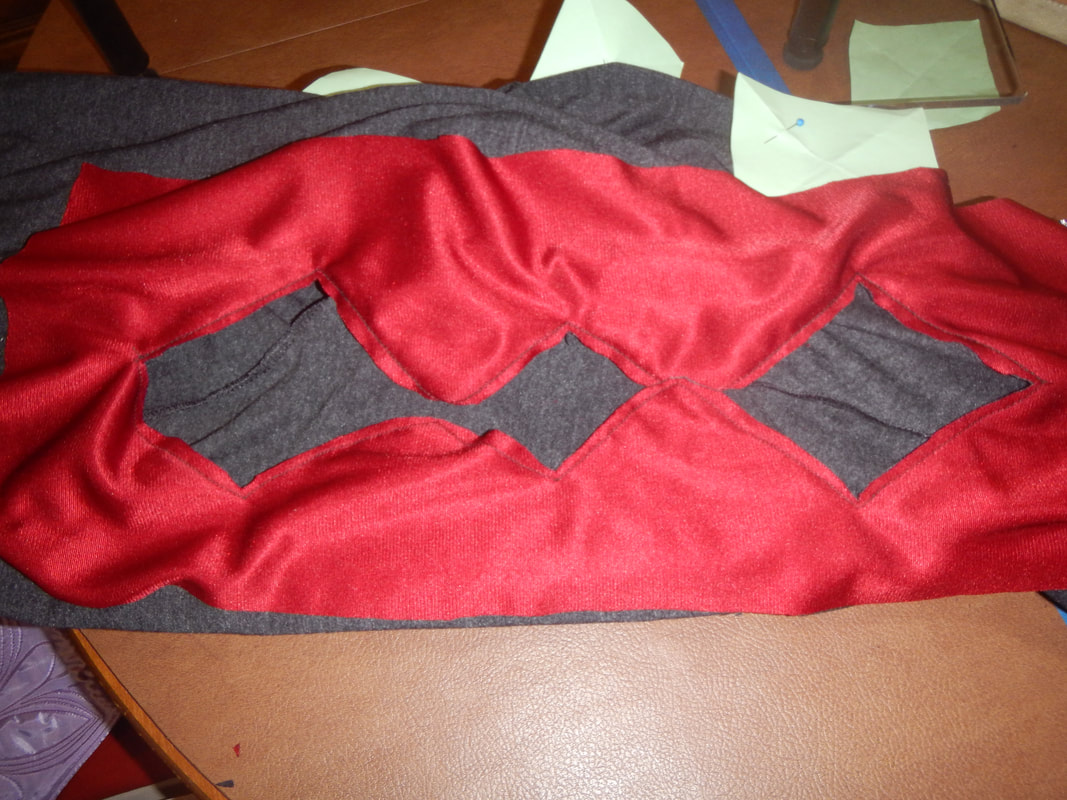
Picture
Step 3: cutting out the zig-zag hole.
Picture
Step 4: the facing turned to the inside, ready for top-stitching and pressing.
Picture
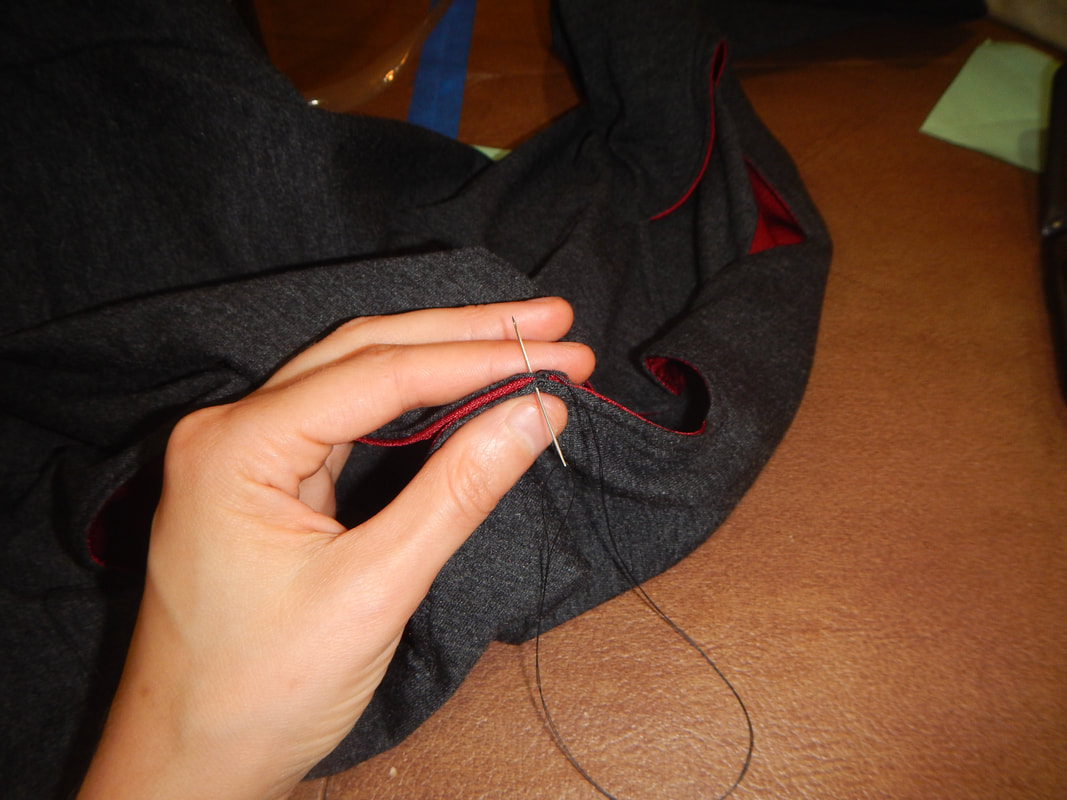
Step 5: sewing the center points together to make diamonds.
To make the second leg match the first, I tuck one leg inside the other, making sure the seams all match neatly, and trace the markings:
Picture
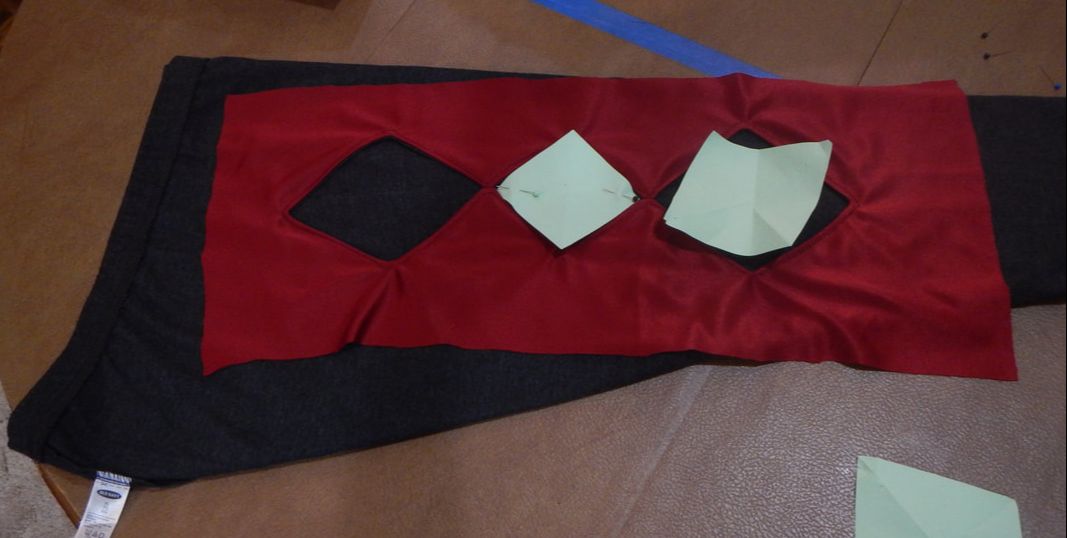
Then I do the same for the second leg as I just did for the first.  Here is the completed cut-out:
Picture
Inside
Picture
Outside
Picture
side view
1 Comment
Francine Corbeil
7/13/2022 10:15:41 pm

Hello!

First, I want to tell you that your work is amazing! You have a wonderful talent, and it's a pleasure to feel the fun that you have with your projects!

Do you sell the patterns that you create? I want to make the dress that Ahsoka Tano wore in the Clone Wars (the exact one that you made) and your pattern would be exactly what I need.

Thank you!

Francine

Reply


Leave a Reply.

    Karen Roy

    Quilting, dressmaking, and history plied with the needle...

    Categories

    All
    1910's
    Alteration
    Antique
    Dyeing
    Embroidery
    General
    Hand Sewing
    History
    Lacemaking
    Mending
    Menswear
    Millinery
    Modern Elizabethan
    Musing
    Other Sewing
    Philippians 4:8
    Project Diary
    Quilting
    Regency
    Retro
    Self Made Pattern
    Self-made Pattern
    Terminology
    Victorian
    Vintage

    Blogs I Read

    The Dreamstress
    Male Pattern Boldness
    ​
    Lilacs & Lace
    Tom of Holland
    Fit for a Queen
    Line of Selvage
    Mainely Menswear
    Bernadette Banner

    Archives

    January 2023
    December 2022
    November 2022
    October 2022
    September 2022
    August 2022
    October 2021
    September 2021
    August 2021
    July 2021
    June 2021
    May 2021
    April 2021
    August 2020
    June 2020
    May 2020
    April 2020
    March 2020
    January 2020
    December 2019
    November 2019
    September 2019
    August 2019
    July 2019
    May 2019
    April 2019
    March 2019
    January 2019
    December 2018
    November 2018
    October 2018
    September 2018
    August 2018
    July 2018
    June 2018
    May 2018
    April 2018
    March 2018
    February 2018
    January 2018
    December 2017
    November 2017
    October 2017
    September 2017
    August 2017
    July 2017
    June 2017
    May 2017
    April 2017
    March 2017
    February 2017
    January 2017

    RSS Feed

Blog

Quilting

Clothing

About

Copyright Karen Roy
​© 2017-2022