|
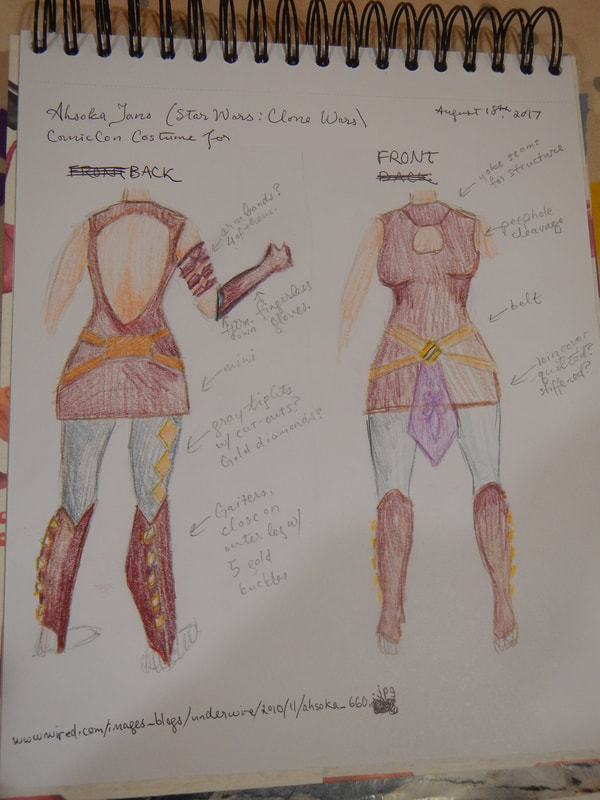
So, as promised on August 21st, here I begin the chronicle of my Ahsoka Tano cosplay commission! Though it's all done now, I wrote this project diary while working on it, so expect present tense throughout. Ahsoka Tano is a Star Wars character in the movie The Clones Wars and in the animated TV series. She is a figure in Anakin Skywalker's younger years: he mentors her when she's a young Padawan, before he becomes Darth Vader. My client C. wishes to dress as her for the Rose City Comic Con. This requires, at minimum, a costume including a dress, belt, and gaiters. Other accessories are the gray tights, armbands and gloves, headdress/hair, et cetera. Our time is short (what with work and all, I only have five full days to work on it between the start of the project on August 20th and the due date of September 8th), so the priority is dress/belt/gaiters. In a pinch, C. can improvise the rest.
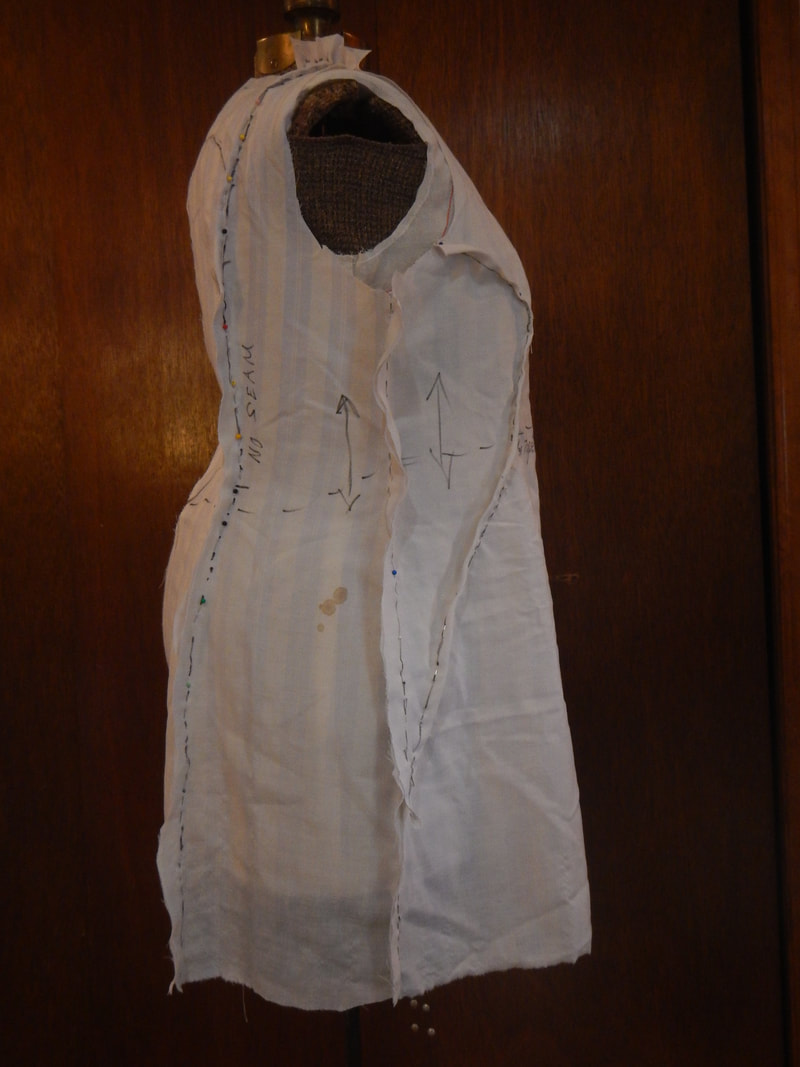
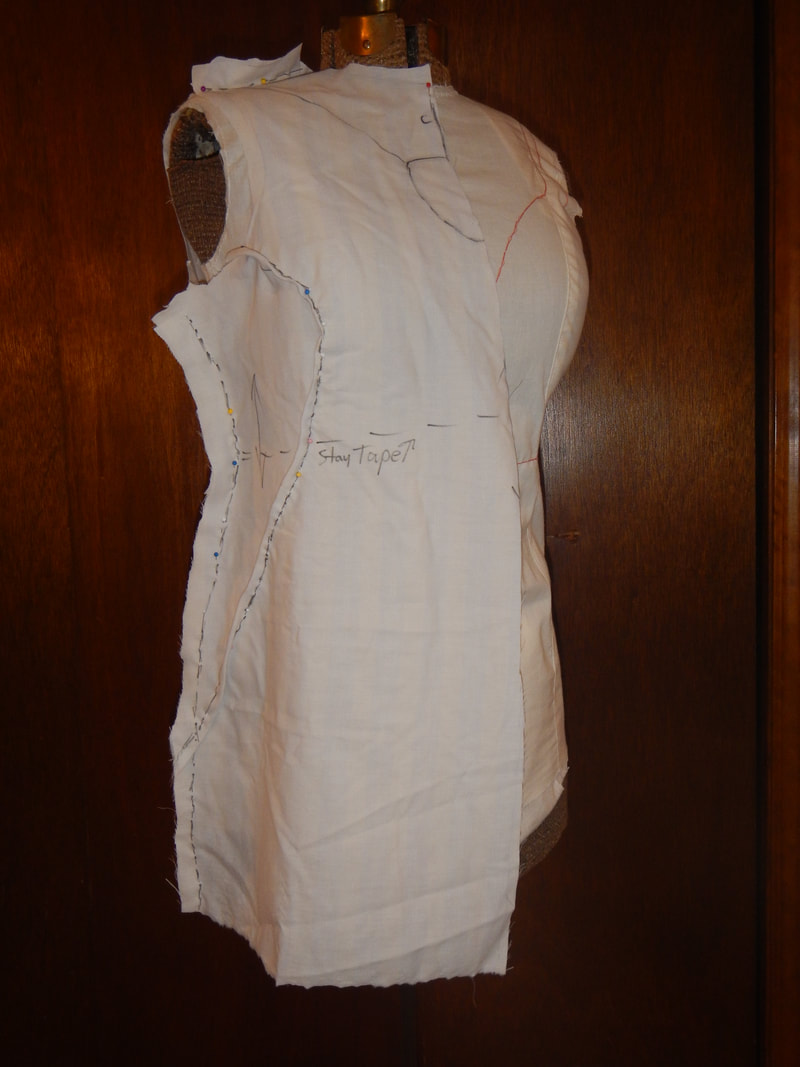
DRAPINGThe fun thing about making a costume version of a cartoon is that there is room for interpretation. Where are the seam-lines in the dress? What kind of material? It's up to me! In this case, I let my client guide me in terms of color and texture, while I guide her in terms of fabric type and construction. In particular, since the dress has a cleavage cut-out and a back cut-out, I position the seamlines to support the holes. Here's the muslin on Claudia, my crooked dress form. It looks baggy because Claudia is not adjusted to fill out the dress.
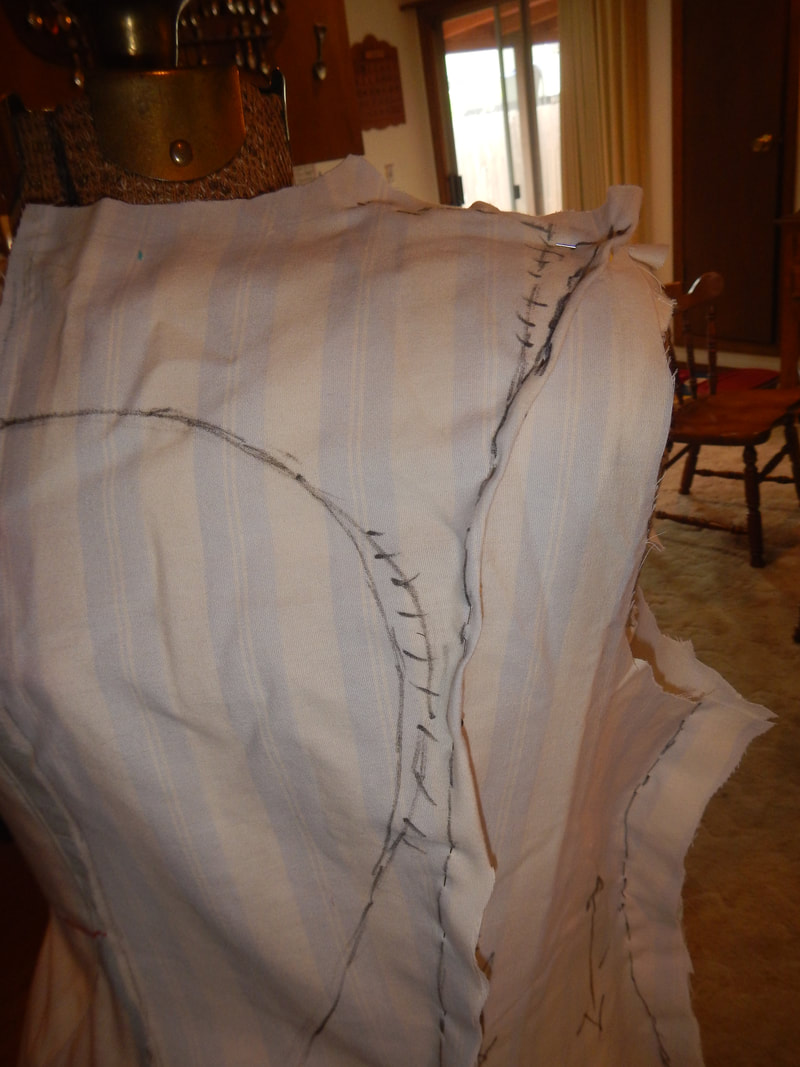
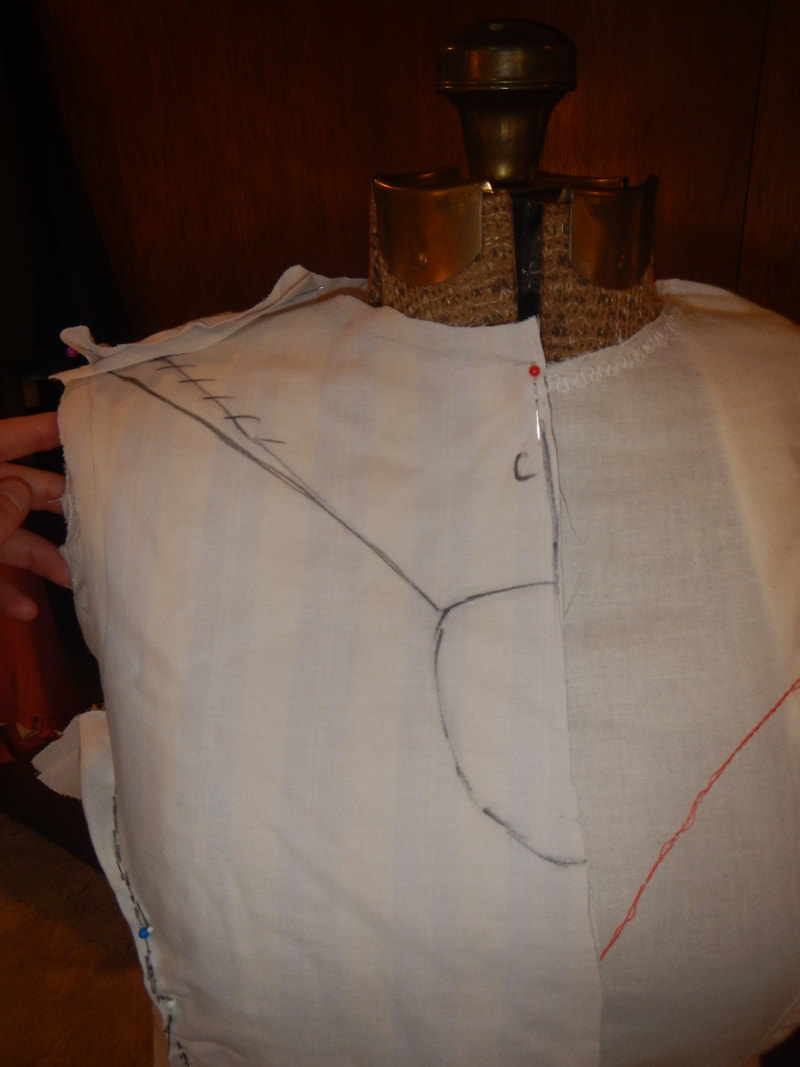
THE MATERIALS Armed with the muslin pattern pieces, we next go shopping for materials. We choose Fabric Depot because they are having a 40%-off-everything sale. There we luck out in their outdoor sale and find ten gold-colored fasteners for the gaiters, and a nice long zipper for the dress. In the remnants section, we get some lilac-colored poly stuff that looks like silk (for the apron part of the belt) and some cheap stained polyester fleece to serve as batting inside the apron. In the trim section, we get a cut of golden grosgrain ribbon to make the belt. 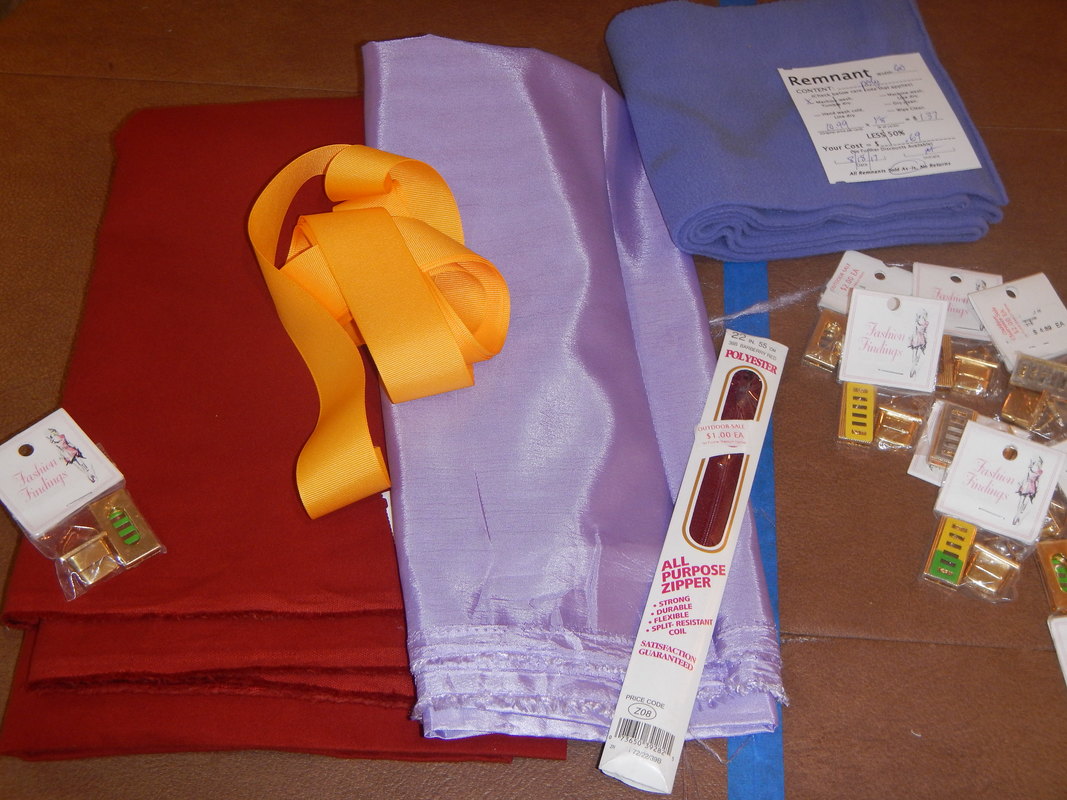 For the dress itself, we have to choose between a raspberry-brown ponte knit or an autumnal red-brown brushed twill. C. leans toward the twill for its color, which looked more rustic and textured, and therefore less costumey. Of course, I have found twills frustrating in the past (remember the incredible skewing denim and the ever-shrinking jeans? Yikes!), but those frustrations related to washing. Given that this dress will have cut-outs that need to be interfaced and such, and will only be worn for cosplay, not everyday, I'm going to recommend drycleaning. We get a yard and a half at 57" wide (I am glad I brought the muslin, since I lay it out on the cutting table to make sure I get enough!) It's more expensive than the ponte knit, but it is discounted 50%. ONE ALTERATION At home after C. has left, I look at the muslin, in particular at the back cut-out, and wonder whether I'm leaving myself enough fabric to work with in the sliver next to the cut-out. I decide to make the cut-out a wee bit smaller and move the vertical seam out a bit, to make the sliver wider. That means changing the location of the front yoke seam, too, so they still meet neatly at the shoulder. The three pics below show the alteration pretty clearly. The black line are seamlines, and the ones which are crossed out like train tracks are the ones I change.
Next, I take the muslin apart and trace it on paper, using this opportunity to smooth out the curves, straighten the straight lines, and walk the seams to make sure they match up. I suppose I could just use the muslin pieces as they are for my pattern, but then I fear I'd be dealing with more problems downstream. Attention to detail now will hopefully prevent a sloppy result later. (Plus, I'd like to have this pattern for another use: I wish at some point to learn how to grade patterns up and down, and this one, being as it is a one-use pattern, might be a good option to cut up and play with.) 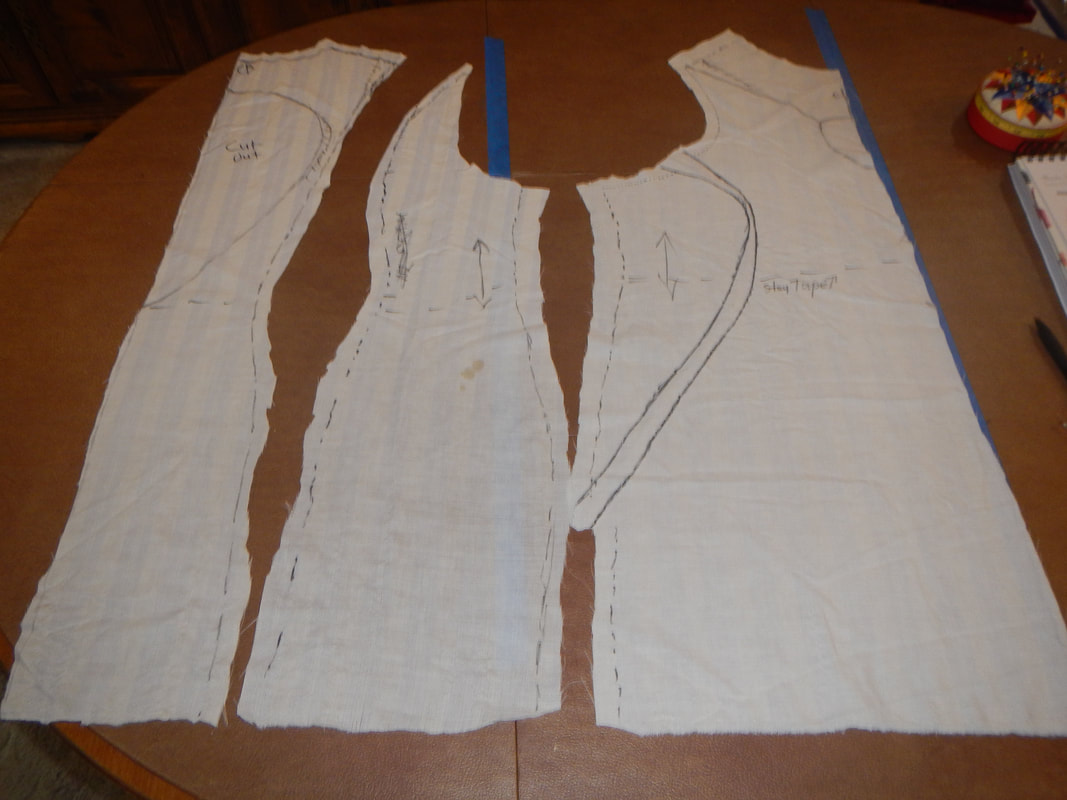 The muslin pieces laid out 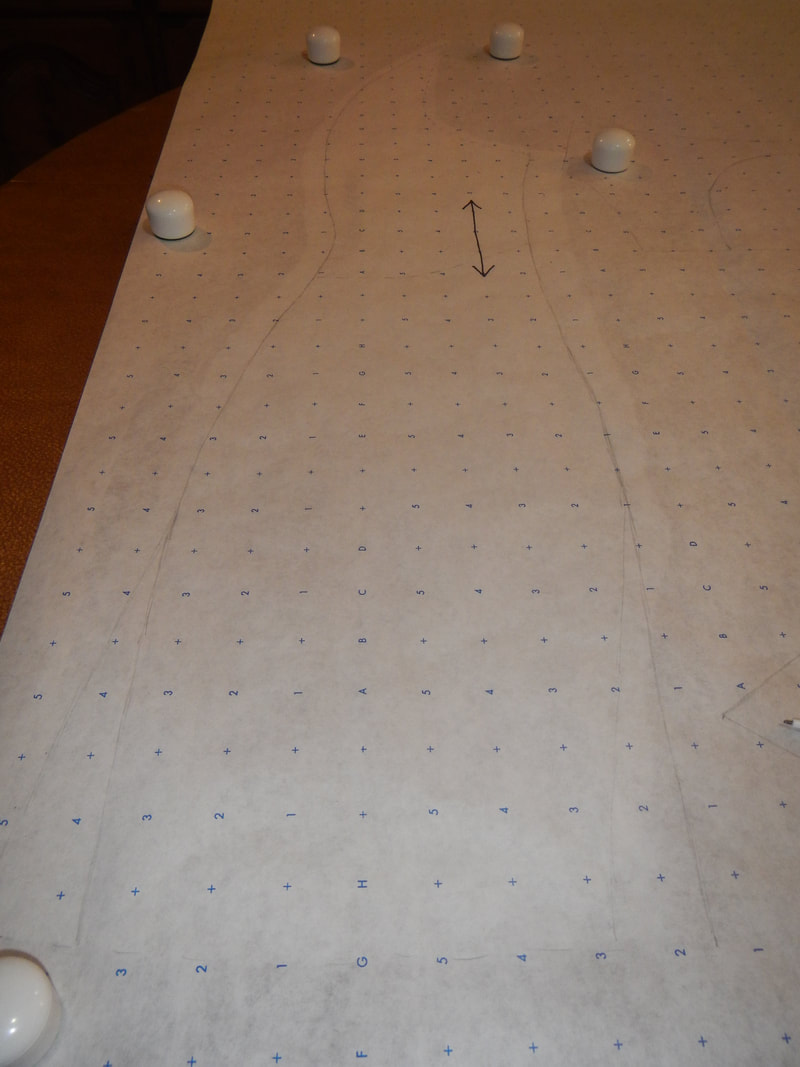 Tracing onto paper. There's a weird sideways skew at the hem, same as when I made my sister's block. What am I doing in my draping that makes this happen? Anyway, I correct it on the paper. And here's my finished pattern, with 5/8" seam allowances drawn on so I make sure to cut enough to allow alterations at the next fitting: 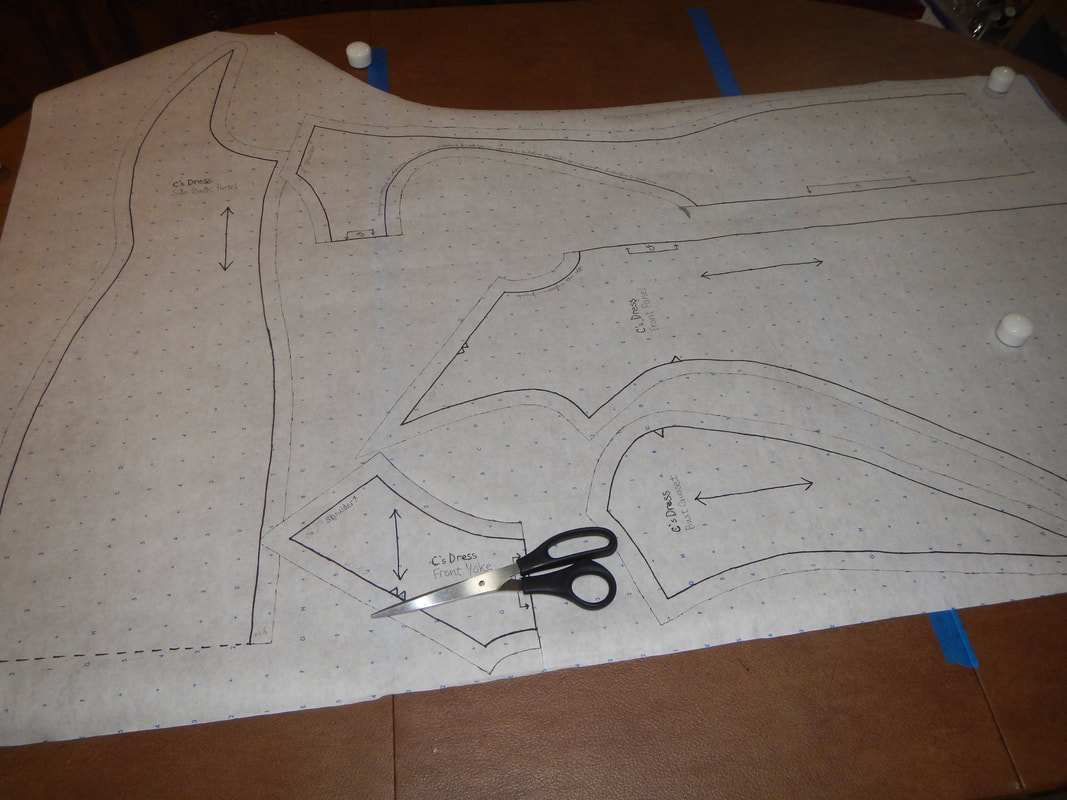 On my Center Back, I mark that it should be cut on the fold, but in actuality, I make it to open and close there. On Thursday, I'll show the dress construction!
0 Comments
Leave a Reply. |
Karen Roy
Quilting, dressmaking, and history plied with the needle... Sites I EnjoyThe Quilt Index Categories
All
Archives
March 2024
|

 RSS Feed