|
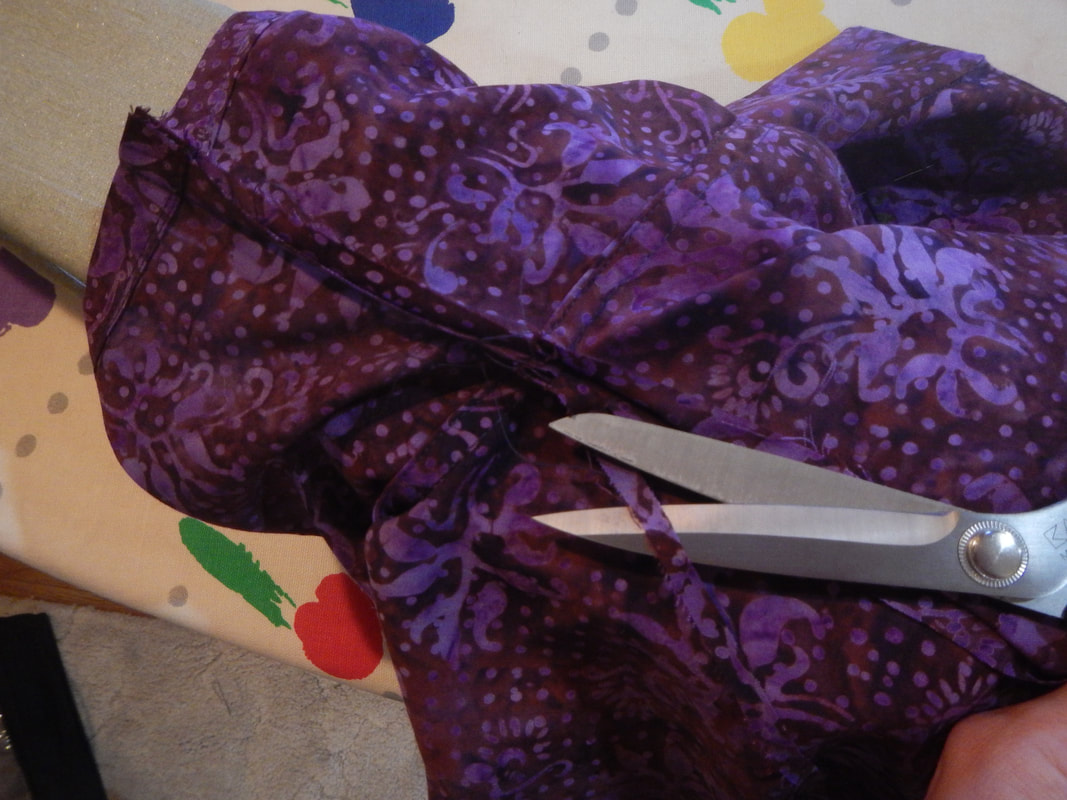
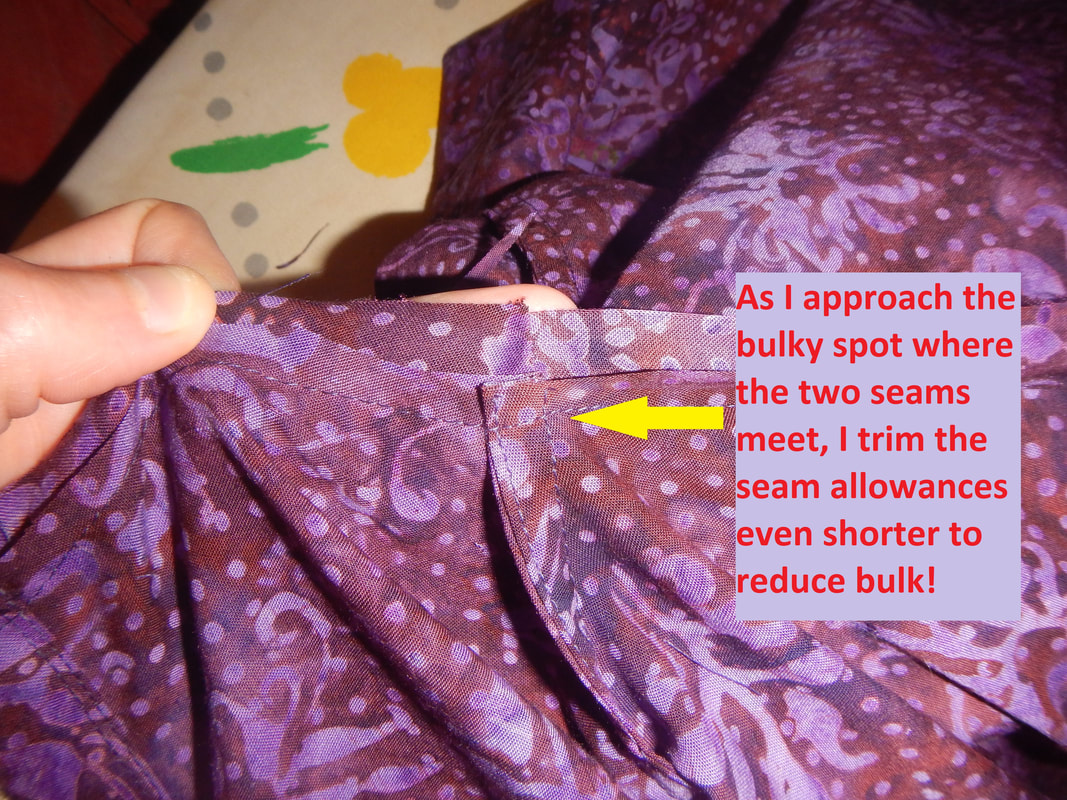
It has been so long since I've worked on this gift for my brother that it's no wonder if you've forgotten all about it! (My brother probably thought I'd forgotten about it!) Allow me to refresh your memory. In Fall, 2016, I came up with the idea of making a camp shirt for my brother, using the Islander #208 pattern and a Robert Kaufman batik in my brother's preferred colors. He was enthusiastic. So I made a mock-up and sent it to him, only to find that, like many commercial patterns, the shirt had far too much ease. Though the pattern envelope said my brother's measurements were a Medium (with a Large neck!), in reality, he was probably a small. At any rate, it was a ton of work with a disappointment at the end, so the wind was taken right out of my sails. The project slipped to the bottom of the pile until... April 2017, when I found an older Aloha shirt at a vintage shop and rubbed off its pattern. I sent the original to my brother, and he confirmed that the fit was good, so I cut out the batik pieces... 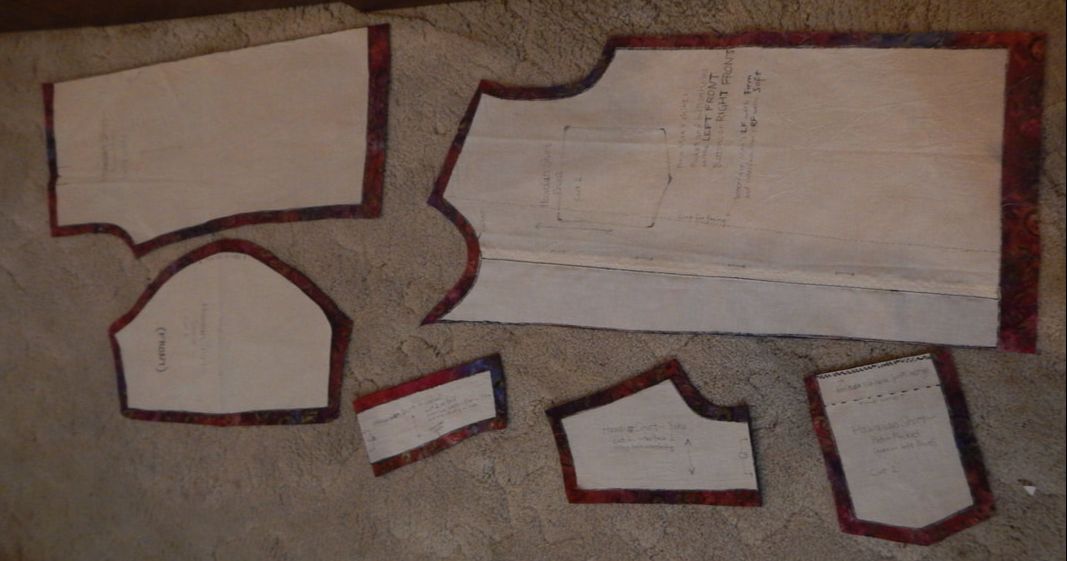 And got distracted by other, paying, work, until August 2017, when I gave myself a stern talking to and put the shirt project back on the top of my to-do list for the fall! Unlike many of my project diaries, I don't have good pictures for this project. Not only are the colors of the Robert Kaufman batik (as well as the rayon batik for shirt number two) nigh impossible to get good pictures of, but the lines make it difficult to see details on pictures of seams and construction. And frankly, there were not many challenges in the making of these shirts, so I don't have much to say. Instead, I'll give a quick tutorial on felling an underarm seam, another on how I hemmed and turned the facing, and talk a bit about the design aspect of the project. Then I'll finish with pretty pictures! TUTORIAL: FELLING AN UNDERARM SEAM Felling a seam is not hard, but when two felled seams intersect, they can be bulky.
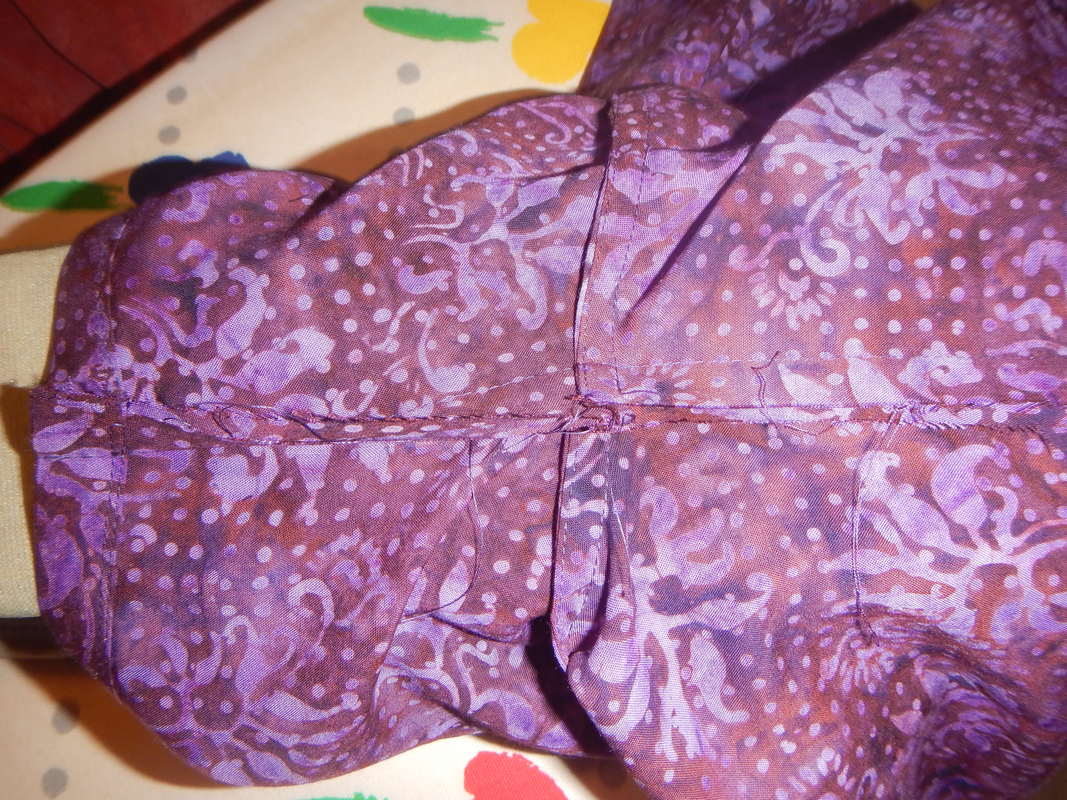
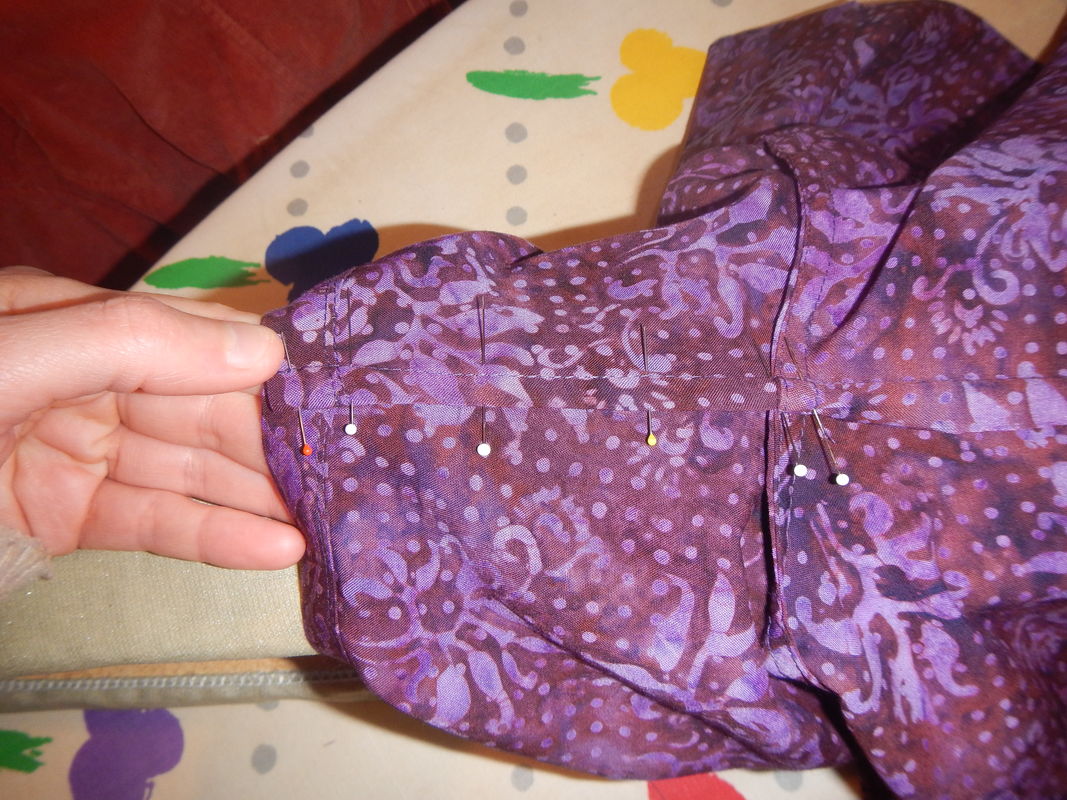
Also, thanks to following the Islander-prescribed order of assembly, I hemmed the sleeves first and then sewed the underarm seam. I'd always done it the other way 'round and then fussed with the hem being too tight. See, a sleeve is roughly cone shaped: wide at the shoulder, narrow at the bottom. When the bottom is turned up to make the hem on a finished sleeve, you're trying to turn a narrow diameter up into a wide diameter where of course it doesn't spread enough to fit, so it buckles a bit. Good patterns account for this by flaring the hem allowance out as a mirror image of the sleeve above it, but it's still tricky to hem it when the sleeve's underarm seam is sewn and the thing is a cone. But this time, when I did the hems first and then sewed and felled the underarm seam, there was no problem. The bits that didn't quite fit just got incorporated into the underarm seam! Hurray for reading directions! Here is the finished juncture of seam and hem: 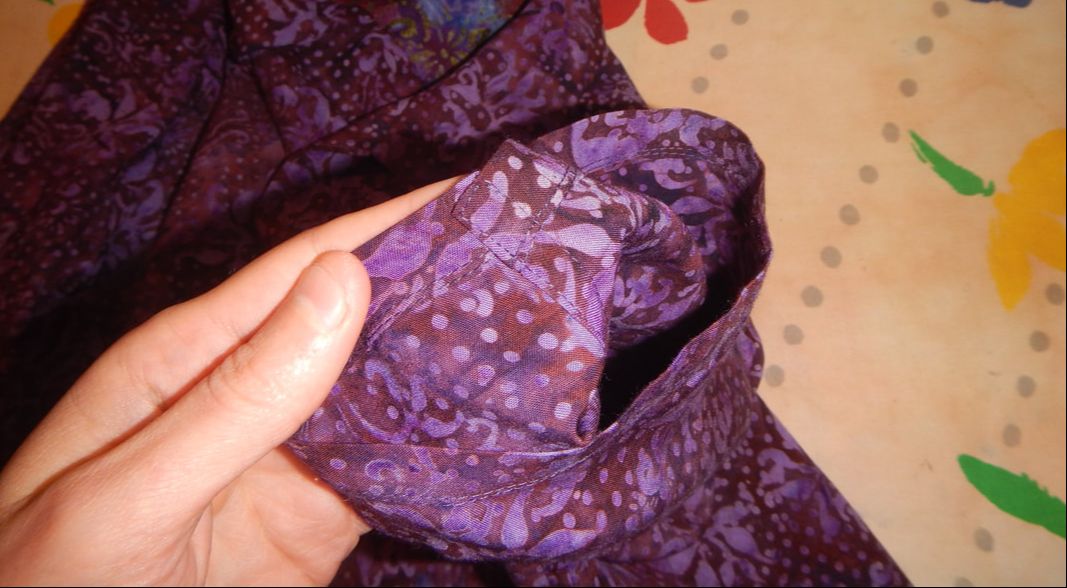 TUTORIAL: HEMMING AND TURNING A FACING I have tried to make the following pictures explicatory enough to avoid lots of verbage, so just click each one to zoom up and read the notes. Pay careful attention to the first picture, where I tug the facing down a teensy bit before sewing across the bottom... Remember when I made my sister's denim blazer and the facing bubbled after I turned it? This time, I avoided that bubble by doing this little tug. 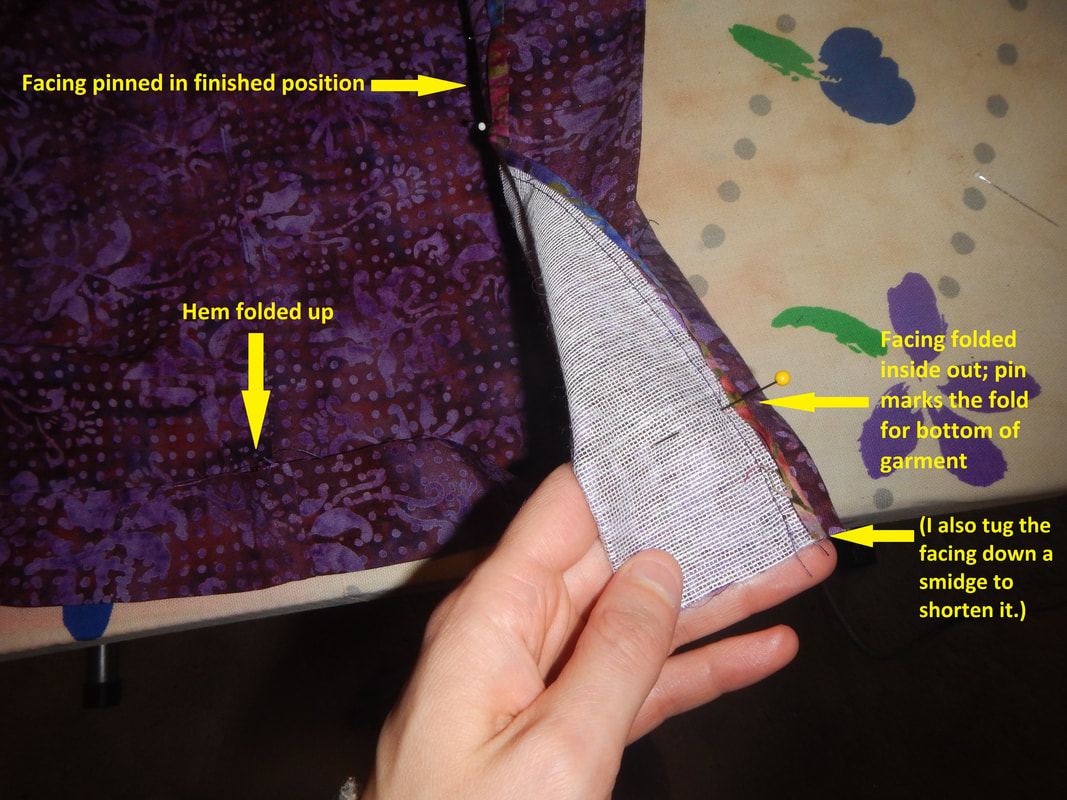 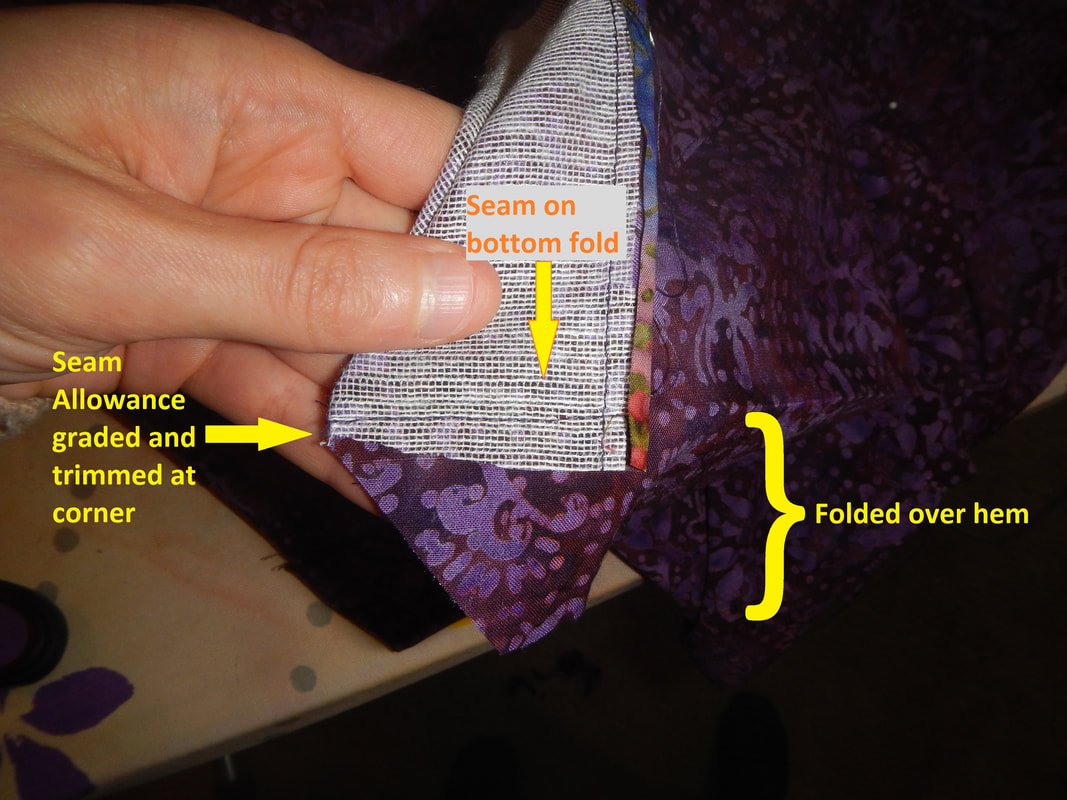 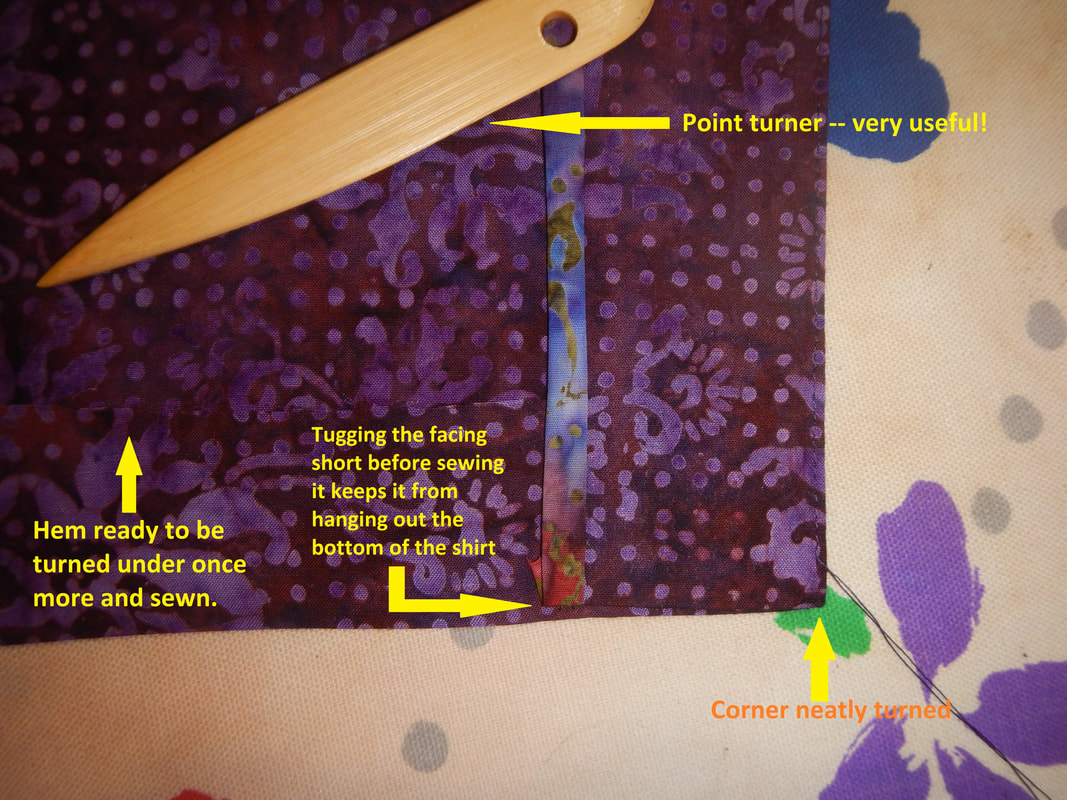 And in this case, because the contrast tape was too narrow and I didn't want it to unfold and fray, I hand-stitched the edge of the facing down: 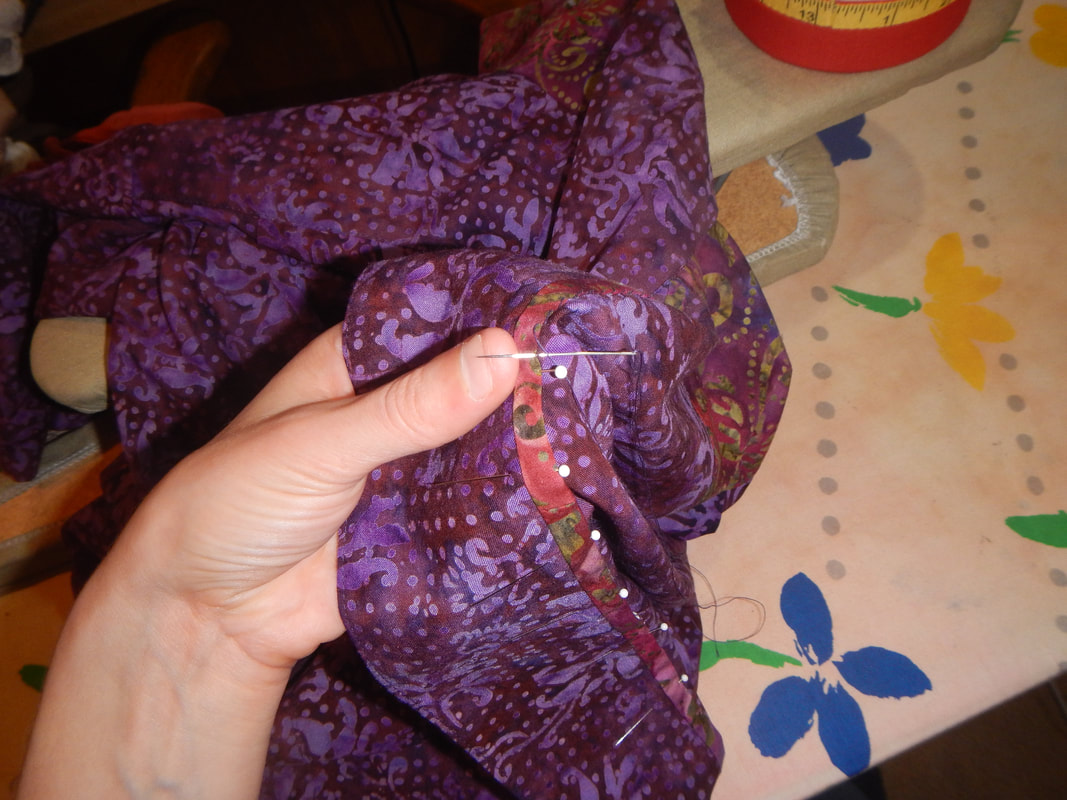 Notice I'm only catching one or two threads of the shirt front as I sew? MY EVOLVING VISION One of many pitfalls in my taking so dang long to make these shirts was that my vision changed half-way through, but I'd already implemented the first vision in a few crucial ways, so I had to proceed with my first plan while wanting to do my second. My first vision was to use one main batik (either purple or multi-colored) for each shirt, and use the contrasting bias tape or other batik for the inside. With that plan in mind, I made each collar so the outer collar was the main color and the under-collar was the batik from the opposite shirt. (If you're not familiar with shirt collars, the outer, visible collar is cut millimeters larger than the undercollar, so the undercollar stays hidden and the outer collar rolls around the edges a bit. I wish I could show you a picture, but my photos came out confusing.) Anyway, I began putting the shirts together thus:
Months passed, and I started following my sister-in-law's Instagram so I could see pics of her and my brother, and through that I got a better idea of how colorful my brother's fashion sense is. He used to be so conservative! But people do change... or perhaps people do relax and discover their inner artists... Now he glories in colorful prints and wacky details! Exactly the kind of thing I was talking about when I encouraged men to enjoy whimsical clothes (scroll down to MISUNDERSTANDING BRUMMEL). So the next time that I took the shirts out to work on them, I thought it a shame that all the cool contrast was on the inside, when my brother of all people would rock the style of contrast on the outside. I particularly love the green bias tape on the multi-colored shirt, and wish that I'd done the whole shirt with that visible. But by the time I got this new vision, the interfacing, ironing, and shaping of the collar and facings was already done, and there was no going back! The only concession I was able to make for my new vision was a line of purple batik piping in the outside back yoke of the multi-colored shirt: 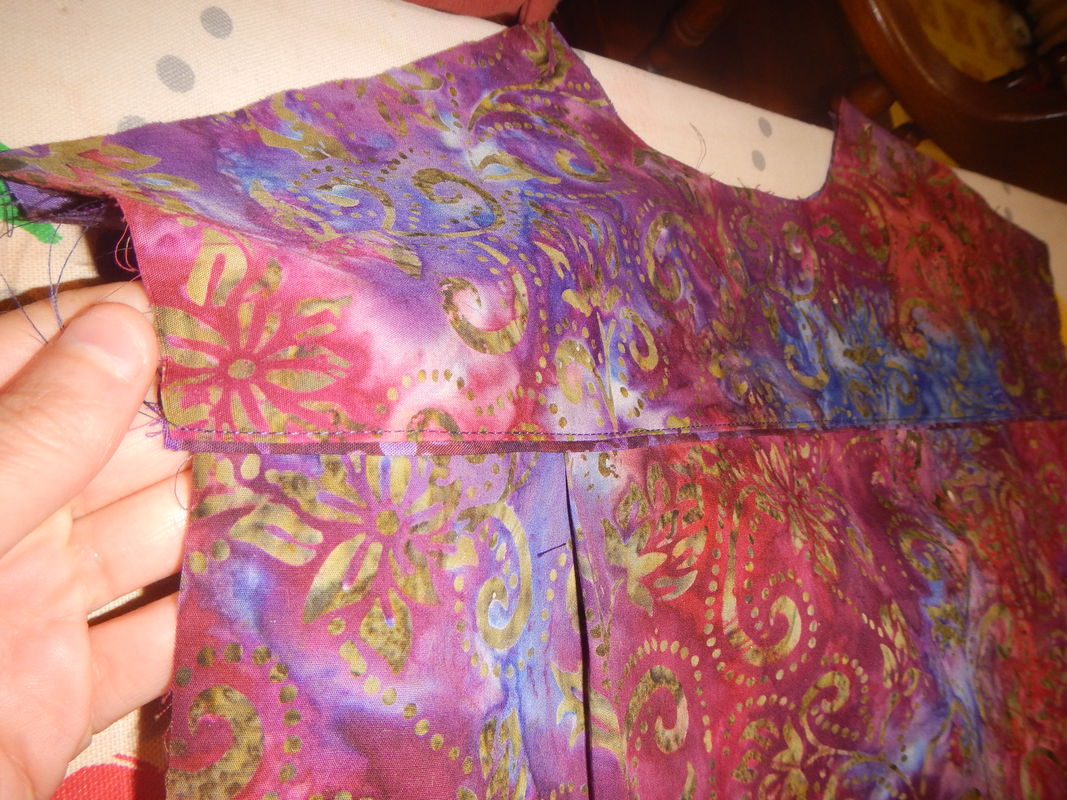 BONUSES AND VICTORIES:
FINISHED AND LOOKING GREAT!  Yes, the front does hang shorter than the back. I wonder if that was intentional in the RTW shirt I rubbed off, or if it was the effect of washing and wearing over time, and I copied it when I did the rub-off. I shall have to ask my brother how he likes that, or if he even notices!  My brother modeling the multicolored shirt! So nice!  Here he is in the purple one, which, being rayon, drapes a bit better. Yay! Yay! Yay! I'm so pleased with the results! I saved the voicemail message from my brother saying they were fantastic. I can't stop smiling. :D
2 Comments
Andrew Ryan
9/17/2023 08:17:27 pm
Karen, I'm a plus-sized gentleman and I've heard that rayon can be a clingy fabric or cause a person to run hot. I love the colors and the way the material lays on these shirts, but I was wondering if you could recommend an alternative material. Thank you!
Cellulose (plant fiber) materials all tend to be cool-wearing. Cellulose fabrics include cotton, linen, and rayon. Linen is the coolest to wear, but wrinkles like crazy and doesn't hold bright color dyes very well. Cotton is the most versatile, because it comes in so many weaves and weights. Rayon is cool on the body, but has some weird properties that come from its manufacture. Its clinginess may be one of those properties. I have noticed that the rayon dresses I grew up wearing always stuck to my legs! Leave a Reply. |
Karen Roy
Quilting, dressmaking, and history plied with the needle... Sites I EnjoyThe Quilt Index Categories
All
Archives
March 2024
|
 RSS Feed