Robes de Coeur
  • Blog
  • Quilting
  • Clothing
    • Menswear
    • Womenswear >
      • Self-Made Patterns
      • Commercial Patterns
    • Hats
    • Miscellany
  • About
  • Blog
  • Quilting
  • Clothing
    • Menswear
    • Womenswear >
      • Self-Made Patterns
      • Commercial Patterns
    • Hats
    • Miscellany
  • About

Patterning a Dress Based on a Picture!

9/1/2019

3 Comments


August was a busy month for me, sewing-wise.  I made two shirts for my brother, a sloper for myself, and a silk dress for myself.  I'll be blogging about them all out of order, though.  I'll start, today, with the silk dress project, because I'm most excited about it.  Then, once my brother gets and models his new shirts (linen and cotton ikat), I'll post those project diaries!  Then I'll get into the nitty-gritty of drafting/draping sleeves for my sloper, because that was a bear of a job, and I need time to sort the pictures and write something coherent. 
Today is the first of three posts about the silk dress project.  It starts with a challenge: to look at a picture of a dress, pattern it, and make it. 
Picture
Other posts: dress construction, finished pics.

THE PICTURE(S)

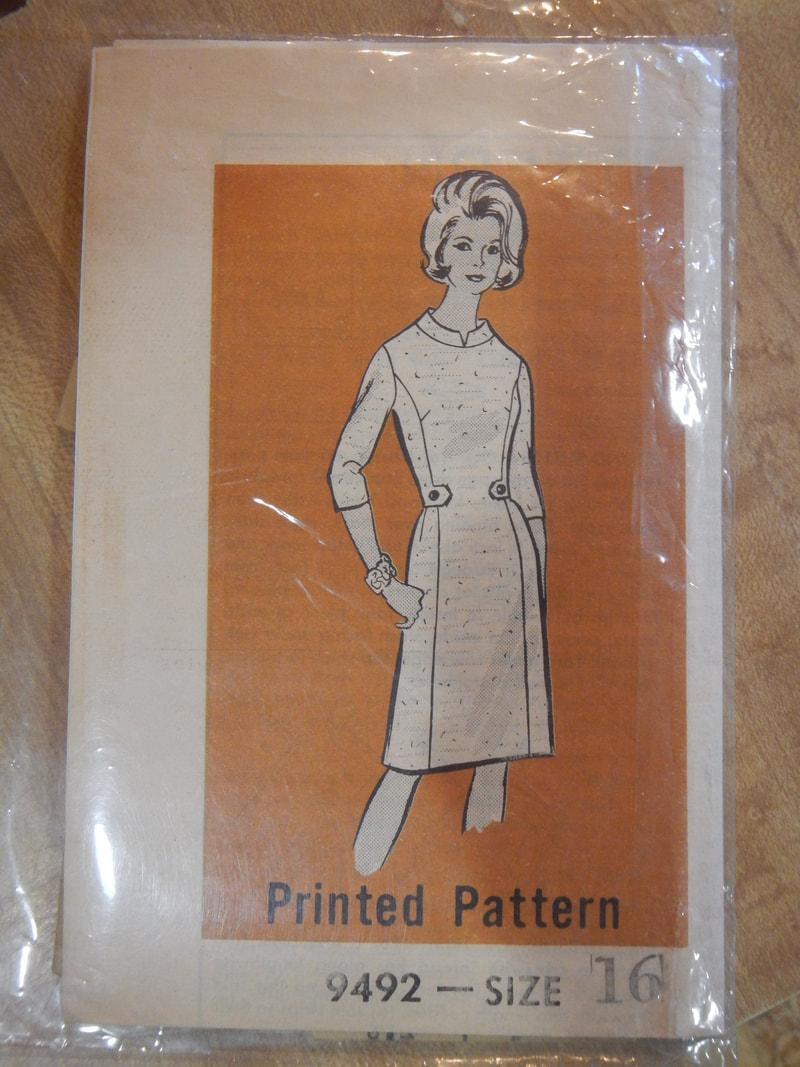
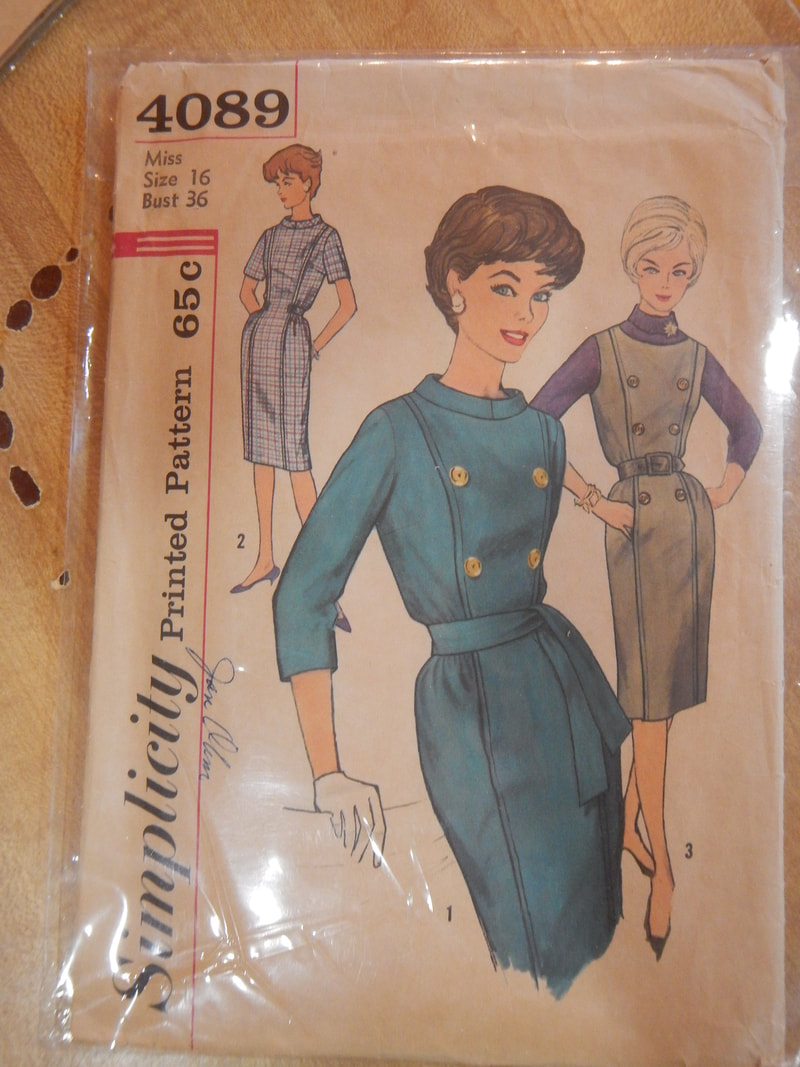
I chose for this project a dress that I already have a pattern for, because then when I'm done the project, I can compare and contrast my pattern with the vintage pattern.  While working on the project, though, I do not open the pattern.  No cheating!  Actually, I have two similar patterns; clearly I liked it enough to buy it twice!  The Vintage Patterns Wikia says Simplicity 4089 is from the "early to mid 60's"*. 
Picture
Picture
* Simplicity re-uses their pattern numbers (as they must--there are only 9999 inclusive permutations of four digits codes); the 1950's S4089 is a suit-dress and the 1940's S4089 is for accessories. 
What I like:
  • The tabard-like panels in the front (and presumably back)
  • The tabs at the waistline that wrap from back to front
  • The pocket(s) inset in the front princess seam
  • The mandarin collar that tilts ever-so-slightly inward
  • The 3/4 length sleeve option
  • The Simplicity version's princess seam that goes into the shoulder seam not the armscye

Simplicity 4089, view 2, is the one I'm trying to replicate, except with longer sleeves.  I like that they illustrated that one with plaid, too, so I can see the grainline the pieces ought to have.  I notice, for instance, that the mandarin collar is on the bias, but all other pieces are perfectly squared to grain. 

THE FABRIC

Picture
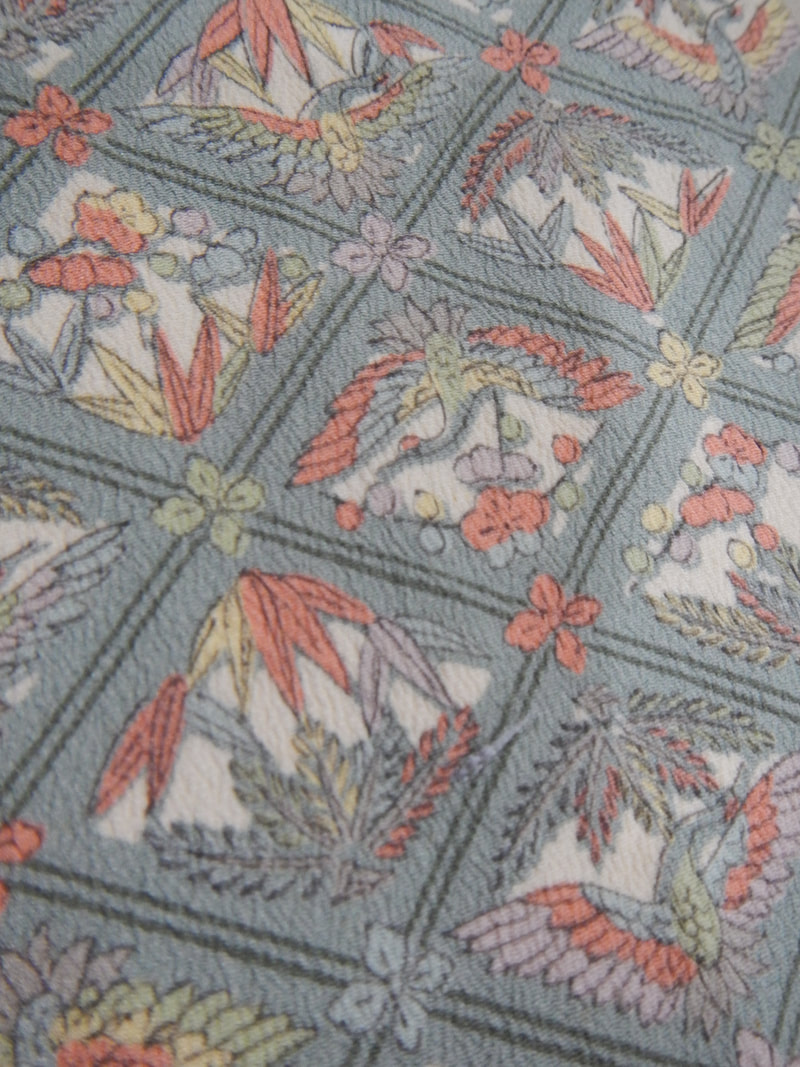
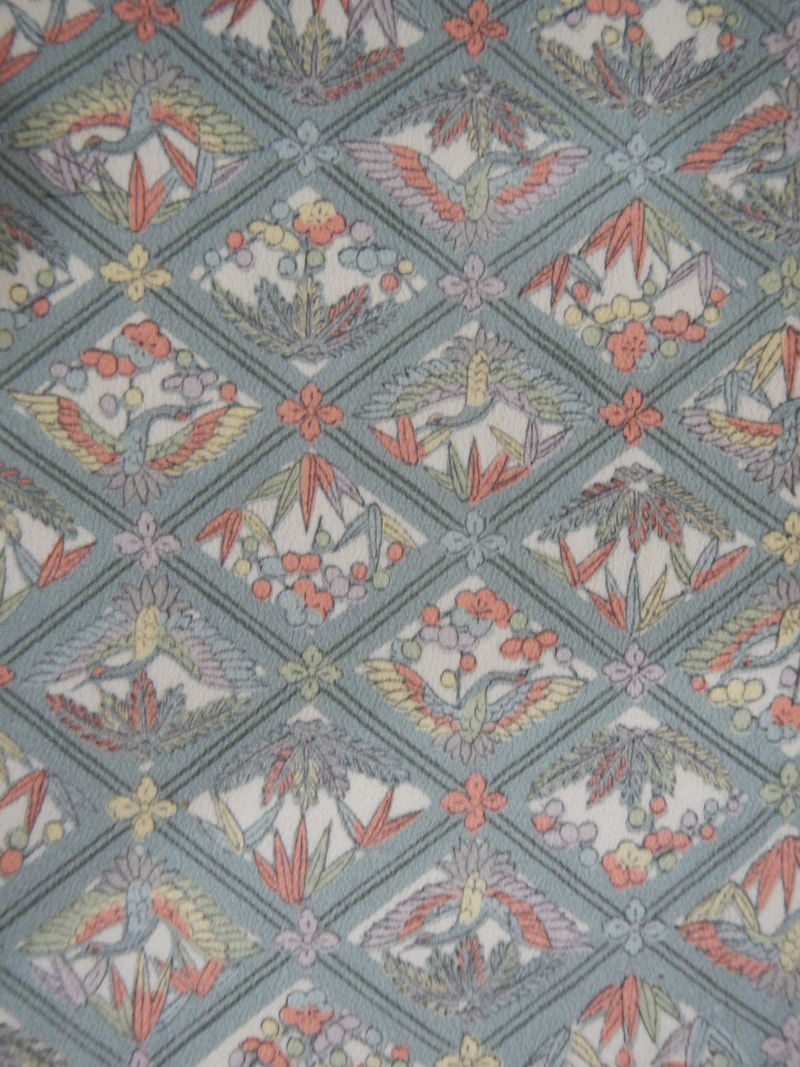
Gorgeous print on silk crepe!
Initially, I think I'll use some happy yellow silk taffeta I have... I have three pieces of it in analogous colors, and I think it would be pleasant to use different ones for each panel... maybe make the tabard out of the plaid one and the side panels from the solid one.  But then I had a brainstorm: I have a silk kimono that cannot be used anymore as a kimono.  (There is an embarrassing menstrual stain that no cleanser can budge, which is probably why it landed in a resale shop! I'm not too delicate to name the stain, but far too delicate to show it to you.)  I could disassemble the kimono and have lots of yardage of silk.  The only problem is that kimono silk is woven on a narrow loom, only thirteen inches wide, but if any pattern could work with narrow fabric, this one could.  It's all skinny panels, anyway! 
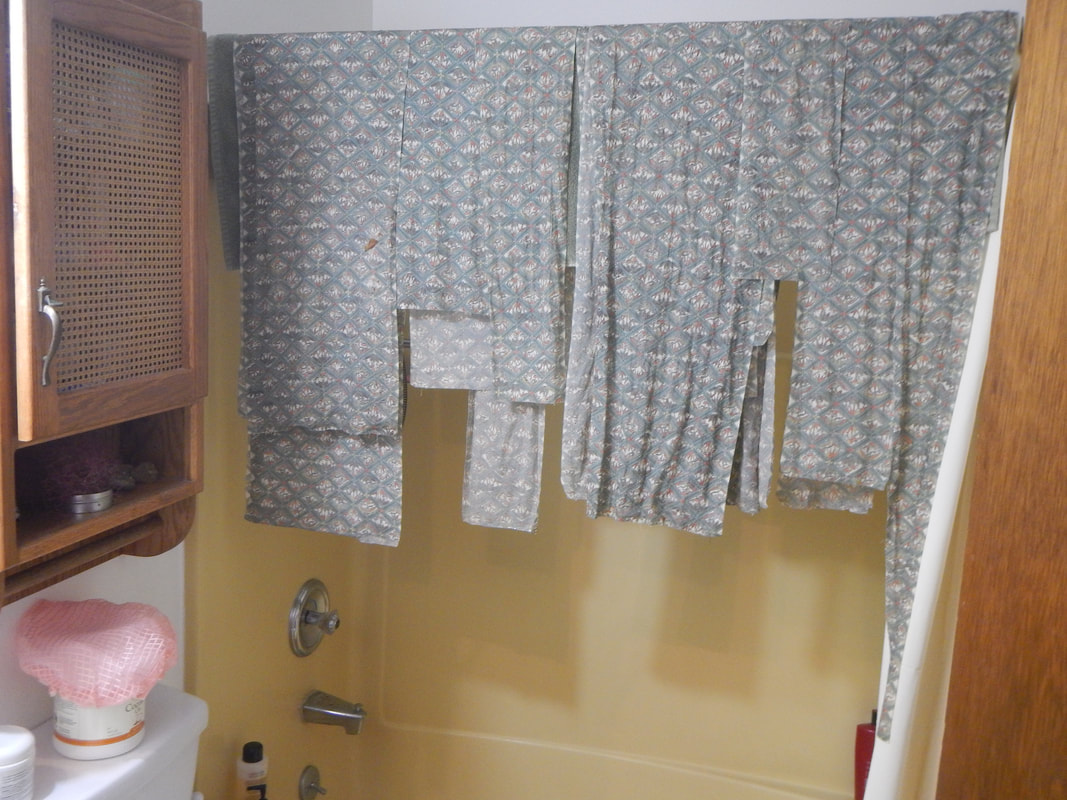
One night while watching YouTube videos, I take the kimono apart.  It was all hand-sewn, so I feel a little bad, but I remind myself that I'm giving it a second life!  I get a nice pile of medium-weight silk crepe (kimono exterior), another of silk habutai in pale pink (the lining) and a smaller one of silk faille in orange (the facings).  Then I wash each silk by hand in cold water with Nordstrom's hosiery wash for delicates (it contains silk protein and conditioners) and hang to dry. 
Picture
Why, yes, that IS a shower cap on my toilet tank. Why, yes, I AM the dorkiest dork in all dork-dom! How did you know? ;)
While the silk is still lightly damp, I press it with low heat, from the back side.  The pattern is printed on it, so the back side is obvious. 

THE PATTERN

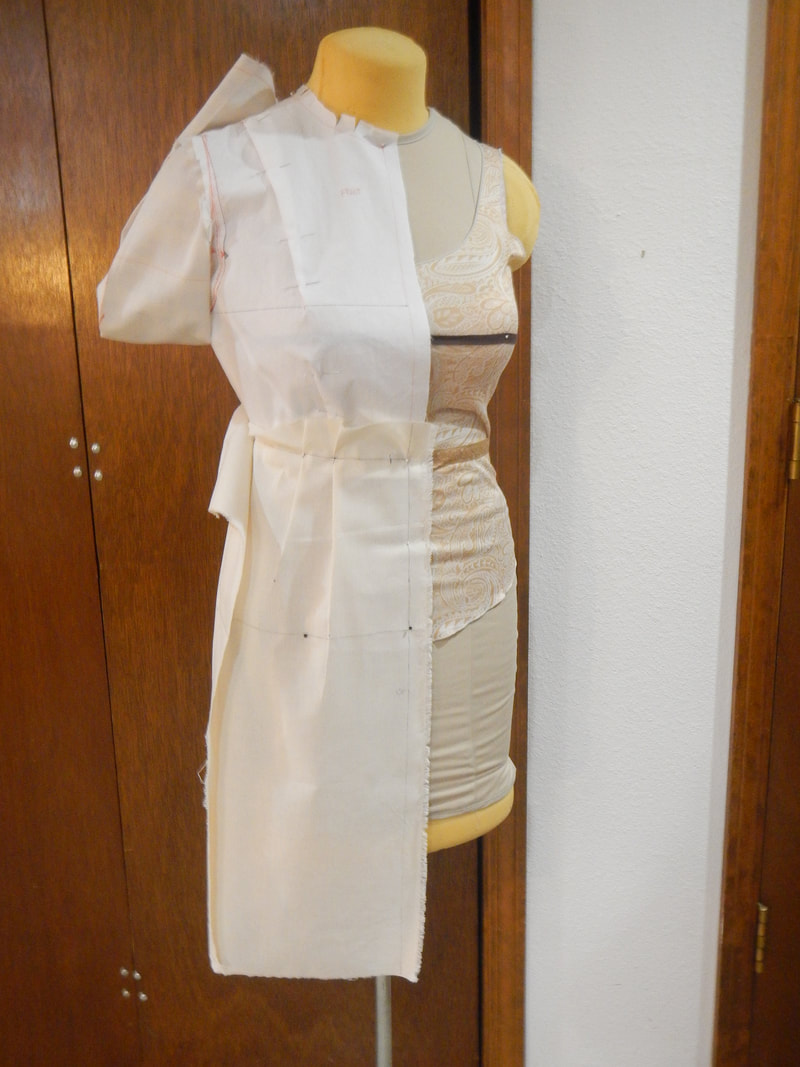
This is my first experience working from a sloper instead of altering existing patterns.  It's so fun and rewarding!  I should've made a sloper ages ago!  Here's a picture of my sloper on the form... the bodice has a dart into the shoulder and a matching dart below it, into the waist.  The skirt has two darts.  The sleeve is pinned out of the way. 

Immediately, I see that to get the tabard front of the dress, I simply take the fabric on the CF side of the bodice and the first skirt dart, and trace them together into one long line.  Then the side panel should be the pattern from the other side.  I'll also need to lower the neckline and lengthen the skirt: the sloper's neckline is Puritan-high and the skirt only goes to my knees. 
Picture
The drafting process did not lend itself well to photos, because it was white paper over white fabric!  But here's the process:
  1. Draw the front and back "tabard" pieces, using the dart-lines as new seamlines.  Draw in new neckline.
  2. Try to merge the bodice side and skirt side, but realize it won't work because my hips are bigger than my ribs/bust, so the darts are different depths.  Realize also that my waist tilts upward toward my back, so even if I add ease to the side bodice to make it match the side skirt, the new side seam will skew off grain toward the back!  Decide to proceed with a waist seam. 
  3. Add ease to the side-front bodice to make it match the skirt.  The side panels will be gathered a bit anyway. 
  4. Trace the side-front skirt separately so the grainline matches the side seam.  The remaining dart in the side-front skirt will become ease to be gathered rather than being sewn as a dart. 
  5. Walk the seamlines: side waist seams match up; princess seam matches up. 
  6. Do the back "tabard" piece.  There will be a CB seam with an invisible zipper. 
  7. Do the side-back bodice same as the front, turning the dart into ease to be gathered. 
  8. Do the side-back skirt with a slightly smaller dart than the sloper's dart, so that it matches the bodice.  The fabric I left out of the dart becomes ease for gathering, so the side-back skirt has gathering and a dart to control fullness.  I guess my bum is bigger than I thought!  ;) 
  9. Walk the seamlines for the back. 
  10. Fold the seam allowances as they'll be sewn and trim the excess so the seam allowances match after sewing.  Mindful of my narrow-gauge fabric, I give everything a mere half-inch seam allowance. 
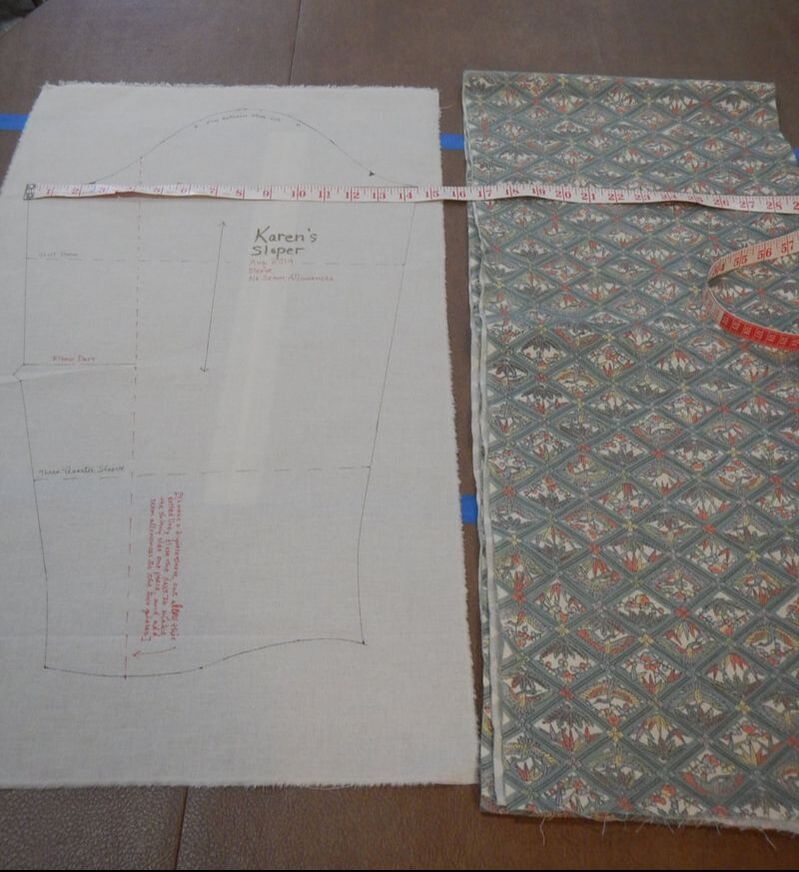
  11. Measure all pieces to make sure they're less than 13 inches across, including seam allowances! 
  12. Time for the sleeves!  They're already wider than 13 inches, so I have to make a two-piece sleeve. 

(Pics of trueing the seam allowances)

Picture
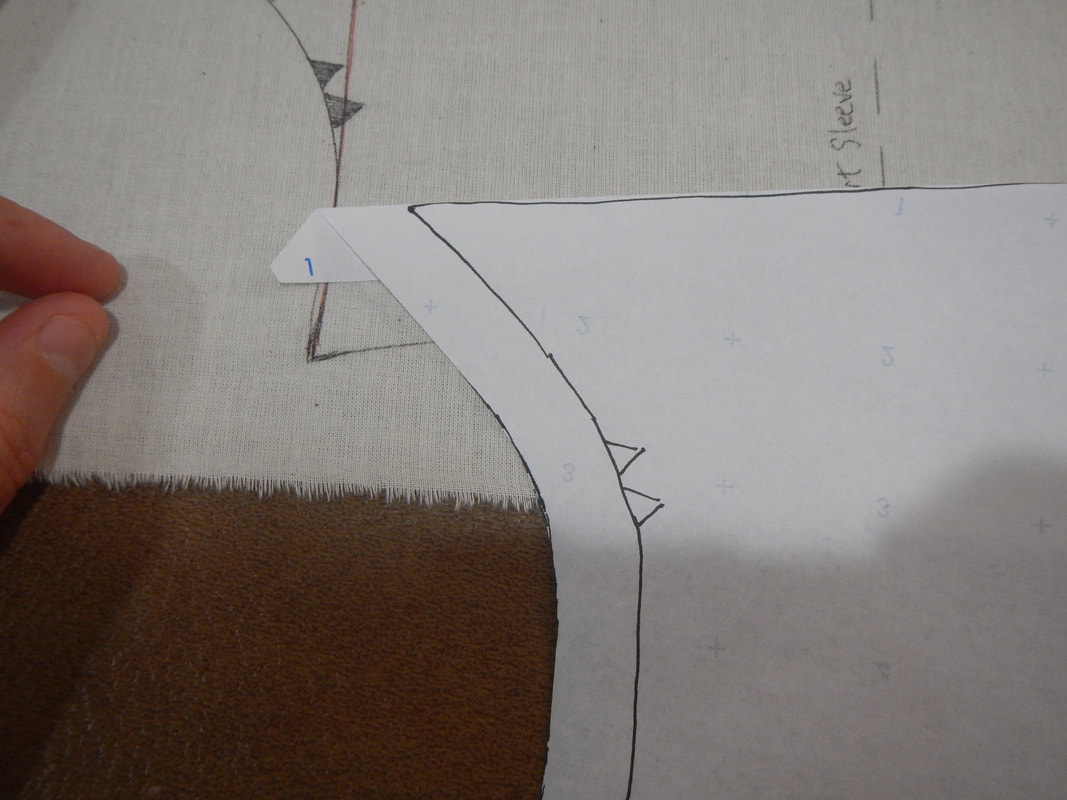
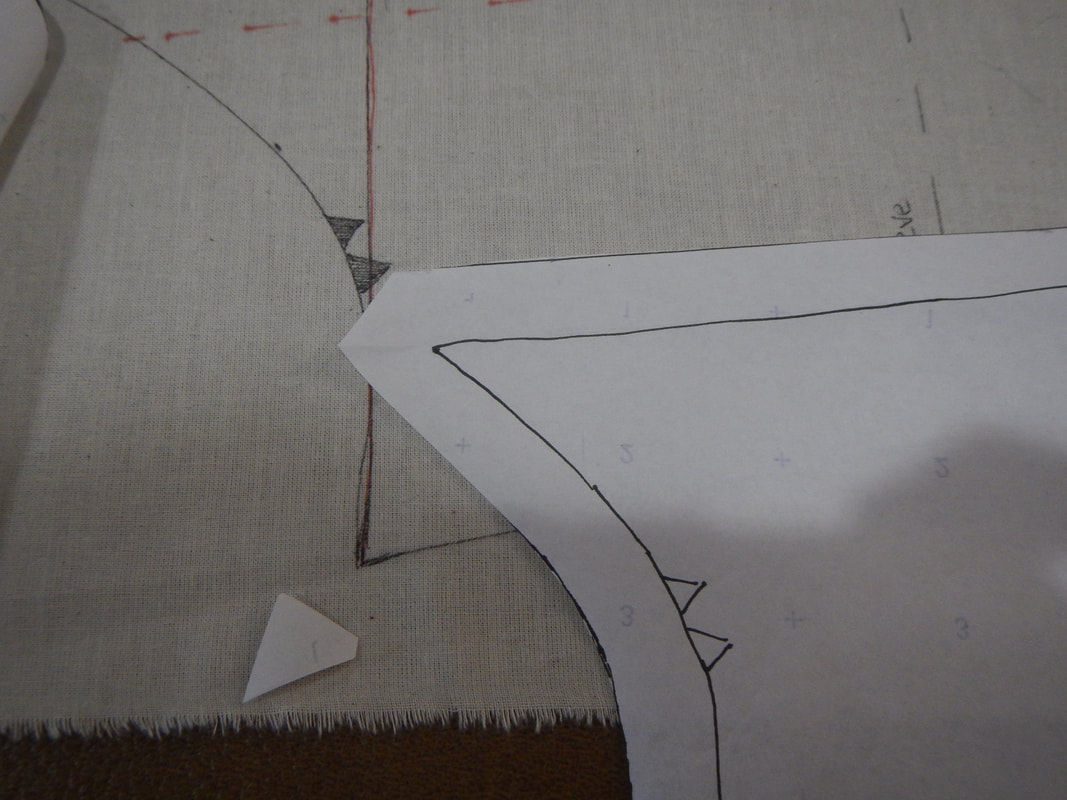
First, fold the seam allowance as it'll be pressed when sewn.
Picture
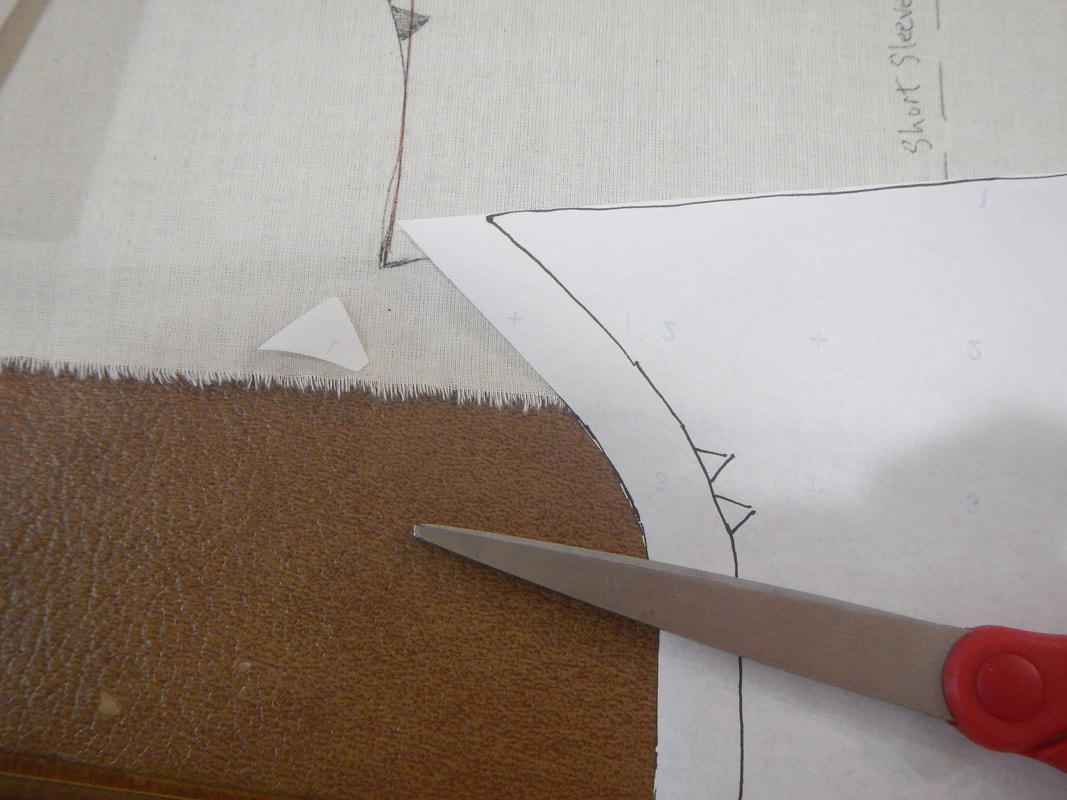
Second, cut off the excess. (Sometimes, the seam allowance will be too short, and you'll have to tape a bit to make it line up with the piece.)
Picture
Third, unfold the seam allowance, and here's the new piece shape.

(Pics of the sleeve alteration)

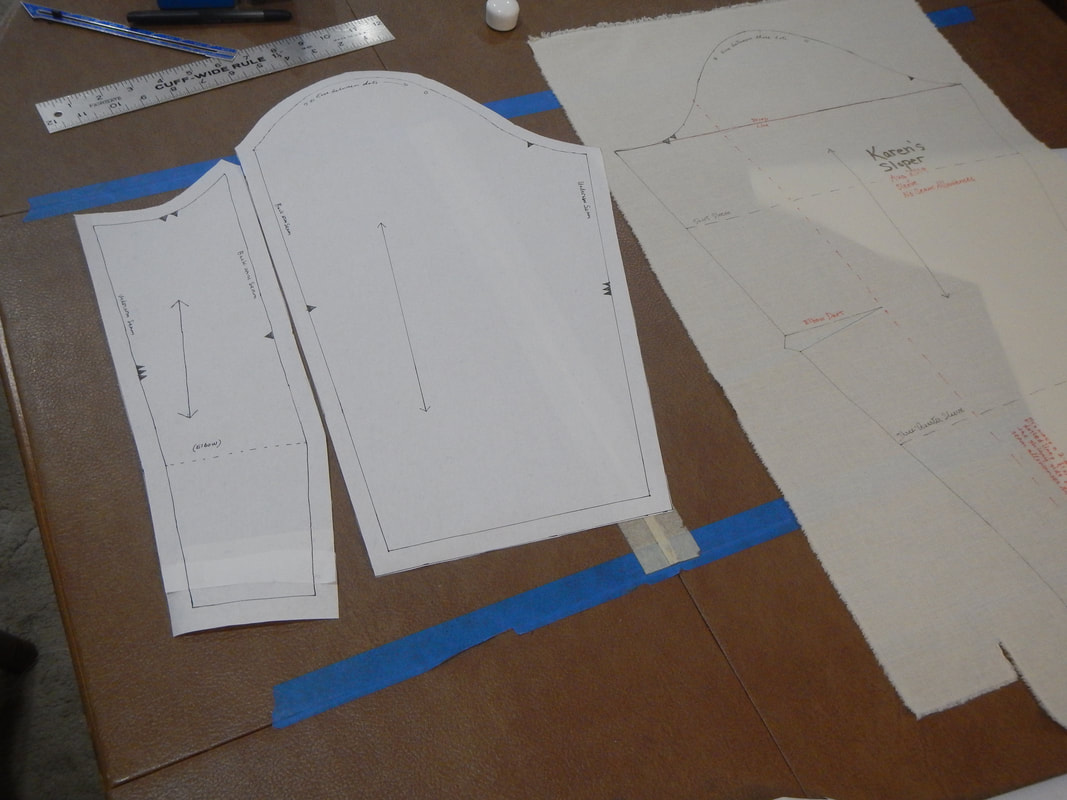
As you can see, the sloper sleeve, which doesn't have seam allowances, is already 14.5 inches wide!  I need to make it into two narrower pieces to fit on the kimono silk. I start by folding the sleeve edge to the center line to find, in the fold, the quarter mark.  I draw a dotted line in red along that mark, through the tip of the elbow dart, and down into the sleeve. 
Picture
Then I cut that dotted line, close the dart, and get two new pieces.  The one is slightly bent, because of the pivot point of the dart that I closed, so the finished sleeve will still have elbow shaping.  I make the sleeve 3/4 length. 
Picture
I discover later that this is not the usual method of making a two-piece sleeve: usually, the smaller piece draws from both sides of the bigger piece, so you end up with the underarm seams not matching the bodice any more.  This reduces bulk, but I don't regret my method for this dress.  I like to have the underarm seam line up perfectly with the side seam of the bodice, so I can sew that as the last seam of my dress. 

WHAT IS A TABARD, ANYWAY? 

A tabard is a simple tunic top made with two rectangles, one for the front and one for the back of the body.  In its simplest form, it's like a long rectangle with a hole for the head, belted at the waist.  The sides don't have to be sewn.  It's a super simple way to pattern a top.  Note: the tabard was a shirt or jerkin in the Middle Ages; it was not full length.  If it was longer than the knees, with a split in the middle for horse-riding like a crusader's robe, it was called a surcoat.  If it was longer with no split, it was a scapular, commonly worn by monastics.  This guy Shad can tell you all about it, though he does make me doubt my pronunciation of the word tabard (the comments section is priceless, too!).  Anyway, in the modern era, much confusion has arisen about this nomenclature, and it seems most people forgot what surcoats and scapulars were and applied the word tabard to all of those rectangle garments.  In the 1920's, when the fashionable silhouette for women was a rectangle and people loved simple geometry in their clothes, a "tabard dress" was one with long rectanglular panels in front and back, closed at the sides but closed in a way that didn't deform the rectangles or show the body.  Tabard aprons are still a thing.  I'm calling this pattern a "60's Tabard Dress" because the front and back center panels make me think of a 1920s tabard, not because that's what it was called in the 60's when the pattern was made.  I am aware that it's not a tabard in the medieval sense, but I am using the word anyway-- sorry Shad! 

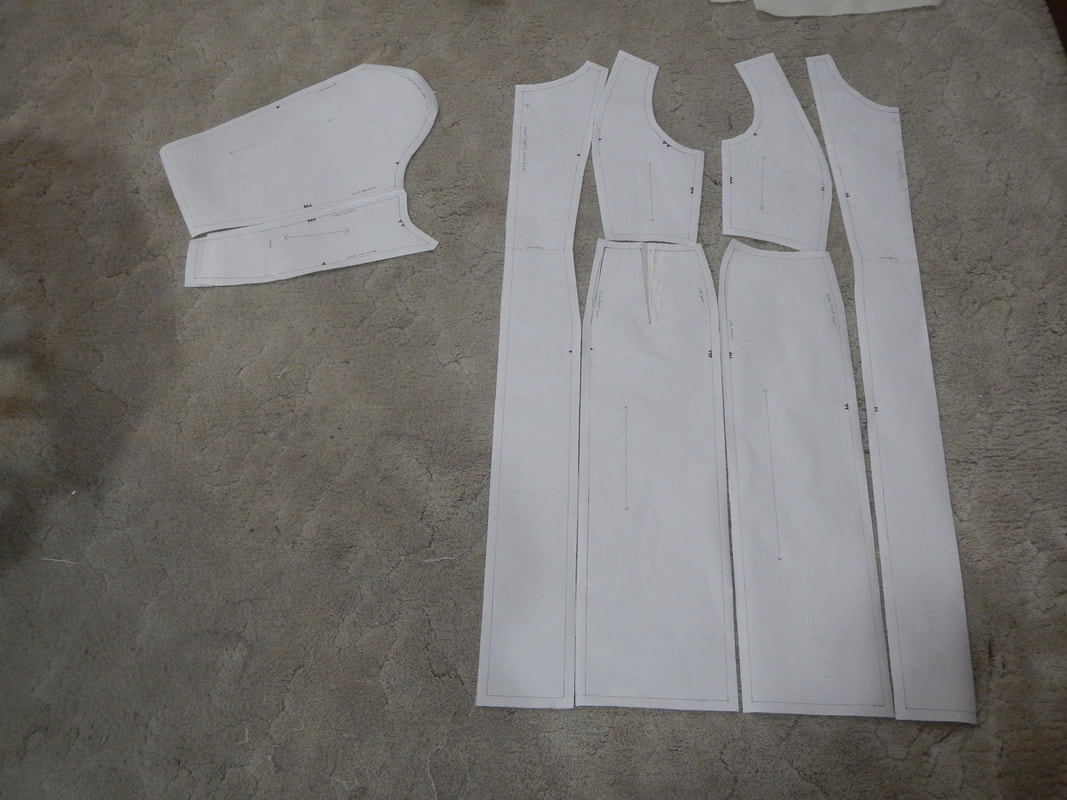
THE (ALMOST) FINISHED PATTERN!

Picture
The missing pieces are pockets, belt, and mandarin collar.  I decide to improvise pockets as I go, depending on fabric available.  For the belt, I decide to do that at the end, to make it fit me just right.  As for the collar, I am unsure how to draft, so decide to drape it when the bodice is all together!  Then I'll know it'll fit. 

TIME & MONEY

I spent $35 on the kimono (I think?  I remember wincing as I paid, so it had to be more than $20, but I don't think I would've bought it if it were $40). 

Here's how the patterning time breaks down:
dress front and skirt: 55 minutes
dress back and truing everything up: 1 hour 40 mins
sleeves: 30 minutes
------------------------------------
TOTAL TIME: 3 hours and 5 minutes

Stay tuned for posts on the dress construction and the finished dress soon! 
3 Comments
The Sister
9/13/2019 01:49:35 pm

Well, that's a lovely soft fabric for you. I'll wager it'll look lightweight and cool when all finished.

Reply
Karen Roy link
9/15/2019 08:47:44 pm

Well, it might look cool, but it's actually quite warm to wear! A winter dress for sure. I'll be posting more about this dress soon, so you'll see! Thanks for reading, sister mine!

Reply
Glenn link
11/2/2023 06:38:21 am

I'm so excited to follow your silk dress project! Your ability to break down the challenge of patterning a dress from a picture into understandable steps is admirable. I'm eagerly anticipating your detailed posts on pattern drafting and the outcome of your brother modeling his new shirts. Your blog truly showcases your passion and expertise in <a )href=""http://www.epsilonpatternsandgrading.com/"">patternmaking for fashion design</a>.

Reply


Leave a Reply.

    Karen Roy

    Quilting, dressmaking, and history plied with the needle...

    Sites I Enjoy

    The Quilt Index
    r/Quilting
    Wonkyworld

    Categories

    All
    1910's
    Alteration
    Antique
    Dyeing
    Embroidery
    General
    Hand Sewing
    History
    Lacemaking
    Mending
    Menswear
    Millinery
    Modern Elizabethan
    Musing
    Other Sewing
    Philippians 4:8
    Project Diary
    Quilting
    Regency
    Retro
    Self Made Pattern
    Self-made Pattern
    Terminology
    Victorian
    Vintage

    Archives

    April 2025
    March 2025
    December 2024
    March 2024
    December 2023
    November 2023
    September 2023
    August 2023
    June 2023
    May 2023
    March 2023
    February 2023
    January 2023
    December 2022
    November 2022
    October 2022
    September 2022
    August 2022
    October 2021
    September 2021
    August 2021
    July 2021
    June 2021
    May 2021
    April 2021
    August 2020
    June 2020
    May 2020
    April 2020
    March 2020
    January 2020
    December 2019
    November 2019
    September 2019
    August 2019
    July 2019
    May 2019
    April 2019
    March 2019
    January 2019
    December 2018
    November 2018
    October 2018
    September 2018
    August 2018
    July 2018
    June 2018
    May 2018
    April 2018
    March 2018
    February 2018
    January 2018
    December 2017
    November 2017
    October 2017
    September 2017
    August 2017
    July 2017
    June 2017
    May 2017
    April 2017
    March 2017
    February 2017
    January 2017

    RSS Feed

Blog

Quilting

Clothing

About

Copyright Karen Roy
​© 2017-2024