|
Modern Elizabethan project posts so far: Elizabethan Inspiration Blackwork Ruffle Blackwork Partlet Elizabethan Stays - first try I wasn't happy with my first pair of bodies, which I made using the custom corset pattern generator from the Elizabethan Costuming Page. I'm not saying their pattern generator was bad, just that I should have tested the pattern and altered it substantially before making it up. Still, I made a bunch of useful mistakes on it that I have learned from. This time, I decide to combine the old pattern with online pictures of the Effigy Corset, one of only two extant pairs of bodies from that era! EFFIGY CORSET LINKS Here's a list of links to Effigy Corset research and reproductions: Westminster Abbey's page about the effigy. The Staymaker's version of the corset. Maridith Smith of the Tudor Revolution talks about using reeds as boning. Reconstructing History made a commercial pattern for the Effigy Bodies. Drea Leed's research and experience is invaluable, though I wish she had more pictures in her "how to draft your own" section! Finally, Missa/The Sempstress analyses the proportions and dimensions of the original in a marvelous way. PATTERN WORK The biggest difference between the Effigy Corset and my original pattern is height at the back: the extant bodies have a high back branching into the shoulder straps. The boning stops where the shoulder straps begin, and there are various eyelets in the top where a standing ruff could have been attached. The extant bodies are also taller than what I made.
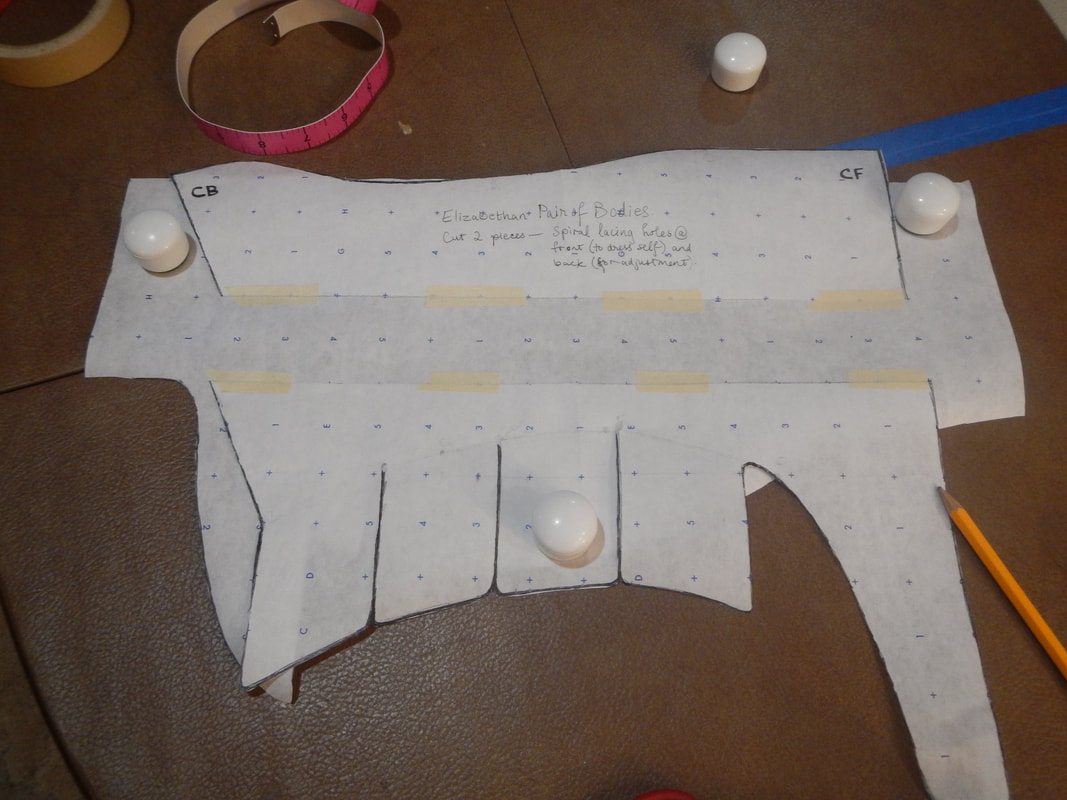
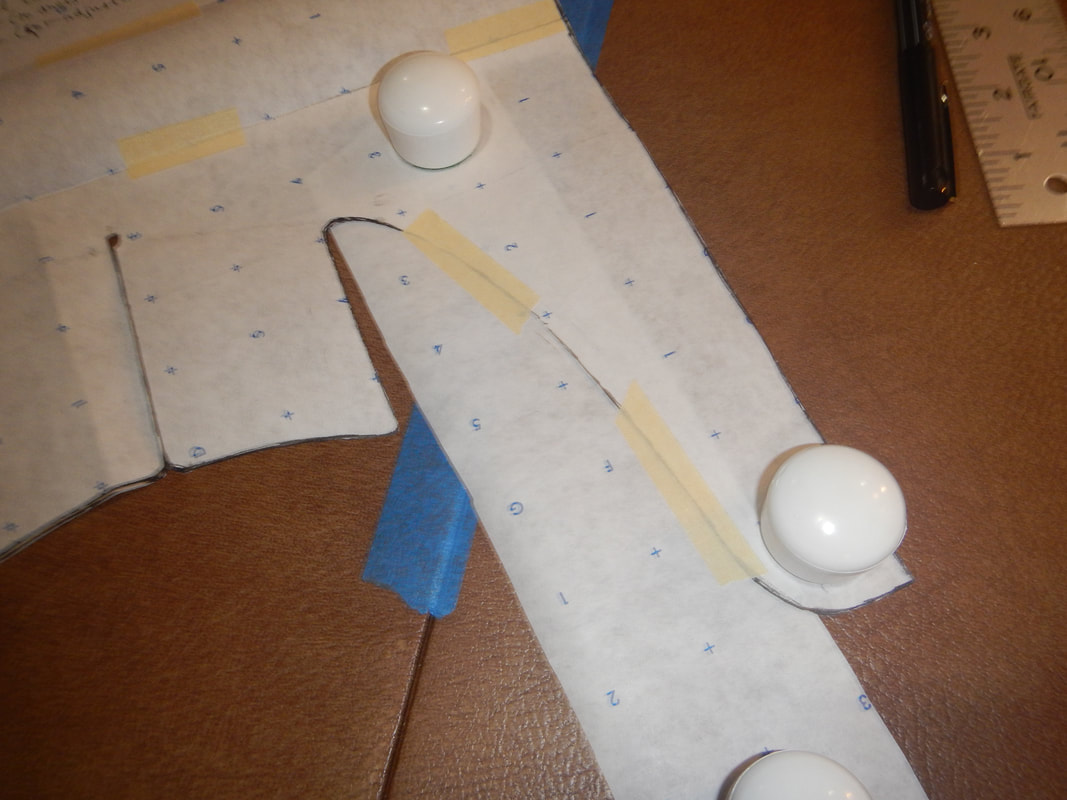
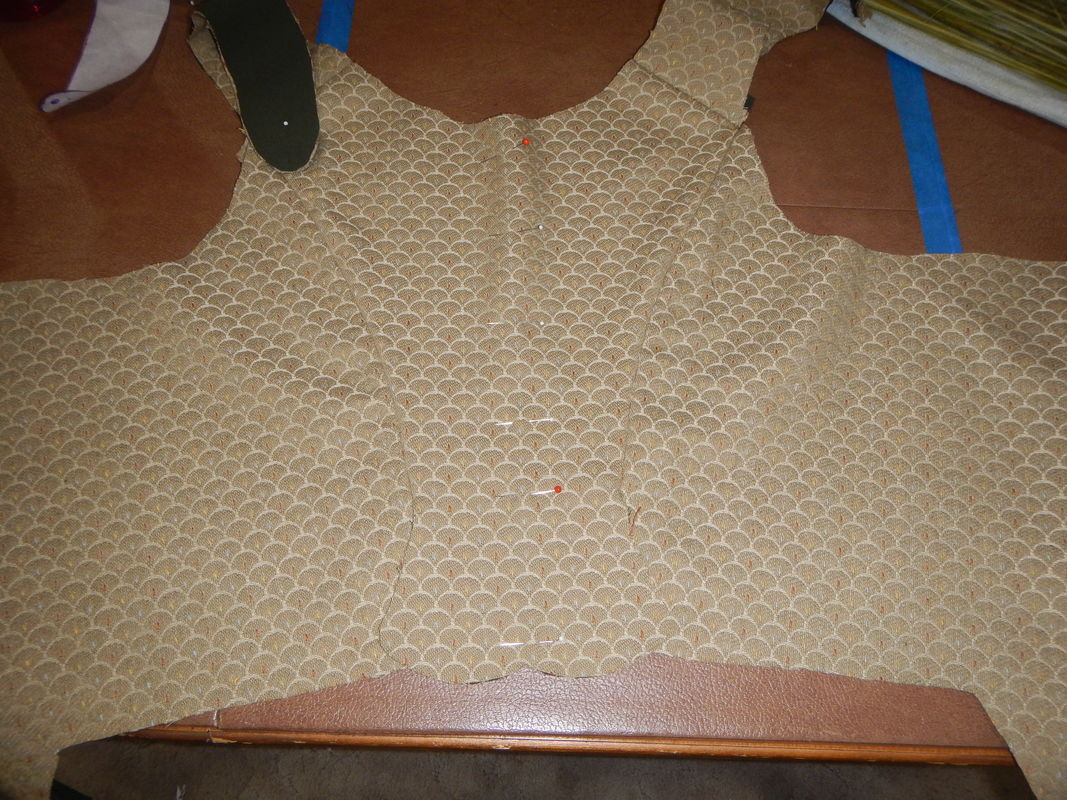
Then I use the pattern #2 as the base, and trace new lines on it to make it match the Effigy Corset. In the end, I have three pieces: the front/side piece, the back piece, and the shoulder strap. Doing the back as a separate piece allows me to make the two back tabs flare out more. I consider doing the strap and back in one piece, but decide not to because it'll be more economical to lay out two smaller pieces than one funny-shaped one. I also round out the tabs a bit more, because I like them curvier. The picture just below shows pattern #2 on the right, and the expanded Effigy version (pattern #3) on the left. 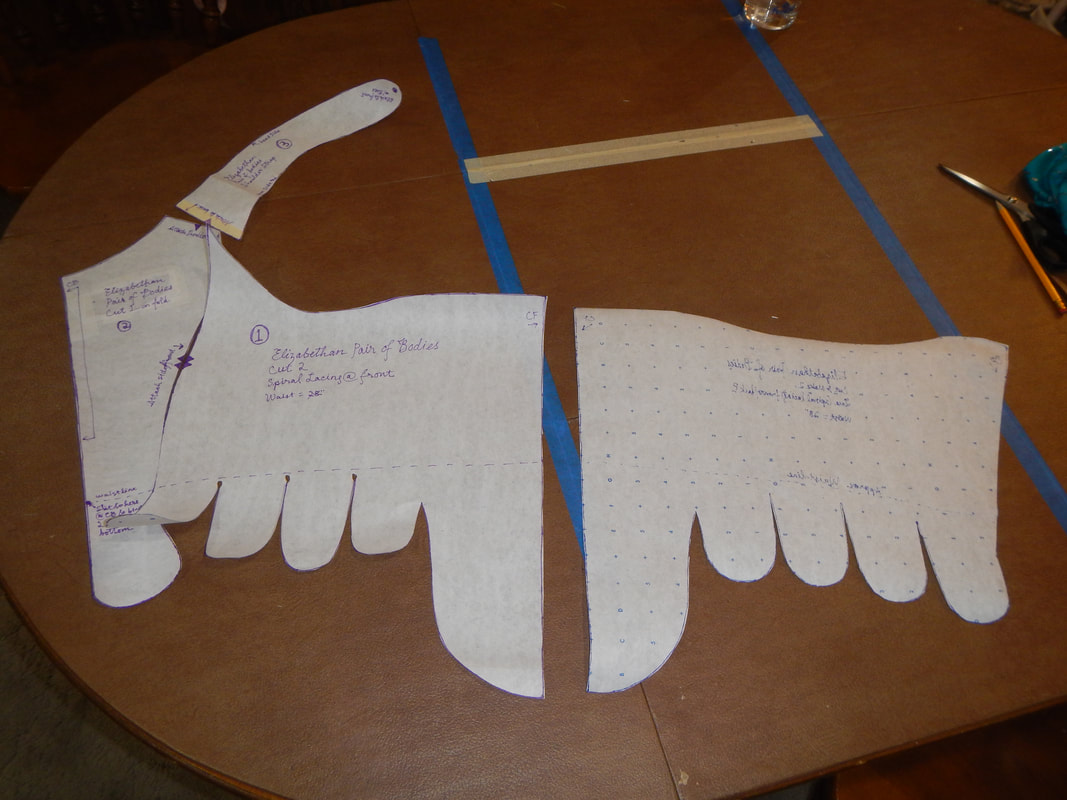 Pattern #3 vs. Pattern #2 The whole time I'm working, I have my laptop with a dozen browser tabs open and keep looking at the various resources, comparing what I'm doing with the research online and the original pair of bodies. This double-checking is constant... for instance, as I type this I realize I could merge the front bottom with the first tab and get a smoother line at the front of the corset. Now that I look, the Effigy Corset has only six tabs (not including the front dip) and I have eight... I'll change that before I cut my fabric! And thanks to Missa's analysis, I also think I could cut the waist in at the front a little bit and expand the bosom with the flare she noticed. It'll be more sophisticated than the squared off edge I have right now. I should also taper the front of the shoulder straps to reduce their appearance in the neckline.  Next, being unsatisfied with trying to fit paper to myself, I make a muslin:
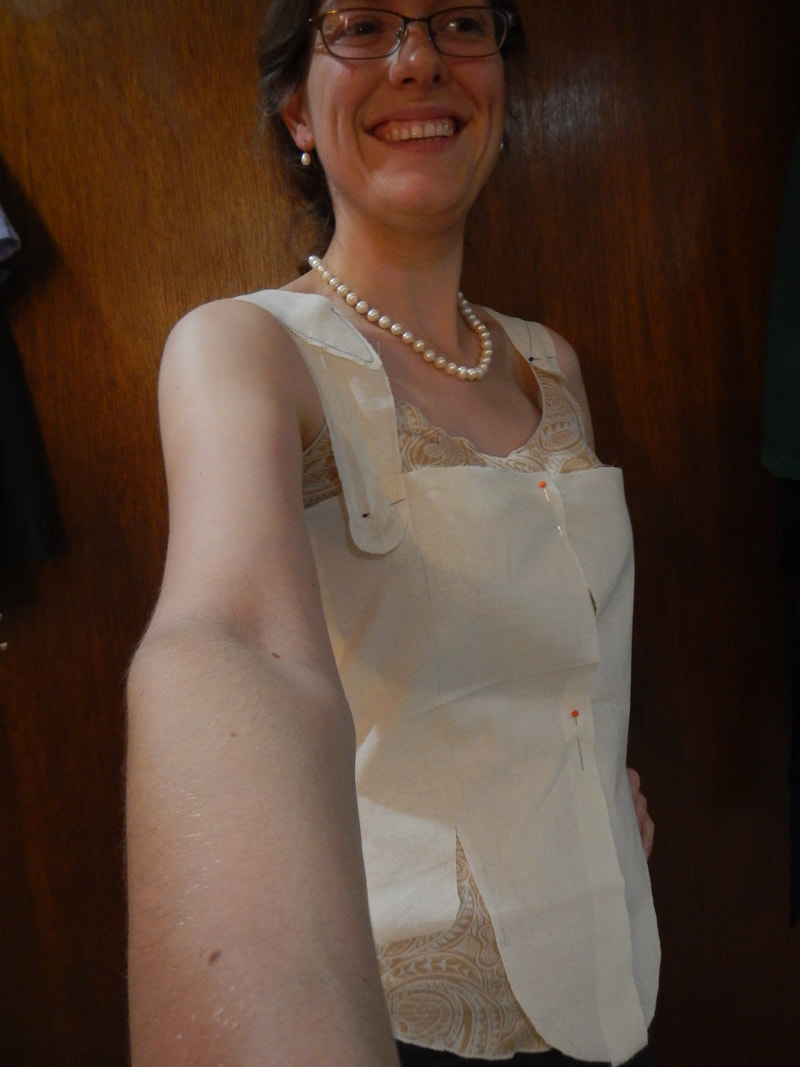
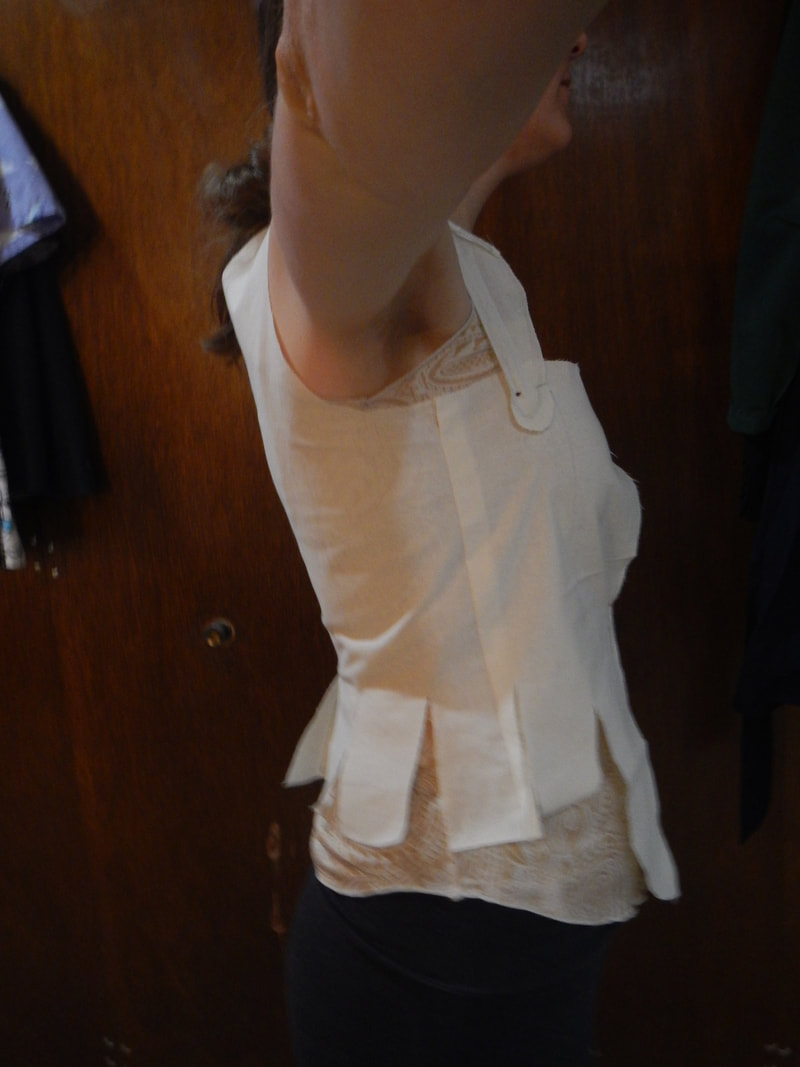
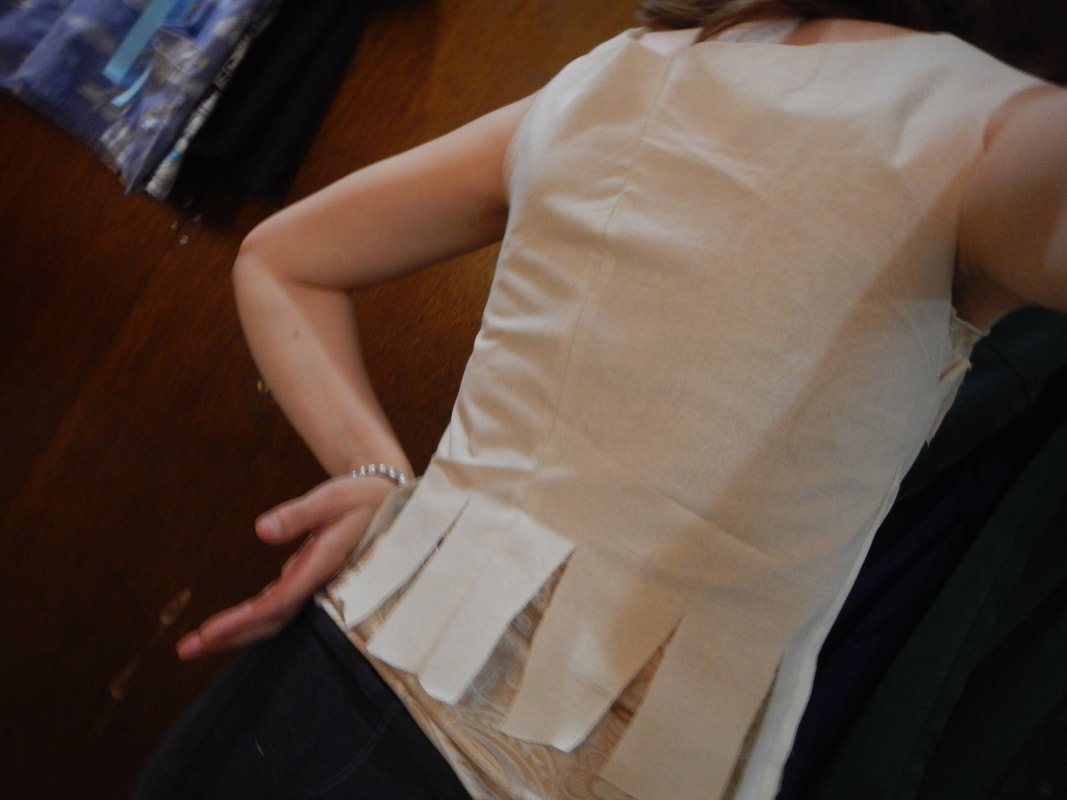
(Ignore the side seam in the side picture... that was on my muslin already since I previously used it to test a pants pattern.) The back seems a little broad at the shoulders, but I must remember that quilting it with straw will shrink its girth.
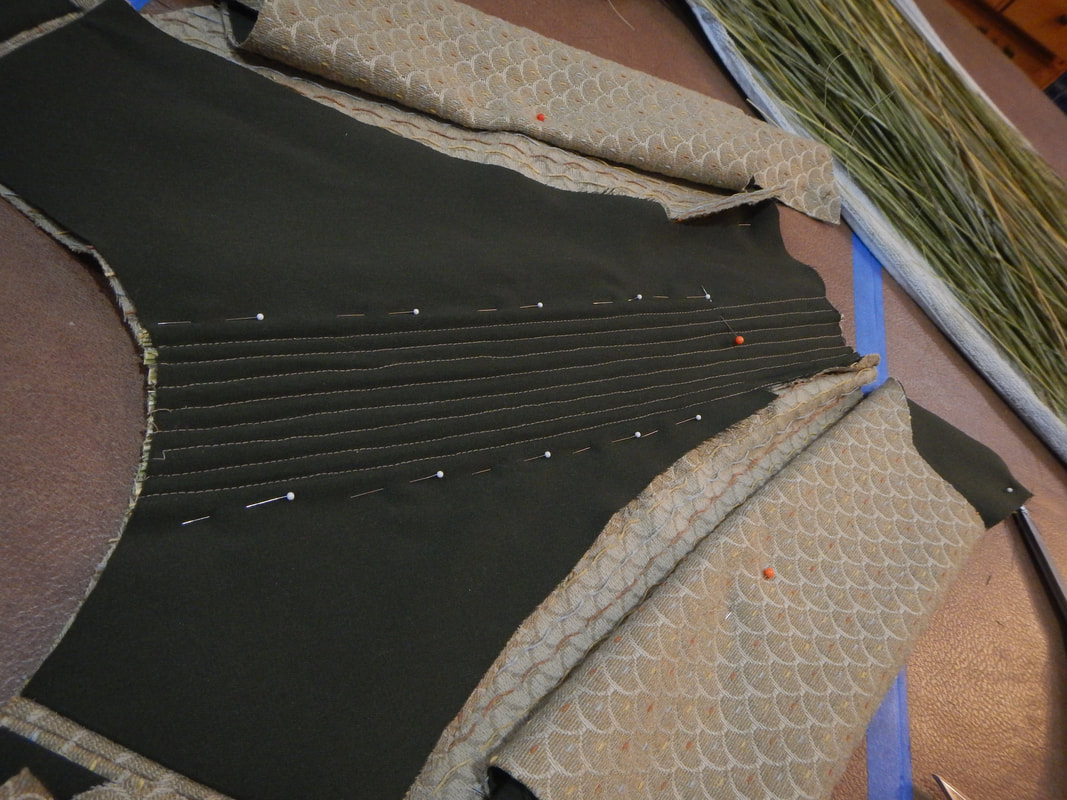
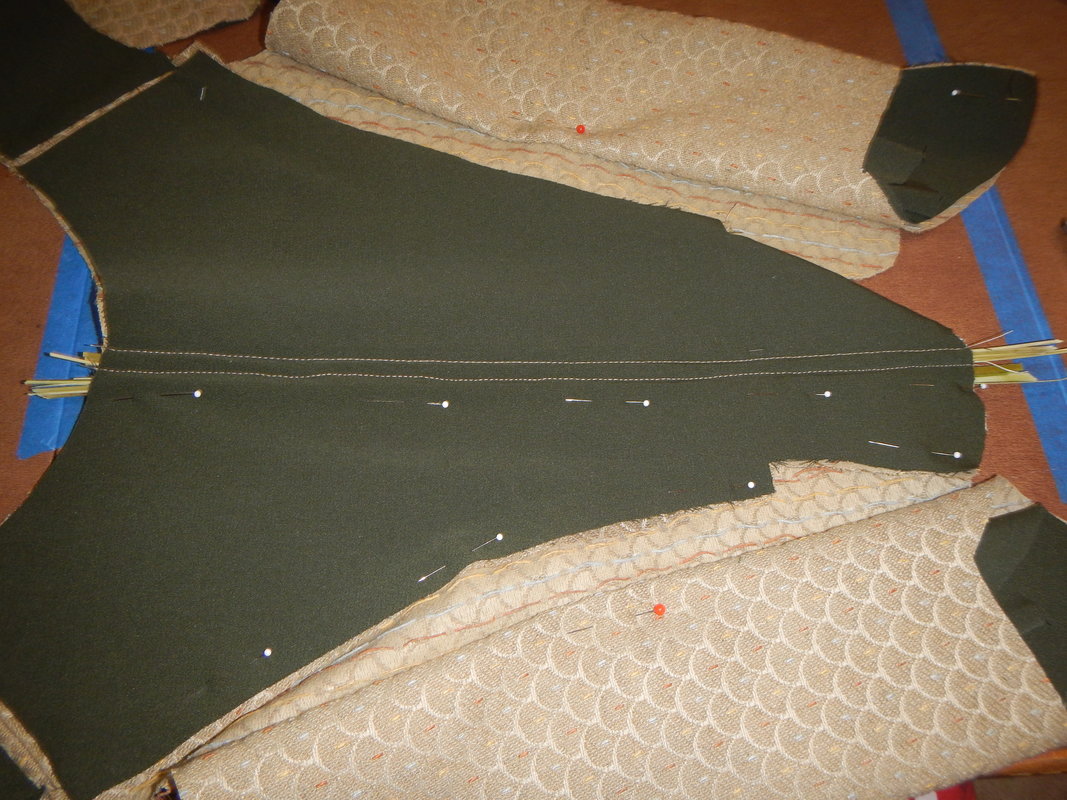
SEWING THE STAYS Since my pattern does not have seam allowances, I add them as I cut, but only to the sides that will be seams. The picture below-left shows the seam allowances as strips of dark fabric extending beyond the pattern. It also shows that I have not cut the tabs yet, because I want to keep the fabric from fraying while I sew with it. I'll cut the tabs apart just before binding them.
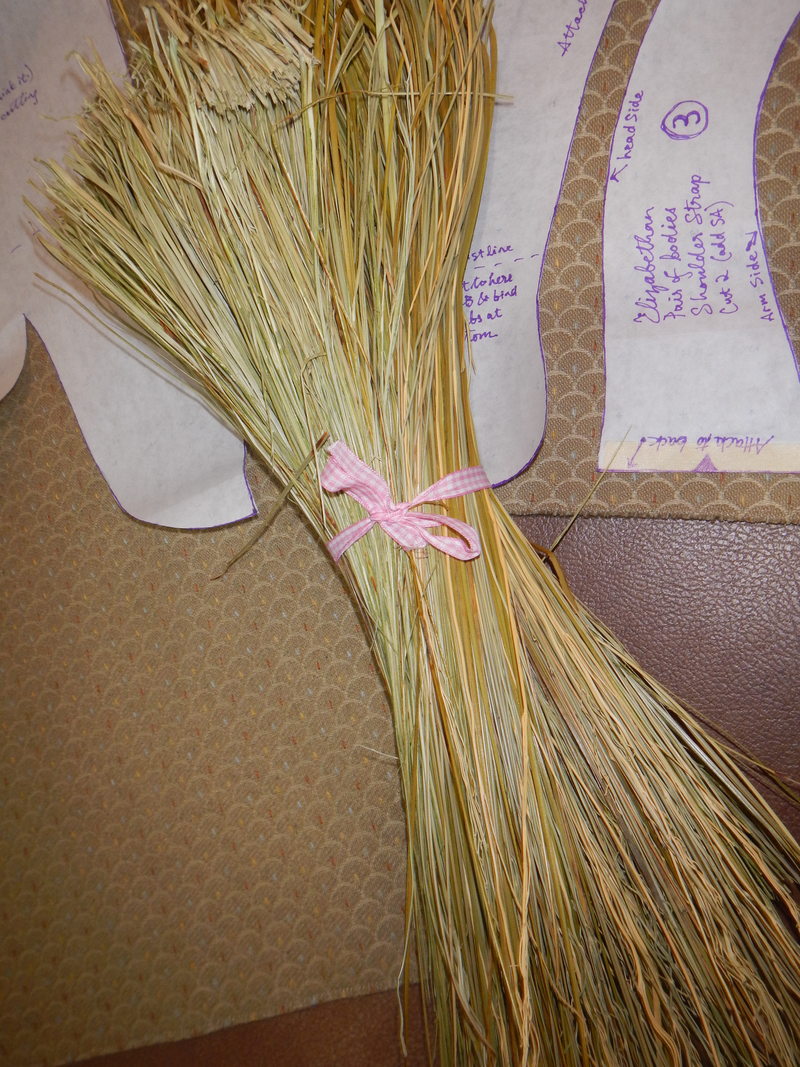
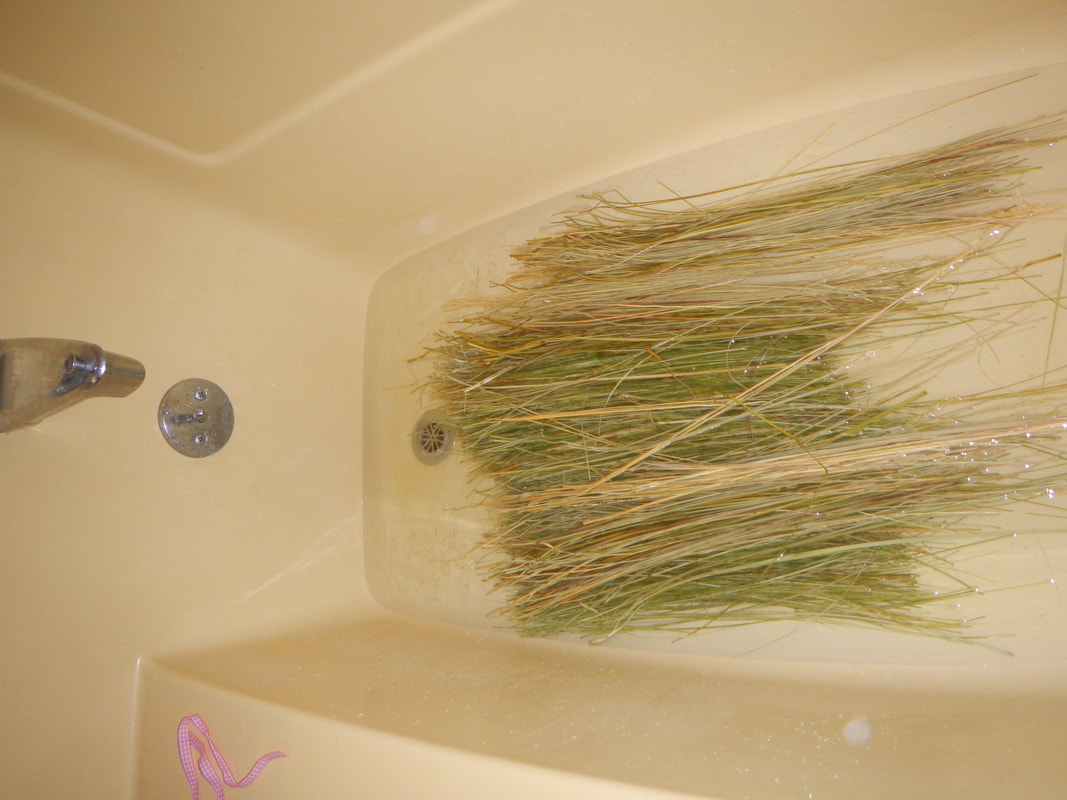
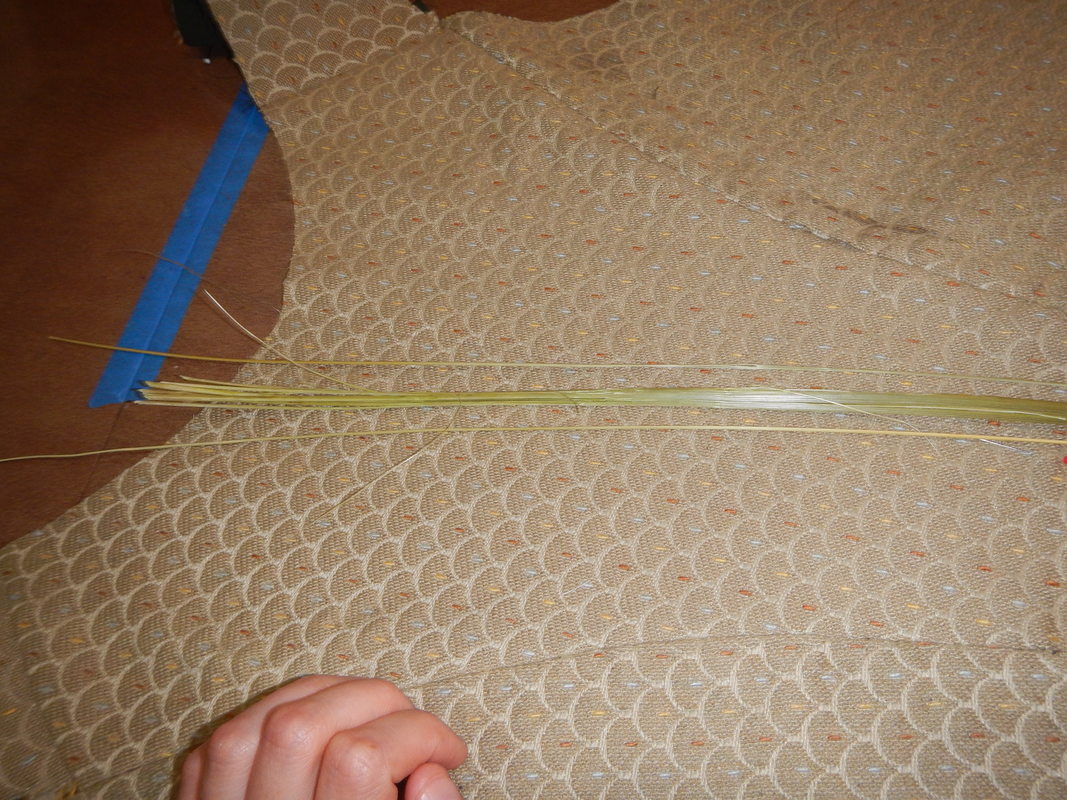
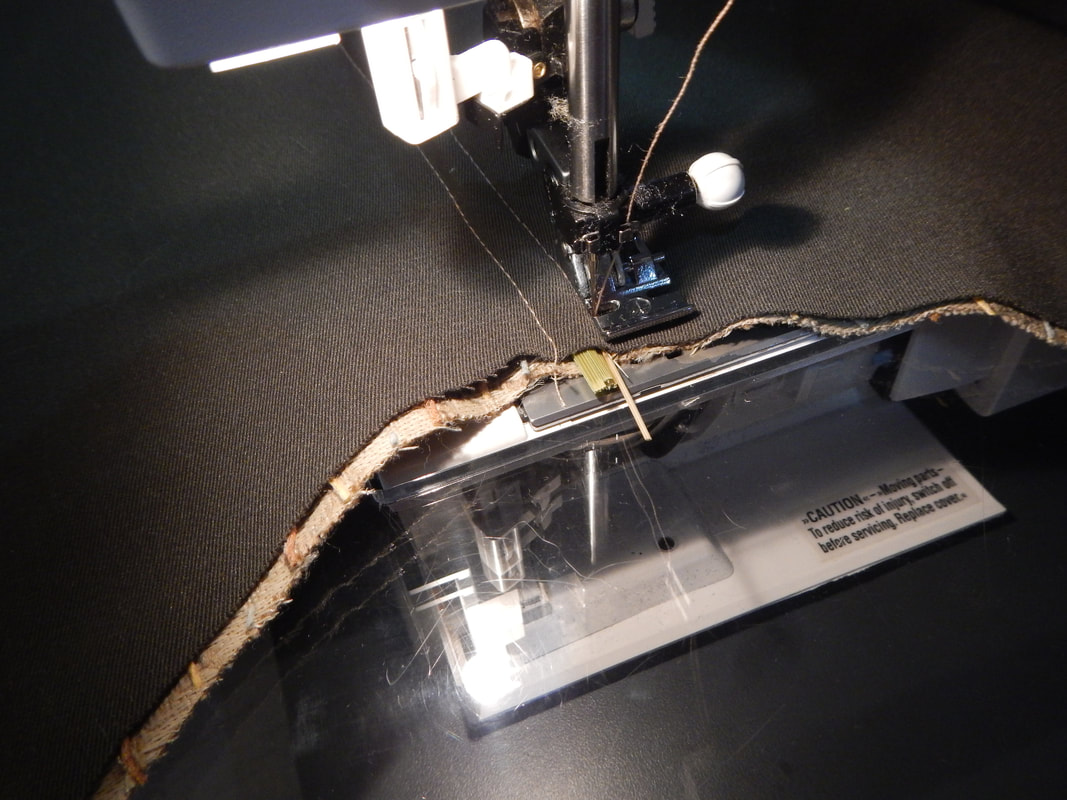
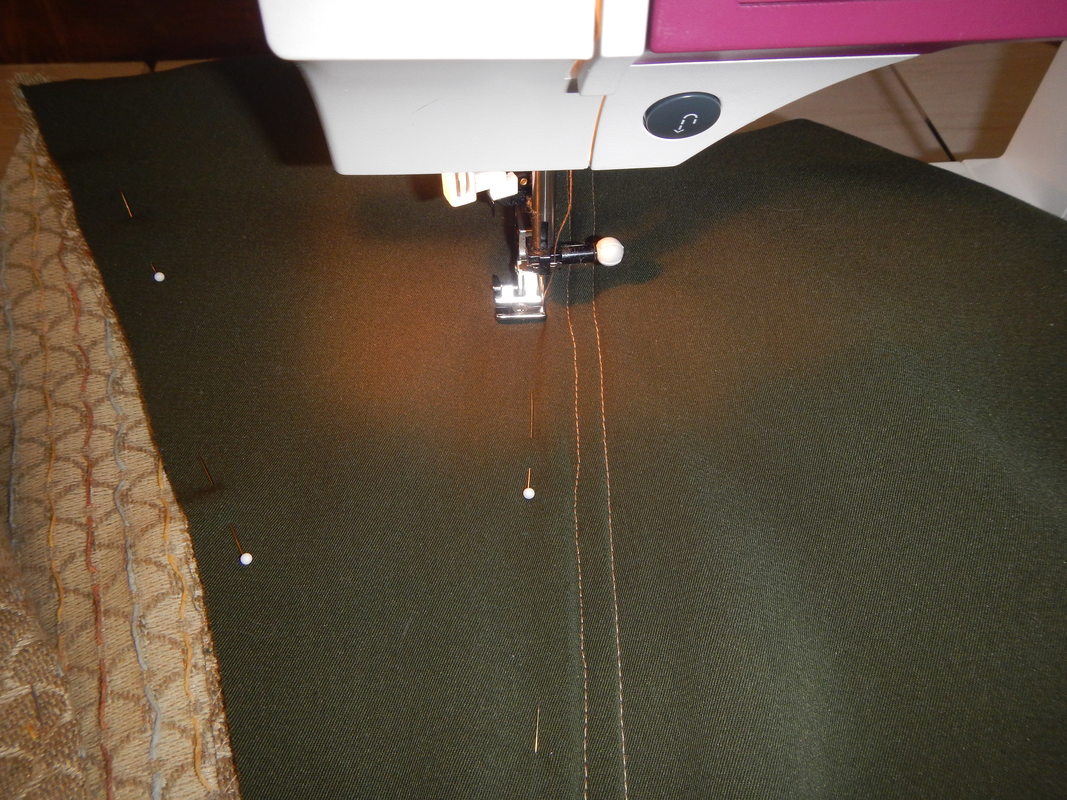
At this point, as my friends who are with me this day can testify, I'm super pleased and keep pinning it to myself and saying "It looks right!" Eventually I stop playing dress up and go back to sewing. I use herringbone-stitch to hold all the seam allowances open in the thicker fabric, because I want to reduce bulk and keep the folds from shifting as I quilt. Then I turn the lining edges under and sew them to the exterior. This is a trick I learned when I was researching my Regency short stays (I don't have a post about them yet, but they go under this gown): if each corset panel is finished separately, then the corset is easier to alter if, say, the woman gains weight and needs an extra panel added; you can take the panels apart without disturbing the quilting or boning. I don't know if this method was used in the Elizabethan era, but it's a sensible method, so why not? Hand-sewing takes time, so planning for alterations keeps you from wasting time and work. See how the shoulder seam ends up exposed, with the lining pieces stopping short of the seam?  FIRST BONING CHANNELS The straw is still damp when I get impatient and start using it. I start with a stitched line right down the Center Back of the stays, going though both layers of fabric. Then I insert a tiny bundle of straw in between the two layers and push it right against the stitching, and pin it there. Putting the zipper foot on Boudica, I stitch a second line of stitching right next to the straw, making the first filled channel. Other costumers, like Lady Drea, do this differently, sewing all their channels first and then stuffing them. I don't know how smooth their straw is, but mine is rough and splintery. Moreover, the inside of my jacquard fabric has floater threads. For both those reasons, I don't want to fuss with trying to slide straw into pre-made channels.
While this method works, it's not period correct, because in period they didn't have sewing machines. The biggest visible difference between making the channels first then filling them (what I'll call "channels-first" boning) and sewing the channels already filled ("channels-filled" boning) is that channels-first boning will result in equal amounts of fabric being taken up from the lining and the exterior. Channels filled boning will result in the top fabric losing more width as it wraps up and over the bone, while the bottom fabric stays flat since it's on a table. "Top" being the fabric on top when you sew it, not necessarily the exterior fabric. In this case, I have the lining side up as I sew, with the result that the lining ends up losing more width than the exterior, and the boning looks bumpier and more obvious inside the stays than outside. (The Dreamstress has a post about cording a bodice, and in the comments section there's an interesting discussion about the merits of channels-first vs. channels-filled cording. I agree with her that the channels-filled method makes tighter channels.) Anyway, here is some more boning:
 Back in progress. I use kitchen shears to snip the protruding straw after each channel is done. THOUGHTS ON STRAW The straw is not hard to work with, and the little bits sandwiched between fabric dry out quickly. But the bundle of straw on my table stays damp for days, no matter how much I shuffle it around, so eventually I put it outside in the hot sun to finish drying because I don't want it to mildew! Then it dries right up, and I bring it back inside. There's no difference in working with it now that it's dry. Occasionally, my stitch lines go askew as I run over a bit of errant straw. Oh well; it's only visible inside the stays, where the thread is a contrasting color to the lining. The cats find the pile of straw interesting, and try to eat it. What they take, they soon return in the least attractive way on the carpet, so I start hiding it when I'm not working with it! Sewing all these channels takes time and a certain meditative mood (read: I'm not done yet). I'll keep at it, and post again when I'm done. However, I keep trying the stays on as I go, and I can already tell that they will be light and not uncomfortable, that the straw will shape itself to my body over time, and that I'll probably need to re-make my straps in a different shape. (Good thing I sewed them in that easy-to-alter way!) The back is already losing a lot of girth, and so it's not going to be as wide as the muslin suggested (good), and I take courage from Drea Leed's experience boning with straw that even if it shrinks a bunch it'll also stretch enough.
In conclusion: experimental archeology FTW!
1 Comment
The Sister
7/27/2018 05:59:36 am
Well this does look like a fun project! I hope you're enjoying the process! Leave a Reply. |
Karen Roy
Quilting, dressmaking, and history plied with the needle... Sites I EnjoyThe Quilt Index Categories
All
Archives
March 2024
|


 RSS Feed