Robes de Coeur
  • Blog
  • Quilting
  • Clothing
    • Menswear
    • Womenswear >
      • Self-Made Patterns
      • Commercial Patterns
    • Hats
    • Miscellany
  • About
  • Blog
  • Quilting
  • Clothing
    • Menswear
    • Womenswear >
      • Self-Made Patterns
      • Commercial Patterns
    • Hats
    • Miscellany
  • About

Leather Costume - Pants

4/23/2018

3 Comments

 
My favorite kind of project is when someone gives me an idea or assignment, and then lets me make it how I want.  If the idea is unusual enough, I am stretched by trying to make it, and I learn new techniques.  One repeat customer of mine always gives me such projects*.  In October 2017, he approached me with a new idea, for album cover art, and as always, it was my favorite kind of project. 
Picture
* One time his inspiration was "the nineteen-eighties, super-artificial, and kind of Japanese".  I combined this with "Neelix from Star Trek Voyager" and came up with a red vinyl jacket that closed diagonally across the chest with red pleather details reminiscent of a Japanese fan.  I had never worked with vinyl or pleather before, so that was new!  Nor had I ever altered a pattern like that, or made anything like it.

INSPIRATION

My client's inspiration for this album cover is darkly gothic: a warrior in a moral battleground.  He wants black leather, lots of piecing and weathering, like the outfit has been put together over time in response to changing needs.  Like a Mad Max outfit? I ask, and get a bit of a shrug.  Instead he points me to the artwork of Yoshitaka Amano, particularly Vampire Hunter D.  In Amano's work, I see disparate inspirations: Japanese woodblock prints, Alphonse Mucha and Gustav Klimt, illustrations of old Arthurian legends... Much like the work of Yoko Saito, whose quilting I admired a while back, Amano's work is textural, layered, intricate.  The Mad Max aesthetic, by contrast, is savage and utilitarian.  So I understand that he wants a beautiful costume. 

The pieces of the costume are several: a leather jacket, a cape, and leather pants with lots of detail.  This post is about making the pants. 

MATERIALS

Once I knew my client wanted black leather, I started researching where to buy it, thinking we'd make a shopping trip together... then one day I was walking down SE Division Street and passed Langlitz Leathers.  There was a giant black plastic bag on the sidewalk with a sign on it saying "20 lbs of leather scraps, $10".  Score!  I went inside and bought it.  (It sure was fun lugging that home on the bus!)  Once I got it home, I sorted brown from black. 
Picture

RESEARCH

Next I went online and searched for basic leather sewing tips.  Here, in no particular order, are the tips and tricks I found:
  • Lightweight leather (no more than the 3 oz. variety), won’t strain your home sewing machine and won’t require serious leather sewing tools.
  • Use a leather needle. 
  • Use nylon or polyester thread, even upholstery thread. Cotton thread tends to degrade over time, so you are better off sticking to synthetic thread blends.
  • Treat finished top-seams with a little beeswax and a hairdryer to preserve the thread longer (especially if using cotton thread).
  • Lengthen stitches so you don't perforate the leather too much and make it tear along the seam.
  • Use a teflon foot, a walking foot (IDT on my Pfaff) or just some masking tape under the foot to prevent it from sticking to the leather and feeding slowly...
  • ... or keep some mineral oil by the machine with a sponge, and oil the pieces that are going into the machine so they'll slide through the feed dog.  Wipe the seams down afterwards and let the rest evaporate.
  • Don't use pins; use paper clips, bobby pins, or tape to hold seams before sewing.
  • Mark only the back of the leather.
  • Get the fit right before sewing: there are no do-overs!
  • Use a press cloth when fusing interfacing.
  • Hot iron will stretch leather.  Experiment.
  • Consider lapped or felled seams.  The edges don't fray, so options are varied.  Use leather adhesive to hold seam allowances down if you do a traditional seam. 
  • Use a jean-a-ma-jig ("hump jumper") to cross seams.  Use a hammer (from the wrong side) to flatten bulky bits before sewing.
I didn't use all the tips, but it gave me a place to start.

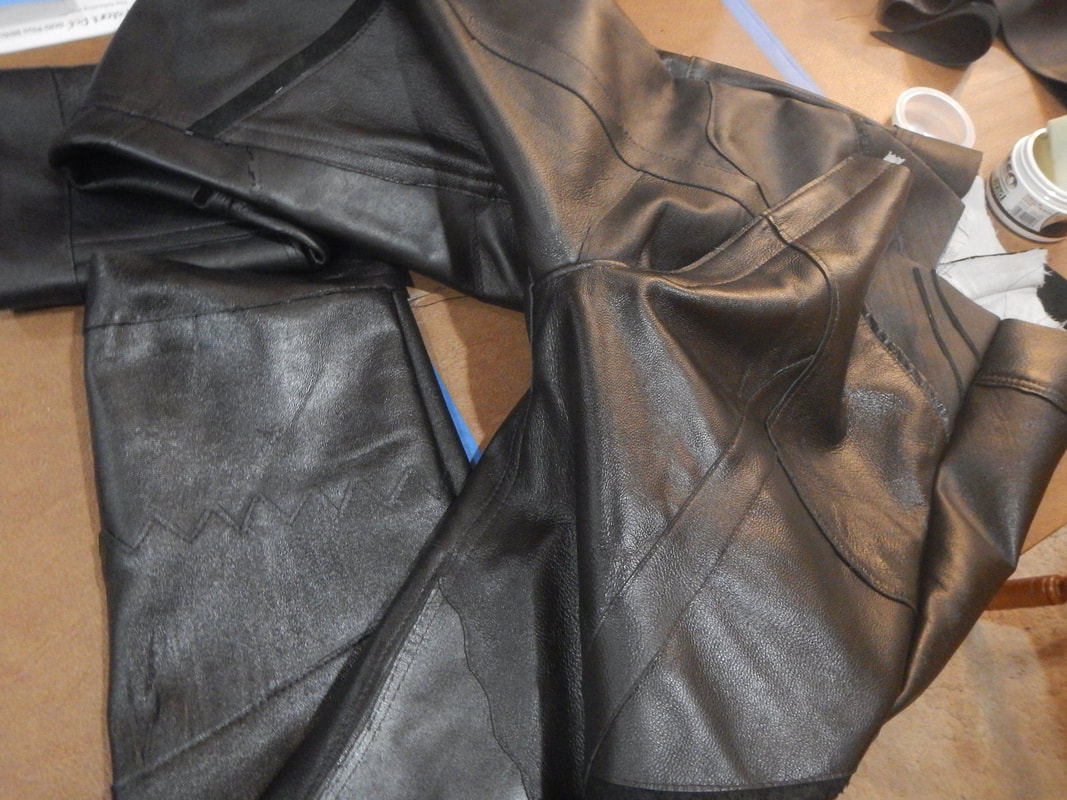
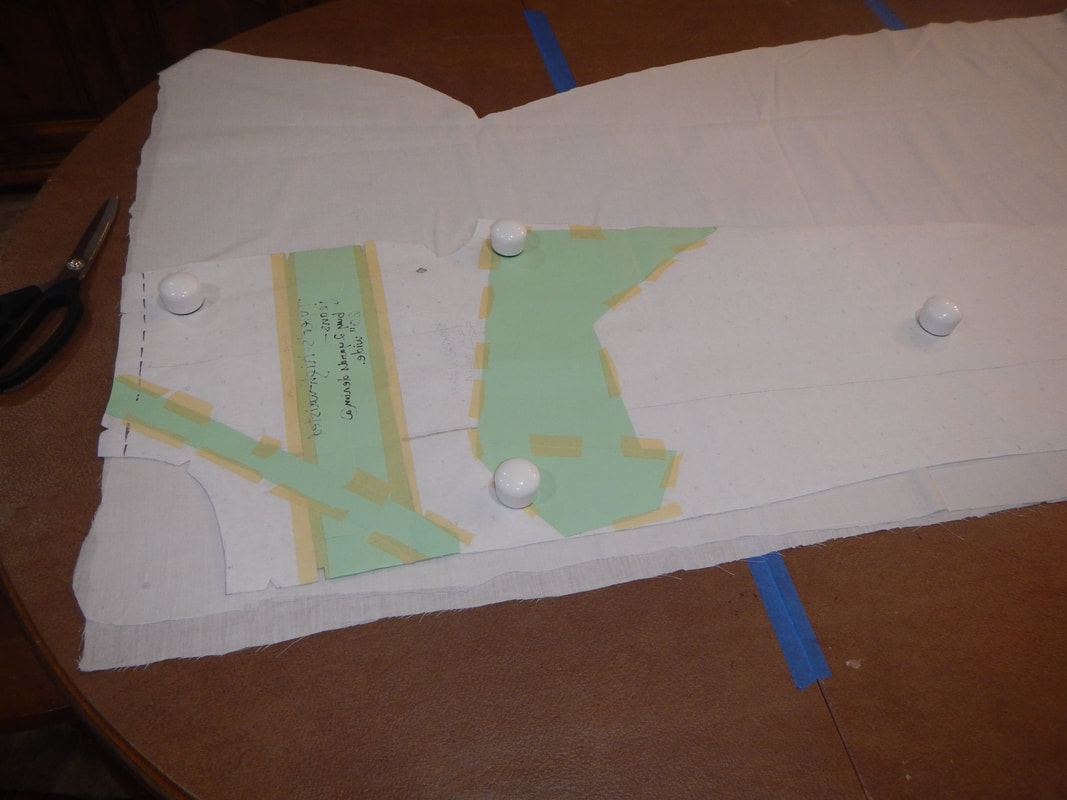
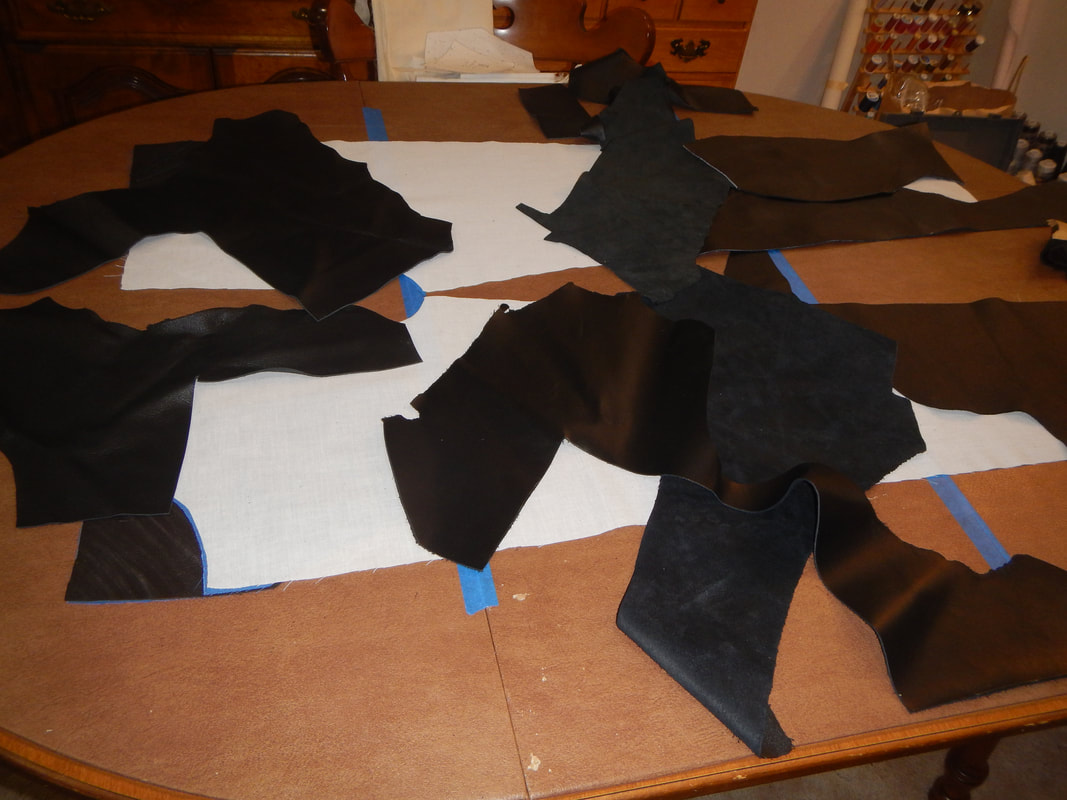
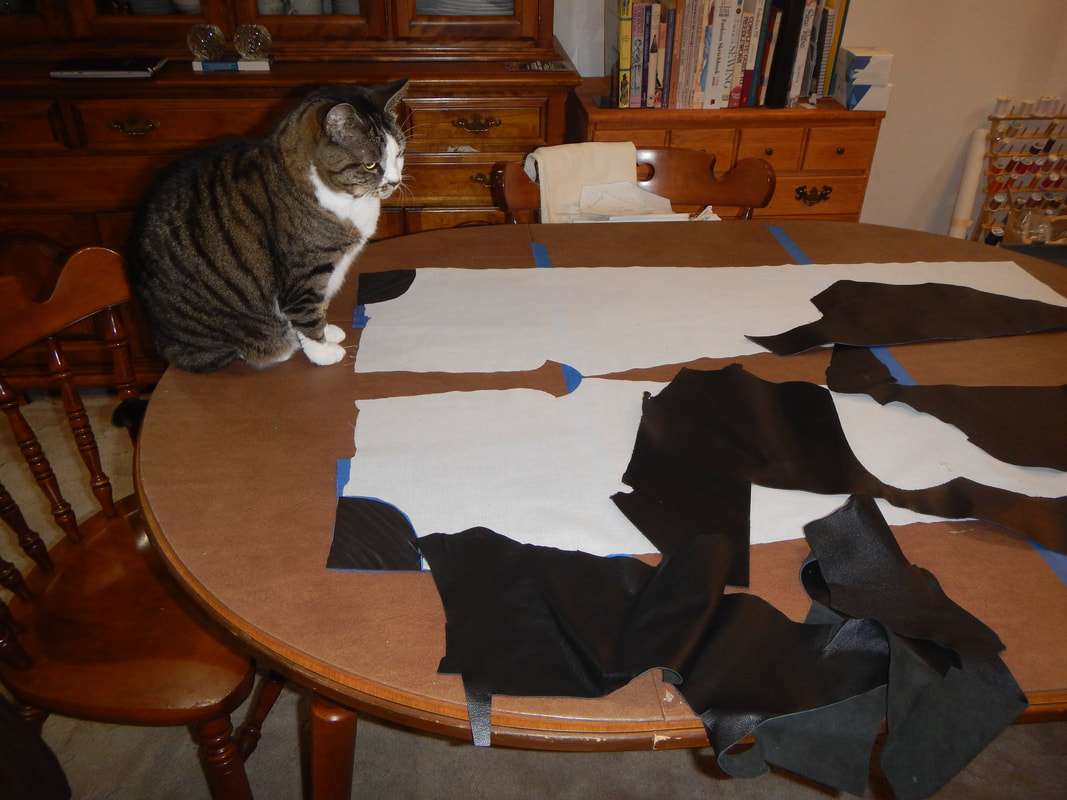
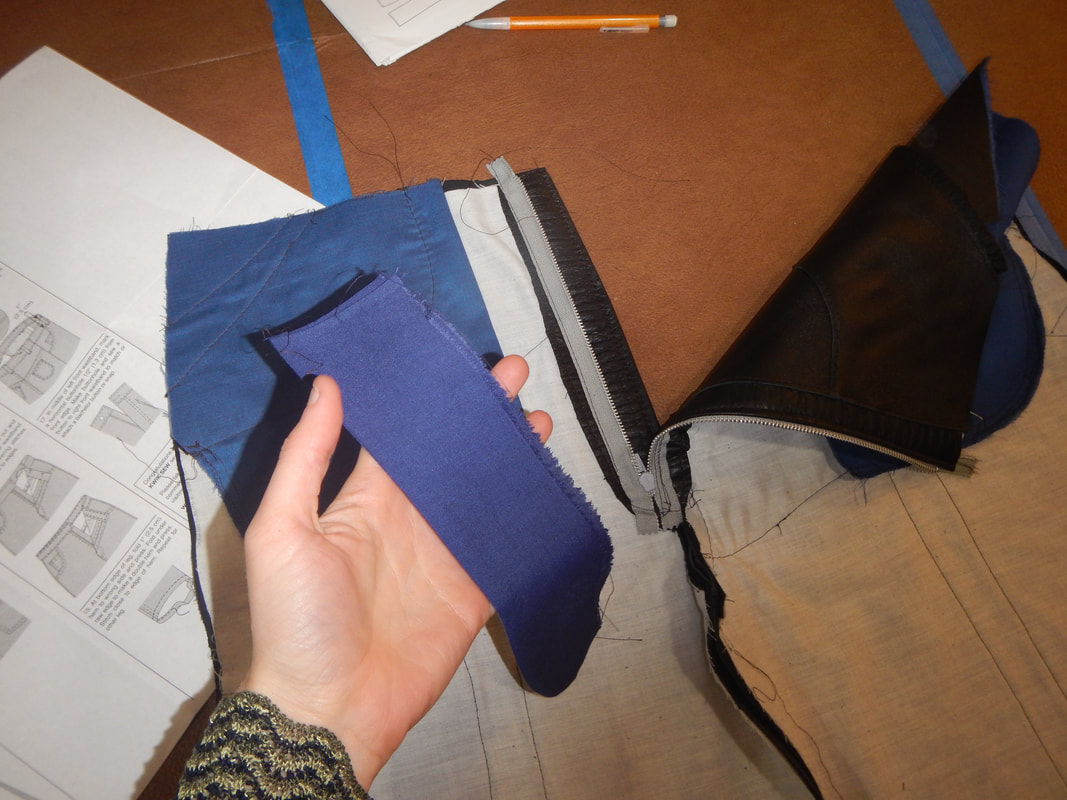
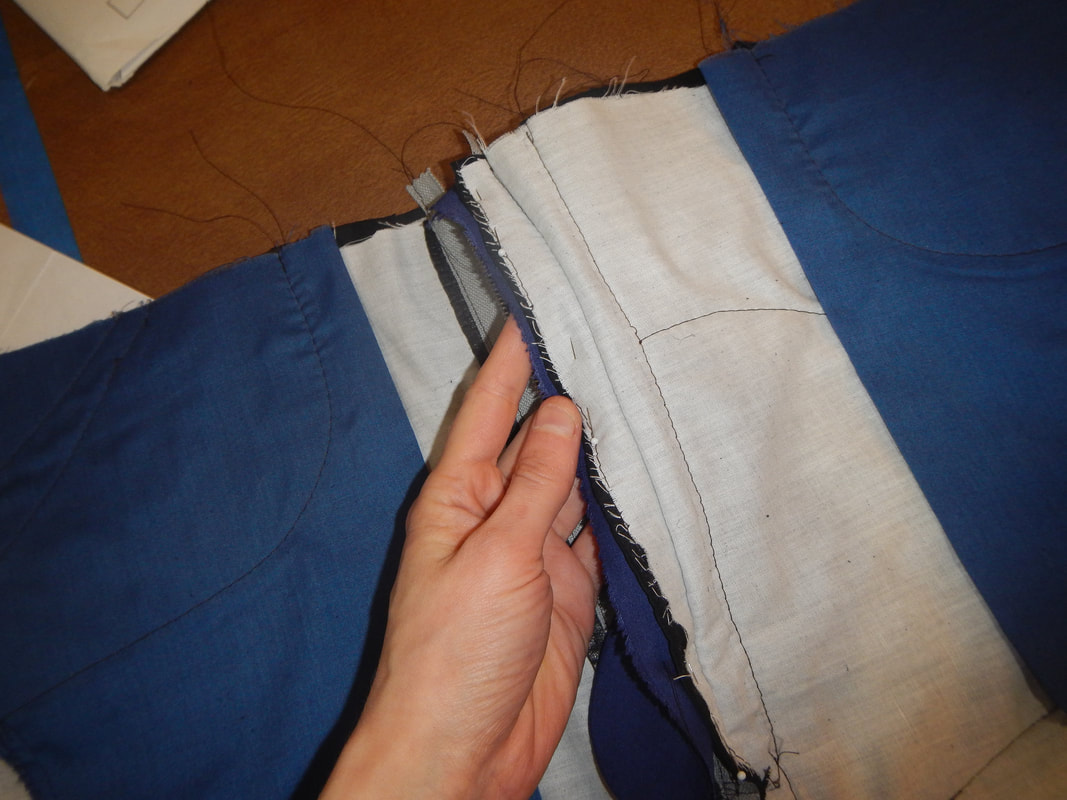
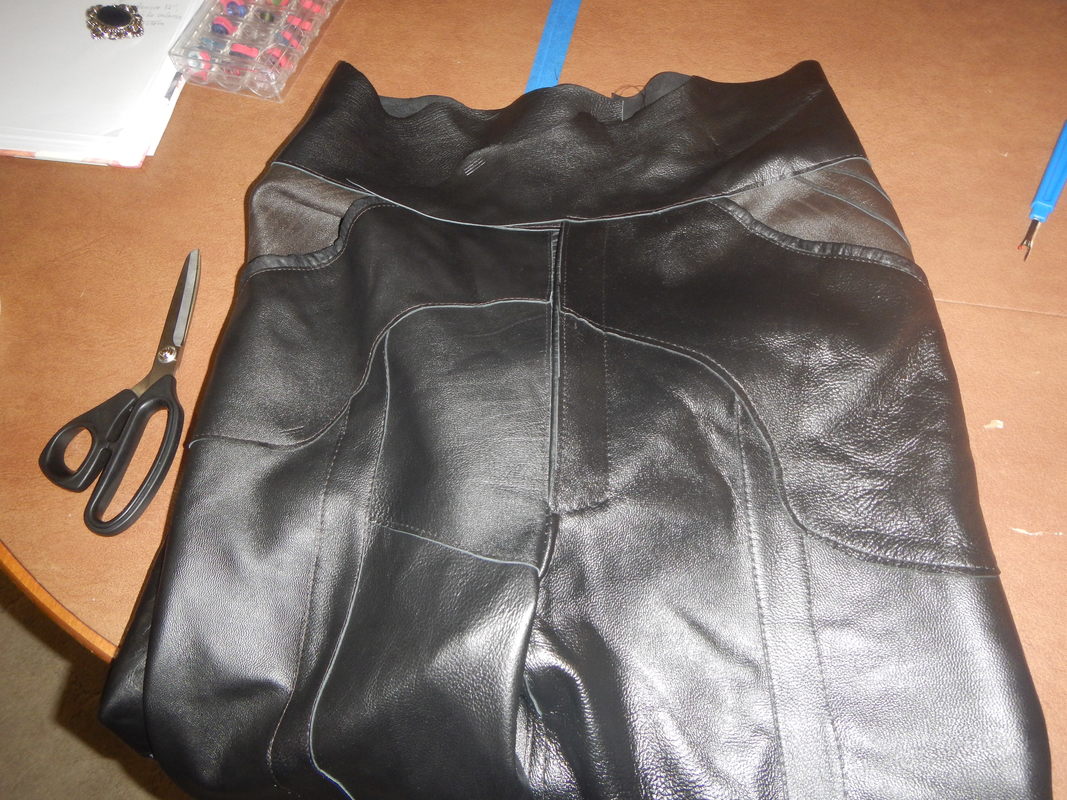
ASSEMBLY - LAYERING THE PIECES

Since none of the scraps was large enough to cut a whole pattern piece, I started by cutting the pieces out in muslin.  Then I started laying the scraps atop the muslin, experimenting with them to find what looked good. 
Picture
Pattern on muslin
Picture
leather scraps on muslin
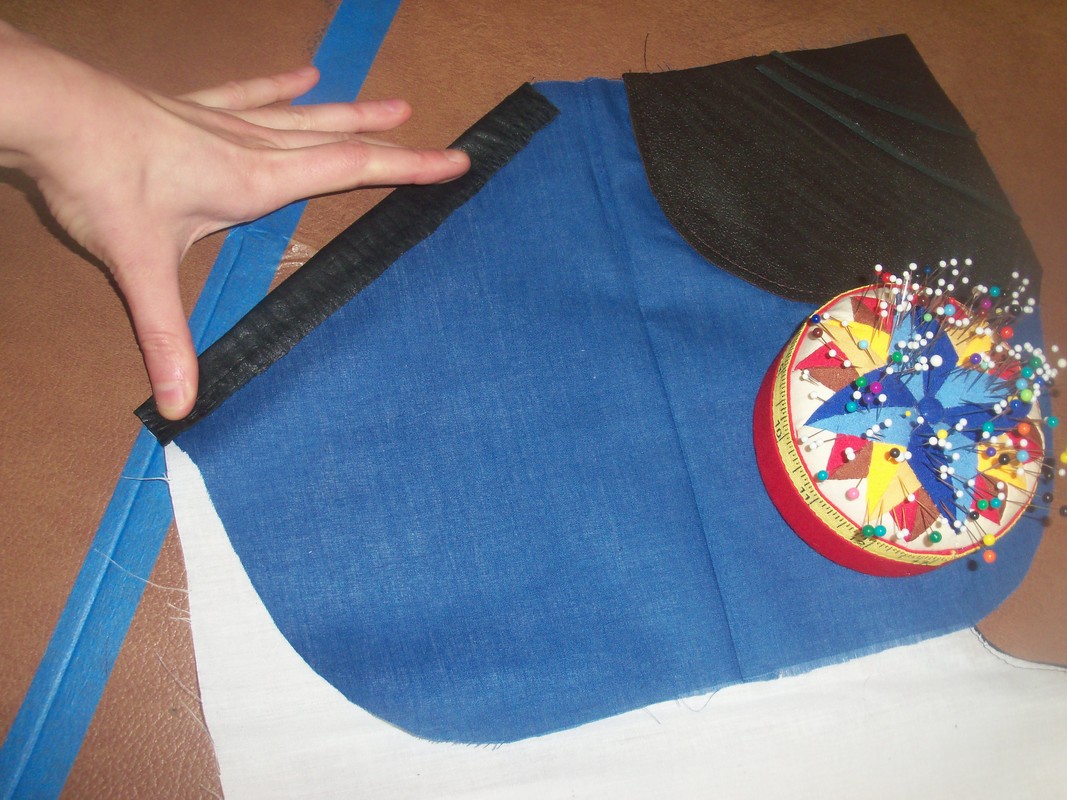
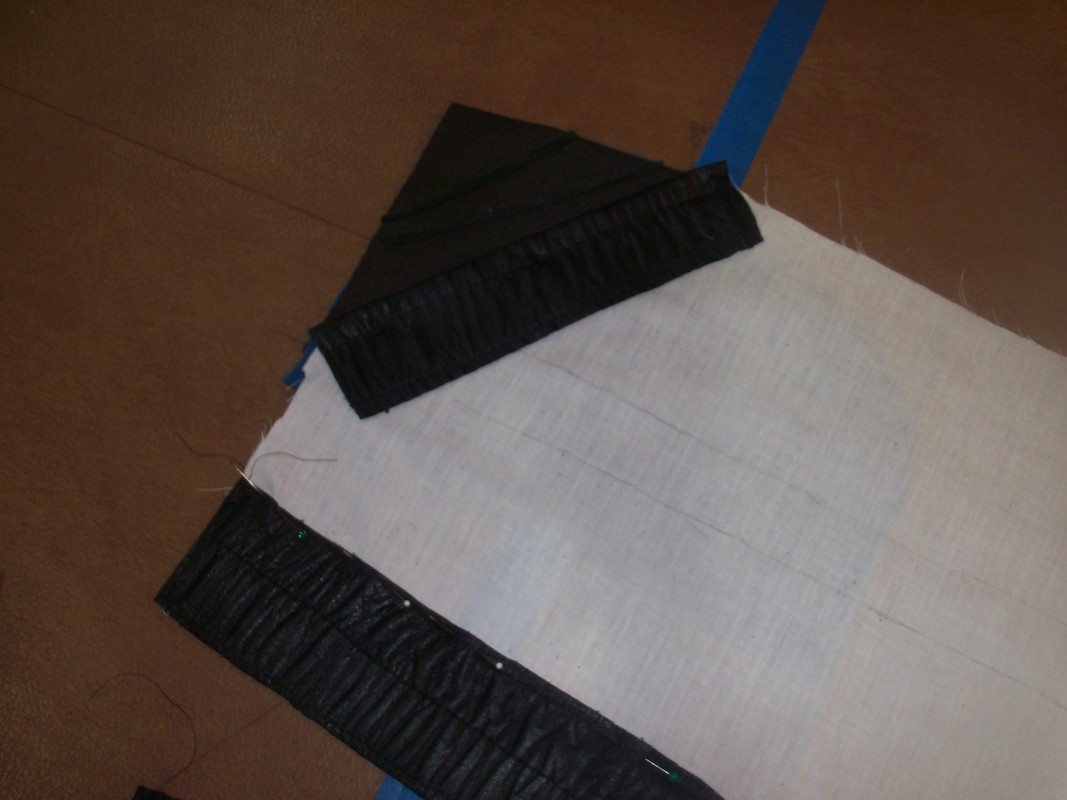
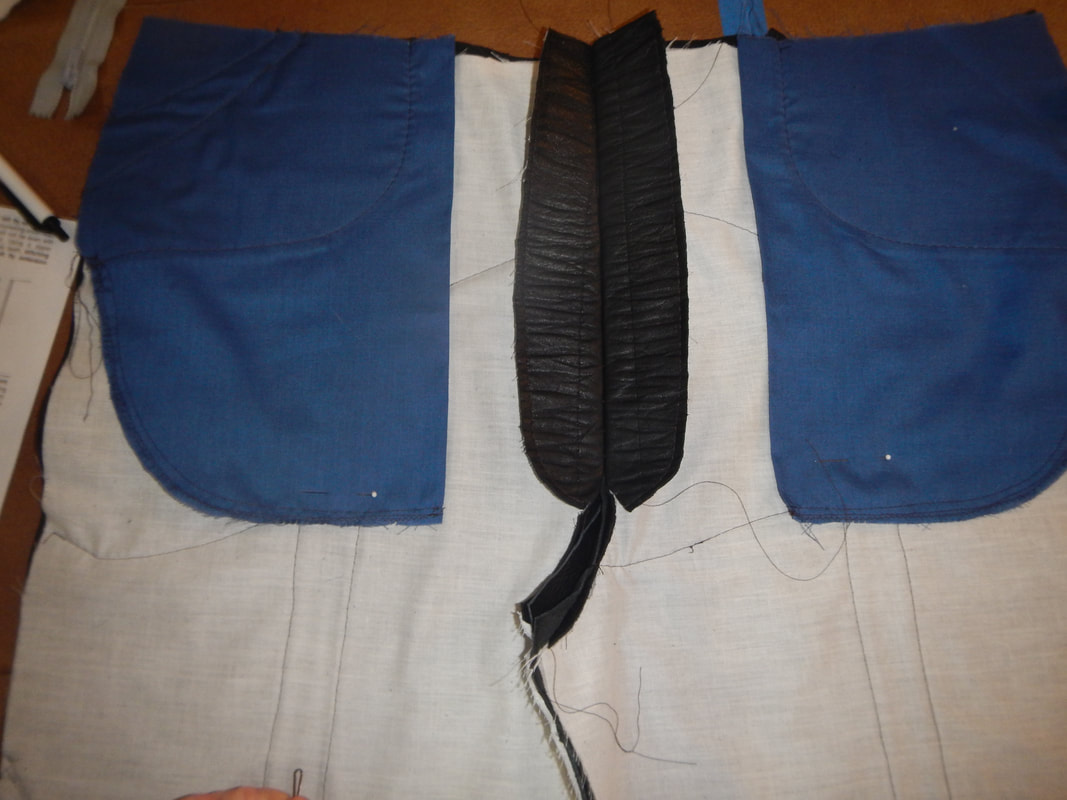
I made the pocket facings on blue pocket fabric, and texturized the leather with sandpaper, for a rougher look:
Picture
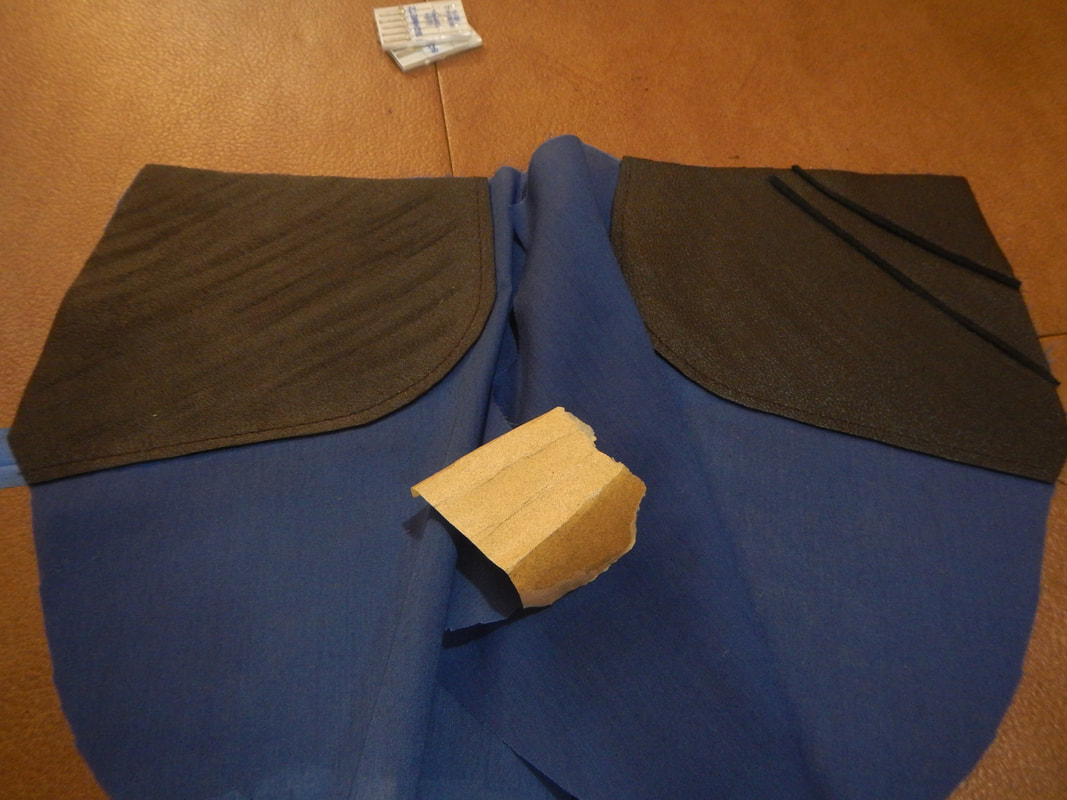
Then some more layering:
Picture
Pretty Kitty is sure I'm doing it wrong.
Picture
I tried to vary my seams, for interest.
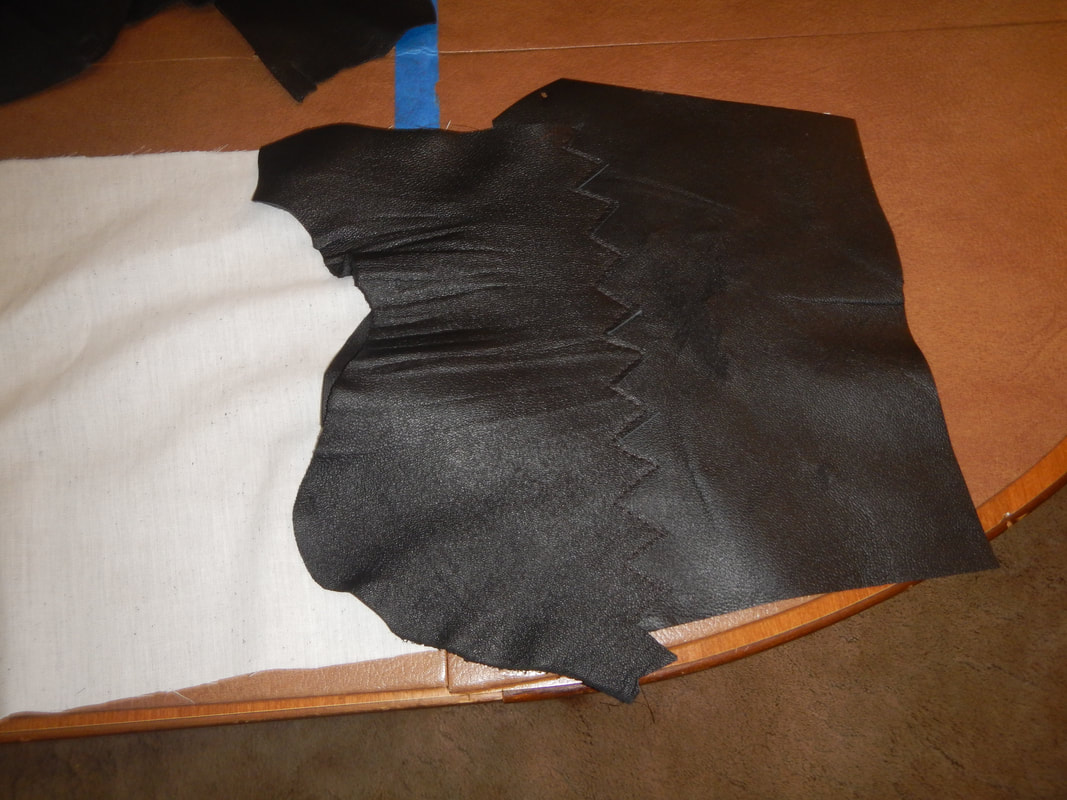
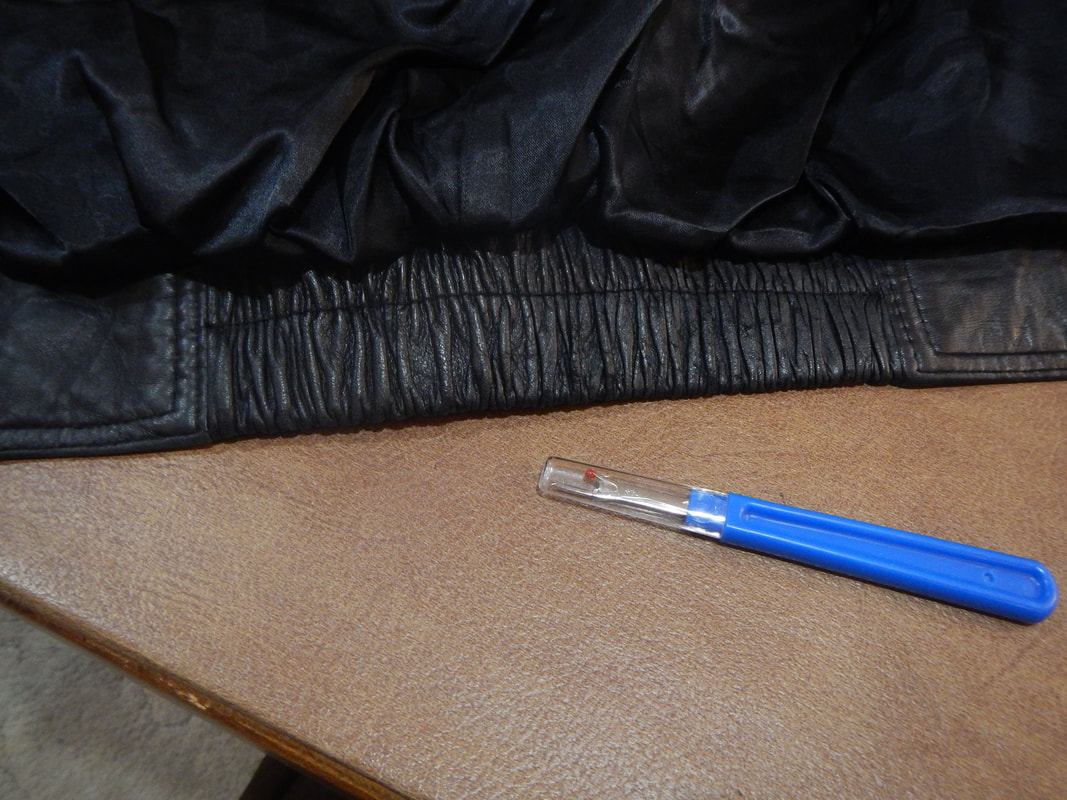
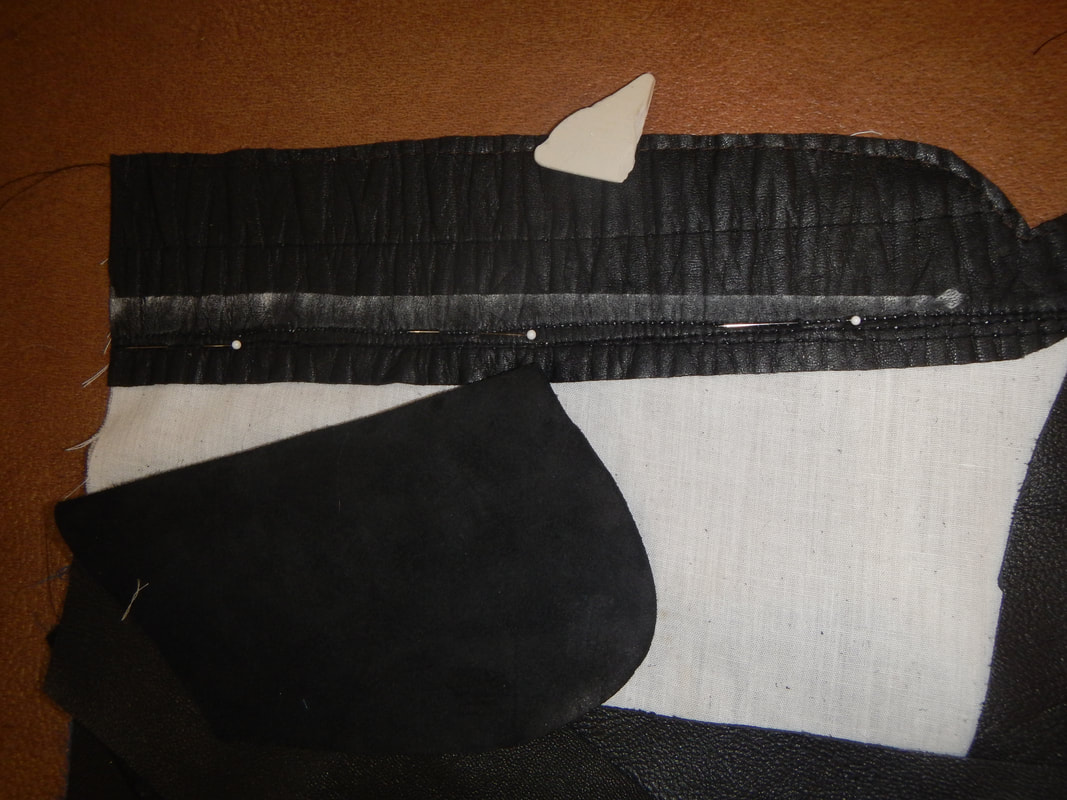
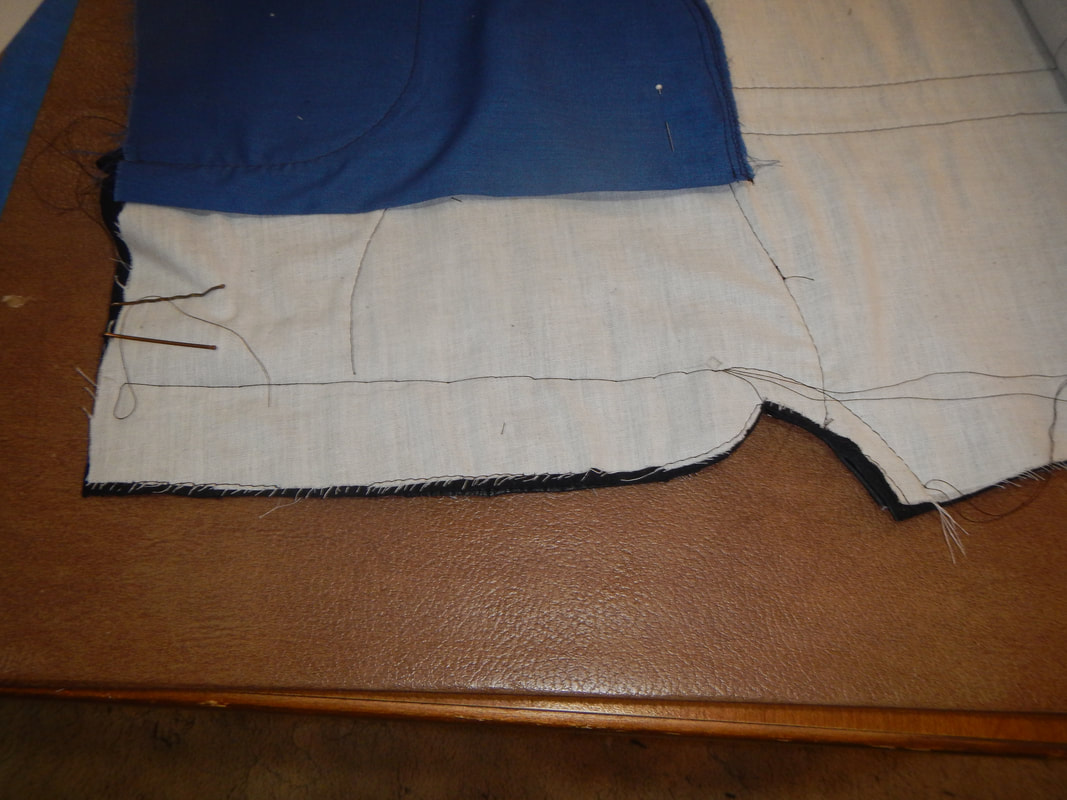
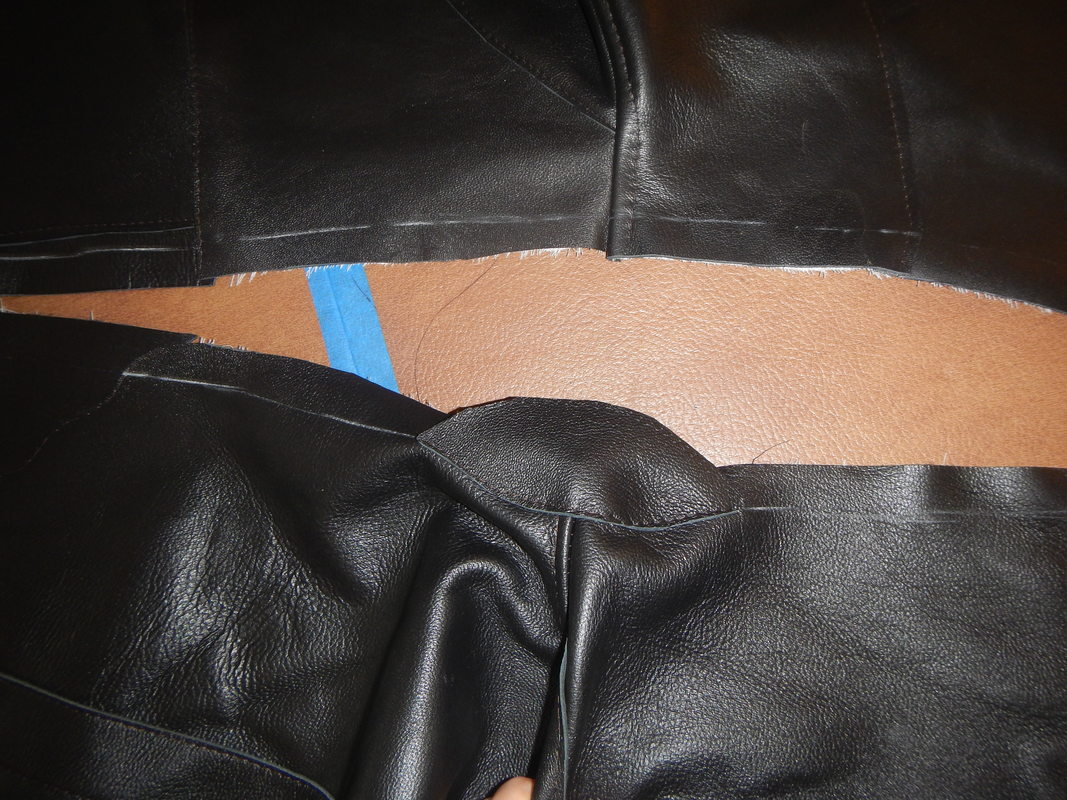
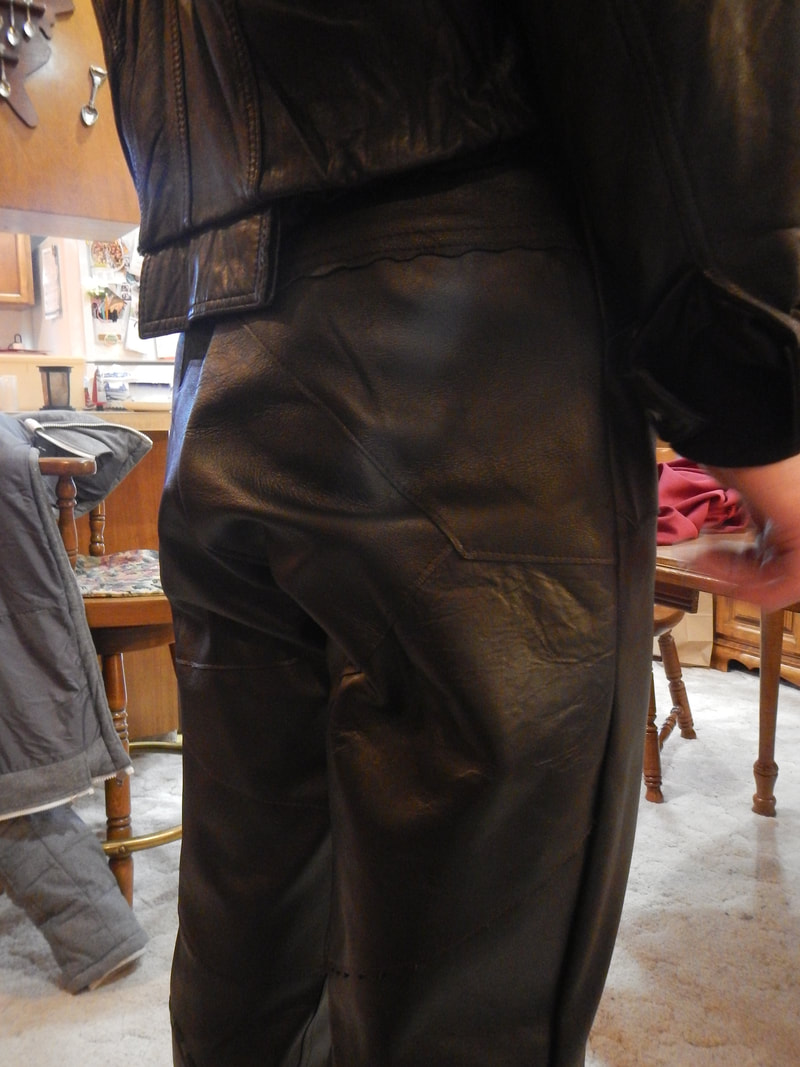
As I worked, I held several considerations in mind.  First, I thought that if this garment were actually made for a battle-ground, then all the seams would have to be made so that they overlapped in such a way as to repel rain and blood.  So I started my layering at the bottom of each pant leg, working my way up.  I imagined it like shingling a roof: you don't start at the top, but the bottom, so the upper layers cover the joins with the lower ones.  Second, I thought about ease of wear; the leather scraps were of varying thicknesses, so I wanted to make sure that thinner, more supple leather scraps covered the areas that needed to flex, particularly around the fly and pockets, and the crotch seam.  I salvaged some super soft, thin leather from the elasticized bottom of the jacket, and used it to cover the fly area and the edges of the pockets. 
Picture
soft leather from the motorcycle jacket
Picture
I ironed the leather to flatten it.

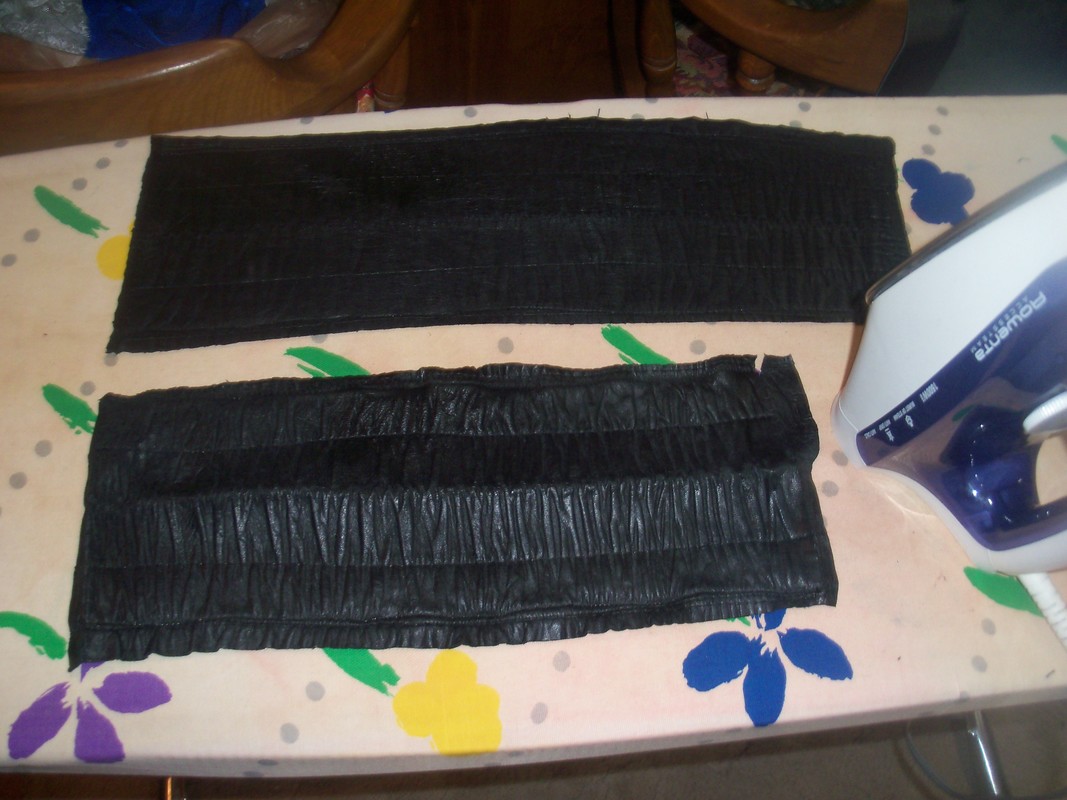
SOFT SPOTS

I applied the soft leather to the flies all the way down the crotch (that seam is bulky enough without also having thick leather!), and around the edges of the pockets:
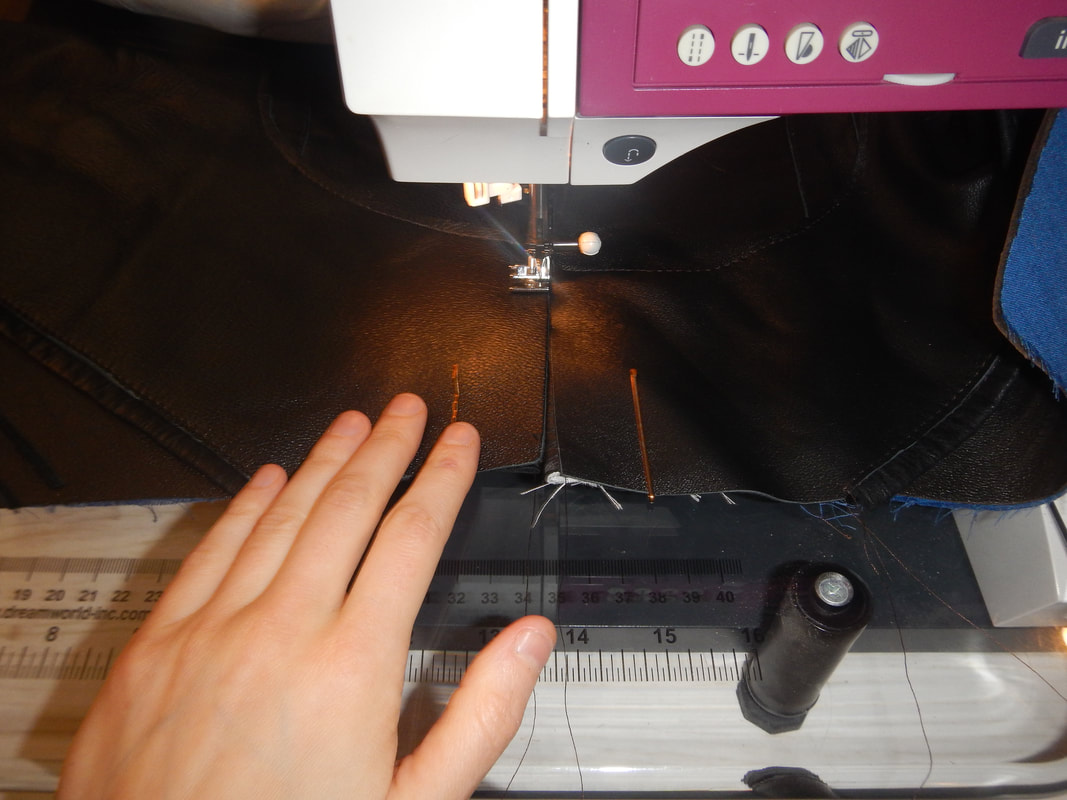
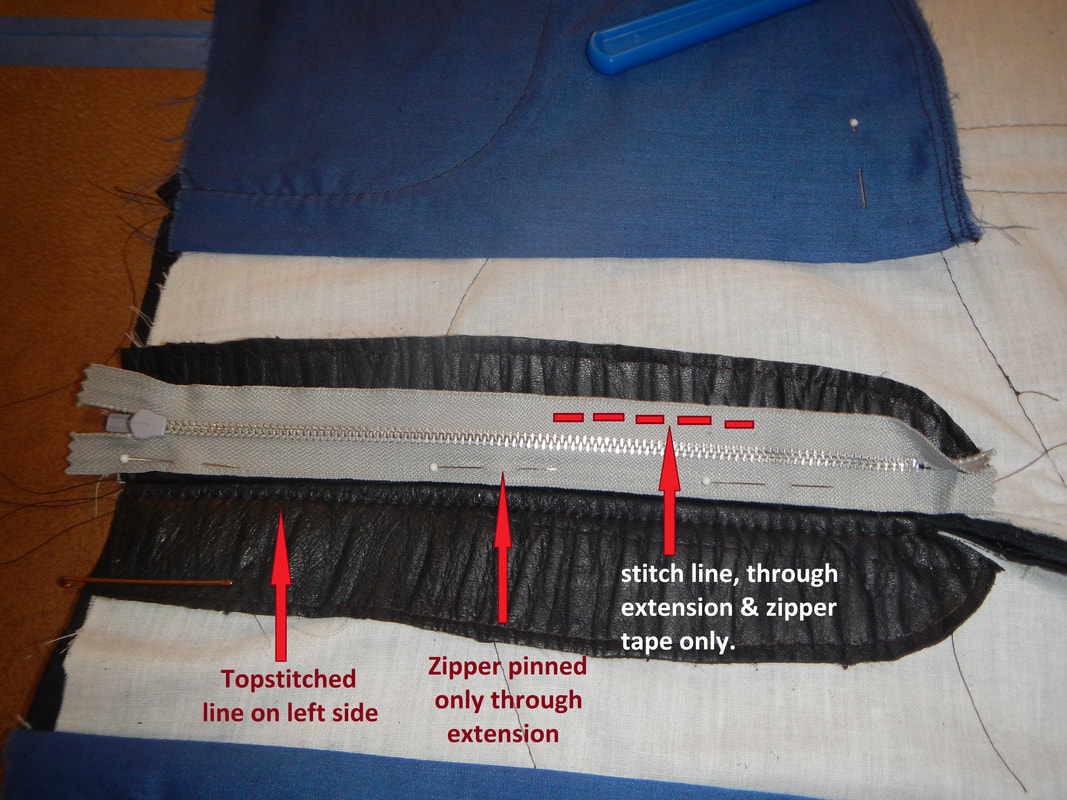
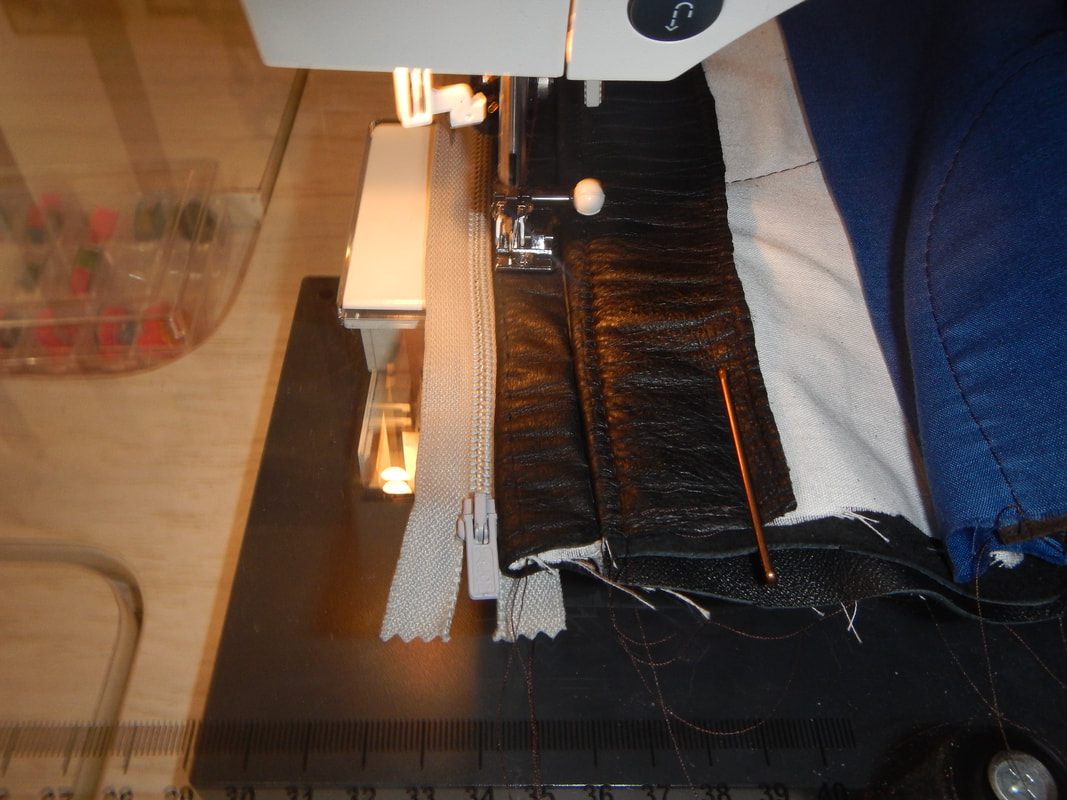
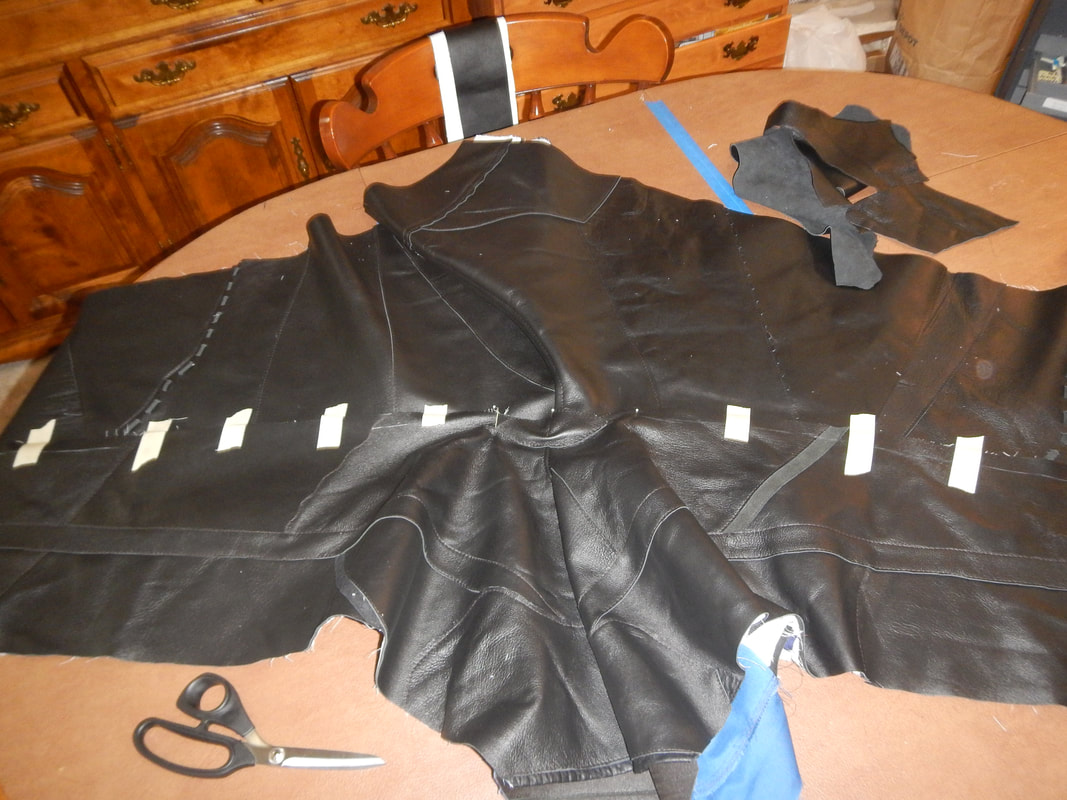
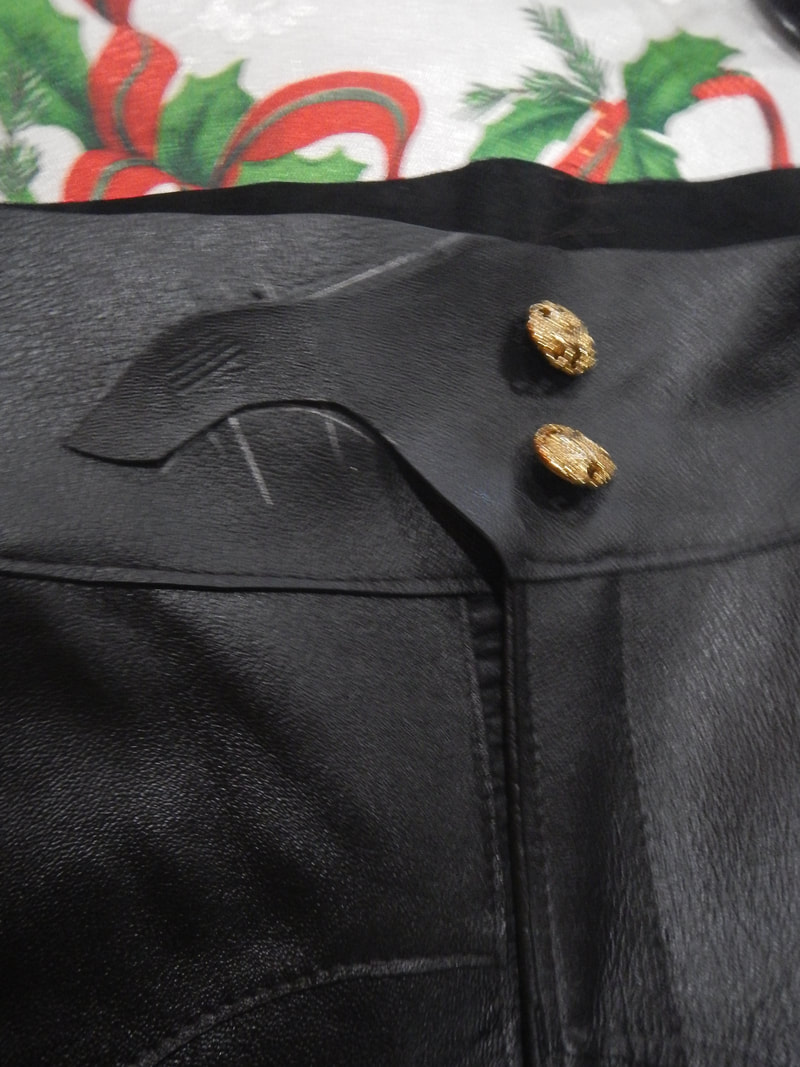
Picture
Soft leather on the flies and the turns of the pockets.
Picture
Soft leather folded over pocket edge...
Picture
...and the finished pocket.
The soft pieces in place, I was ready to finish covering the muslin with leather for the front panels.  

ASSEMBLY - THE FLY

I find flies very satisfying to sew, because they're complex but not difficult, and when they're done they look so professional!  Way back when, I used The English Tailor's video to learn the basics.  He used separate pieces for the fly facing and the zipper guard, but when I made jeans, I learned from the Kwik Sew pattern how to do it with identical fly extensions cut as one piece with the pant fronts, and a zipper guard added later.  Kwik Sew's method is easier, I think, but there may be a good tailoring reason for the multi-piece method; I don't know as much about tailoring as I'd like to.  YouTube has a ton of how-to videos, so find one that makes sense to you!

For this project, I used the modified Kwik Sew pattern from my client's jeans.  Because I had to create my leather/fabric as I went, I definitely didn't want more seams!  I took lots of pictures as I went, so here goes... 
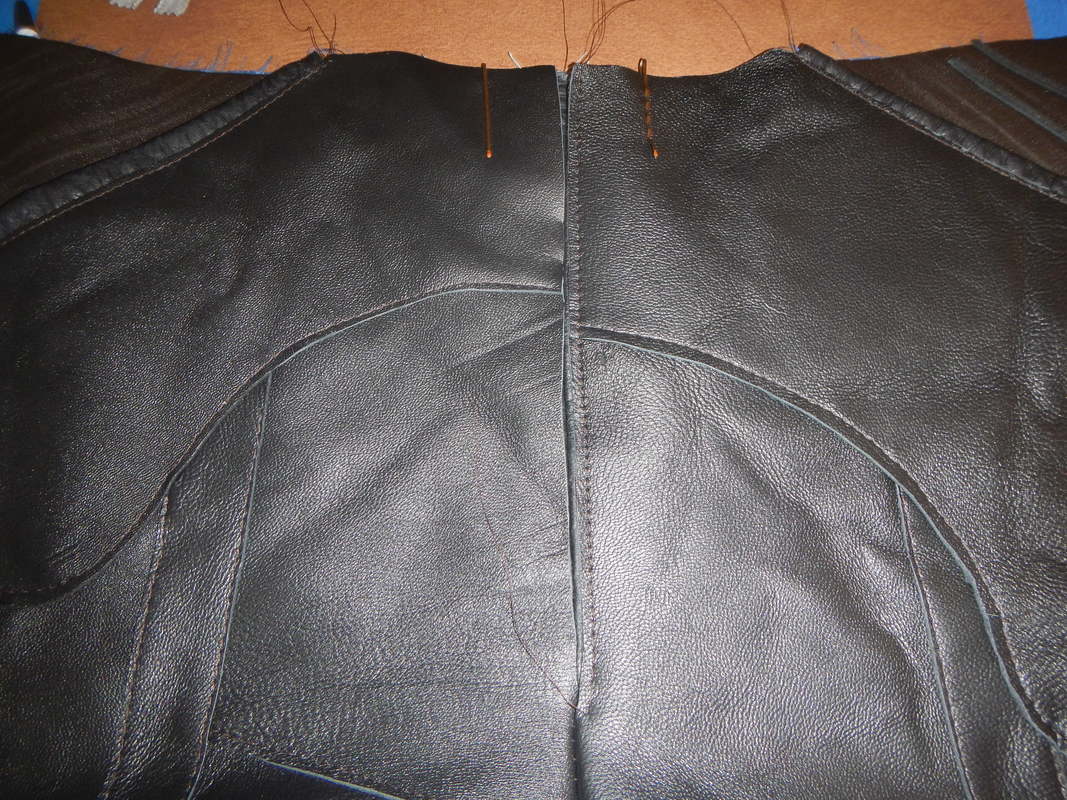
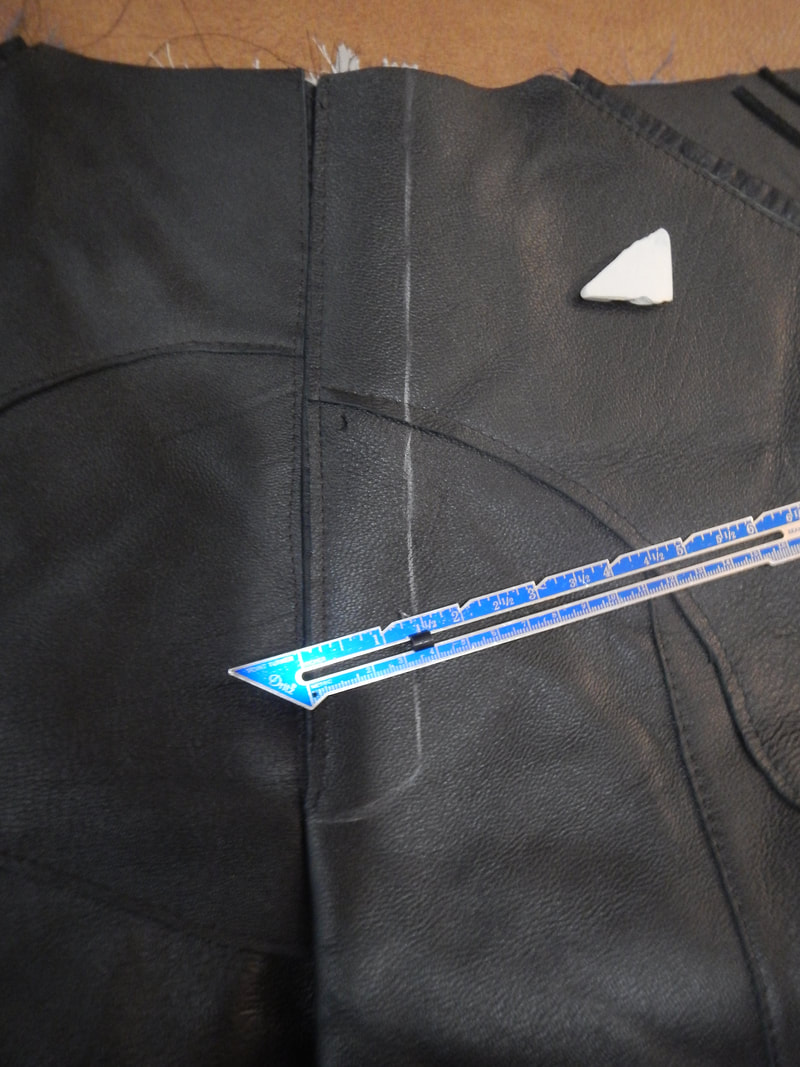
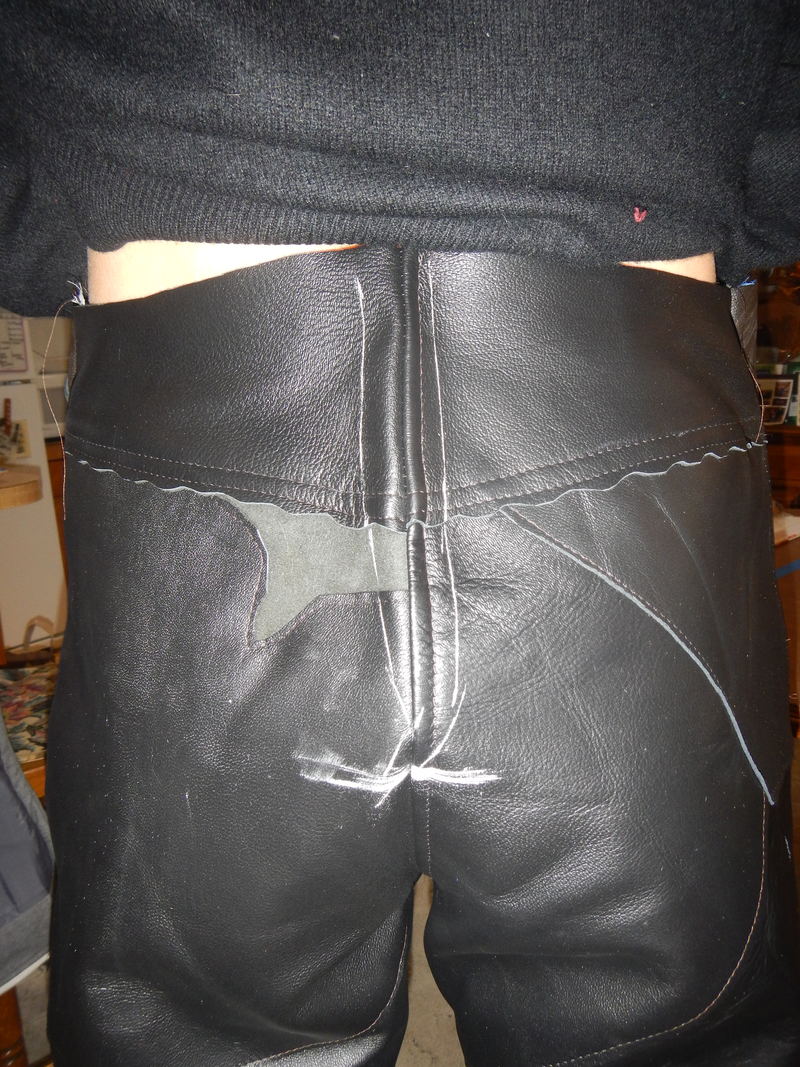
Picture
Step 1. The chalk indicates the part of the fly that opens.

​On the Center Front (CF) seam, the fly extensions both get turned in, so they have to fold.  Since my applied leather was really thick, I knew it wouldn't bend, which is why the soft pieces were needed.  I sewed and pinned the soft fly piece to the muslin, and chalked the Center Front line.  Then I sewed the thicker leather right up to, but not over that line.  
Picture
Step 2.
With right sides together, I sewed the crotch seam using regular length stitches, and the chalked CF line using widely spaced basting stitches.  The seam only caught the thin leather and muslin, not the thicker leather.  

​You can see how I used bobby pins to hold the pieces in place on the left side of the picture.  Bobby pins are great for thick fabrics!  
Picture
Step 3.


Then I pressed the seam open.  Remember, you can press leather!  I did, and no disaster occurred. 

Recently, I wrote about how menswear closures always lap left over right.  So for this, I held the pant front to myself and figured out which side was left.  
Picture
Step 4.

​

Then, seam allowances still open, I top-stitched the left side.  In this picture, the top/waistband is at the bottom.  My trusty bobby pins are still working hard!  
Picture
Step 4, cont'd.


​Here's the finished top-stitching; the right side of the picture is the wearer's left.  Bobby pins still in place, and check out those cool pockets!  
Picture
Step 5.

​Next, on the back side of the pants, I laid the zipper face down on the right side fly extension.  I pinned the side I did not intend to sew, so I could sew the other side without removing pins.  So, as the zipper was laid, I sewed on the side farther from the CF of the pants.  

Click pic to enlarge!
Picture
Step 5, cont'd.


​Once the zipper was attached to the right fly extension, I pulled it toward the CF, and you can see how the teeth were now next to a nice fold of soft leather!  
Picture
Step 6.


​Some more top-stitching neatened that edge up.  
Picture
Step 7.

​This is the trickiest part of fly assembly; I kept lifting my shirt and double-checking what I was doing against my own jeans!  I pulled the zipper so the front of it was facing the outside of the garment, as it must be in a finished fly.  With the garment right-side-up on the table, this meant that the zipper was lying to the wearer's left, under the left fly extension.  

I chalked the line of top-stitching that I would do to hold it in place, so you can see that the zipper is under the area delineated by chalk.  The fly extension I sewed the zipper to is under there and will be part of this final seam.  I sewed along the chalk line.  
Picture
Step 8.
I unpicked the basting stitches from Step 2, and opened the zipper.  Success!  The next step was the fly-guard (to keep the wearer's more delicate parts out of the zipper teeth).    

Yes, that fly guard was a different color from the pocket fabric... I'd made one in the same fabric, but my sewing room ate it!  I honestly don't know where it went, so I had to make a new one in different fabric!  
Picture
Step 9.

I lined the fly guard up with the right side extension and sewed the edges as you see them pinned.  Then I tacked the bottom down, but forgot to take pictures.  So look at your own jeans to see the tack(s) near the bottom of the top-stitched curve from Step 7.  

FINAL SEAMS

As complex as the project was so far, the final seams were the hardest!  First, I added a waistband. 
Picture
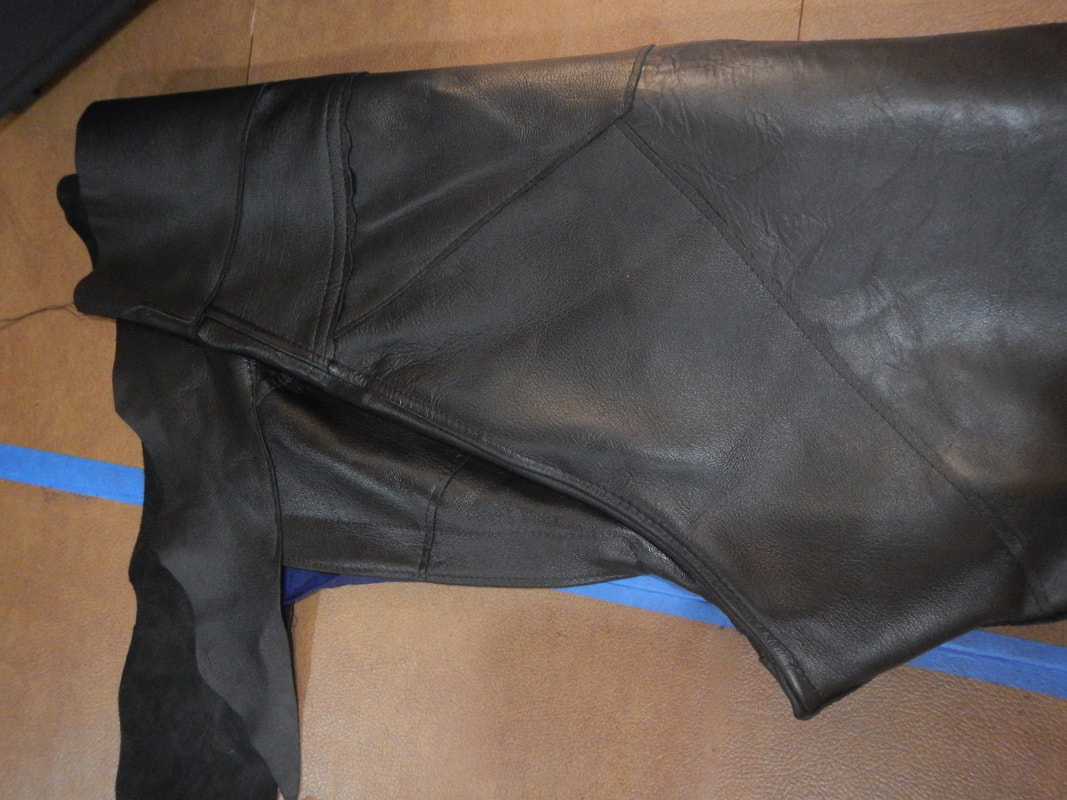
Then, knowing that the leather was super stiff, I added a gusset to the crotch for a little extra ease.  I sewed the inside leg seams with lapped construction, but found it impossible to do the outside leg seams that way because the leather was simply too stiff to feed under the machine in long tubes.  So I sewed the outside legs with seam allowances inside the legs.  
Picture
crotch gusset and chalked seam lines
Picture
seams overlapped and taped, ready for sewing
The seat wasn't well fitting, and the stiffness of the leather made alterations tricky, but I did my best: 
Picture
chalk marks the new seam lines to take the back in
Picture
I'm not in love with this view...
Everything about the fit was right except the bum, but I think the flaw was in the heaviness of the leather rather than the pattern.  I suspect that if I took it in more to make it look perfect, he wouldn't be able to sit.  So I reluctantly called it good enough and reminded myself that the costume includes a floor length cape!  


​At least I did something cool with the front closure!  I sewed two buttons to the under-flap, and simply cut slits in the leather over-flap for buttonholes.  Then I cut a little wavy strip of the overlapping leather and made little slits in the underlapping leather for it to weave through. 

In the picture to the left you can see vertical chalk marks which I cut so I could weave the strip into and then out of the waistband.  I think it looks really neat, like a combo of button-fly and belt, and it prevents the left-side-overlap from protruding overmuch.  
Picture
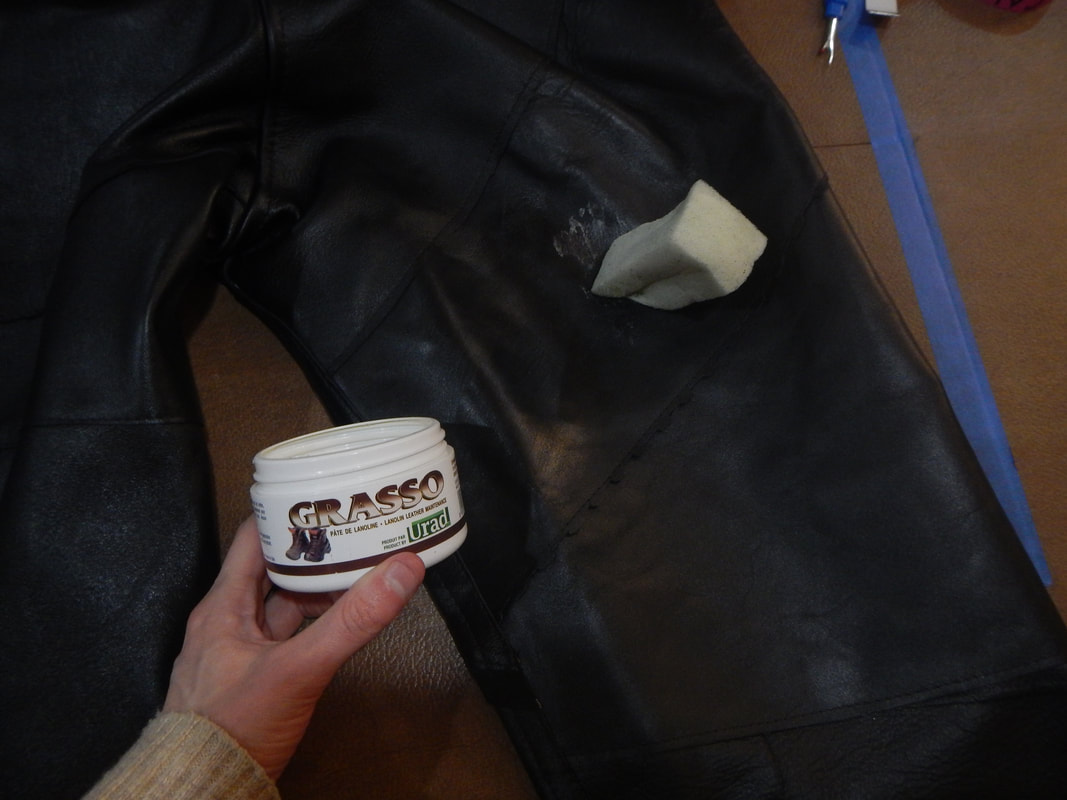
Before sending the pants to their new home, I rubbed them thoroughly with leather conditioner to make them shine. 
Picture
Picture
I think this project is made of awesome!  I had so much fun making it, and it looked really cool when done.  Next up, I'll tell you about how I altered the motorcycle jacket to make an epic coat, then how I made the cape. 

7/29/2018 - Edited to add link to the red costume jacket, at top of post.
3 Comments
momsydoodle
5/5/2018 08:12:46 am

Isn't it amazing how God supplied the material at just the right time? Just when you happened to be in the area, the right price, and in as many smallish pieces as needed for the particular project you were working on? And you were able to get it on a bus to get home! Who says He doesn't have a sense of humor! You have great imagination and creativity. Interesting projects.

Reply
Karen Roy link
5/8/2018 08:53:20 pm

Hi Mom!
Yeah, God made me smile that day!

Reply
The Sister
5/16/2018 02:53:39 pm

I agree with Mom! It's fun to see how God laid everything out for you! This is fun to watch.

Reply


Leave a Reply.

    Karen Roy

    Quilting, dressmaking, and history plied with the needle...

    Categories

    All
    1910's
    Alteration
    Antique
    Dyeing
    Embroidery
    General
    Hand Sewing
    History
    Lacemaking
    Mending
    Menswear
    Millinery
    Modern Elizabethan
    Musing
    Other Sewing
    Philippians 4:8
    Project Diary
    Quilting
    Regency
    Retro
    Self Made Pattern
    Self-made Pattern
    Terminology
    Victorian
    Vintage

    Blogs I Read

    The Dreamstress
    Male Pattern Boldness
    ​
    Lilacs & Lace
    Tom of Holland
    Fit for a Queen
    Line of Selvage
    Mainely Menswear
    Bernadette Banner

    Archives

    January 2023
    December 2022
    November 2022
    October 2022
    September 2022
    August 2022
    October 2021
    September 2021
    August 2021
    July 2021
    June 2021
    May 2021
    April 2021
    August 2020
    June 2020
    May 2020
    April 2020
    March 2020
    January 2020
    December 2019
    November 2019
    September 2019
    August 2019
    July 2019
    May 2019
    April 2019
    March 2019
    January 2019
    December 2018
    November 2018
    October 2018
    September 2018
    August 2018
    July 2018
    June 2018
    May 2018
    April 2018
    March 2018
    February 2018
    January 2018
    December 2017
    November 2017
    October 2017
    September 2017
    August 2017
    July 2017
    June 2017
    May 2017
    April 2017
    March 2017
    February 2017
    January 2017

    RSS Feed

Blog

Quilting

Clothing

About

Copyright Karen Roy
​© 2017-2022