|
So to recap: I have a cool antique bodice, circa 1880's; I copied the pattern by drafting and by draping. Now I'm ready to sew!  Finished pattern, sans hem facing, collar, capelet, and trim. The dotted line crossing the bodice pieces is the waistline. Since the project is complex, (I took over a hundred photos), I'll streamline the blogging of it by going topically and splitting it into a few posts. The order of construction is as follows (with much stopping, pinning to the dressform, drinking tea, and so on):
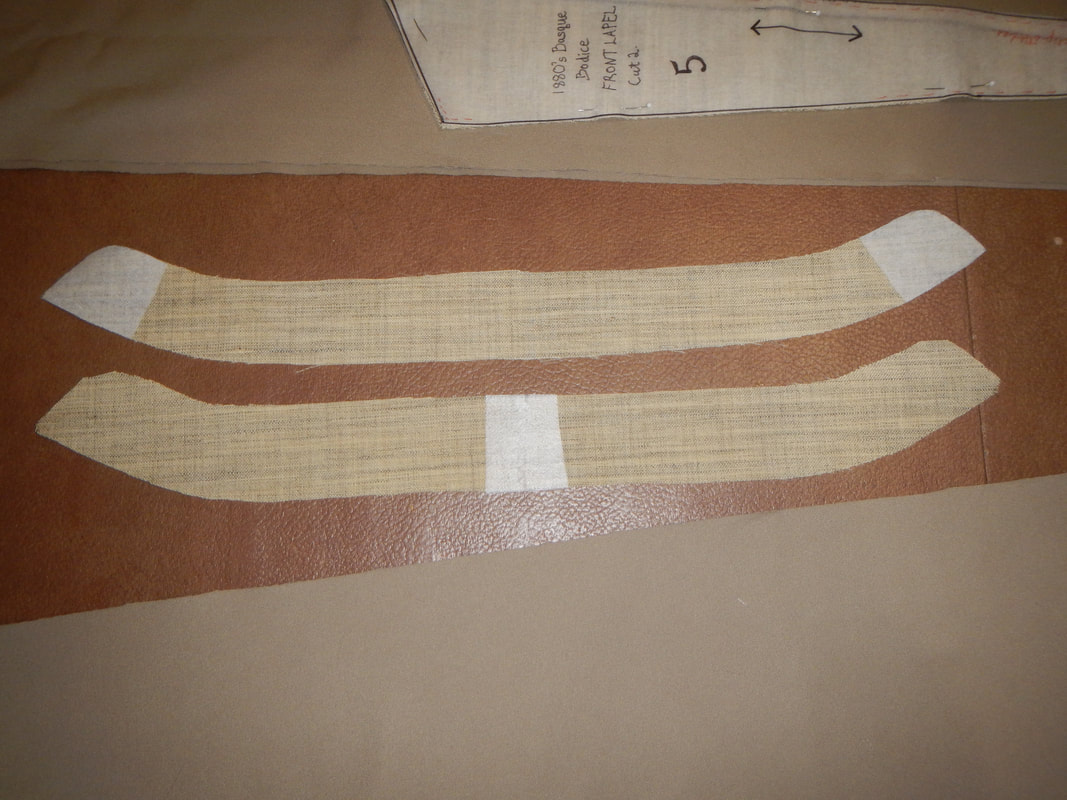
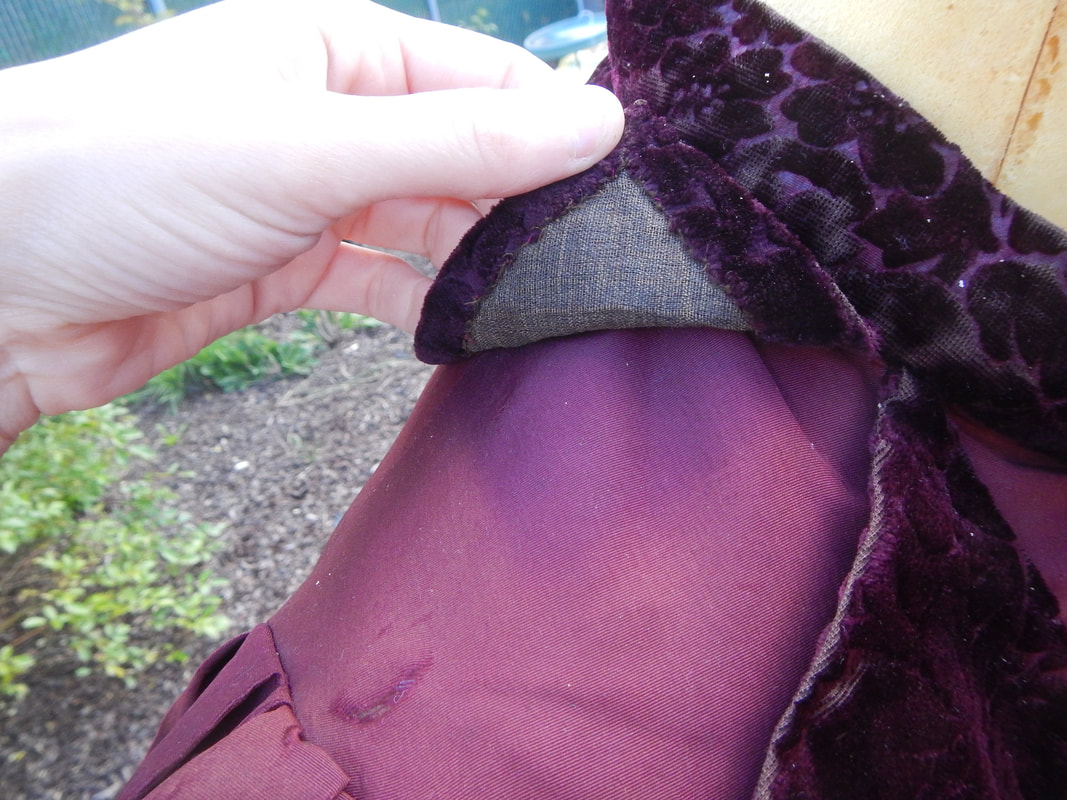
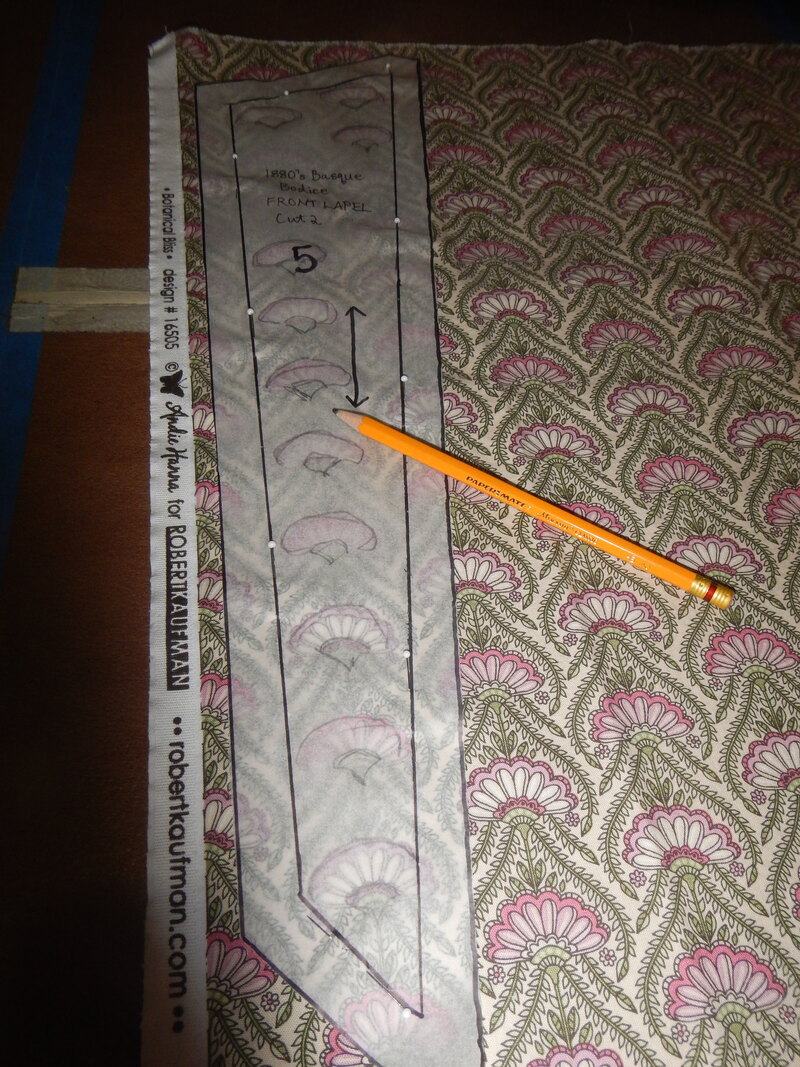
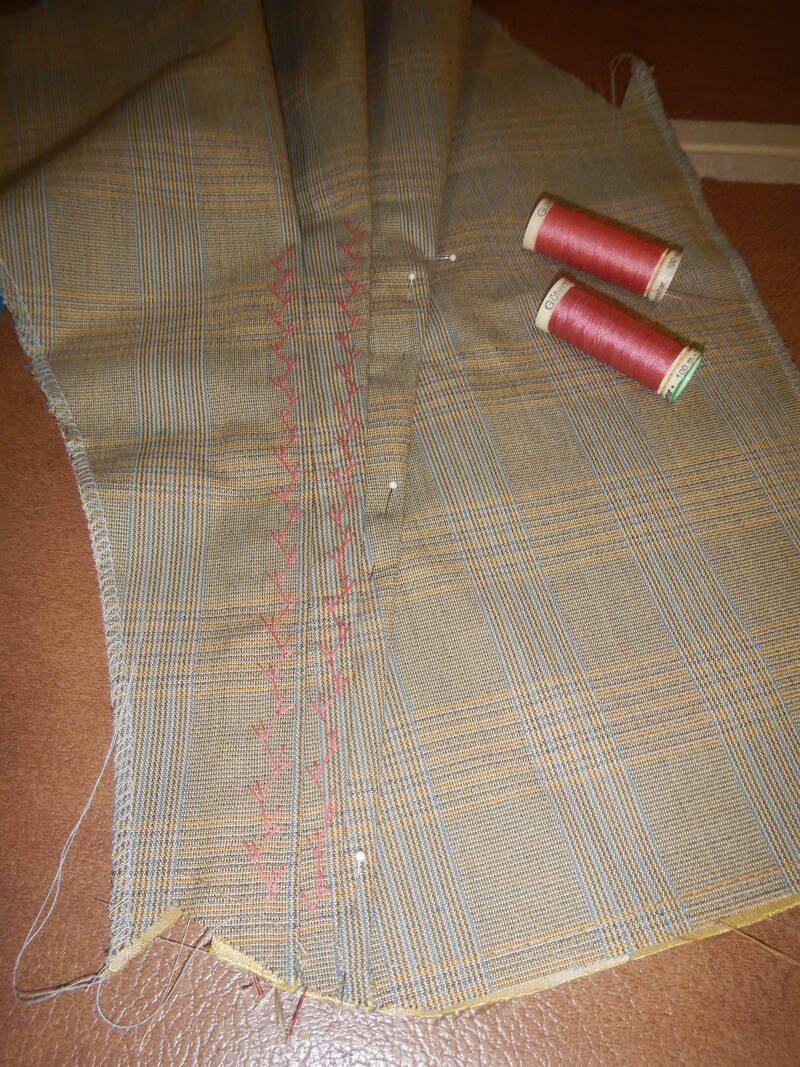
FRIENDLY ADVICE After I asked witness2fashion for permission to use one of the photos featured on the blog, that same blogger responded with technical expertise: Good luck on your project. I can’t resist giving some advice: Theatrical costumes, like couture, are often built with an interior structure of coutil or strong fabric and boned seams. The boning is vitally important for an authentic fit and silhouette. (And some actresses do not like to wear period undergarments, like corsets!) If you are not going to wear a corset under your bodice, I strongly recommend that you flat-line it with a pre-shrunk fabric without stretch, like corset coutil. (Flat-lining means the fashion fabric pieces are attached to a stronger material cut identically, and the two layers are treated as one when you make the garment. They can be overlocked or zigzagged around the edges.) Flat-lining makes is possible to get a very tight fit without straining the silk or taffeta at the seams or at the buttonholes, and also lessens the chance that bumps and ridges of the undergarments will show through the fashion fabric. That is excellent advice, and matches the construction of my original, which is silk taffeta exterior flat-lined with a cotton(?) twill. The fabric I've chosen is a stiff poly/cotton blend. When I say stiff, I mean stiff enough that if I were to make an A-line skirt of it, it would stand out in a permanent A when worn. I think this'll be a good alternative to the silk taffeta of the original, since I can rely on it to hold its shape in the poofy sleevecap. It's heavier than silk taffeta, though, so I choose a lighter fabric for the flat-lining: a shirt-weight gray cotton. I fear that choosing a sturdy lining with a sturdy exterior will make the basque far too heavy in the end. I'm not concerned about my poly-cotton being too weak in the seams. For the sleeve lining, I use poly satin, in case I want to wear the basque on top of long sleeves. Satin is nice and slippery. I intend to bone the seams and darts that were boned in the original. One interesting point: the side seams of the original were boned at one time, but the boning was cut off at some point and all that remains is a bit of bone casing in the hem. I have no way of knowing when the side bones were cut off. I'll omit the side seam boning in my recreation, so there'll be boning in the front darts, and diagonal back seam. I also consider adding a waist stay (even though the original doesn't have it), but in the end I find that cutting the hem facing all the way up to the waist does the same job, since the facing's top edge takes a lot of the horizontal stress when the bodice is closed. More on that later. CUTTING OUT The fabric choice presents me with one confounding factor: it's a woven plaid. Matching plaid is not hard on a simple pattern, but gets more complex on a many-pieced pattern like this. In the photo above that shows the whole bodice laid out, look at the grainlines, which I drew based on what my reference piece had: they are not all perpendicular to the waistline. In piece #2, for instance, the grainline runs parallel to the side seam, but because the piece is place diagonally on the body, the side seam doesn't intersect the waistline at a right angle. This prompts several questions: what was the reason for the original grainline? Was the original seamstress trying to keep her seams on grain so she wasn't sewing on the bias? Or was the seamstress unconcerned with grain because she was just maximizing the use she got from her fabric by laying the pattern pieces however they fit? This is the only extant bodice I've ever examined, so I can't generalize what I see to say anything about 1880's dressmaking in general. What does this mean for plaid-matching? Let's say I decide to ignore the pattern grainlines and cut the pieces according to the plaid? If I line up the horizontal stripes with the waistline... the Center Back (hereafter CB) piece is on grain, but the side back and side pieces are off grain, and the front is nearly on the bias! The picture below shows what I mean. The black arrows are the pattern grain, but the pieces are laid on the fabric according to the stripe. 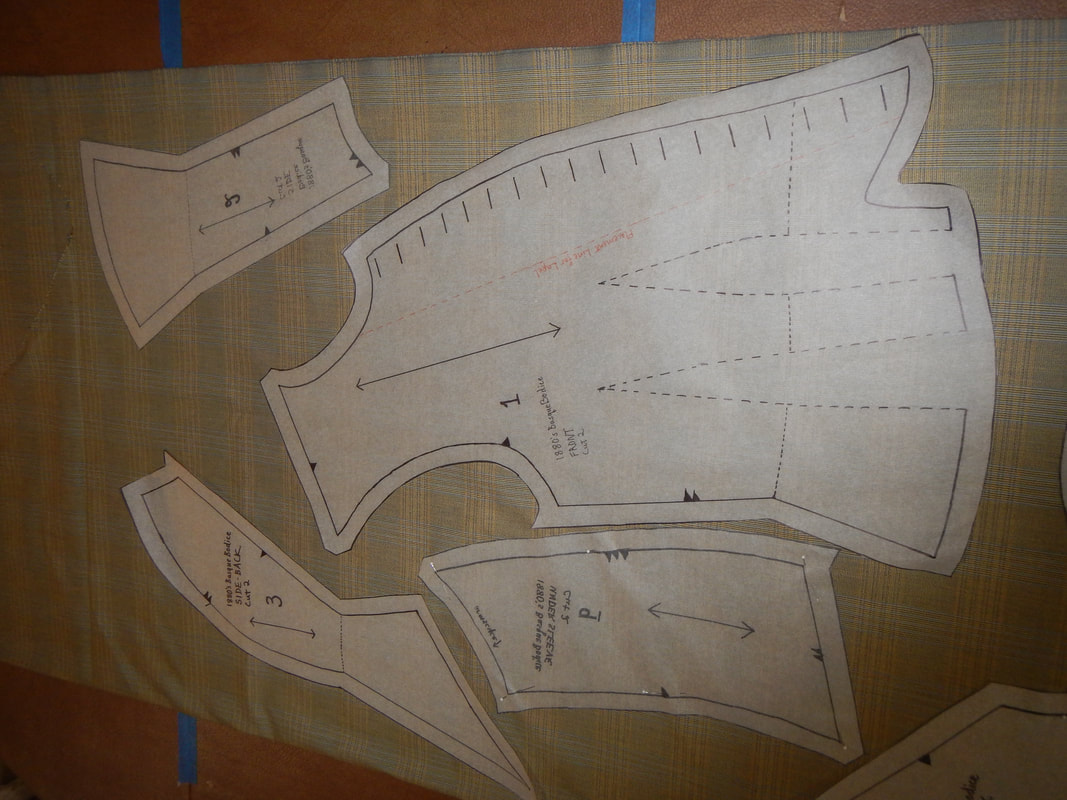 I obsess for a little while about which to prioritize: the pattern grain or the visual effect of matching stripes? I decide to match the stripes. For one thing, the visual effect will be lovely. For another, if I cut the lining on-grain, that should ameliorate the effect of cutting the exterior off-grain. And finally, the poly/cotton plaid fabric is so stiff, and the bodice so close-fitting, that even if it's off-grain I don't worry about it draping funny. I only have enough fabric to do this one. Nervously, I cut it out according to the stripe, then pin it to Mimi to see if it works: 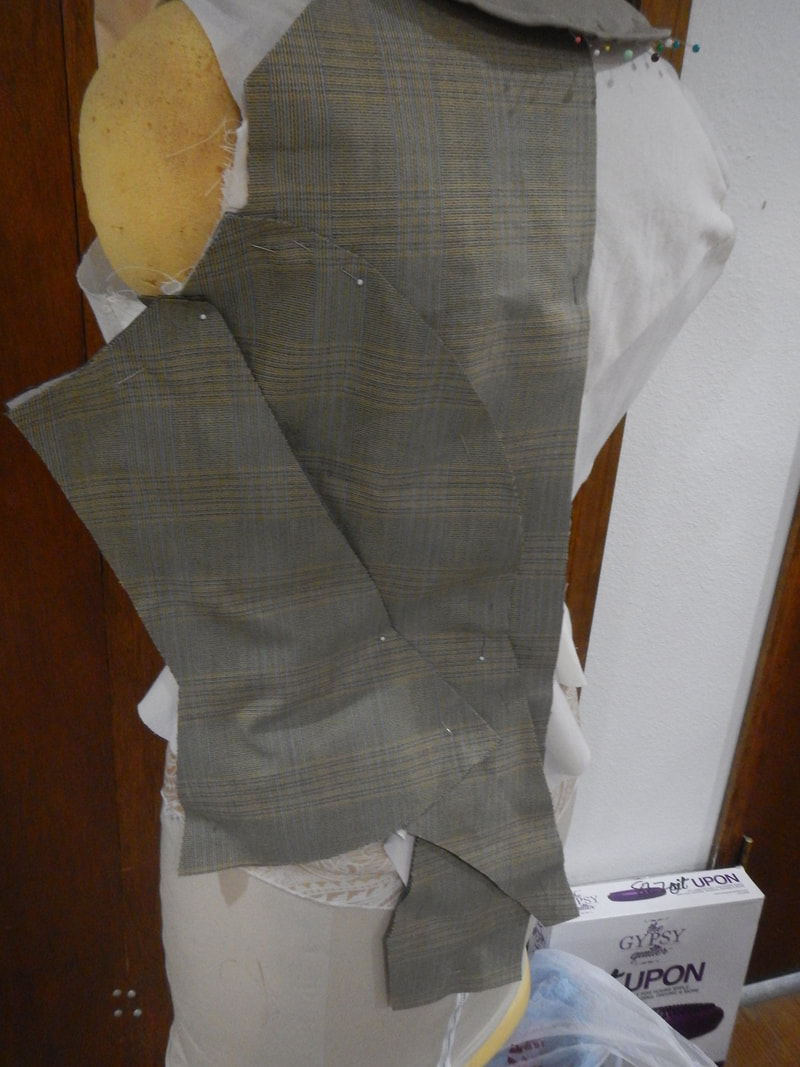 Huzzah! TRIM I have selected a coordinating khaki green for the trim pieces, collar, and cuffs. It's the same fabric I made my swishy skirt out of. I stabilize the interior with some horsehair canvas (HH canvas). Here's the collar. I cut two layers of HH canvas, then curve them in the shape I want and baste them together.
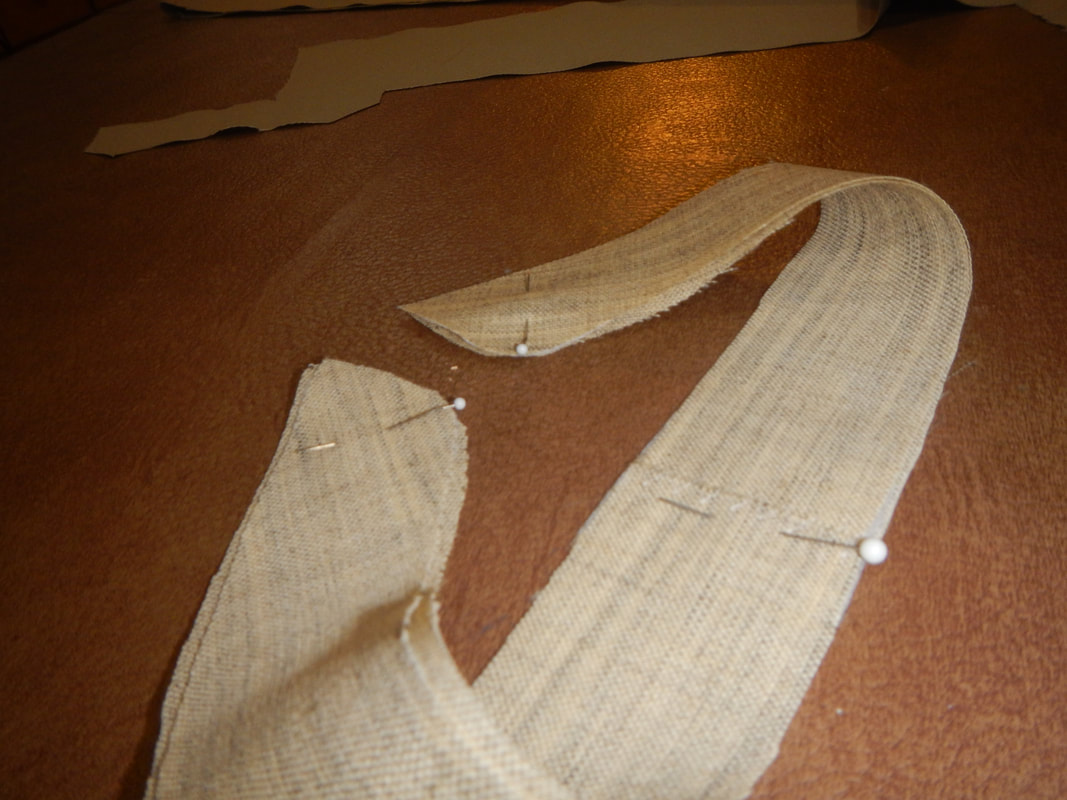
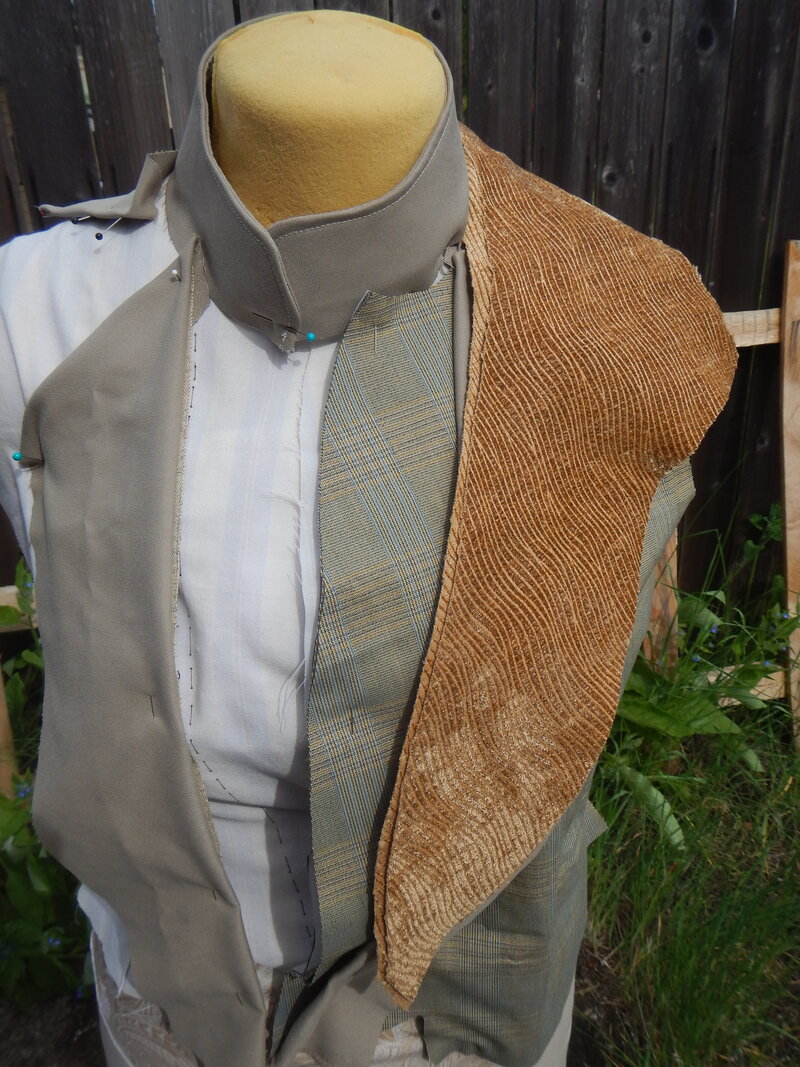
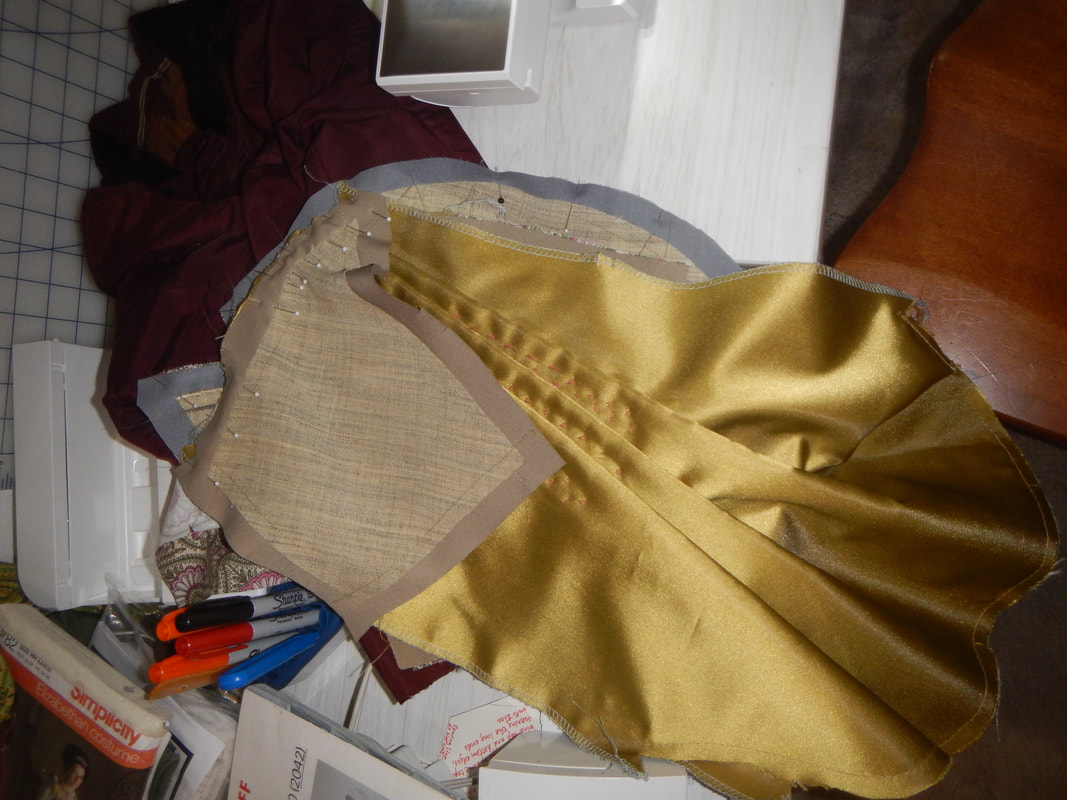
Now, when it comes to the capelet and faux lapels, the reference garment simply wrapped the contrast fabric (burnout velvet) around the HH canvas and sewed it down, with no fabric backing. I attempt that.
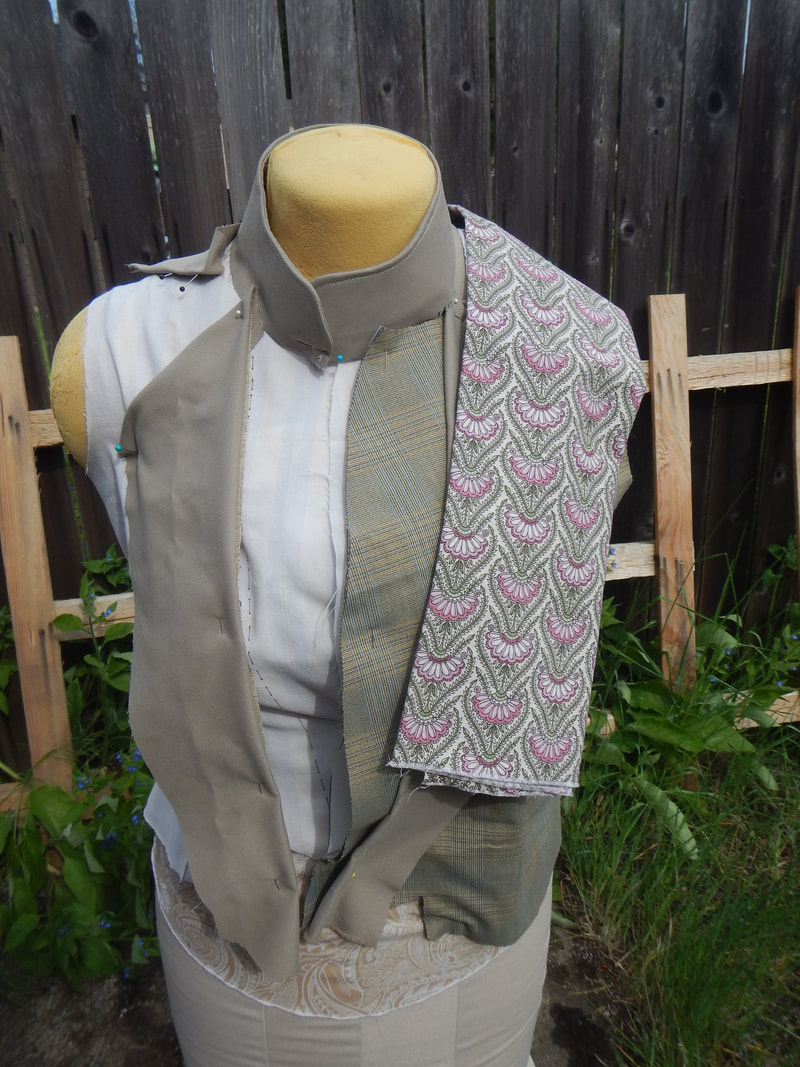
Time to re-think. What else can I use for the contrast fabric? I take Mimi out in the sun to get a true idea of color. I have a silvery blue that works well with the plaid (which has narrow blue stripes in it), but is too cool for my complexion. The brown is good for my complexion, but too warm for the plaid. The printed cotton wins the day. Bonus points for being something I've liked for a while and wanted to use!
Cutting the contrast pieces from the printed cotton requires come care, especially for the lapels. I want the pattern to match! So I cut one, tracing the important lines on the pattern tissue. Then I line the pattern up and cut the other. When doing this, remember to flip the tissue upside down, because the pieces should mirror each other!
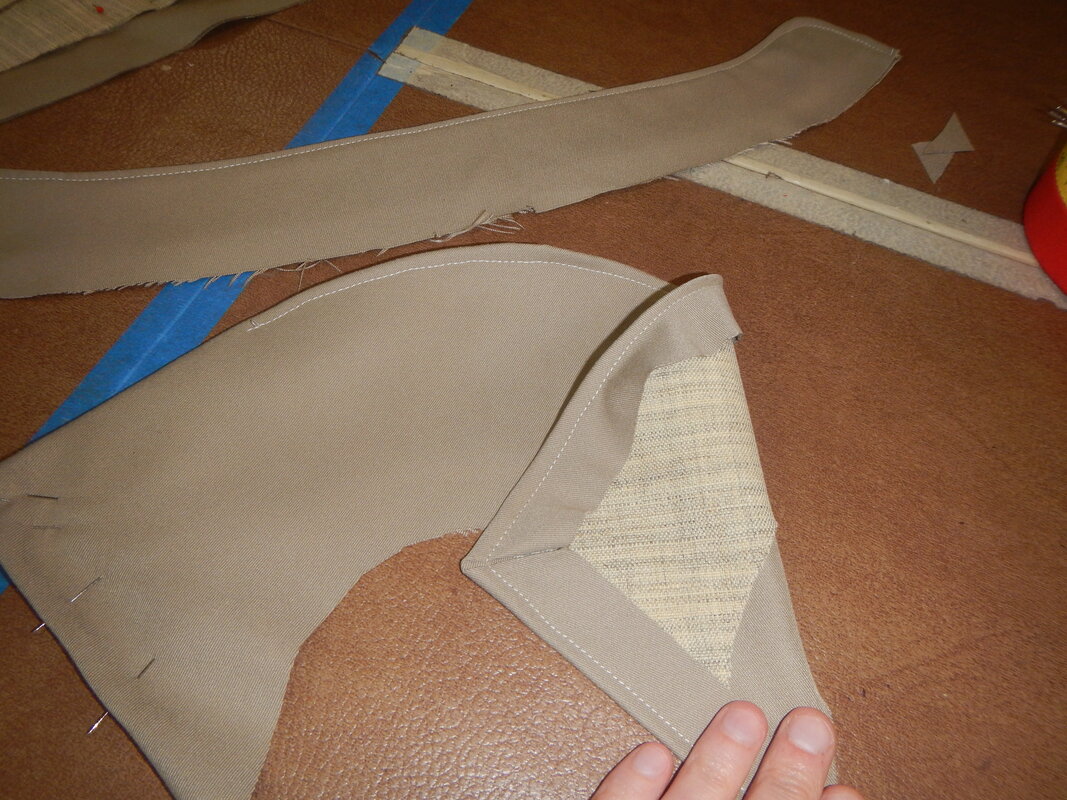
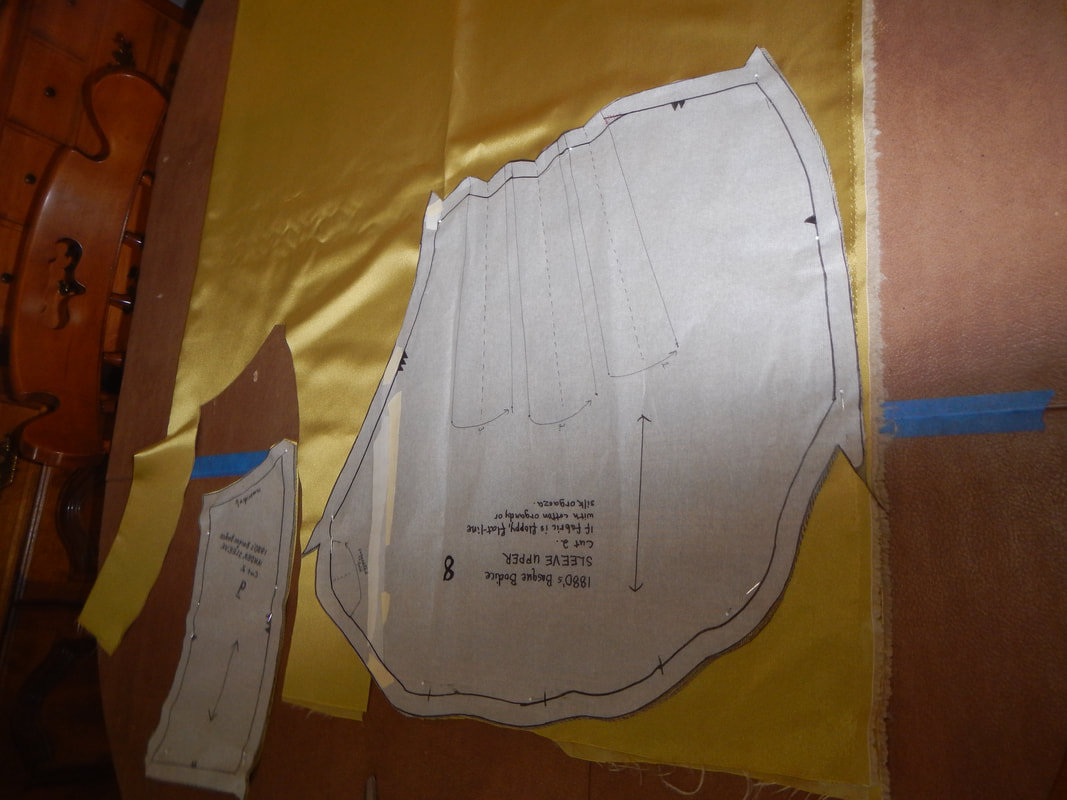
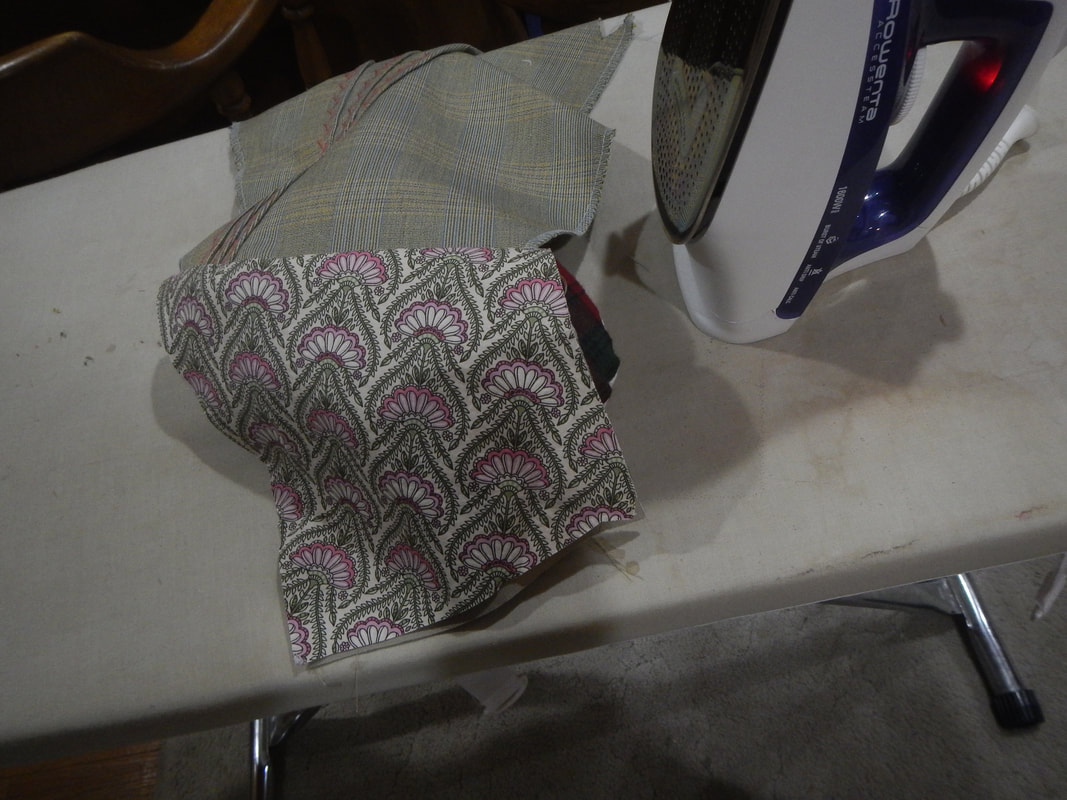
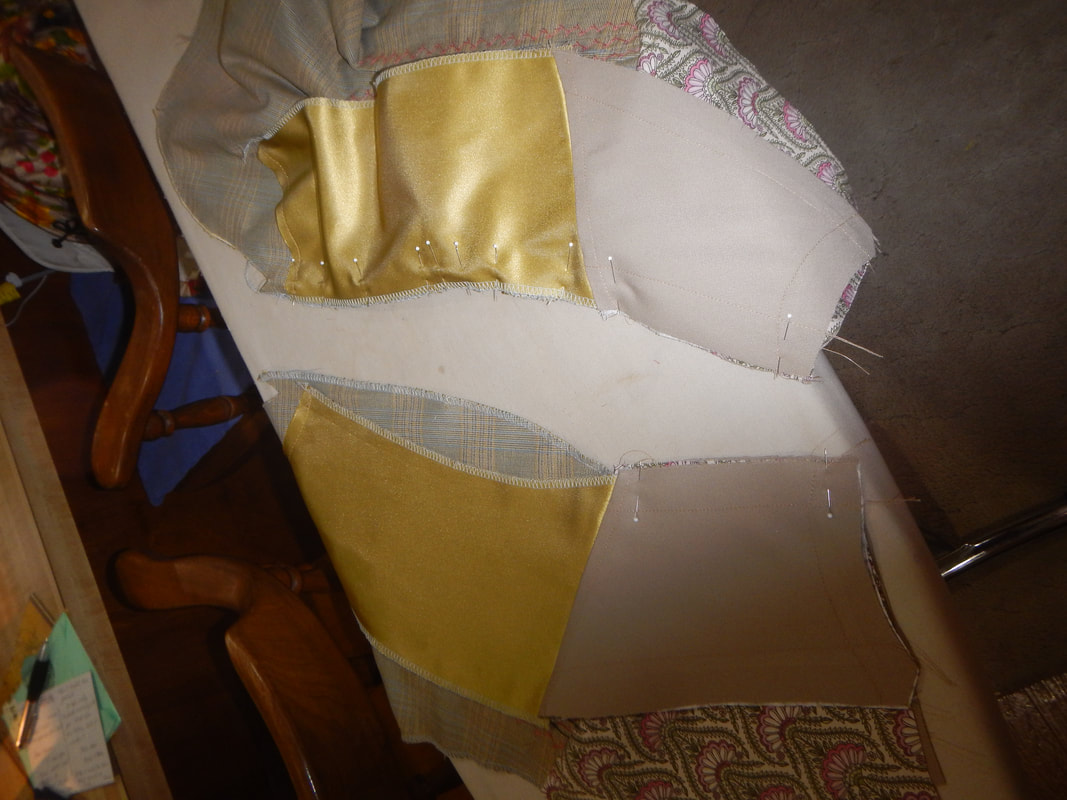
My method of enclosing the HH canvas and finishing everything is not the way the extant bodice was made, and I can't aver that it's the best way, but it makes sense to me when I do it. I first stitch the HH canvas to the gray cotton backing, just following the perimeter so that it'll look like top-stiching when it's done. From this point, I treat these two layers as one. I put the back and front layers right sides together, and sew the perimeter, using the edge of the HH canvas as a guide. On the lapels, I leave a section unsewn so I can turn right side out and press it neatly. Then I slip-stitch the opening closed. On the capelet, I leave the whole neck edge unsewn, even after I turn it right side out, because it'll get sewn into the collar seam. SLEEVES Next up, the sleeves. I wish I could say that I cleverly match the sleeve plaid to the bodice plaid, but I don't because of fabric limitations. That the sleeve eventually does match the bodice is a happy surprise! I cut the sleeves out in satin (lining) and the poly/cotton (exterior). Then I put the two layers together and serge each along the edges to flat-line them.
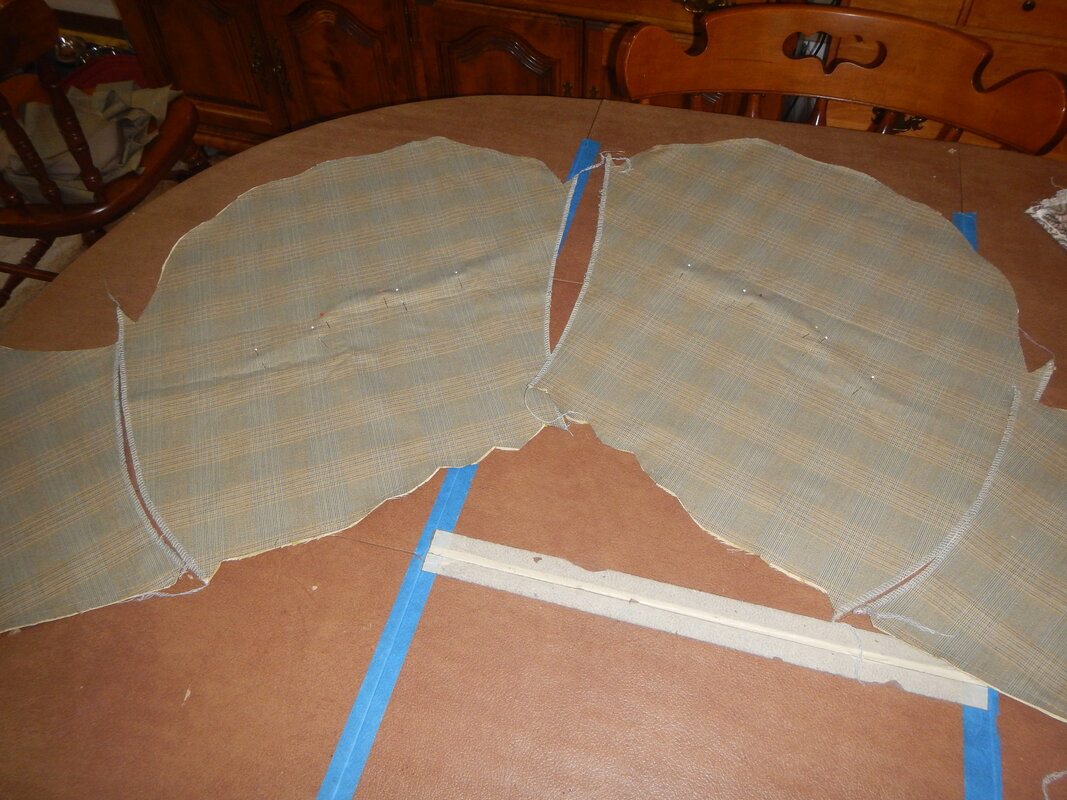
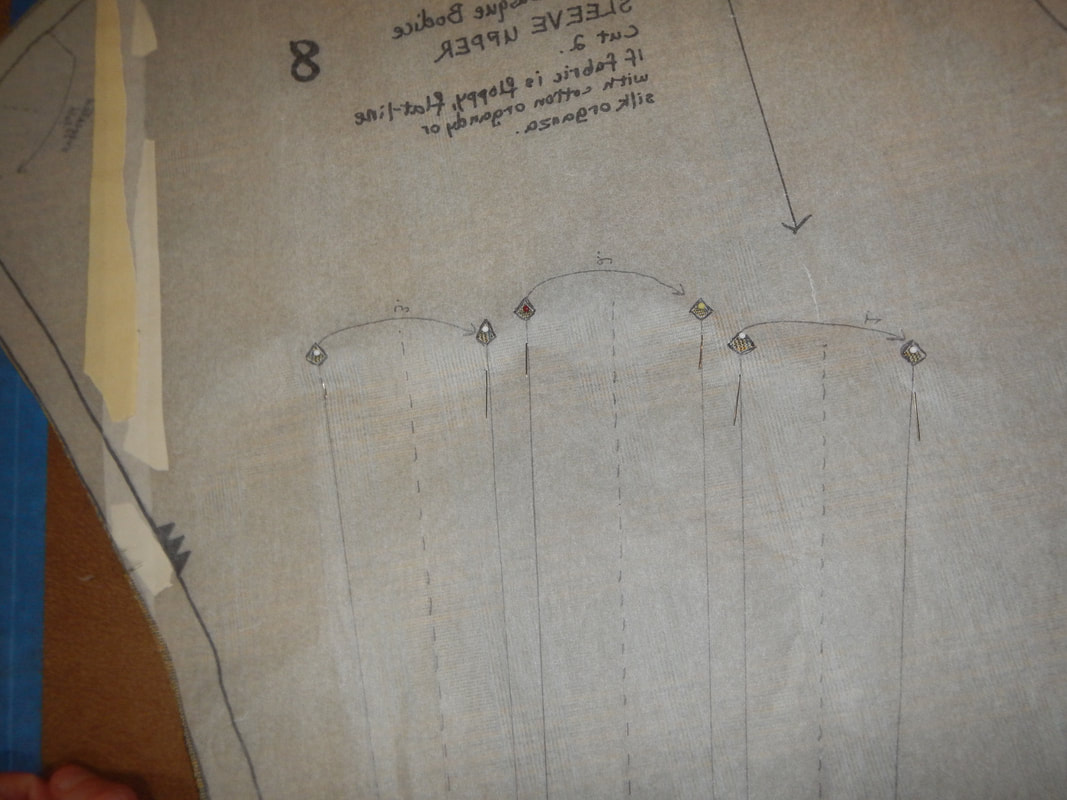
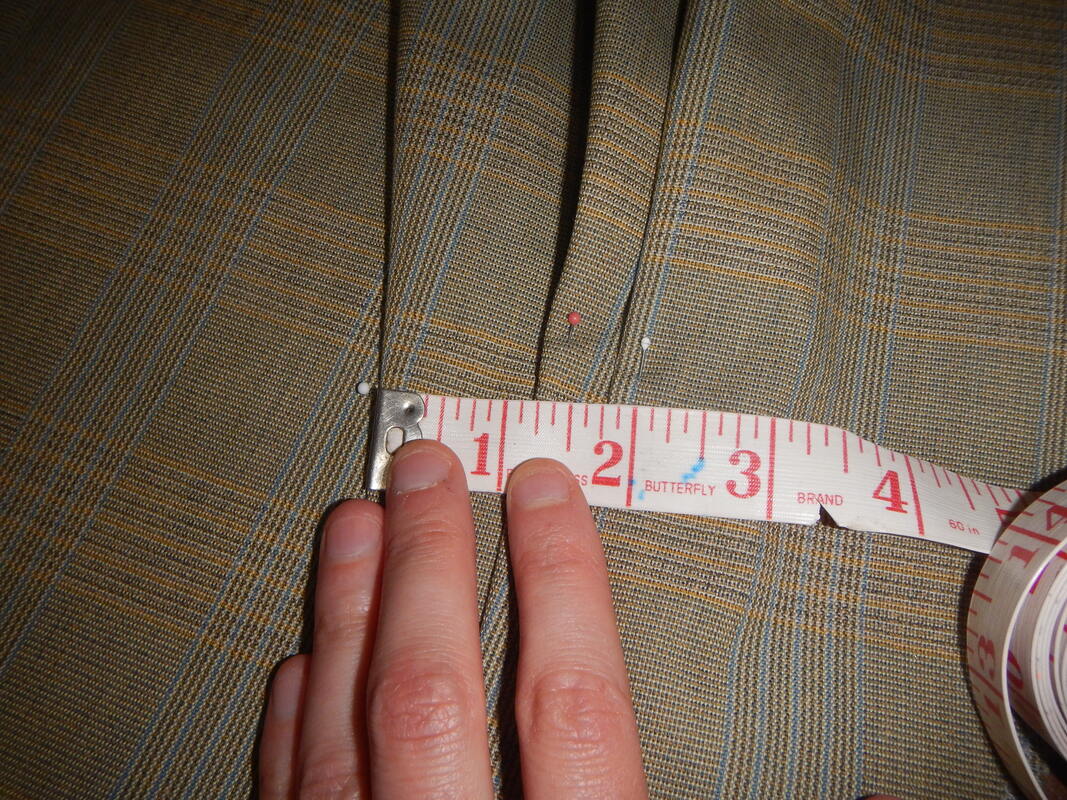
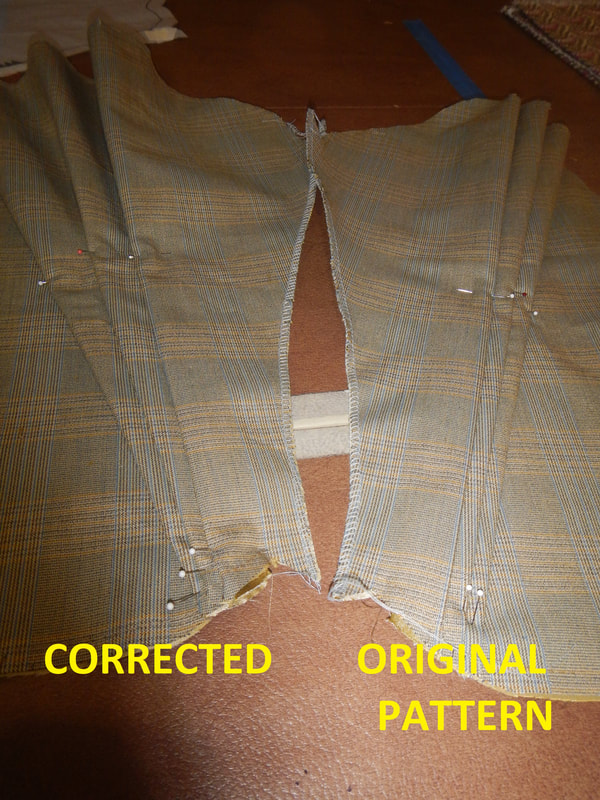
Notice that the pleats fan outward at the top? That's part of what made draping them so confusing, but now that I make them, I can see how each pleat shifts the grainline at the back of the sleeve a little more, making the confusing picture that I wrestled with before. Now I check the measurement of the top against the reference sleeve, and find mine don't fan quite enough. I fix them.
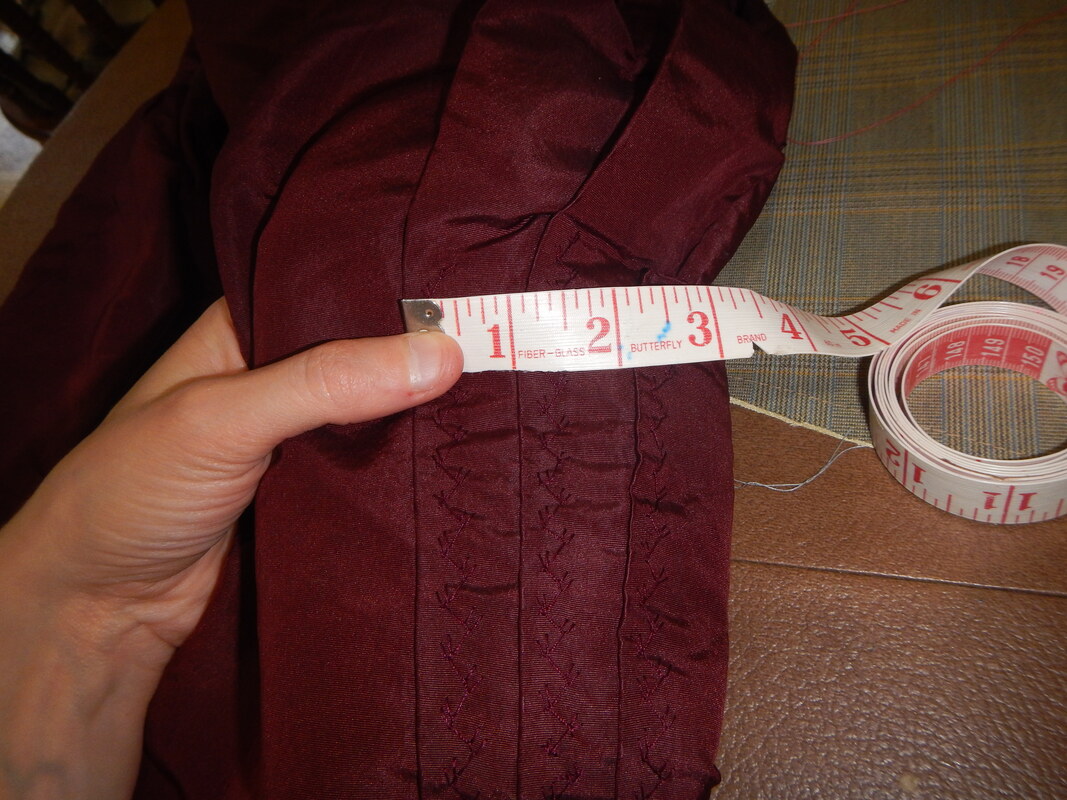
It's a good thing I correct the pleats! Look how much nicer the corrected version looks. And the wider spacing leaves more room for the embroidery, which is the only thing holding the pleats down. Such a subtle bit of style. The embroidery is a variation of feather stitching. I use two shades of pink in the same needle.
The biggest mistake I make at this stage is that I embroider all the way to the raw edge. When I go to sew the upper sleeve to the upper cuff, I realize the embroidery thread is now in the way of my trimming and grading seam allowances! I don't want to cut the embroidery thread, because I fear it would work its way loose on the other side of the seam, and come undone. So I trim carefully around the embroidered pleats and sigh about the bulk that I now cannot reduce. If I do this or something similar in future, I'll remember to stop embroidering at the seam, so the seam allowances are free to be trimmed. 
In my next post, I'll explain how I made the bodice, attached the sleeves, and finished everything but the buttons.
1 Comment
The Sister
5/28/2020 09:43:05 am
Oh, what fun! I like seeing how the pleats are made... can't wait to see the whole thing all finished! Leave a Reply. |
Karen Roy
Quilting, dressmaking, and history plied with the needle... Sites I EnjoyThe Quilt Index Categories
All
Archives
March 2024
|


 RSS Feed